Close
0%
0%

tiny7

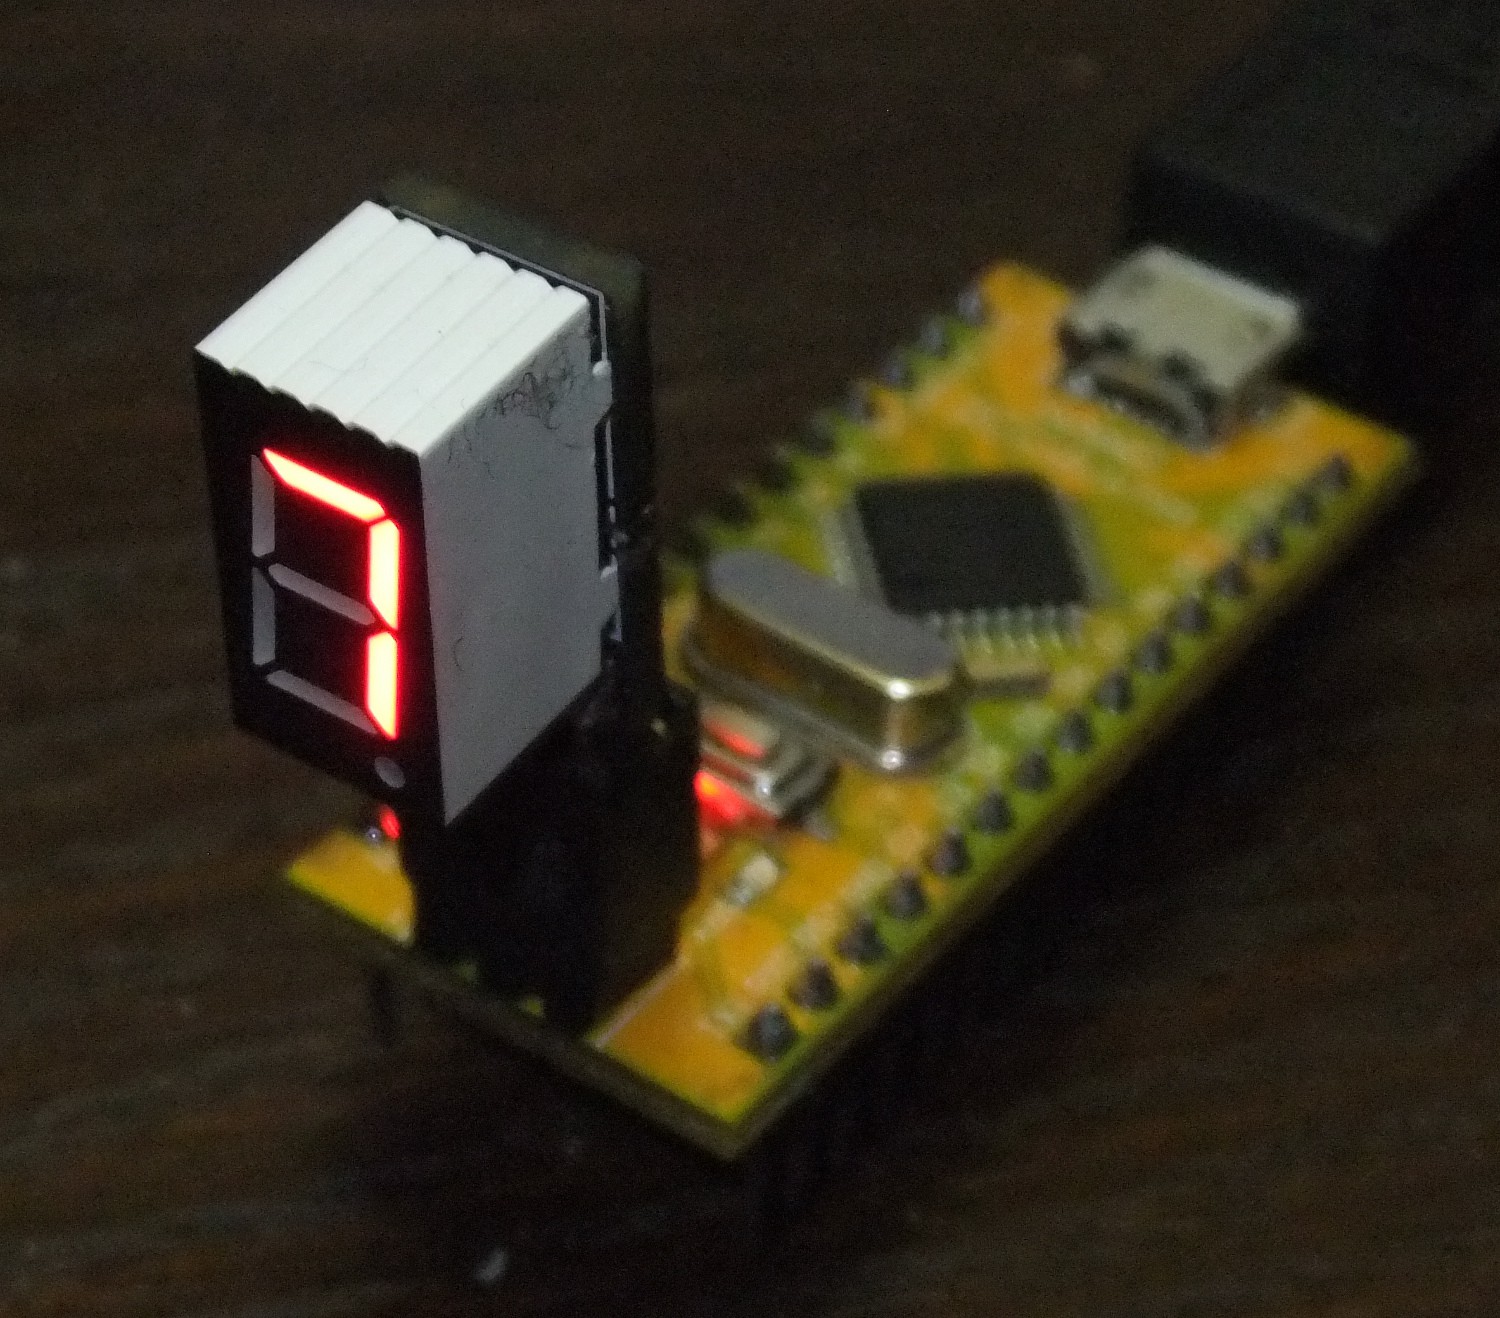
small seven segment display for plugging on an ISP programming header of an Atmel Board or an Arduino

Similar projects worth following
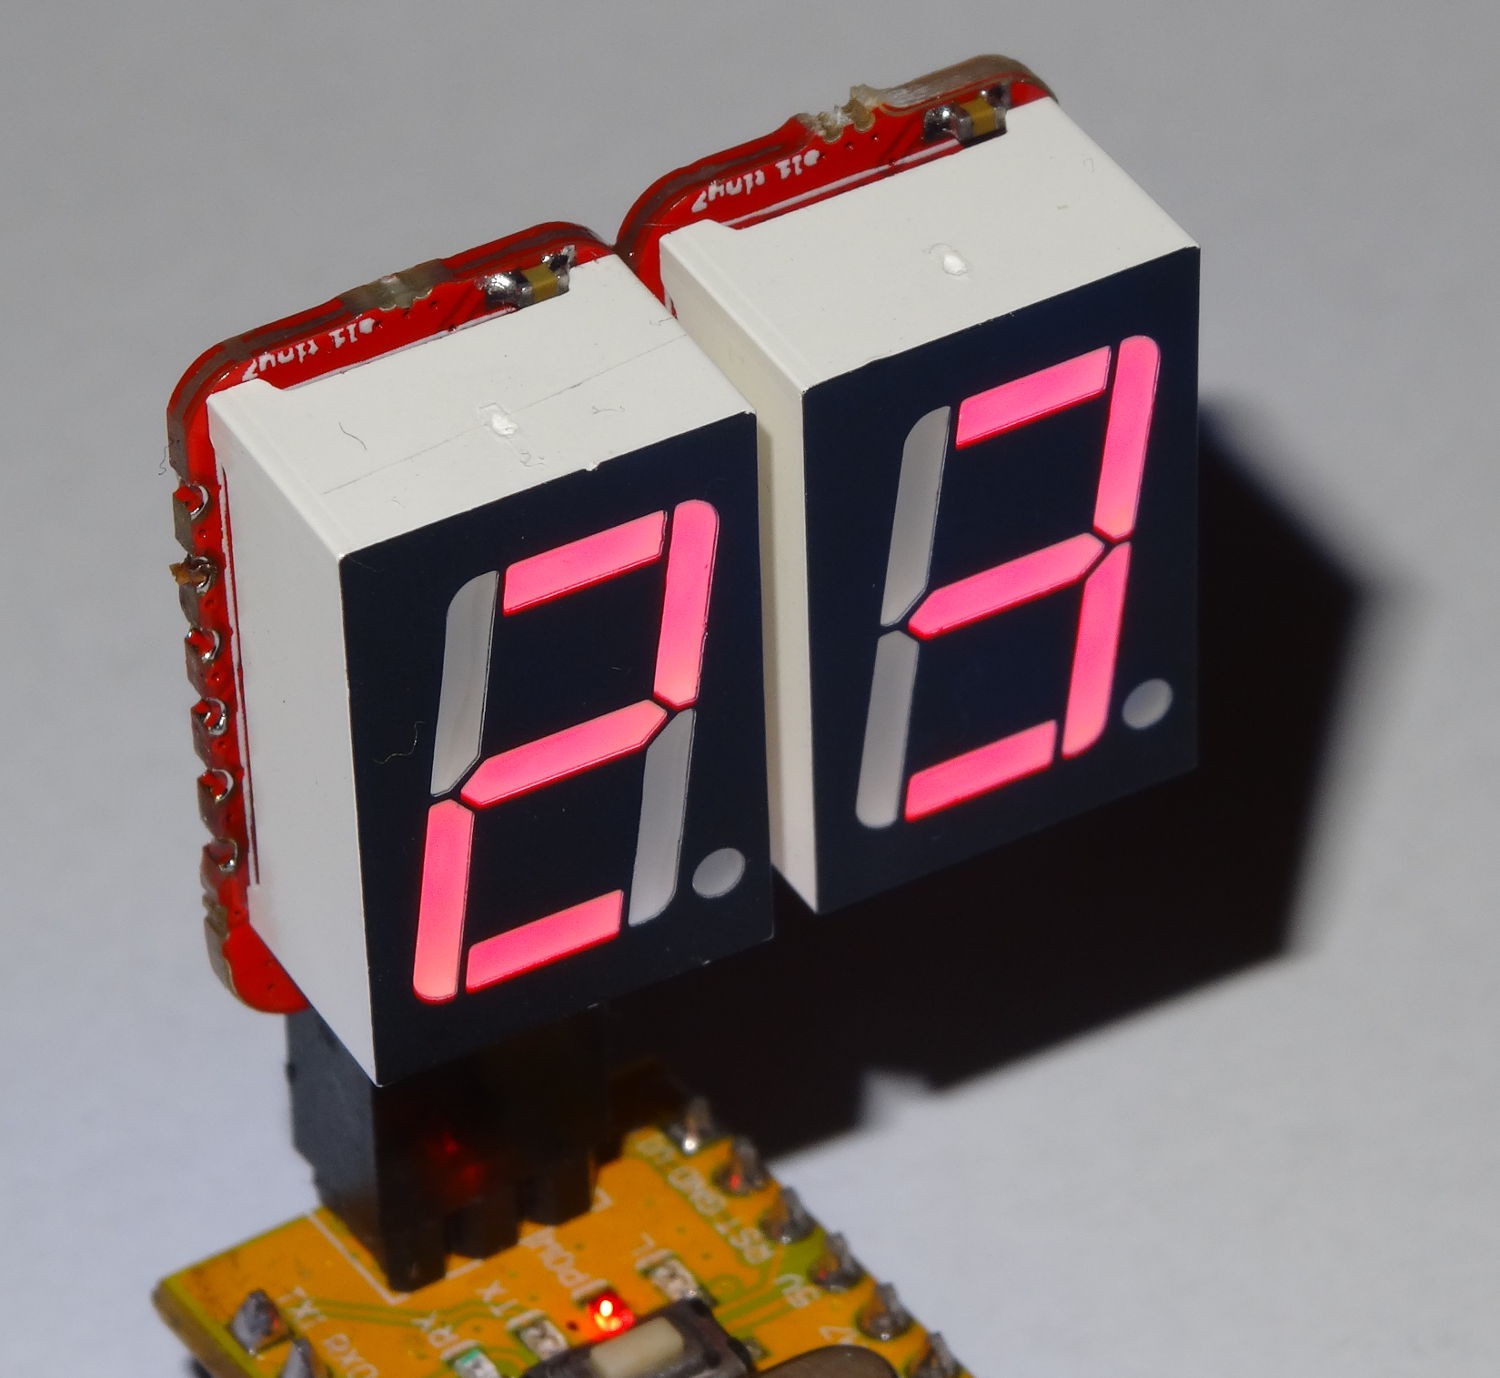
This is a small seven segment LED display. It fits on Atmel's ISP header which is available on most development boards and most AVR-based 'duinos. This header is normally only used for Programming, so after Programming you can plug this Diplay on the header to get an easy to use display. Beside the Hardware this project will also provide Libraries for the Arduino IDE (C++) and Atmel Studio (C).

With this you will get an easy and quick to use display for your projects. Just plug it on the the ISP header and you are ready to start start!

This projects is about an small easy to use seven segment display. The disdplay is controlled by a 8-bit shift register. Rev2 and higher displays are chainable, so you can get multi segment display. Beside the Hardware there is also a Software part in this project. This software part is shared with a very similar project ( #µ7 ), wich is very similar (shrunken down version of tny7's rev1) but to to differnt to handle it as the same project.

Hardware

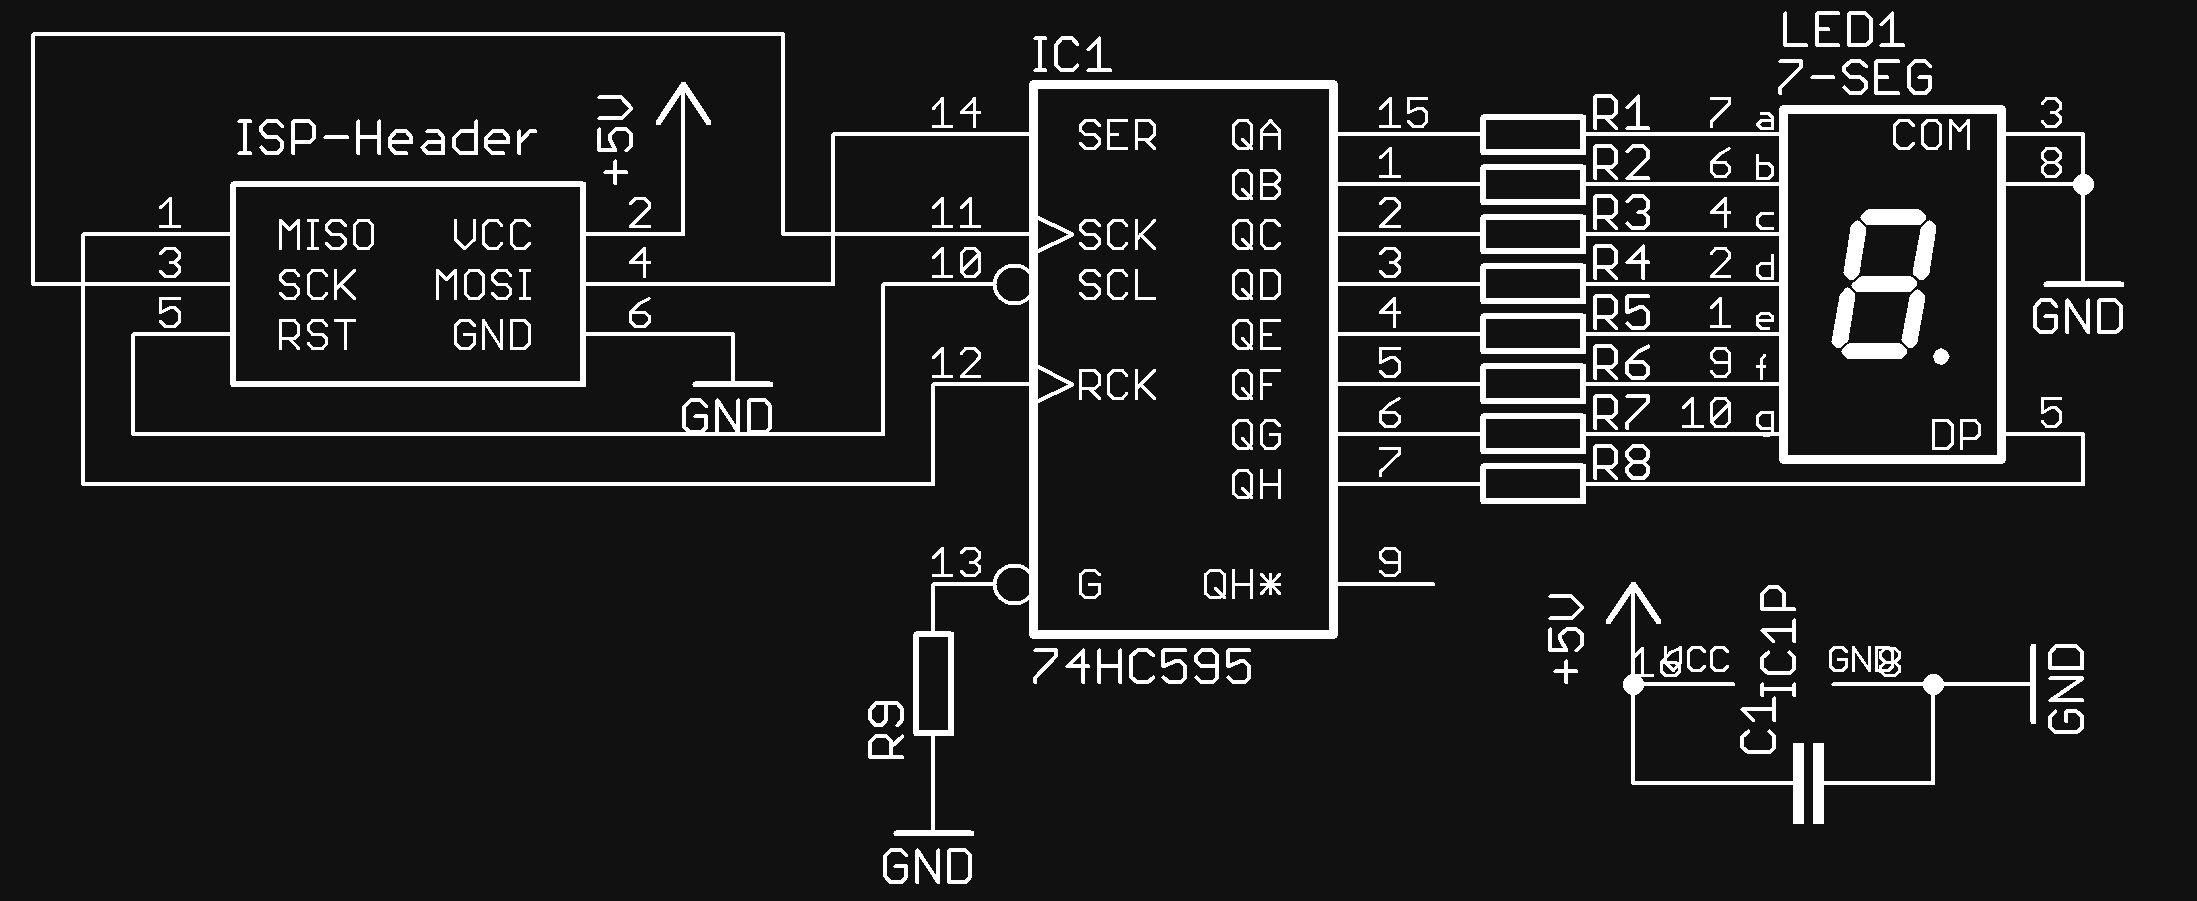
There is nothing special about the Hardware: on the ISP header you have access to three IOs of the micro controller. These are connected to shift-register, which drives the Leds.
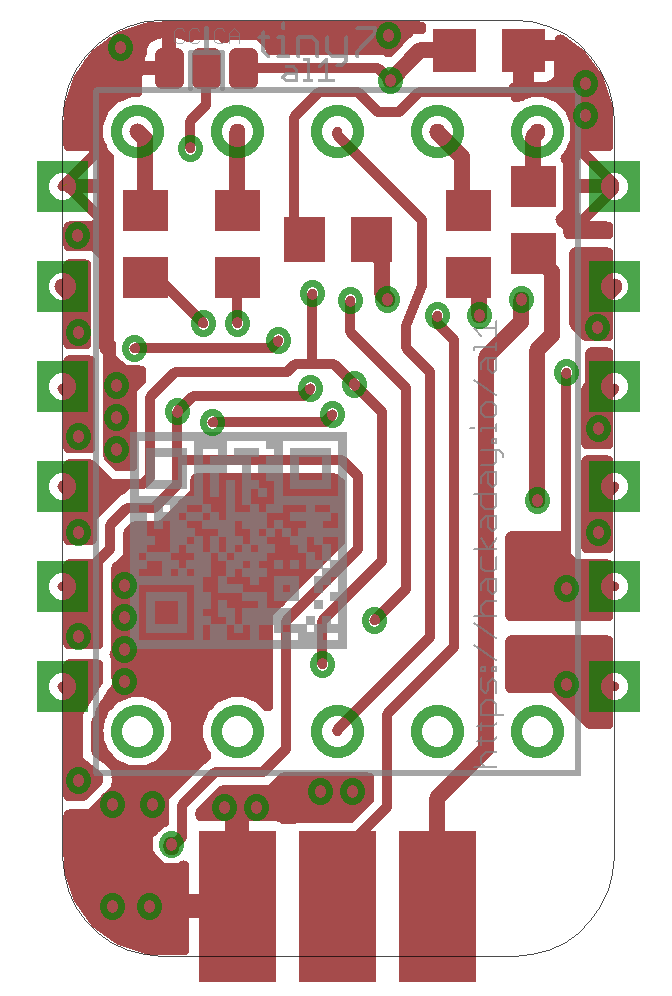
The PCB should be small. So it can be used quick and easy. So I ended with this, after some hours of routing:
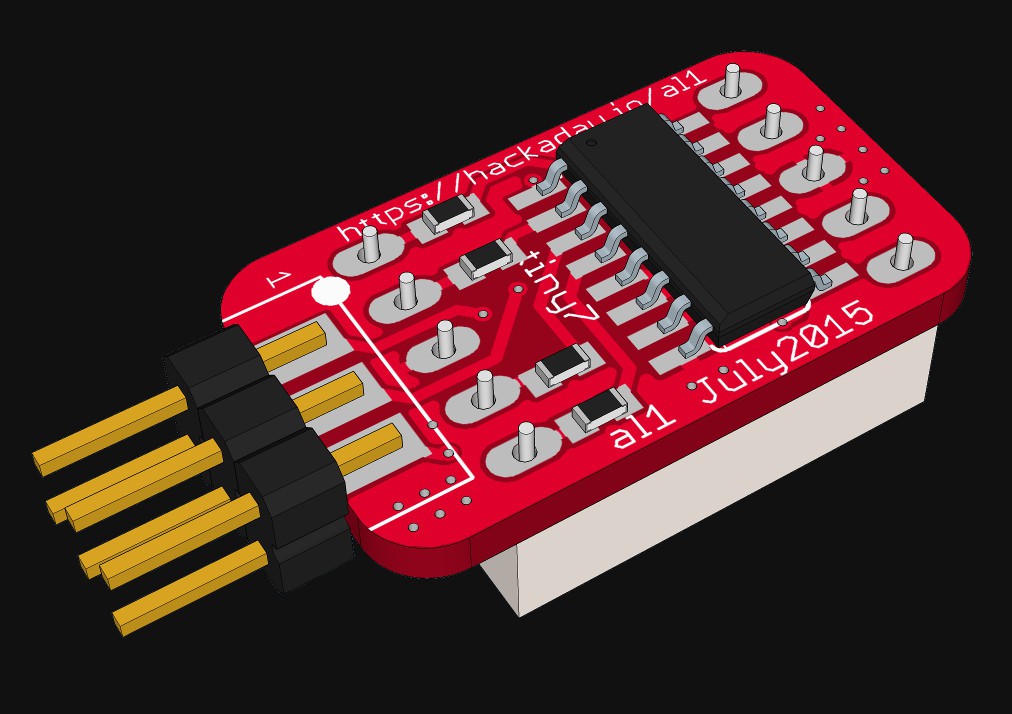
The used seven segment displays have a very clever pin out (this pin out is also very conmen, so nothing special): The common ground pin are in the middle. You can mount the display on both sides of the PCB and only the order of the segments changes. This could be reversed in software.

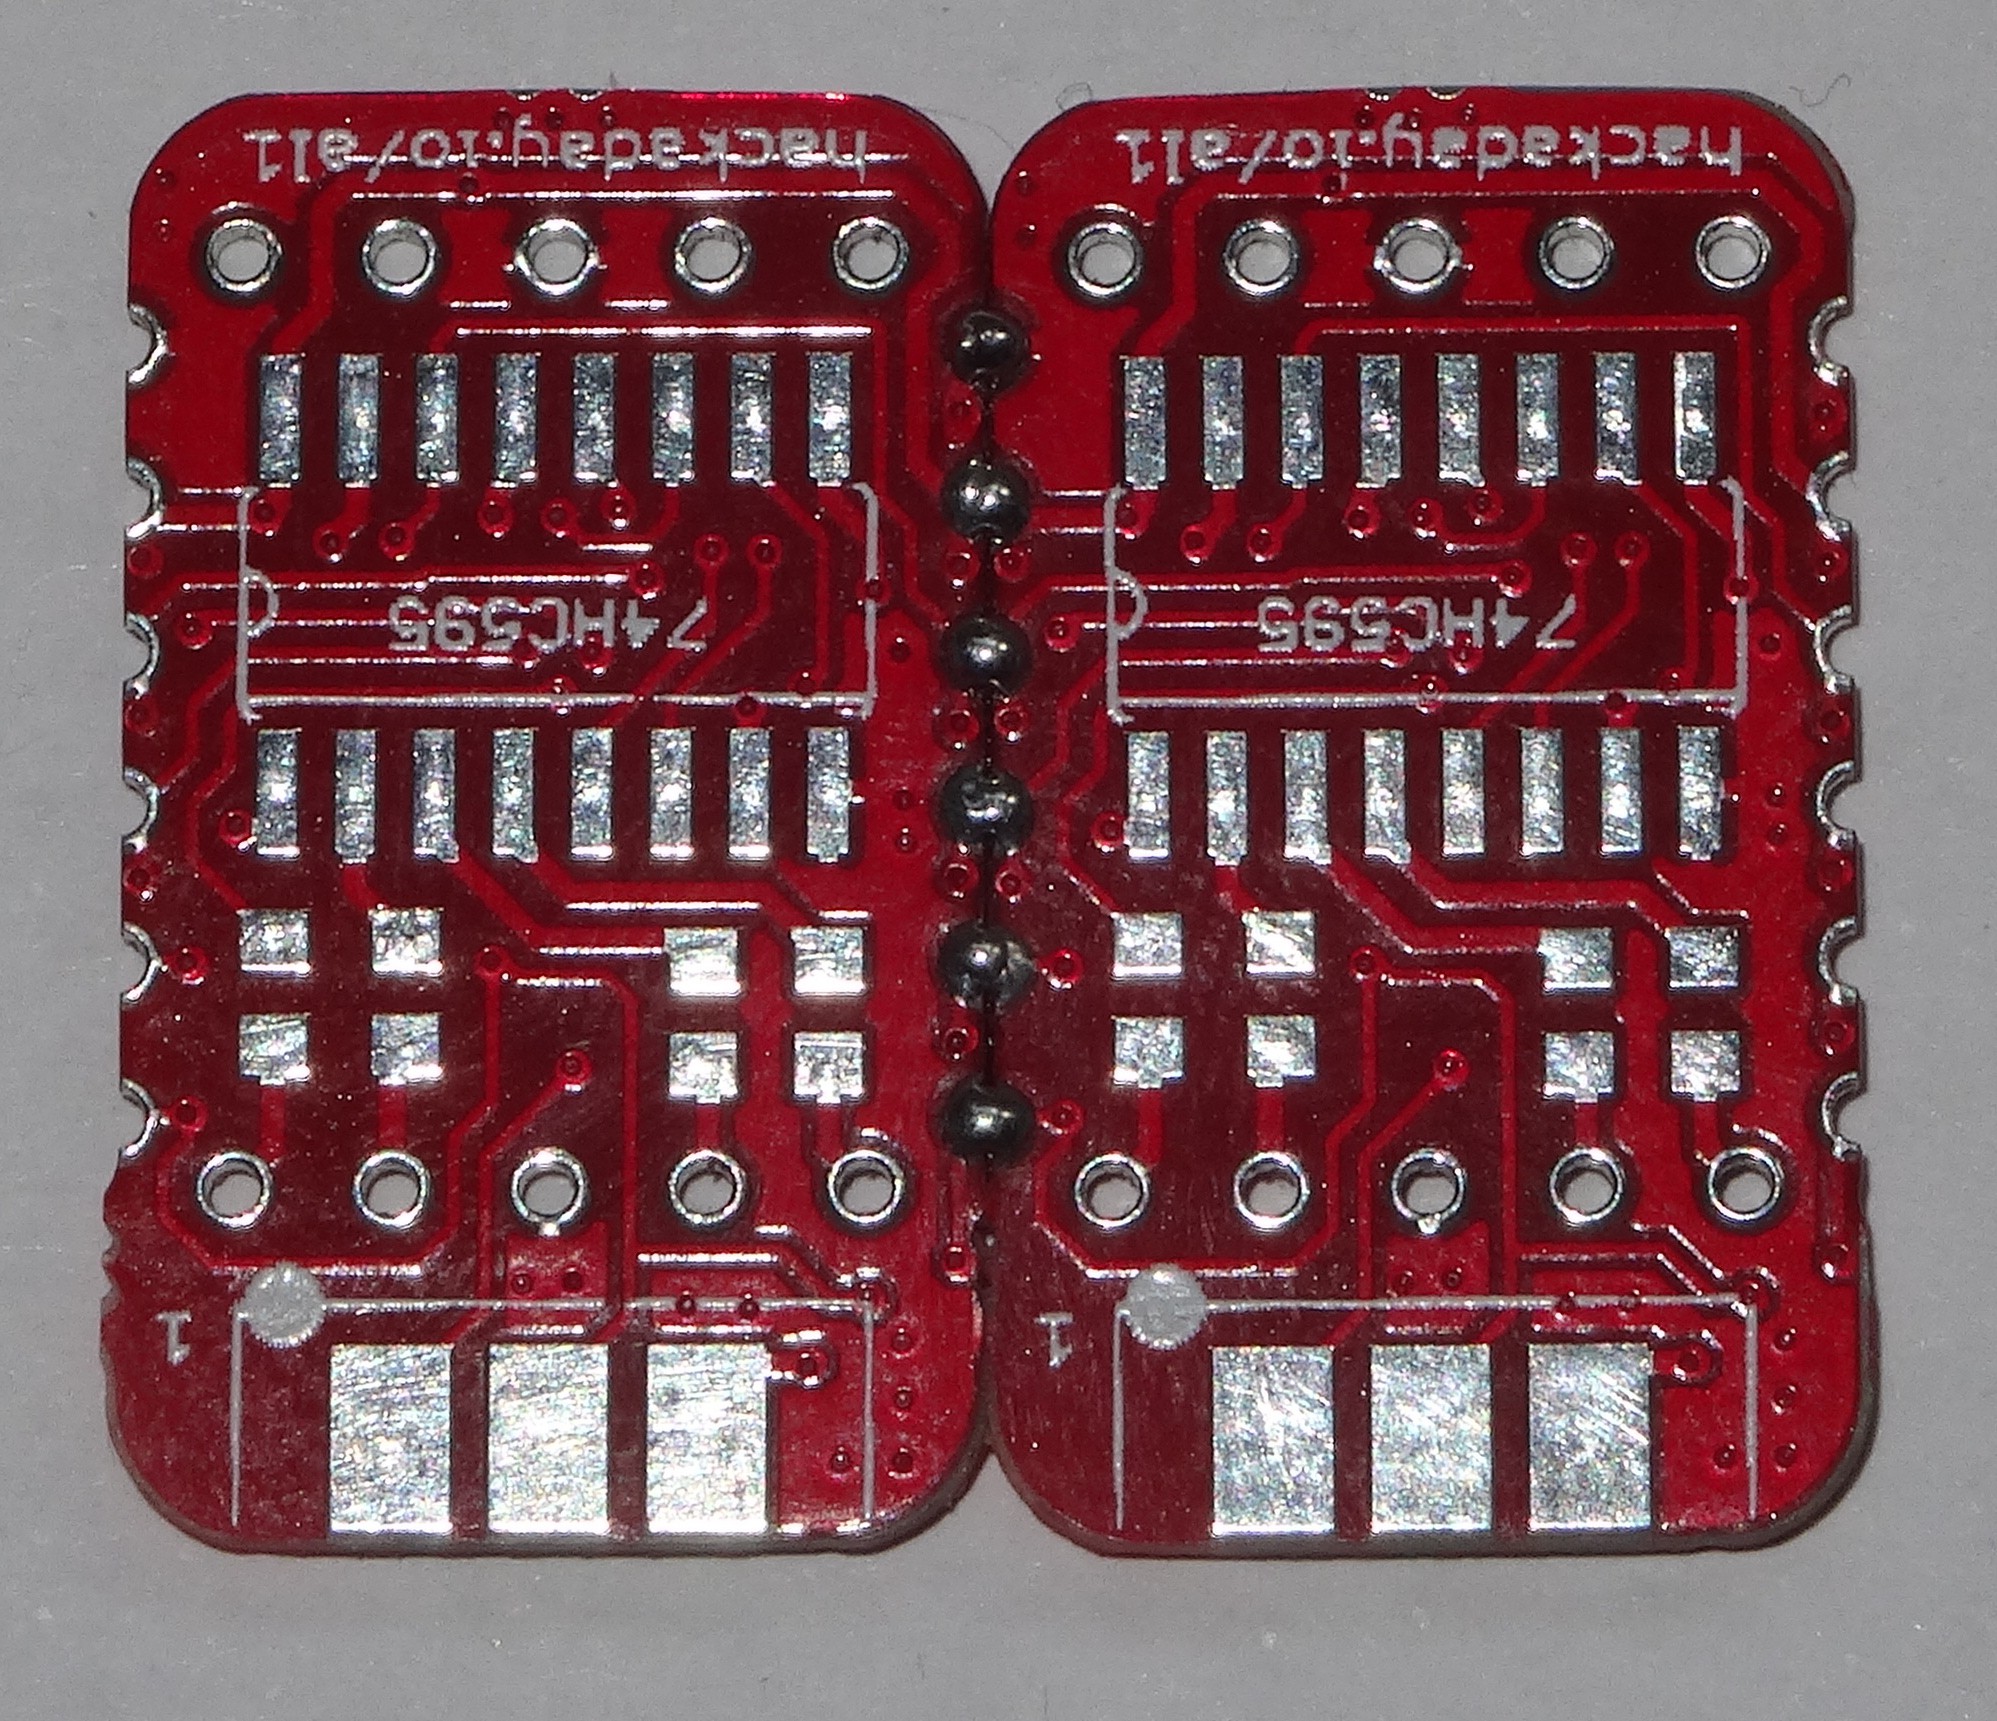
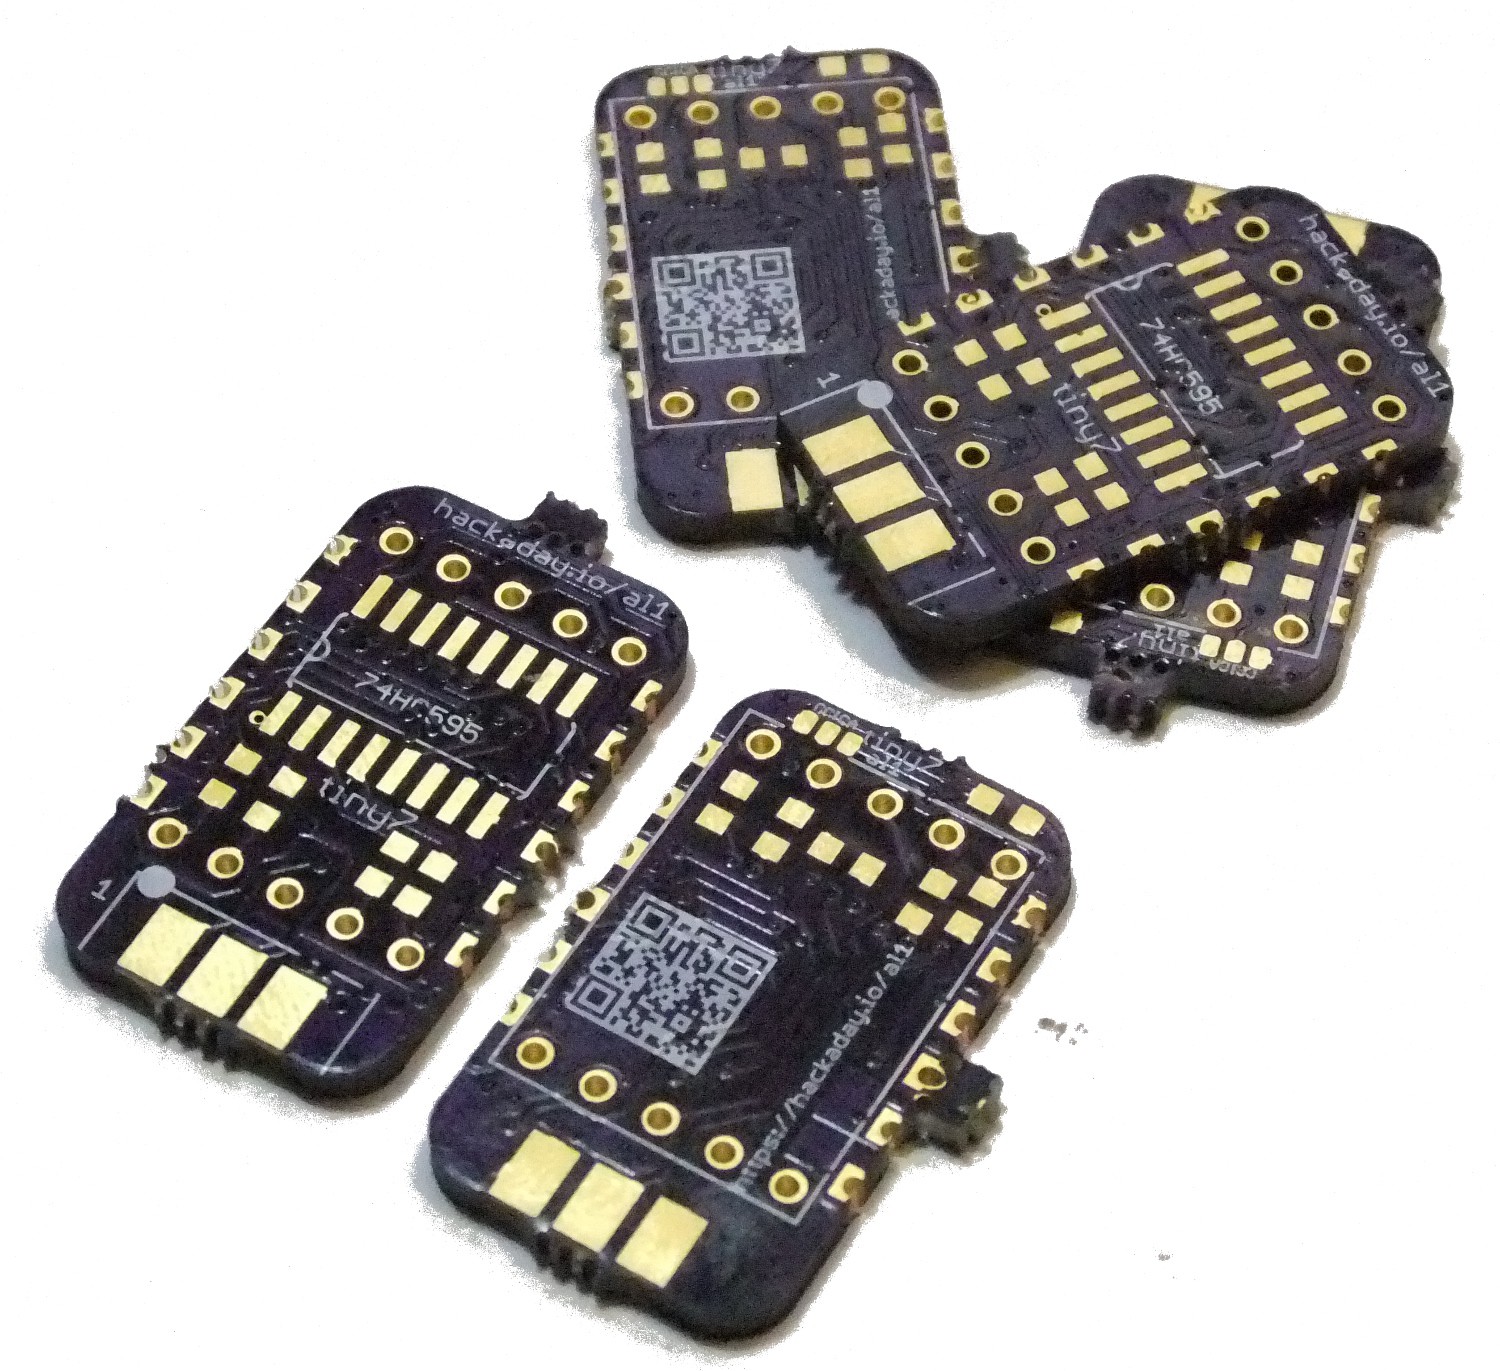
In the second revision two pin headers on both sides of the PCB got added. With these pin headers you can solder two (or more) PCBs together to get a two digit display. so you can create multiple digit displays.

In revision 2.1 there is beside some minor changed an SMD solder jumper added. with this solder Jumper you can connect the common pins of the display to GND or Vcc. So common anode or common cathode display can be used. The library is also updated to use this option.

Hardware files (eagle) are availible in the bitbucked reposetory.

Software

There is a working Arduino library available (see Bitbucket). With this you can control one or more displays. The plain C library is not ready yet.

Using the Arduino Library

To use the Arduino Library you have to include it first. Additionally you have to create an tiny7 object:

#include <tiny7.h>
tiny7 myTiny7;
In your setup you have to use the function .begin() this is the prototype of the function:
void begin(char inLength=1,        // length of chain
           char inInvert=0,        // display orientation
           char commonPin= T7_CC,  // common cathode/anode
           char inSDO=127,         // MOSI pin
           char inSCK=127,         // SCK pin
           char inLatch=127);      // MISO pin (used for the latch)
None of the Parameters are needed if using only one tiny7, normal display mount, normal Arduino and common cathode display. So is could look like:
myTiny7.begin(); //setup for one tiny7

The other parameters of begin can be used to use for additional configuration if needed.

Now you can use your display by using the .print() function. For example like this:

myTiny7.print("H");
There is also an .printf() Function availible. This is very usefull for display values with an unit on bigger displays. For example you can do this:
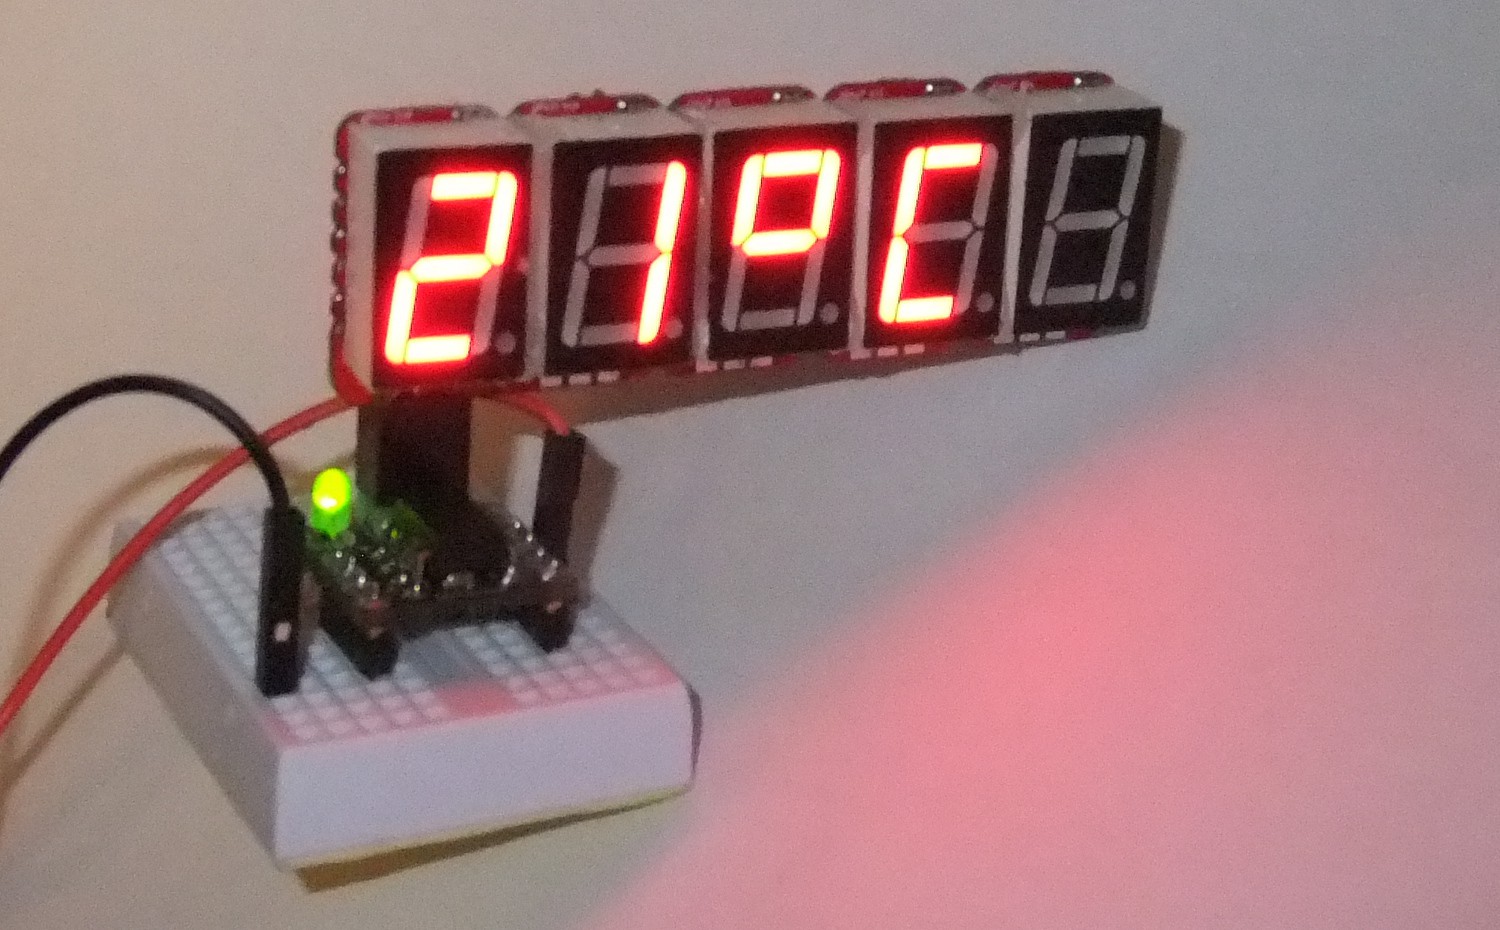
with this function call:

myTiny7.printf("%d`C",21);

More examples can be found in the library!

Tested devices

I did test test the library and the tiny7 with the following devices:

  • Arduino Nano with ATmega 328p
  • ESP8266 development board ( #ESP8266 (ESP-07/12) Dev Board )
  • ATtiny 85 ( used as Trinket)
  • Arduino Mega2560 with ATmega 2560

It should work on all board which are using the Arduino IDE. The pins used by the tiny7 library can be changed in the .begin() function.

Used Tools and Software

Cadsoft, Egale 7.2 Freeware for circuit an PCB
Jerome Lamy, egleUp for the 3D images (freeware)
ImageMagick Studio LLC, ImageMagick used by eagleUp (open source, Apache 2.0)
Trimble Navigation, SktechUp Make for the 3D images
Arduino IDE
Notepad++ v6.4.2
GIMP 2.8

Credits

First I would like to thank to everyone who write comment, following this project or gave a skull. Specially @Stefan Lochbrunner who had the idea of dais chain multiple displays.

I would also thanks @WooDWorkeR. With him I did have an inspired taslk about how to mechanical strengthen the connection between multiple displays. I am still thinking about which one would be the best. Hot Glue? Foame tape? soldering massive wires on it? or maybe some other? I do not know yet., but I like hot...

Read more »

  • 1 × 74HC595 Electronic Components / Misc. Electronic Components
  • 1 × seven segment Led display common kathode 13mm (tdso5160 or similar)
  • 1 × 0603 resistors and one capacitor misc passives
  • 1 × female 2x3 pinheader
  • 1 × PCB Electronic Components / Misc. Electronic Components

  • µ7 (formaly an own project)

    Alex09/23/2016 at 18:10 0 comments

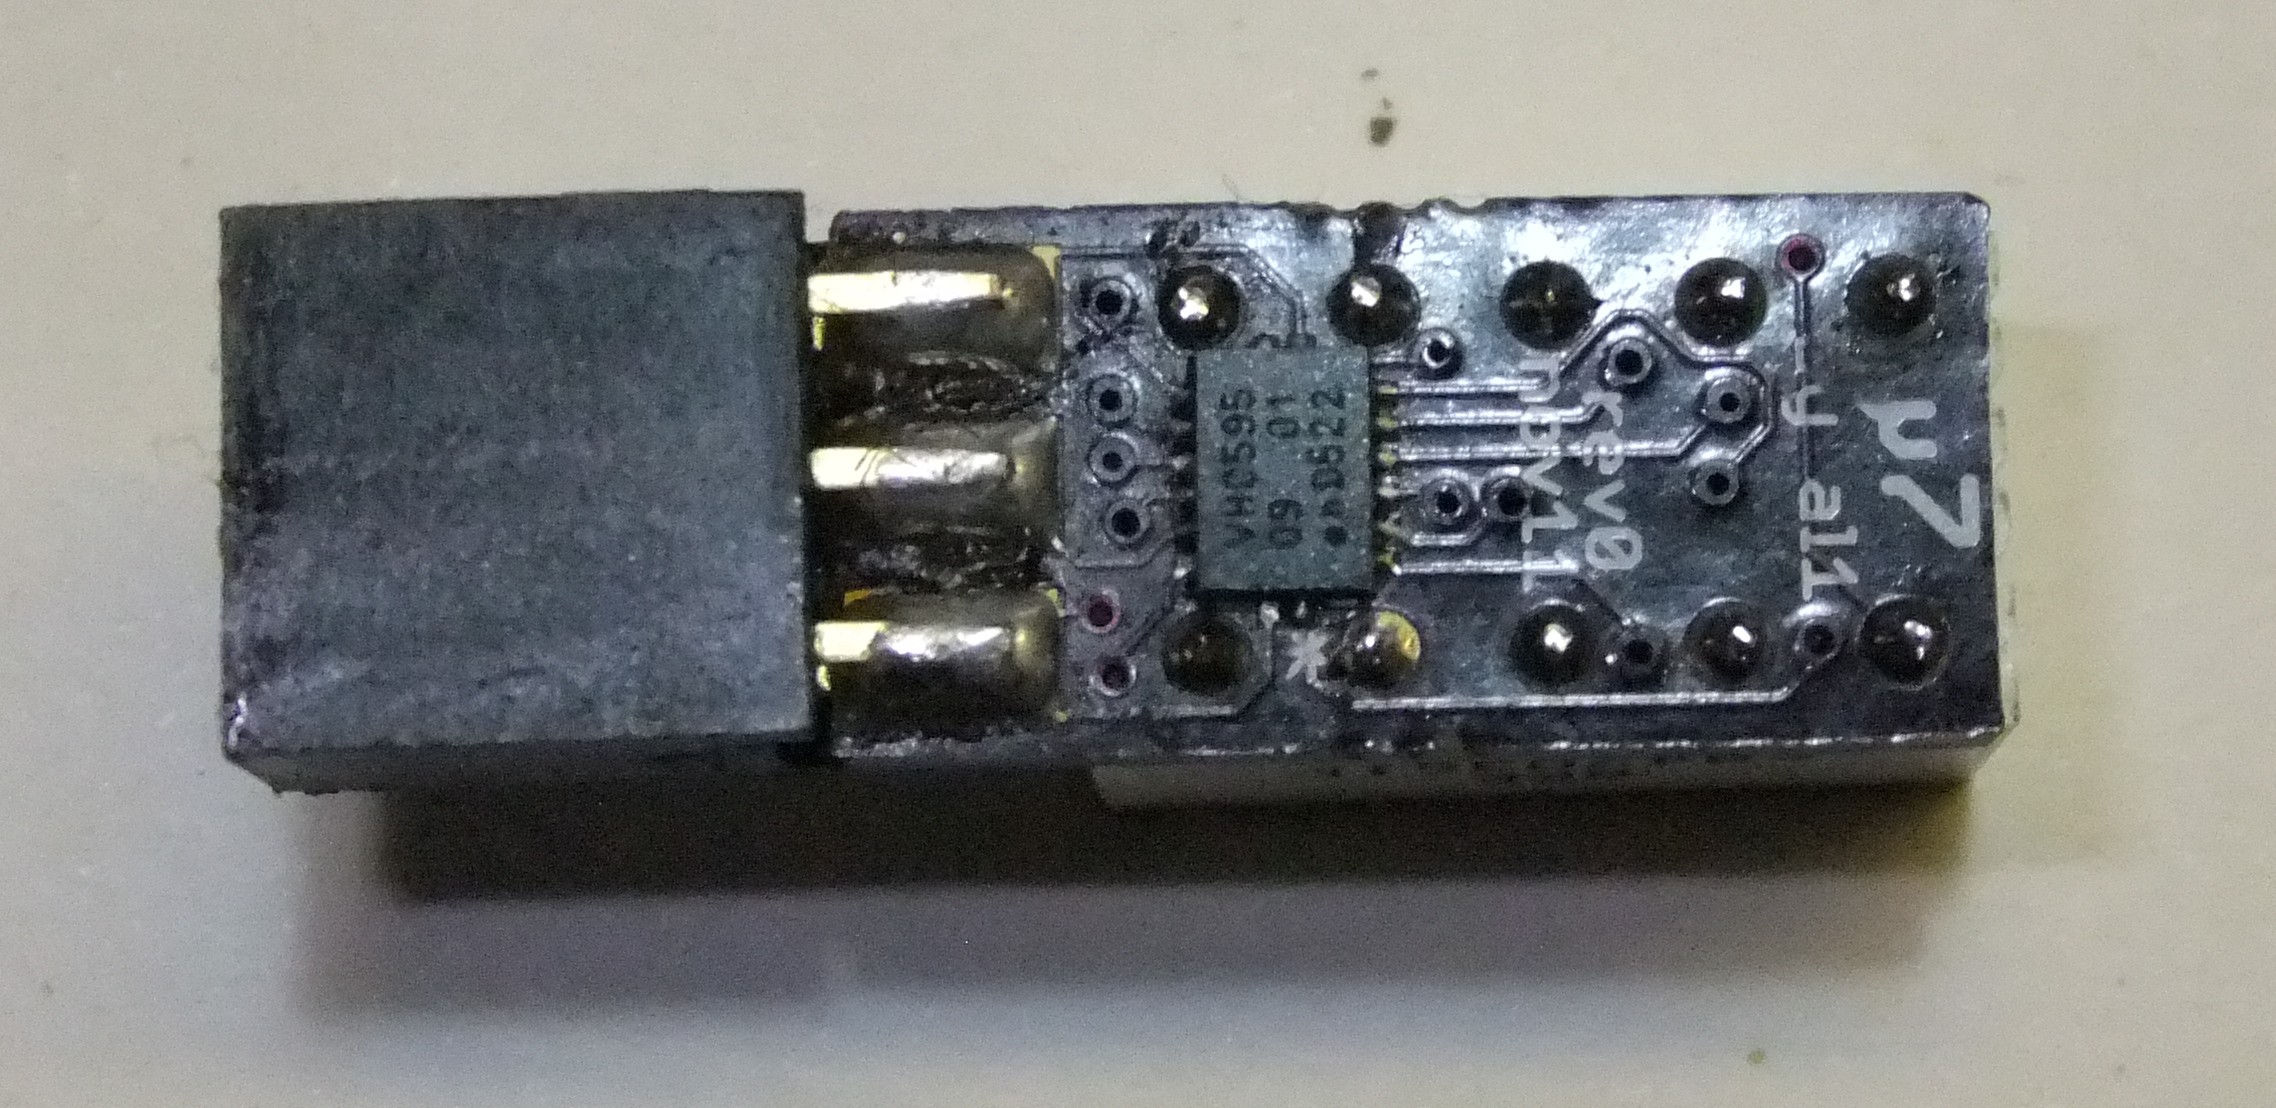
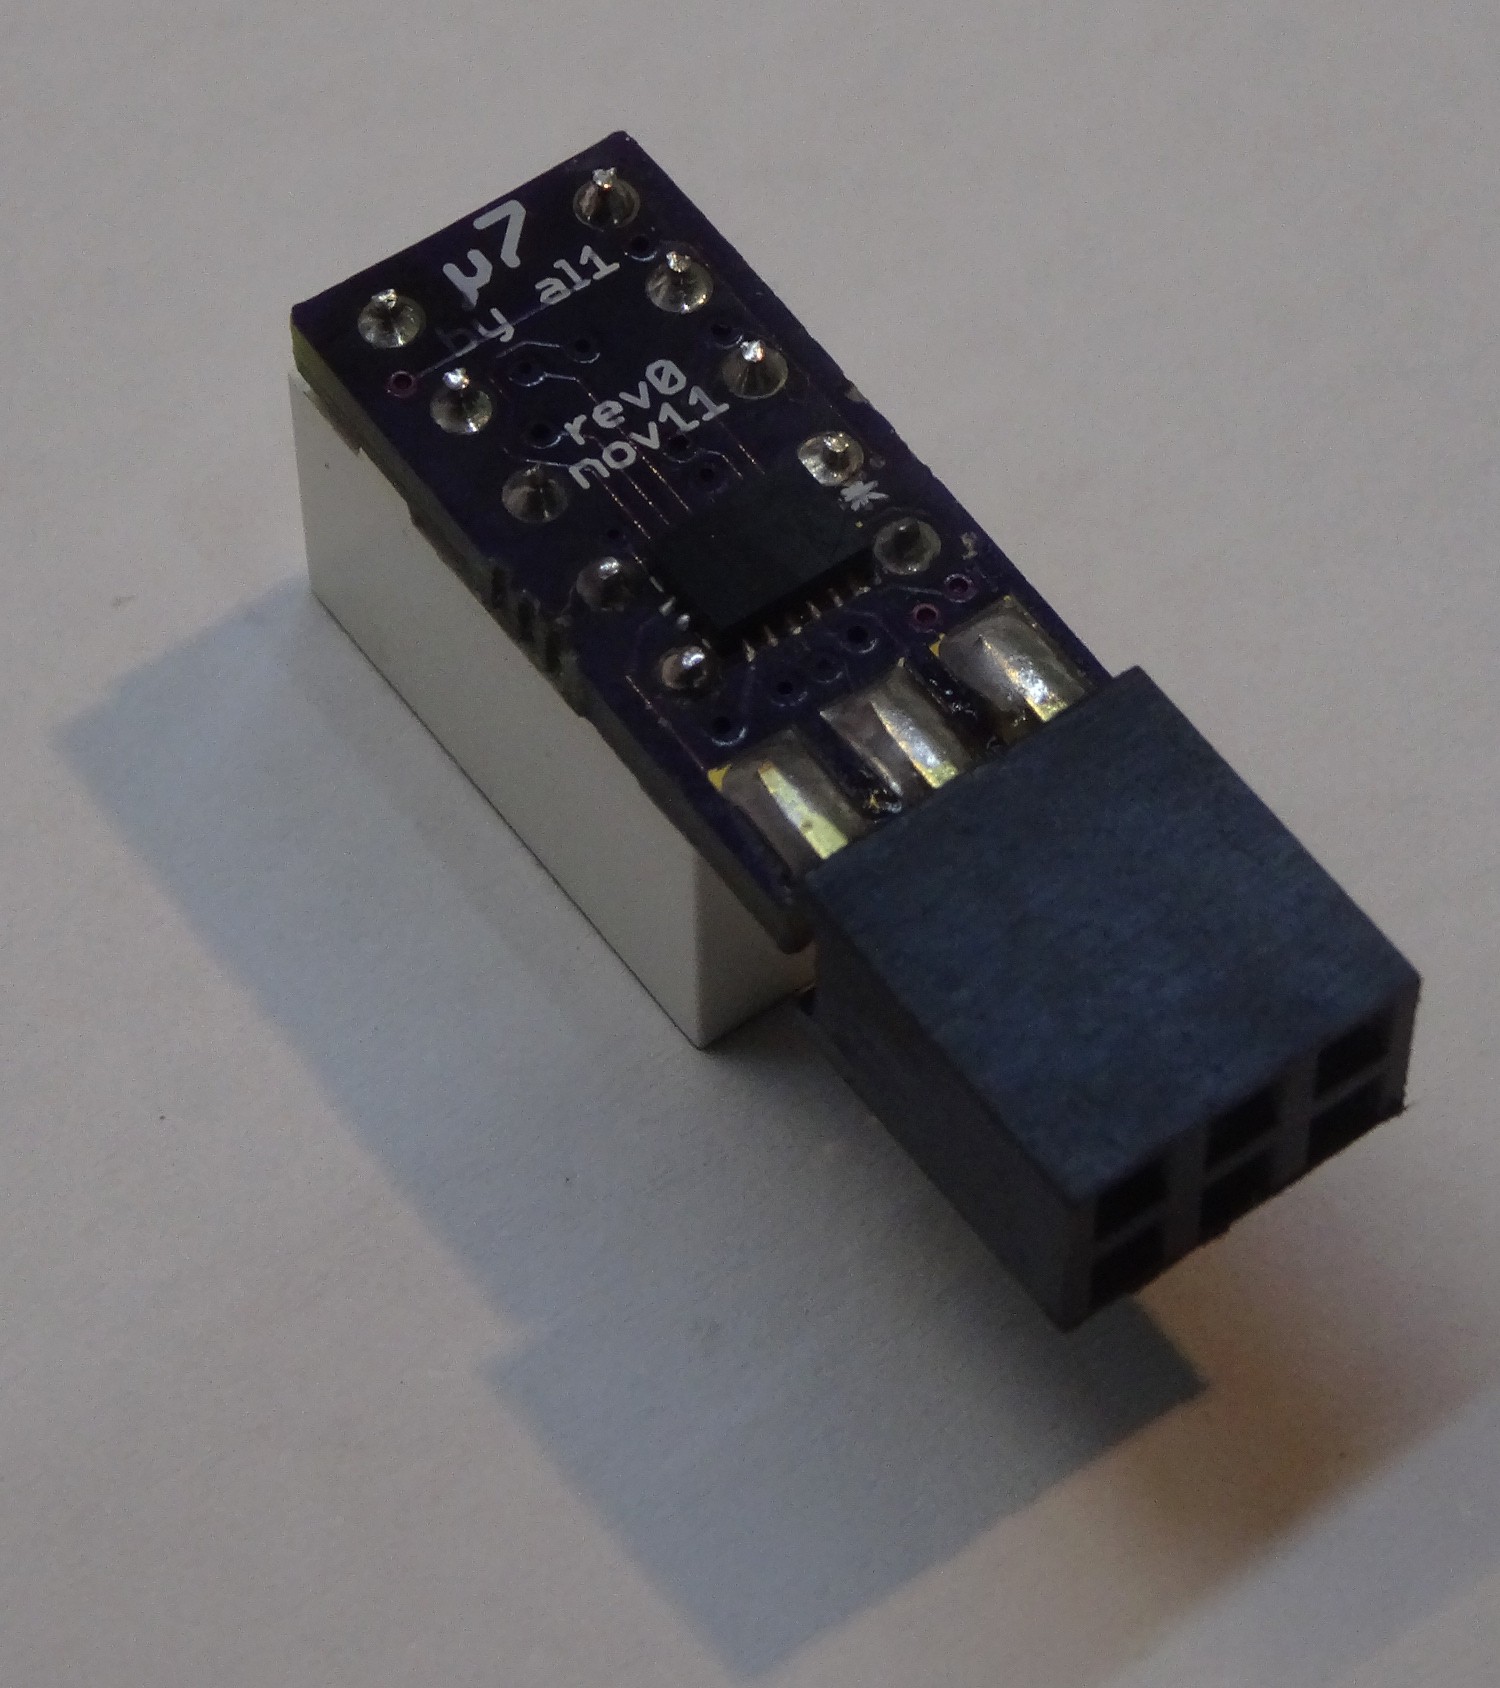
    To tidy up a little bit my projects I will push the µ7-project into a log of tiny7 The following text is mostly just a copy from the old µ7 project page:

    This is just an idea how to make #tiny7 smaller. Smaller IC package (QFN) and samller parts are used. The dispaly is 0,36'' 7 segment display.

    It should be 100% compatibel with #tiny7 . The same library should be used. But µ7 is not chainable (yet?).

    • 1 × HC595 shift register DHVQFN16 package
    • 2 × 4x1k resisitor array
    • 1 × 10k resisitor 0402
    • 1 × 100nF capacitor 0402
    • 1 × 0,36'' seven segment display
    • 1 × pinheader
    • 1 × PCB Electronic Components / Misc. Electronic Components

    https://cdn.hackaday.io/images/5830351449523648148.JPG

  • New rev2.1 PCBs

    Alex11/16/2015 at 16:42 0 comments

    • support for common anode or cathode displays (selectable via jumper
    • mechanical stronger pads at the side (more copper)
    • fully compatible and mixable with rev2 PCBs if using common cathode displays

  • Video showing printf() example

    Alex11/14/2015 at 15:05 0 comments

  • Now full .print() support and something like .printf()

    Alex10/26/2015 at 20:53 1 comment

    Soooo . the .print() support is ready. The mapping of all 127 ASCII chars to a seven segments display took some time but so far I did found no error. I will upload the updated library today or tomorrow.

    I did also add a function .printf() which is similar to stdio.h's. This page was very helpful doing that. So now I can use this code:

    myTiny7.printf("%d`C",21);
    (note: ` is the only ASCII char wich is mapped to another symbol ( ° ). ° is not part of ASCII code and ` is the same as ' on seven segments displays)

    This is the result on the display;

    As you can see it is working on an ATtiny (ATtiny85 used as Trinket). Arduino Nano is also tested and working. I do not have yet other types of Arduinos to test it, but I will test this on my ESP board soon.

  • Working on Arduino Library - now with string support

    Alex10/25/2015 at 21:54 0 comments

    After fixing my five digit tiny7, which broke during my Berlin trip, I started to improve the Arduino Library. I found out that using the print class would be very handy. Many people are familiar with this because it is also used for the Serial communication. till now not all function and only a reduced set of ASCII characters are supported but code like this works already:

    #include <tiny7.h>
    tiny7 myTiny7;
    
    void setup() {
      myTiny7.begin(5);	  //5 segments
      myTiny7.print("Hello");
      }
    void loop() {;}
    The result is this:

    Next I will expand my character set to full ASCII and I will also add support for dots.

  • rev2.1

    Alex10/13/2015 at 19:52 0 comments

    Rev 2.1 is ready. I did add an small jumper (top left on the picture) to connect the common pins of the display to Vcc or GND. Now both common Anode and common Cathode displays should be supported.

    I also tried to fix the problems of mechanical weak solder pads. When connecting multiple boards the pads at the sides breaks off easily. A added some planes next to bigger pads.

    In the links you can find the board at OSH-Park. An I did also published the files in the bitbucket.

  • Chain of five tiny7s and ESP8266

    Alex09/28/2015 at 16:01 3 comments

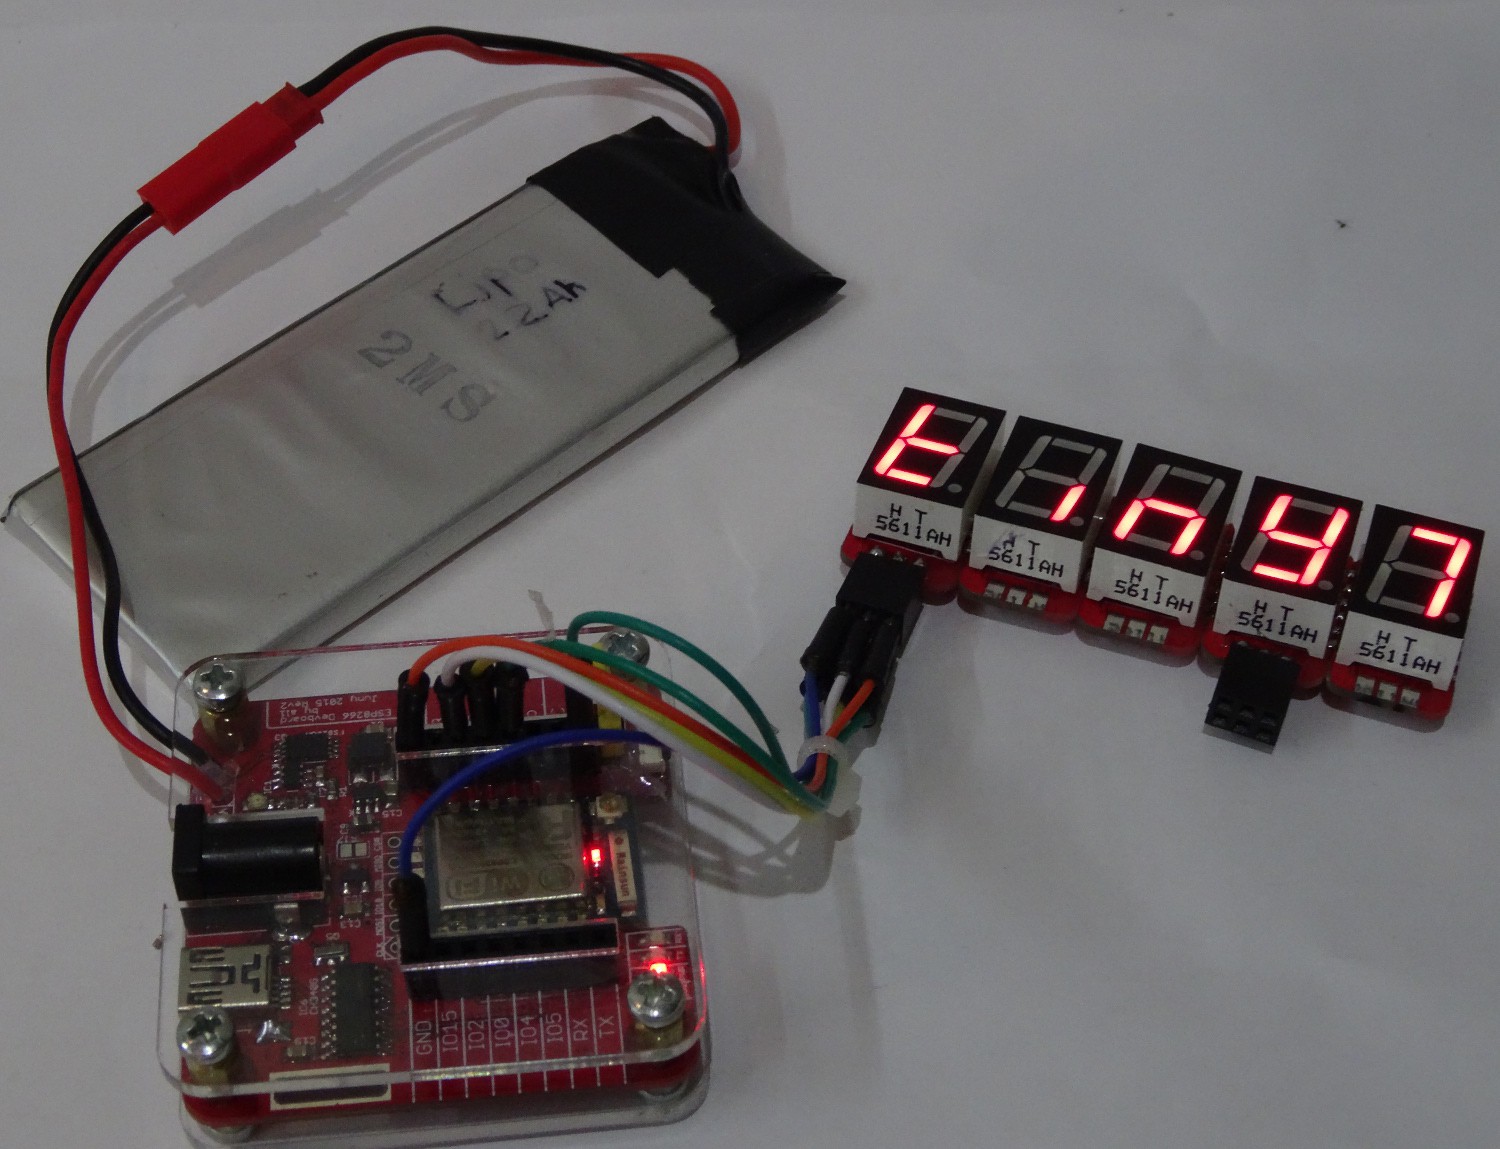
    The tiny7 does also work with the Arduino IDE and the ESP8266. And five digits do work well. And a supply voltage of only 3.3V is also working.

    The library for writing chars is still very experimental - as you can see by the code used:

    #include <tiny7.h>
    #define S_SDO 12
    #define S_CLK 14
    #define S_LTH 16
    tiny7 myTiny7;
    
    void setup() 
    {
      myTiny7.begin(0, S_SDO, S_CLK, S_LTH);	
      myTiny7.show(7,0);    // ptint 7
      myTiny7.show(20,0);   // print Y
      myTiny7.show(16,0);   // print n
      myTiny7.show(19,0);   // print i
      myTiny7.show(18,0);   // peint t
      delay(1000);
    }
    I will try to add a better way to show strings or larger numbers soon. I am thinking of something like: myTiny7.print("string").

    [If you are interested: The ESP-Board used on the picture can be fined here: #ESP8266 (ESP-07/12) Dev Board ]

  • building rev2

    Alex09/04/2015 at 18:33 1 comment

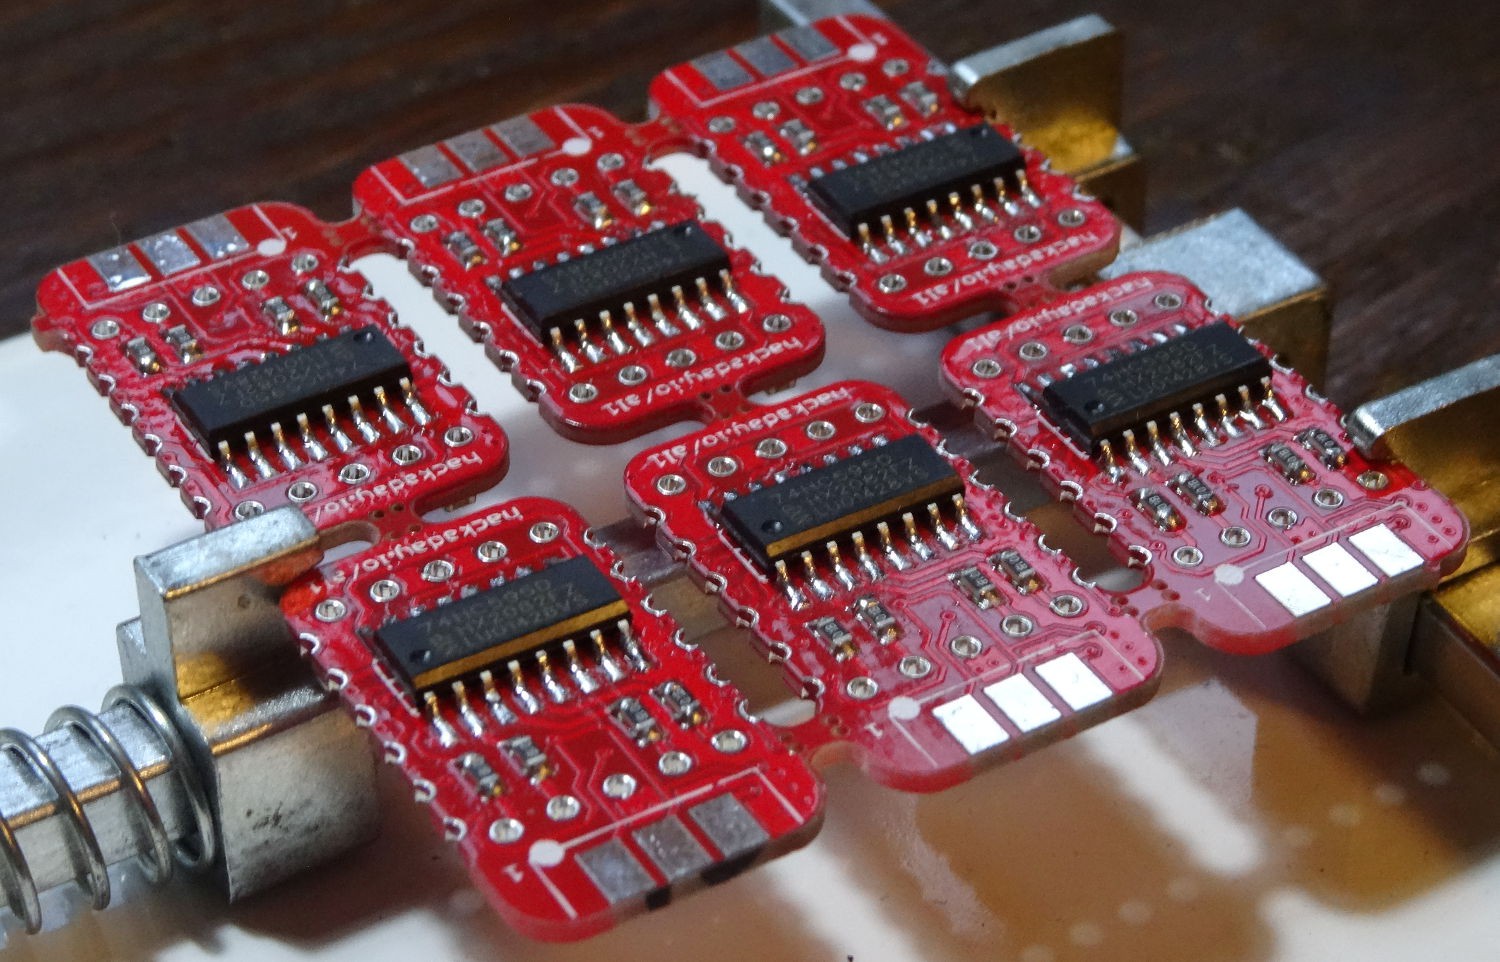
    I did soldered six of the rev2 boards. And at least two of them work! now they are chainable. Next I will update the library for better support of multi digits displays.

  • rev2 boards arrived

    Alex08/14/2015 at 11:25 0 comments

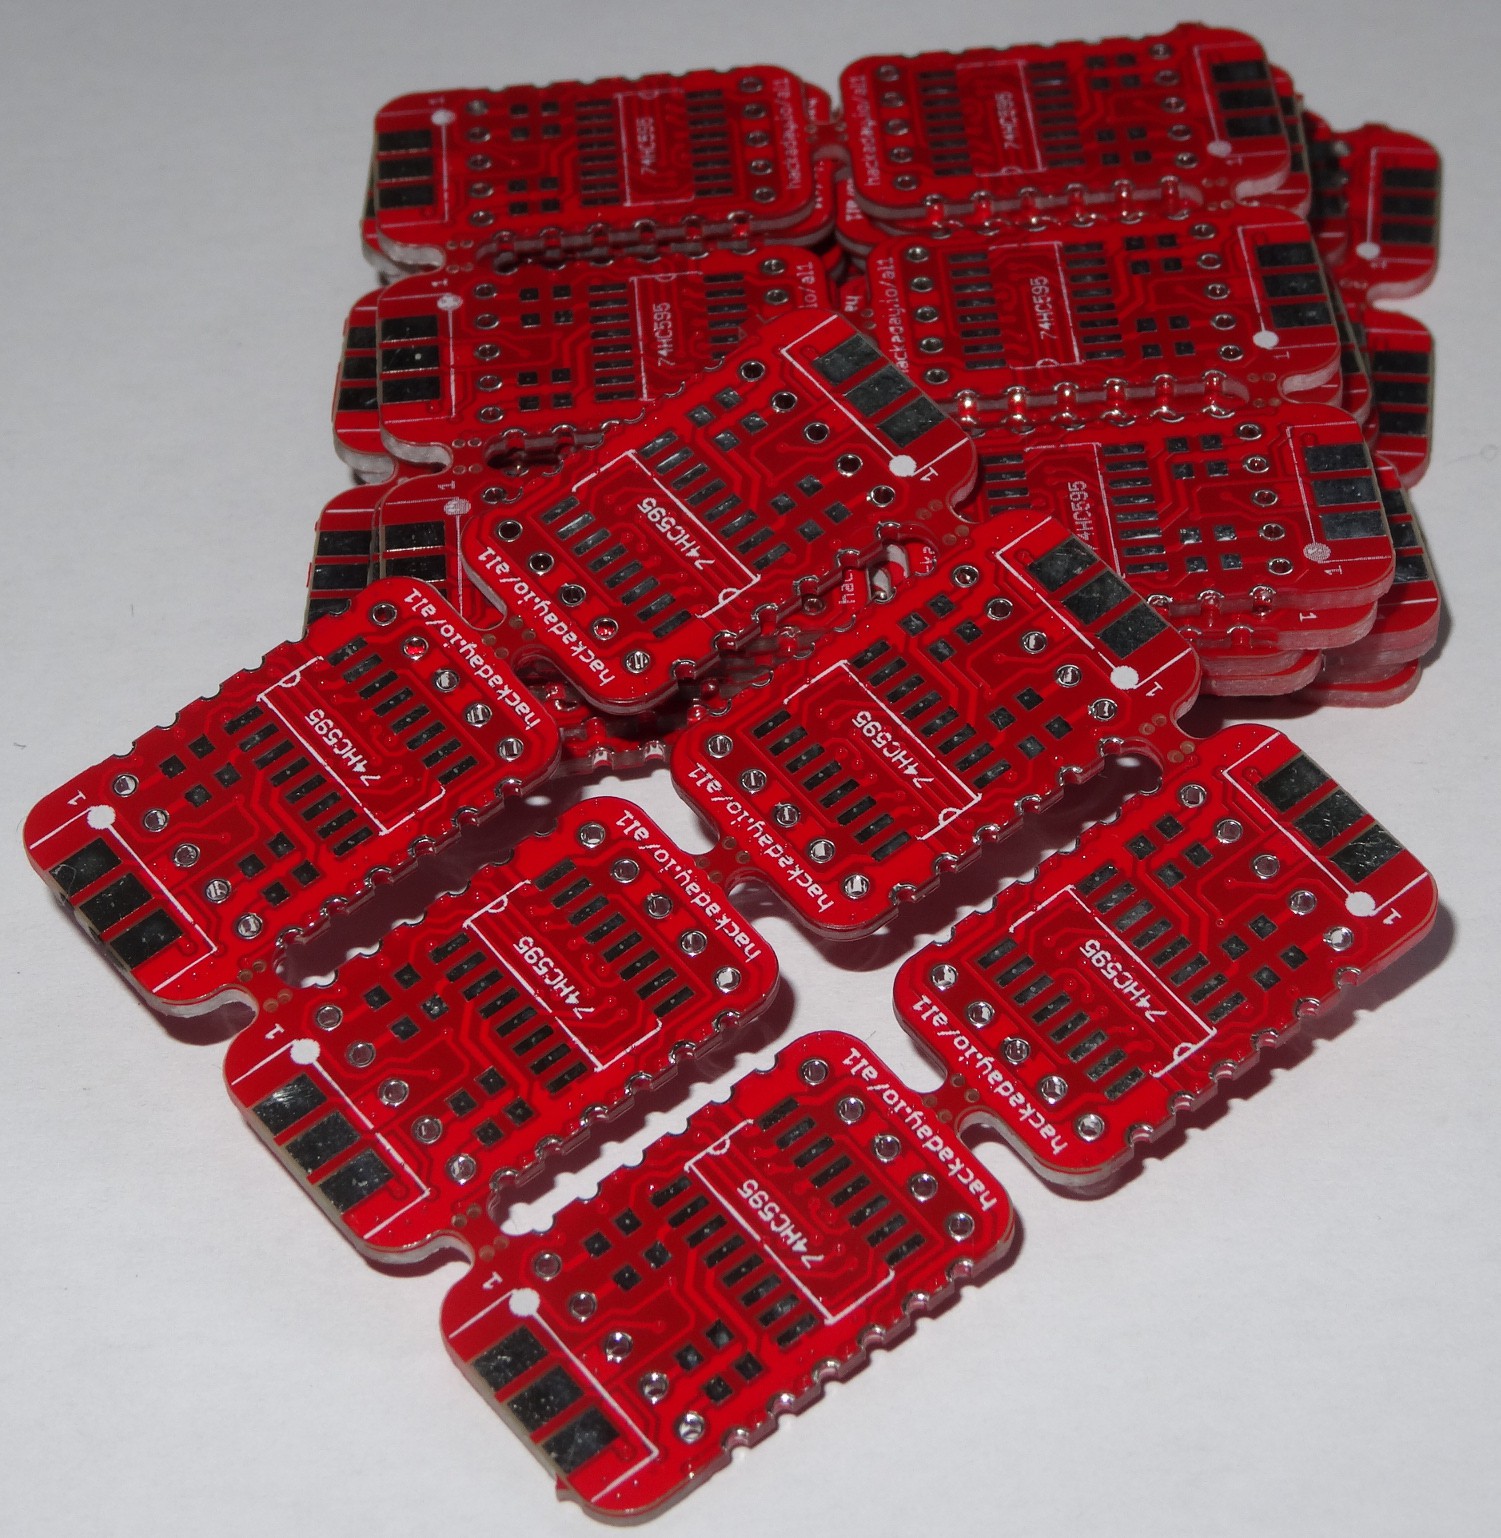
    Many boards (someone want one?). But I wanted to try out to make a panel. And now they can be chained like this:

  • Arduino Library updated

    Alex07/22/2015 at 17:37 0 comments

    So the library (see bitbucket) does now support all three kinds of mounting the display. Just use different argument at the .begin function like:

     myTiny7.begin(3);
    //if your display is mounted normal use no argument or 0 else:
    // 0: normal 		(default)
    // 1: mirror 		mounted on the other side of the PCB over the IC
    // 2: rotated		mounted on normal side (over the QR-Code) but upside down
    // 3: mirror + rotated 	mounted on other side upside down 
    Also Attiny85/456 based boards like the Trinket should be supported now. Then the default pin out is:
    1: SDO serial data out
    2: Clock
    3: latch
    Change this as additional parameter in the .begin function, if needed, like this:
    myTiny7.begin(3, SDO_PIN, CLK_PIN, LATCH_PIN);

View all 16 project logs

Enjoy this project?

Share

Discussions

alpha_ninja wrote 12/07/2015 at 00:30 point

[verified: no design files missing]

  Are you sure? yes | no

alpha_ninja wrote 12/02/2015 at 00:47 point

This is your one-week reminder to upload design documents: https://hackaday.io/project/7813-the-square-inch-project/log/28566-design-deadline

  Are you sure? yes | no

alpha_ninja wrote 09/28/2015 at 23:10 point

Nice project! If you're interested, you can enter #The Square Inch Project—it looks like your design meets the requirements already!

  Are you sure? yes | no

Alex wrote 09/29/2015 at 14:31 point

thanks!

  Are you sure? yes | no

Stefan Lochbrunner wrote 07/21/2015 at 14:36 point

So I've tested your library and obviously it works on an ATmega328 (Pro Mini) but I'm having trouble on an ATtiny85 (Trinket and bare ATtiny cores). The aliases MOSI, MISO and SCK seem not to be defined in the relevant pins_arduino.h which gives me an error for every argument in tiny7.h:10 stating that they are not defined in this scope and an error in the sketch for every argument stating "uses the default argument for parameter [2/3/4], which is not yet defined". Editing pins_arduino.h didn't work but I'm not sure I'm looking at/editing the right file since I'm also not sure where the board manager of the 1.6.4 IDE puts its hardware files. When I try to override the default pin setting in the [tiny7].begin() call I get the three "not declared in this scope" errors from above and an "Error compiling."

Regarding the inversion setting I have a suggestion. Due to the pinout of the displays you could also install them upside down, summing up to 4 different ways to mount them. It'd probably be a lot more work to accommodate these two additional cases but maybe that's something to add in the future. Yet another suggestion is to implement a setting that inverts the output such that this library can be used with common anode and cathode displays.

Sorry if this is getting too much ;)

  Are you sure? yes | no

Alex wrote 07/21/2015 at 15:19 point

Well, I also tried to at least least compile it for a Trinket now and same error. I think its because MISO, MOSI and SCK are not defined then. And that right the Tiny85 do not have these pins. Sadly using myTiny7.begin(false,0,1,2); do not help, because the are still MISO.. undefined, although not used. I will fix that in the next version of the library.

The upside down is again a good idea, and not difficult to add (also in next version I think). 

Supporting common anode displays is something I have to think about. should be realizable via some solder jumpers to change the common pin to either Vcc or GND. And an inverted output at the shift register.

Thanks again

  Are you sure? yes | no

Stefan Lochbrunner wrote 07/21/2015 at 15:36 point

Sounds awesome! If only I could skull more than once ;)

  Are you sure? yes | no

Scott wrote 07/05/2017 at 20:36 point

The Tiny85 (25 and 45 as well) does not have a hardware SPI interface, it has a USI interface, which stands for Universal Serial Inerface.  The MISO, MOSI and SCLK pins on the Tiny25/45/85 only work for ISP programming only.  If you want to use the USI as an SPI interface, you must set the USI into the proper mode then write your code to properly use the hardware to make it work like an SPI interface.  Its not like the Mega328, etc. where they have the built-in SPI interface and you set the mode (0, 1, 2, or 3) and I/O pin directions then write/read a byte to/from the SPI data register.  It takes a bit more code on the Tiny25/45/85 but it can be done.

  Are you sure? yes | no

Stefan Lochbrunner wrote 07/19/2015 at 15:33 point

With how much current are you driving the individual segments?

  Are you sure? yes | no

Alex wrote 07/19/2015 at 16:24 point

That depends on the resistors you use. In my test setup I used a red display. Each led have a froward voltage of 2V. So I used 150 ohm resistors to get 20mA current. You can use bigger resistors to save energy, but the display is darker than. 

  Are you sure? yes | no

Stefan Lochbrunner wrote 07/19/2015 at 16:54 point

Yeah, I know that it depends on the resistors but I was asking in regards to the maximum continuous current through the register. I was playing with some shift registers and seven segment displays I had lying around and was planning on driving the segments with 20mA, too. However, that sums up to 160mA in the worst case which is way more than my HC164Ns should carry (50mA). The first two datasheets I found for the HC595 quote it's maximum to be 70mA. It's not killing the SRs instantly but it's still way out of spec, isn't it?

  Are you sure? yes | no

Alex wrote 07/19/2015 at 17:39 point

Yes, in the data sheet 70mA is the maximum total current. But at least my HC595 can handle 8*20mA over ~2hrs. To be on safe side I should use larger resistor to limit the current through each led to 8,75mA.

  Are you sure? yes | no

Stefan Lochbrunner wrote 07/19/2015 at 19:32 point

Assuming that every number/symbol is equally probable you could also dimension the resistors according to the mean number of active segments which might increase the time before failure. I'm just surprised that the SRs operate this far beyond their max ratings.

I'll probably go with 20mA per segment, too, because the displays are quite dim and 150 ohms is what I have on hand for four digits ;) 

If you're interested, I can let you know how your library works with this "tiny7 through-hole clone" I'm building but it shouldn't be an issue since it's basically shifting out the data. Are you planning on implementing a function to clear the display? Might be handy and the hardware seems to be in place anyway.

Btw: I like the idea of being able to use the display on either side of the PCB!

  Are you sure? yes | no

Alex wrote 07/19/2015 at 21:33 point

There is a way to clear the display yet. But it is not good. I should make a function like tiny7.clear() or similar. But functional the same can be achieved with tiny7.show(18). That is some strange but the 18th character is empty digit for the library. But this could also change in future, because I am planning to support characters, so you  can write messages on the display. 

Feel free to test the library yourself. But I think there will be a new improved Version during the next week available.

  Are you sure? yes | no

Scott wrote 07/05/2017 at 21:36 point

If you are looking to reduce power consumption, I've had success running the segments at 5 ma each.  Also, to reduce power consumption, you might pulse the cathode of the display with say the output of a LM555 timer set to ~50% duty cycle running at 40 Hz.  I know it means adding another 8-pin SMC and a few extra passives to the PCB but it will reduce power consumption by ~50%.  The LM555 can sink/source 200 ma.  One of the OEM's data sheets shows the CE drop of the output transistor to be ~0.5 volts at 40 ma, so adjust your series resistors appropriately.

  Are you sure? yes | no

SopaXorzTaker wrote 07/18/2015 at 14:27 point

Perfect use for a shift register, unike other modules where they manage to put an Atmega328 to control a single RGB led.

  Are you sure? yes | no

Dmm6137 wrote 07/17/2015 at 17:23 point

I'm pretty sure all you have to do is jumper the Q7'/QH'(depending on the source documents you're looking at ) to the DS/SER pin on the next one to daisy chain the boards together.  There could be a bunch of different ways for this to be done, but I definitely wouldn't use angled headers. Just an idea, you could make two separate boards, the one you already have and then another board to plug in multiple displays and daisy chain them.

  Are you sure? yes | no

Scott wrote 07/05/2017 at 21:29 point

Don't forget they all get the same clock too.

  Are you sure? yes | no

Stefan Lochbrunner wrote 07/17/2015 at 15:51 point

This is pretty neat! It'd be cool if one could daisy-chain additional modules onto the one that attaches to the ISP header. Also the library would have to support multiple digits. With some headers on the side this should be possible since it's based on a shift register, right?

  Are you sure? yes | no

Alex wrote 07/17/2015 at 16:01 point

Thank you!

Well, that is good idea. And yes it would not be that difficult because is used a shift register. I will consider this in a next Revision. But first I will make the one digit Version and libraries ready. 

  Are you sure? yes | no

Stefan Lochbrunner wrote 07/17/2015 at 16:16 point

Yes, having this version working is probably a better stating point for an expansion.

I was just thinking that if one wants the digits to be close together, headers might not be the best idea since right angle female ones would have to be flush with PCB edge which makes them take up a lot of space. Therefore it might be better if the PCBs are connected from the beginning and can be broken apart as needed.

  Are you sure? yes | no

Similar Projects

Does this project spark your interest?

Become a member to follow this project and never miss any updates