David Prutchi
-
iPhone DOLPi Polarization Camera Developed by Paul Wallace
07/03/2016 at 15:07 • 0 comments![]()
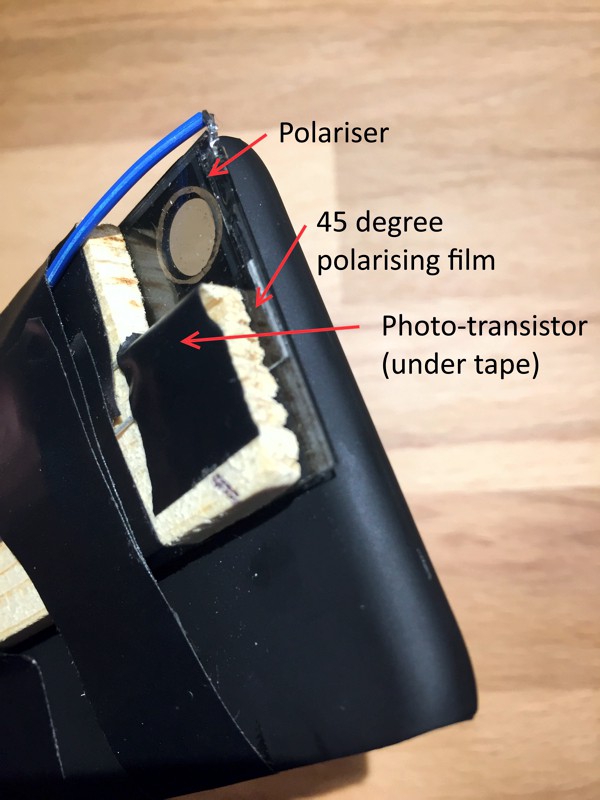
Reader Paul Wallace contacted me to tell me about the DOLPi electro-optic polarization camera that he built for his iPhone. His ingenious solution makes use of the iPhone's flashlight to calibrate and synchronize the control of the polarization analyzer (hacked from a welder's mask as described in the DOLPi whitepaper).
The drive voltage at which quasi-45 degree rotation of polarization occurs varies over time, so Paul used a phototransistor to detect light from the iPhone's flashlight that passes through a 45-degree polarizer on its way through the liquid-crystal panel. By varying the drive voltage across the liquid crystal panel, a minimum in transmitted light occurs when the 45 degree polarizers cross. As shown in the following picture, this level can be detected and used to set the corresponding 45 degree voltage reference:
![LCP transmission to 45-degree polarized light as a function of voltage in Paul Wallace's iPhone implementation of a DOLPi polarimetric camera]() LCP transmission to 45-degree polarized light as a function of voltage in Paul Wallace's iPhone implementation of a DOLPi polarimetric camera
LCP transmission to 45-degree polarized light as a function of voltage in Paul Wallace's iPhone implementation of a DOLPi polarimetric camera
The iPhone’s flashlight is also used to synchronize the change in polarization with the image taking. The iPhone blinks the flashlight after every three images have been taken. The device uses this flash to reset the 0,45,90 sequence to a known state.
Paul provides details of the Arduino-controlled circuit, its firmware, and the iPhone app in his webpage: http://ynformatics.com/2016/iphone-polarisation-camera/
Thanks Paul for sharing, and kudos for your very ingenious solution!
![Arduino-controlled circuit for the iPhone-based DOLPi Polarimetric camera developed by Paul Wallace]() Arduino-controlled circuit for the iPhone-based DOLPi Polarimetric camera developed by Paul Wallace
Arduino-controlled circuit for the iPhone-based DOLPi Polarimetric camera developed by Paul Wallace
-
Final Version of DOLPi Whitepaper Posted
10/26/2015 at 12:49 • 0 comments![]()
The final version of the whitepaper is now available at: http://www.diyphysics.com/wp-content/uploads/2015/10/DOLPi_Polarimetric_Camera_D_Prutchi_2015_v5.pdf
Copies of all project files are available for download from Dropbox and Github
-
All DOLPi Files Now Available from Dropbox
10/26/2015 at 12:14 • 0 comments![]()
All DOLPi Project files for the productized versions are now available on Dropbox. The project's whitepaper and finalist video are also included.
CLICK HERE to be taken to the Dropbox file
-
Finalist Video Released
10/25/2015 at 23:07 • 0 commentsWhat a marathon weekend! I'm almost done though...
I just posted the finalist video for DOLPi:
-
DOLPi-UI Universal Imager Hardware Completed and Working
10/18/2015 at 23:22 • 0 commentsThis weekend I was able to complete the construction and test of the DOLPi-UI imager. It is capable of viewing and polarimetric imaging in the IR-VISIBLE-UV bands. A FLIR Lepton module extends its imaging (but not polarimetric) capabilities down to the longwave IR ("thermal IR"). Raspberry Pi is able to simultaneously present the thermal IR image while acquiring images in the near-IR, visible, and near-UV ranges.
![]()
-
Productive Weekend for DOLPi-UI
10/12/2015 at 11:36 • 0 comments![]()
Had a very productive weekend for DOLPi-UI (Universal Imager). The main Chassis is assembled and all electronics and software are working. I added a FLIR Lepton module to extend the imaging range (although not polarimetry) to the longwave IR ("thermal" infrared).
Still have to complete the assembly with the new bandpass filter wheel and light shield that are *still* being 3D-printed.
I have a few surprises for the final submission!
![]()
-
DOLPi is a HAD 2015 Prize Finalist!
10/05/2015 at 16:48 • 0 comments![]()
HAD just announced the 2015 HAD Prize Finalists, and DOLPi is one of them! Thanks HAD!
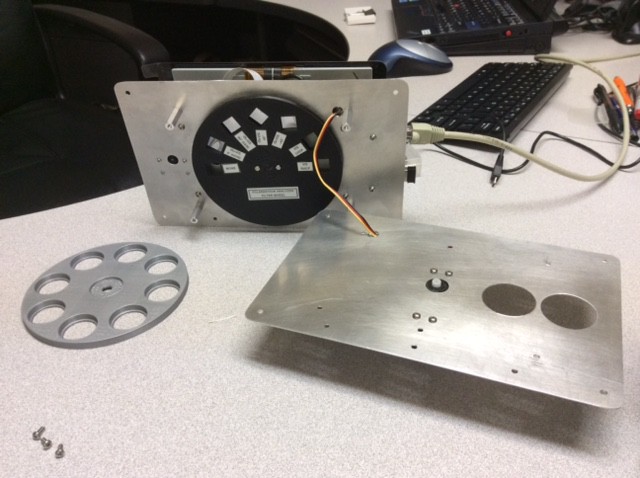
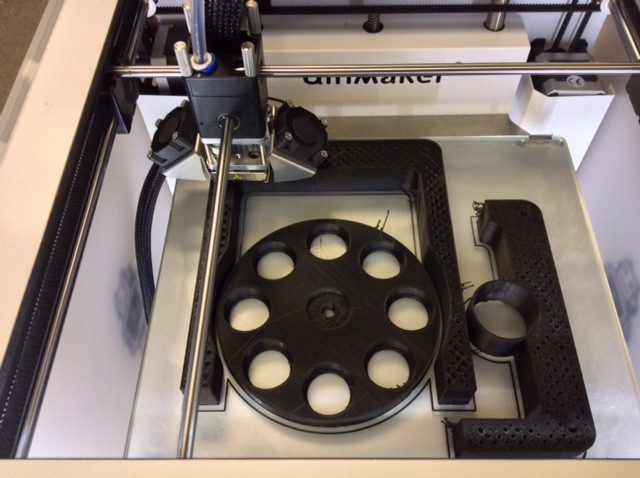
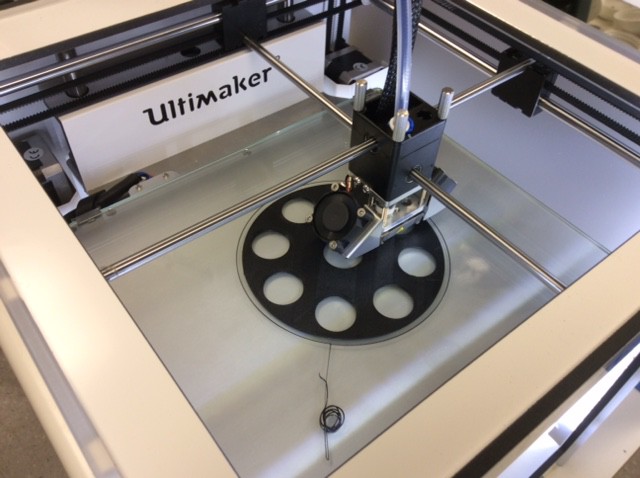
Pushing along for the final submission, parts for the final product-ready prototypes of DOLPi and DOLPi-MECH are now being 3D printed. Here is a DOLPi-MECH filter wheel being printed by an Ultimaker 2:
![]()
-
More Elegant Liquid Crystal Panel Driver for DOLPi
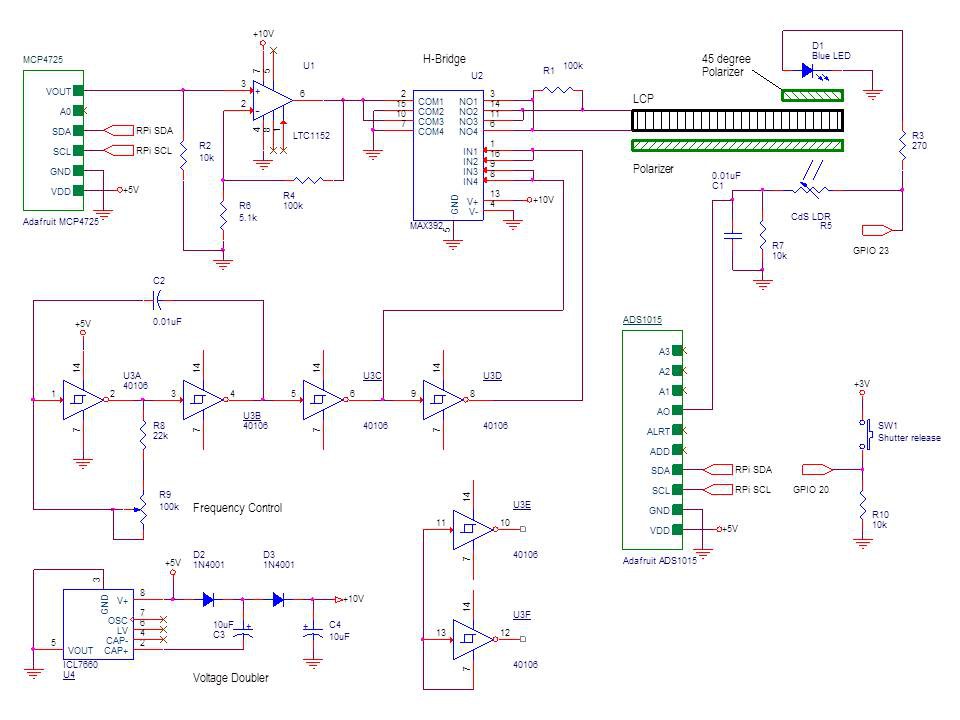
10/03/2015 at 20:18 • 0 commentsAlthough the circuit of shown so far as the liquid crystal panel's AC driver works well, I’m not too happy with the intrinsic non-linearity of the FET. Because of this, today I designed and tested an alternative, a bit more complex, but I believe more elegant design. In the circuit shown below, the LCP drive amplitude tracks linearly with the DAC’s output.
The non-inverting amplifier built around U1 approximately doubles the output of the DAC. This voltage is then presented to an H-bridge implemented by the analog switches in U2. The H-bridge produces a continuous biphasic train at a frequency given by the oscillator built around U3A and U3B. U4 doubles the +5V coming from the Raspberry Pi to power U1 and U2. The LCP is connected between the legs of the H-bridge.
![]()
-
Project whitepaper updated to v4
10/02/2015 at 18:56 • 0 commentsAn updated version of the project's whitepaper is available at: http://www.diyphysics.com/wp-content/uploads/2015/10/DOLPi_Polarimetric_Camera_D_Prutchi_2015_v4.pdf
-
DOLPi Whitepaper Updated to v.3
09/25/2015 at 20:59 • 0 commentsV.3 of the DOLPi whitepaper is now available at: http://www.diyphysics.com/wp-content/uploads/2015/09/DOLPi_Polarimetric_Camera_D_Prutchi_2015_v3.pdf
DOLPi - RasPi Polarization Camera
A polarimetric imager to locate landmines, detect invisible pollutants, identify cancerous tissues, and maybe even observe cloaked UFOs!