Close
0%
0%

BooSTick - small AA voltage booster

Switchable 5V and 3.3V power from a AA, using an efficient boost regulator

Similar projects worth following
Starting from
$7.95
CaptMcAllister has 26 orders / 0reviews
Ships from United States of America
Note: BooSTick production is winding down. There are only about 50 units left, so if you still want one, get one at Amazon or Tindie while they last!

BooSTick on Amazon:https://www.amazon.com/dp/B01MZARIR8

Bring the power to your project. An AA battery provides breadboard power of 5V or 3.3V. Current Capability: 220 mA @ 5V & 320 mA @ 3.3V, or > 500 mA @ 5 V and >700 mA @ 3.3 V with dual AA.

Visit us at www.roverdev.us

What can I do with a BooSTick?

I'm glad you asked!

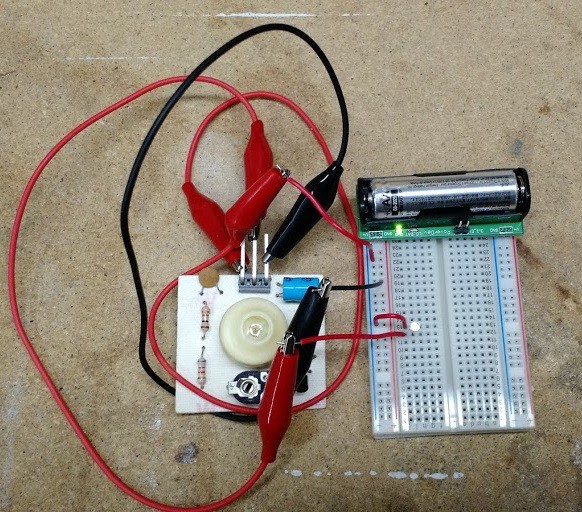
Prototyping: Since BooSTick plugs right into your breadboard, you can use it for prototype power and testing. This clapper circuit requires more than 3.3V to run, and the BooSTick provides up to 5V!
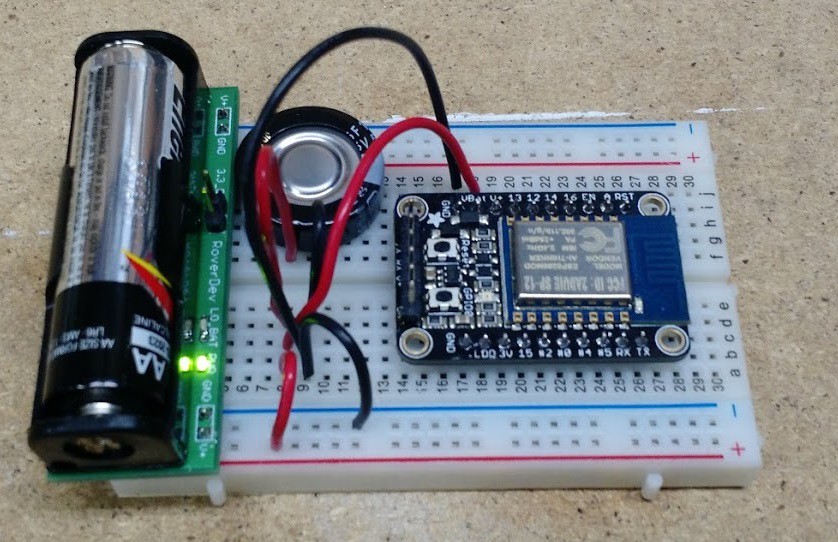
Wi-Fi: Even Wi-Fi is possible with the BooSTick. The ESP8266 draws a bit of a current spike at some point in its operation, so a cap is required on the power supply to keep the BooSTick from dropping out during operation. With the cap, Wi-Fi runs great!
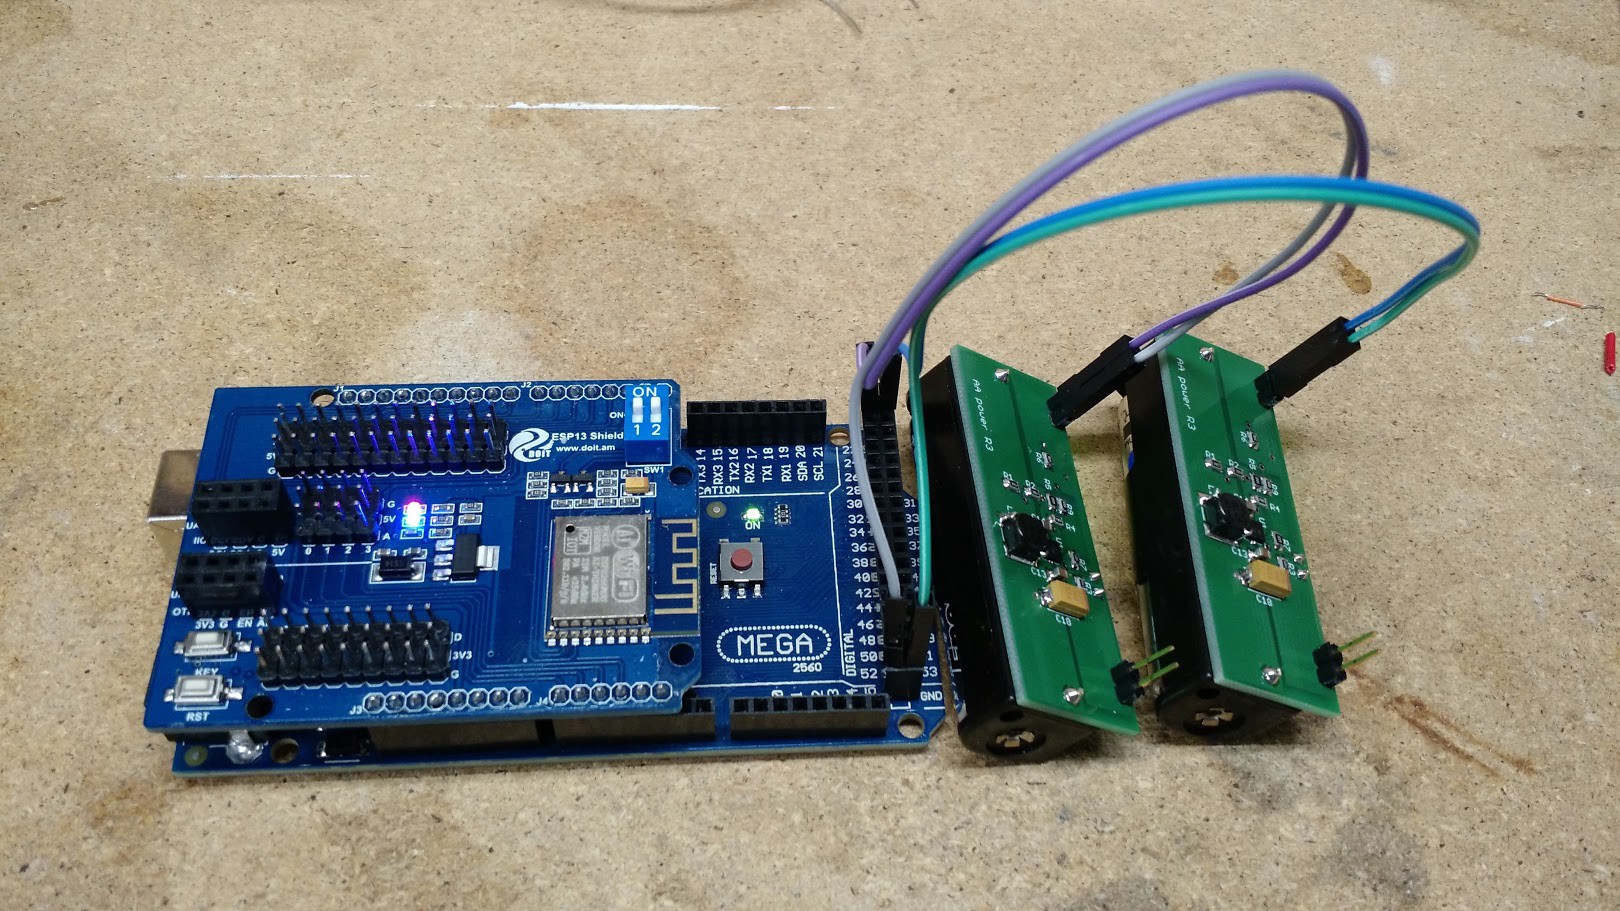
Arduino: At 200 mA output, BooSTick can handle even the biggest Arduinos. Even if you're sloppy with power management in your code and you use a power hungry shield, you can use two BooSTicks in parallel to provide even more than 200 mA. Pictured is a Mega 2560 with terribly optimized code and an ESP13 Wi-Fi shield plugged into the top. Two BooSTicks allow me to telnet to a server in China!

LED lights: I've used the BooStick in a POV (persistence of vision) project where I needed an untethered power source to put my electronics in a bike wheel: https://hackaday.io/project/6470-multi-sensor-pov-light

Remote sensors: I used the BooSTick to power a TI RF2500 microcontroller board with a low power radio: http://www.ti.com/tool/EZ430-RF2500 with sensors attached to it. I needed to make sure the accelerometer I wanted to use for the POV light was in the right acceleration range so the wheel rotation wouldn't just max it out all the time. I used the RF2500 to take acceleration measurements and radio them back to my PC.


Specifications:

Voltage outputs:

  • 3.3 V (with jumper installed)
  • Pull the jumper for a full 5V supply! (included)
  • Other voltages between 1.8 V and 5.5 V are achievable by tuning the feedback resistors. Specify different voltage if desired.

Current limit (with new batteries). This is intended to be a peak current or a pulsed current. A new battery will only last about 20 minutes at these levels before the output voltage drops more than 10%.

  • 5V: 220 mA
  • 3.3V: 320 mA

Run time:

  • 5V, 50 mA: 6 hrs
  • 3.3V, 50 mA: 12 hrs
  • Lower current/voltage generally leads to proportionally longer run time or more

Indicators:

  • Green power on LED
  • Red low battery LED

BooSTick is released under the Creative Commons Attribution-NonCommercial 4.0 International license. http://creativecommons.org/licenses/by-nc/4.0/

BooSTick r4 files.zip

All BooSTick r4 files, released under the Creative Commons Attribution-NonCommercial 4.0 License http://creativecommons.org/licenses/by-nc/4.0/

x-zip-compressed - 122.46 kB - 09/14/2016 at 18:54

Download

  • 1 × TPS61029 Power Management ICs / Switching Regulators and Controllers
  • 1 × AA battery holder Holds the battery
  • 1 × Sumida Inductor-CDRH5D28 6.2 uH inductor for switching circuit

  • Boostick

    CaptMcAllister02/22/2016 at 16:10 0 comments

    February 2, 2016: The Rev 3 boards arrived and they look good. I have posted new pictures, and I will be updating my Tindie store with this new design. Overall, I think it's much better than the previous revisions. I didn't realize before that I could put all the components under the battery and not interfere with the breadboard. Now that I've seen it, it makes perfect sense.

  • Rev 3 (part 2) files

    CaptMcAllister01/21/2016 at 02:37 0 comments

    January 20, 2016: I just can't stay away from this project for some reason. I realized the board was way too big so I put the boost circuit on the bottom side and shrunk the board by almost a factor of 2. I think it's done now. I still called it Rev 3 because I had forgotten I did a full rev roll when I fixed the via problem before. I'm not going to re-revision it now :)

    So Rev 3 files are on this project page, along with the BOM. I haven't tested this yet, but I'm pretty sure it should be good. I'll test it at some point soon and report back.

  • Rev 3 files posted

    CaptMcAllister12/29/2015 at 02:33 0 comments

    Dec. 28, 2015: Oops. Rev 2 files came back and there was a via shorting to a trace. It was a dead power to ground short. It was simple to fix on the boards, but in case anyone else is looking at these files, I wanted to fix it. It's been fixed on the project page by uploading Rev 3.

    This marks the end of the project. I was able to get 250 mA out of the output at 5V and 350 mA at 3.3 V. This is more power than an AA can source for any more than 20 minutes or so, so I wouldn't recommend running it this hard. It's been a nice little project, and I'm glad it worked out. It's available for sale on Tindie. Link is in the project description.

  • Revision 2 files posted

    CaptMcAllister12/06/2015 at 03:01 0 comments

    December 5, 2015: I got the rev 1 boards back and they worked, but the maximum current was only about 100 mA. Although I had used the same layout as I had used in a previous project, it really didn't do well at high current. The output voltage would drop. I have corrected the issue by following the layout guidelines in the datasheet to a T. The new files are posted on the project page.

    I plan to order some rev 2 boards and try again.

  • Model uploaded

    CaptMcAllister10/11/2015 at 02:16 0 comments

    October 10, 2015: I spent some time making the EagleUp model of the board and putting it in the pictures. I like how it looks.

  • Layout complete

    CaptMcAllister10/09/2015 at 02:28 0 comments

    October 8, 2015: I was surprised at the interest in this design. I didn't intend to finish it, but since people seem to like the idea, I finally did. I'll try to post the Gerbers on here at some point.

    Does anyone want a board? I can make an order if people are interested.

View all 6 project logs

Enjoy this project?

Share

Discussions

Henrik Ekblad wrote 04/15/2016 at 19:32 point

Great project, please add it to https://www.openhardware.io

  Are you sure? yes | no

CaptMcAllister wrote 04/05/2016 at 18:46 point

Hi everyone!  It's the last couple days of the BooSTick campaign on Kickstarter.  Please like (skull) this Hackaday project page if you like it, tell others, and get your orders in before the campaign closes :)

  Are you sure? yes | no

zakqwy wrote 03/31/2016 at 22:52 point

Congrats on hitting your KS goal! Didn't realize you were local to Mpls--good to see a few neighbors on this site!

  Are you sure? yes | no

CaptMcAllister wrote 04/01/2016 at 13:37 point

Thanks!  The campaign has been much bigger than I expected.  I intended for it to be a trial for me to learn how Kickstarter works.  I have a more complicated project (also on my Hackaday profile) that I want to launch next, but I can't do it without some secure funding.  Given the success of BooSTick, I plan to launch the next one this summer.

Also, isn't it funny how much more "real" things and people seem when you realize they're local?

  Are you sure? yes | no

John Boyd wrote 03/18/2016 at 16:19 point

I love it! Just pledged for two :)

  Are you sure? yes | no

CaptMcAllister wrote 04/05/2016 at 18:42 point

A bit belated, but thanks very much!  I think you'll find them as useful as I have.  It's one of those things that I keep finding uses for.

  Are you sure? yes | no

Jan wrote 03/13/2016 at 13:32 point

Nice project there! I´m using Pololus step-up modules a lot, they use the same regulator series from TI. Great chips. But your all-in-one project is just sweeeeet!

PS: Be careful with your output voltage silkscreen text! It´s wrong for te second row, at least when relying on the red/blue marking: red row marked GND, blue row marked positive. I did fry a few parts because of little mistakes like that :)

  Are you sure? yes | no

CaptMcAllister wrote 03/13/2016 at 17:30 point

Thanks.  This is based on another design where I used the same family of regulators to drive 10 very bright LEDs for a persistence of vision light.  That's a linked project in my profile.

Just to make sure I understand what you mean, you're saying that my silkscreen shows V+ on the outer pin of both rails, but it should be the inner pin on one rail and the outer on the other?  In this case, it's not my silkscreen that's wrong, it's the actual layout, and I just realized it last night.  The silkscreen matches the layout, but if you rely on the red and blue colors on your breadboard, it will cause problems like you said.  I've shipped a few units this way but I will fix it before the Kickstarter order goes in!

  Are you sure? yes | no

Jan wrote 03/13/2016 at 19:02 point

Yep, right. Thats what I meant. And all breadboards are the same nowadays. Haven't seen one with GND/V+ arraged differently. They are all V+/GND – V+/GND.

  Are you sure? yes | no

Similar Projects

Does this project spark your interest?

Become a member to follow this project and never miss any updates