 Barry Nelson
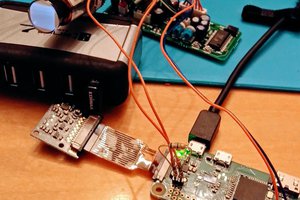
I wired the CoCo 3's RGB video lines from the connector on the bottom of the computer to the RGB lines in an SCART connector. I connected the audio from the CoCo connector to the left and right audio on the SCART connector. I connected the CoCo 3's composite video to the composite video/sync on the SCART connector and I connected +5V to a 100 ohm resistor connected to the "fast switching" pin on the SCART connector. I then plugged the SCART video connector into my SCART --> HDMI converter, which I plugged into my TV. Viola! Perfect RGB video up scaled to 1080P.
Wiring
CoCo monitor out pins 1 + 2, ground, to SCART pins 4, 5, 9, 13, 17, and 18
CoCo monitor out pin 3, red video, to SCART pin 15
CoCo monitor out pin 4, green video, to SCART pin 11
CoCo monitor out pin 5, blue video, to SCART pin 7
CoCo monitor out pin 7, audio, to SCART pins 2 and 6
CoCo composite video out center wire to SCART pin 20 composite/sync
+5V connected to a 100 ohm resistor to SCART pin 16
I used an old cell phone charger to supply the +5V. You could also get +5V from the CoCo's joystick port.


 Jeffrey Jacques
 ThunderSqueak
 SCART VADER
I have 3D modeled a 3D-printable box that mounts a DB-9 connector, which mounts under the Coco-3, which may help in constructing a SCART cable. The idea is to make a cable in such a way that the 10-pin IDC connector and the Composite connector stays in place, and a old VGA cable takes the brunt of the disconnections and strain.
The box mounts to the bottom of the Coco-3, either with double-sided foam tape, or by (carefully) threading the 2 vestigial bosses on the bottom of the computer.
The box lid is to be threaded 3mm, while the DB-9 connector should be threaded #4-40 UNC. During final assembly, a drop of thread-locker should keep the #4 studs tight.
I've decided to line the inside of the box with copper foil, and ground that to minimize interference. The box may also hold the capacitors, as mentioned in this thread.
I may do a rudimentary Kicad schematic of the setup variation.
https://www.thingiverse.com/thing:5528298