 rossumur
-
1Step 1
Building the Hardware
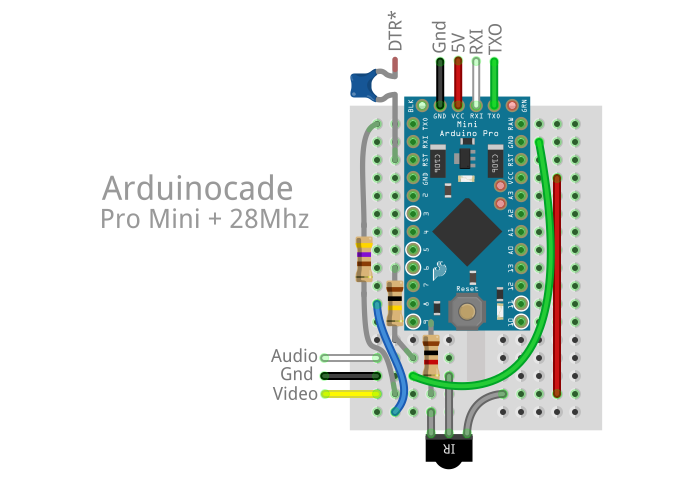
Lots of different ways to build this beastie. The design is simple enough to build on a breadboard with a DIP Atmega328, alternatively you might want to add a 28.6363Mhz crystal to a $2 Arduino Pro Mini or even build on a custom PCB.
You will need- Arduino Pro Mini, Atmega328p or equivalent
- 28.6363Mhz Crystal (from Adafruit, eBay etc)
- RCA Audio/Video Cable (eBay)
- 470ohm, 1k and 100k resistors
- IR receiver TSOP38238,TSOP4838 or equivalent (Adafruit, Mouser etc)
- IR Input device (see below)
        +----------------+
        |    arduino     |
        |    uno/pro     |
        |     28Mhz      |       5v <--+-+   IR Receiver
        |                |      GND <--|  )  TSOP4838
        |              8 |-------------+-+
        |                |
        |              6 |----[ 100k ]--------> AUDIO
        |                |
        |              9 |----[  1k  ]----+---> VIDEO
        |                |                |
        |              1 |----[ 470  ]----+
        |                |
        |              3 |
        |              2 |
        |                |
        +----------------+
Mini Pro![]()
We will be upgrading the crystal/resonator on these boards from 16Mhz to 28.6363Mhz. The easiest ones to modify have the big silver cans on them. Others use a ceramic resonator which require a bit of SMD fiddling.
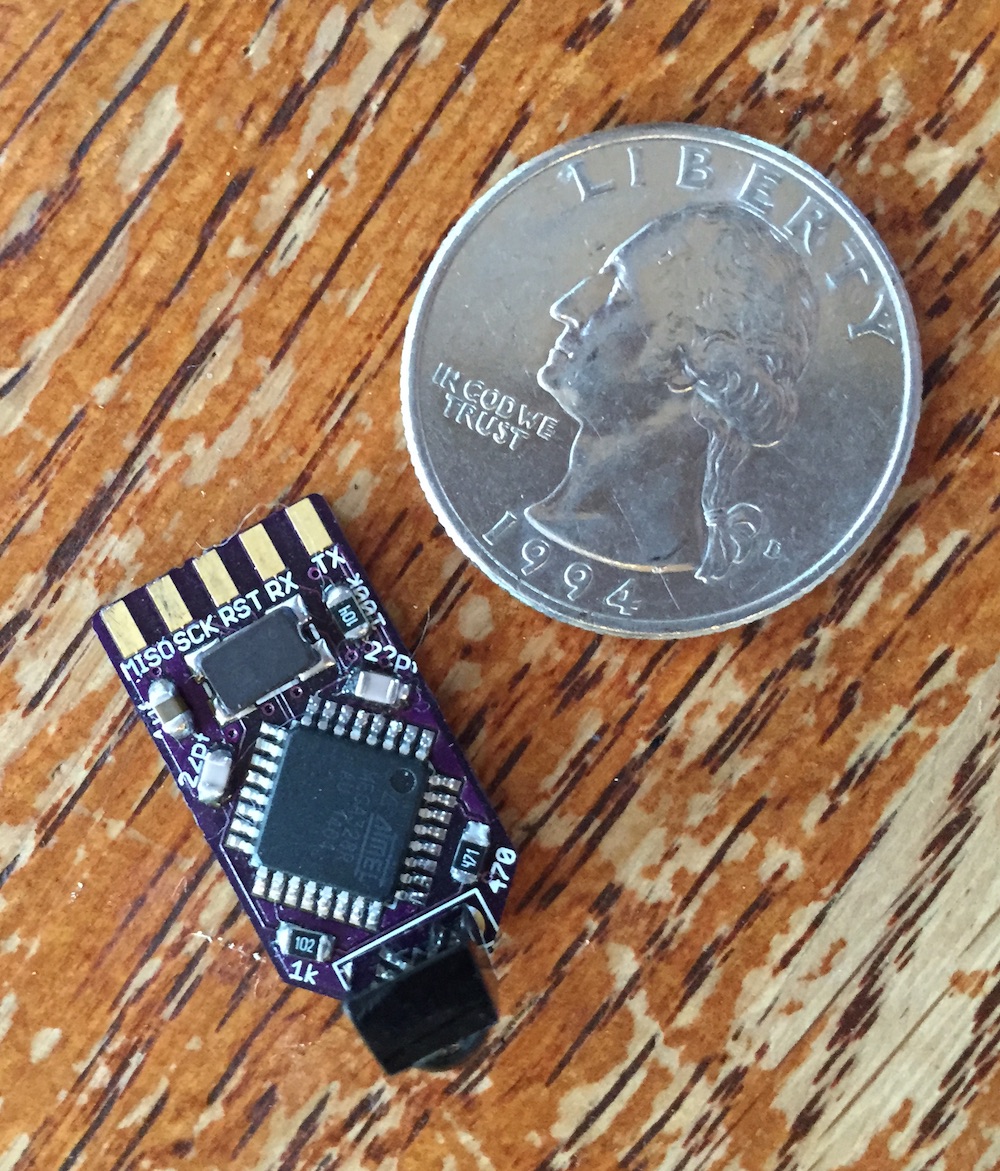
Custom PCB![]()
If you want to get silly and build a custom board you can get a video console down to about the size of a quarter. Board and schematics can be found in sim/docs/eagle.Input Devices
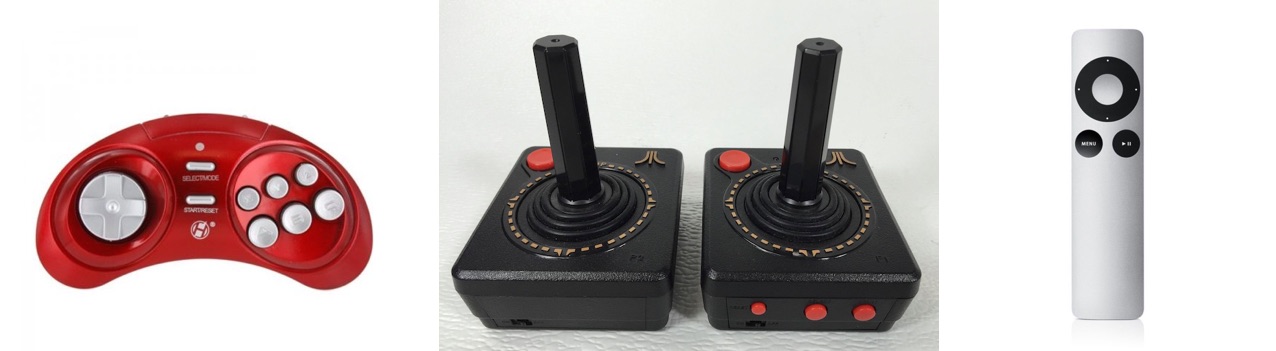
![]()
Retcon IR Controller, Atari Flashback 4 joysticks, Apple TV remoteA number of IR input devices are supported. The IR Wireless Controllers from Atari Flashback 4 work well and have that classic joystick feel, as do the Retron IR controllers. These can be readily found on eBay for a few bucks. The Apple TV remote is also supported by you might feel a little silly. Edit config.h to select your input of choice.
Upgrading the bootloader
If you want to use the Arduino IDE you should upgrade the bootloader to be able to work at 115200 baud with the faster crystal installed. The optiboot_atmega32_28.hex image has been rebuilt with F_CPU=28636363 and a slower watchdog reset so baud rate calculations will be correct for our overclocked device. Install the image with avrdude and your favorite ISP.
avrdude -c usbtiny -p atmega328p -e -u -U lock:w:0x3f:m -U efuse:w:0x05:m -U hfuse:w:0xDE:m -U lfuse:w:0xFF:m
avrdude -c usbtiny -p atmega328p -U flash:w:optiboot_atmega328_28Mhz.hex -U lock:w:0x0f:m
Once the modified optiboot is installed the device will behave like an Uno, so remember to select that from the boards menu in the Arduino IDE.
Using the Arduino IDE
Note:
The current code does not work correctly with Arduino IDEs later than 1.5.6. Compiler optimizations in later versions interfere with hand timed loops in the video kernels. I will fix soon.Copy the `Arduinocade` folder into the IDE libraries folder and relaunch IDE. You should be able to open the example games from File->Examples->Arduinocade. Edit the config.h file to enable or disable the custom `BALLBLASTER_GAME` kernel.
Discussions
Become a Hackaday.io Member
Create an account to leave a comment. Already have an account? Log In.