Close
0%
0%

ESP8266Basic "A basic interpret for your esp"

Basic interpreter for the ESP8266 wifi SOC

Similar projects worth following
At ESP8266BASIC.com we care about basic.
What is an ESP8266
Well an esp8266 is a microcontroller made by Espressif.
It is loaded with features. The most important being wifi. The best part is that they are dirt cheap and more powerful than an arduino. There is a variety of programming resources for these chips but one glaring gap. Basic. And thats where we come in. You are looking at the site for the first ESP8266 basic interpreter available and its not just any basic. Its a phansy basic (Yes, With a ph) that lets you make web enabled gui interfaces.
Why Basic? Why not?
Basic is a language beloved by millions of people. Its what many of us started out with and what the old timers used on there commodore 64s. Its how Microsoft got started and one of the reasons for the explosive growth of computers in the 80s. Basic is a simple but powerull language that lets you do amazing things with out needing a degree in computer science.

ESP8266 BASIC Language Reference

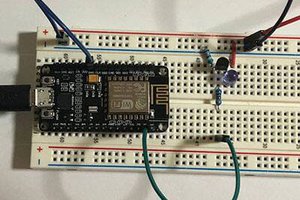
Hardware Basics (Node MCU Board)

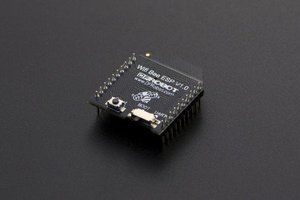
ESP-01 BOARD

BASE COMMANDS (Basic Core)

IF .. THEN:

LET:

Comparison Operators:

Math Operators:

Logic Operators:

Boolean Operators:

DIM:

UNDIM:

GOTO:

GOSUB AND RETURN:

FOR ... NEXT loops:

BRANCH LABELS:

PRINT:

SERIALPRINT:

SERIALPRINTLN:

BAUDRATE:

INPUT:

SERIALFLUSH:

SERIALTIMEOUT:

SERIAL PORT 2:

SERIAL2BEGIN:

SERIAL2PRINT:

SERIAL2PRINTLN:

LOAD:

Timers And Interrupts

TIMER:

SLEEP:

REBOOT:

INTERRUPT:

SERIALBRANCH:

FILE I/O

READ:

WRITE:

HARDWARE INTERFACE COMMANDS

PO:

PI:

PWO:

PWI:

SERVO:

AI:

LASTSTAT:

TEMP:

delay:

OLED & LCD DISPLAY COMMANDS

OLEDPRINT:

OLEDCLS:

OLEDSEND:

LCDPRINT:

LCDCLS:

LCDBL:

LCDSEND:

FUNCTIONS (NEOPIXEL WS2812)

NEO():

NEOCLS():

neostripcolor():

(FUNCTIONS) DHT21

DHT.TEMP():

DHT.HUM():

DHT.HEATINDEX():

WEB INTERFACE COMMANDS

CLS:

WPRINT:

WPRINT with htmlvar() function:

IMAGE:

JAVASCRIPT:

CSS:

BUTTON:

IMAGEBUTTON:

TEXTBOX:

PASSWORDBOX:

SLIDER:

DROPDOWN:

LISTBOX:

ONLOAD:

WAIT:

HTMLID():

WEB MSG HANDLER COMMANDS

MSGBRANCH:

MSGGET:

MSGRETURN:

SMTP EMAIL COMMANDS

SETUPEMAIL:

EMAIL:

GRAPHICS COMMANDS

GRAPHICS

GCLS:

LINE:

CIRCLE:

ELLIPSE:

RECT:

Color palette

WIFI COMMANDS

CONNECT:

AP:

WIFIOFF:

WIFI.SCAN():

WIFI.SSID():

WIFI.RSSI():

FUNCTIONS (THINGSPEAK API)

SENDTS:

READTS:

FUNCTIONS String

len():

instr():

mid():

left():

right():

str():

replace():

chr():

asc():

upper():

lower():

id():

word():

json():

ReadOpenWeather():

FUNCTIONS (Numeric)

sqr():

sin():

cos():

tan():

log():

rnd():

millis():

int():

val():

oct():

hex():

hextoint():

ramfree():

flashfree():

Function inherited from the parser (c++ style)

pow(x, y ):

exp(x):

asin(x):

acos(x):

atan(x):

atan2(x, y):

abs(x):

fabs(x)

floor(x):

ceil(x):

round(x):

FUNCTIONS (Time&Date)

time():

unixtime():

timesetup():

FUNCTIONS (Web Related)

wget():

ip():

FUNCTIONS I2C

i2c functions:

i2c.begin():

i2c.write():

i2c.end():

i2c.requestfrom():

i2c.available():

i2c.read():

FUNCTIONS UDP

Udpbegin:

Udpstop:

UdpbeginMultiCast:

Udpwrite:

UdpwriteMultiCast:

UdpReply:

UdpRead():

UdpRemote():

UdpBranch:

SPECIFICITY OF THE NEW PARSER

Hardware Basics (Node MCU Board)

ESP-01 BOARD

BASE COMMANDS (Basic Core)

IF .. THEN:

The if then command will compare 2 values or variables.

To check if strings are equal to each other use ‘==’, for numbers use ‘=’.

if {var or value} {=, ==,>,<,<>,>=,<=}, {var or value} then {statement to be executed if true} {else} {Statement if false}

LET:

Let will perform math or string operations on a set of values or variables and place the result into a variable.

To add strings together you must use the ‘&’ symbol instead of the ‘+’

Can also be used to evaluate logic operations like in the if then statement. If the result is true it will return a -1 otherwise a 0

let {Result var} = {value or var} {operator *,/,+,-,^,&} {value or var}

let {Result var} = {value or var} {=, ==,>,<,<>,<=,>=} {value or var}

Can also be used without the let statement

bla = 5 + 5

Comparison Operators:

Math Operators:

= Equal for numbers

== Equal for strings

> More than

< less than

<> Not Equal

>= more than or equal

<= less than or equal

+ Add (Numbers Only)

- Subtract

* Multiply

/ Divide

^ To the power of

& Add (Text)

% Modulo

Logic Operators:

Boolean Operators:

And boolean ‘and’ (ex. If a=10 and b=20 then ..)

Or boolean ‘or’ (ex. If a=10 or b=20 then ..)

Xor boolean ‘xor’ (ex. If a=10 xor b=20 then ..)

Not boolean ‘not’ (ex. If not (a=10) then ..)

Any combination of these operators is allowed.

(ex. If (a=10 or b=20) and c=30 then

And boolean ‘and’ (ex. a = b and c)

Or boolean ‘or’ (ex. A = a or 16)

Xor boolean ‘xor’ (ex. A = b xor 255)

Not boolean ‘not’ (ex. A = not 15 )

<< shift left (ex. A = b << 4)

>> shift right (ex. A = b >> 8)

DIM:

Will dimension an array. Arrays dimensioned with out the $ will be defined as numeric. Arrays defined with a $ will be defined as string. Can be used just like other variables. Can not be used for gui widgets.

dim araynumeric( {variable or numeric value} )

dim arraystring$( {variable or numeric value} )

UNDIM:

Will release memory used by an array

undim arraystring$

GOTO:

Will jump to the branch label of your choice

goto {label}

GOSUB AND RETURN:

Will jump to the branch label of your choice and allow you to return to the location...

Read more »

  • 1 × ESP8266 WIFI soc

View all 3 project logs

  • 1
    Step 1

    How to flash the chip.

    Download the package from the download page
    Run "ESP_Basic_Flasher.exe"

    Picture

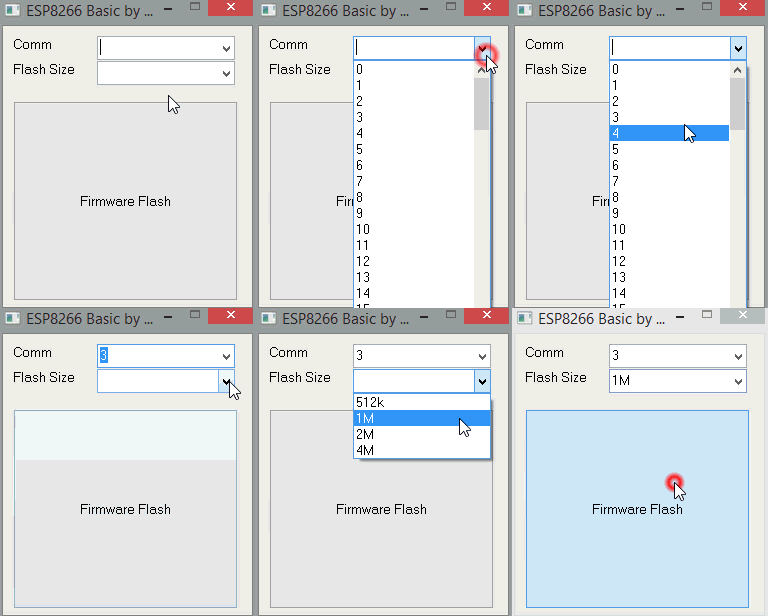
    Select Your com port number and flash memory size for your chip.

    Picture

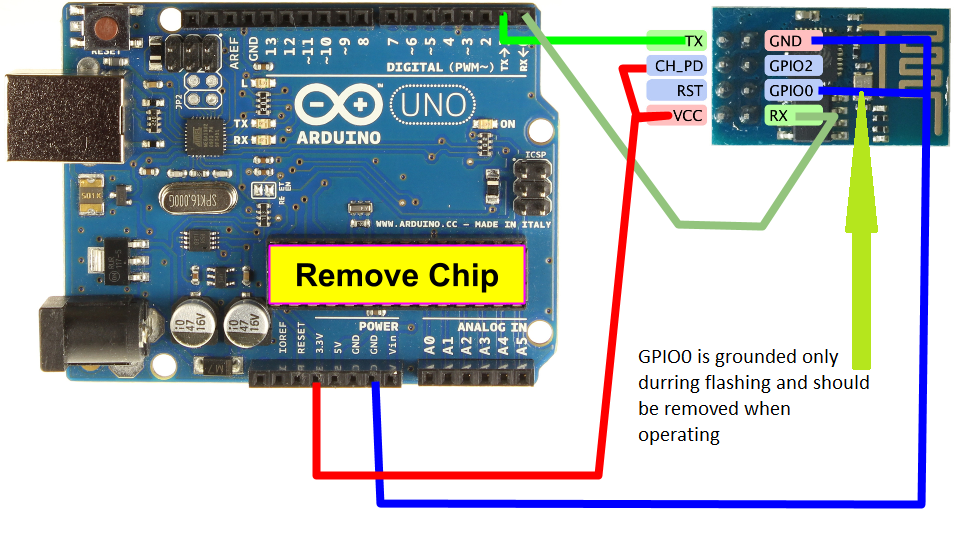
    Hook your ESP8266 module up in flashing configuration as shown.
    Click the "Firmware Flash" button.
    Wait for the flash to finish with out errors. IF there are any errors check your wiring.
    Reset the ESP8266 module with out GPIO 0 grounded.

    Picture

    The module will attempt to connect to the last network it was connected to. Because this module has never been connected before it will start its own access point.


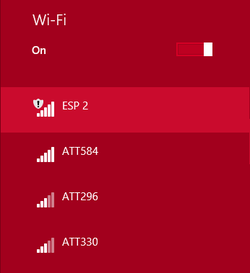
    Connect to the "ESP" access point

    Picture

    Picture

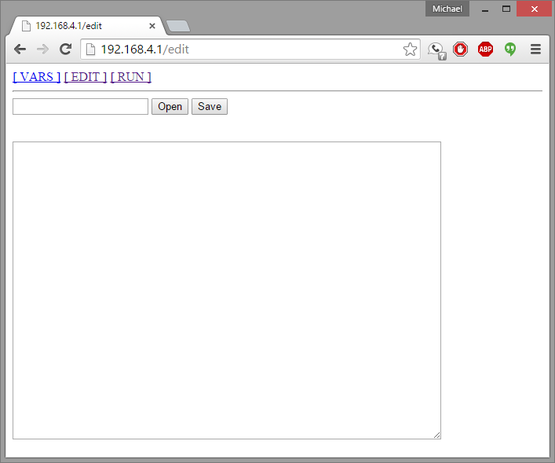
    Goto http://192.168.4.1/edit in your browser. You should see a screen that looks like this.
    You can now use the edit area to type basic programs for the ESP8266.
    Saving the program with no file name will make it the default program that is loaded upon restart of module likewise clicking the open button with out a program name specified will open the default program.
    To connect to you you wifi access point see the wifi example.

View all instructions

Enjoy this project?

Share

Discussions

Similar Projects

Does this project spark your interest?

Become a member to follow this project and never miss any updates