 Daniel
-
1Step 1
Build the edge segments
![]()
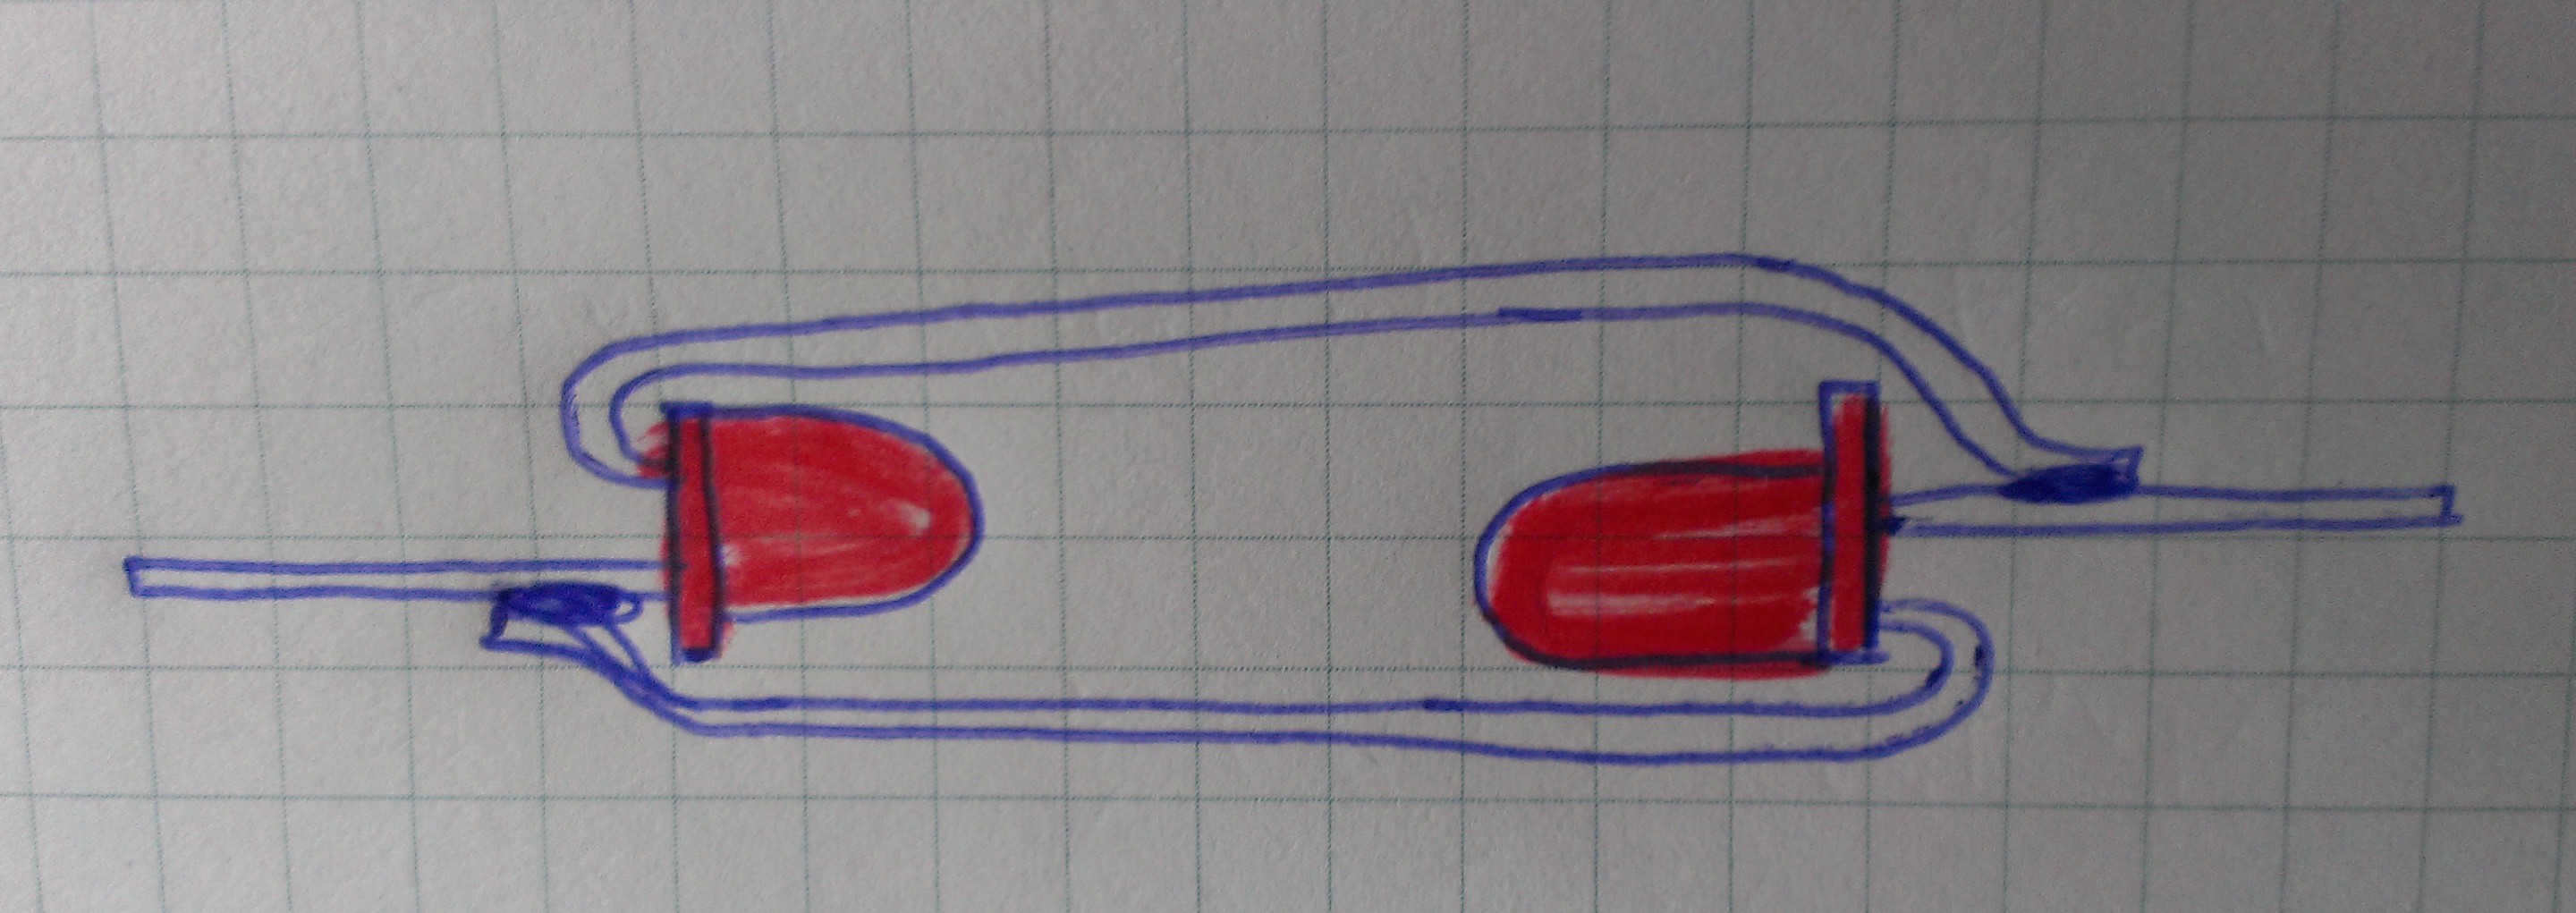
- Grab two LEDs
- Bend one leg up by 180º on each
(the same on both, e.g. the anode = longer leg) - Align the LEDs facing each other
- Solder the bent leg of one LED to the unbent leg of the other, and vice-versa.
The LEDs are now wired in anti-parallel. - Repeat this process for the required number of edges for your polyhedron. (see table)
* Ensure that the distance between both LEDs is the same for all edge segments you build. A template placed below the LEDs while soldering might help.
Segments LEDs Tetrahedron 6 ||||| | 12 Cube 12 ||||| ||||| || 24 Octahedron 12 ||||| ||||| || 24 Dodecahedron 30 ||||| ||||| ||||| ||||| ||||| 60 Icosahedron 30 ||||| ||||| ||||| ||||| ||||| 60 -
2Step 2
Build the first face
![]()
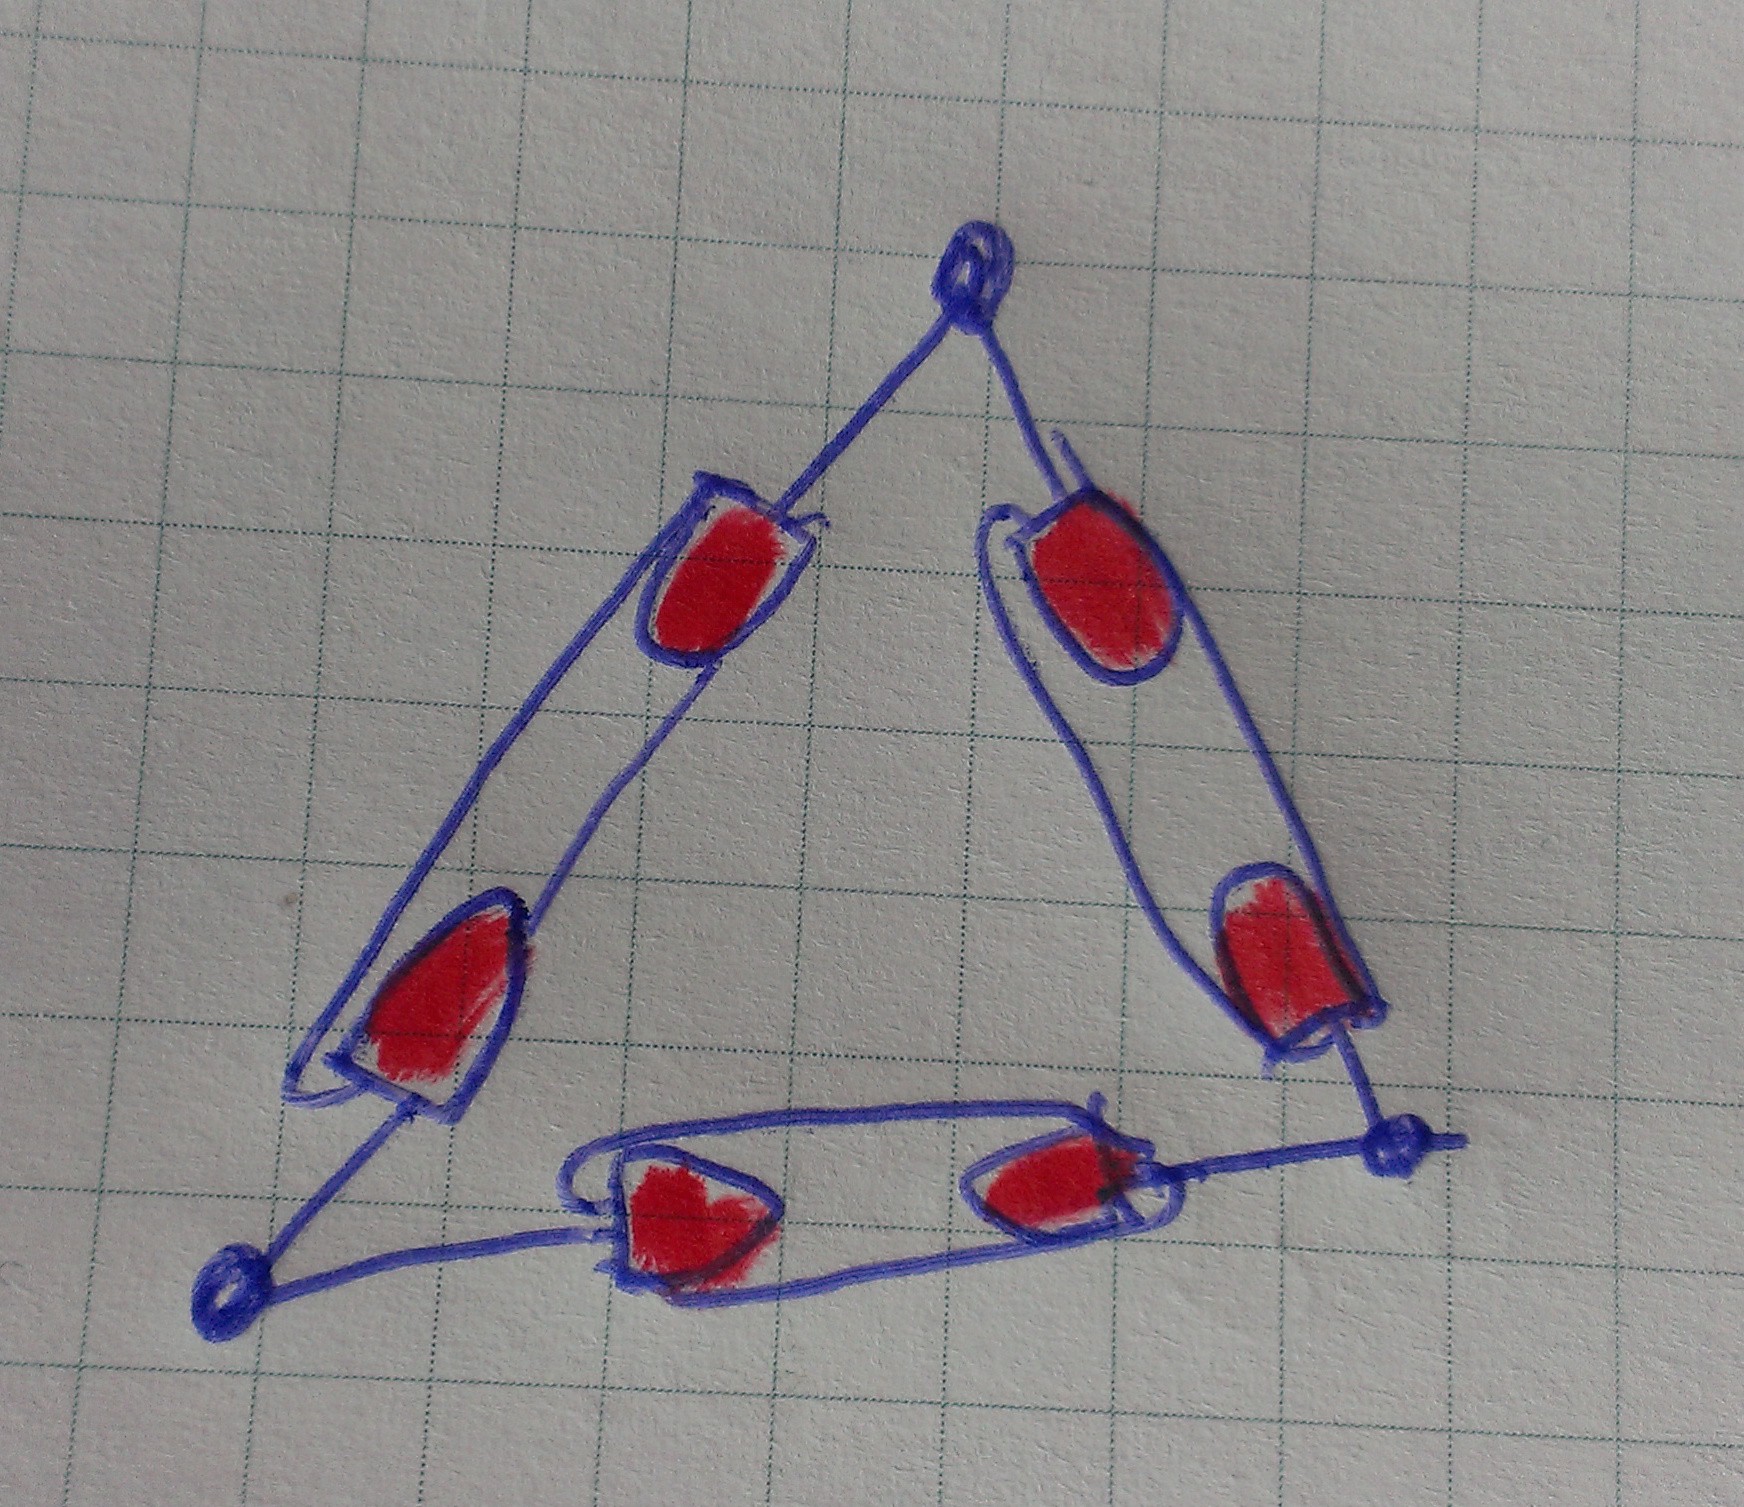
- Align two edge segments' ends at the appropriate angle, to create the first vertex of the polyhedron. (see table)
- Solder the vertex
- Complete the first face by adding more edge segments until a ring is formed
Face shape Inner angle Tetrahedron Triangle △ 3x 60º Cube Square □ 4x 90º Octahedron Triangle △ 3x 60º Dodecahedron Pentagon ⭔ 5x 10⁸º Icosahedron Triangle △ 3x 60º -
3Step 3
Build more independent faces
Depending on the polyhedron you are building, you may be able to build more of these 2-dimensional faces before joining them in 3D space.
Independent faces Single edges Tetrahedron 1 △ 3 | | | Cube 2 □ □ 4 | | | | Octahedron 4 * △ △ △ △ 0 Dodecahedron 3 (!) ⭔ ⭔ ⭔ 15 (!) ||||| ||||| ||||| Icosahedron 7 (!) △ △ △ △ △ △ △ 9 (!) ||||| |||| * The octahedron might be the easiest choice in this respect, as it has four independent faces which comprise all edges. Joining them should be relatively easy. I have not tested this myself.
(!) I did these calculations in my head without testing. Let me know if you find a mistake!
-
4Step 4
Let's go 3D!
![]()
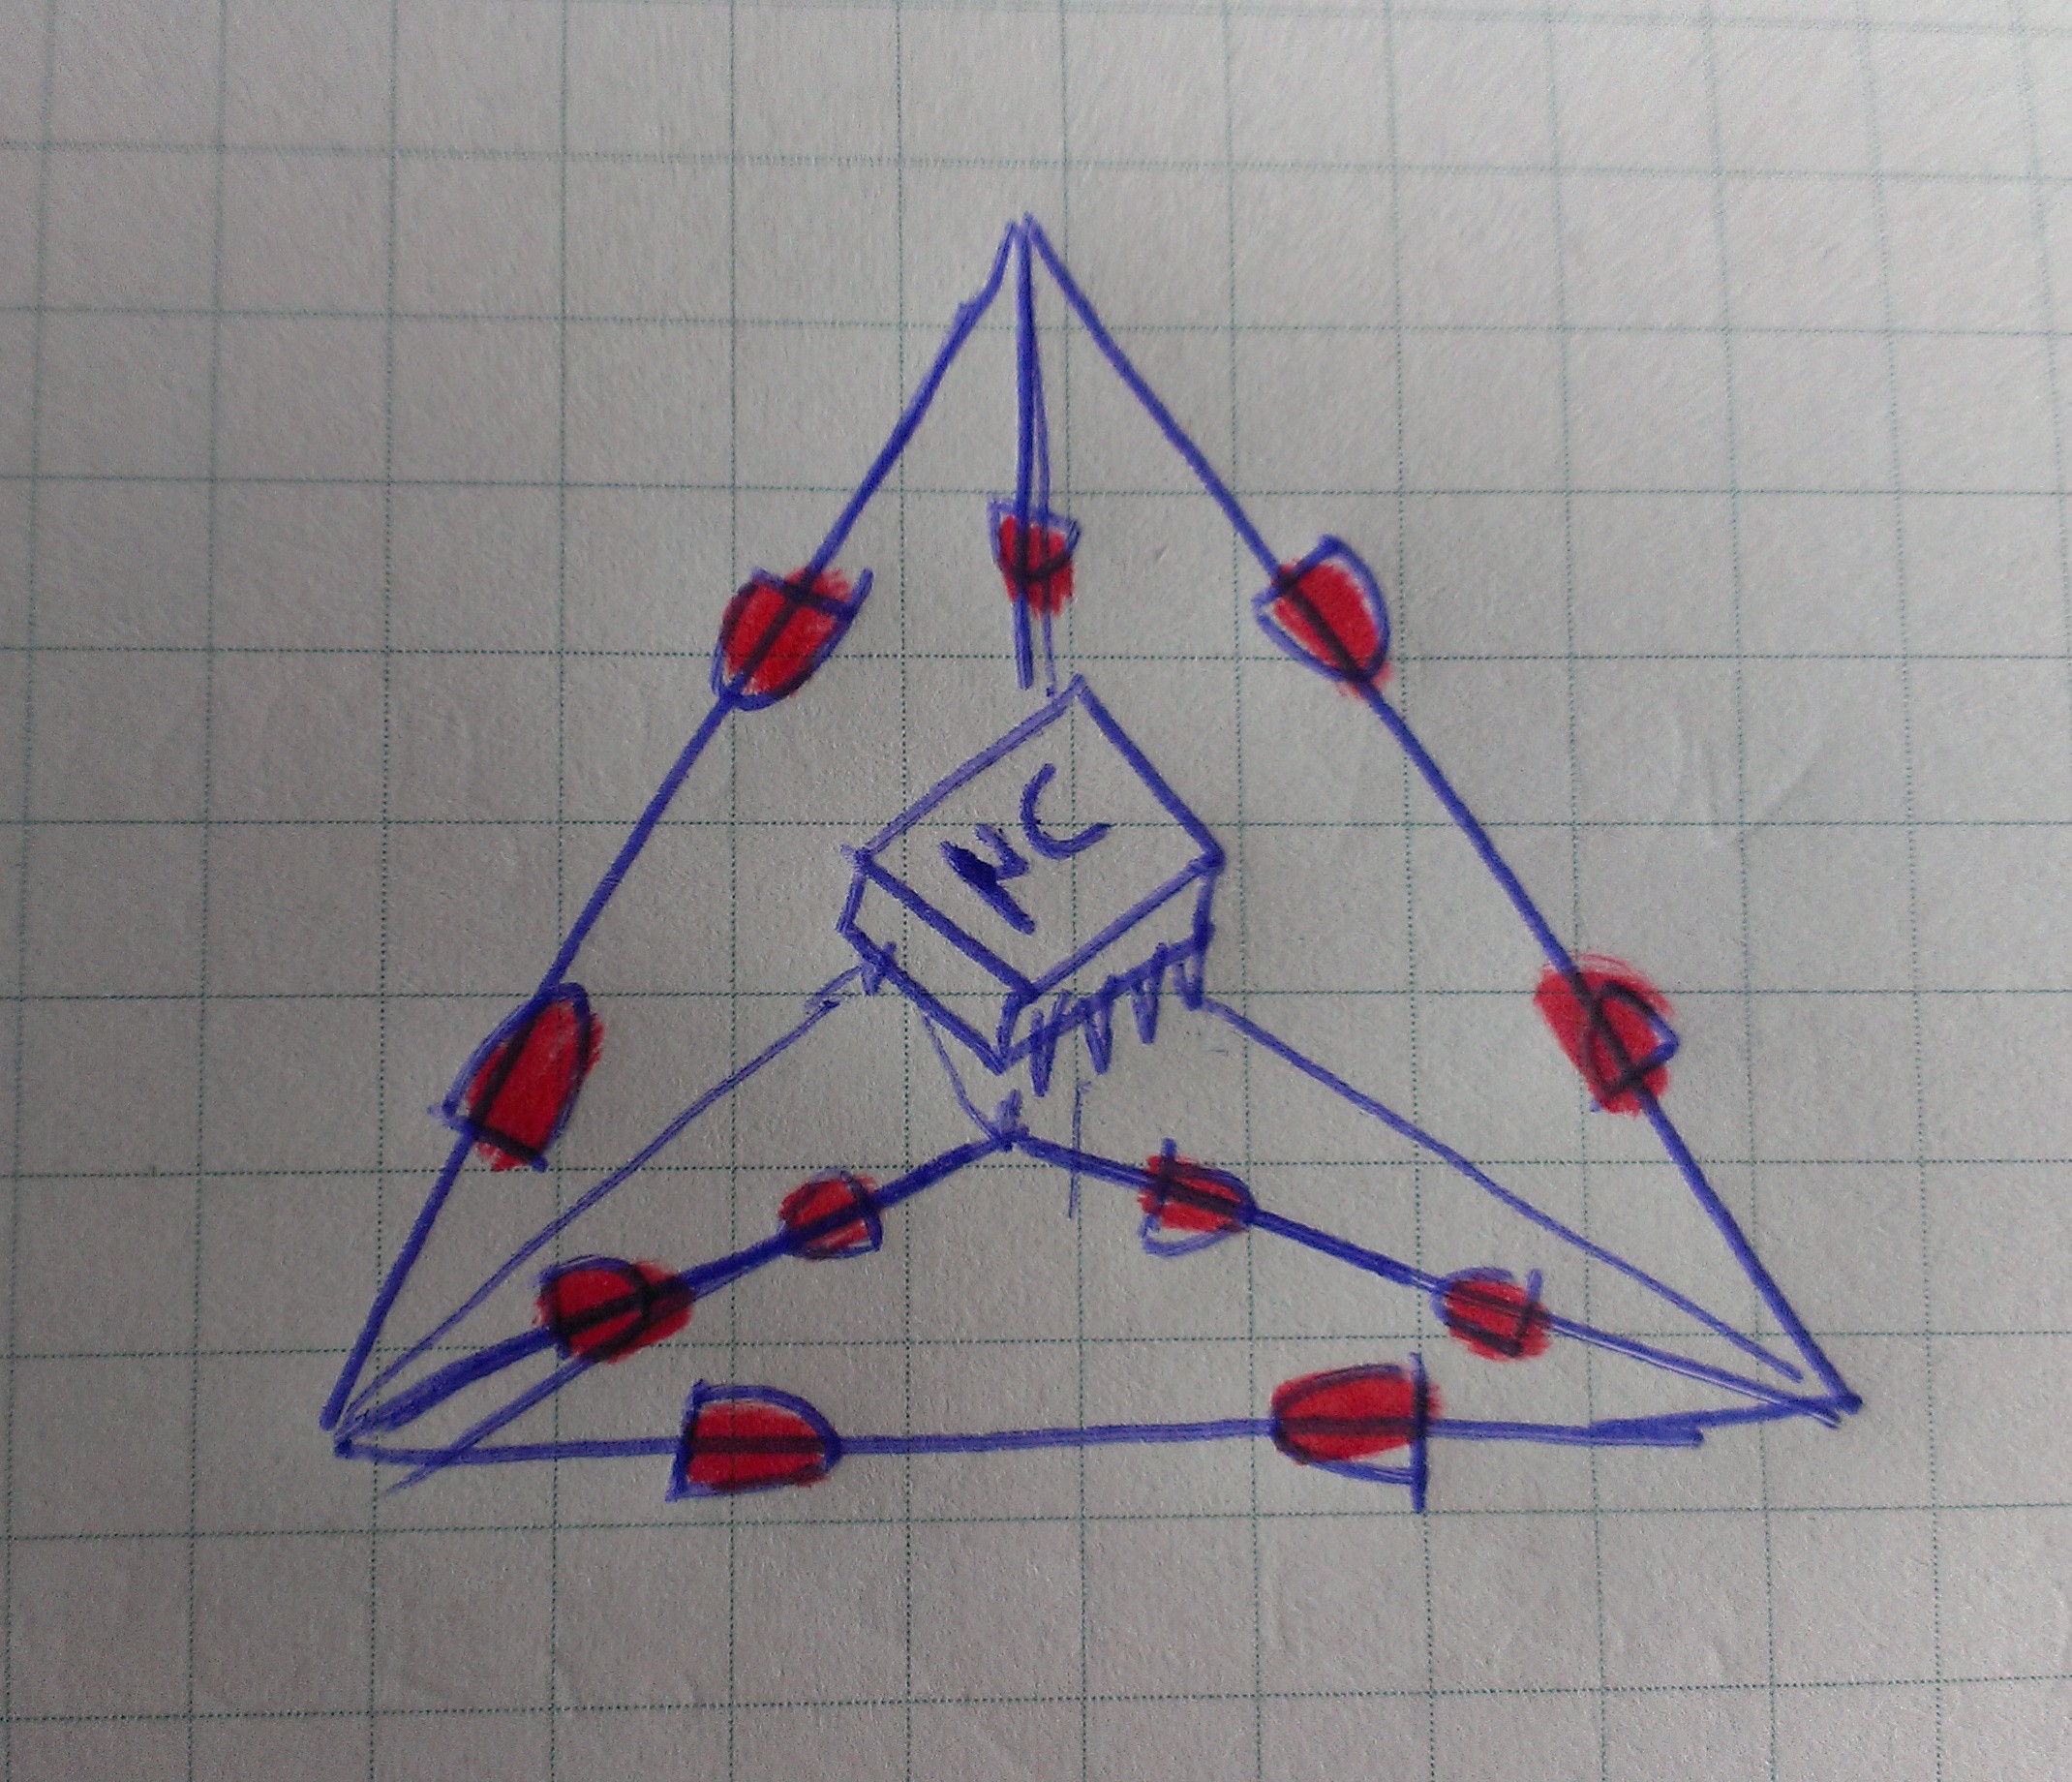
Use the faces you have made, and add more edge segments to build up the 3-dimensional body of the polyhedron.
-
5Step 5
Program your microcontroller
Since it might be difficult to access your controller's pins once it is suspended inside your polyhedron, you should program it at first.
-
6Step 6
Wire it up
![]()
- Add a generous length of wire to each IO pin on your microcontroller.
You can also use a socket for soldering and insert the chip later. - Don't forget two additional (possibly longer) wires for power.
- Place the controller approximately in the center of your polyhedron.
- Route each piece of wire from its IO pin to the corresponding vertex on the structure.
- Wrap it tighly around the vertex a few times
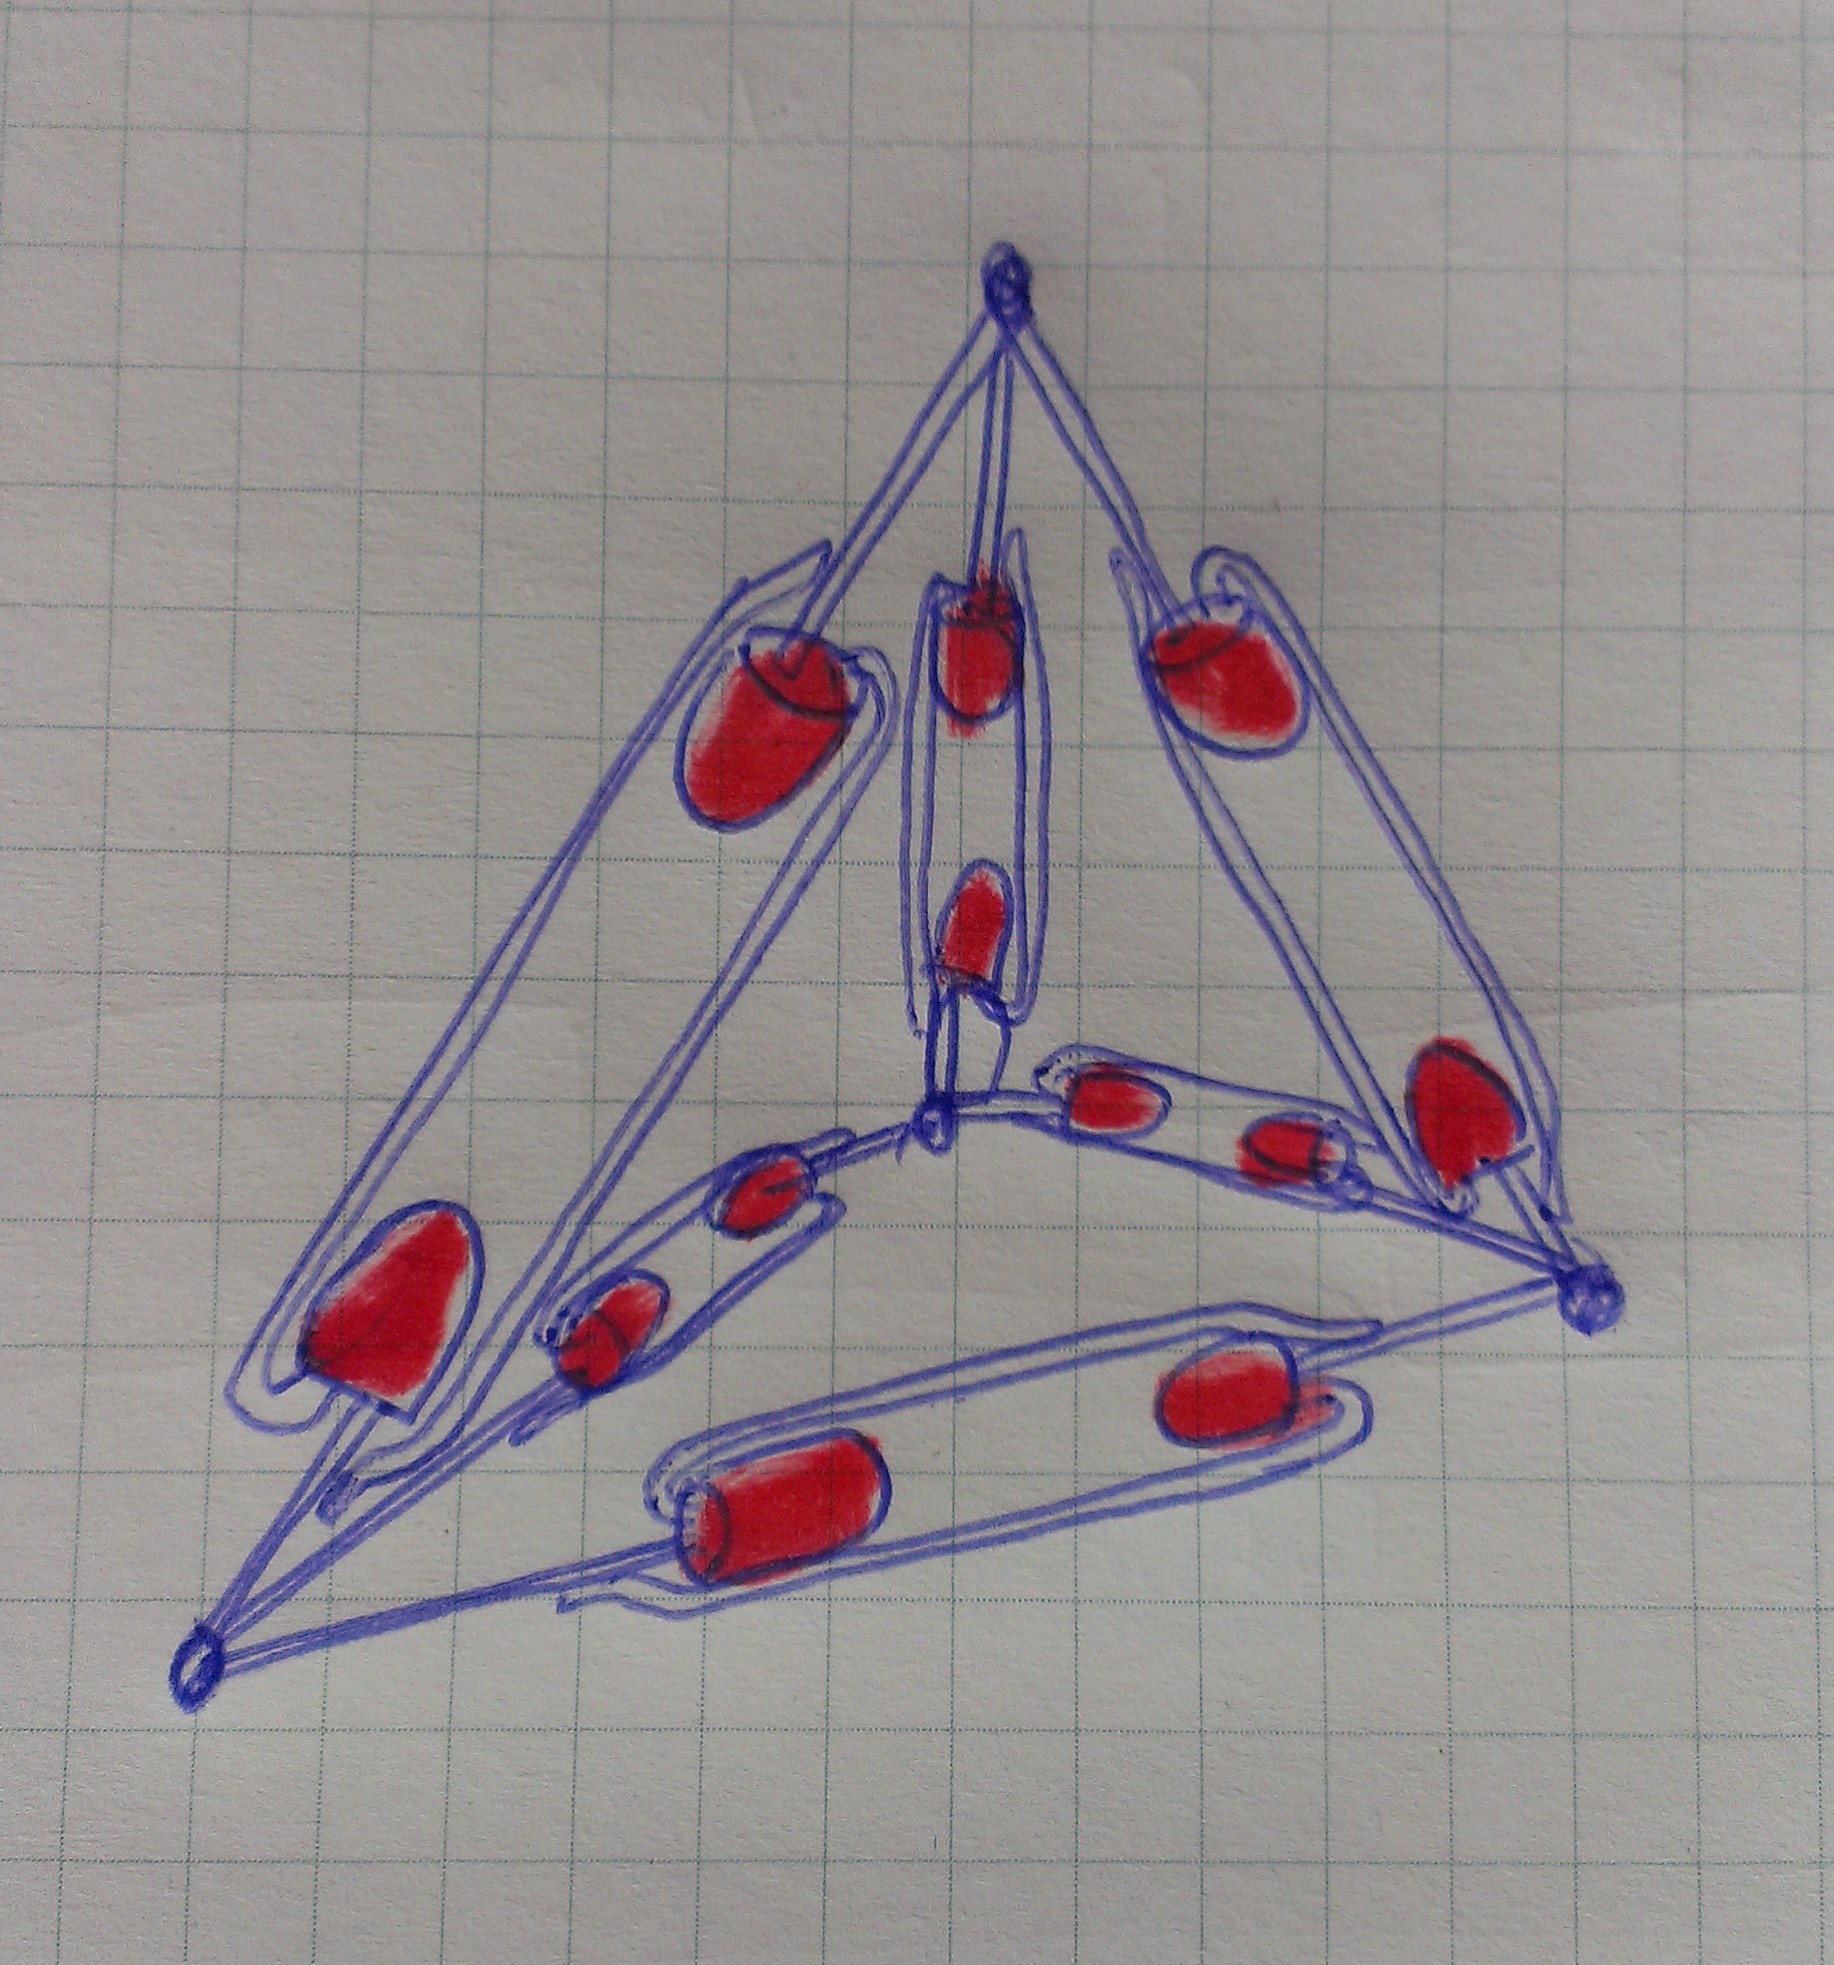
- You can adjust the exact position of the controller by pulling it in the desired direction.
- In the end, all wires (except power) should be straight and taut.
- Add a generous length of wire to each IO pin on your microcontroller.
-
7Step 7
Done!
![]()
- Add power to your creation and enjoy!
Be careful not to mix up the + and - power wires. - You may build or 3D print a base.
- Add power to your creation and enjoy!
LED Polyhedron
Charlieplexed LEDs 3D-soldered together to make blinky platonic solids!

Discussions
Become a Hackaday.io Member
Create an account to leave a comment. Already have an account? Log In.