-
1Step 1
![]()
![]()
Tools:
1. Circular Saw.
2. Laser Cutter.
3. Screwdriver.
4. Screws.
5. 6 mm Female Female Copper Spacers ( To fix the Arduino Board).
6. Nylon Cable Tie Belt.
7. Stainless Steel Angle Brackets.Materials:
1. Plywood sheets 3mm.
2. Pine Wood.Electronics Components:
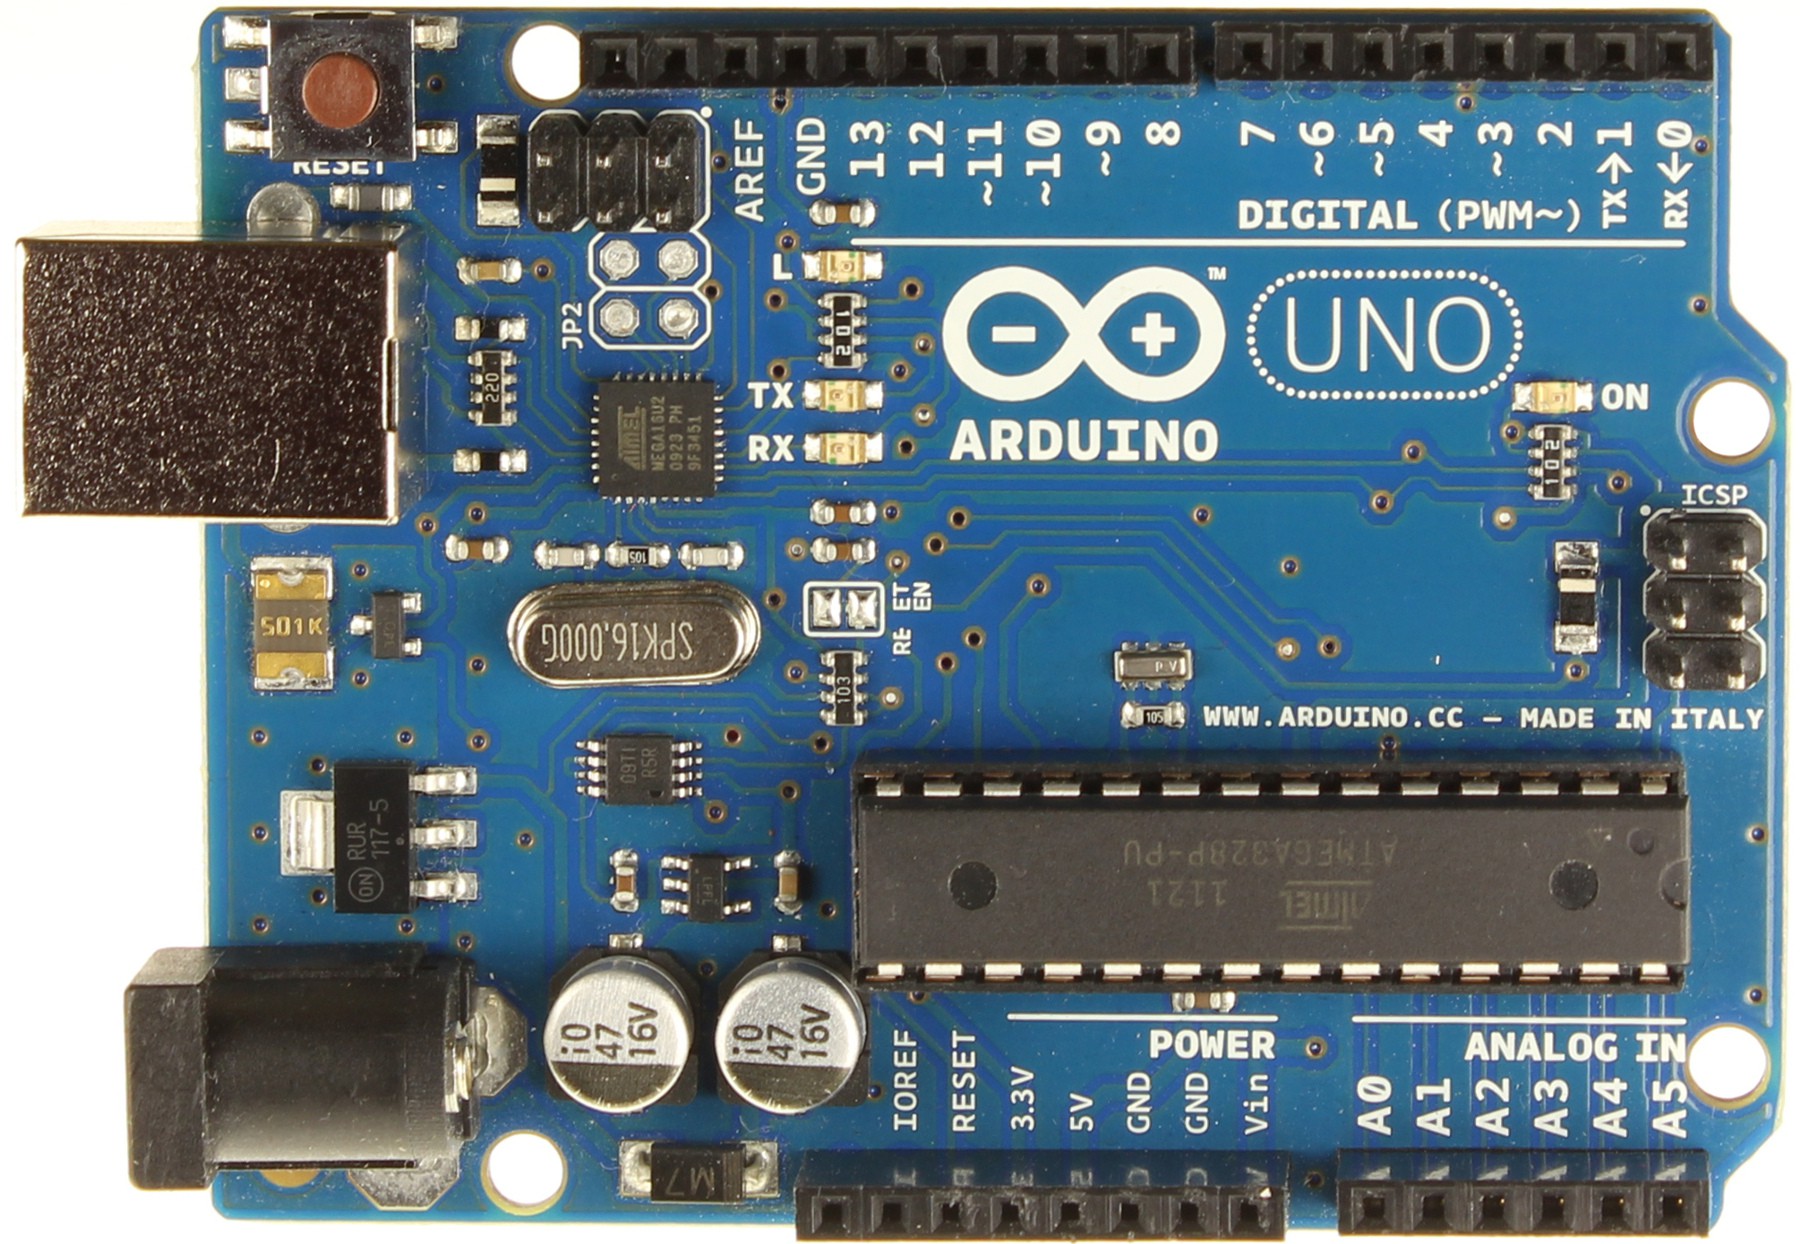
1. Arduino UNO.
2. 1Sheeld
3. 2 x Ultrasonic sensors
4. 5V / 2A DC Adapter
5. Male Female Jumper Wires -
2Step 2
I used SolidWorks to design this project and to make sure from
its stability then I tried to create it as simple and modular as
possible so:
1. I used a pine wood block to cut 1 inch x 1 inch rods to create the frame.
2. I used the laser cutter machine to cut the front and back parts from a 3mm plywood sheet.
3. I used stainless steel angle brackets to fix the Music player to the table.
4. I used some screws to assemble this project parts with each other. -
3Step 3
This project based on Arduino UNO, 1Sheeld and an Android smart phone.
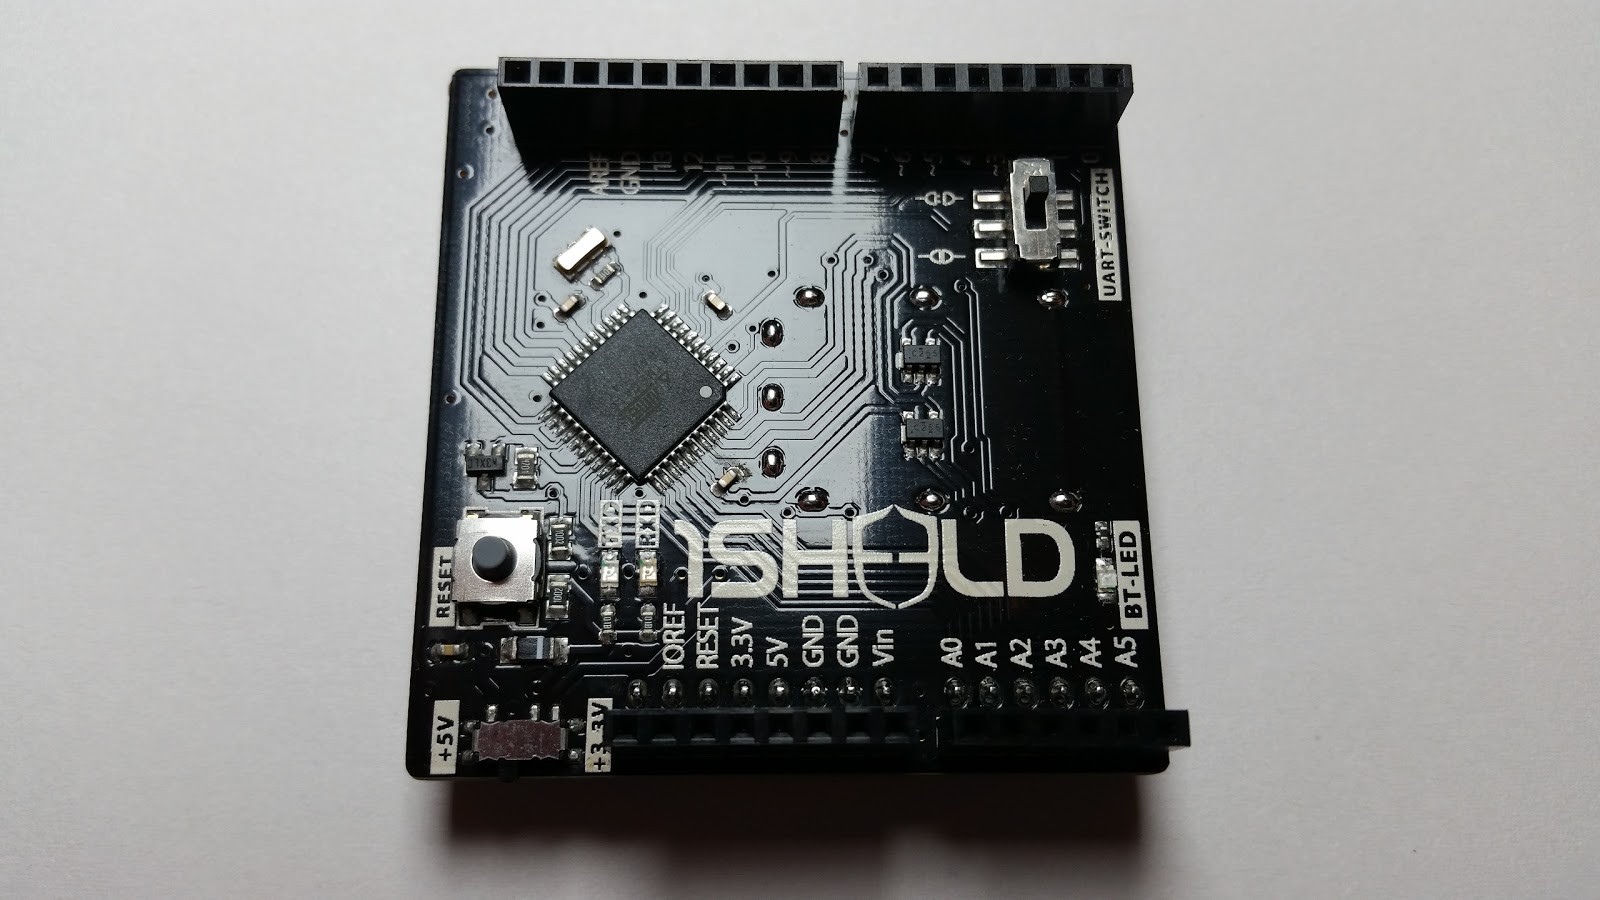
1Sheeld consists of two parts:
The first part is a shield that is physically connected to your Arduino board and acts as a wireless middle-man, piping data between Arduino and any Android smartphone via Bluetooth.
The second part is a software platform and app on Android smartphones that manages the communication between our shield and your smartphone and let your choose between different available shields.
In this project we will use Music Player shield and Terminal shield for debugging issues.Music Player Shield: Music player library turns your smartphone to an MP3 player where you can control it using your Arduino board and take actions.
Terminal Shield: Terminal library simulates a serial terminal on your smartphone so that you can display any serial data on it even data of the 1Sheeld sensors shields. For more information about each shield you can visit this link: http://1sheeld.com/docs/
Now lets connect Arduino & 1Sheeld to your PC or laptop
Adjust 1Sheeld:
Warning! If you have the Arduino Due or any board that works on 3.3V, you must switch your 1Sheeld to operate on 3.3V since it may damage your board. To switch 1Sheeld to 3.3V locate the toggle switch on the top of the board and switch it to the 3.3V position. Place your 1Sheeld on your Arduino board then plug the Arduino to your laptop or
PC. i.e: 1Sheeld works on Arduino (Uno/MegaADK/Mega2560/Leonardo/Due). -
4Step 4
![]()
![]()
![]()
![]()
Step 1: Download 1Sheeld Application onto your smart phone from Google play store
Step 2: Download OneSheeld library to your computer through this link
Extract the folder, copy it, and paste it in your Arduino libraries directory.
Or use Codebender.cc through this link, then you don’t have to install the Arduino IDE or 1Sheeld library.
Step 3: Download the attached Arduino code.Step 4: Upload the sketch
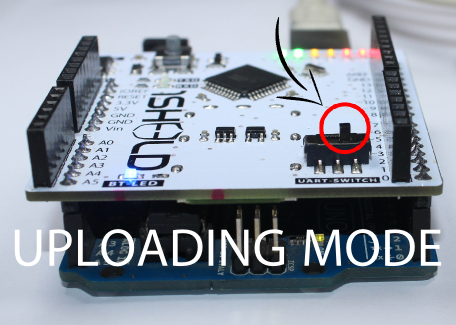
Here comes the most important part of the whole tutorial, switch 1Sheeld to the Uploading-mode (this is the switch labeled UART Switch on the board) before you upload your sketch to the Arduino board to avoid serial conflicts between 1Sheeld and Arduino, then press the Upload button in the IDE.
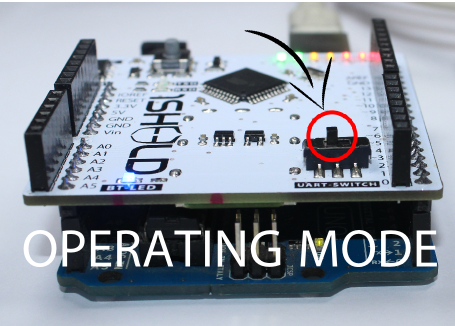
Upload mode is turned on when the UART switch is pushed away from the 1Sheeld logo.Step 5: Once you have completed your upload you need to switch 1Sheeld back to the operating mode
Don’t forget! If you don’t switch the UART Switch back to the operating mode your project will not work properly as you will have no communication between 1Sheeld and the Arduino board. Operating mode is turned on when the UART switch is pushed closest to the 1Sheeld logo.
Step 6: Use 1Sheeld Application
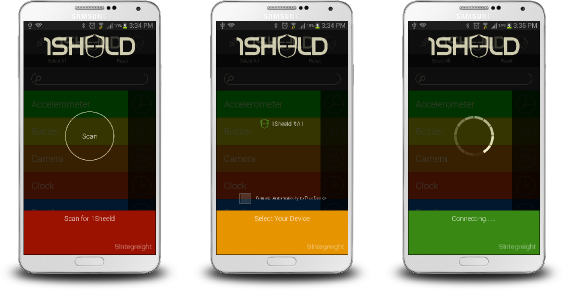
Open 1Sheeld application on your Android smart phone. The application will first scan over Bluetooth for your 1Sheeld, it will take a few seconds and the phone will find it. Once it appears on your screen as 1Sheeld #xxxx, you will be required to enter the pairing code (the default pairing code is 1234) and connect to 1Sheeld via Bluetooth.
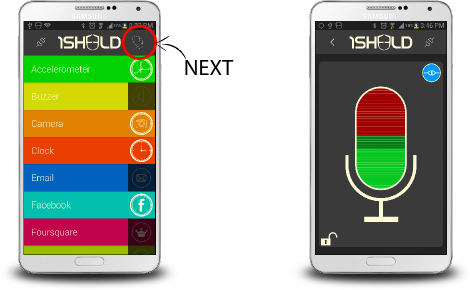
Note: If you are having trouble please make sure the Bluetooth is turned on for your Android phone and that the Android phone is close to your 1Sheeld.Step 7: Access Shields
Select the shields you would like to use in your Arduino sketch (project) and press on the multiple shields icon at the top right of the app. In this case, select SoundCloud shield, Twitter shield, Camera shield and Terminal shield to be able to see the ultrasonic sensors values.
How To Create An Interactive Music Player For Even
How To Create An Interactive Music Player For Events using Arduino, 1Sheeld and Ultrasonic sensors
Discussions
Become a Hackaday.io Member
Create an account to leave a comment. Already have an account? Log In.
can't find the attached file (code)
Are you sure? yes | no