Close
0%
0%

goMon

Govecs Electric Scooter Remote Monitoring

Similar projects worth following
goMon is a remote monitoring tool for Govecs Electric Scooters, it will monitor main scooter parameters, log them and report them online.

Features

For onboard module:

  • Able to monitor Battery and Controller
    • BMS is proprietary is RS232 port
  • Controller is a Sevcon Gen 4 with CAN
    • CAN BUS is accessed using an MCP2515 + TJ10150 module
  • Able to update the display with current values and other desired variables without being limited to the expected object scale values used for current TPDOs
  • WiFi connectivity, able to switch between multiple SSID''s, and act as Access Point
    • 3G and RF backup for internet connectivity
    • WiFi via YUN shield
    • 3G via SIM800L or YUN shield with USB dongle
    • RF via RFM23BP
  • Alternative to local display is having the goMon as an WiFi access point and allow a mobile device to open a browser and view the status
  • Local display for monitoring status
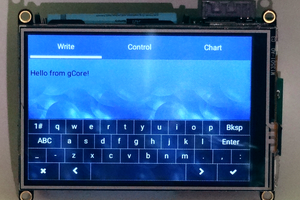
    • Via an Itead Nextion HMI
  • Power from DC/DC (this is NOT the one available at the scooter) and 12V line
    • DC/DC is a 5V 2500mA power supply
    • The dual power supply will add the ability to support a local power kill switch, and be able to be waked up as soon as 12V are available
  • Ignition remote kill switch
    • Via relay
  • Read charging current
    • Using a current transformer
  • Ability to disable goMon power if local battery is low
    • Via relay
  • Remote plug control algo via RF
    • To be able to start charging, and report charged Ah and duration
  • Local log record
    • To SD Card or USB Stick at Yun shield
  • GPS
    • Using a uBlox Neo6Mv2
  • Compass
    • HMC5883L
  • Accelerometer
    • MPU6050
  • Temperature
    • Typical DHT11/22

For remote gateway:

  • RF connectivity to onboard unit
    • Using a RFM23BP, estimated range is over 10KM, or 7 floors UP
  • WiFi connectivity
    • Using an ESP8266

For remote plug

  • RF connectivity to onboard unit
    • Probably not with the RFM23BP
  • Charging controlled by the onboard unit
    • Via relay

Inspiration comes from scooterputer and OVMS, if you don't know them, you should check them.

  • 1 × Arduino Mega or Due You know, to make stuff happen
  • 1 × Nextion Display For local display
  • 1 × CAN Transceiver For the SEVCON controller
  • 1 × RS232 Tranceiver For the BMS
  • 1 × RFM23BP For remote RF logging when WiFI is unavailable

  • Power supply considerations

    Nuno Cruz11/27/2015 at 00:34 0 comments

    Power will come from two sources:

    • From the 12V line, available at the lighter. Only available when the scooter has it's ignition on. Connected to the arduino DC jack.
    • From the battery, 65v to around 84v power supply. I'll be using a DC/DC bring it down to 5v. The connection will be made at PA3 connection, which is the ignition connector. And will connect directly to the 5V VCC at the arduino.

    The battery power line will have a NO relay connected to it that will be closed from the arduino itself. This will allow the arduino to completely power off in case of low battery. It will come back to life when the ignition is turned on, by the 12V.

    Meanwhile, since we're tapping the ignition line, lets add another relay (NC now), that will be used to remotely kill the scooter, in case of emergency or if stolen.

    One thing I'm in doubt is if the arduino prefers to be powered from the DC jack or from the 5V. Probably won't be an issue. The rest of the logic will be always powered from the battery via DC/DC.

    By the way, the DC/DC will be a 110-230V power supply that I tested and provides 2.5A from at least 48VDC to 96VDC.

  • Schematics and more details

    Nuno Cruz11/24/2015 at 21:27 0 comments

    Here's the main schematic of what I'm trying to build, with the compromises of not having some of the modules available at fritzing. For example as screen, I'm using an itead nextion HMI display, which rocks! And as internet connectivity I'm expecting to use either a 3G module (cheaper sim800l solution) or a YUN shield. The yun shield has the advantage of allowing to build some sort of script on the linux side that could switch between a 3g and a WiFi connection (with the added support of 802.1x, needed for the wifi network at work). The RFM23BP works when parked at home to allow the monitoring device to connect to my house. So yes, at my house I'm also having another RFM23BP, but connected to an NodeMCU, since at home I don't need the 802.1x support. The RFM23BP will be an added feature, if 3G is unavailable at all times, or if I don't want to pay for a 3G data plan on a card to be used only for monitoring.

  • Curious about the IDE I'm using?

    Nuno Cruz11/12/2015 at 23:19 0 comments

    For the most curious of you, I'm currently using embedXcode (and Xcode) for the development part.

  • BMS Logging Completed

    Nuno Cruz11/12/2015 at 23:17 1 comment

    Just finished building the BMS logger part, I'm able to get everything from the BMS which as a serial port for a PIC controller that is responsible for the management of the two OZ890. Reverse engineering the bms proved to by harder than I thought, almost two months building the code for arduino.

View all 4 project logs

Enjoy this project?

Share

Discussions

Similar Projects

Does this project spark your interest?

Become a member to follow this project and never miss any updates