DIL-Duino
A complete Arduino environment in a DIL-8 form factor based on the DigiSpark Hardware
A complete Arduino environment in a DIL-8 form factor based on the DigiSpark Hardware
To make the experience fit your profile, pick a username and tell us what interests you.
We found and based on your interests.
I finally managed to upload the Micronucleus Bootloader and getting it to work.
I am now able to upload sketches via USB (after resetting the chip manually with the push button).
I may also could now upload sketches using the Arduino IDE, but I like to use GNU make instead.
I uploaded a simple blinking sketch using the on board LED on PB2. For a more anticipated test I didn't have enough time, since I wanted to upload this Log as a proof of concept for the square inch contest.

look ma, no hands:
As I wrote, I received the boards quite a while back, but I have to admit, I really had a hard time getting them assembled.
The first I tried with the stencils I ordered from OSH Park. This really did work great but I managed to put on the pin headers the wrong way around and really fucked up the USB mini jack so the board was on functional.
My next try was 6 days after the first but I did forget to put the solder paste back into the freezer after using it the last time so I could not apply it through the stencil (it basically was just clogging the stencil).
After that I tried to use solder paste without the stencil and it looked quite good, but I think I've shortened some pins on the QFN because I was not able to program it.
Today (as the deadline for the sqare inch contest moved closer :)) I finally gave it another try. This time I did not use solder paste but normal 40/60 and pre tinned all pads with it. then I put on the QFN and applied head with my soldering iron from the bottom. I then used the hot-air gun to reflow the solder.
This time it worked and I finally can program the chip :)
programming the chip with an Arduino Leonardo
I tested the programming and reset circuit using the build-in LED on PB2:

The boards werw ordered just 12 days ago and already arrived here in Germany. I really didn't expect the this quick. Now I first have to order the components before I can populate them. Also the stencil is still missing and the QFN pads seem a bit too small for my soldering skills ;)
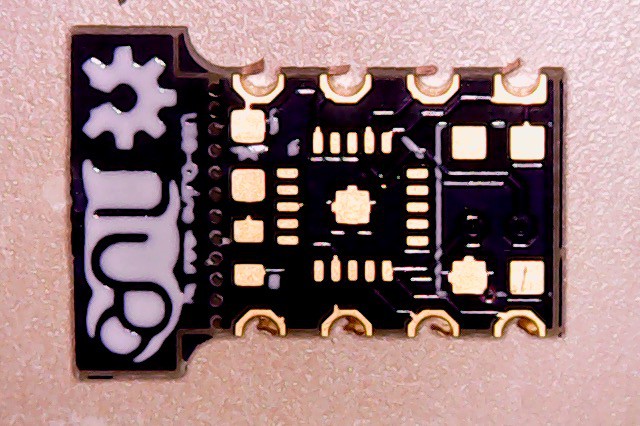
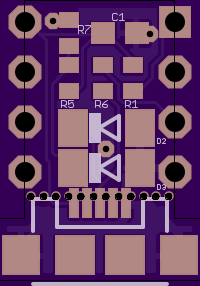
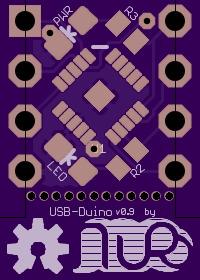
Here are some pics of the board:
Topside:
Bottomside:
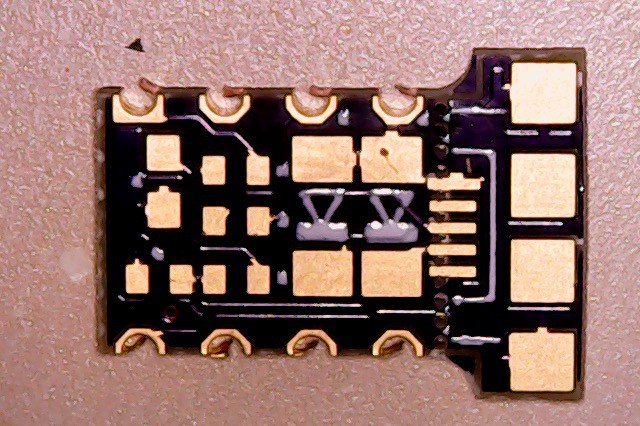
They are really really small. you may can guess the size by taking a look on how high the silkscreen and the copper traces seem on the board and how "blurry" the silkscreen appears to be.
The small white dots around the components are the designators in text size 0.254mm. Ok, I guess that was way to small to be readable :D.
Just got a mail from OSHPark:
Hi!  We had some free room on one of our Super Swift Service panels,
so we took the opportunity to give you an upgrade.

Your affected orders are:
  * <CENCORED :)>

The Super Swift Service drops your expected fabrication time from 12
calendar days to just 5 business days.  The same fabs manufacture the
Super Swift panels as our normal panels, so you can expect the same
excellent quality.

Only fabrication time is affected, so the shipping times and method will
remain the same.

Thanks for using OSH Park!
No, OSH Park: Thank you!
I never used stencils to apply soldermasks before (Well, I also always milled my boards which limited the size of the smd components to a size that is still pretty easy to hand solder, so I'm very new to boards in this quality).
Since I use a TQFP Packaged ATTiny, I thought it would be a good idea to produce some stencils for the board.
My first thought was to mill them myself from some thin aluminium sheets, but I quickly realized that I dont have mills small enough and the only way to produce holes small enough would by to etch them or use a laser cutter. Since I do not own a laser cutter and have no idea if it is even possible to etch aluminium, I searched online for cheap and easy services.
I quickly found OSHStencils and was quite suprised from the fammiliar interface (well, exactly what you expect from the name :) ). I uploaded my *.brd file and ordered a set of stencils. Lets see how they turn out when they arrive.
I just placed my order for 9 boards on OSHPark.
Why 9? Well, three only cost 1.10 US$ but I really don't need more than 9, even though I think it is crazy that for 3.30 US$ 9 board gets eched, coated, soldermasked and silkscreend on 2 sides and the shipped thousands of miles. Thats amazing !
I just stumbled across the Nanite85 project by Tim. It is a really nice project that has the same goal as mine. It also is a drop-in replacement for the ATTiny85 with a DIP-8 footprint and a matching pinout. However, since Tim started with a 'who has the smallest' table I want to add my board to it:
| Board | Width | Length | Area |
| Olimexino-85s | 12.7 mm | 16.9 mm | 214.6 mm² |
| Nanite | 10.1 mm | 17.8 mm | 179.9 mm² |
| DIL-Duino [with USB] | 10.2 mm | 14.2 mm | 144,84 mm² |
| DIL-Duino [without USB] | 7.6 mm | 9.8 mm | 74,48 mm² |
Wohoo, did it! Both variants are smaller.
But to be fair, the variant with USB is almost the size of the Nanite.
What do we learn from this? It is almost impossible to have an idea no one ever had before :)
I just added a switch to the board that works as a manual reset. In the old design the switch was missing and the idea was that you could just replug the USB to powercycle and enter bootloader mode, but after some time thinking about all the consequences I decided that it was too much of a hassle and also would mean you can not plug the board into a socket when supplying power over the pins or you would need to add an external reset switch.
Since I wanted to provide a full Arduino stack this would cause too much trouble to the user and would influence the ease of use. for this reason I added a tiny switch but needed to remove the power LED to fit it on the board. the other LED is still available. I also needed to rotate the ATTiny to the original orientation which is quite a bummer since I liked the way the rotated chip looked on the board.
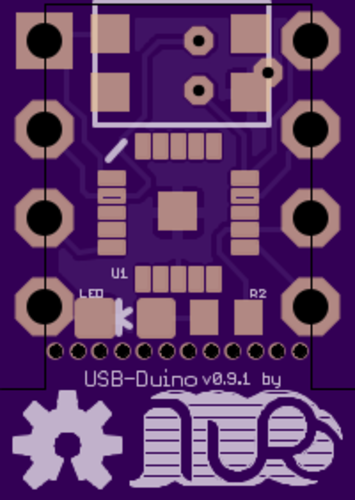
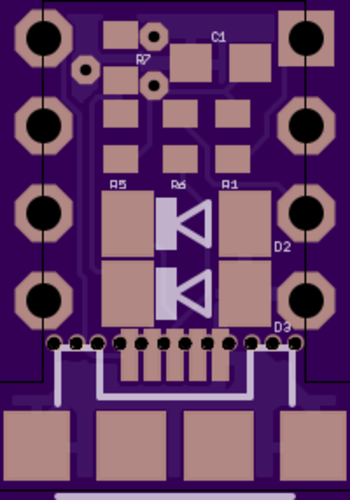
I just completed the layout of the board. The last couple of traces were really hard to route, but I managed to sneak them around the board.
It really feels awkward to ignore all the DRC Errors that appear because of the half-moon shape of the pins and the perforation holes but I hope it will be fine and the board turns out how I imagine it.
Create an account to leave a comment. Already have an account? Log In.
Cool project, I just don't get one thing: why would you "stampify" this, when you're still using pin headers?
Just a friendly reminder to please upload your BOM by 23:59 UTC on Dec 8, 2015 to be in the running for #The Square Inch Project!
Please excuse me asking, but what is the point of converting QFN attiny85 into DIP attiny85 when there is one readily available?
Good Question!
It's not only converting QFN to DIP but also embedding the necessary components to enable the programming over USB and the USB jack. So think of a DIP with a Micro USB Port in the side and a build in LED on top
Ah, well, the LED did convince me. There is no schematic, so I was not
aware of its presence. But wouldn't it be possible to stick a better
equipped micro (more ram/flash) in there?
Become a member to follow this project and never miss any updates
By using our website and services, you expressly agree to the placement of our performance, functionality, and advertising cookies. Learn More
 Jarrett
 Eugene Mikhantiev
 Stefan Lochbrunner
 Sander van de Bor
"Dilduino" .... hehehehehe