ACROBOTIC Industries
-
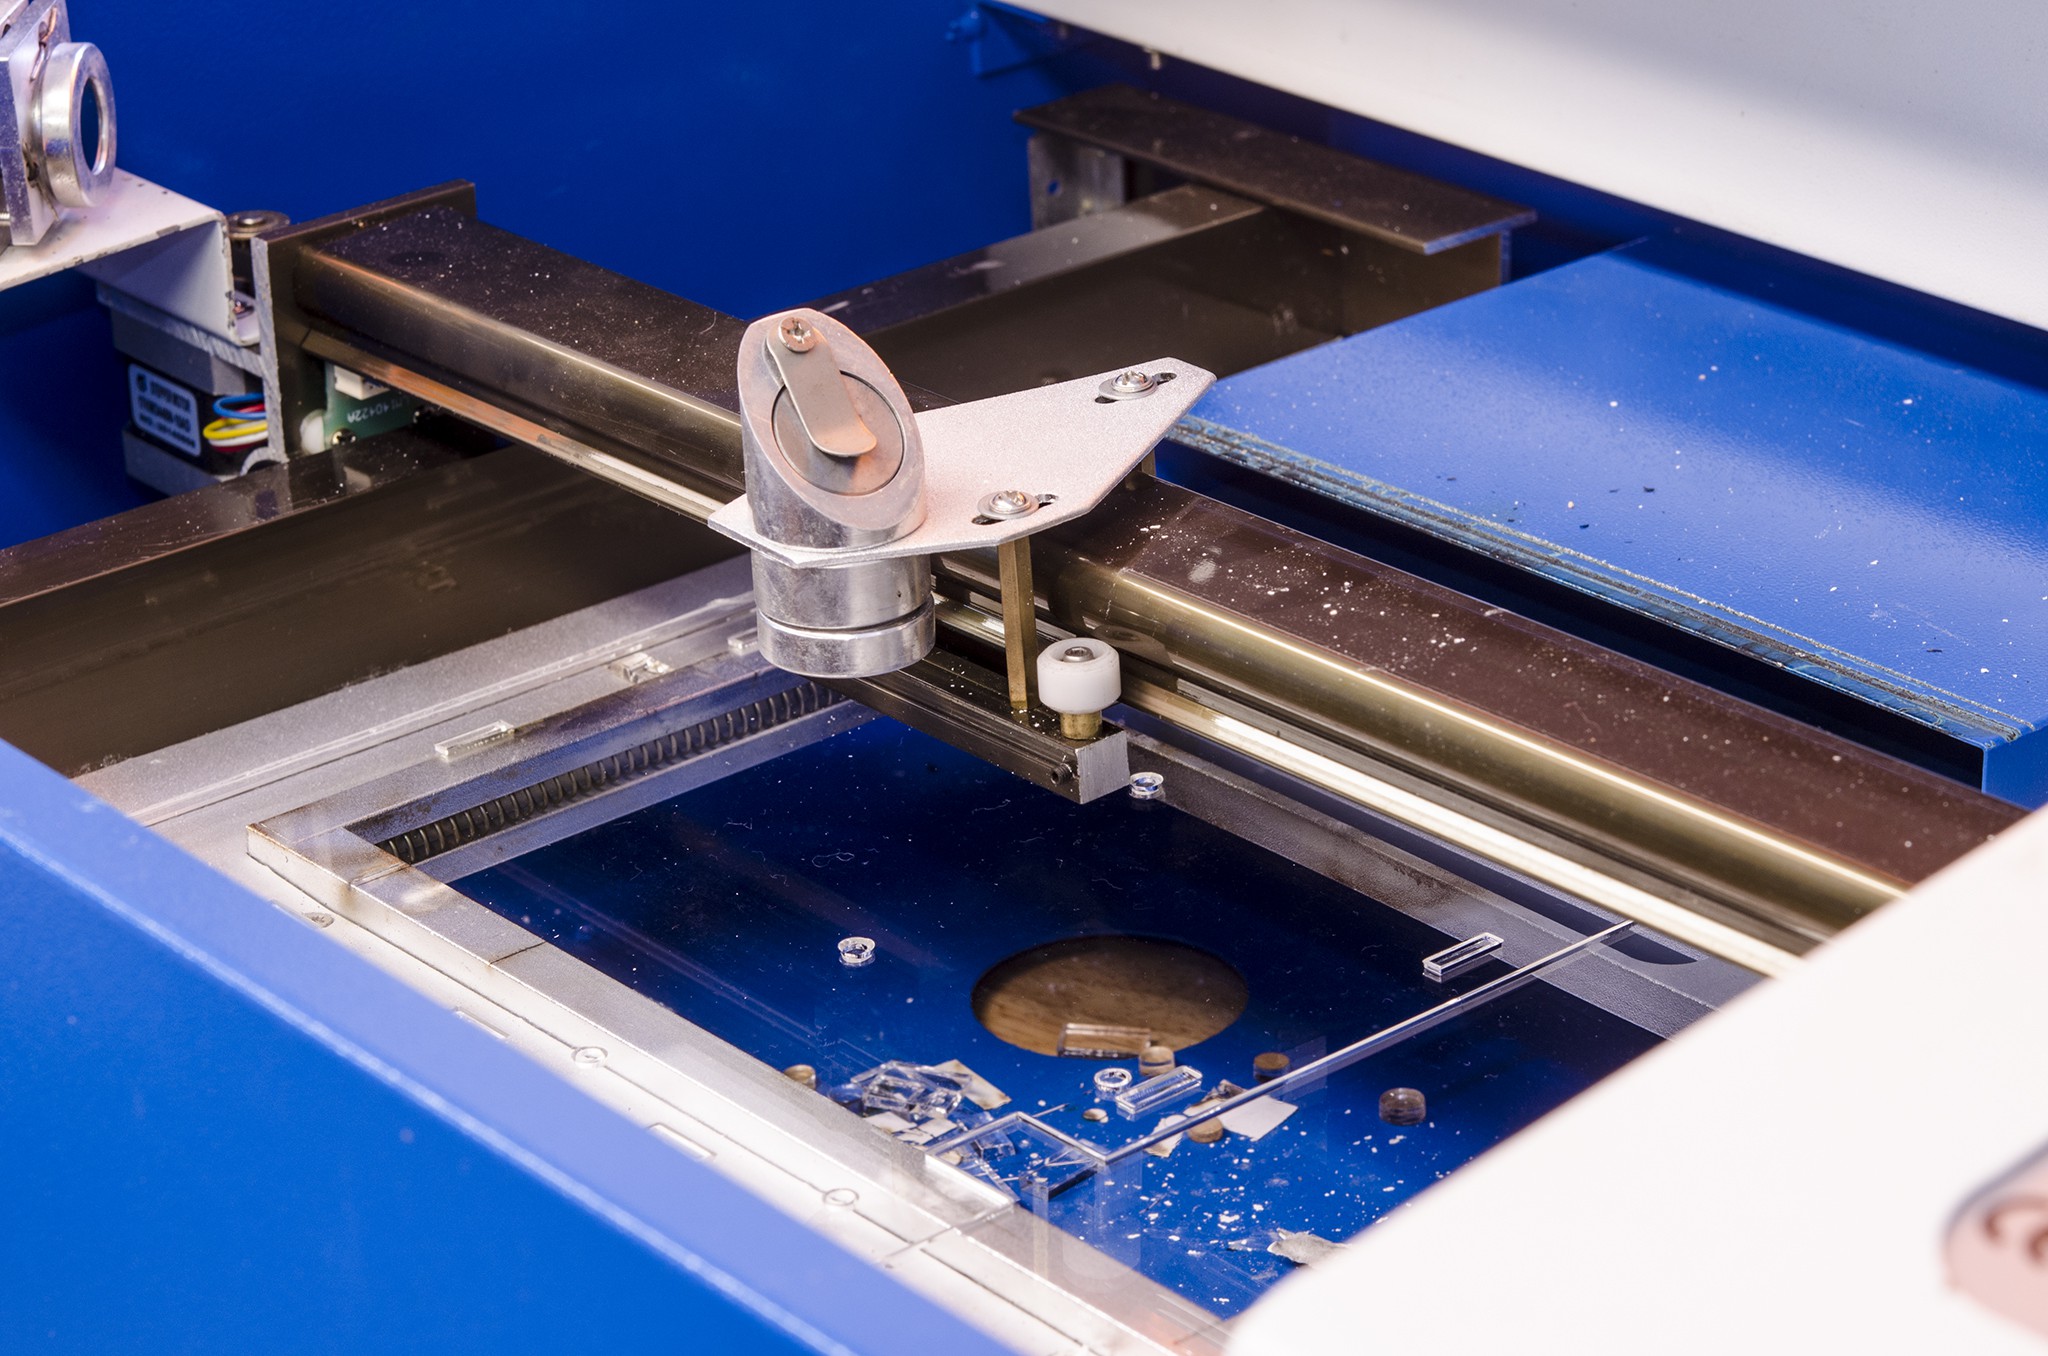
Laser-cutting the enclosure, finally!
01/16/2016 at 21:52 • 0 commentsFinally testing the enclosure design on 1/8in clear acrylic using our little 40W laser cutter in the shop.
![]()
We've been playing with the overall dimensions a bit, and found that 6.5in is a bit small on the back to fit the two panel-mount connectors and the Pi. It seems that we'll settle for a 6.75in square with a 1/4in overhang for the footprint of the case!
![]() More coming soon!
More coming soon! -
Testing the FE1.1s-powered USB Hub
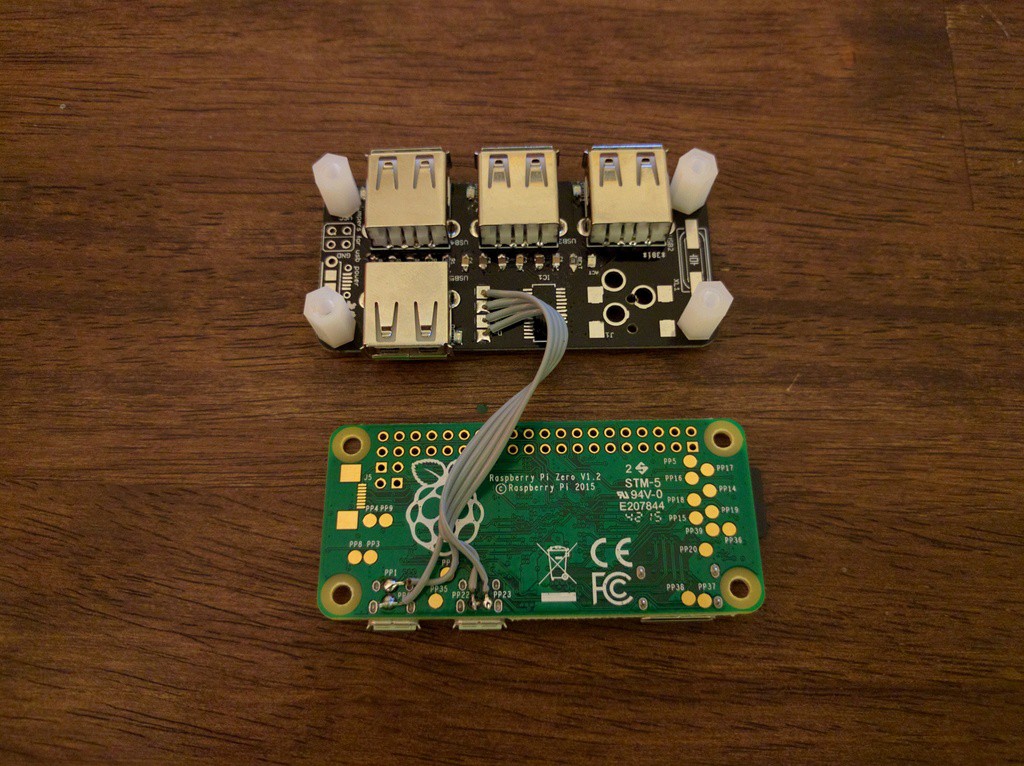
01/13/2016 at 22:41 • 0 commentsFinally had a chance to assemble and test the prototype for the 4-Port USB Hub that will go inside the console. More than a Hub, we're using this custom board as a USB breakout for the Raspberry Pi inside RASPICON, as its onboard USB ports won't be easily accessible from outside the RASPICON enclosure.
![]() First test using a microSD card reader connected to the hub carrying... you guessed it... a microSD card with Raspbian loaded on it :)
First test using a microSD card reader connected to the hub carrying... you guessed it... a microSD card with Raspbian loaded on it :)The good news is that it works, and even though we haven't done extensive testing for transfer speeds (a few people online have reported 1.1 speeds on some hubs using this IC), we're happy that the hub is recognized on Windows 10, OS X (El Capitan), and Raspbian (Jessie).
![]()
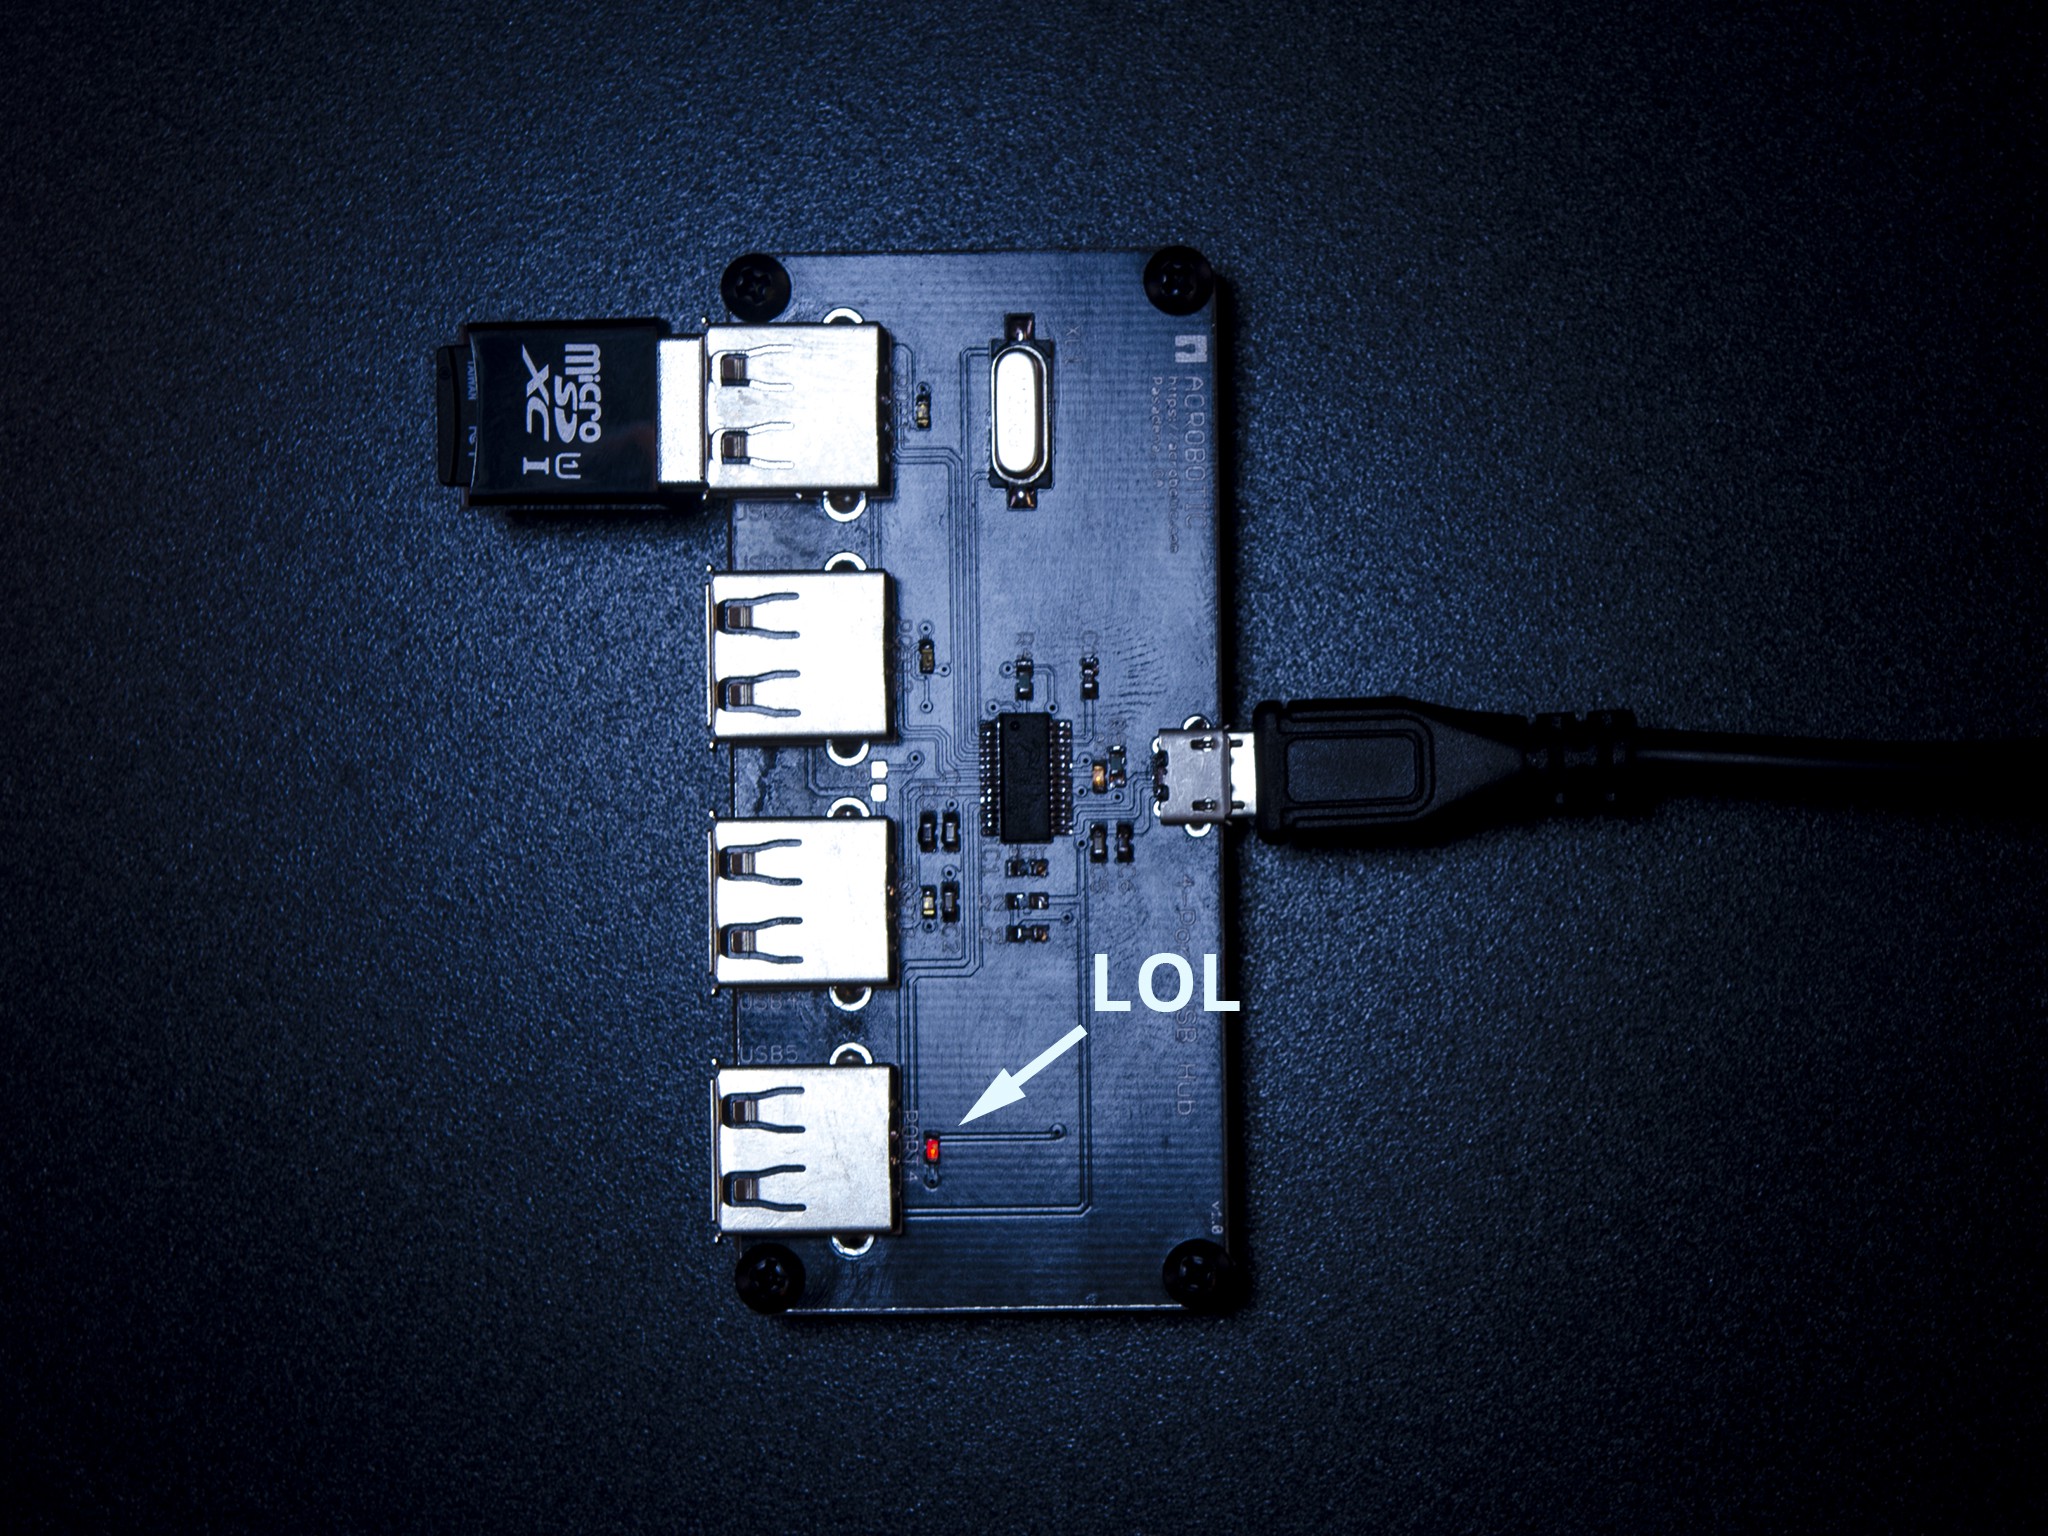
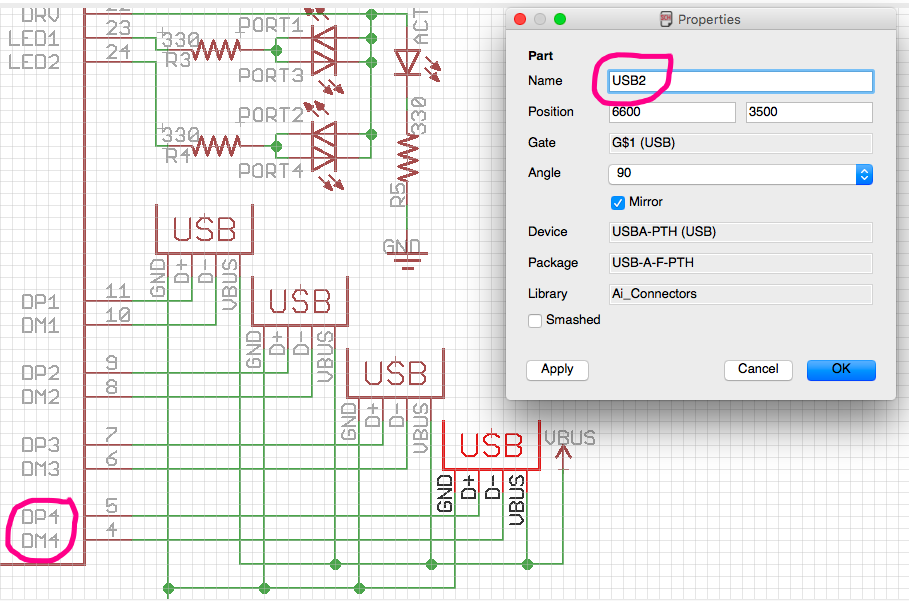
Of course, as with any first prototype of a PCB design we had a few things to correct. The first is the ordering of the LEDs relative to the ports (d'oh!). Apparently, @Cisco 'MakerBro' Zabala was lazy to reposition the USB ports on the schematic and thought he could get away with renaming the parts themselves. Well this is the result:
![]()
The LEDs for ports 1 and 4 are swapped, as well as those for ports 2 and 3 :) Another thing we noticed is that two of the LEDs do not power at all when a device is connected to the corresponding port. As one would immediately suspect, the LEDs in question are those whose cathode is connected to the DRV pin on the FE1.1s. We're in the process of hooking things up to the oscilloscope and seeing what's going on, but decided to take a break to write this log #procrastination
![]()
We're also happy to see this design out in the wild, so check out the uber cool version made by [Richard Hawthorn] for the Raspberry Pi Zero (http://hackaday.com/2015/12/19/yet-another-pi-zero-usb-hub/). A few other Open-Source hubs have started popping up as well on this site, so we're happy we'll get to see what works/fails as several people come up with different designs using the same FE1.1s IC.
![]()
Photo Credit: Richard Hawthorn (https://github.com/richardhawthorn/piZero-Hub/)
So yeah, we've started asking around to see if anyone else noticed the problem with the LEDs too, as the schematics from a few different projects suggest that our design is okay...
-
Emulation Station and Kodi integration
12/13/2015 at 01:04 • 0 commentsWe've been trying to find a seamless way to integrate Emulation Station and Kodi into one another. So far, @Brayden DeVito has made some progress and is able to boot Kodi from the Emulation Station side using some of the work by Steve Smith where he integrated RetroPie and Kodi: We'll be starting with the Kodi side of the equation shortly!
![]() The goal is to have a stablem 'vanilla' image people can download and flash on an SD Card. To do this, we (of course) won't include any of the Kodi add-ons for streaming illegal content, and only freeware/shareware games on the Emulation Station side of things.
The goal is to have a stablem 'vanilla' image people can download and flash on an SD Card. To do this, we (of course) won't include any of the Kodi add-ons for streaming illegal content, and only freeware/shareware games on the Emulation Station side of things.Besides this integration, the next thing to tackle will be (perhaps) a simple x-platform application for non-technical folks to drag-and-drop games onto the RASPICON. Stay tuned!
-
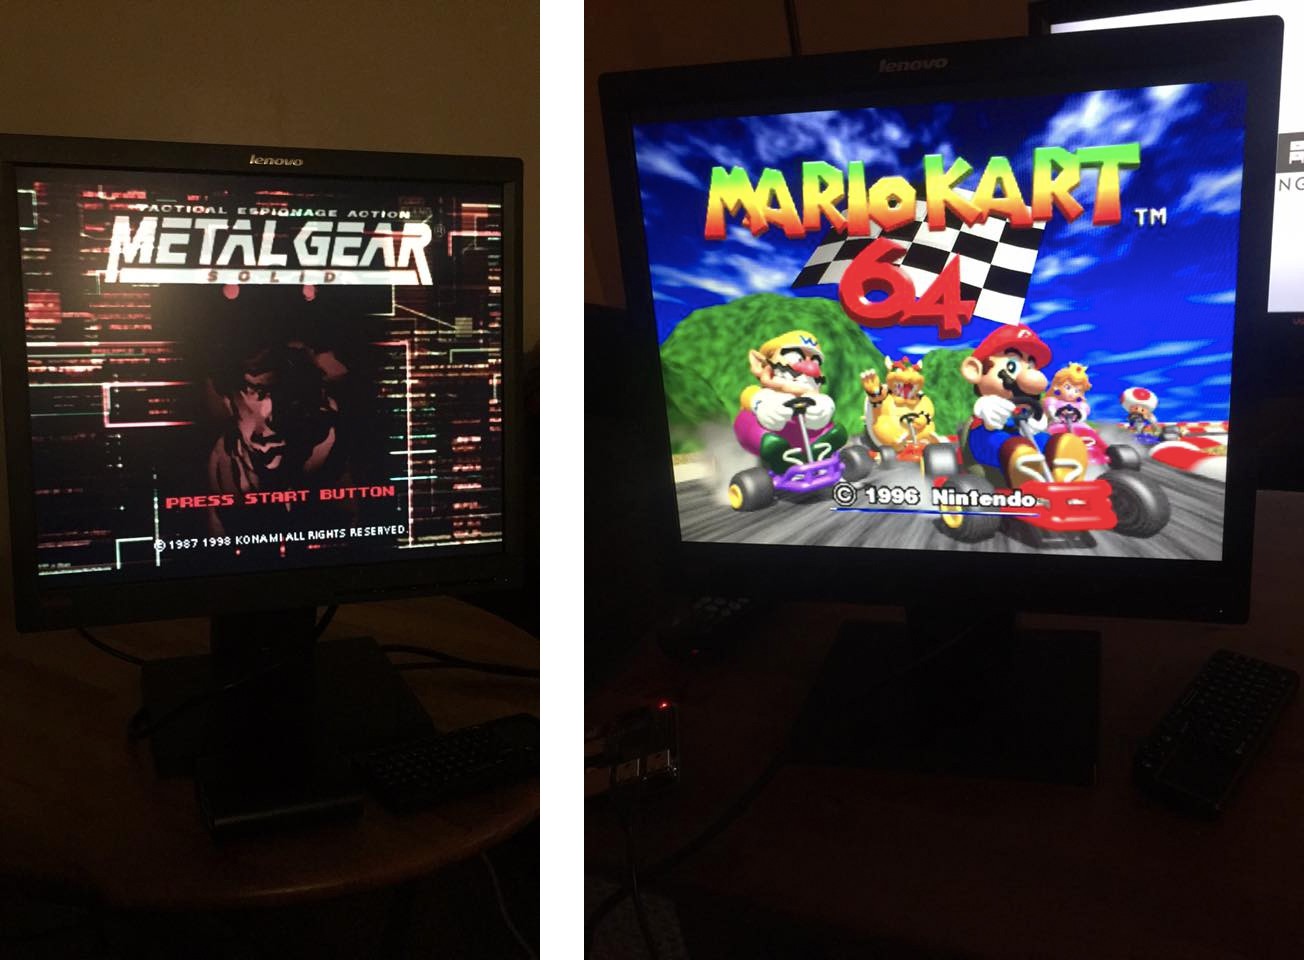
Finishing the enclosure and testing N64 & PSX operation!
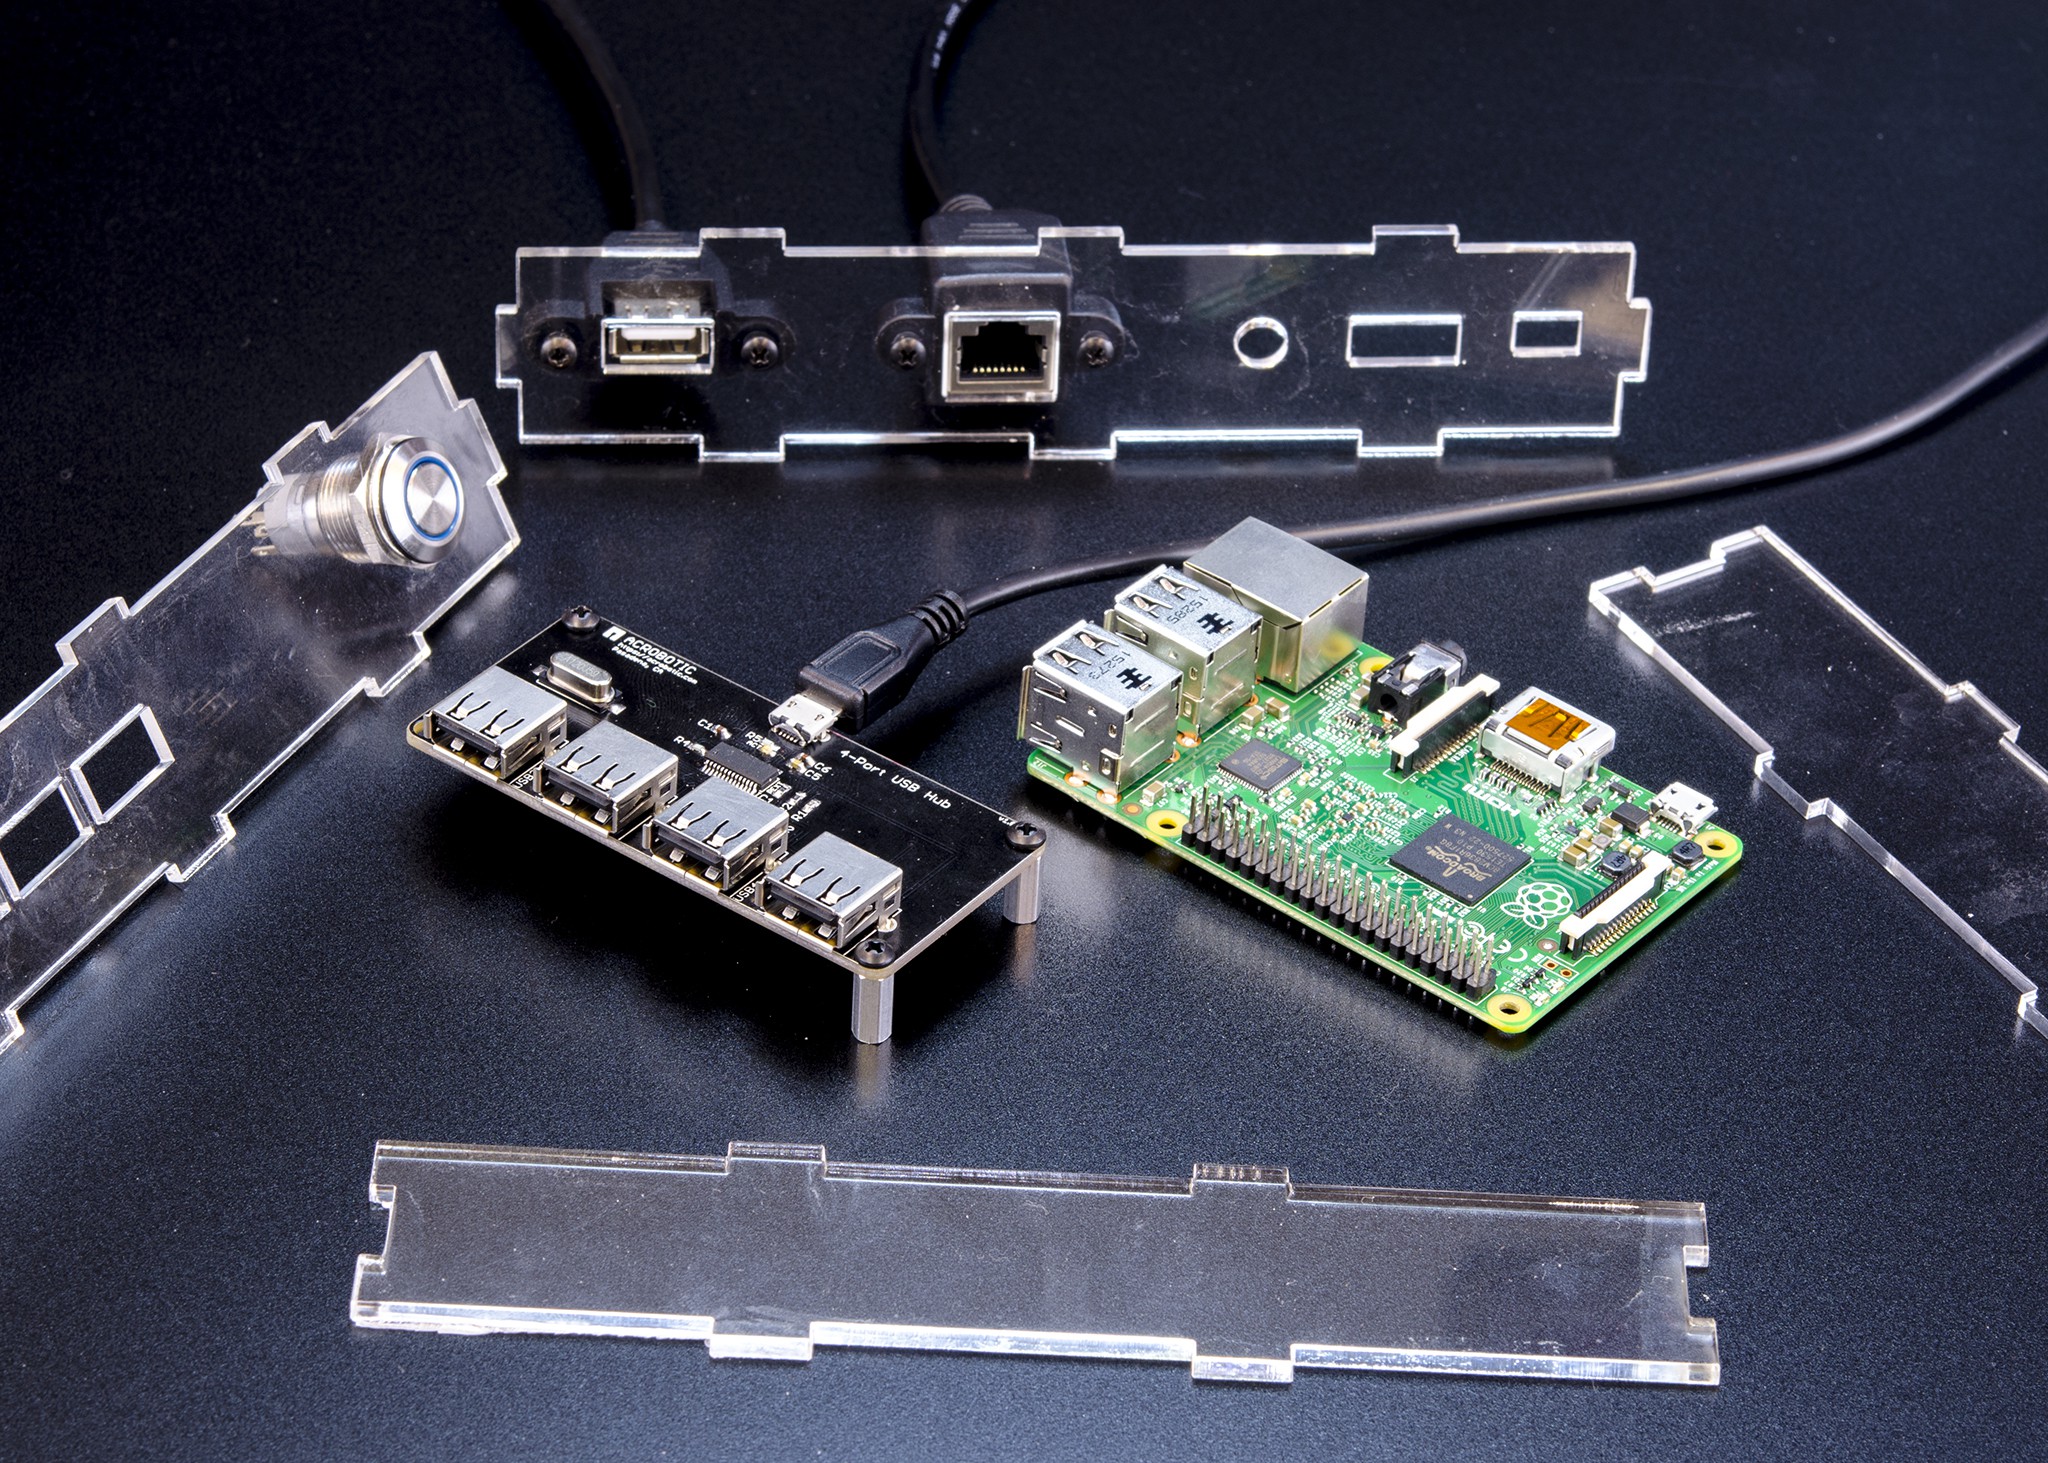
12/11/2015 at 02:08 • 0 commentsSo we spent some time testing the cutouts for the panel mounted connectors for ethernet and USB, as well as making sure that the mounting holes for our internal USB Hub and Raspberry Pi fit nicely.
![]()
We are ready to start cutting our first version and do a fitting test. We bought some nice, black translucent acrylic for the final version, but we'll do our first cuts on plain old clear acrylic. We'll be using 3mm (~1/8in) acrylic for these enclosures as there is no need to go thicker because the electronics inside are very lightweight.
@Brayden DeVito has been working on the software side of things, and started testing the N64 and PSX emulators on Emulation Station, which work quite well. We upgraded the microSD card to 32GB and will likely do a split where 1/3 of disk space is assigned to Kodi (~8GB) and 2/3 to ES (~24GB), obviously subtracting space needed by system files.
![]()
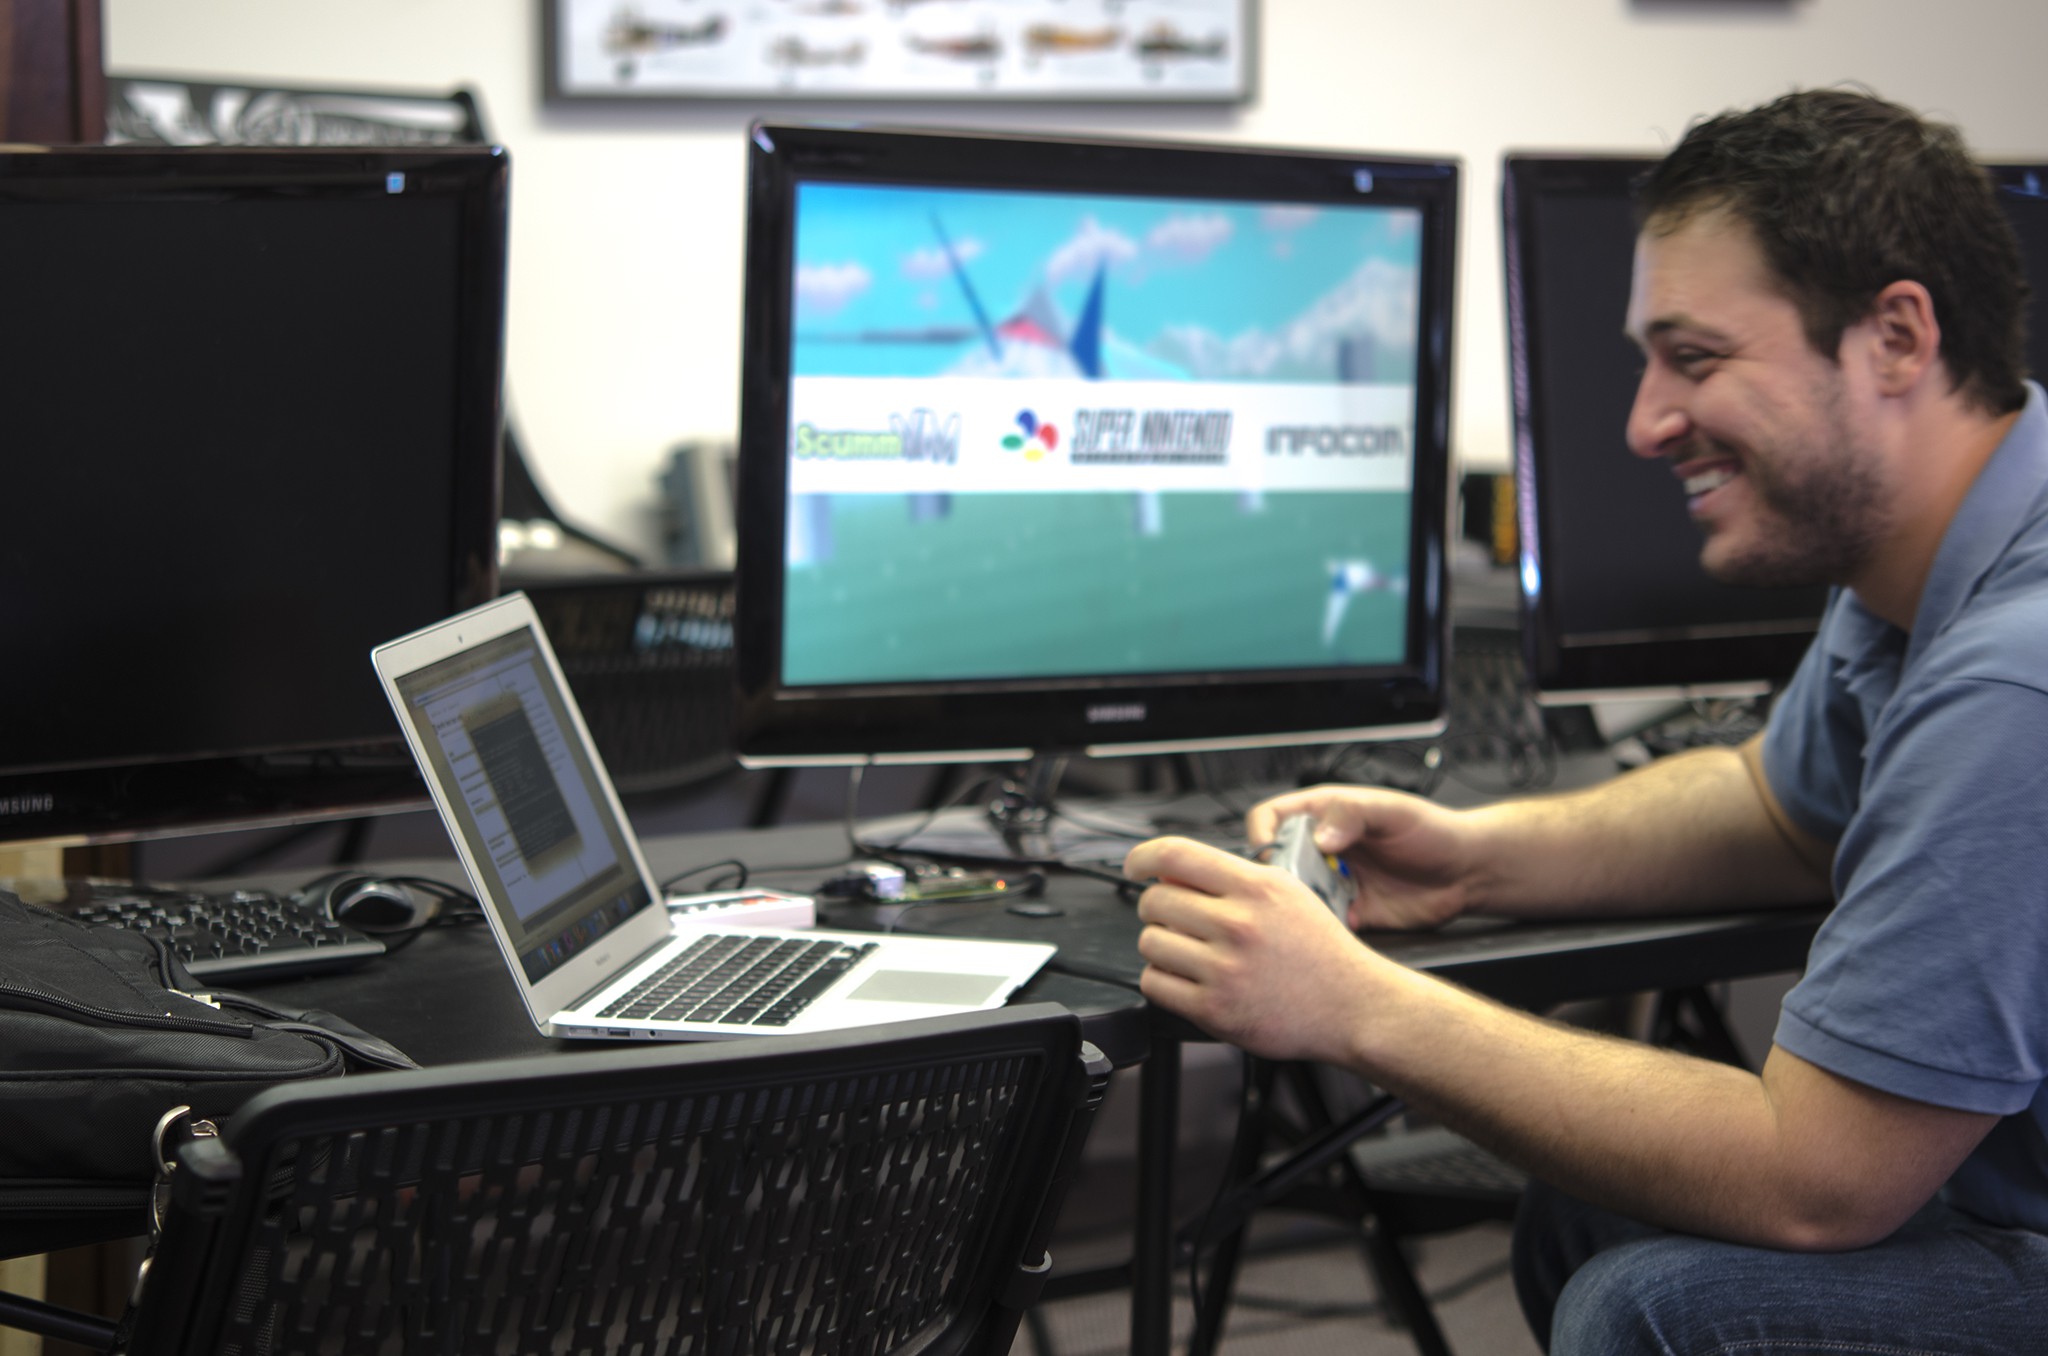
We went ahead and purchased a few USB N64- and PSX-like controllers to enjoy the full experience! We'll post some pics and video when they arrive.
-
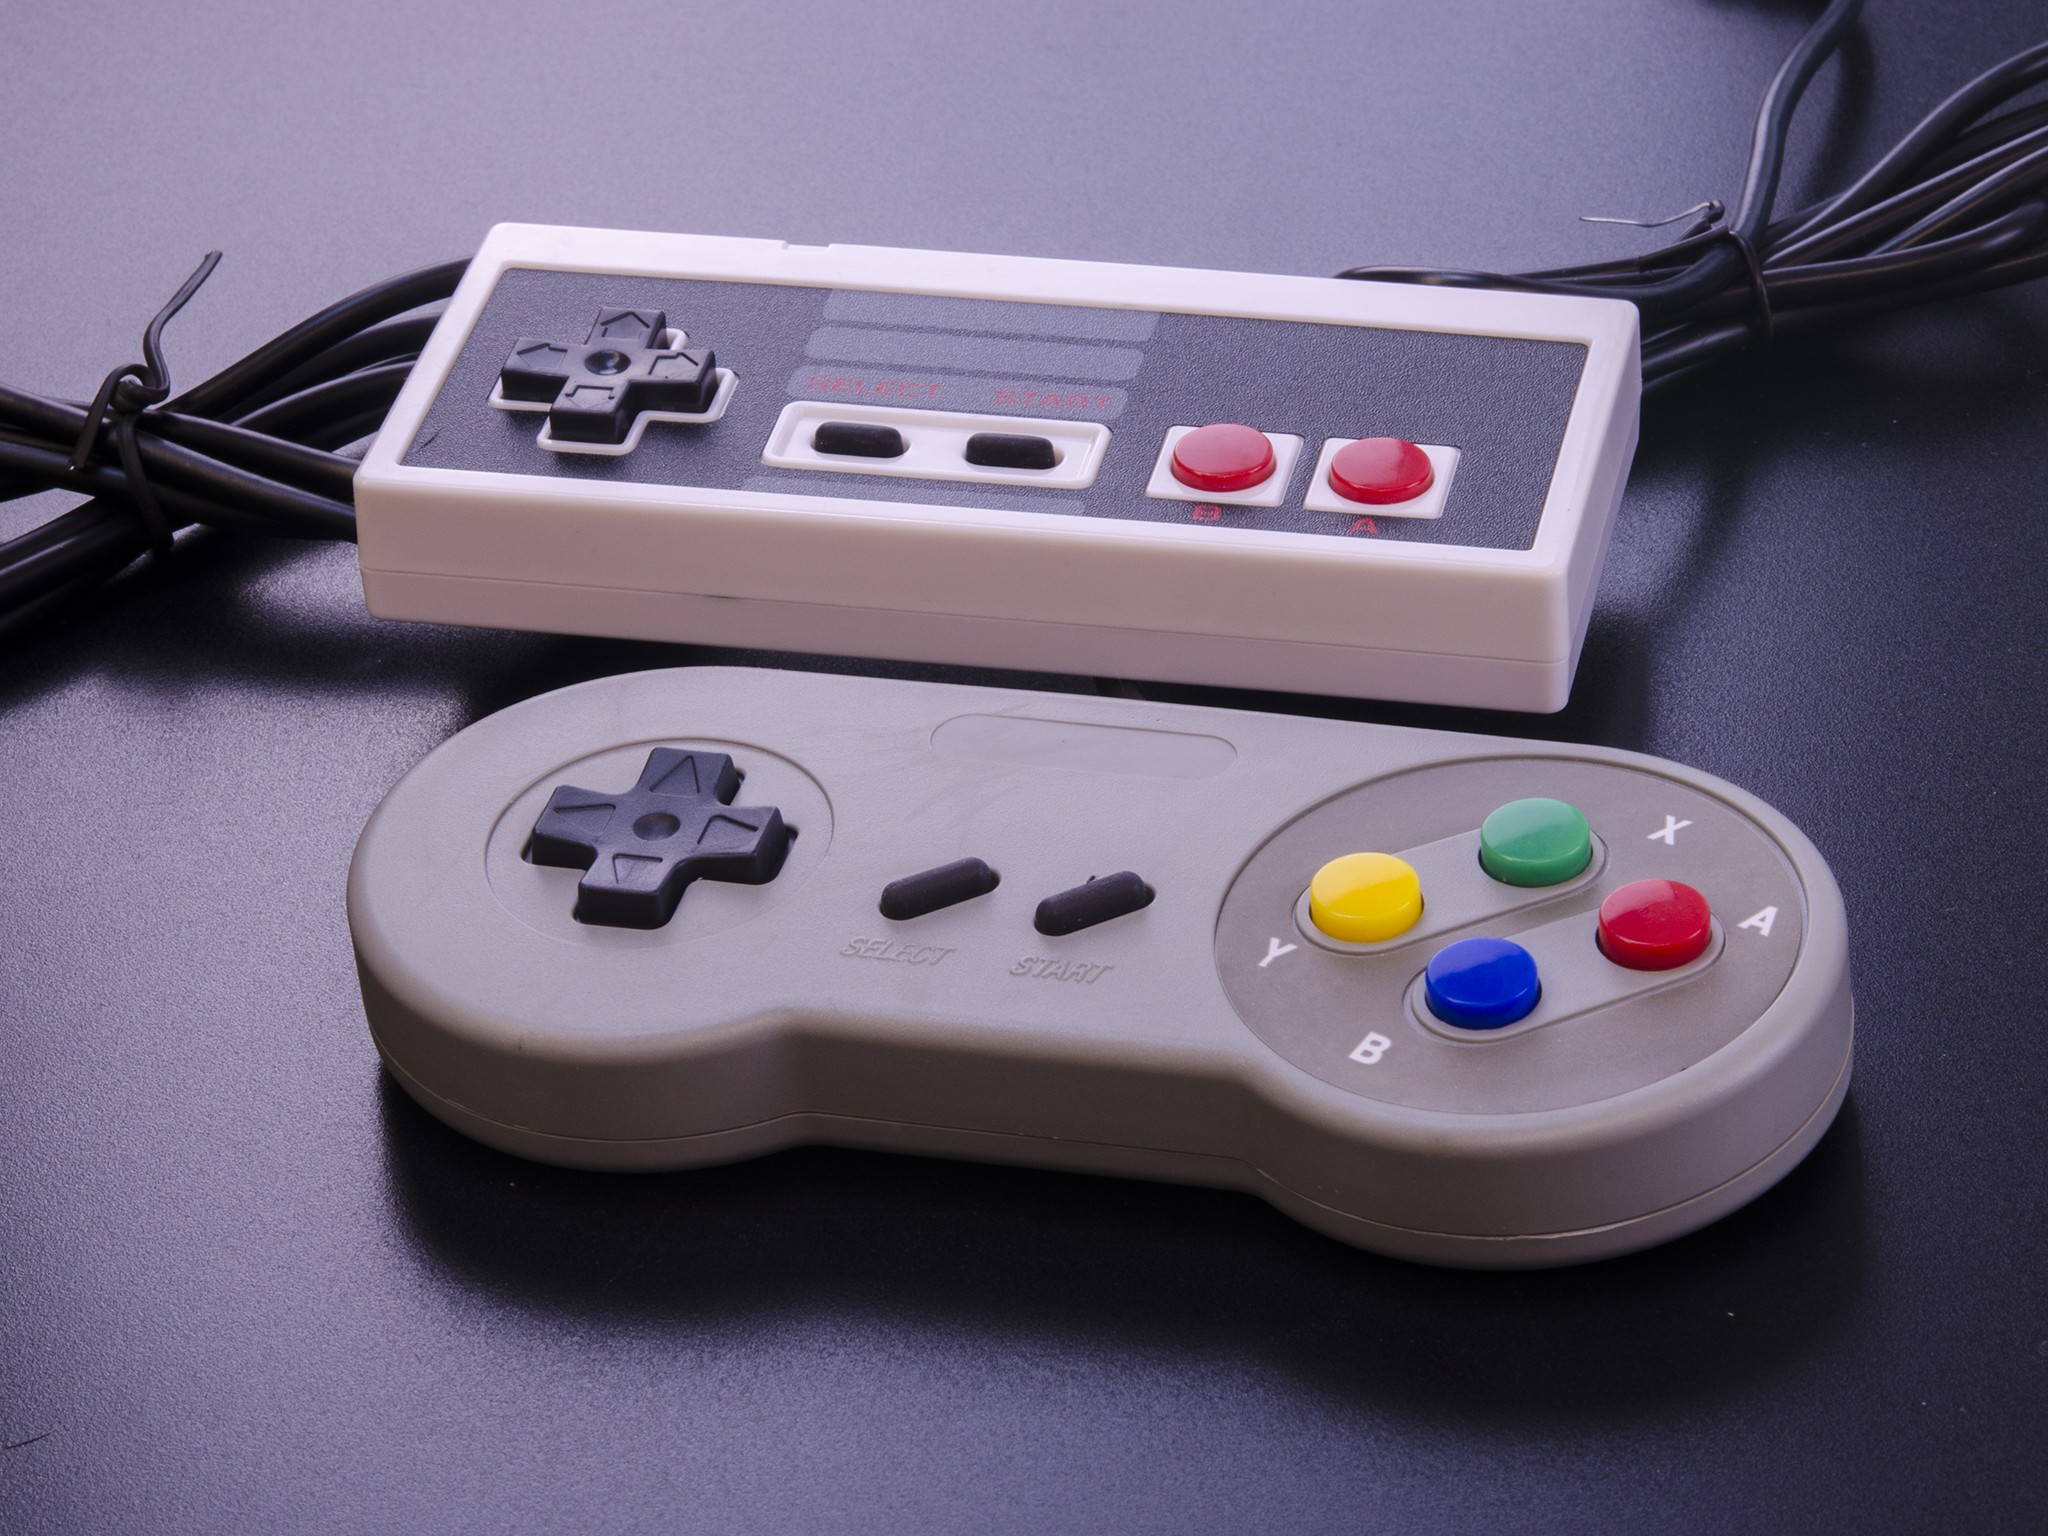
NES- and SNES-like USB Controllers!
11/30/2015 at 23:58 • 0 commentsOh the nostalgia... As a child of the 80s, @Cisco 'MakerBro' Zabala was all giddy when the controllers came in the mail. These are inexpensive look-alike controllers to the original NES and SNES controllers with a USB interface.
![]()
We want to pug together a kit where two of each are included so that users get 4 controllers (the max number of USB ports in our custom hub) right out of the box. We also plan on including a little USB BLE adapter (without a BLE controller) to allow connecting any XBOX/PS3/PS4 controller to the RASPICON.
We also received most of the electronics, so we'll be assembling the USB Hub and posting a new log over the next couple of days!
-
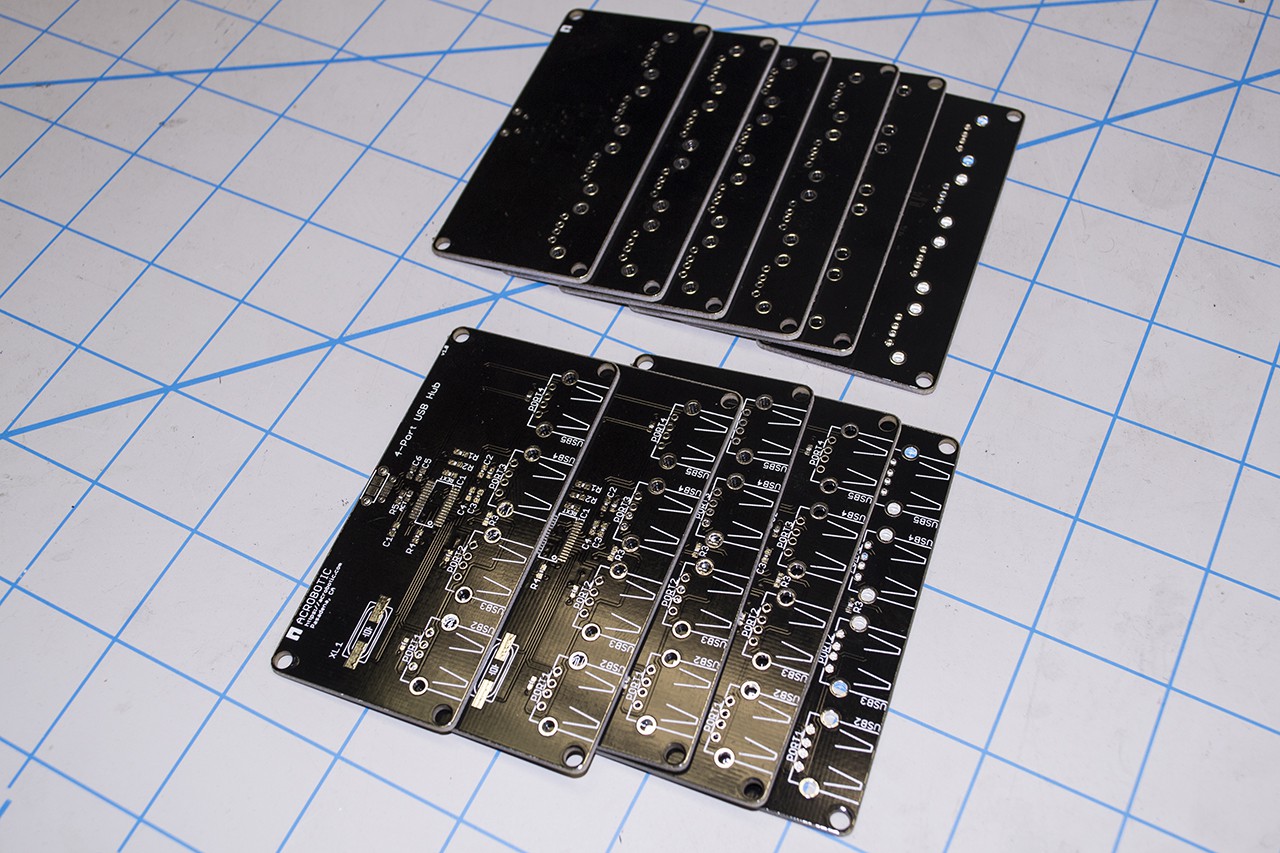
Custom 4-Port USB Hub boards have arrived!
11/20/2015 at 10:15 • 0 commentsThe first version of the PCBs for the Custom 4-Port USB Hub have been manufactured! The circuit design (available on Github) is straight-forward. It is based around the ubiquitous FE1.1s USB 2.0 High-Speed 4-Port Hub Controller.
![]() Because we're connecting our Hub directly to one of the USB ports on the Raspberry Pi, we can have peace of mind knowing that the USB-related circuitry on the Pi is reliable. We skip dealing with some of the nuisances that encountered when designing powered hubs.
Because we're connecting our Hub directly to one of the USB ports on the Raspberry Pi, we can have peace of mind knowing that the USB-related circuitry on the Pi is reliable. We skip dealing with some of the nuisances that encountered when designing powered hubs.The motivation to have a custom USB Hub is that it gives us more flexibility for connecting the controllers, adapters (e.g., Wi-Fi, Bluetooth), or any other USB device. Also, having the hub inside the RASPICON instead of externally (perhaps using an off-the-shelf hub) will make the overall design more compact and improve the aesthetics. Finally, instead of dismantling an Off-the-Shelf hub and adapting the PCB to our own enclosure, we get more control of the placement of the connectors, mounting holes, etc.
Now we wait for the FE1.1s ICs to arrive to start testing!
-
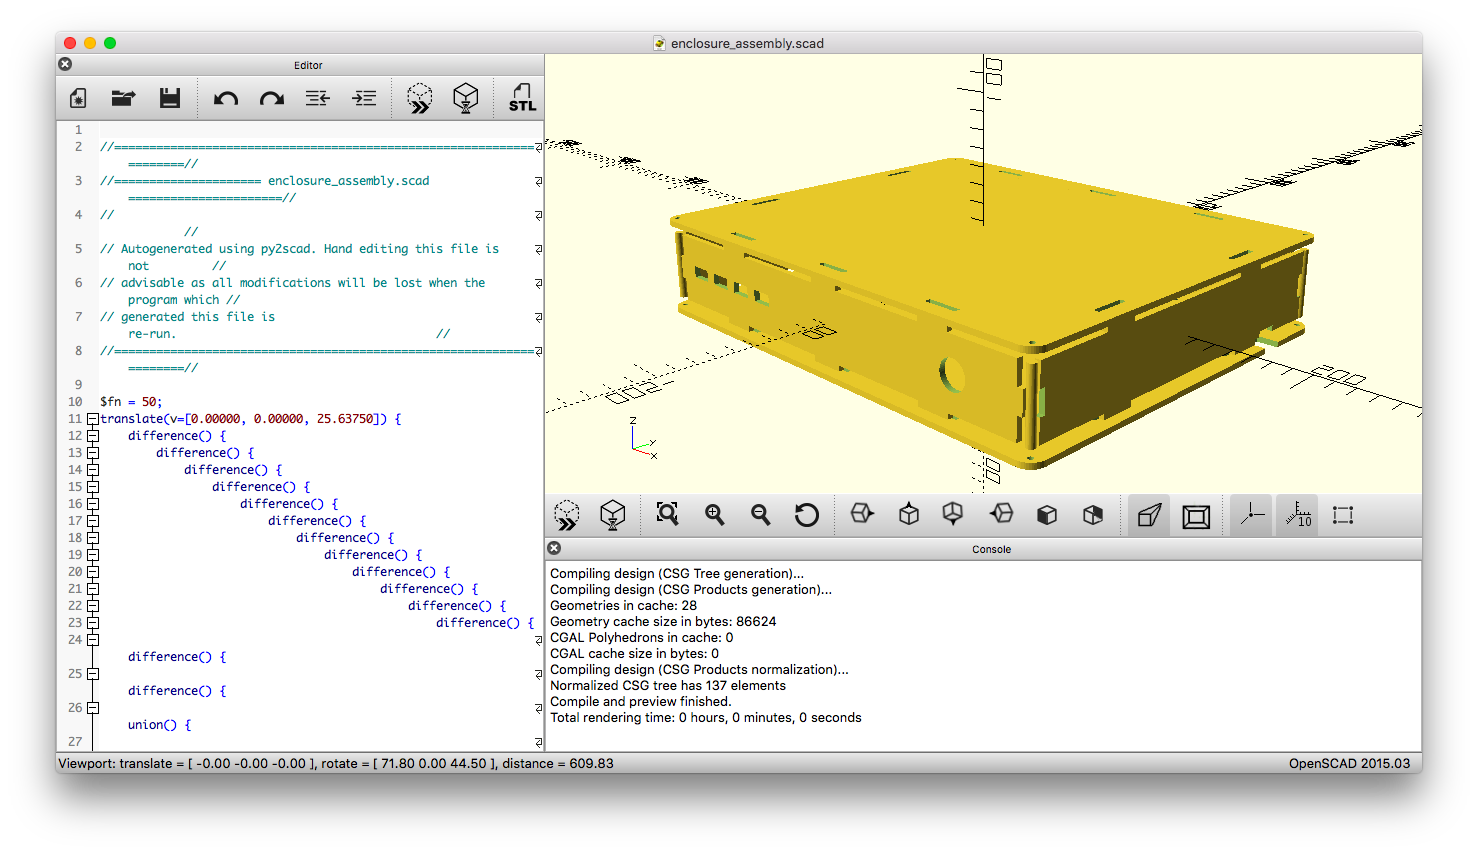
Programmatic Design of the Enclosure using py2scad
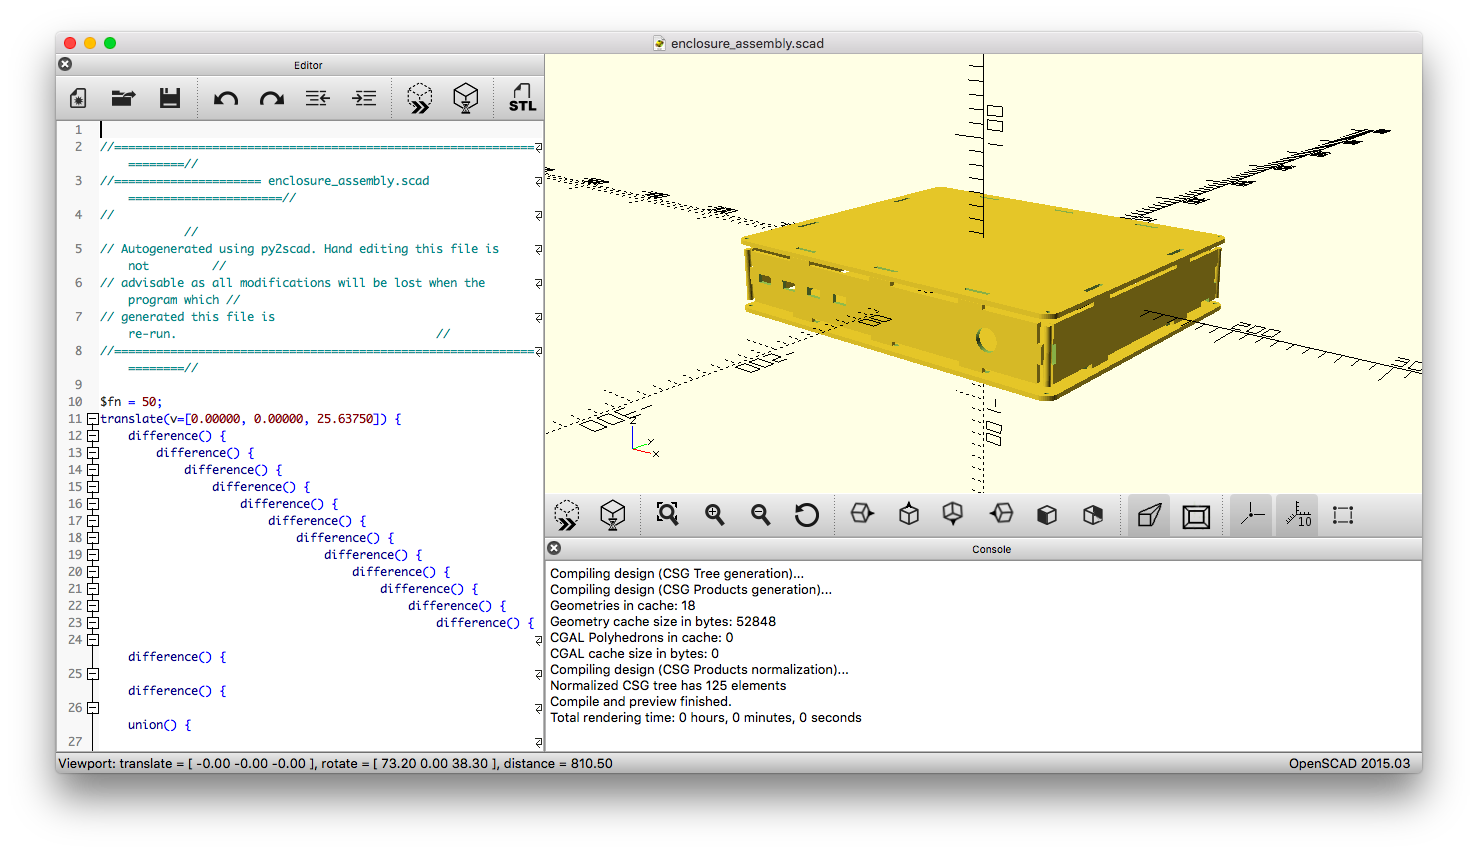
11/17/2015 at 01:00 • 0 commentsWorked a bit on the enclosure using py2scad (https://github.com/acrobotic/py2scad). This neat module auto-generates the OpenSCAD files allowing for easy programmatic design of a few things. It's particularly useful for box-type enclosures.
The auto-generated files can then be opened using OpenSCAD:
The holes size and position are temporary for now, the next step will be to do some careful measurements of the Raspberry Pi and the USB Hub PCBs in order to adjust these parameters to fit all the connectors more precisely.![]()
-
Custom USB Hub using the FE1.1s
11/16/2015 at 14:32 • 0 commentsWe designed a basic 4-Port USB Hub using the inexpensive FE1.1s IC. The basic reason is to use one of the Raspberry Pi's built-in USB ports to add 4 USB ports that are easily accessed from outside an enclosure.
![]()
Using a short (6in.) USB micro-B to USB-A cable we'll connect this USB Hub to one of the Raspberry Pi's ports. For now, we'll be powering the Hub directly from the USB port of the Pi as we don't intend to draw too much current from the hub output. A separate port from the Pi will be used for running any other USB device (in our case, we'll only need one for a Wi-Fi adapter).
Caveat emptor: we'll have to test this arrangement using 4 wireless controllers, which need the USB Bluetooth Adapters and may draw too much current from the single port of the Pi.
The design files are up on Github: https://github.com/acrobotic/Ai_Hub_USB
-
First pass at the BOM
11/16/2015 at 07:44 • 0 commentsCompiled a list of the major items needed for this project.
RASPICON | Retro Gaming and Media Center Platform
Play 1000's of games from over 40 retro gaming platforms, or enjoy playback and streaming your media content. Raspberry Pi CPU inside!
 First test using a microSD card reader connected to the hub carrying... you guessed it... a microSD card with Raspbian loaded on it :)
 Because we're connecting our Hub directly to one of the USB ports on the Raspberry Pi, we can have peace of mind knowing that the USB-related circuitry on the Pi is reliable. We skip dealing with some of the nuisances that encountered when designing powered hubs.