 Lentin Joseph
-
11Step 11
Step 10: Designing a GUI for Chefbot using Qt and Python
![]()
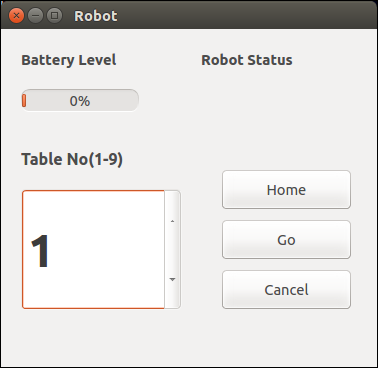
In this step we are building a commander GUI for the robot. Using the GUI, we can command the robot to go into a particular table position in a hotel like environment.
After building the map, we can start AMCL for localizing and command the robot to go into a particular pose of map. We can retrieve each pose of the map.
The GUI of the robot is placed in chefbot/chefbot_bringup/scripts folder called robot_gui.py
Start commanding robot in GazeboStart Gazebo simulation of hotel environment
$ roslaunch chefbot_gazebo chefbot_hotel_world.launch
Launch AMCL with the generated map
$ roslaunch chefbot_gazebo amcl_demo.launch map_file:=/home/lentin/catkin_ws/src/chefbot/chefbot_bringup/map/hotel1.yaml
View robot in Rviz and correct the initial pose of robot in the map using 2D Pose Estimate button
$ roslaunch chefbot_bringup view_navigation.launch
Using 2D Nav Goal button, we can command the robot in the map. We will get the pose of robot from following command
$ rosrun tf tf_echo /map /base_link
We can collect each pose of table and feed inside the robot_gui.py, the poses are hard coded inside this code. After getting each position of table, we can start running the robot commander GUI
$ rosrun chefbot_bringup robot_gui.py
Select the table number and press Go button. Here we are taking a 3x3 tables in hotel
-
12Step 12
Step 11: Calibration and Testing of Chefbot
![]()
![]()
After complete integration of robot and building the GUI, the final step is to calibrating and testing the robot.
First we need to calibrate following sensors
- Kinect/Asus Xtion Pro
- Wheel Odometry Calibration
- Calibrating the MPU 6050
In ROS, we have a package to perform calibration of RGB image and depth image. Given below the command to install this calibration package
$ sudo apt-get install ros-indigo-openni-launch ros-indigo-cameracalibration
Following tutorial will guide you to calibrate the robot : Tutorial link
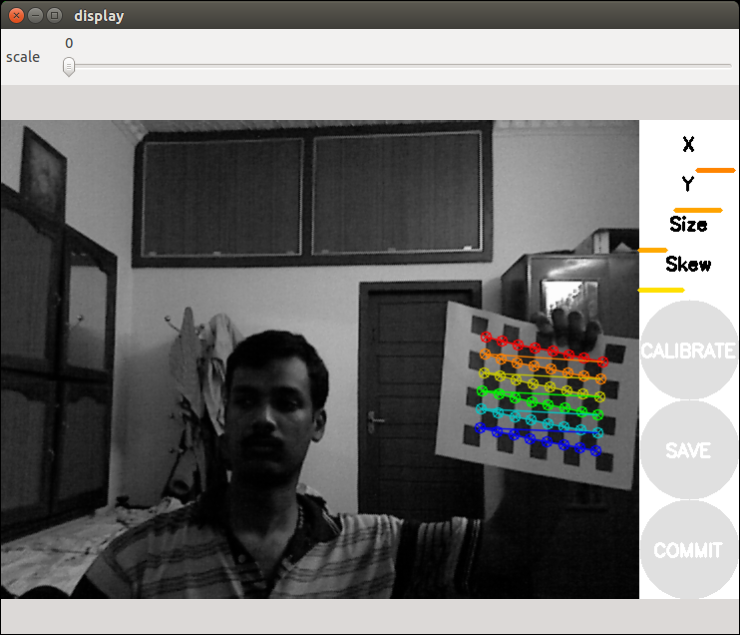
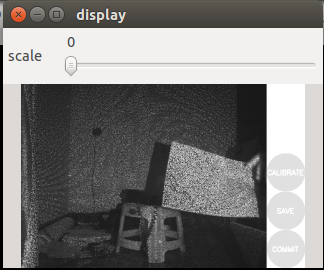
The image gallery shows the RGB, and Depth image calibration of 3D sensor
The details of Odometry and IMU calibration need to be referred from the book itself. You can also see how to test the GUI and inserting new poses inside the code.
Hope that you all enjoyed the quick start tutorial to build Chefbot. I can't explain the entire book content here but this tutorial give an idea to build an autonomous mobile robot.
If you really wanted to know more details of robot design; then you can checkout the book.Regards
DIY Autonomous Mobile Robot
This project is about building an autonomous mobile robot with the help of Robot Operating System(R.O.S) and Python.
Discussions
Become a Hackaday.io Member
Create an account to leave a comment. Already have an account? Log In.
I am using ubuntu mate 18.04 and using ros-melodic .I need to apply this project .
but when execute the frist commen after change the release of ros to melodic as:
sudo apt-get install ros-melodic-turtlebot ros-melodic-turtlebot-apps ros-melodic-turtlebot-interactions ros-melodic-turtlebot-simulator ros-melodic-kobuki-ftdi ros-melodic-rocon-remocon
give me error :
E: unable to locate package ros -melodic-turtlebot
E:unable to loacate package ros-melodic-turtlebot-apps
E:unable to loacate package ros-melodic-turtlebot-interaction
E:unable to loacate package ros-melodic-turtlebot-simulator
E:unable to loacate package ros-melodic-turtlebot-remocon
I know the turtlebot is work with ros-kinetic..Then I change ros-indigo to ros-melodic
Are you sure? yes | no
The project is based on ROS Kinetic. I am running ROS Melodic on Ubuntu 18.04 and hence facing the version compatibility issue.
Here is the question invoked by me on ROS answers:
https://answers.ros.org/question/305453/how-to-get-packages-built-for-ros-kinetic-working-in-ros-melodic/
Are you sure? yes | no
Thinks.
Are you sure? yes | no