 Gary
Gary-
1Step 1
WARNING.... WARNING... WARNING...WARNING...WARNING.... WARNING... WARNING...WARNING..
THE ESP 8266 is a 3.3v device. DONT connect VCC or any of the pins to a 5v source or it will damage the device.
WARNING.... WARNING... WARNING...WARNING...WARNING.... WARNING... WARNING...WARNING..
-
2Step 2
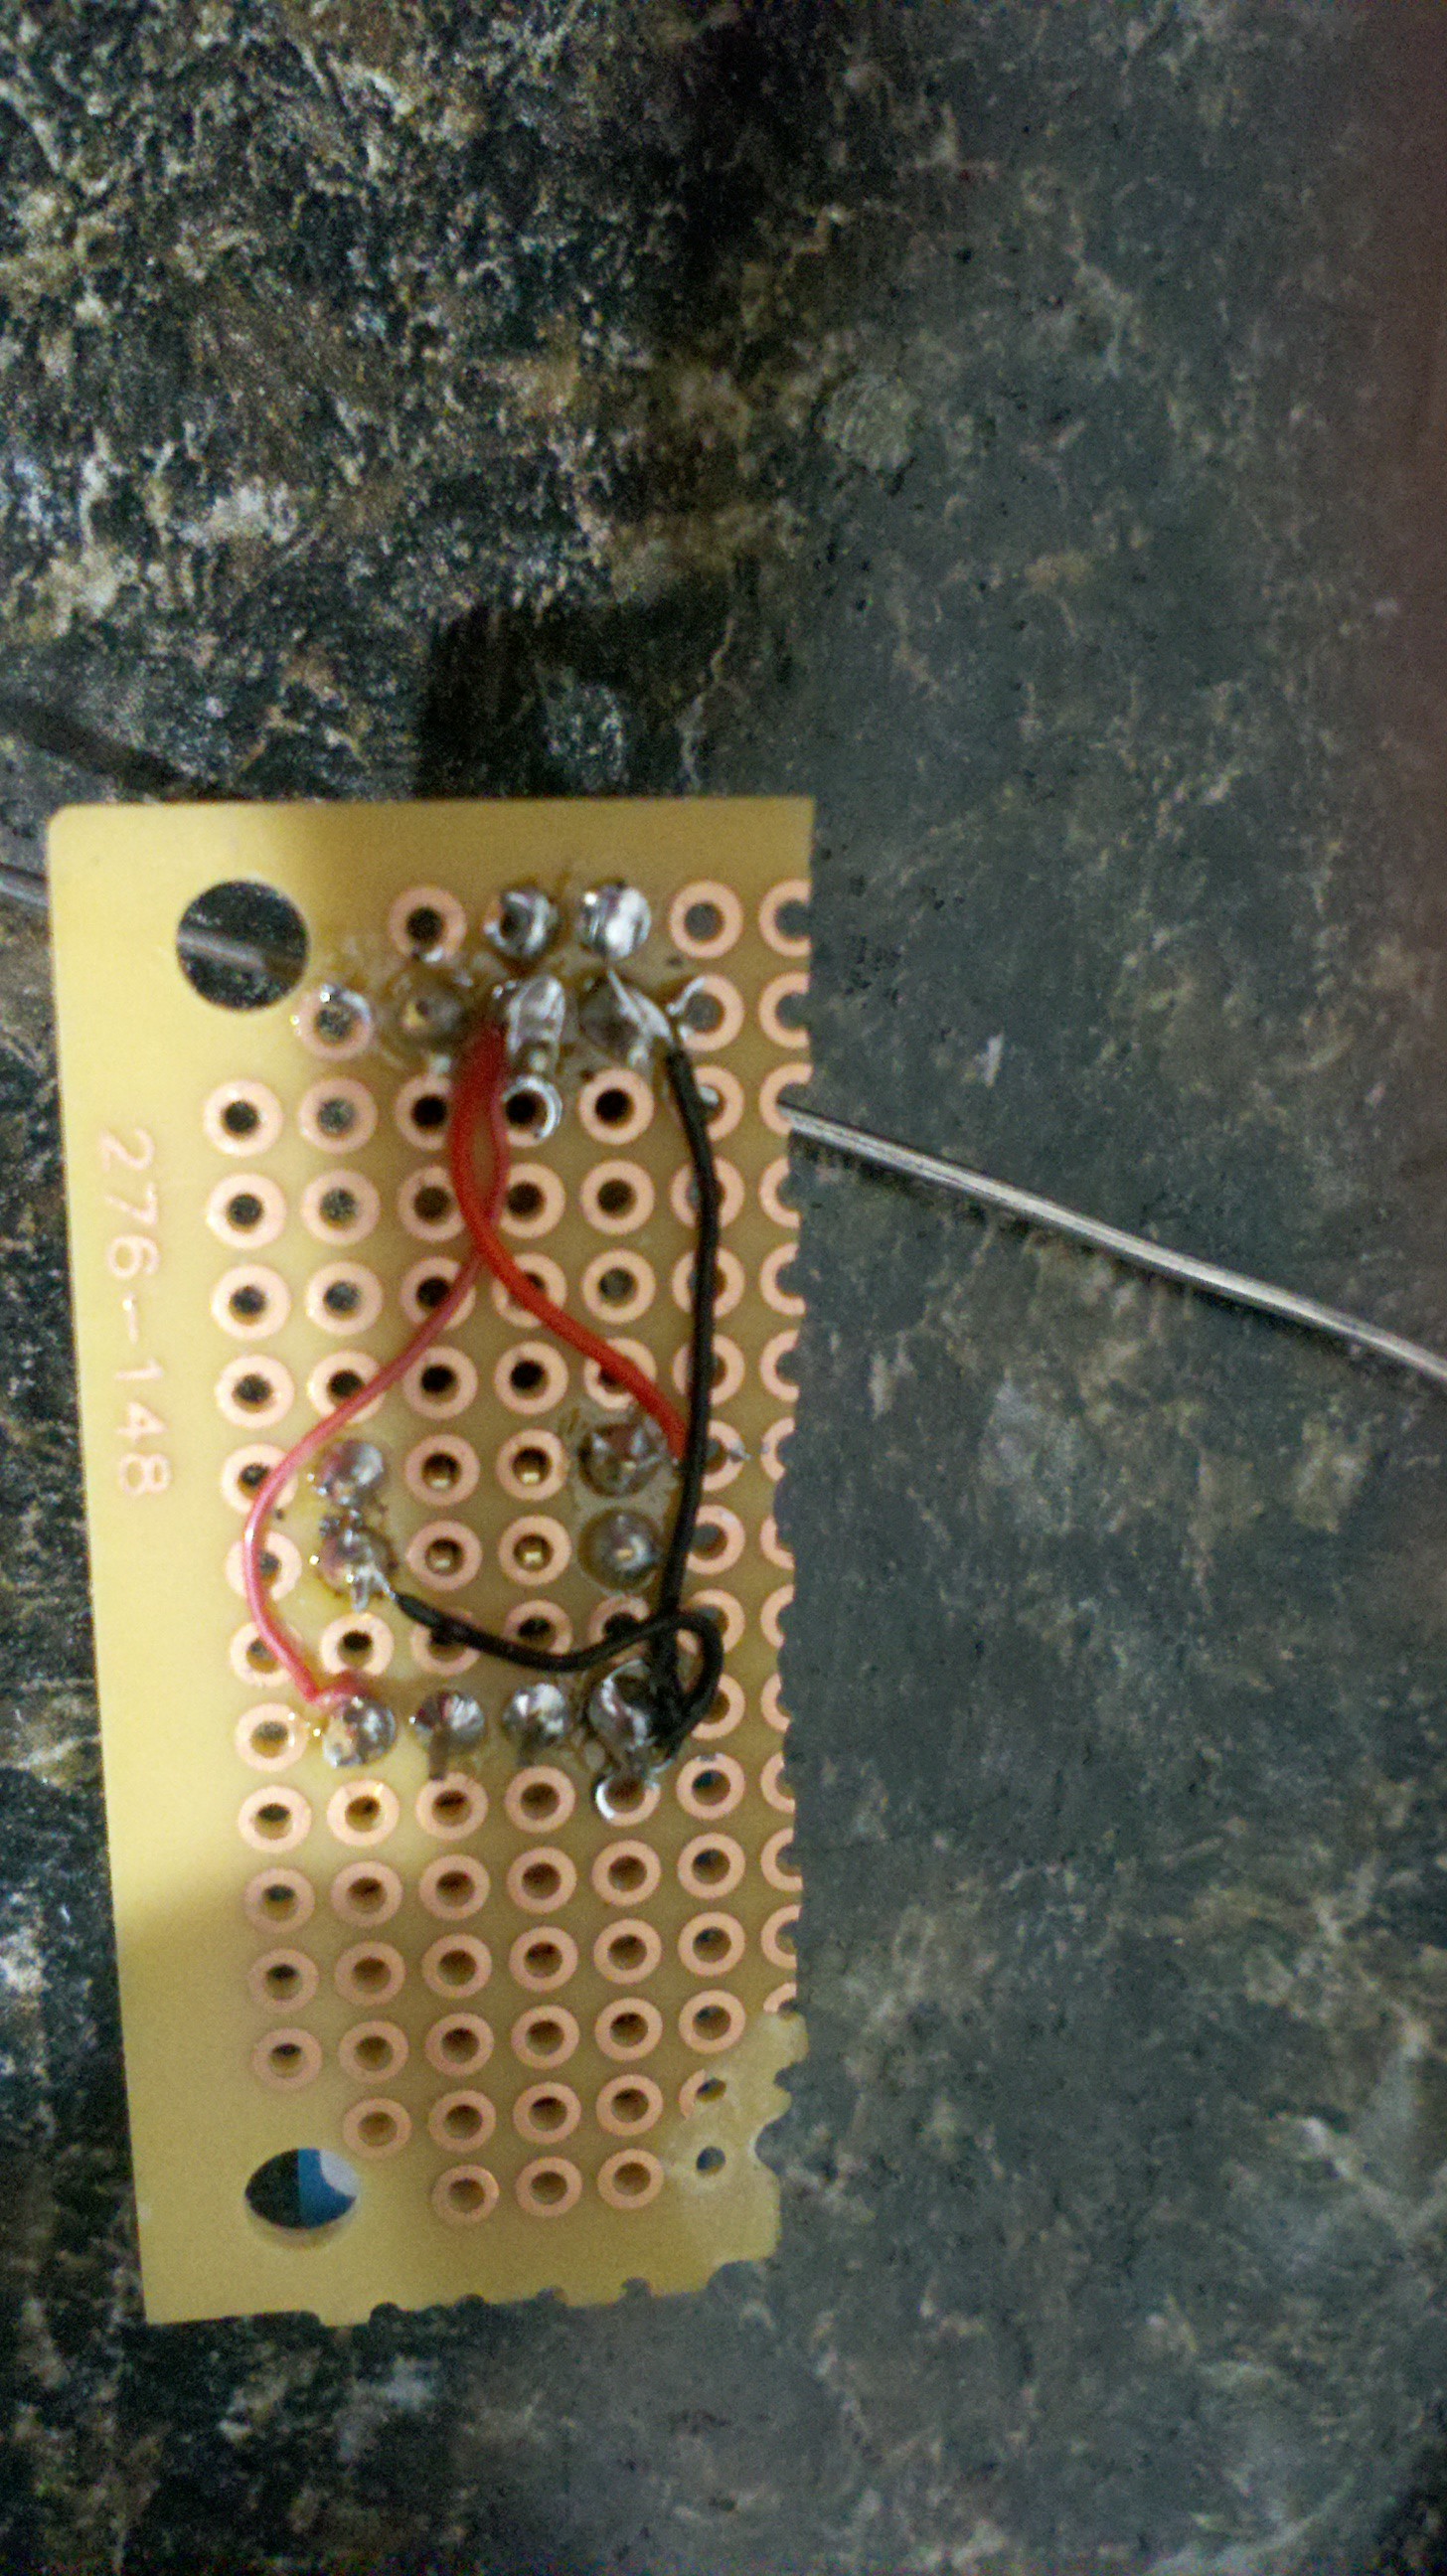
The build is pretty simple, use whatever technique works for you. My build I used some 22 guage (wirewrap) wire and soldered the small number of connections. Connect VCC (3.3v) from the voltage regulator to the DHT11 and esp8266. Connect ground to both devices as well. Now connect data pin the DHT11 to the GPIO0 on the ESP8266
Becarefull when you look at the pinouts since your going to be working on the board upside down and pins will be inverted and reversed as well.
![]()
-
3Step 3
![]()
Here is the pinout for the DHT11
-
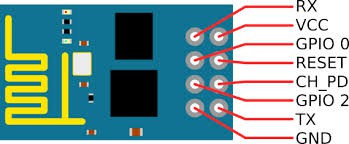
4Step 4
Here is the pin out of the esp8266-01
![]()
-
5Step 5
![]()
Re-check all connections. Once validated plug in the esp8266 chip into the socket and apply power. Make sure the lights on the regulator (if used) and the power to the esp8266 come on.
-
6Step 6
Here is the LUA code to run the module. You can set the Location name, Set Fahrenheit/Celsius flag as well as setting your router SSID and password. You can copy and paste the code below or grab my git repository at https://github.com/ohgary/esp8266-temperature
--Temperature display
--Gary Sanders, N8EMR
--
--Defined ESP8266 I/O Pin to use. 4=gpio2,
DHTpin=4
--Defined the location of the device. This is just a
--description that is displayed with the temp. Can be blank
LOCATION="Bedroom"
--set to 1 for Fahrenheit, 0 for Celsius
fahrenheit=1
--setup the wifi SSID and password.
SSID="MYSSID"
WIFIPWD="MYSSIDPWD"
function get_temp()
--layout top of web page
outbuf = ""
outbuf = outbuf.."<!doctype html>"
outbuf = outbuf.."<html>"
outbuf = outbuf.."<head>"
outbuf = outbuf.."<title>Temperature and Humidty </title>"
outbuf = outbuf.."<META HTTP-EQUIV=\"refresh\" CONTENT=\"15\">"
outbuf = outbuf.."</head>"
outbuf = outbuf.."<body>"
outbuf = outbuf.."<h1>"..LOCATION..": "
--get temperature and humity and layout web data
status,temp,humi,temp_decimial,humi_decimial = dht.read11(DHTpin)
if( status == dht.OK ) then
if (fahrenheit == 1 ) then
--convert to Fahrenheit
temp=(temp*9/5+32)
outbuf= outbuf.."Temperature: "..temp.." F"
else
--temp in Celsius
outbuf= outbuf.."Temperature: "..temp.." C"
end
outbuf= outbuf.." , "
outbuf= outbuf.."Humidity: "..humi.." %"
else
outbuf= outbuf.."Unable to read DHT sensor"
end -- end if status
-- layout end of web page.
outbuf = outbuf.."</h1>"
outbuf = outbuf.."</body>"
outbuf = outbuf.."</html>"
return outbuf --return the formated page to caller.
end --end get_temp
function setup_wifi()
print("Setting up WIFI...")
wifi.setmode(wifi.STATION)
--modify according your wireless router settings
wifi.sta.config(SSID,WIFIPWD)
wifi.sta.setip({ip="192.168.1.241",netmask="255.255.255.0",gateway="192.168.1.1"})
wifi.sta.connect()
tmr.alarm(1, 1000, 1, function()
if wifi.sta.getip()== nil then
print("IP unavaiable, Waiting...")
else
tmr.stop(1)
print("Config done, IP is "..wifi.sta.getip())
--dofile("ds1820.lua")
--dofile("listap.lua")
end
end)
end
setup_wifi()
-- A simple http server
srv=net.createServer(net.TCP)
srv:listen(80,function(conn)
conn:on("receive",function(conn,payload)
tempout=get_temp() -- get tempature and humidty
conn:send(tempout)
end)
conn:on("sent",function(conn) conn:close() end)
end)
-
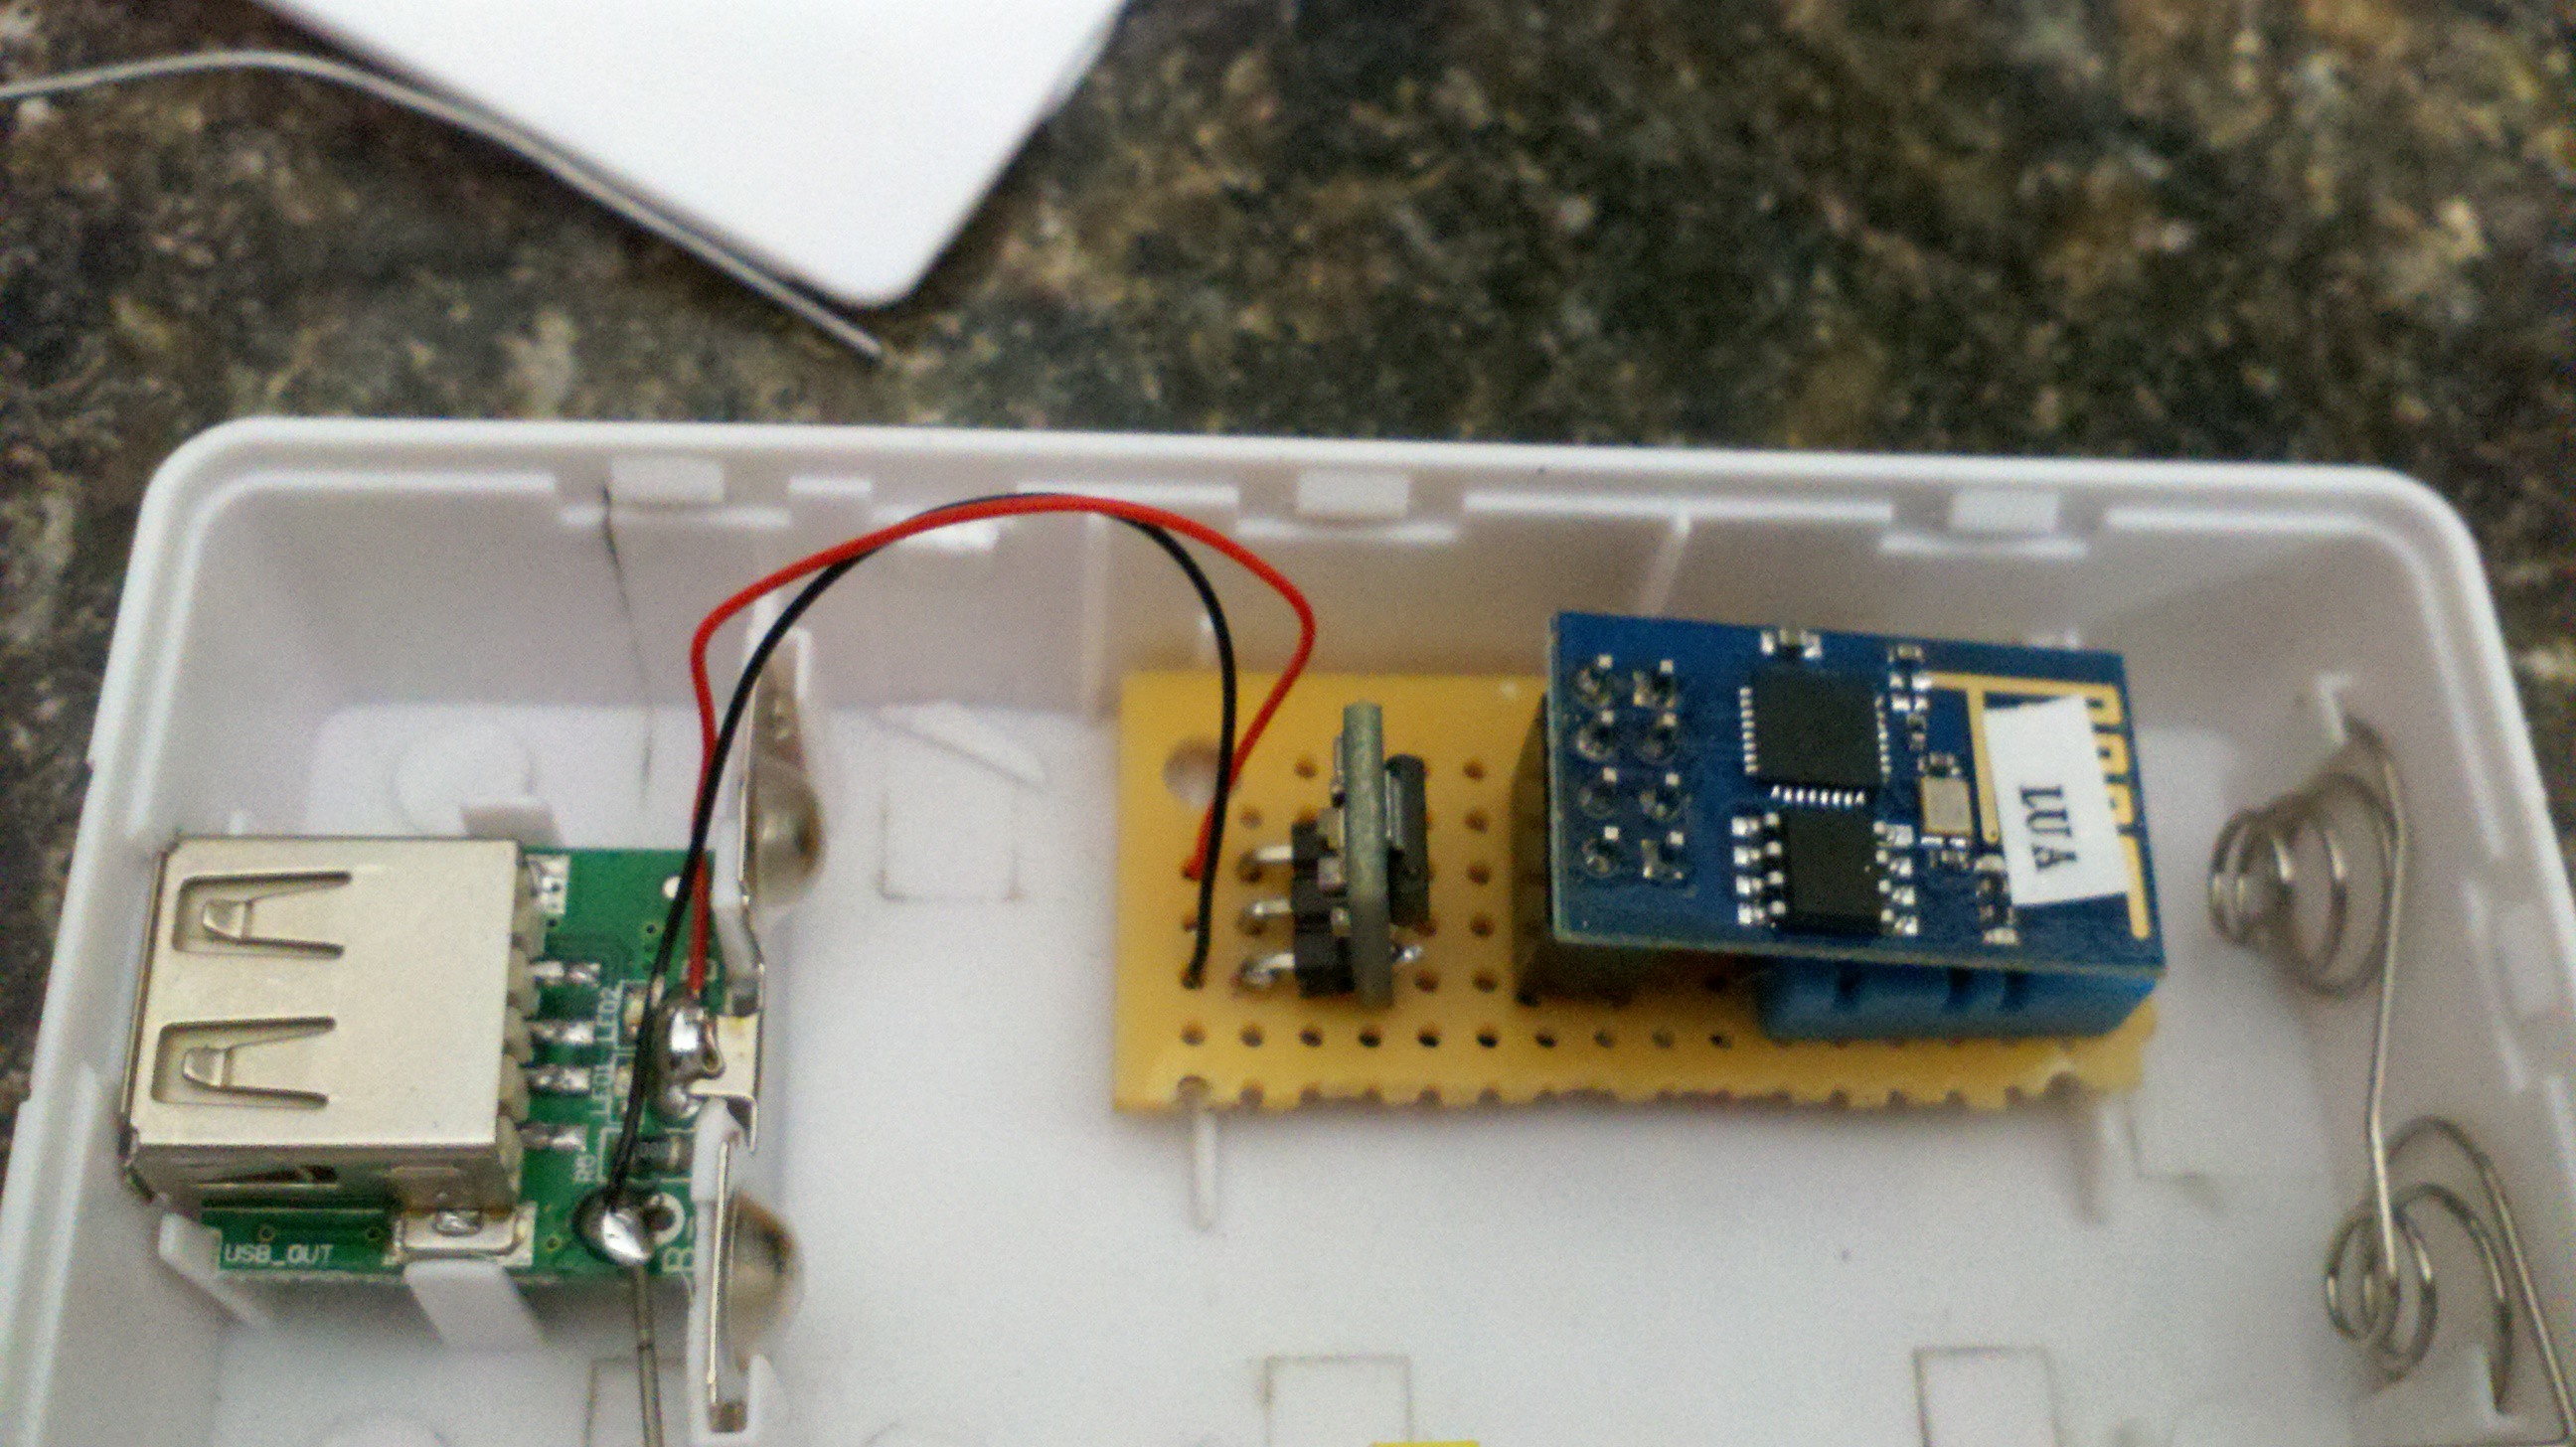
7Step 7
Place assemble into your USB power box.
![]()
-
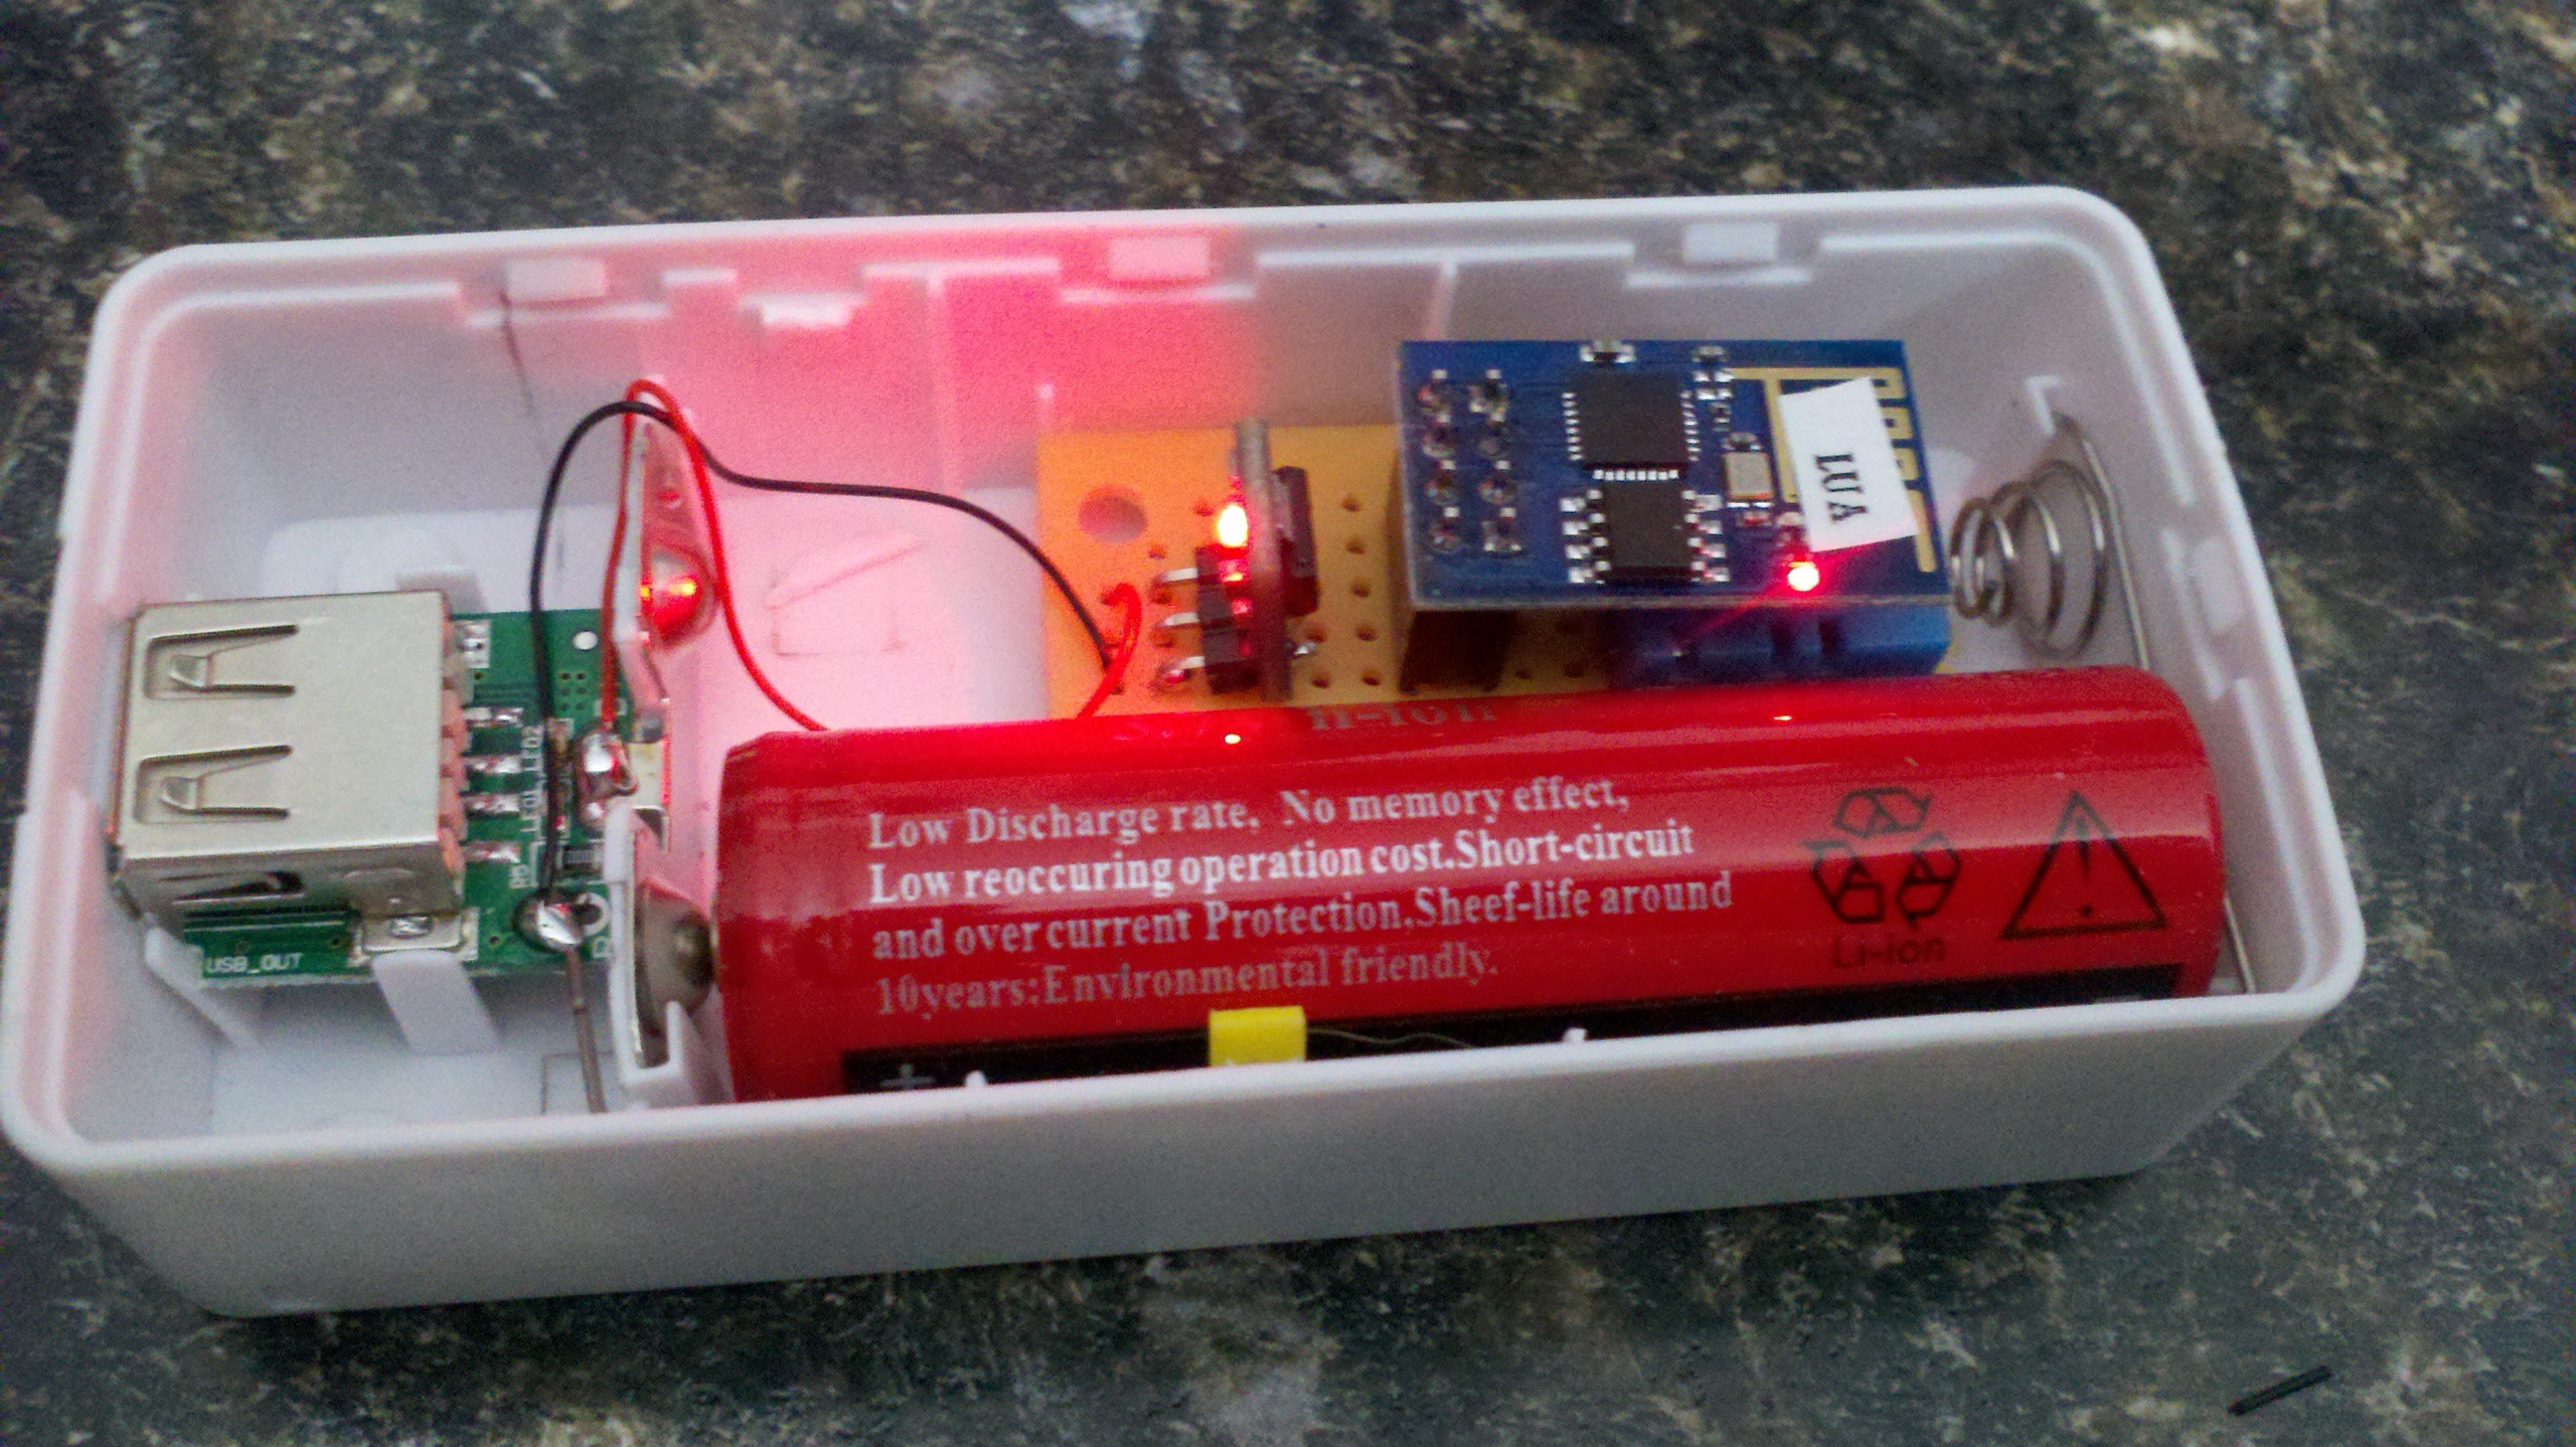
8Step 8
Add the battery and confirm module powers up. One of the nice things about this box is I can power the device via the 18650 batter but also charge the battery via the charge circuit built into the power box.
![]()
-
9Step 9
Test your web connection. By default the code puts sensor at 192.168.1.241 port 80. Open your browser and connected to the device. You should see a page similar to the one below.
![]()
-
10Step 10
Close up the box and place in whatever location you need to monitor the temperature.
![]()
ESP8266 web based temperature sensor
Use an esp8266 to provide temperature data to a web page.


Discussions
Become a Hackaday.io Member
Create an account to leave a comment. Already have an account? Log In.
This was just one way to mount the device, SInce I wanted to have it in a dusty enviornmnet (stable) I choose to keep it enclosed. I am seeing a slight temp boost when I close up the box. Looks like it a pretty even 8 deg offset, so I might just add an offset variable to compensate. If your not worried about dust then you can move the DHT11 outside the case or come up with a case that has vents.
Are you sure? yes | no
I have not tested the battery from full charge to empty, but have had it up and running at least 3 days. Right now I am testing a small solar panel to keep the batter charged during the day. The unit is located out in my stable.
Are you sure? yes | no
Very interesting ! Thanks a lot for all these instructions ! How long roughly lasts the 18650 battery of your setup ?
Are you sure? yes | no
I don't see any vents in the box although the last picture is not se clear. In my experience some ventilation is needed to ensure a proper temperature reading. Maybe you can drill some holes in a nice pattern?
Are you sure? yes | no