Index
How to build some things from (almost) nothing
A collection of tips and info about making on a budget. Ideas welcome!
A collection of tips and info about making on a budget. Ideas welcome!
To make the experience fit your profile, pick a username and tell us what interests you.
We found and based on your interests.
If you want to get into electronics, one great thing to have is some modules/sensors lying around for fast prototyping. You can buy cheap 'kits' of sensors (Search '37 sensors arduino' on banggood or aliexpress) with tilt, touch, laser, joystick and so on. A good write-up of the common ones can be found here: https://tkkrlab.nl/wiki/Arduino_37_sensors
My loving brother bought me a kit - here's my first useful hack with it as an example of how easy this sort of thing is. I was reminded why so many people choose arduino for prototyping - this whole project took about half an hour. Sure, it's not energy efficient or as cheap as it would otherwise be, but I'll re-use all the components and I didn't even have to solder a single wire.
The goal was to make a box that would play a melody and blink some lights whenever someone recycled a plastic bottle. I thought of having the bottle break a beam, or activate a vibration sensor when it landed, but I decided to go with one of the little mercury tilt switches.
Read more »Inspired by #MobileVise and the scrapvice in #Misc. spur-of-the-moment projects, I decided to make a simple version of the wonderful #Stickvise - low profile soldering vise by @Alex Rich.

Parts:
One 4x70mm machine screw with nut, One small spring from a printer (any spring that fits around the screw) and a scrap piece of wood.
I drilled a 4.2mm hole through both pieces of wood at the same time to keep things aligned. I used a saw to make a groove just above the hole on both sides to give the PCB somewhere to click in. The picture pretty much says it all.
This is a pretty useful kind of vice. You can play with different ideas (eg having two threaded rods or screws, one at either end, to clamp something in the middle with a bit more force). Or you could make a more conventional C clamp with a few extra pieces of wood. The spring means you can easily clip something in and out, but you can remove it if you want more brute force clamping power.
To build stuff, you need stuff! While you could just go and buy what you need, not all of us have the $$$ and besides, you learn more by using what you can get sometimes.
One of my favourite sources for parts is old printers and scanners. The newer they are, the less interesting stuff can be easily had since there has been a shift from printers with several dedicated boards (eg one motor controller board, power supply, processing, interface etc) and a few stepper motors to just one integrated board and a DC motor or two. But even new printers have some useful stuff in them. Here are some of the useful things you can look out for, as well as just pictures from the latest laser printer I took apart:

Stepper motors - by far the most useful parts for me at least, these can be controlled by your computer or arduino or whatever to rotate in small increments. You can find various sizes and strengths, so google around to find the pinouts and stats:
Power supplies. If you're lucky, the printer will have a separate board outputting something like +24V, GND, +5V and possible +12V or something. These are nice for running any motors you scavenge.
DC motors. Some printers use a DC motor and an optical encoder for positional feedback. You can try your hand at working with these for precise control, but personally I just rip the motors out and use them for other things. They are generally quite high torque and decently fast...

Brushless motors. These are super hard to drive, BUT there is usually a motor controller chip right next to them. Google the part number and you can figure out a +V, GND, and GO_AS_FAST_AS_YOU_CAN pin :D These are quite often used to spin the mirror in the laser assemblies of laser printers, but beefier ones are also used to push the paper through in some printers. Here's one with a square mirror Note the piece of paper I keep with it so I don't have to keep looking up the pinout:
Strait rods and slides. If you're planning any sort of mill/3d orinter/laser cutter/xy thingee, these are super useful.
Screws, springs and gears. A lot of printers only use two or three different screws, so they are a good source of parts if you need a lot of the same thing. Chuck the springs and smaller pieces into a jar - they will come in handy when you least expect (see if you can spot one in #Scanning EIT Imaging System (SEITIS)).
Little solenoid/clutch things. Apply a current and the little lever moves and potentially stops a gear from spinning.
Photo-interrupters. Most printers have at least four, with some larger ones having closer to 20! These little things are easy to interface with, and can be set up to triger an event when the beam is broken.
Photo-interrupters, an electric clutch thing and some assorted screws:

A fusor module from laser printers is basically a heating element. Some a quartz crystals, others are basically a long thin ceramic resistor. Don't burn yourself...
Metal and plastic stock. Especially if you're just starting to build a collection of materials, some nice flat pieces of metal with lots of threaded holes and attachment points are useful building platforms. Don't bother keeping everything, but grab some of the nicer looking pieces of metal and plastic to leave in a box until you need them.
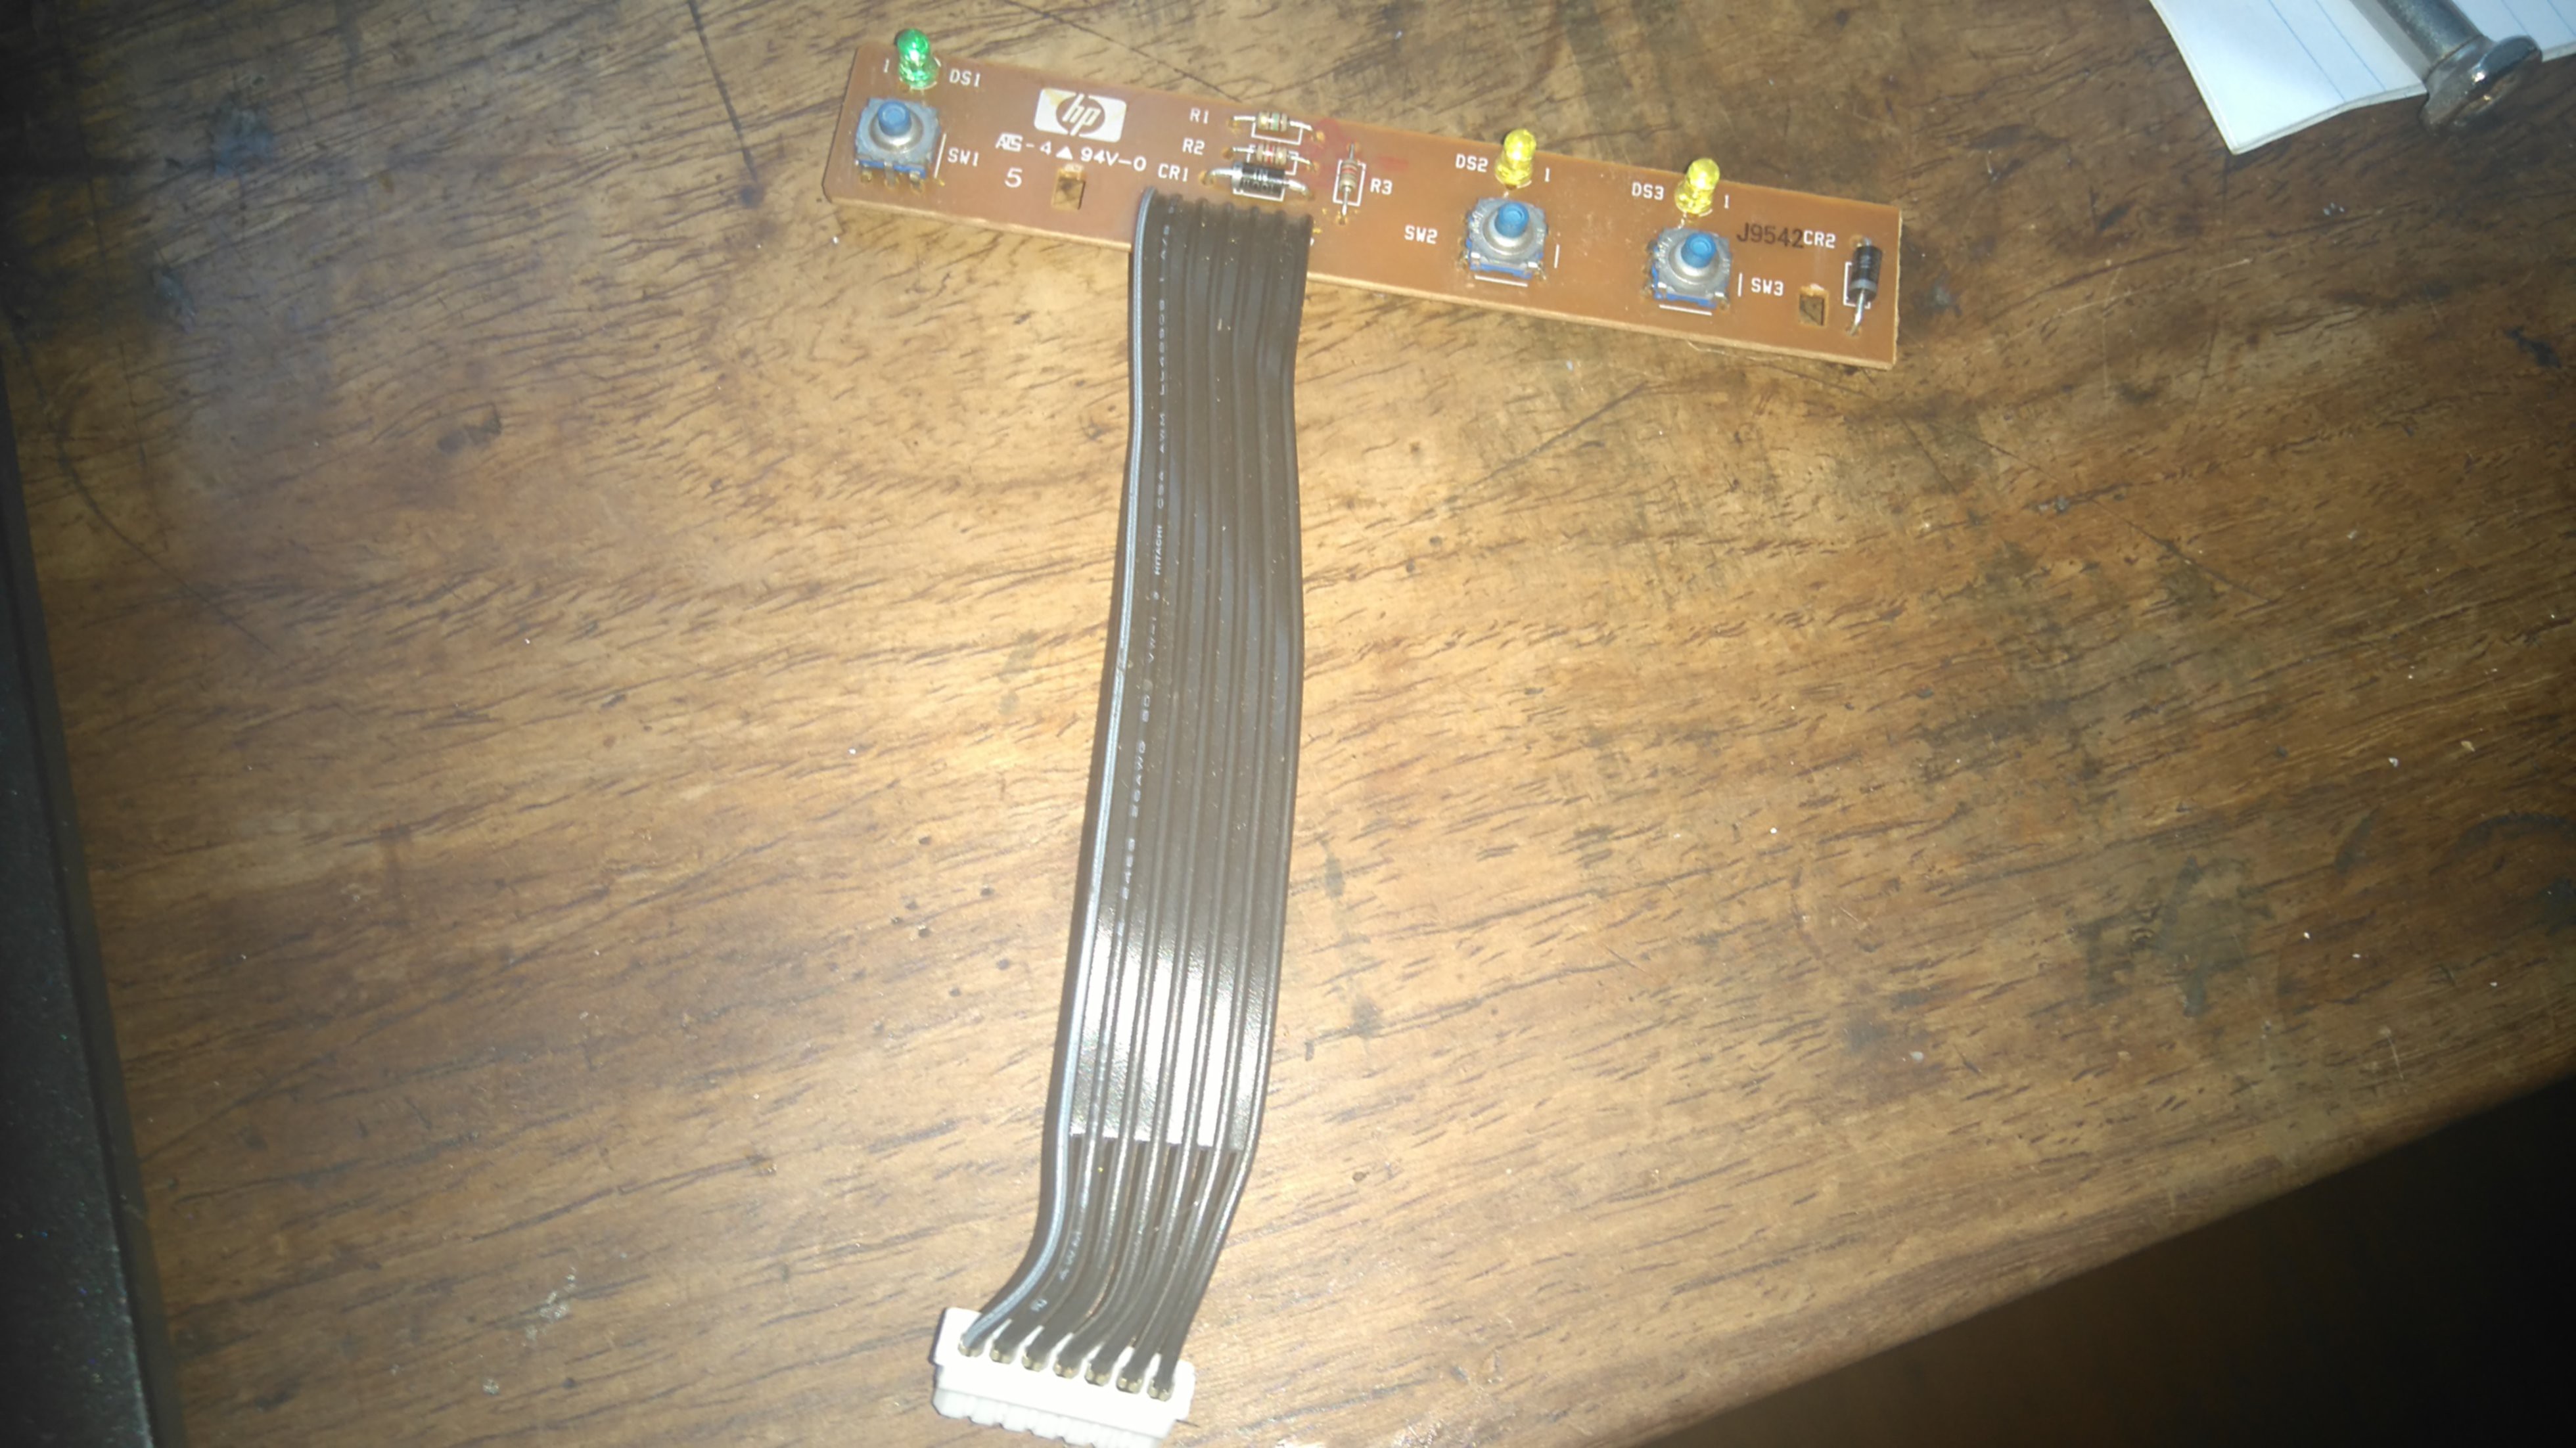
Small PCBs with a few buttons and LEDs. Need to add an interface to something but can't be bothered to breadboard some buttons? These are easy to plug in and go, although not many newer printers have one. :

On to the controversial topic of which tools are a *must* for someone starting out. Obviously, everyone has different ideas and the necessities will change depending on what type of projects you're working on, but here are my recommendations and thoughts.
1. The Essentials
Here we come to the meaty question of what exactly I mean by ‘Almost Nothing’. While you could start from a lump of iron ore and a loincloth, the reality is that beginning with a few simple tools will make life easier. Here are some good ones to start with:
I'm also going to be assuming access to e-waste, some basic timber, string, wire etc. You can scavenge most of this stuff by keeping an eye out. I’ll try to use a few different components as possible, and have standard ways of doing things. For example, I have decided to use 3mm machine screws for as many things as possible, simply because I have a 3.2mm drill bit or three for my dremel and it's easy to adjust tension etc by adding a spring washer and a nut to the bolt. For larger stuff i also have 4 and 6mm ones, and I have lots of 3mm screws of assorted lengths from some printers I took apart.
If you're mainly going to be doing electronics, you could ditch some of the above and last quite some time. But you will definitely also need:
This is not a definitive list by any stretch of the imagination. But everything listed above other than the soldering stuff should come in around $30 depending on how you get things. To be honest, you can start making things with hacksaw blades, box cutters, some nails and a screwdriver for <$5, and most of us should have hammers and things lying around or be able to steal hem from dads/uncles/grandparents who were handy around the house.
2. Nice to
have
These tools are nice, and generally speed things up a lot, so are often worth it in terms of time they save
A bag of 10mm (or 6 inch) nails, a hammer and a file or two (or a grindstone, or some rough concrete, or a rock) can be used to make some pretty useful things in a pinch. Without further ado, here are some ideas:
1) Leave the nail exactly as it is - useful for banging quick holes in things). Can also round the end with a file to make nice round holes.
2) Flatten the end, sharpen it to make a chisel. Useful for cutting thin metal (like a tin). Lots of info and diagrams at nzdl - chisel
3) A drill, also described at the nzdl link.
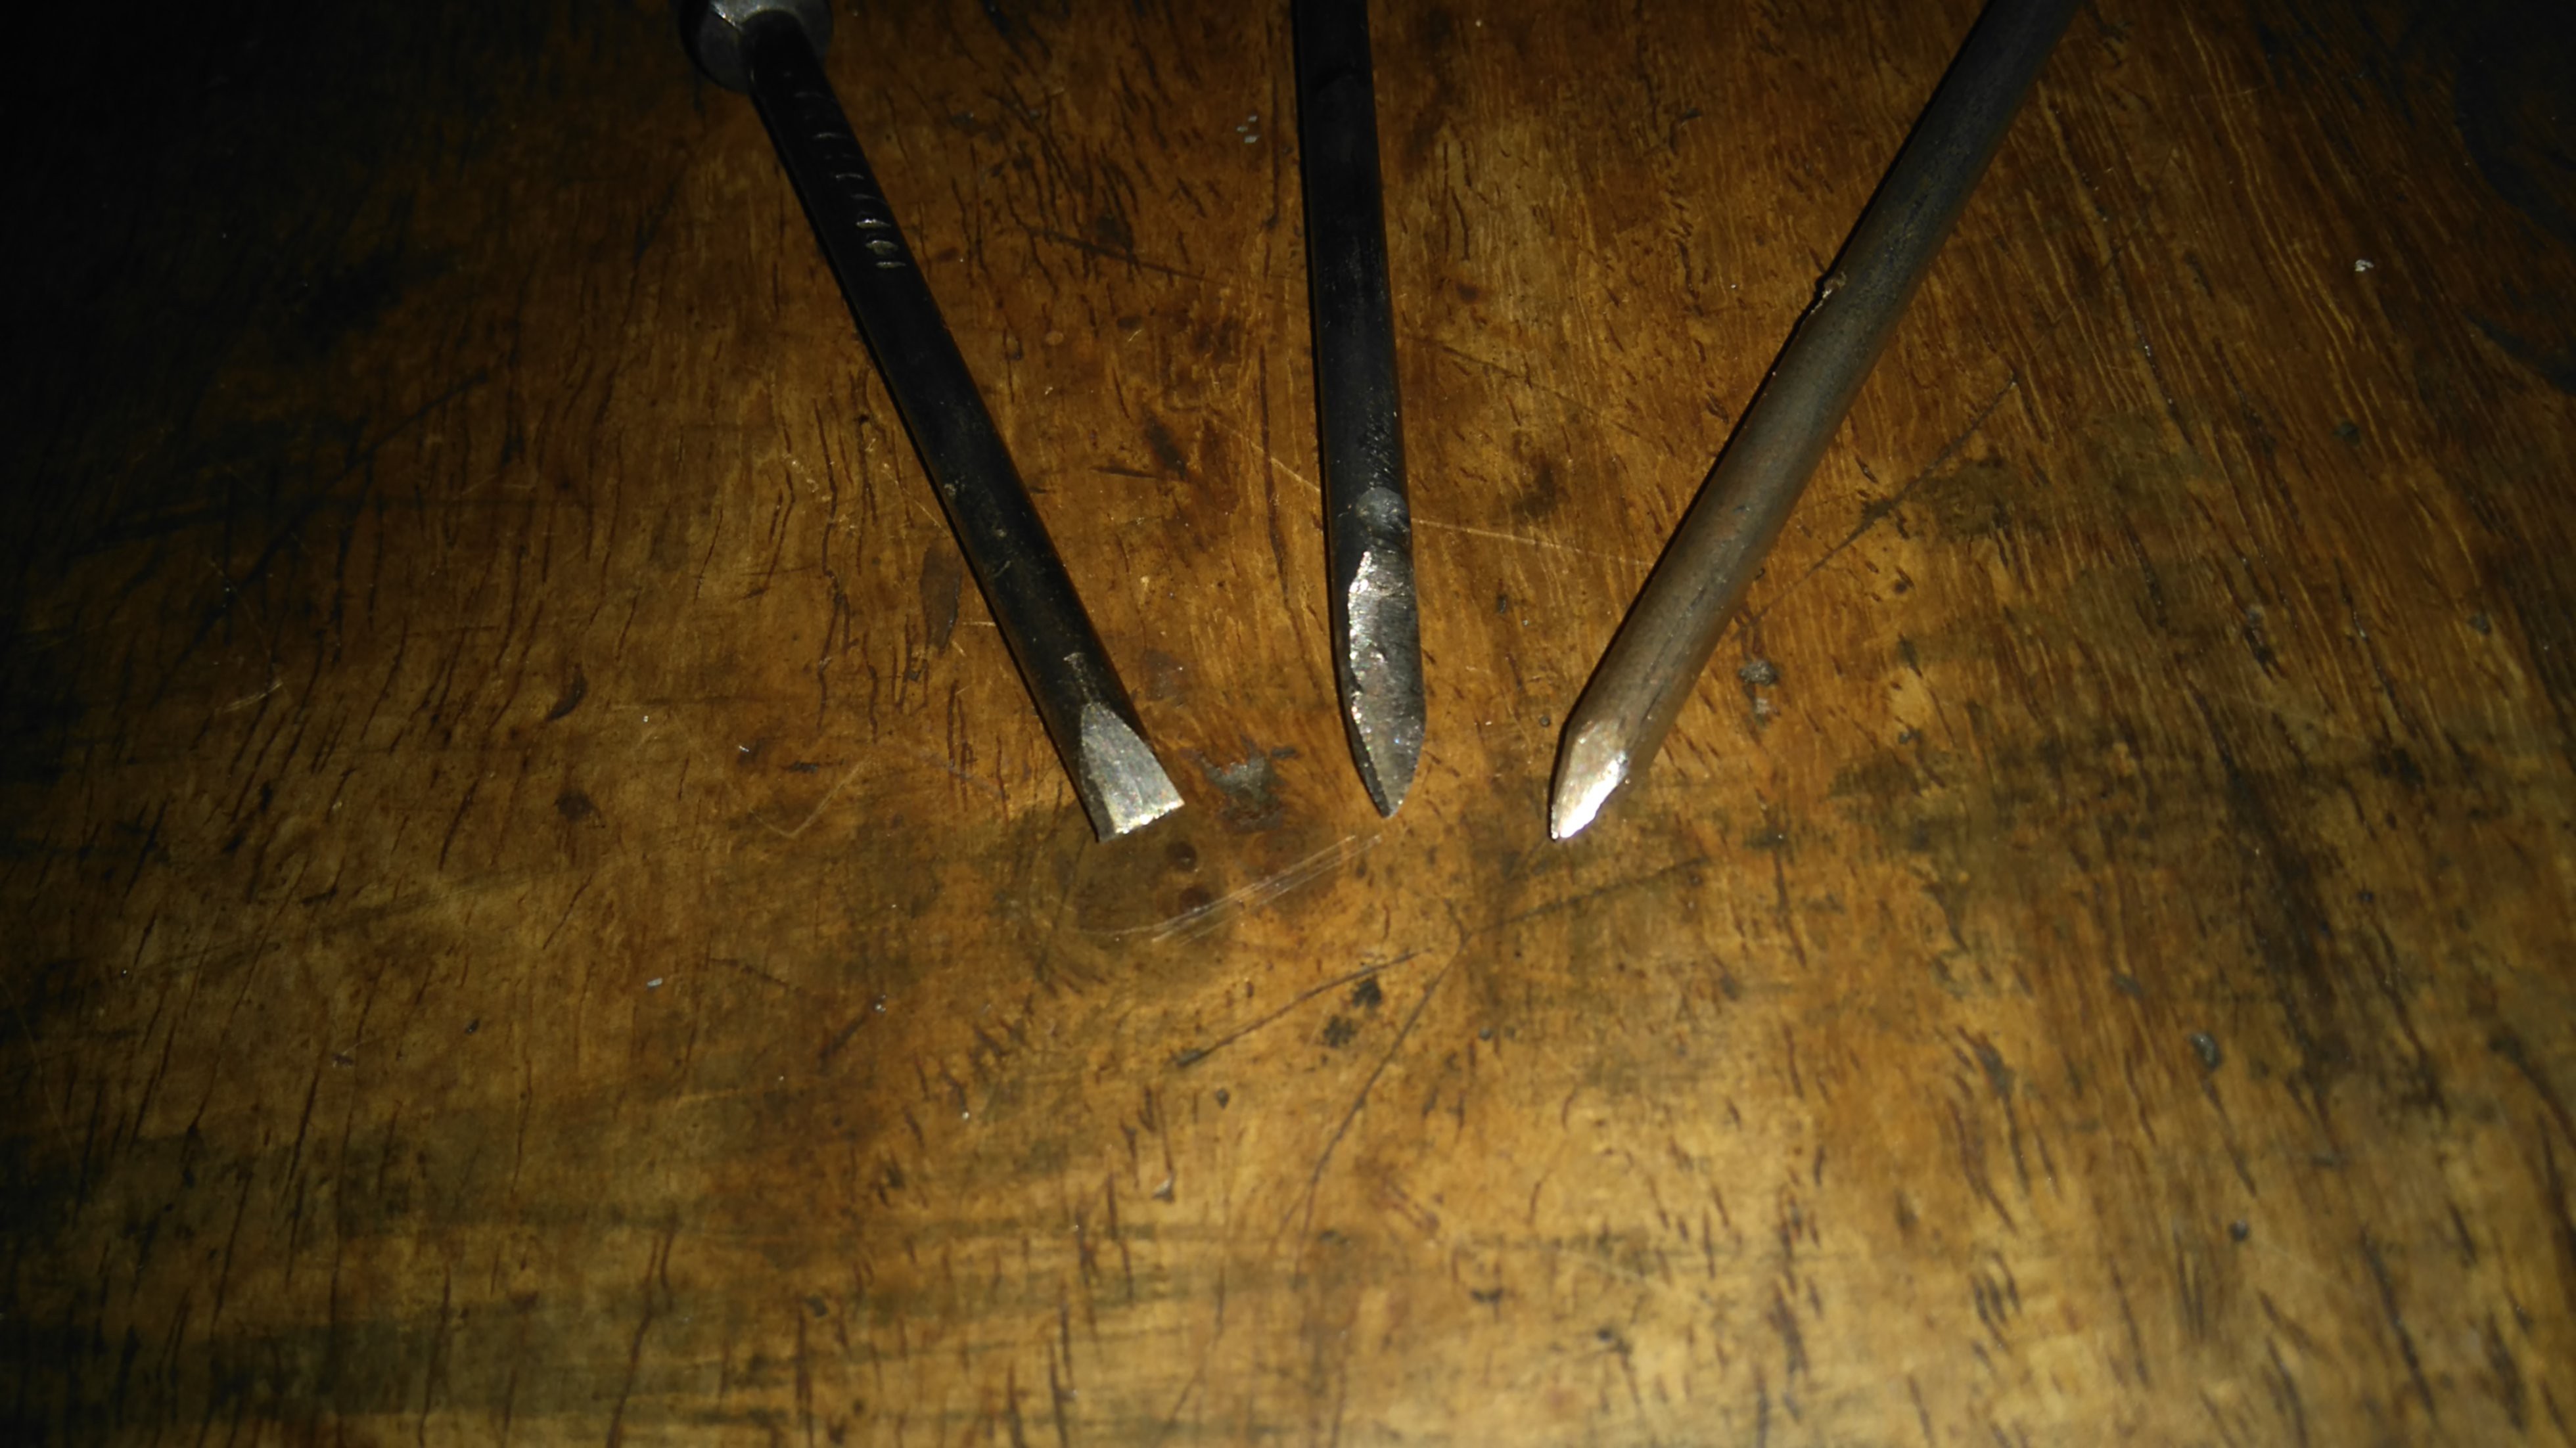
4) Flat and Phillips screwdrivers. Flat is simple - file it to a flat point! But Phillips? Well, ok, 2D phillips... but it still works! Basically make a flat triangle at the end...
5) Various other pokers and pointy things as the need arises - the whole point is that you make what you need. Filing away 5 or 6 sides and adding a right angle bend for example could make a crude allen key, etc.
Notes:
Here are the ones I have made that are lying within reach right now (I made them recently away from home):
Create an account to leave a comment. Already have an account? Log In.
Become a member to follow this project and never miss any updates
 David Tucker

 T. B. Trzepacz
 matthewkleinmann