Close
0%
0%

"Ultimate" Lora Gateway Backplane

An "ultimate" DIY LoRa Gateway Backplane

Similar projects worth following
LoRa Gateways are coming down in cost however many of the DIY Solutions aren't the best to implement in public locations.

My solution is to try and build a better, more integrated LoRa Gateway Backplane PCB which can support either the ic880a or RAK831 most commonly used in DIY Gateways, Passive POE to allow one wire for ethernet and power all in a under 10x10CM Size with a total cost of less than £150 for a fully working LoRa Gateway

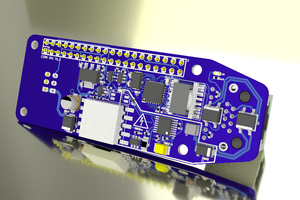
This project is designed to be a new backplane PCB for LoRa Gateway concentrators with my ideal specs.

Specifications

  • Headers for both the ic880a and RAK831
    • Allows for people who have both boards to use the same backplane pcbs
    • Theoretically identical software can be ran on the host with no changes required between the two
  • Passive POE
    • Allows for power to be carried over ethernet line without expensive injectors
    • 9-12V Recommended, allows for voltage drop over cable.
  • Linear Regulators
    • An odd choice, however produces less noise than a switching regulator may.
    • Heat generated can be ideal for cold conditions when placed outside to prevent the components getting damaged.
  • Ethernet Connection
    • Allows for a wired connection, better suited for TTN due to lower latency.
    • Wi-fi also can be used instead
  • Small Size
    • 8x8.5CM Size allows it to fit in most small boxes
    • Built in passive POE eliminates the need for POE Injectors in boxes.
    • More Compact stack

  • Version 2 is complete - Final Tweaks & Crowdfunder

    Ryan Walmsley06/10/2018 at 11:30 0 comments

    I've finished version 2 of my LoRa Backplane and with quite a lot of interest on twitter and a bit in the TTN Slack I thought I'd post about it here.

    Its finally completed, here's a final list of features and functions.

    Features

    • Passive POE - The board can be powered either using the MicroUSB Port on the Raspberry Pi Zero or primarily using a Passive POE Injector with no adaptors needed on the gateway. The board has a switching power supply with an approximate 90% effeciency and can accept between 9-12V over POE.
    • Wired or Wireless - Connect to the internet using either the Wired Ethernet Connection with POE or use the Wireless connection on the Zero W
    • Reliable - The board features mechanical reliability in the soldered headers & mounting holes for the Raspberry Pi Zero & RAK831. Furthermore with the monitoring functions and reliability of Raspberry Pi there should be minimal downtime.
    • Monitoring - The board has a MCU running on it at the same time that checks the Raspberry Pi is operational and if not reboots it, it also allows for a WOL packet to be sent to the board and have it reset the Raspberry Pi.
    • No soldering required! - The board will arrive pre-soldered and with a Zero WH & Radio Module will be as simple as plugging the three boards into each other.
    • Compact - The total size is 8.5x8x8CM including the Raspberry Pi Zero and Radio Module.
    • Supports both RAK & IMST Boards - This backplane supports both the RAK831 & IMST ic880a Radio Concentrators, allowing you to have a mix of gateways using both boards, with no software configuration changes required.
    • Quick to get going  - As well as the fact no soldering is required, I'll be compiling a SD Card image which will allow you to write the OS & Packet Forwarding software to the SD Card. Change the configuration file on the SD Card using your computer. Plug it into the Pi and go!

    If you are interested in potentially buying one:
    If you're interested in buying one, this may launch on Indiegogo because of the risks involved. However to begin with you can sign up to the emailing list at https://www.indiegogo.com/projects/ultimate-lora-gateway-backplane/coming_soon , you'll then get emailed if the project launches. The current estimated price is £30 / 35 EUR / 40USD plus postage (5-10). 
    You'll have to buy a Raspberry Pi and RAK831 or ic880a-SPI elsewhere.

    If the email list doesn't get enough interest then the campaign won't launch., Unless you opt into the indiegogo email only I get your email address of which it'll only be used to email you to notify you if it launches and nothing else.


    Disclaimer: Raspberry Pi is a Trademark of the Raspberry Pi Foundation, While designed for use with a Raspberry Pi & either IMST ic880a or RAK Wireless RAK831 there is no affiliation or endosment by the companies.

  • Testing Update & Modifcations Planned

    Ryan Walmsley05/01/2018 at 13:30 0 comments

    Well it's been one month since I got my Backplane board so its time for an update.

    How well has it lasted?

    The Answer is, great! So far the gateway has been running for about a month with the downtime only being from where I've been tweaking the software or power cuts.

    Otherwise I have two gateways running using this board, one RAK831 and the other ic880a and both are working ideal.

    Modifications Planned

    Currently I have the following modifications planned:

    • Add USB Ports - I'm planning to break out 2 of the USB Ports from the Nano Pi Duo
    • Add Barrel Jack - 
    • Move Mounting Hole
    • Modify Silkscreen
    • Still undecided - Change to use a switching regulator

    And that's it for now!

  • OS & Power Supply Tweaks

    Ryan Walmsley04/16/2018 at 10:57 0 comments

    Just a quick update,

    Linear Regulator

    I looked at changing to a switch mode but after running some thermal simulations using the tools provided by the maker of some of the switching regulators I looked at predicted high temperatures. So for cost and convenience I'm keeping with the linear but am decreasing the input voltage from 9-12V to 6-9V. So far with 3 of the 4 cores disabled and radio enabled with a 6V PSU the SOC Doesn't read above 50 Degrees under stress. A great improvement.

    Kersing Packet Forwarder

    I still haven't been able to figure out why the packet forwarder is segfaulting when it goes to do a transmission, However I have now had the parts to build my second one so I can use that as a development one for now. Currently I have been using Ubuntu 16.04 with 4.11

    I'm going to try with Debian Stretch which is the same OS that the RPi uses and we'll see if that works.

  • Improving the gateway - Part 1, Software, OS & HW Tweaks

    Ryan Walmsley04/13/2018 at 21:05 0 comments

    Following up from the previous blogging here's an update on improving the gateway.

    I've been wanting to do a few tweaks to the software running on the SBC so here's a brief update.

    Packet Forwarder

    Primarily I've been trying to work on getting the mp_pkt_fwd packet forwarder working however keep hitting an issue with it segfaulting, I'm working on it still but we'll leave this part at that.

    New OS In Use

    Originally I was using the Ubuntu Xenial distribution released by Friendlyarm, however without running it as classic confinements the snaps wouldn't install as recommended. I then tried normal armbian and had a similar issue where it didn't want to mount the snap as it didn't have squashfs enabled default in the kernel

    To solve this I followed armbian's guide to compile the OS in a virtualbox with squashFS enabled in the kernel and it then allowed me to install the snap from the snap repositories :D This means that to install on another gateway it'll be as simple as writing the SD Card, installing snap and running snap install ulti-lora-backplane. No compiling or such required.

    SBC Tweaking

    As well as the OS I've been playing around with some of the bits of the SBC, specifically as a majority of gateways are built with Raspberry Pi Zero's (And mine was before this) the Allwinner H2+ chip is a bit overkill with its quad cores clocked at up to 1.2Ghz.

    After doing some tests in sysbench a single threaded CPU bench on average runs quicker than a Pi Zero does based on some reading on the Armbian Forums, this is I suspect from where the entire OS is compiled for ArmV7 and not ArmV6 which provides some optimisation and on top of this as it does run at up to 1.2Ghz this is also an advantage over the 1Ghz Pi Zero.

    So in testing by running a few commands (namely echoing 0 to the online to CPU1-3 in /sys/devices/system/cpu/) a 4 threaded sysbench with all 4 cores raised to about 70 Degrees and Armbian's internal throttling had also kicked in. Disabling cores 1-3 obviously meant the test took longer but didn't peak above around 46 degrees with no throttling. The normal running temperature also decreased by a few degrees! Excellent.

    I haven't measured the power difference yet because of not being able to measure it yet. However the temperature difference is great.

    Next on my list is to see how to disable the cores as default on my SD Card image.


    To Do Next

    Hardware Tweaks

    The hardware is almost at a final completed stage, however there's two tweaks left. A minor change in the position of the mounting hole for the RAK831 and..

    The regulator, as it does seem to be the biggest producer of heat I have decided to re-design to use a switching regulator as even with the lower power going into the board and SBC tweaks it'd be better to have a switching reg so I can use 12V instead of 7.5V as I have a lot more 12V PSUs spare.

    I'm currently looking at using either the ANP1509 or similar.

    I may also put a I2C EEPROM on board to store a few bits of data.

    Security

    Another step I'll be working on is security of the gateway and specifically try and improve the OS. Specifically a few basic tweaks including on first boot not just requiring the user to change the root account's password but make it so after the user account is created that it'll disable root account. Change the SSH Server port and a few more tweaks.

  • Testing - 1 Week On

    Ryan Walmsley04/13/2018 at 19:03 0 comments

    This was originally published on my blog at 

    https://ryanteck.net/ulti-lora-backplane-1-week-on/

    Future posts will continue to be made on here.

    Just a short blogpost following up on the Lora Backplane I designed.

    One of the main concerns was temperature. And while I didn't think it would be much of an issue because it has to be in a sealed box it was overheating to around 80 degrees.  However since changing the powersupply from 12v to 7.5 this has dropped dramatically to around 50 Degrees peak. Very acceptable :D

    Otherwise the gateway has been working perfect and more reliably than my original Pi Zero setup over Wi-Fi. 

    #Improvements still to do
    **Multi Packet Forwarder**
    I'm still trying to sort out to use the multi packet forwarder. Currently while I have been able to get it crashes with a segfault. I need to do some more debugging to solve this, originally when trying to compile some extra debugging stuff the gateway was crashing due to overheating so now the overheating problem is solved I should be able to debug it.

    **Installer script**
    Even while I've created a SNAP, I'll likely have to still create an installer bash script which will help speed up the installation process by automatically installing the snap, and then ask questions to automatically generate the configuration files for you.

    **More power improvements**
    To be honest, the Nano Pi is overkill. With it's 4 Cores running at around 1Ghz and 512MB Of ram, it's overspecced by far. The memory usage also rarely goes over 200MB.

    A quick sysbench of 10,000 primes on one thread took around 210 Seconds. Looking around online this is around the same (or a little bit faster) than a Pi Zero at 1Ghz too. However when we add multiple threads in it's only 57 Seconds.

    So when I get the parts for the second one I'll experiment with turning 2-3 cores off to see if the power saving is worth it. 

    Another thing I haven't turned off is the wi-fi adaptor as I'm not using it at all.

    #Some Questions that I've been asked
    A little FAQ

    **You've missed off the cost of the SD Card**
    Yes I have, this is partially deliberate as for this you don't need a big SD Card and I suspect most people that are into electronics of some kind will have an abundance of SD Cards. However if you add one one (Say £8) our total is still around £116 so within my original £110-120 bracket quoted.

    **Why did you not use [Insert SBC Name here]?**
    I looked at a lot of SBC Options before designing it, the main part I wanted was a single connector going into the box which had ethernet and power without having to use extra adaptors or connectors in the box.

    I could for example have used a Raspberry Pi B+/2/3/3 B+ / Orange Pi Zero / Orange Pi Plus with a POE Adaptor which takes the cable in and outputs a micro usb and ethernet cable. However I wanted it to be all on one board.

    I could have used one such as the Pi Zero however I'd have either have had to used SPI for ethernet (very slow) or wire up a USB Network controller (Pogo pin mechanical reliability in question). 

    I did originally plan to use an Onion Omega 2+ however had issues with the SPI Bus on it. The benefit of this would have been that it could use built in flash which the nano pi duo does not have however the SPI Bus not working correct was a major issue.

    As mentioned above it also doesn't need to be faster, for example I could have looked at using the 3B+ as this came out just a few days before I placed the order for the PCBs, However the initial cost of the Pi (£30) plus the much higher power consumption & heat generation didn't seem ideal.

    To make it clear, the main idea was to have one connector going into one board to provide power and ethernet, not to then have extra adaptors in a box.

    **What about Kersing's forwarder?**
    As mentioned above I'm half way there, just a few bugs in my compiling to sort out.

    **SD Cards are unreliable either because of the type of memory / socket they use**

    This is a bit...

    Read more »

  • My "Ultimate" Lora Gateway Backplane

    Ryan Walmsley04/13/2018 at 19:02 0 comments

    This update was originally published on my blog at

    https://ryanteck.net/my-ultimate-lora-gateway-backplane/

    #A DIY Solution I'd be happy to use as a stable alternative to a premade.

    I've been working on this project for about a month and a half now with changes along the way. If you follow me on twitter you'll have likely seen the progress I made. I've also been posting devleopment updates at https://hackaday.io/project/90405-ultimate-lora-gateway-backplane

    This post will be a mix of a summary / analysis of the current design.

    ##Designing the board


    I wanted to build a DIY Gateway solution which I'd be happy to put somewhere and leave. My current gateway is on the side of the garage but at the time I started developing this project I was planning to move it onto my roof. (Didn't happen due to another reason).

    However as I was planning this I wanted a more reliable solution.

    My design was to use a SBC of some kind, I wanted the SBC to have SPI and ideally some kind of built in networking. After lots of searching I found the Onion Omega 2, However due to some issues the SPI Bus just didn't work.

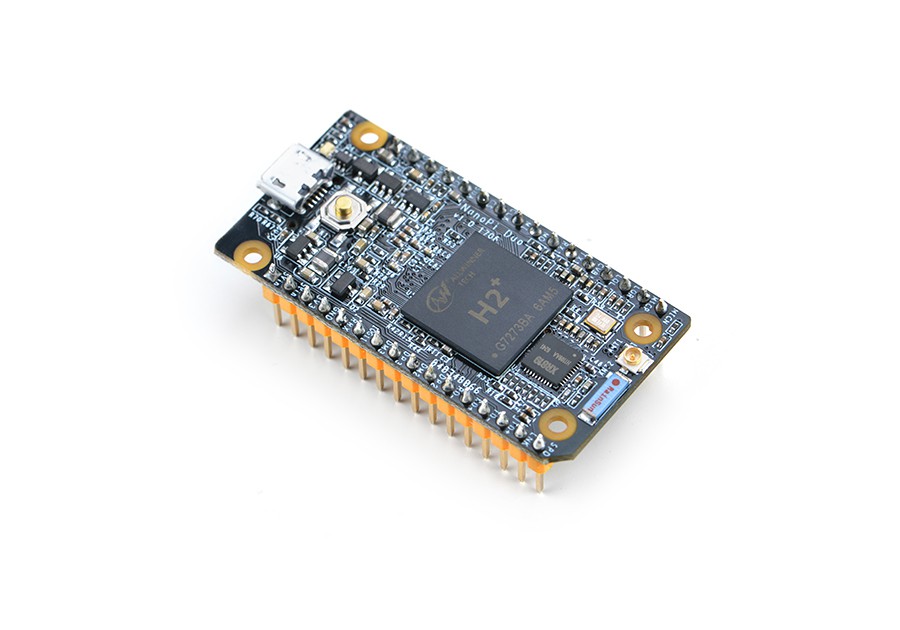
    I then did some more searching and found the Nano Pi Duo, a H2+ Based SBC (Like the Orange Pi Zero) however in a Breadboard format, with the ethernet pins broken out like the onion omega. Ideal! I also know the SPI works fine on these chips as I've used my OPi 0 for my gateway before. I did look into an RPi based solution, however a zero would have had to have had SPI Ethernet (Max 10Mbits vs 100Mbits) or USB (Complicated). And the 3 B+ was launched around the same time I completed the other design, (And also costs more).

    The next main consideration was power, I wanted to use POE of some kind. Originally I was planning on using a passive 5V POE method however this could have caused issues with voltage loss over long lengths of cable. So I decided on using between 9-12V with a onboard regulator.

    This then lead onto comparing a linear vs a switching regulator. I chose the linear for a couple of reasons, being less noisy in theory than a switching, only being a couple of parts vs 5-10 components and I actually wanted some heat. One concern was during winter that it wasn't hot enough to keep itself warm enough with the previous solution I was using. Where as with heat being a side effect of linear regulators it could be used to it's benefit.

    Finally I wanted this board to support both the main two DIY Gateway concentrators, these are the IMST IC880a and RAK831. This is for a simple reason of by having both supported by one board you can mix and match when you make more. For example I'll have one ic880a and one RAK831 gateway with both the rest of the hardware & software being identical.

    ##Making the board
    With all of my requirements set I designed the board in Eagle 7.7 and sent off to AllPCB to get fabbed up on Saturday. And they arrived on Wednesday! 

    I then started work on soldering them up, I did all of the SMT Components by hand and then just re-flowed them in my toaster oven to ensure a good solder. Followed by soldering all of the through header parts and it was complete!

    ![IMG_20180328_215335034--1-](https://ryanteck.net

    /content/images/2018/03/IMG_20180328_215335034--1-.jpg)

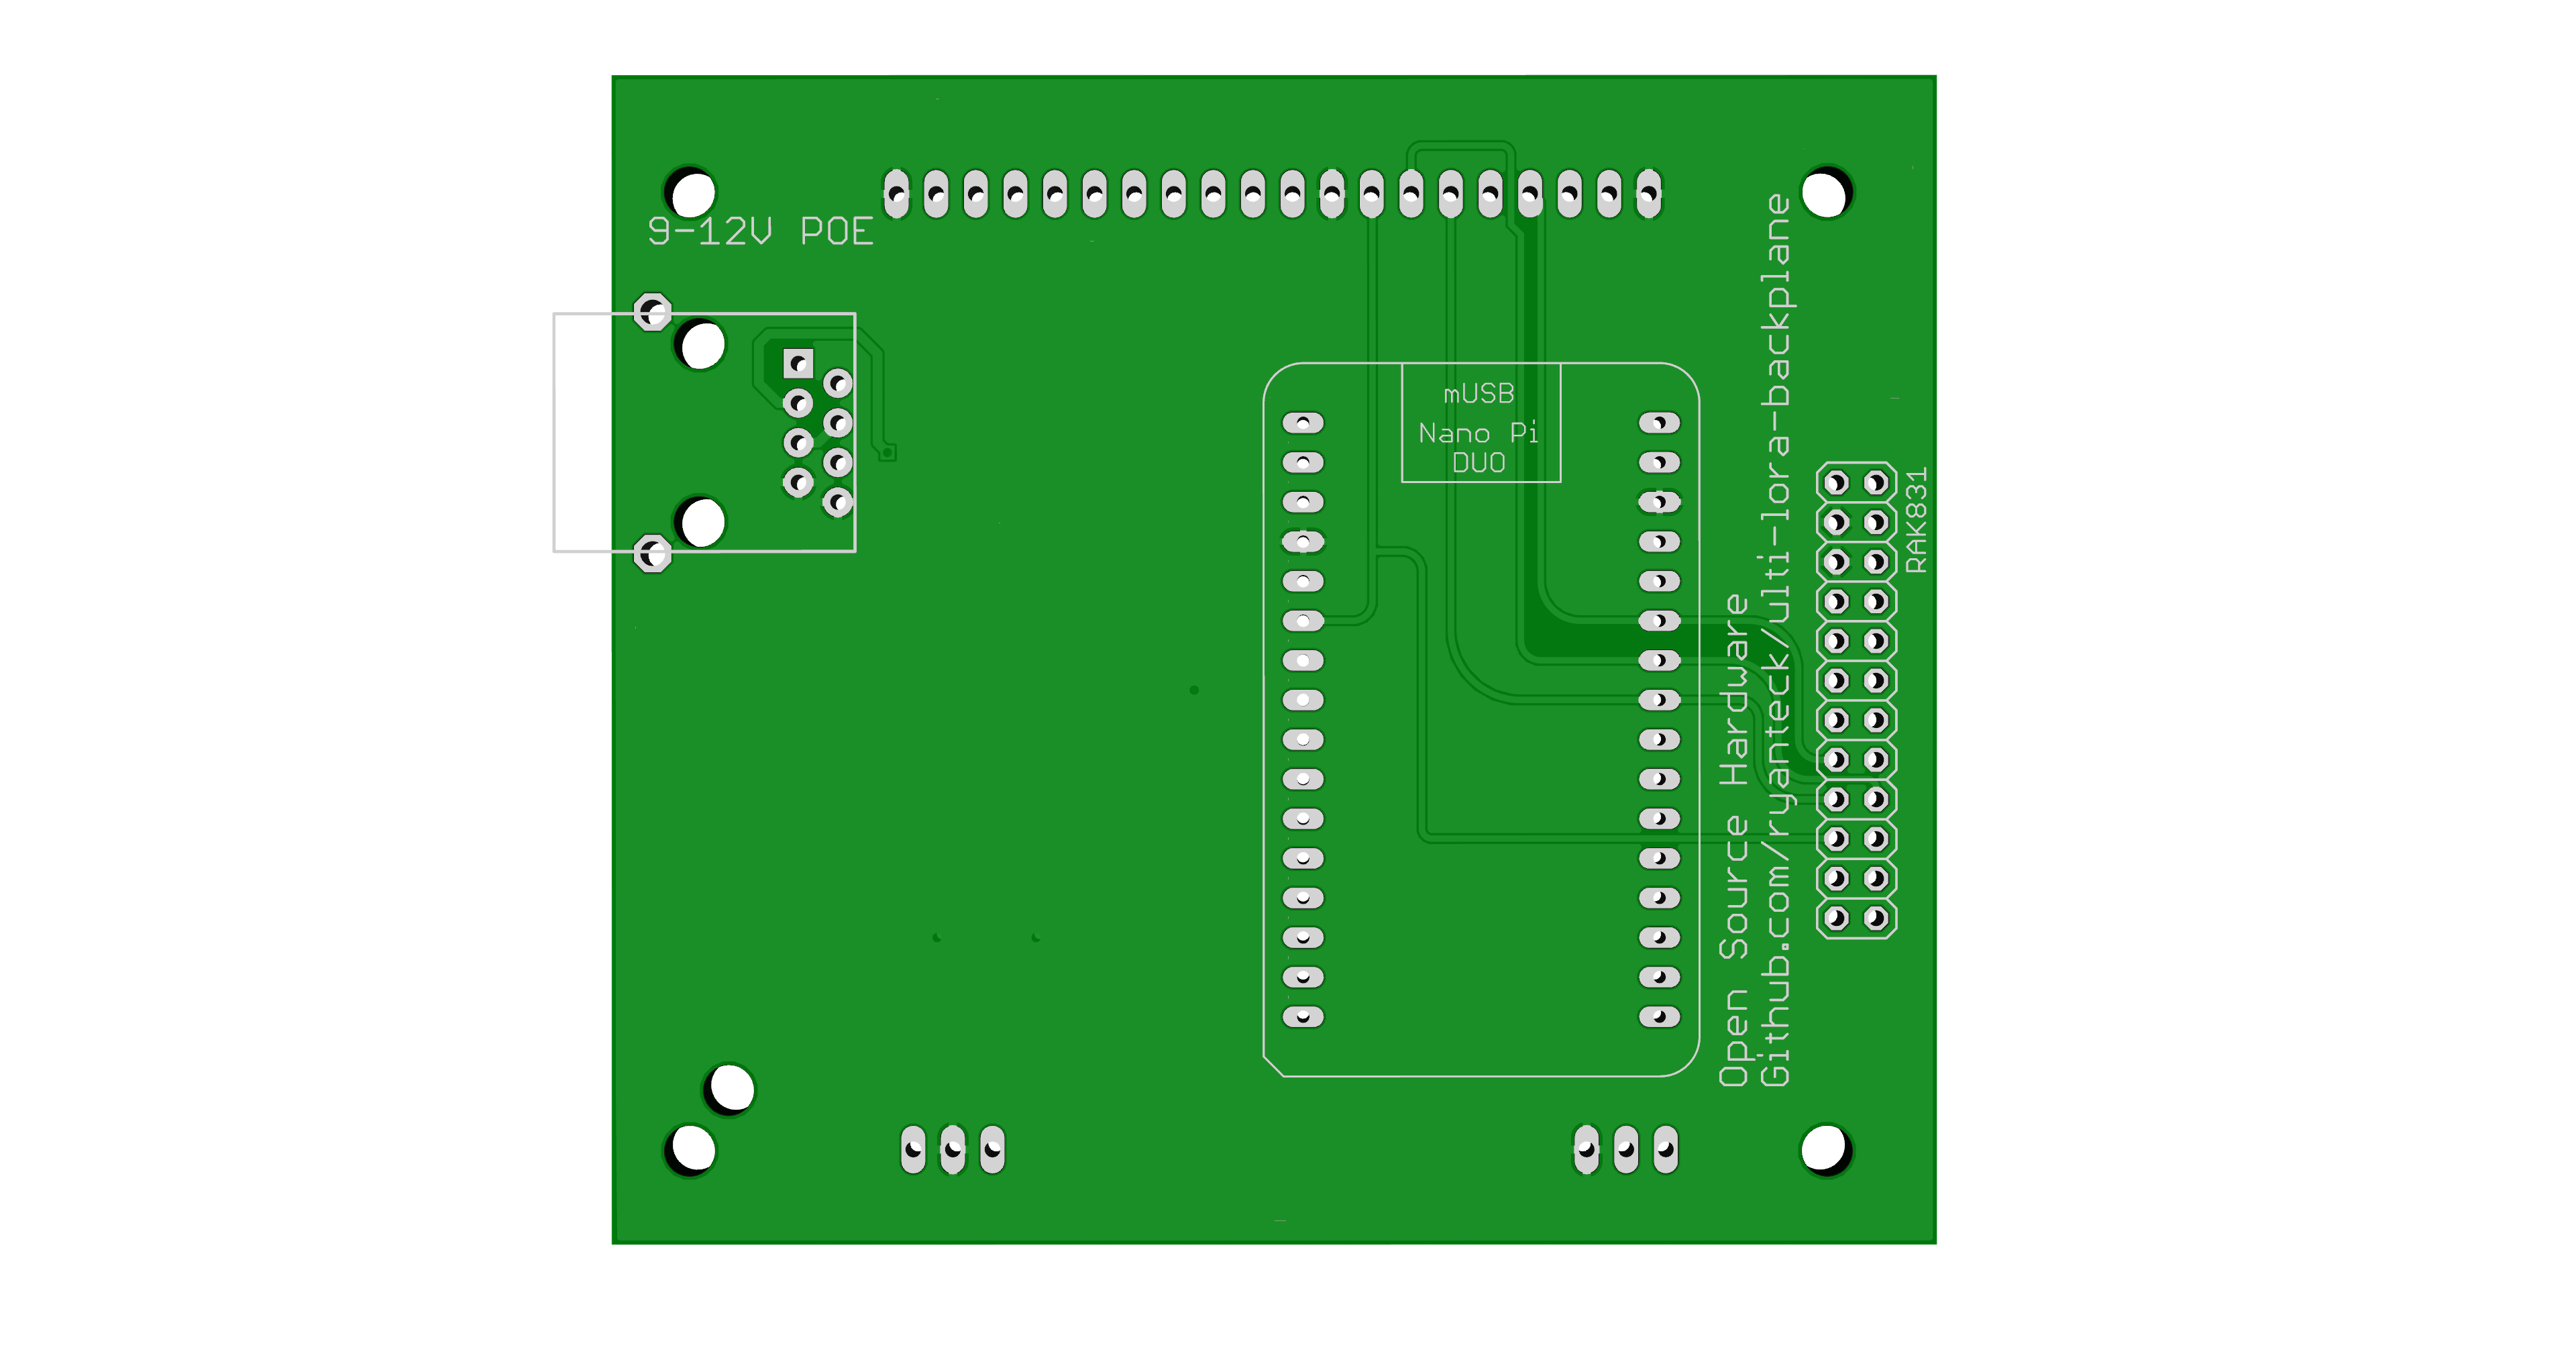
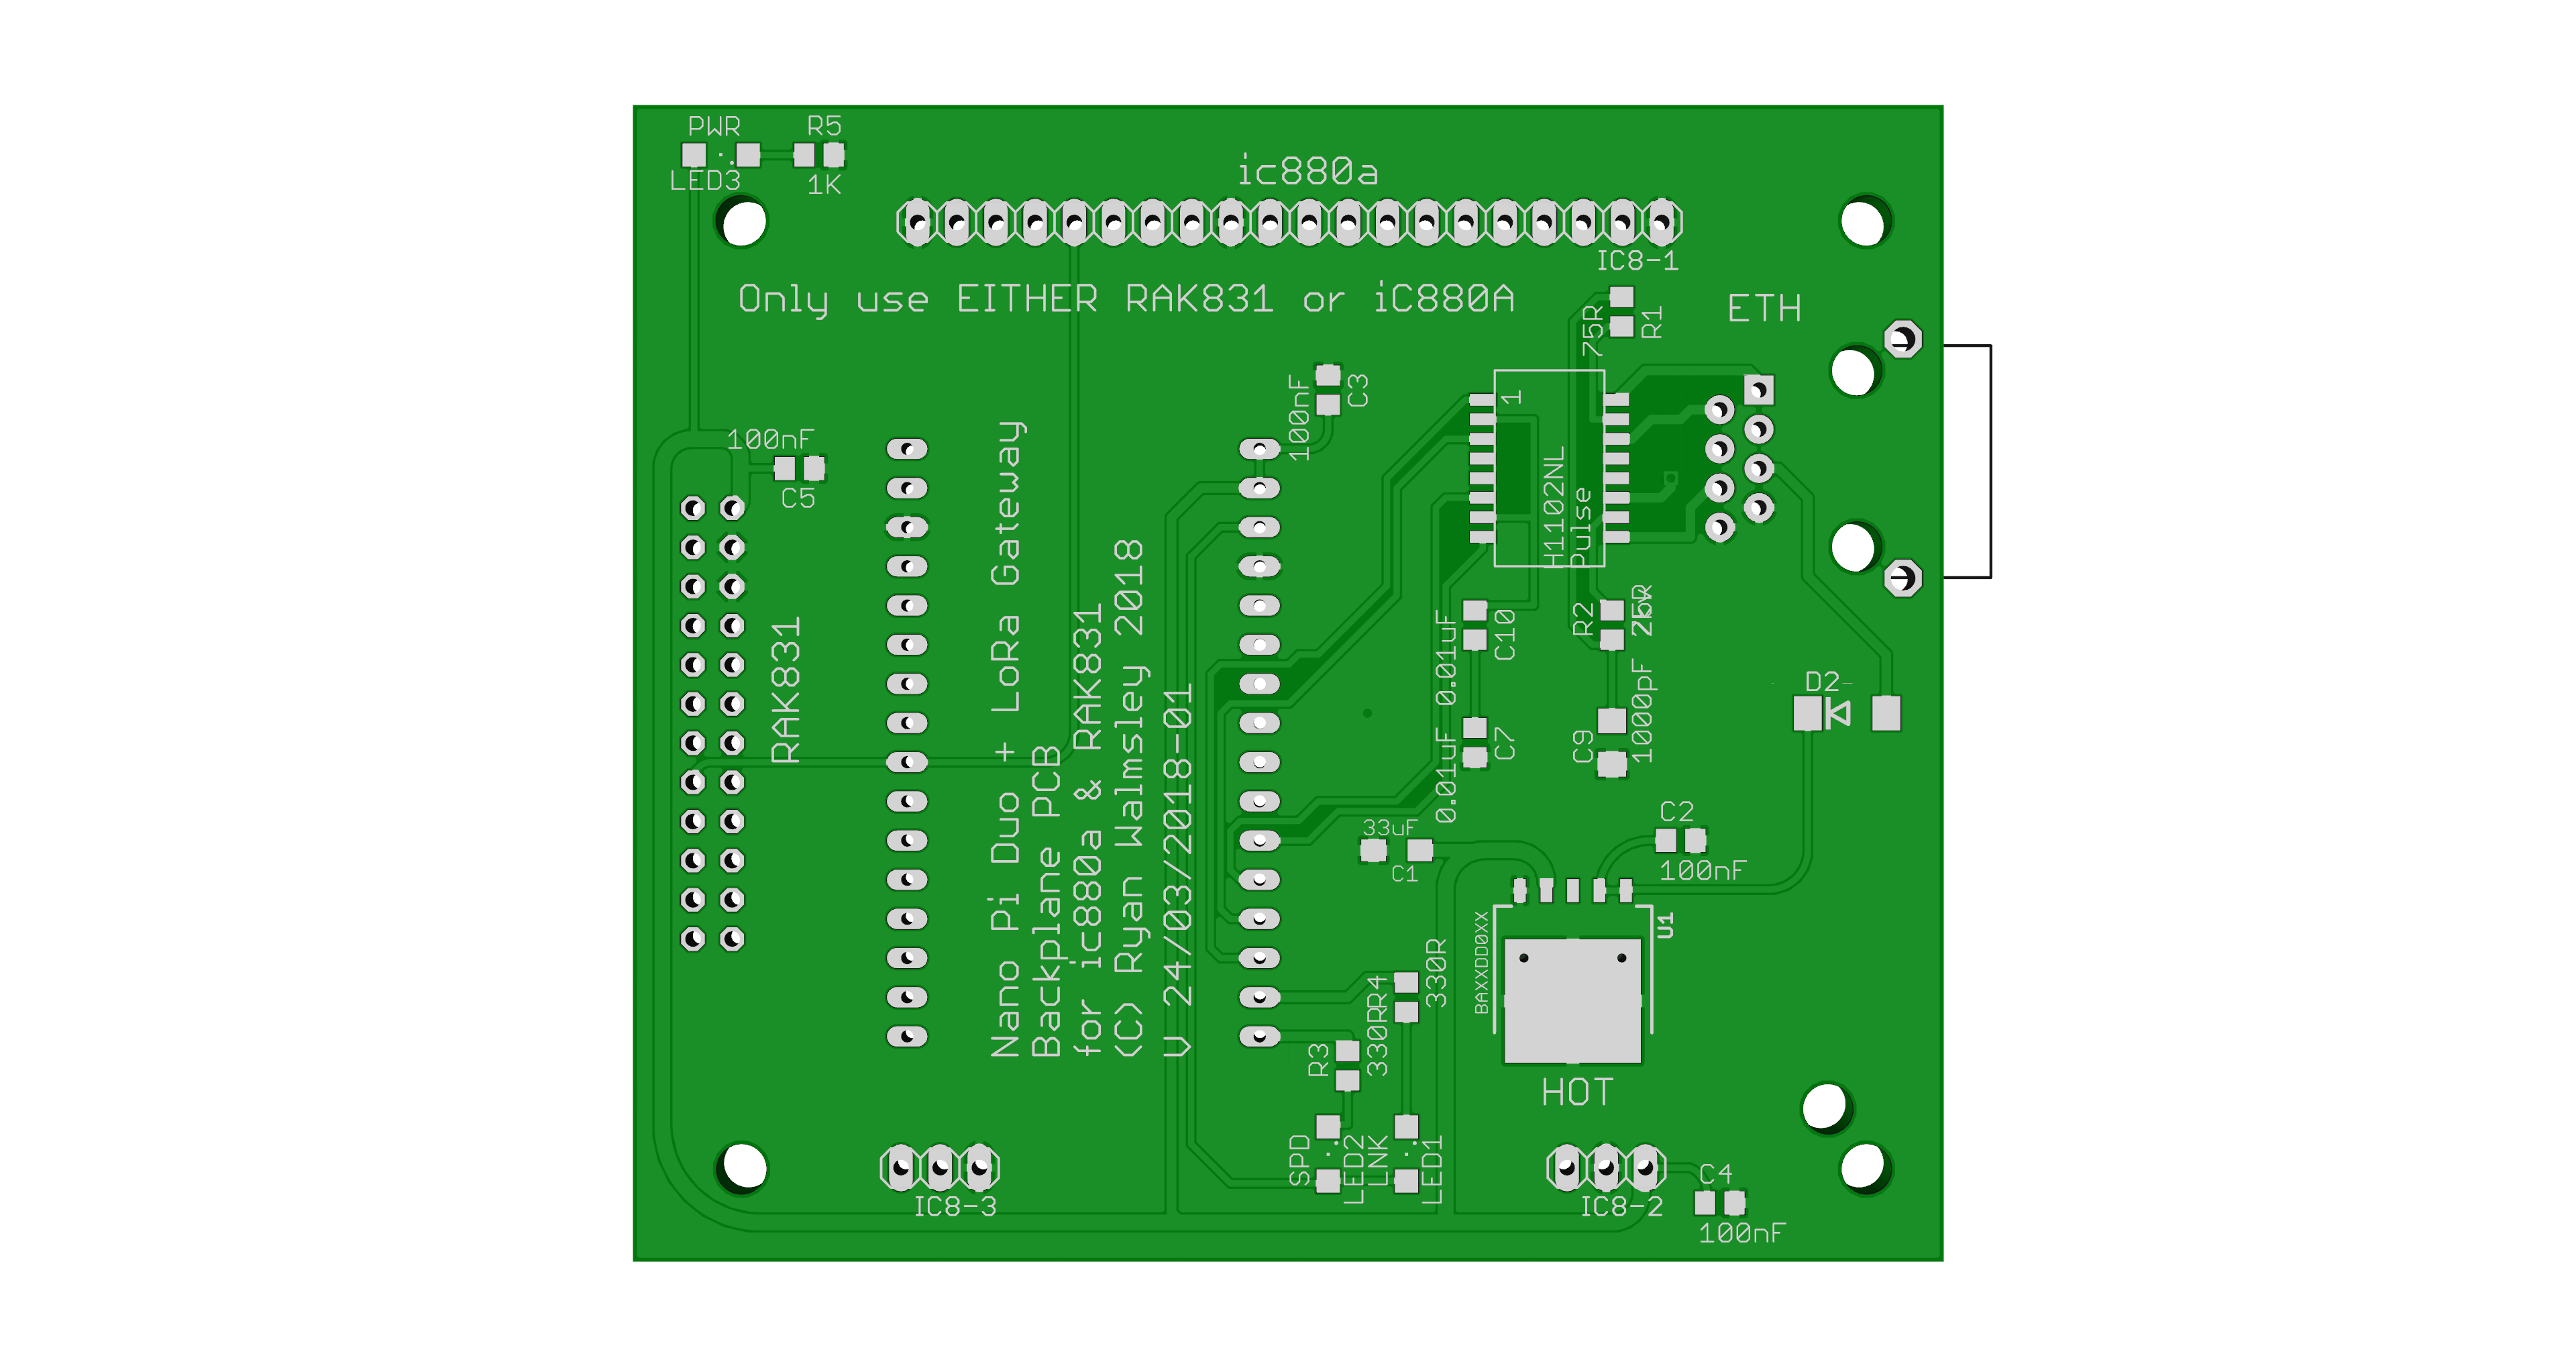
    *The nano pi fits on the back, with the radio of your choice on the front.*

    ![IMG_20180328_215305723](https://ryanteck.net/content/images/2018/03/IMG_20180328_215305723.jpg)
    *picture of the nano pi duo on the back*

    ![ic880a](https://ryanteck.net/content/images/2018/03/ic880a.JPG)
    *Picture of the ic880a on the front*

    ![IMG_20180328_215319046--1-](https://ryanteck.net/content/images/2018/03/IMG_20180328_215319046--1-.jpg)
    *Picture of the rak831 on the front*

    ##Software
    Aiming for my backplane to be "ultimate" with the idea being its easy to replicatefor other gateways. I wanted a simple method of installing the software on multiple.

    For this I chose to create a "Snap" and use Ubuntu on the NanoPi DUO As the host OS. With lots of tweaking and compiling...

    Read more »

  • Software packaged, or is it?

    Ryan Walmsley03/26/2018 at 22:25 0 comments

    I have spent most of today prepping the software for when all of the hardware arrives.

    One of the issues I was having was deciding what would be the best method of distribution the software. I wanted something easy to replicate over multiple gateways.

    I ran a poll on twitter asking between Docker, SD Image and Bash script and @magicaltrout on twitter came up with using Ubuntu Core & A Snap Package.

    I didn't think there would be an ubuntu core distribution for the Nano Pi Duo but it seems there was!

    I then got to work trying to package up the forwarder. Long story short I originally tried to package up the one by Kersing which uses the newer method of forwarding packets. However this just was being a right pain to compile and had about 5-6 different repositories to compile from.

    I changed to using the older semtech forwarder and got it compiled in about 15 minutes! With a few tweaks I have a package I think I'm confident with.

    The next stage will be testing the hardware and software all out in one go. Meanwhile I'll do some smaller tests with the snap package possibly using my Orange Pi Zero.

  • V24-03-2018-1 Prototypes Ordered!

    Ryan Walmsley03/25/2018 at 09:35 0 comments

    I have now ordered the hopefully final design for my LoRa Backplane.

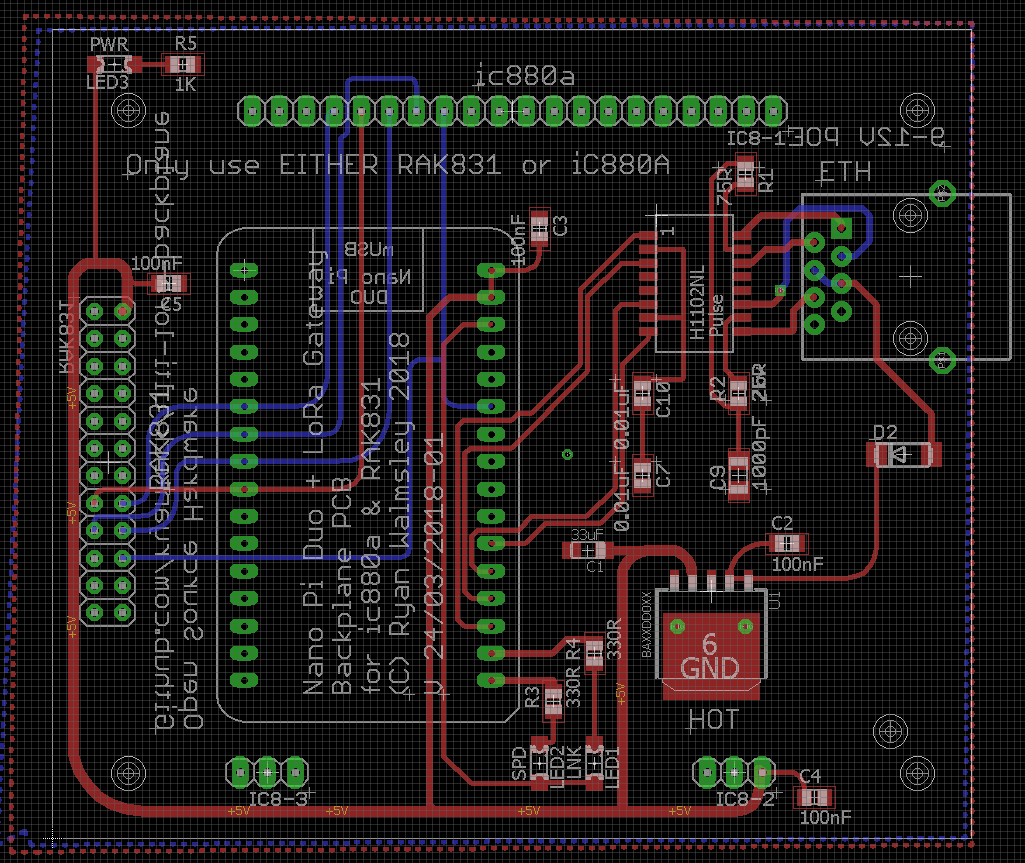
    Eagle Screenshot of the routing

    Quite a few changes have been made between this version and the previous. Here's a quick summary

    • Removed 3v3 Regulator
    • Replaced 5V Regulator with 2A Variant, added bigger capacitor on output and smaller ceramics near each main section
    • Added Power LED
    • Added Ethernet LEDs
    • Kept rest of Ethernet circuit the same except for changing C9 from 0805 to 1206
    • Ethernet jack updated to include chassis holes
    • 4 Drill Holes around board for possible mounting solutions.
    • 1 Drill hole for standoff for RAK831

    In total the BOM has been reduced to around 12 Items. The NanoPi Duo and IC880a Headers all use 0.1" Female headers which can be cut to the correct sizes. And the RAK831 can use 0.1" Male Headers which can be easily snapped.

    The PCBs should be here in around a week and hopefully work first time. I'll report on it then!

  • Few Design Choices made, and a few to decide

    Ryan Walmsley03/19/2018 at 17:49 0 comments

    Just a quick update on a few design choices made.

    Voltage Regulators

    I have decided to go for a linear voltage regulator in the design for the reduced noise. While the theoretical maximum waste is 14W Of heat an estimated 5W is more realistic. 

    The chip chosen also isn't the cheapest and I could have possibly got away with one at half the cost, however this one can handle up to 2A and is a bigger package allowing for better heat dissipation. It also has built in over current, thermal and over voltage protection.

    SBC Choice

    I am planning on using the NanoPi Duo and have ordered one. This will be ideal for this project as like the Onion Omega it has a built in ethernet phy and like most other SBCs is a full linux OS. Specced with a Quad Core H2+ and 512MB Of Ram is ideal for a packet forwarder and should be able to run the newer kersing variation of the packet forwarder which supports the TTN Gateway Connector Protocol. (https://github.com/kersing/packet_forwarder)

    Software Choice

    As mentioned I plan to use the kersing forwarder however am not sure on how I will be configuring it.

    The current options are:

    • Installer Bash Script - Installs and configures it all for you
    • Armbian Image - Pre built SD card image with all unneeded packages removed and all required ones and gateway software installed and ready for use.
    • Docker / Container - If I'm correct a docker image would be a mix between the two. However I haven't had much experience in it.

  • Prototype 1 - V 27/02/2018-05 Analysis

    Ryan Walmsley03/16/2018 at 15:10 0 comments

    The first version of my Gateway PCB Arrived and has been tested. Here's the analysis, I added this to hackaday.io after doing these tests. Any developments from now on will be documented here.

    The PCBs and components all arrived for my first attempt at creating this Ultimate Backplane PCB.

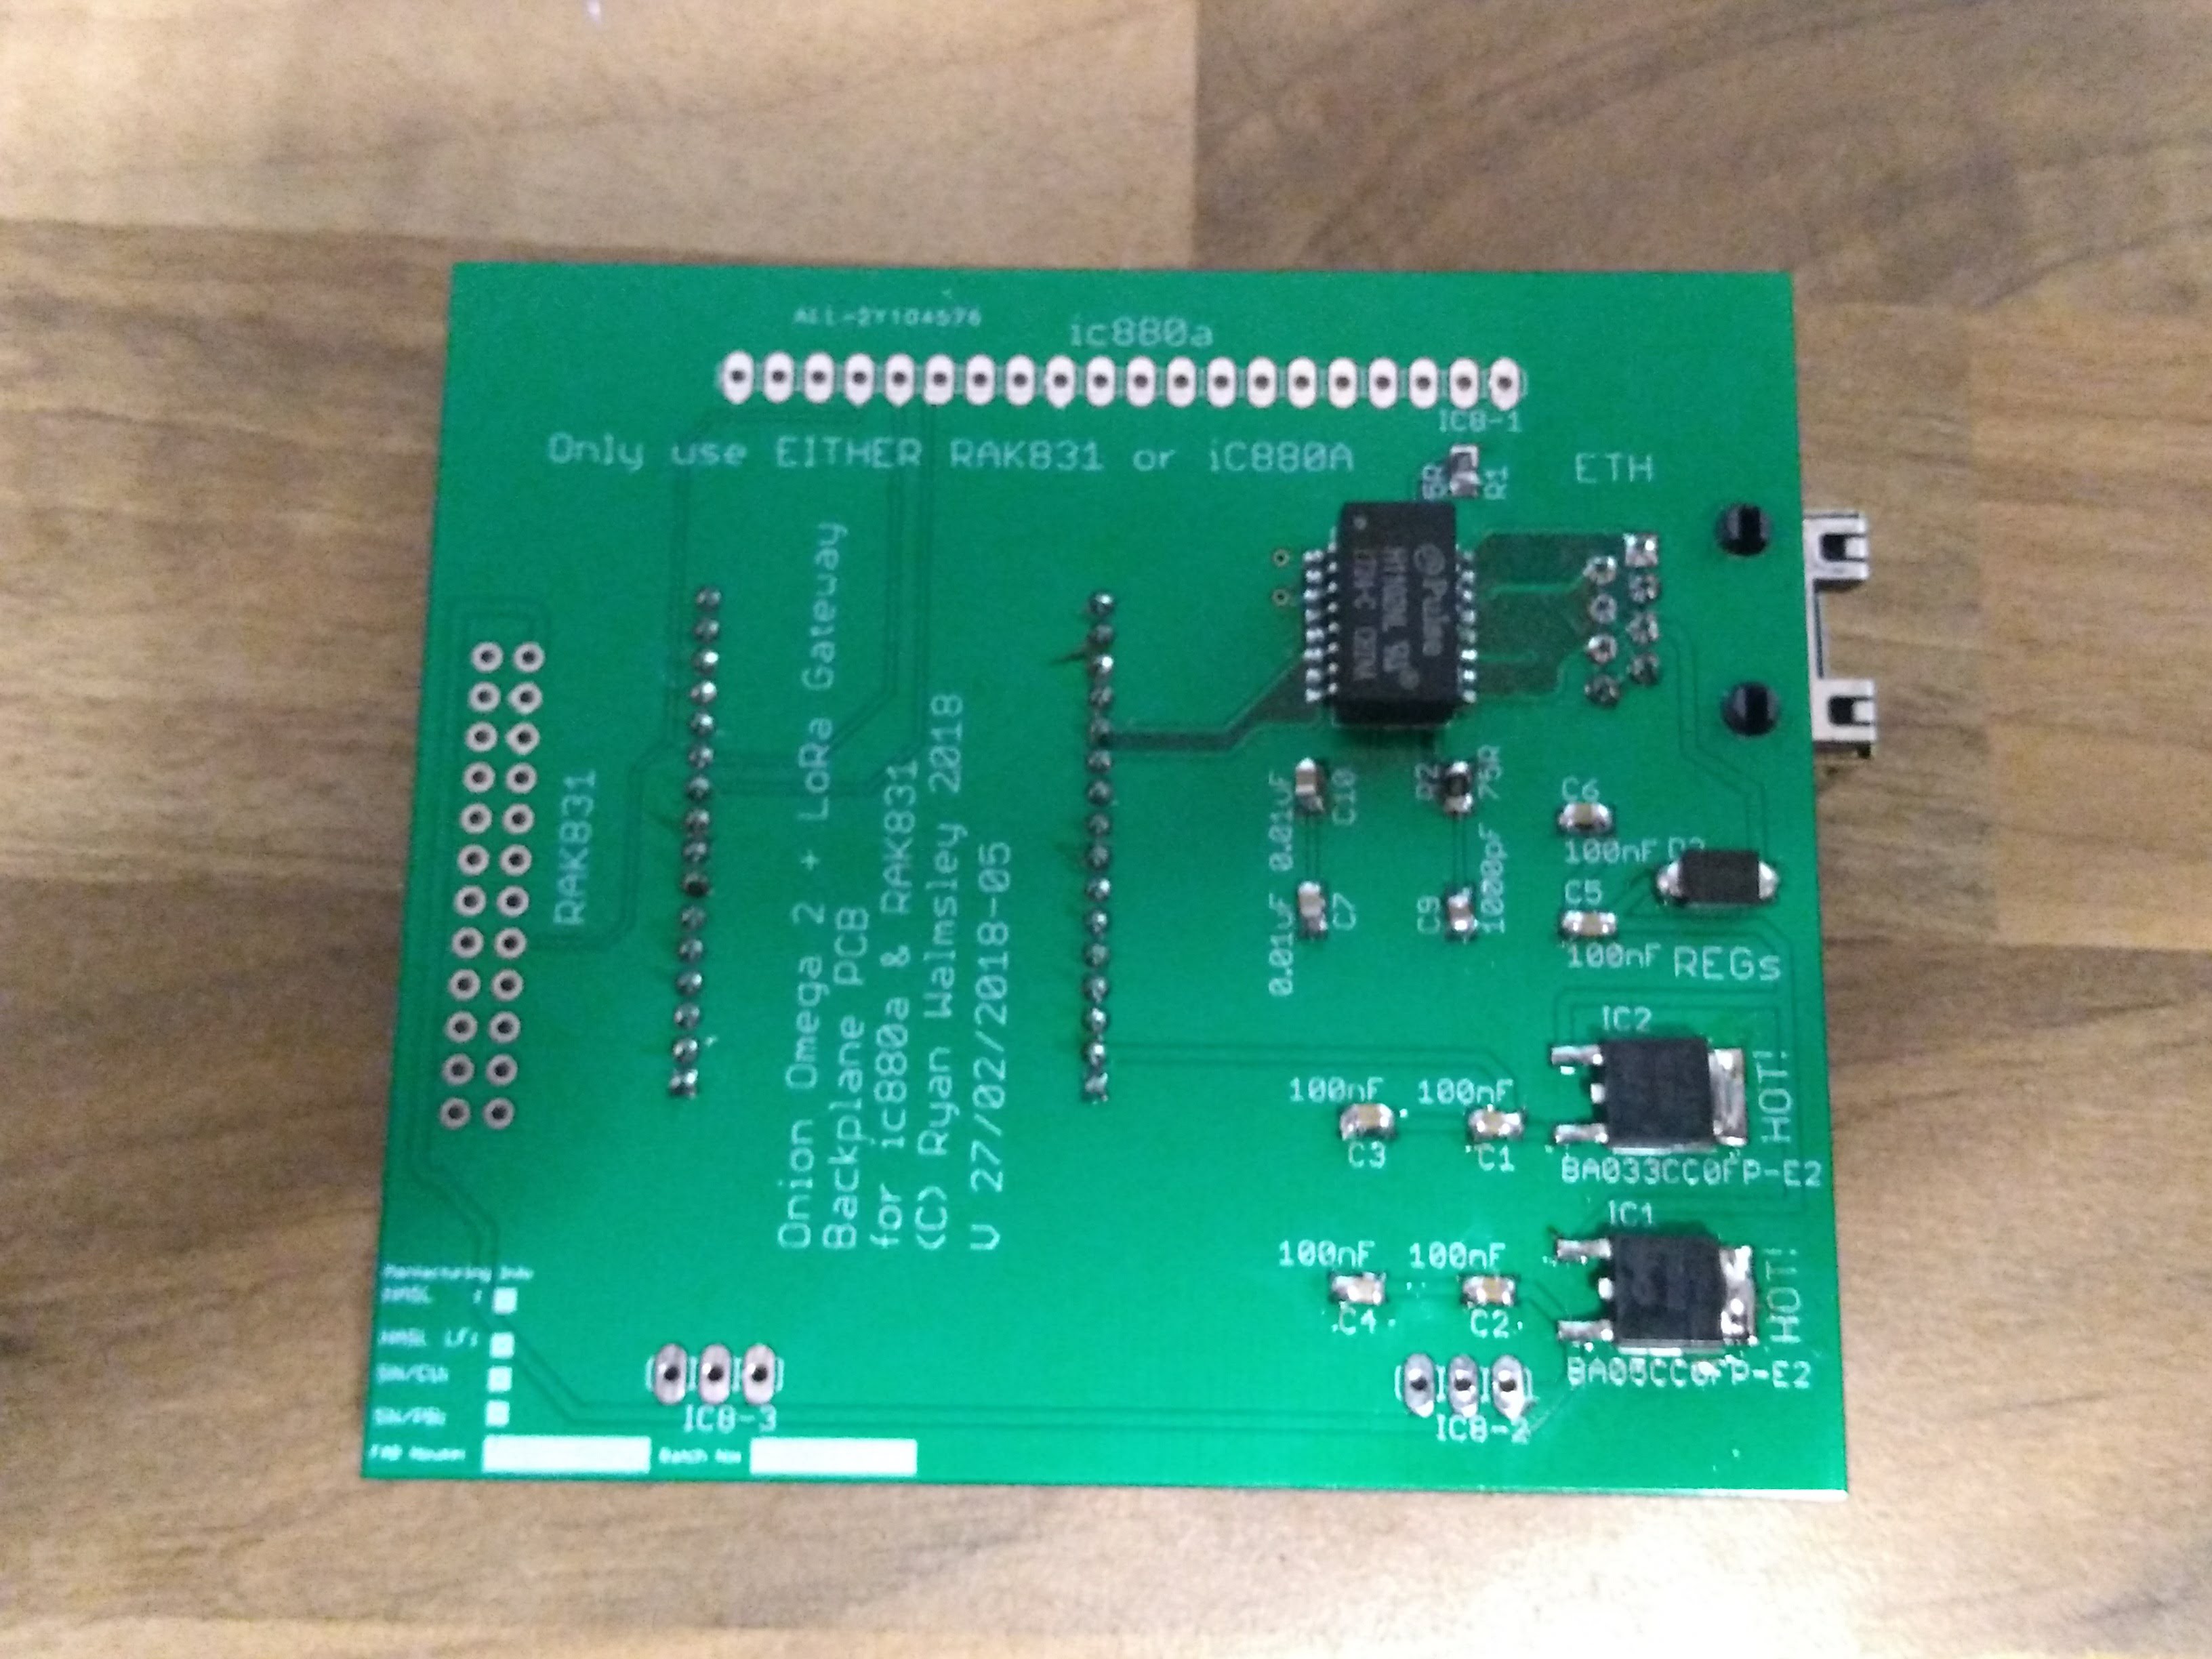
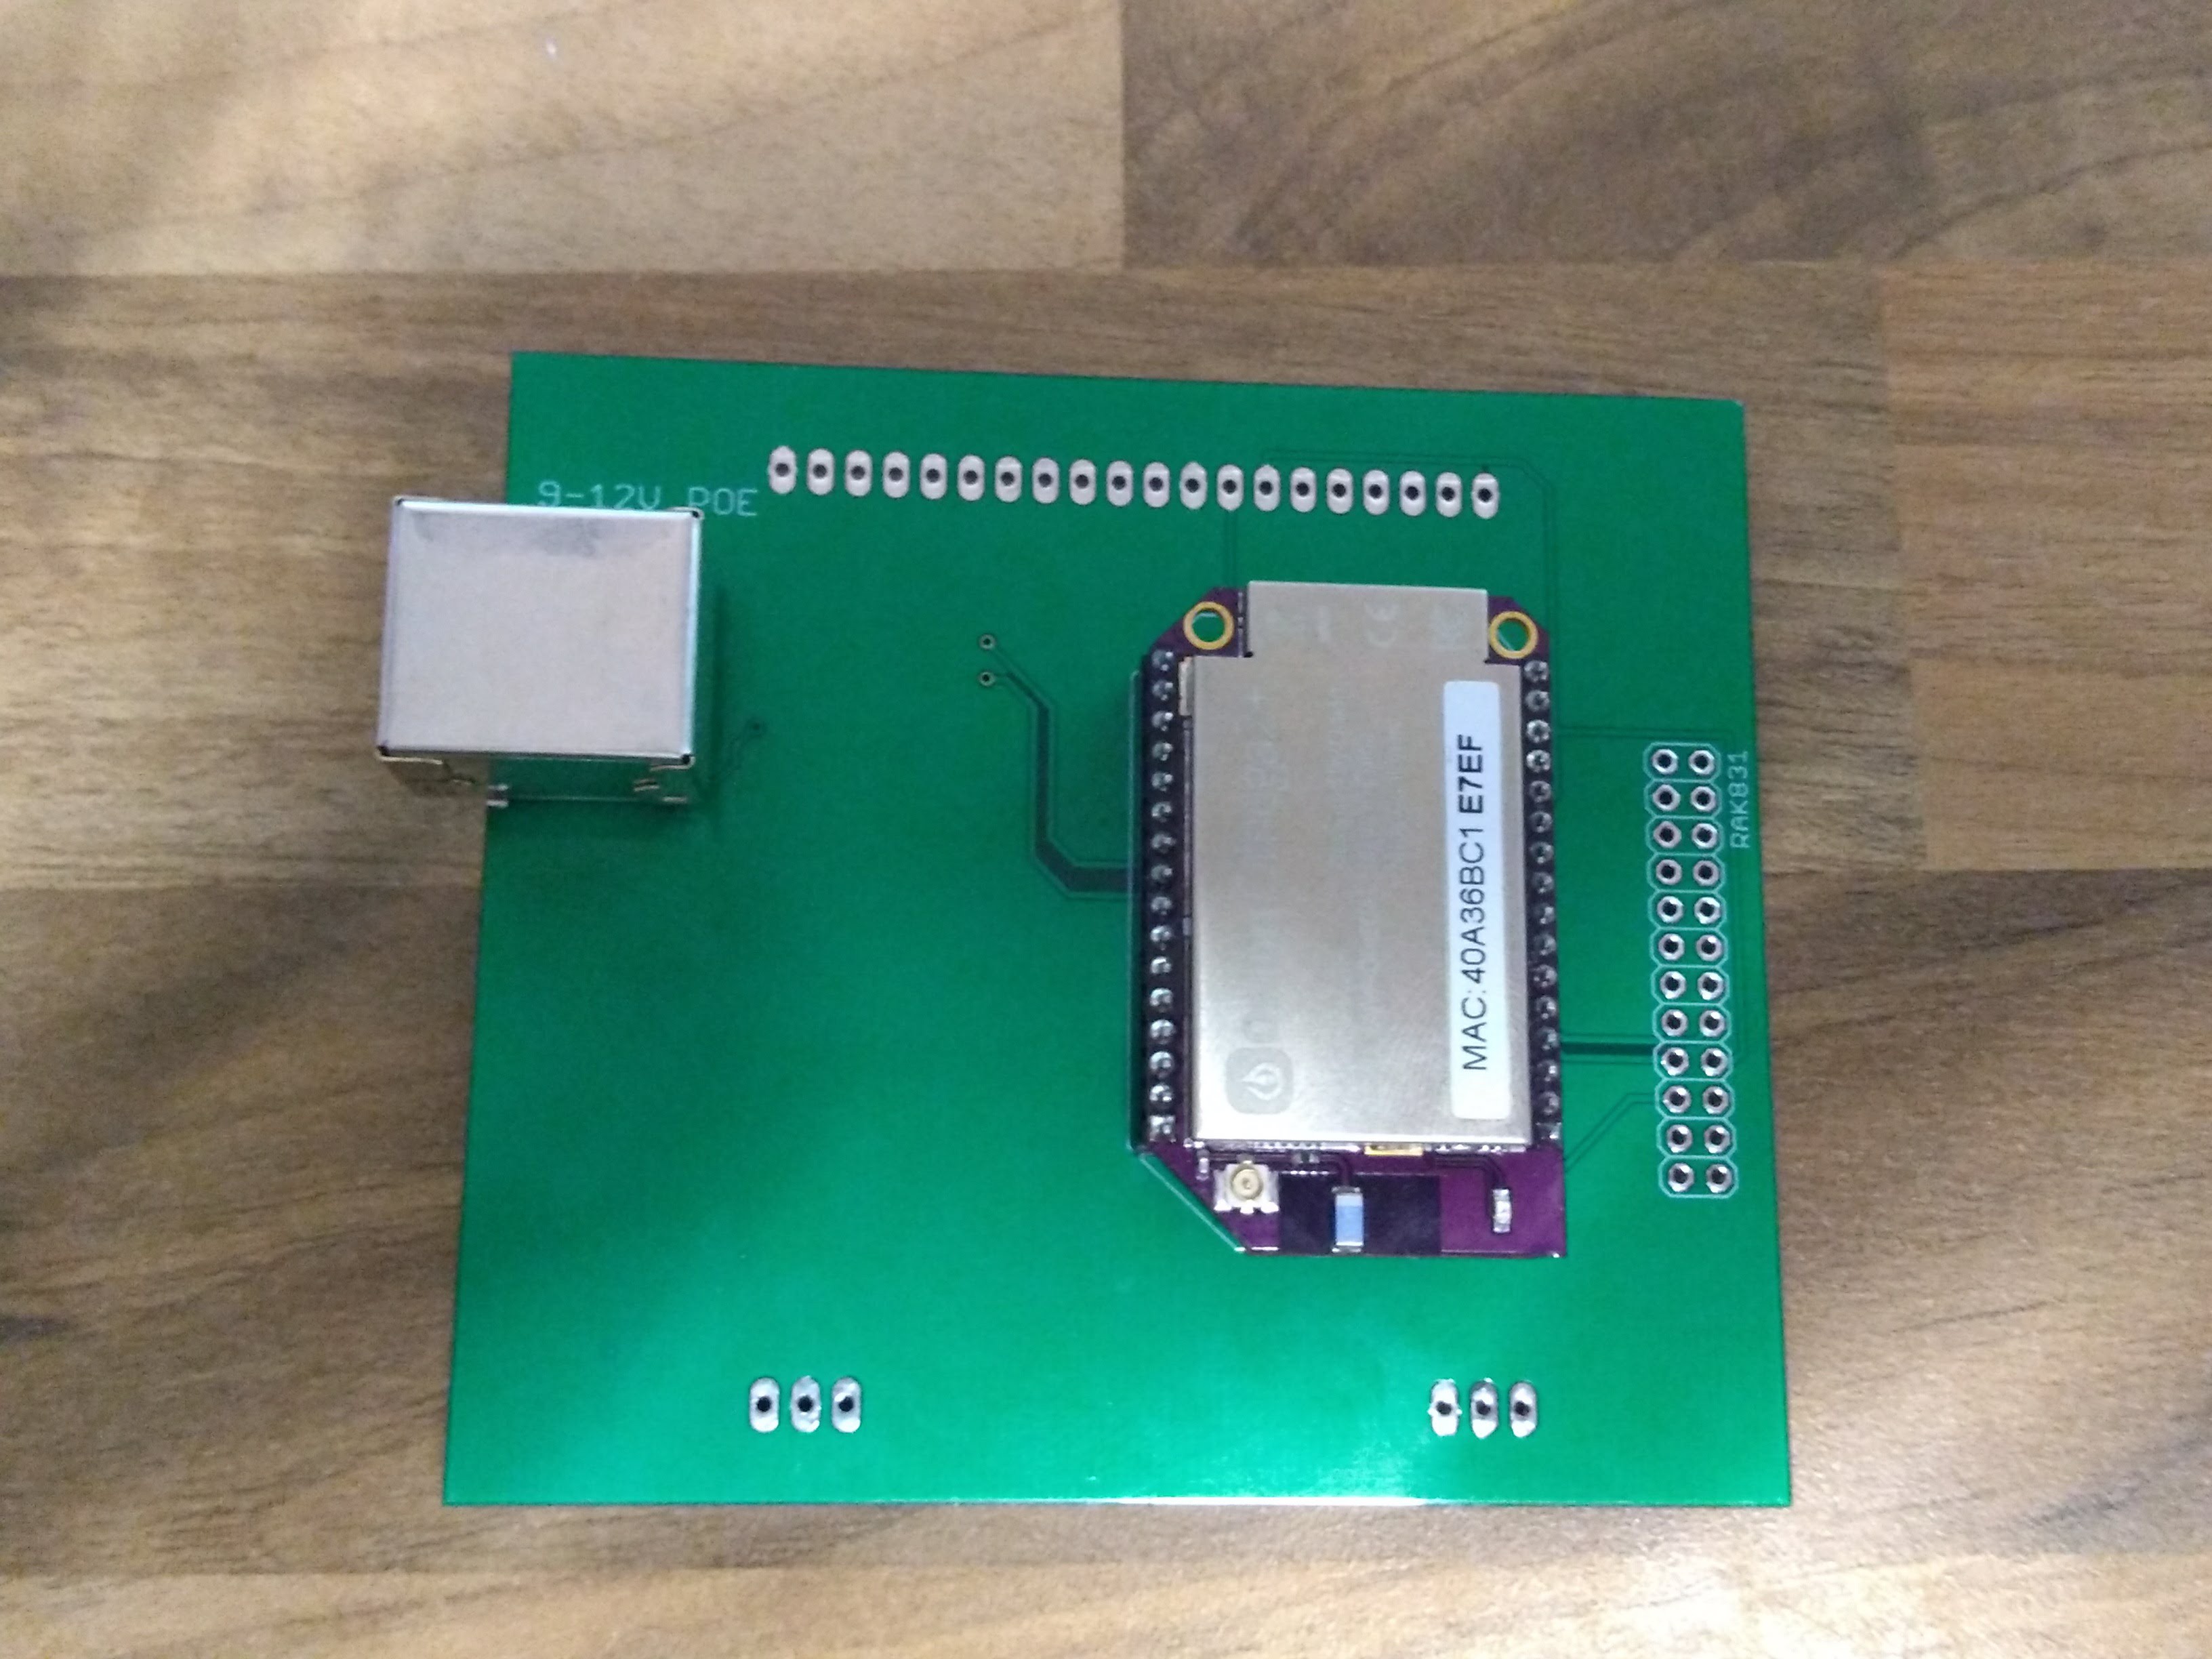
    I chose to use the Onion Omega 2+ as the brains of my backplane due to the fact it had a built in Ethernet phy and an SPI Bus required for the LoRa Concentrator.

    For power I chose to use passive POE. This method uses two pairs of the Ethernet cable to carry the voltage, for this as the runs of ethernet cable may get quite long I chose to use 9-12V Passively injected POE. This doesn't require any fancy components except for a voltage regulator on the board. I used two regulators as the Onion Omega requires 3v3 and the lora concentrator 5V. Both were rated at 1A with each device only requiring a max of 0.5A

    When it arrived I soldered it all up, I wasn't sure if it was going to work as it was the first time I've done any ethernet wiring including magnetics. I plugged it in without the Onion or Concentrator plugged in and poof, magic smoke came out of the regulators.

    As the supplier was out of stock of the regulator I designed it for I chose a cheaper alternative, however didn't realise that the alternative had the pinout different. So I ordered the correct regulators and plugged it in and everything seemed fine.

    I then chose to plug the onion omega in and set it up and the ethernet port worked! Excellent for first time.

    After ensuring everything was fine to plug my concentrator in I took it out of my current RPi powered box and put it on. Ran the software and.....

    Well after a bit of debugging and searching around it seems the Onion Omega's SPI implementation isn't up to standard which makes it unsuitable for use. Meaning this revision is a failure.

    Version 2 Specs

    I plan to create a version 2 very soon, either using a Raspberry Pi Zero with SPI Ethernet or a Nano Pi Duo with ethernet like the Onion Omega but better SPI Support (as it uses the same chip as the Orange Pi Zero which I've tested SPI on.

    That's it for this revision. V2 will be designed and sent to fab next week.

View all 10 project logs

  • 1
    Prepare components

    To begin make sure that you have all of the components to hand. This guide will walk you through the recommended soldering issue.

    While mostly SMD all of the parts are easy to solder SMD. The only tricky part may be the Voltage Regulator's ground pad, this is from where it has to heat up most of the board.

    You may also be able to tin all of the pads with solder and then use a DIY Reflow oven if that's easier for you.

  • 2
    Capacitors

    To begin solder the capacitors, these are all small components and won't interfere with others.

    I recommend to start with C2,C3,C4 & C5 100nF's Capacitors first, then work through C1, 33uF Tant,  C9 1000pF 2KV and C7&C10 0.01uF

  • 3
    Resistors

    Next solder the resistors, begin with R1 & R2 75Ohm resistors around the network jack., move onto R3 & R4 330Ohm  for the ethernet LEDs, and finish with R5 with a 1K Ohm resistor for the power LED

View all 8 instructions

Enjoy this project?

Share

Discussions

Similar Projects

Does this project spark your interest?

Become a member to follow this project and never miss any updates