Michael Barton-Sweeney
-
Clam videos
11/02/2018 at 20:41 • 1 commentI don't have a lot of videos of the clams, and need to setup a regime for testing that includes video documentation, but I came across some video I made a few years ago of the first clam while I was testing it's solenoid.
Here are videos of it in air and in water before I attached the solenoid to the top shell:
The first clam used an air core solenoid and was not very powerful, but was powerful enough to open the shell and break the seal (for the clam to descend into the water).
-
Saturometer Siphon
10/29/2018 at 01:06 • 0 commentsI got a new job at a startup this summer that has soaked up most of my time. That's not a bad thing because it is my dream job and I really like all my coworkers, but the clam project is my dream project, so I want to keep pushing forward. It's the nature of free software/open source projects that they are not profit driven and are dependent upon support from other things. I am hoping to find a better balance, so I can keep making progress.
I have passed two major milestones for my ability to contribute to this project. I have become a diver and gotten my open water certificate for scuba, and can now start working in the environments where the clams will be. I have also transitioned all of the design and fabrication of the clam to CAD and 3D printing. That is really important, so that I can test the clams without worrying too much about losing them. The first two prototypes I made with thermoforming, casting, hand cutting and finishing. I initially considered them more as works of art than prototypes, and was really sad when they burned out during testing. Now, I can print out a new design, test it, and keep moving forward when the clams are lost.
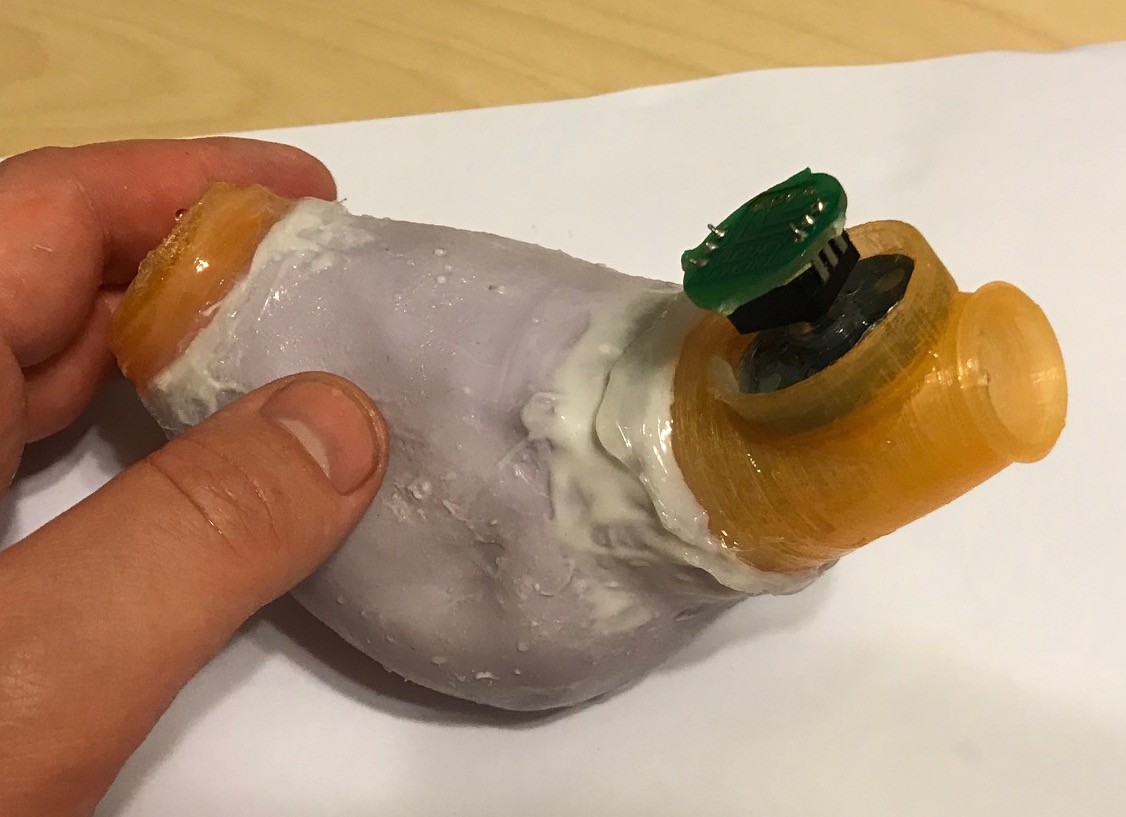
I have recently completed the first new 3D printed saturometer siphon and am beginning testing. It is essentially a gas collector and a water pump. The gas collector is made from a long length of silicone tubing. Silicone is gas permeable, so that if you have a thin enough membrane, and enough surface area, you can have a significant amount of gas pass through. An absolute pressure sensor is then used to measure the pressure of the gas in the tube, and give the total dissolved gas pressure.
![]()
![]()
The water pump is made from a silicone chamber and two valves. The valves are made from diaphragms taken from my air respirator, and 3D printed holders. Water flow is essential for getting an accurate pressure reading, so water needs to be pumped across the gas collector. This design is too big to fit into the clam, so it will need to be tested and miniaturized.
![]()
![]()
![]()
![]()
![]()
![]()
-
Clam prototypes
10/28/2018 at 23:36 • 0 commentsVideo of clam prototypes
-
Circuit
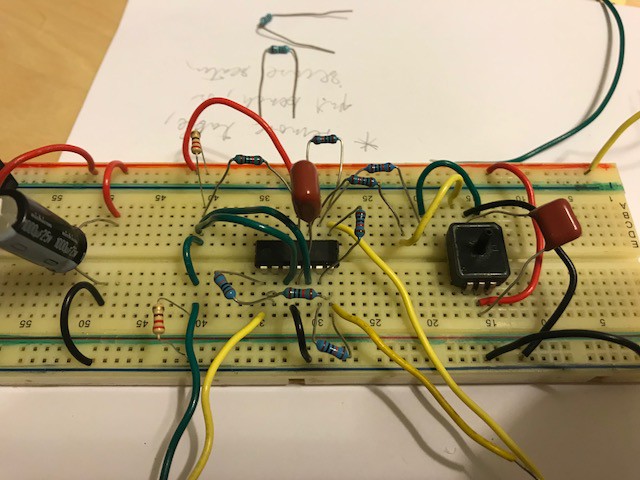
10/22/2018 at 13:00 • 0 commentsThe circuit is adapted from previous projects. There is a raspberry pi connected to an atmega, with an op-amp for the pressure sensor, a simple motor driver, batteries and a 5v regulator. I've simplified the motor driver, so that it only passes current in one direction (the previous design had two push-pulls on each coil, which is unnecessary for just squeezing a pump chamber).
I learned one major lesson about driving coils from my last prototype. You must have two zener diodes in parallel to each coil, so that when you stop passes current through the coil, it does not burn out your circuit. When current stops, the magnet field that was created collapses and reverses voltage. This voltage will build until it can flow. If you have two zener diodes in opposite orientations in series with each other, and have them parallel to the coil, then you can provide a pathway for current to flow through the coil, and not through out your electronics :)
-
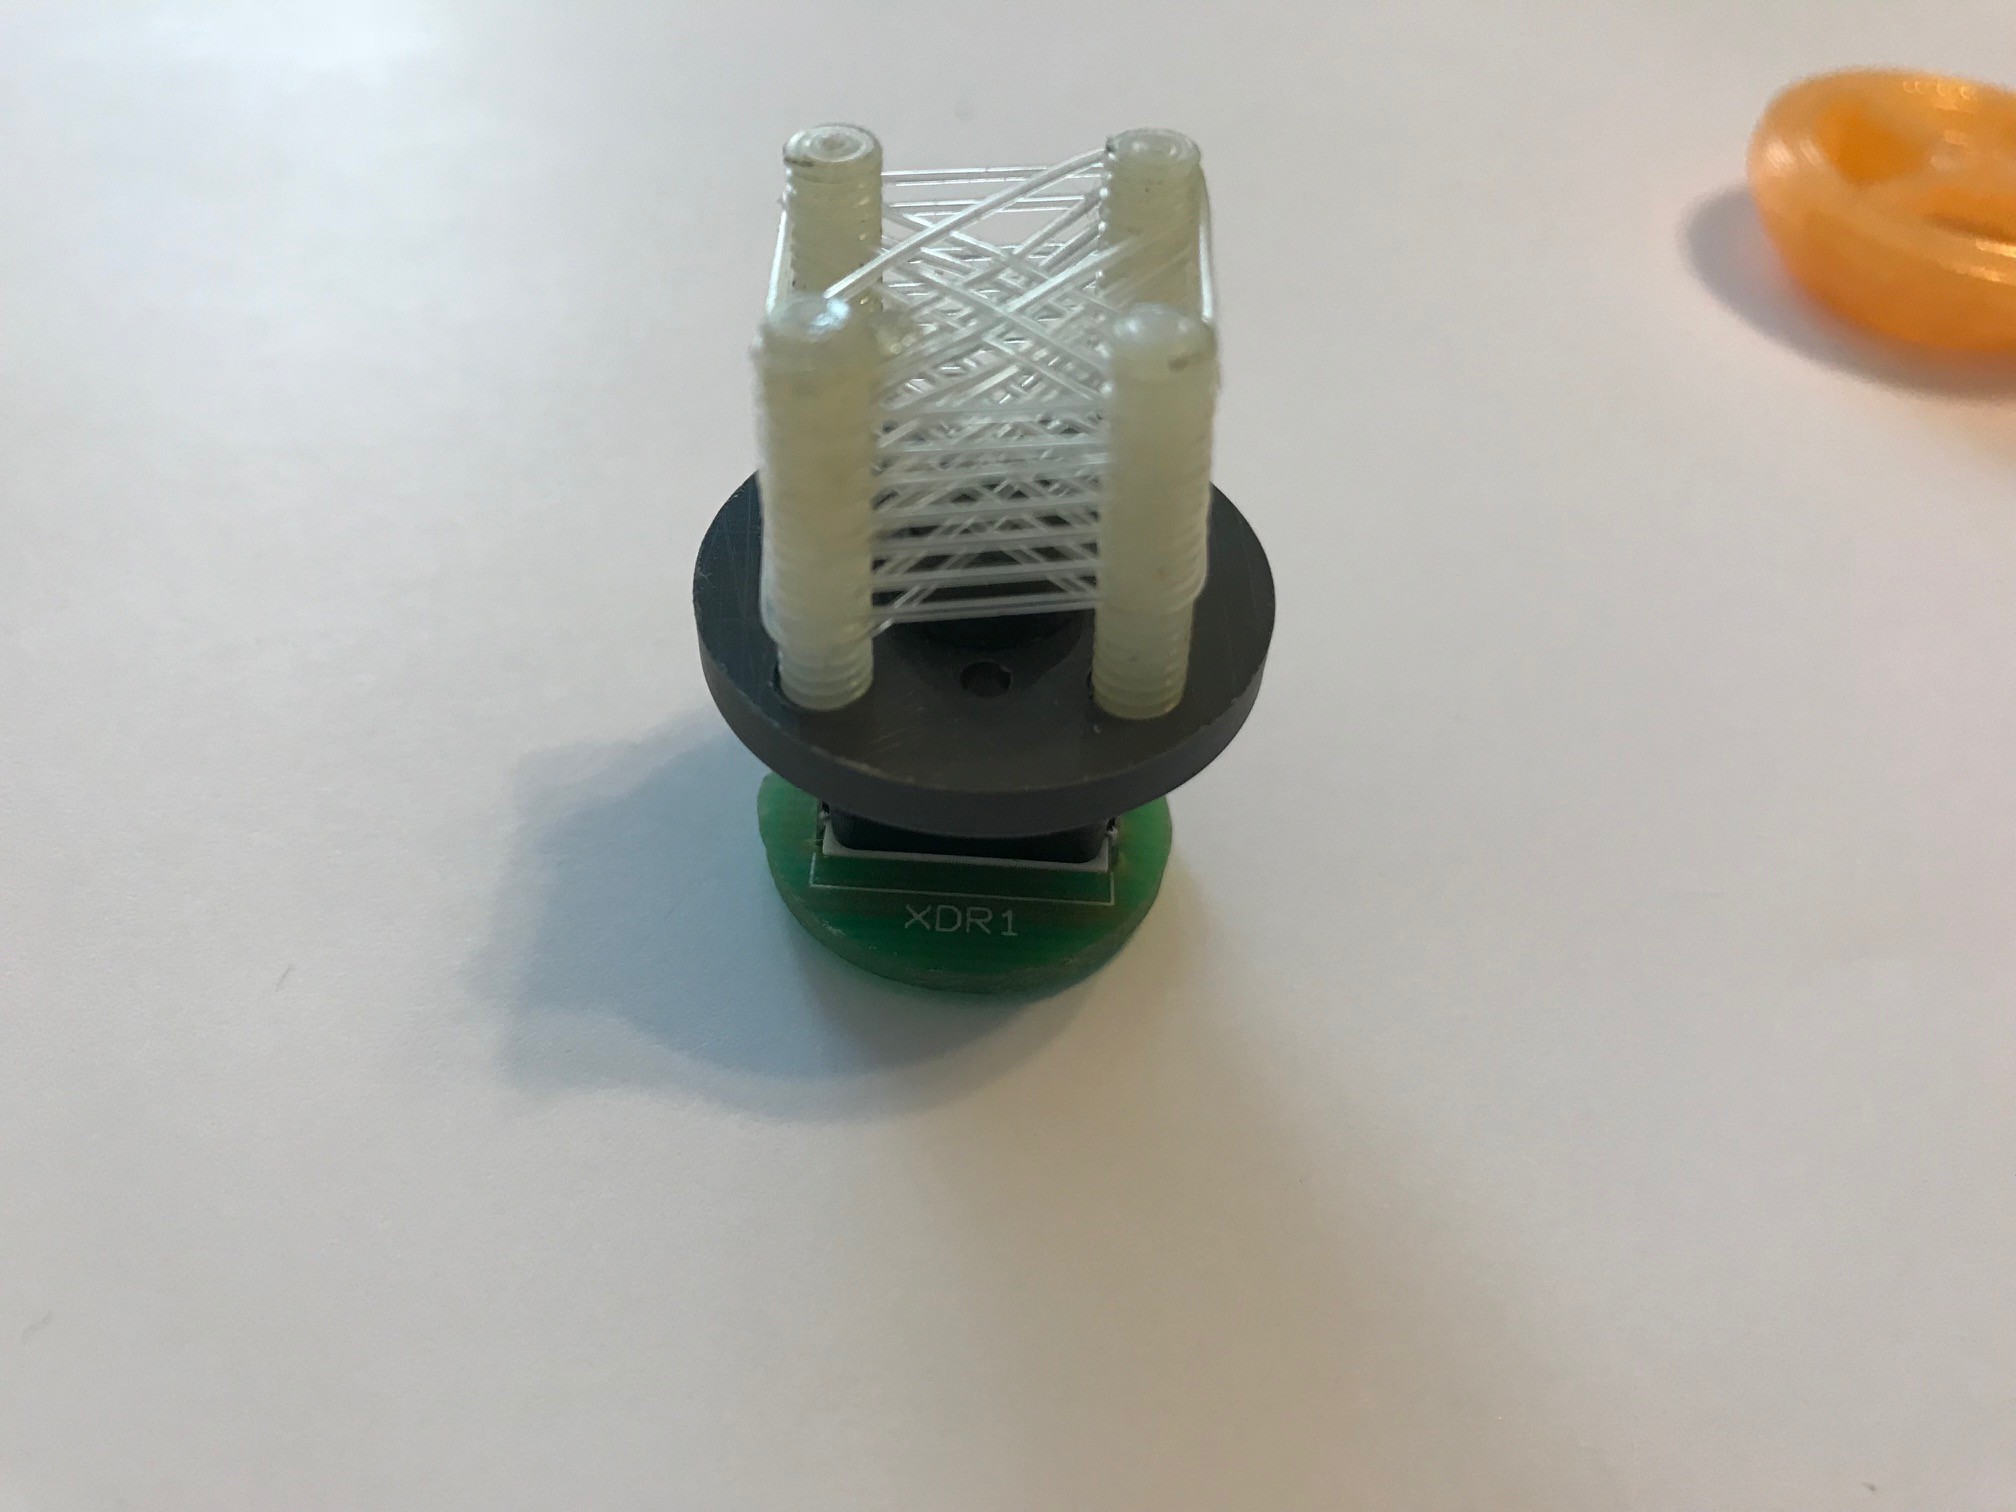
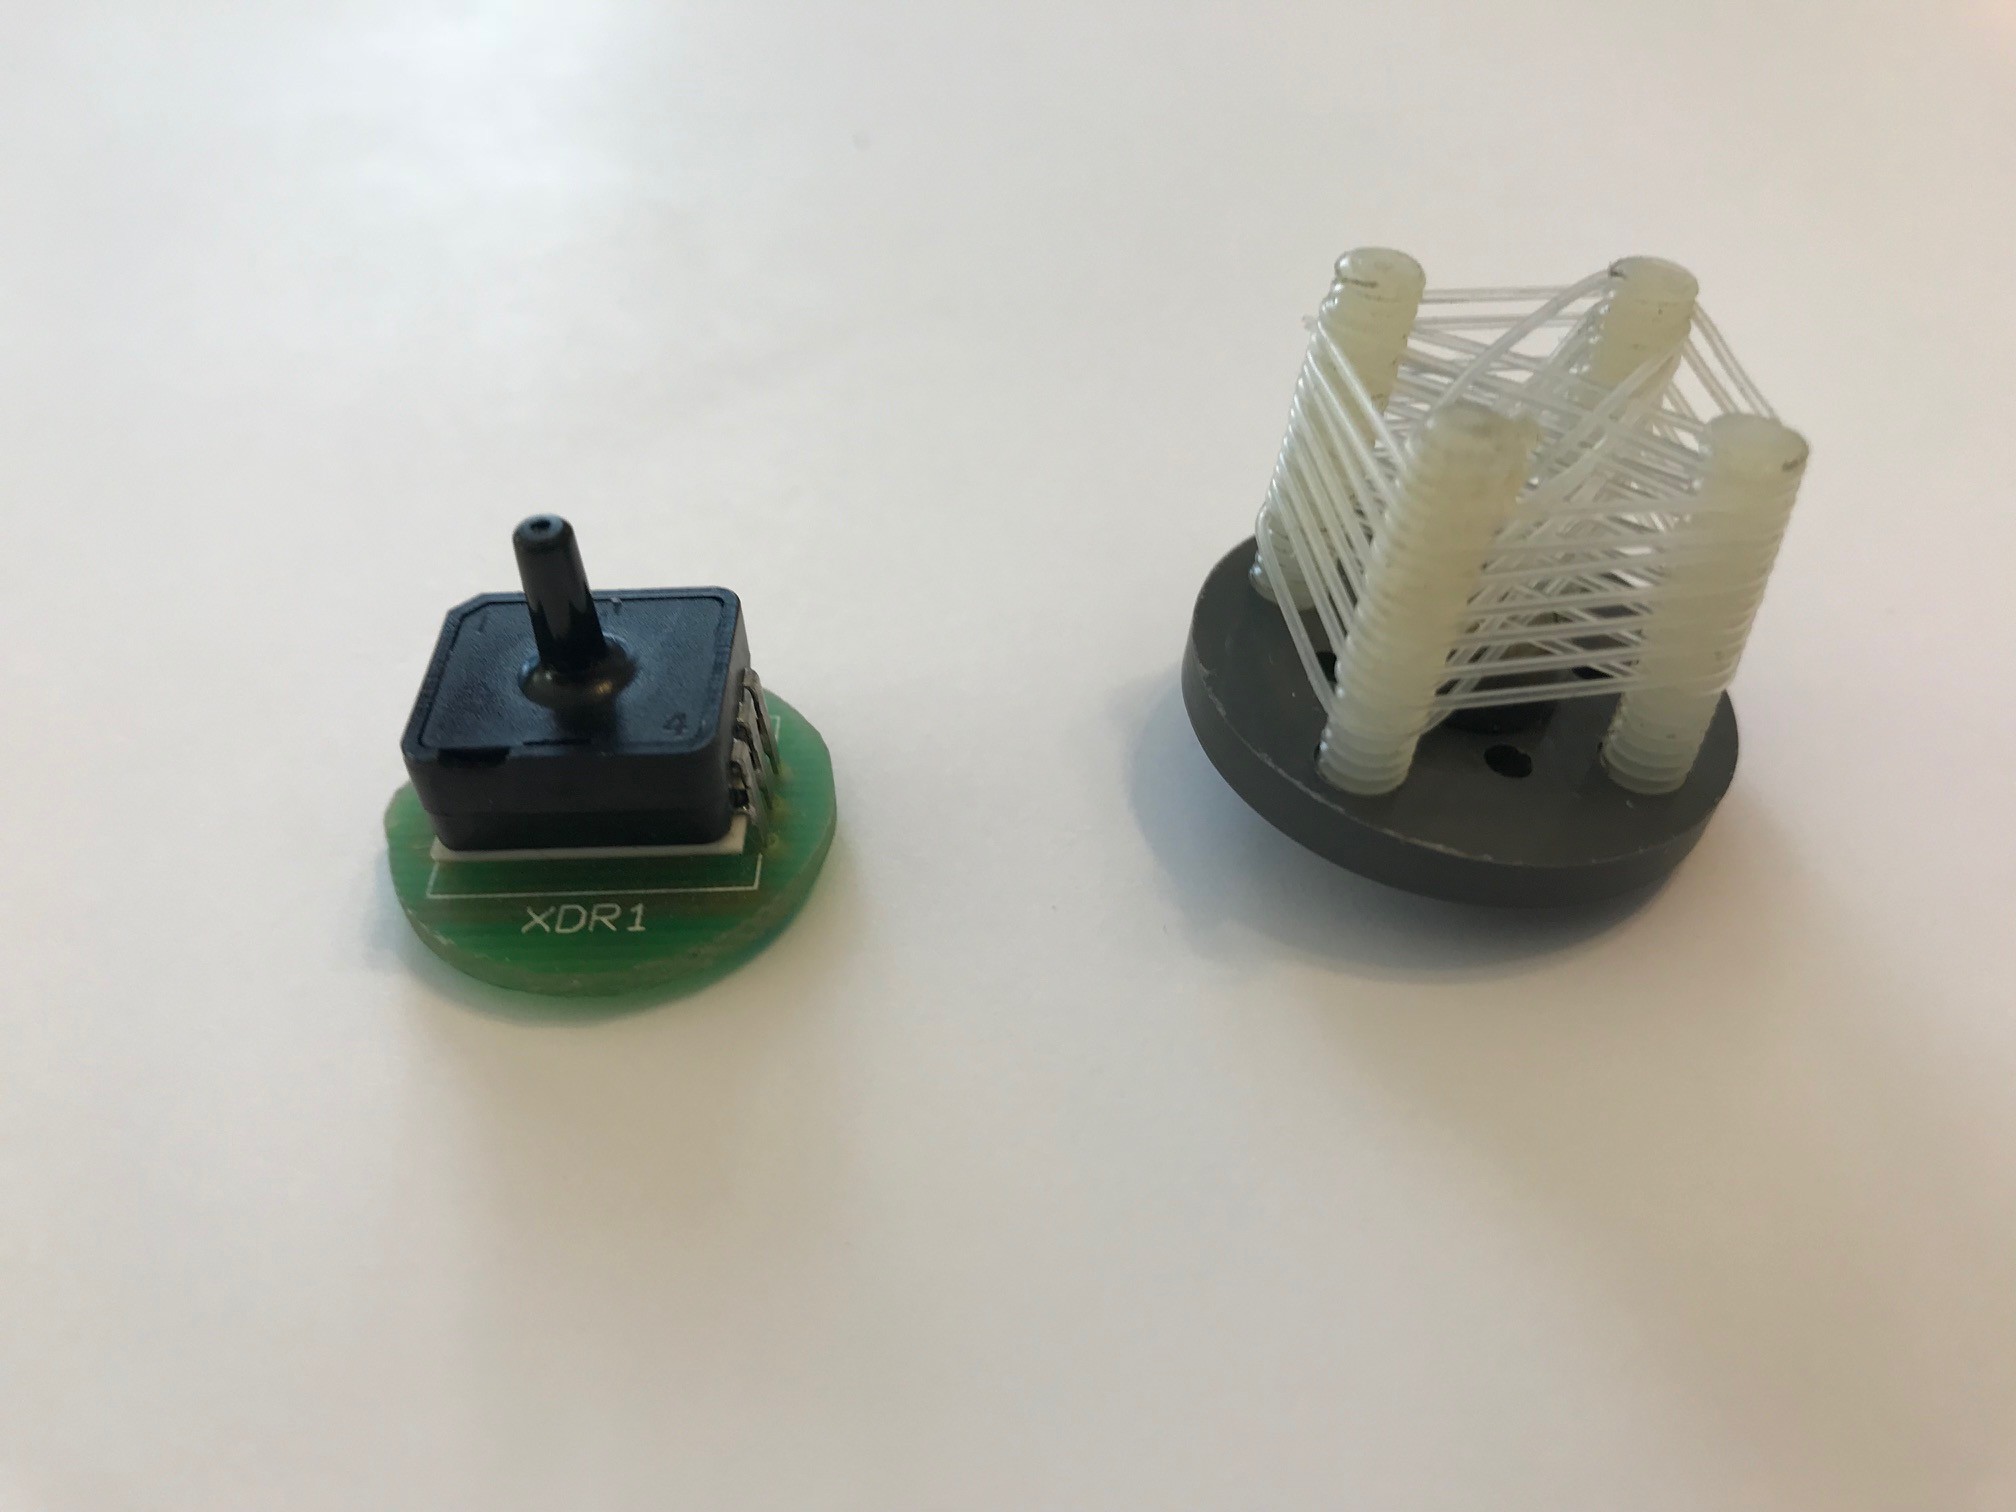
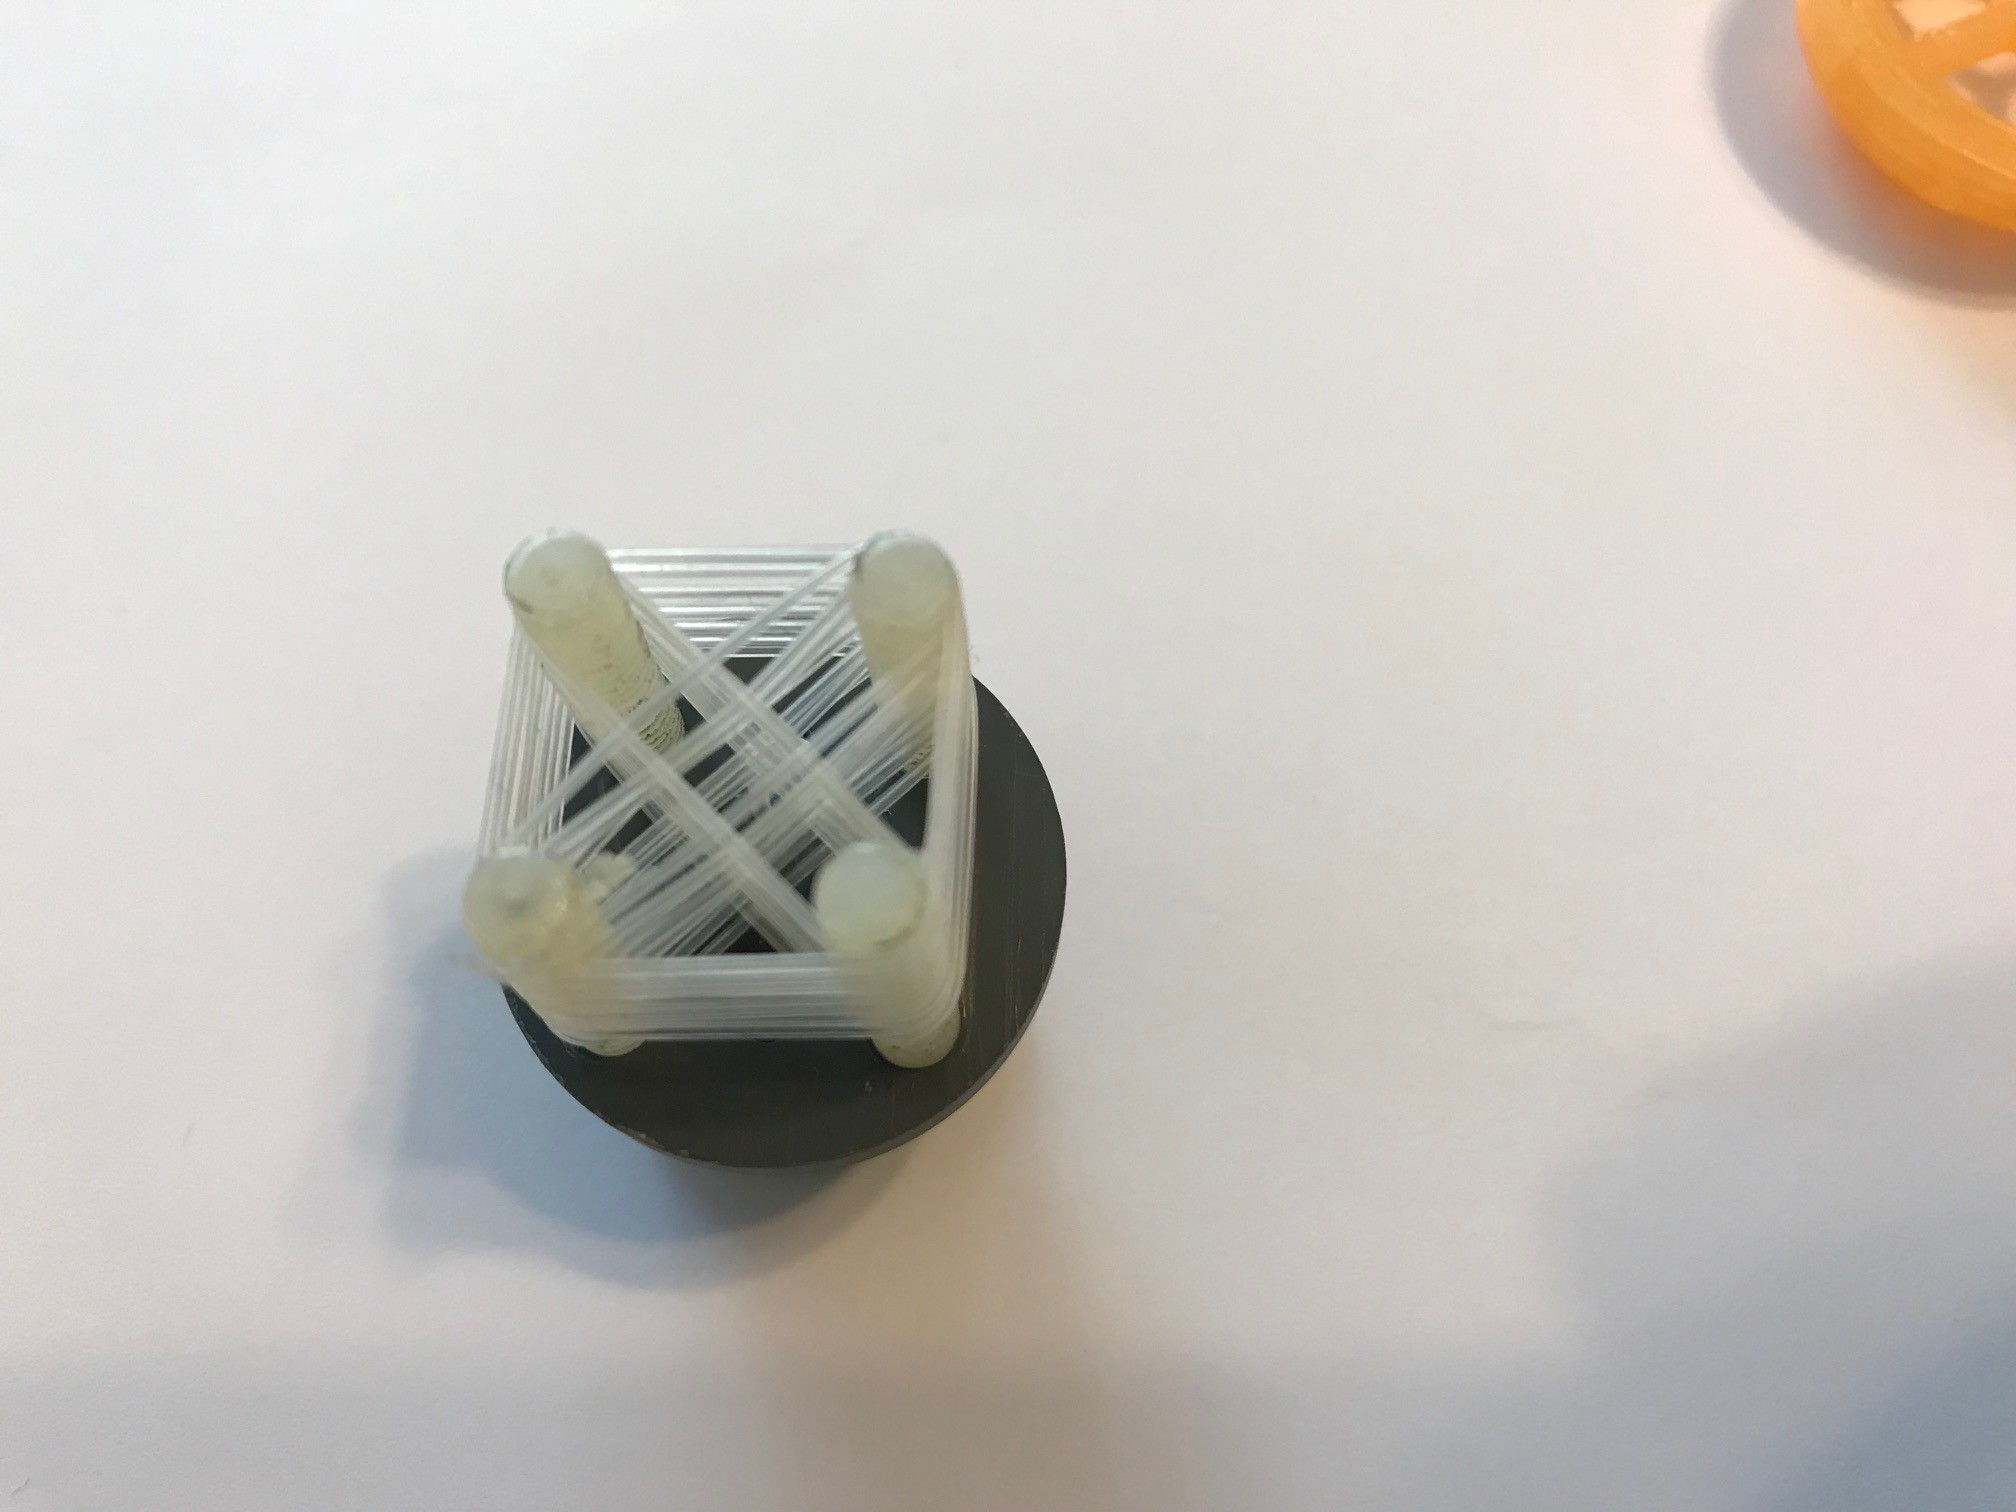
Saturometer
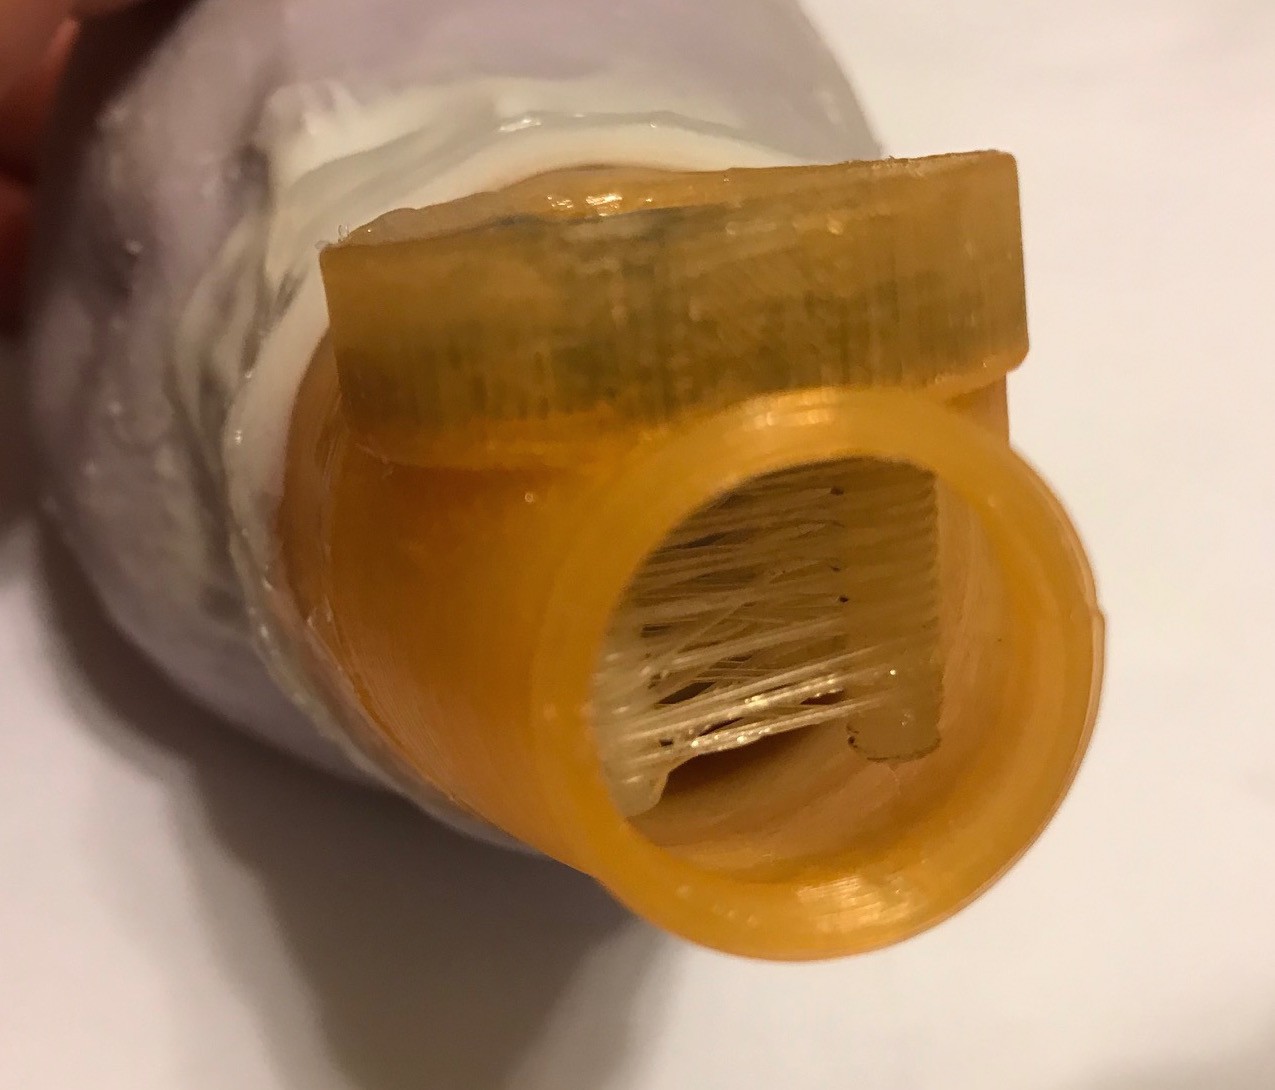
10/22/2018 at 12:45 • 0 commentsThe saturometer is essentially a long length of silastic tubing that connects to a pressure sensor. Because the clam will be underwater, I am using an absolute pressure sensor, instead of a differential one. The silastic tubing is strung along four support rods, and will be placed inside a silicone tube connected to the outflow valve on the pump chamber.
![]()
![]()
![]()
-
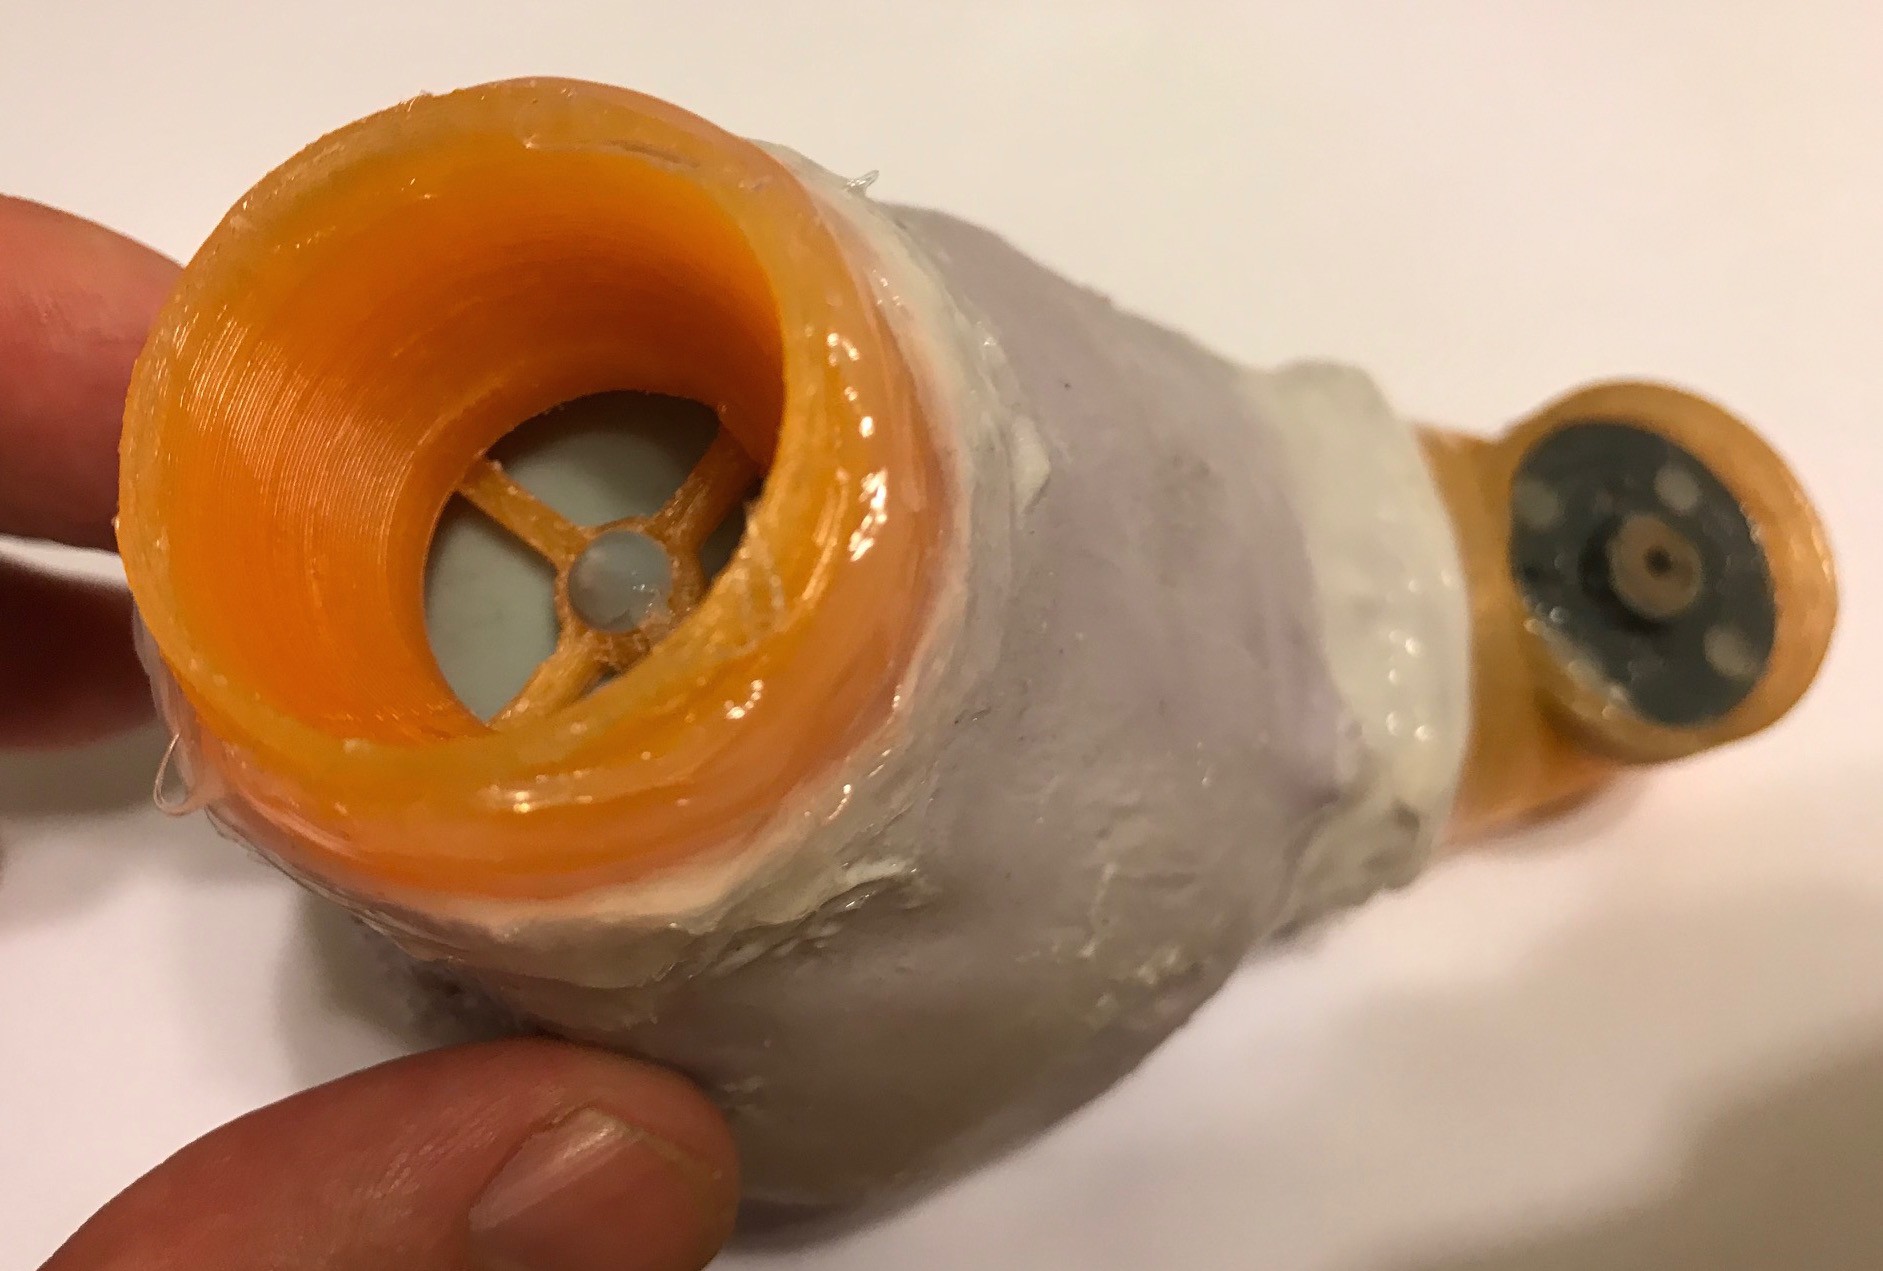
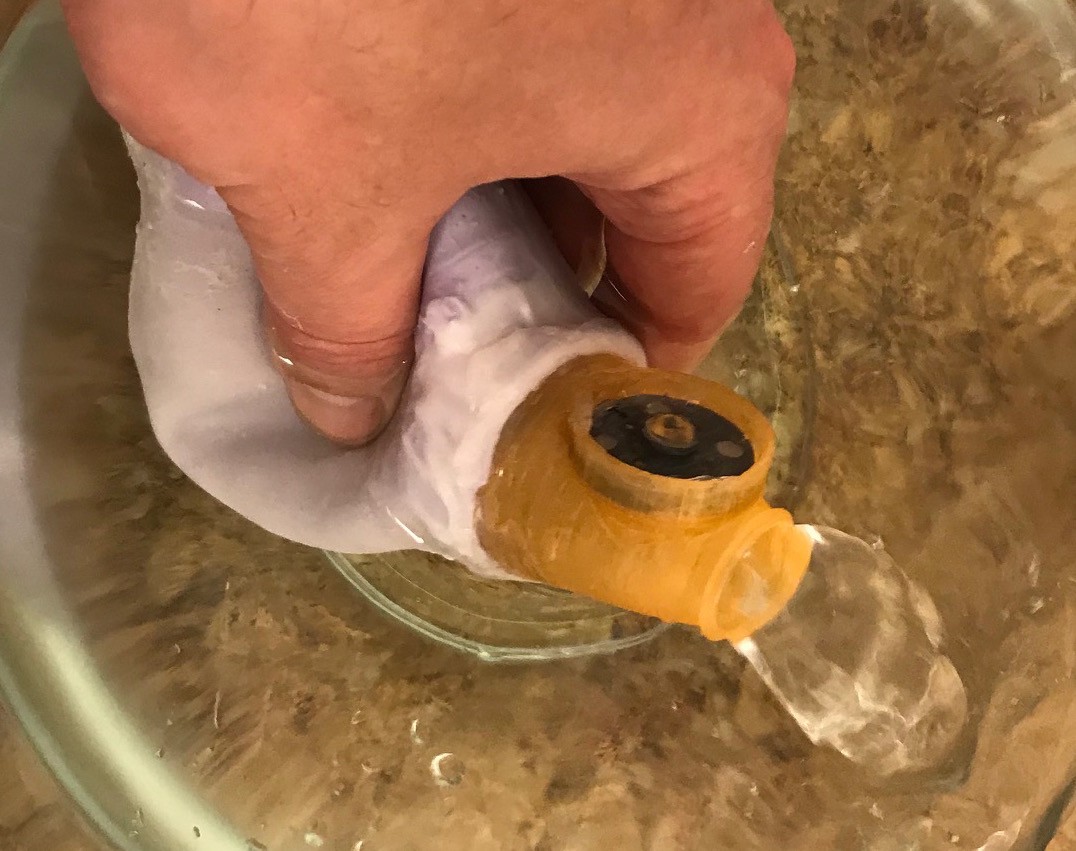
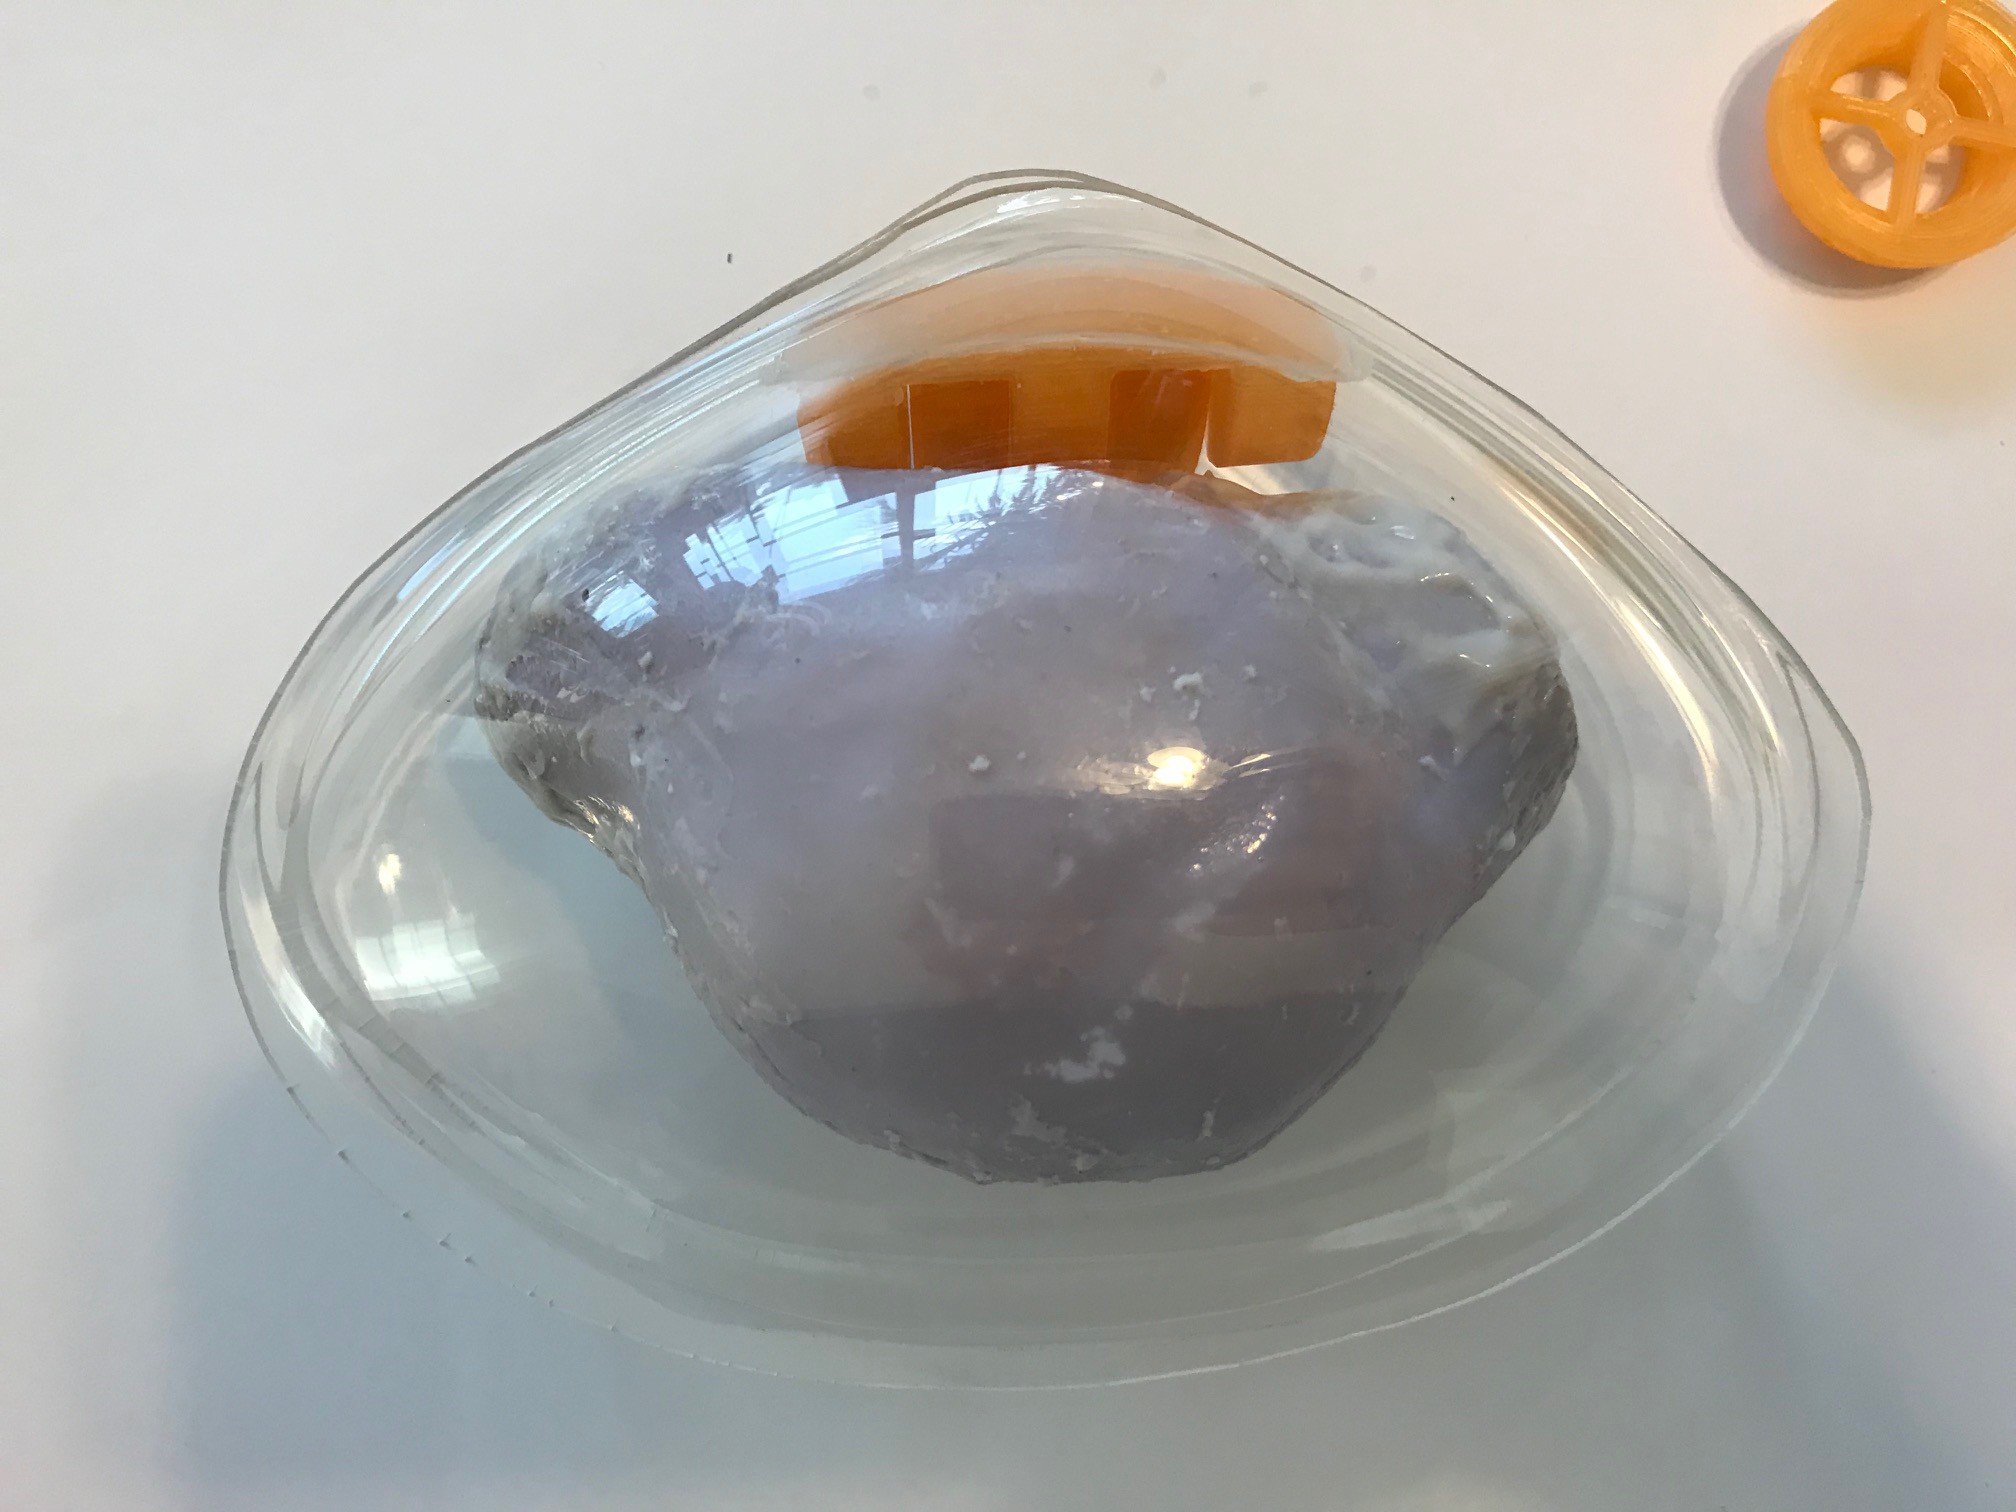
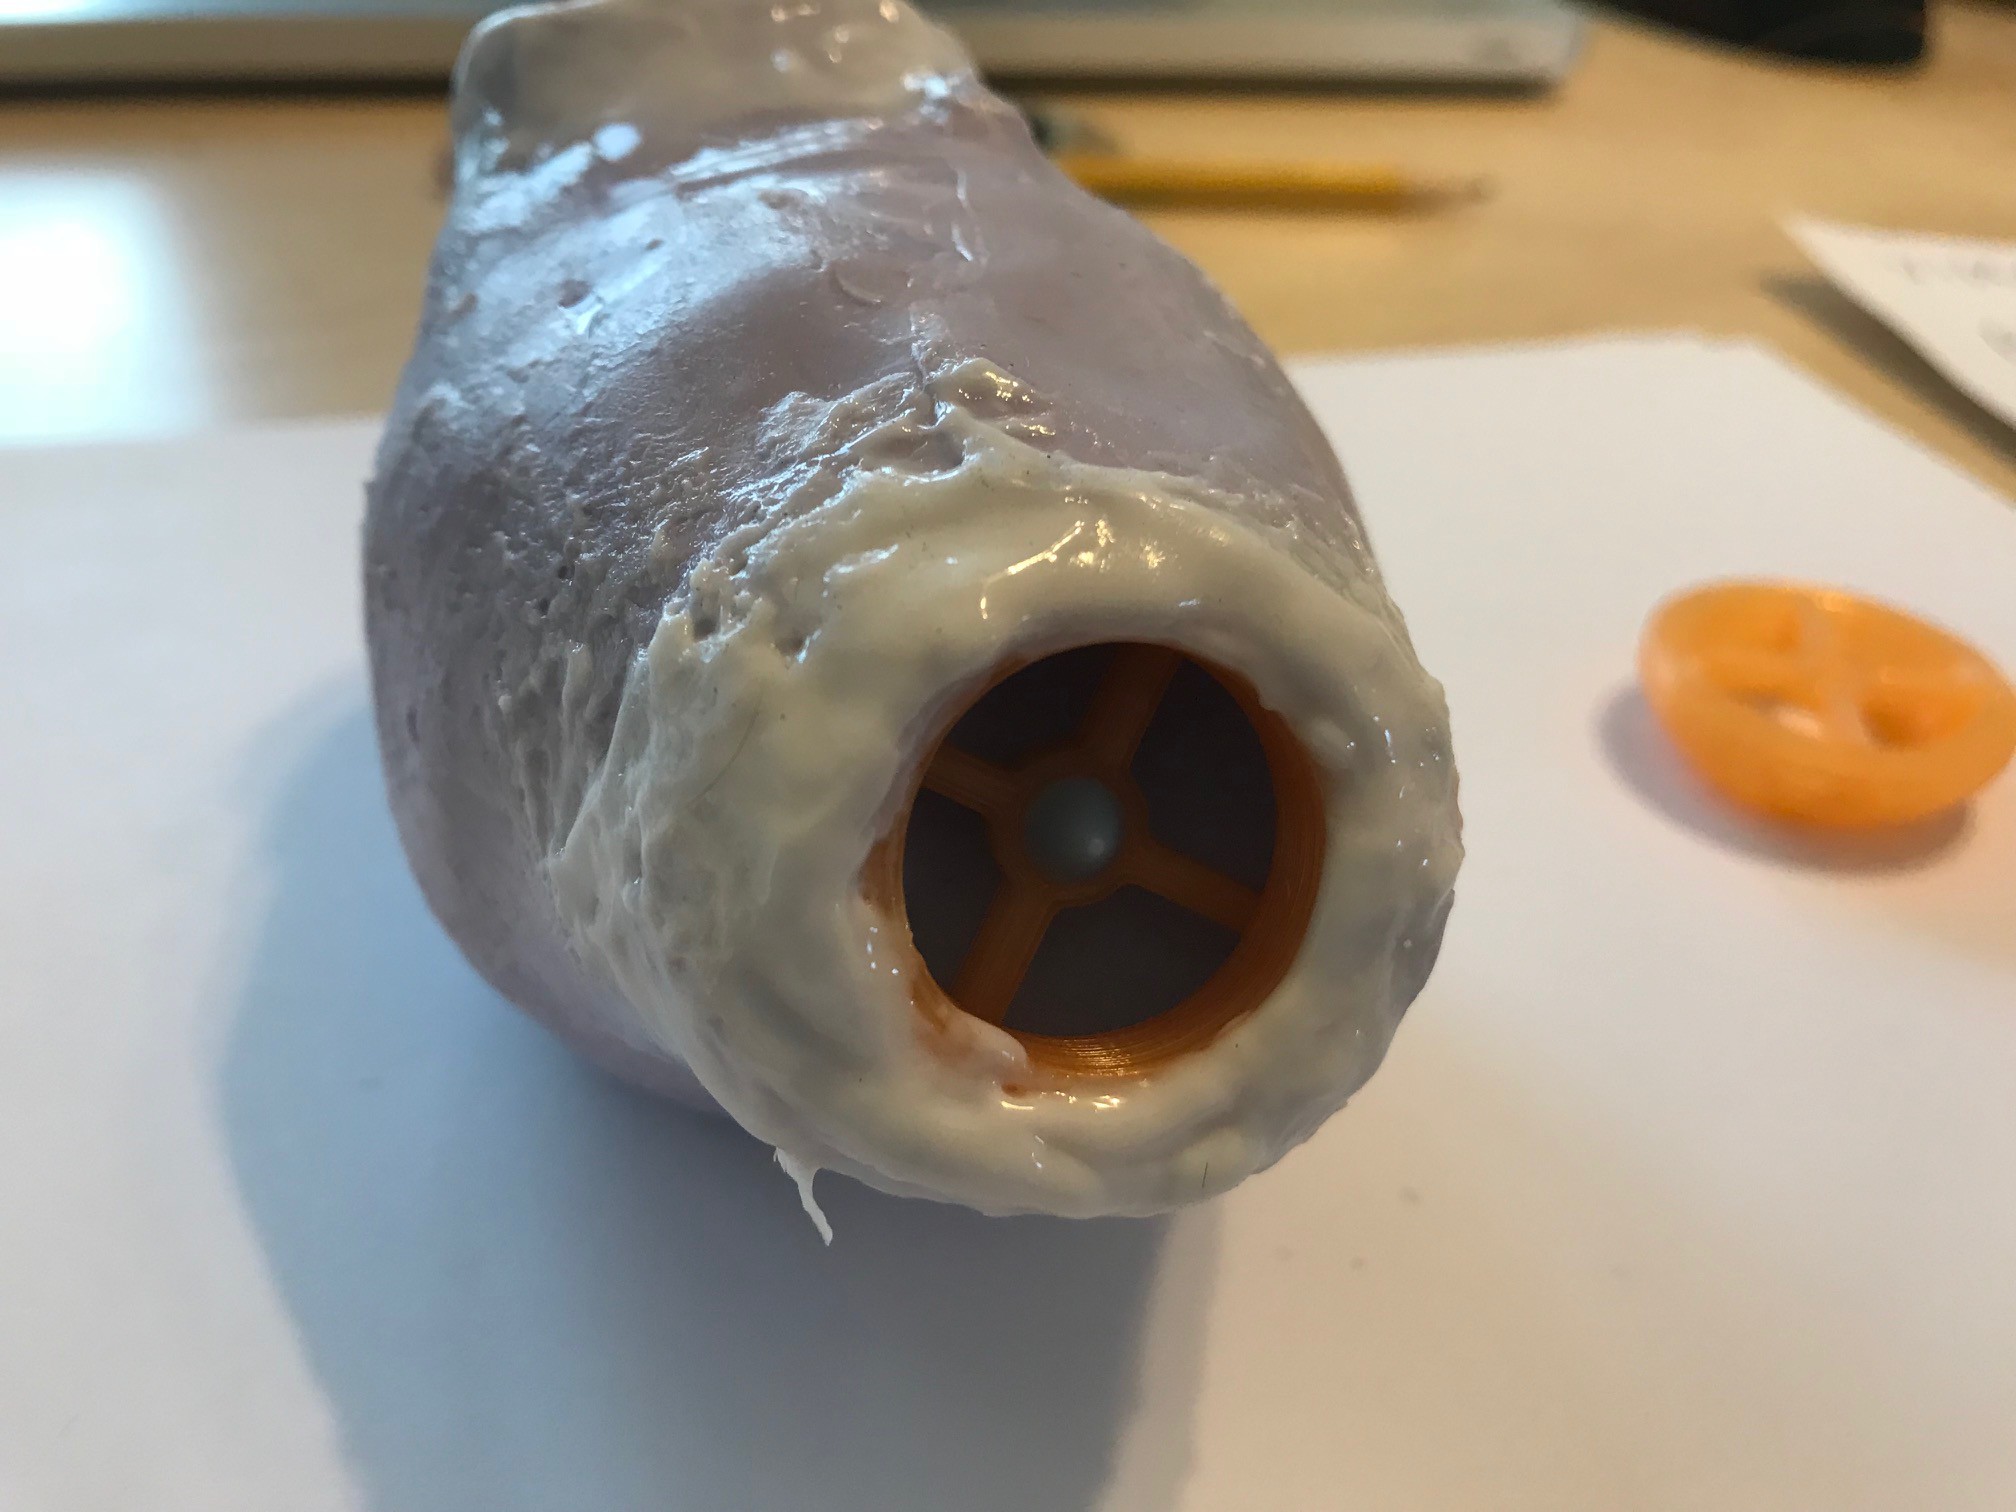
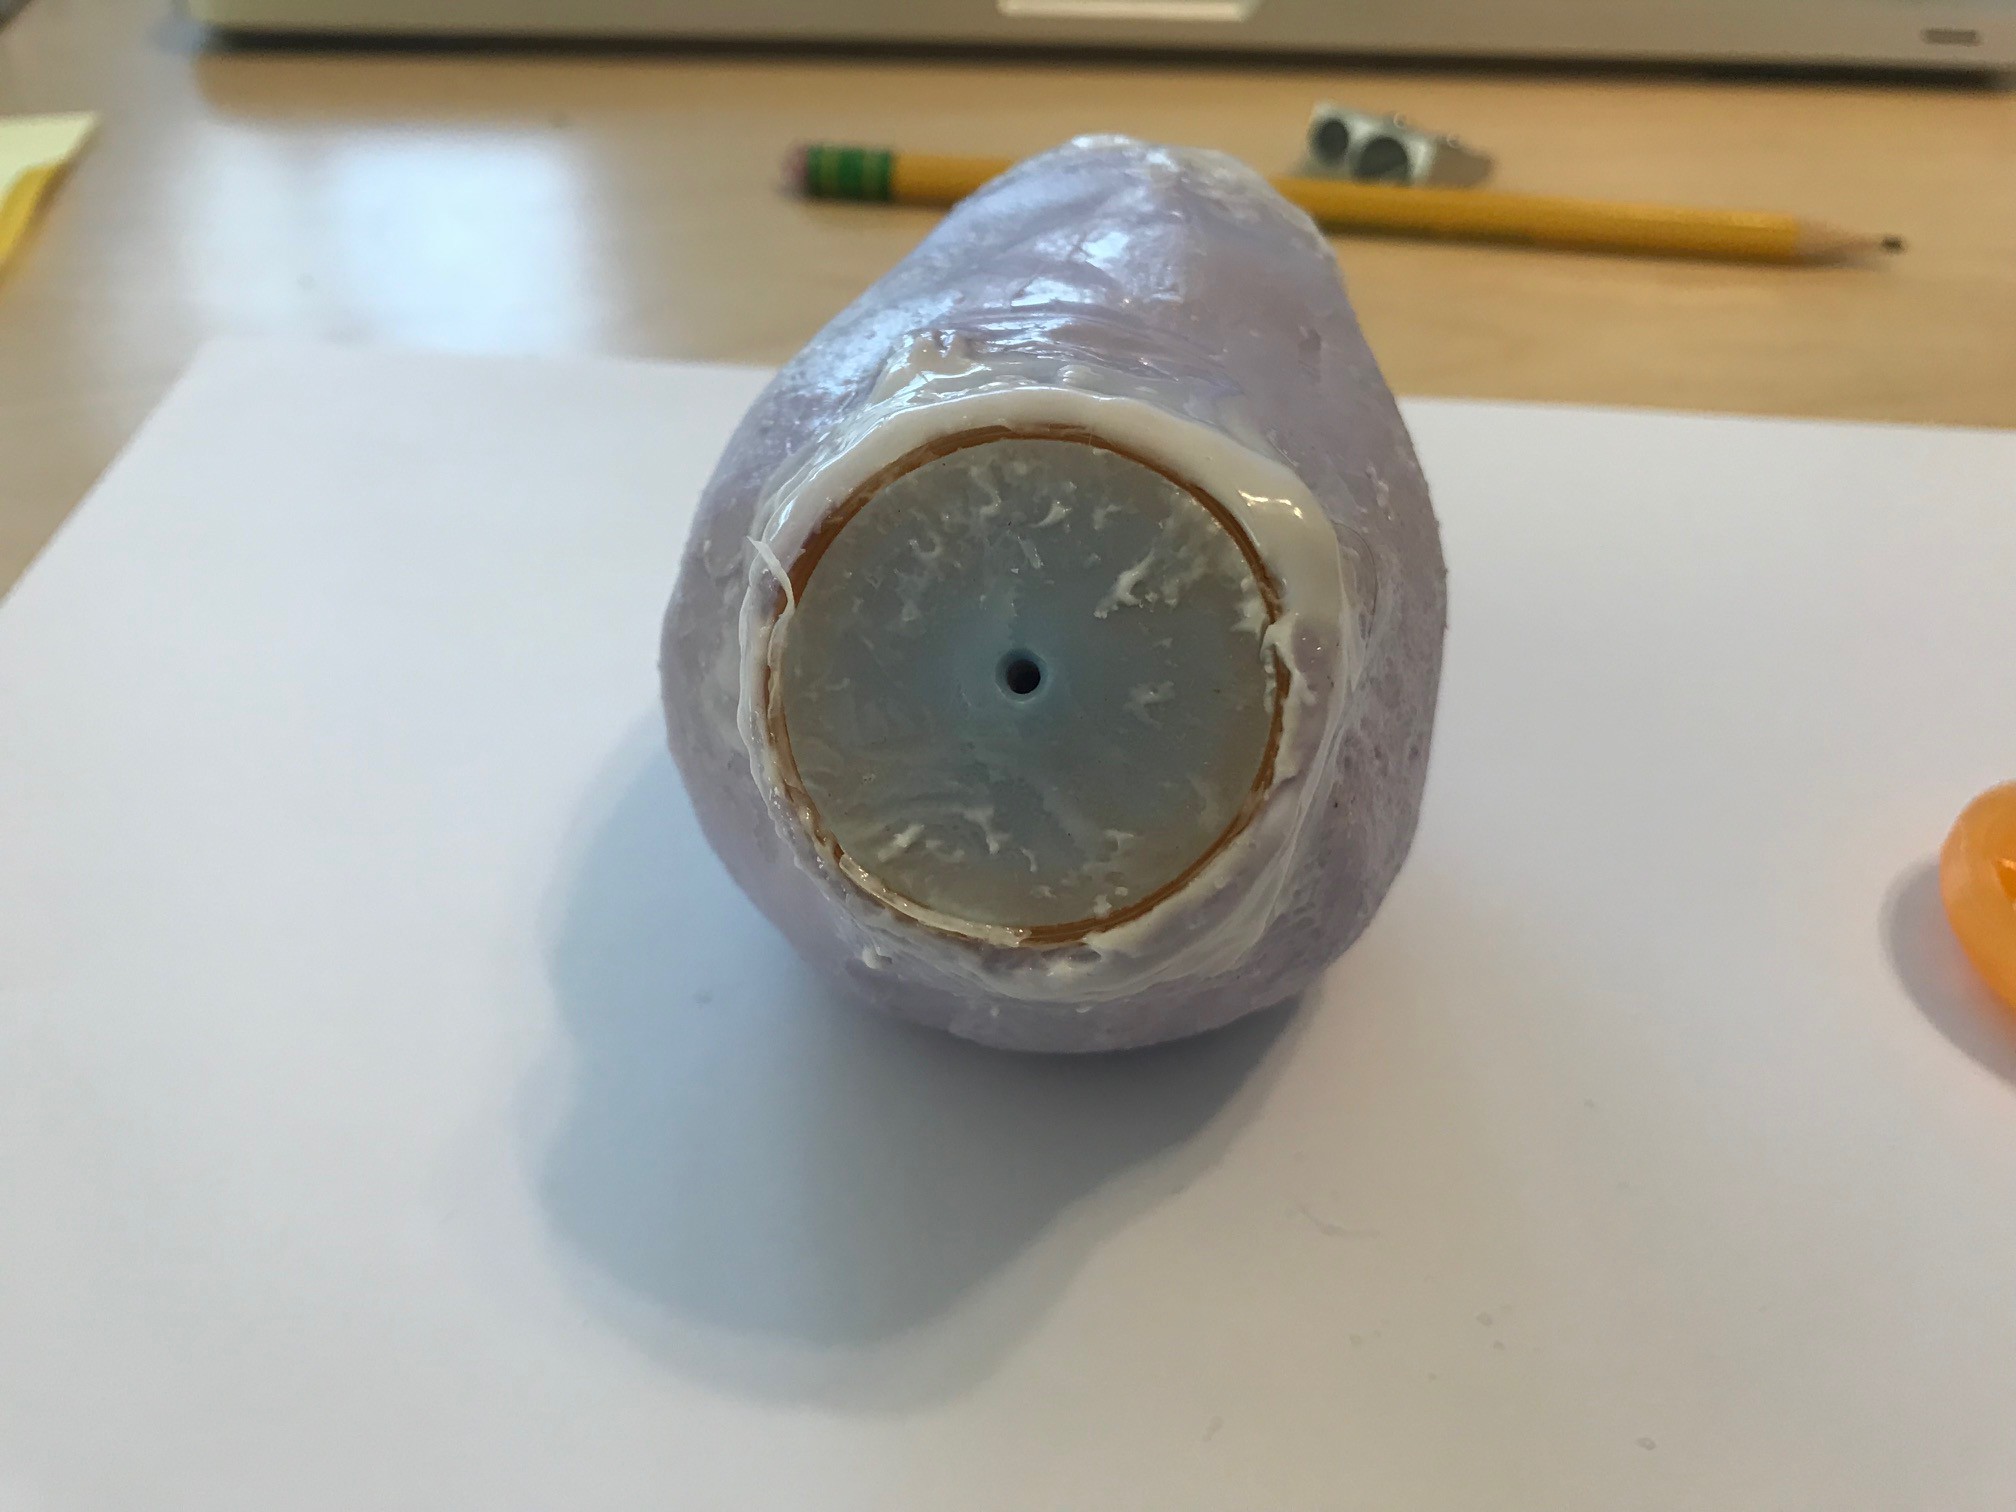
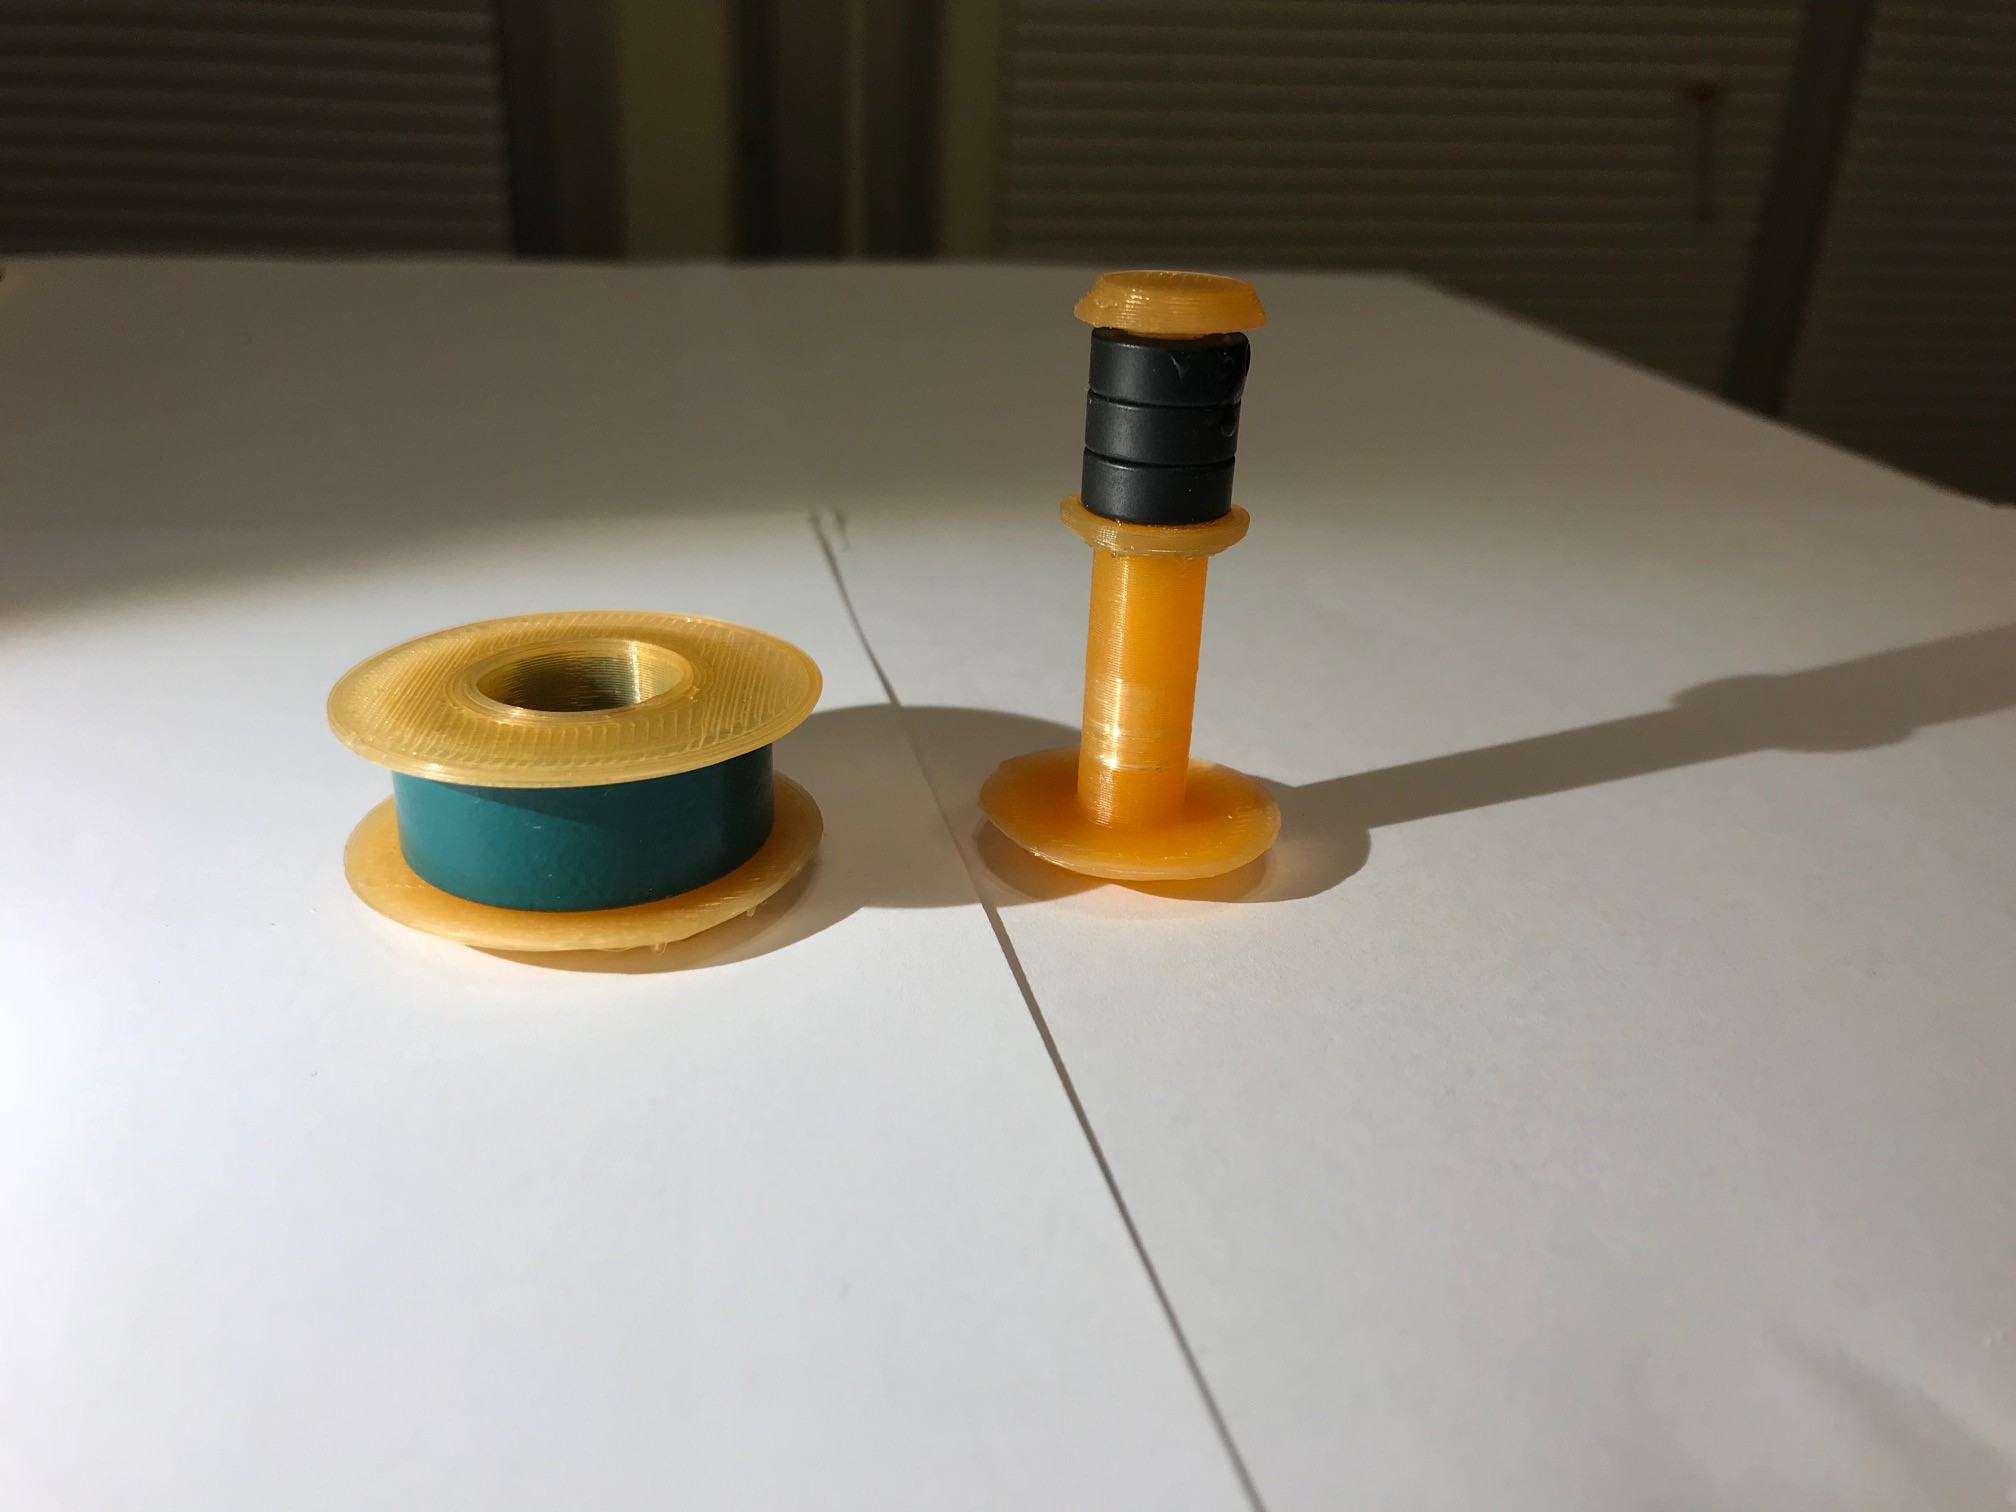
Siphon Pump
10/22/2018 at 12:40 • 0 commentsThis prototype is essentially a pump. The pump is essential to create water flow for the saturometer to work. I made valves by using the diaphragms from an old respirator, and designing a new retainer ring modeled off of the one in the respirator. I made the pump chamber from silicone, using a balloon as the form. When squeezed, it pumps a small amount of water (or air) through it. In the future, I want to use a 3D printed form for the bladder.
![]()
![]()
![]()
![]()
![]()
![]()
![]()
-
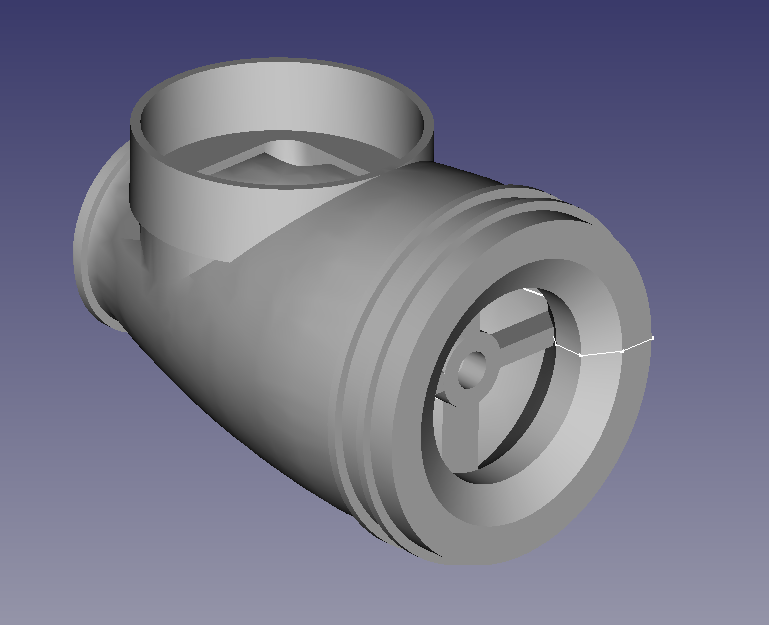
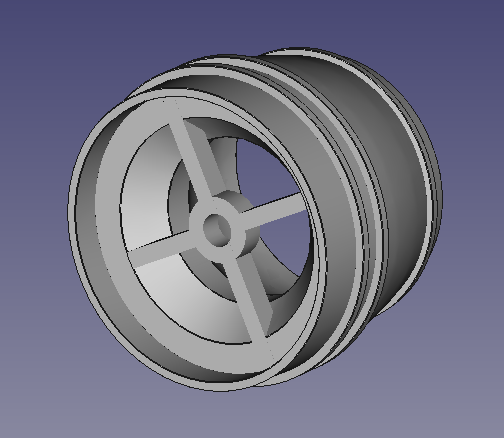
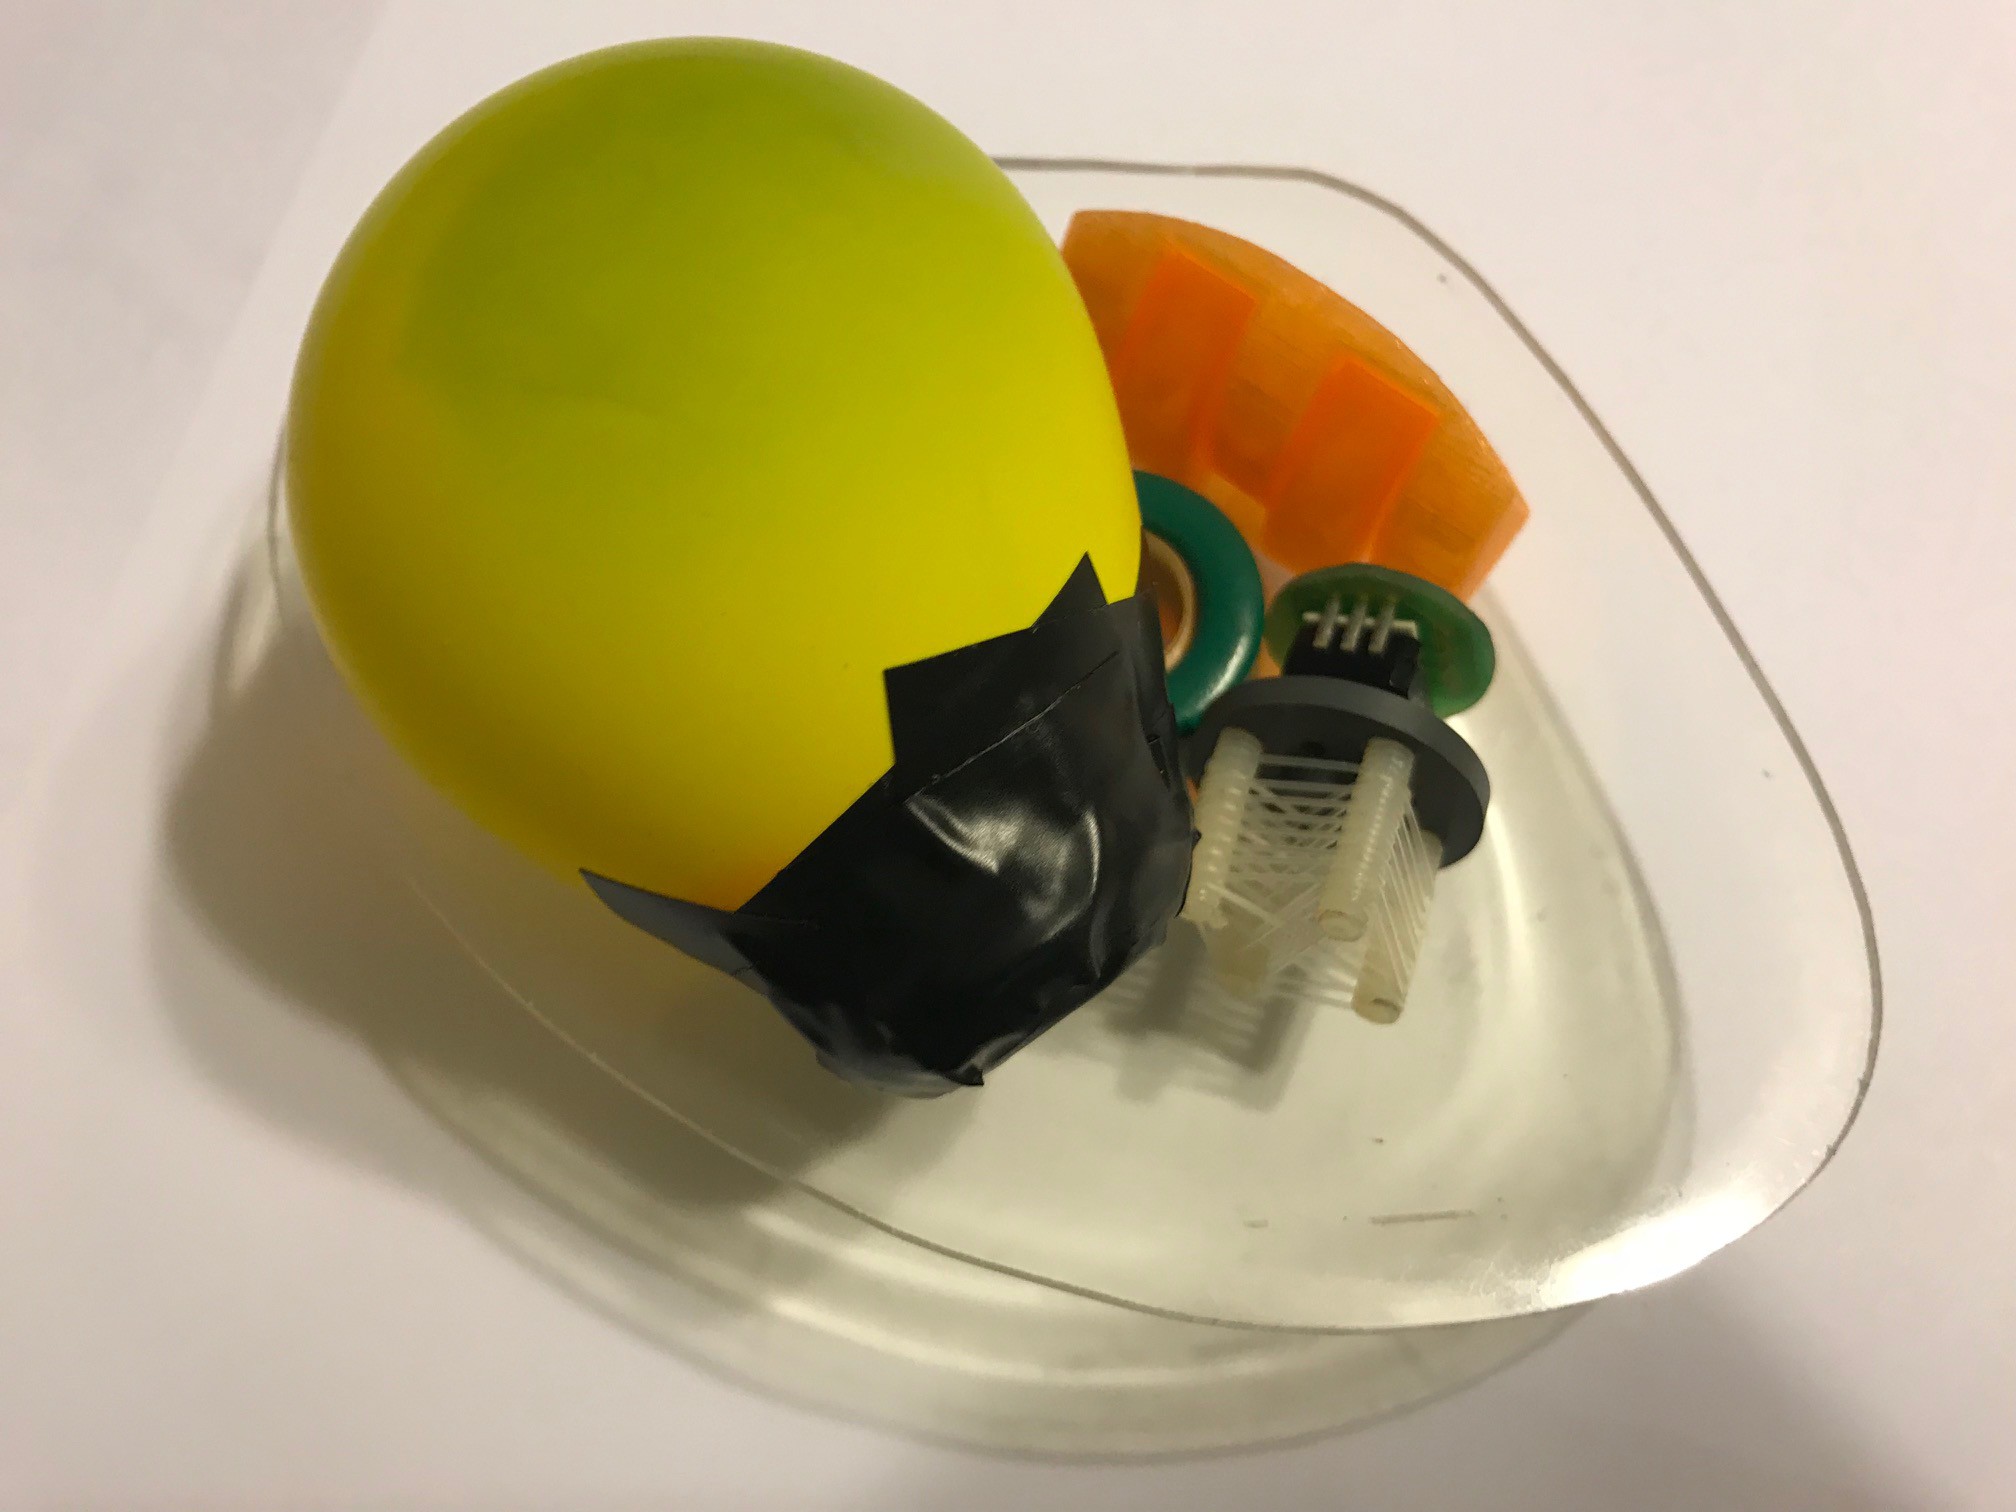
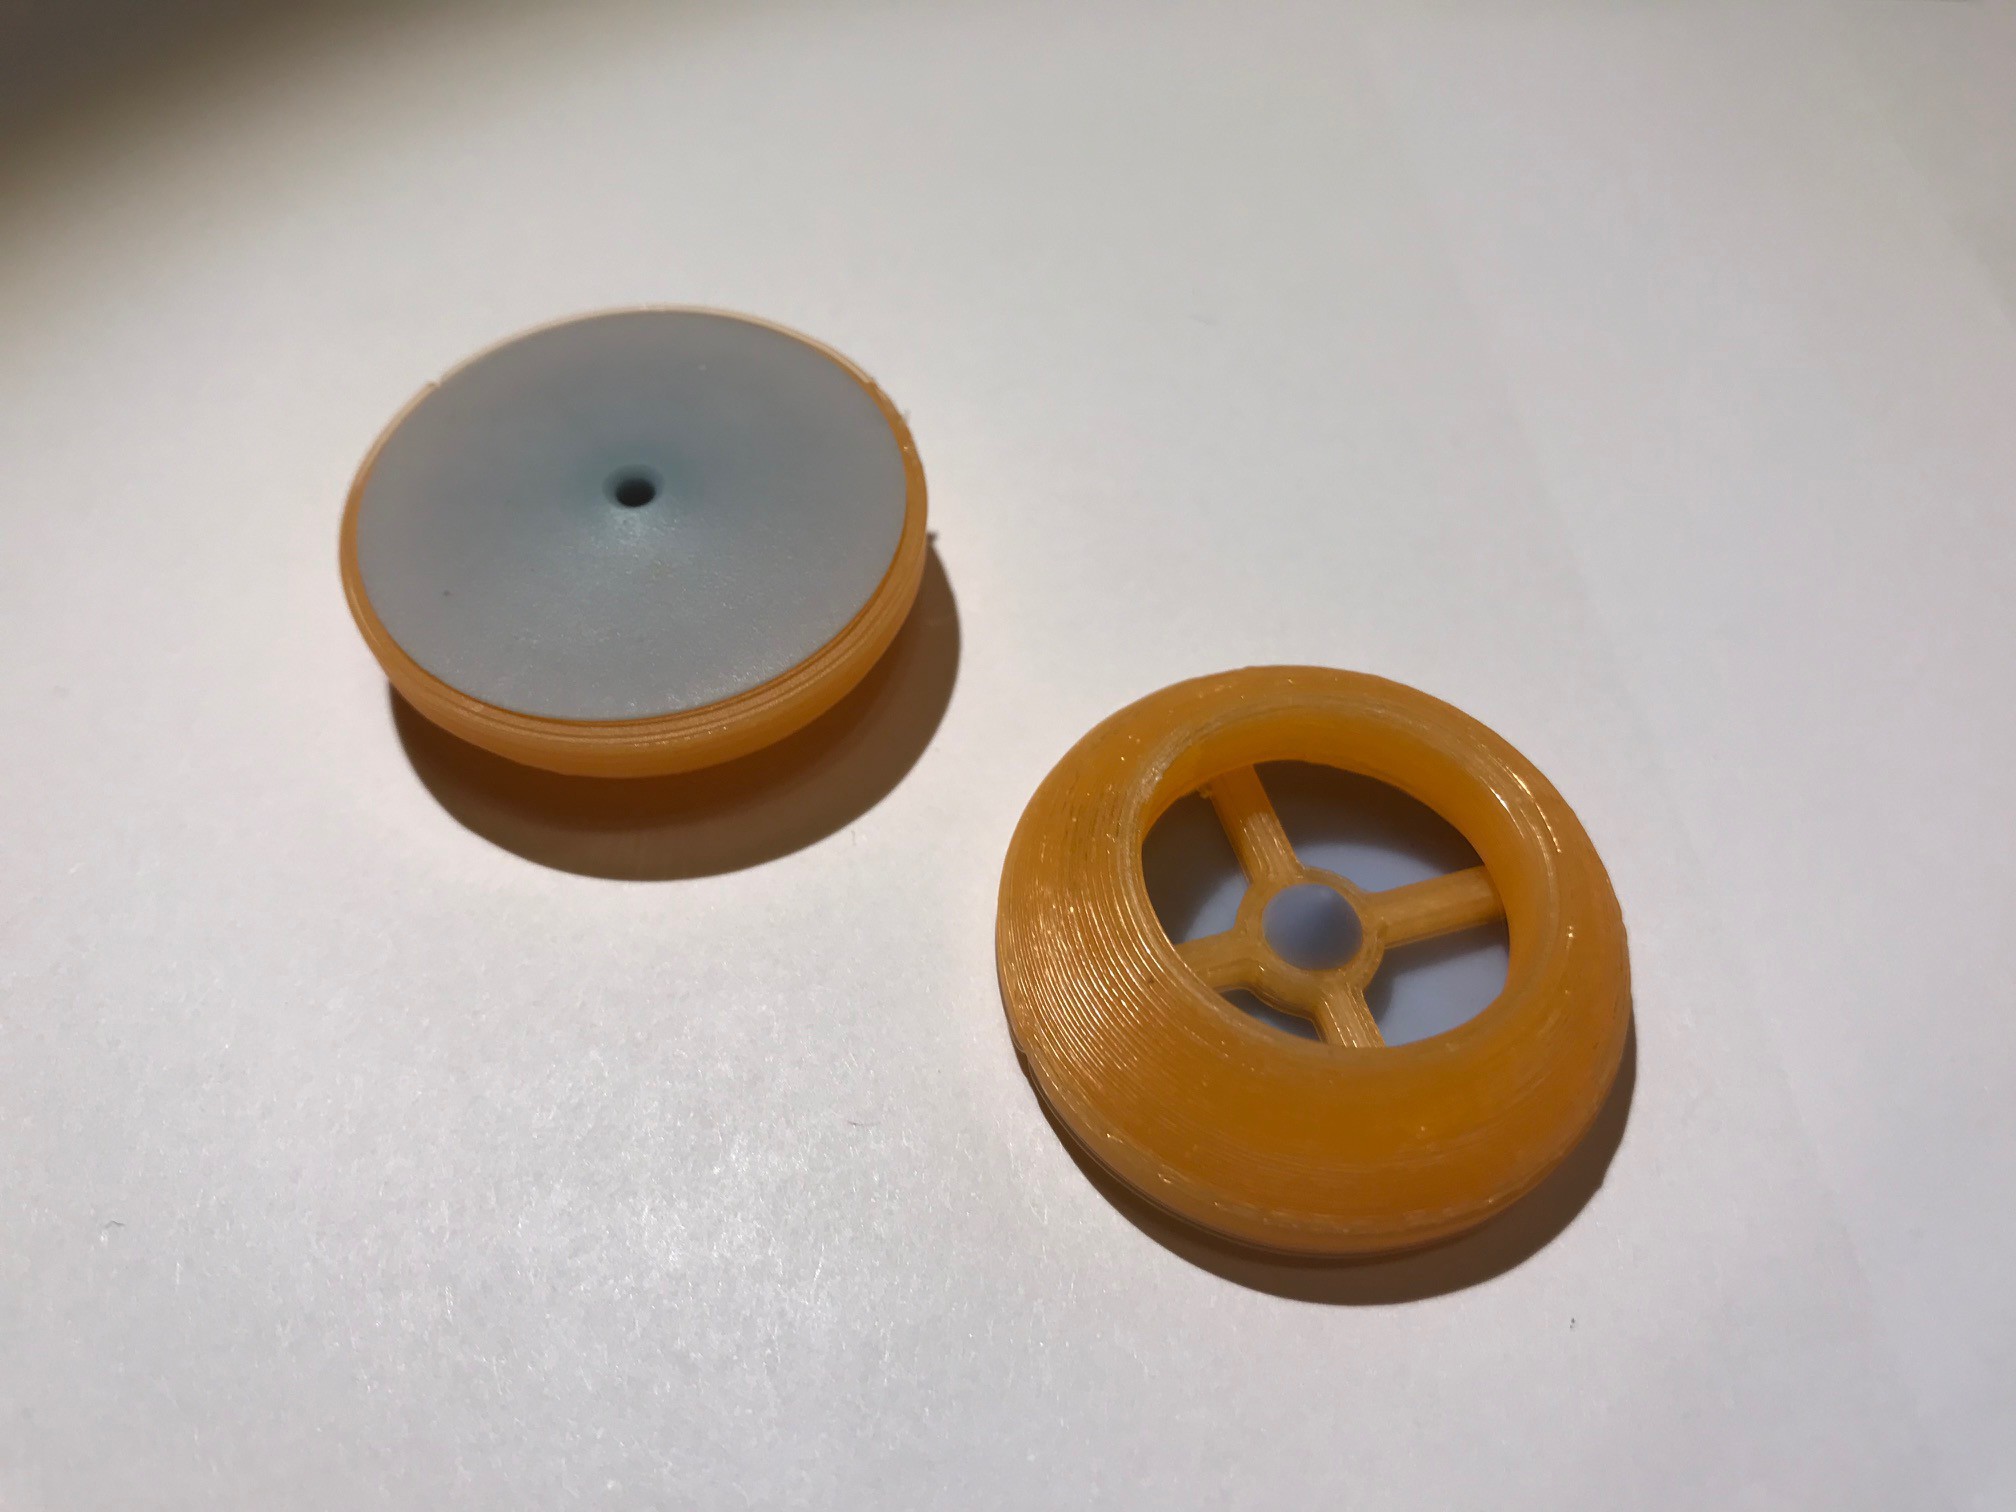
FreeCAD
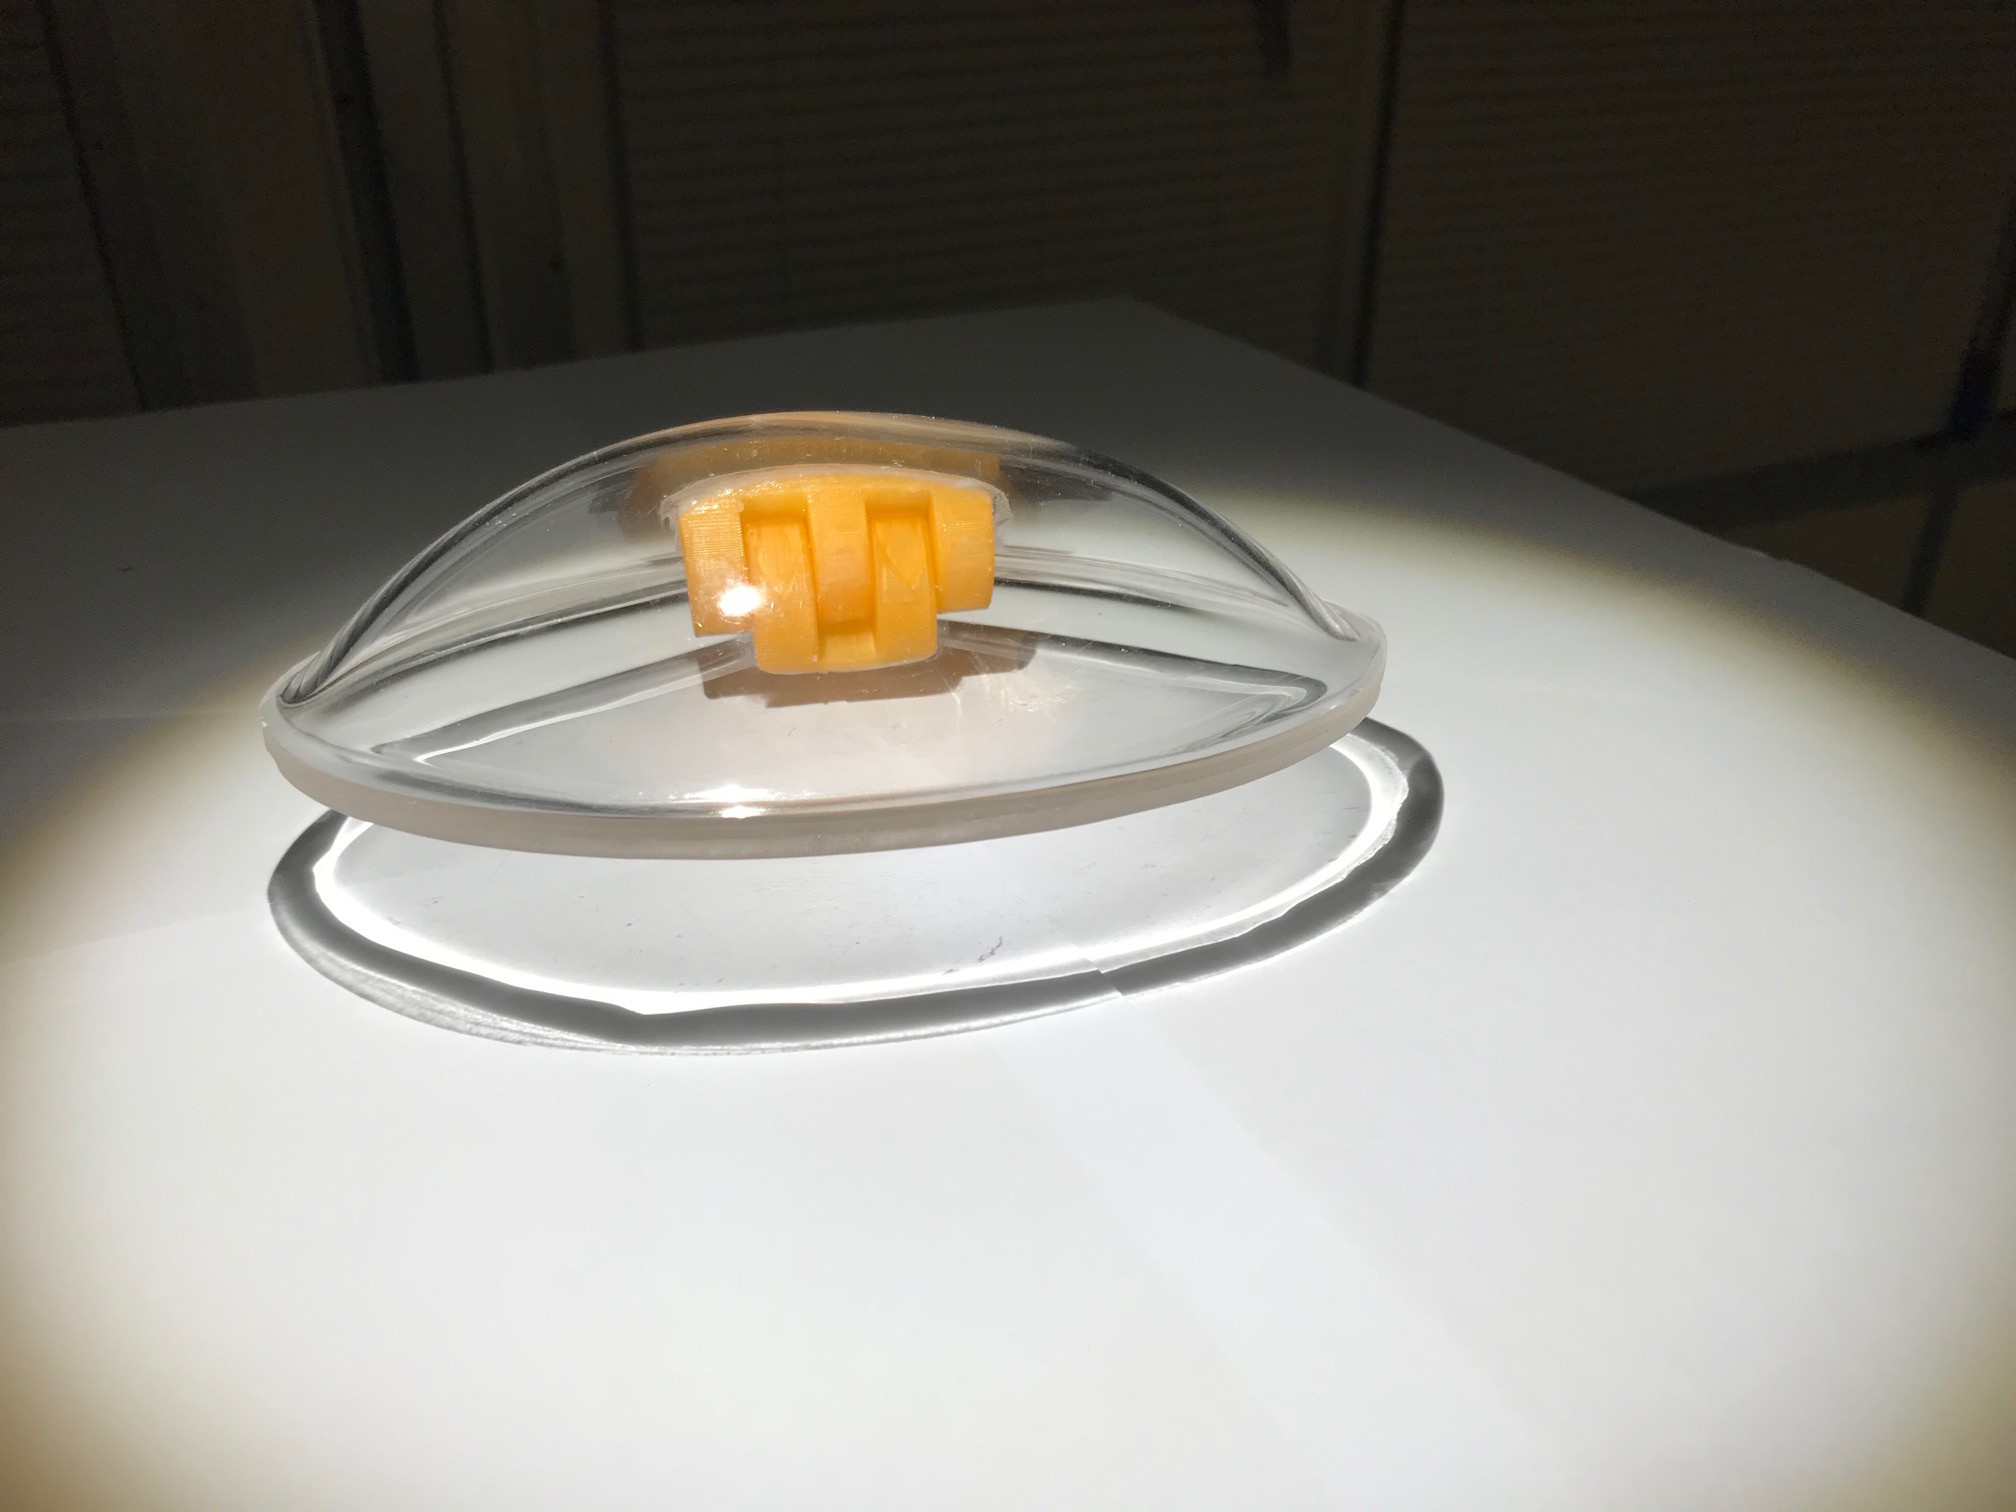
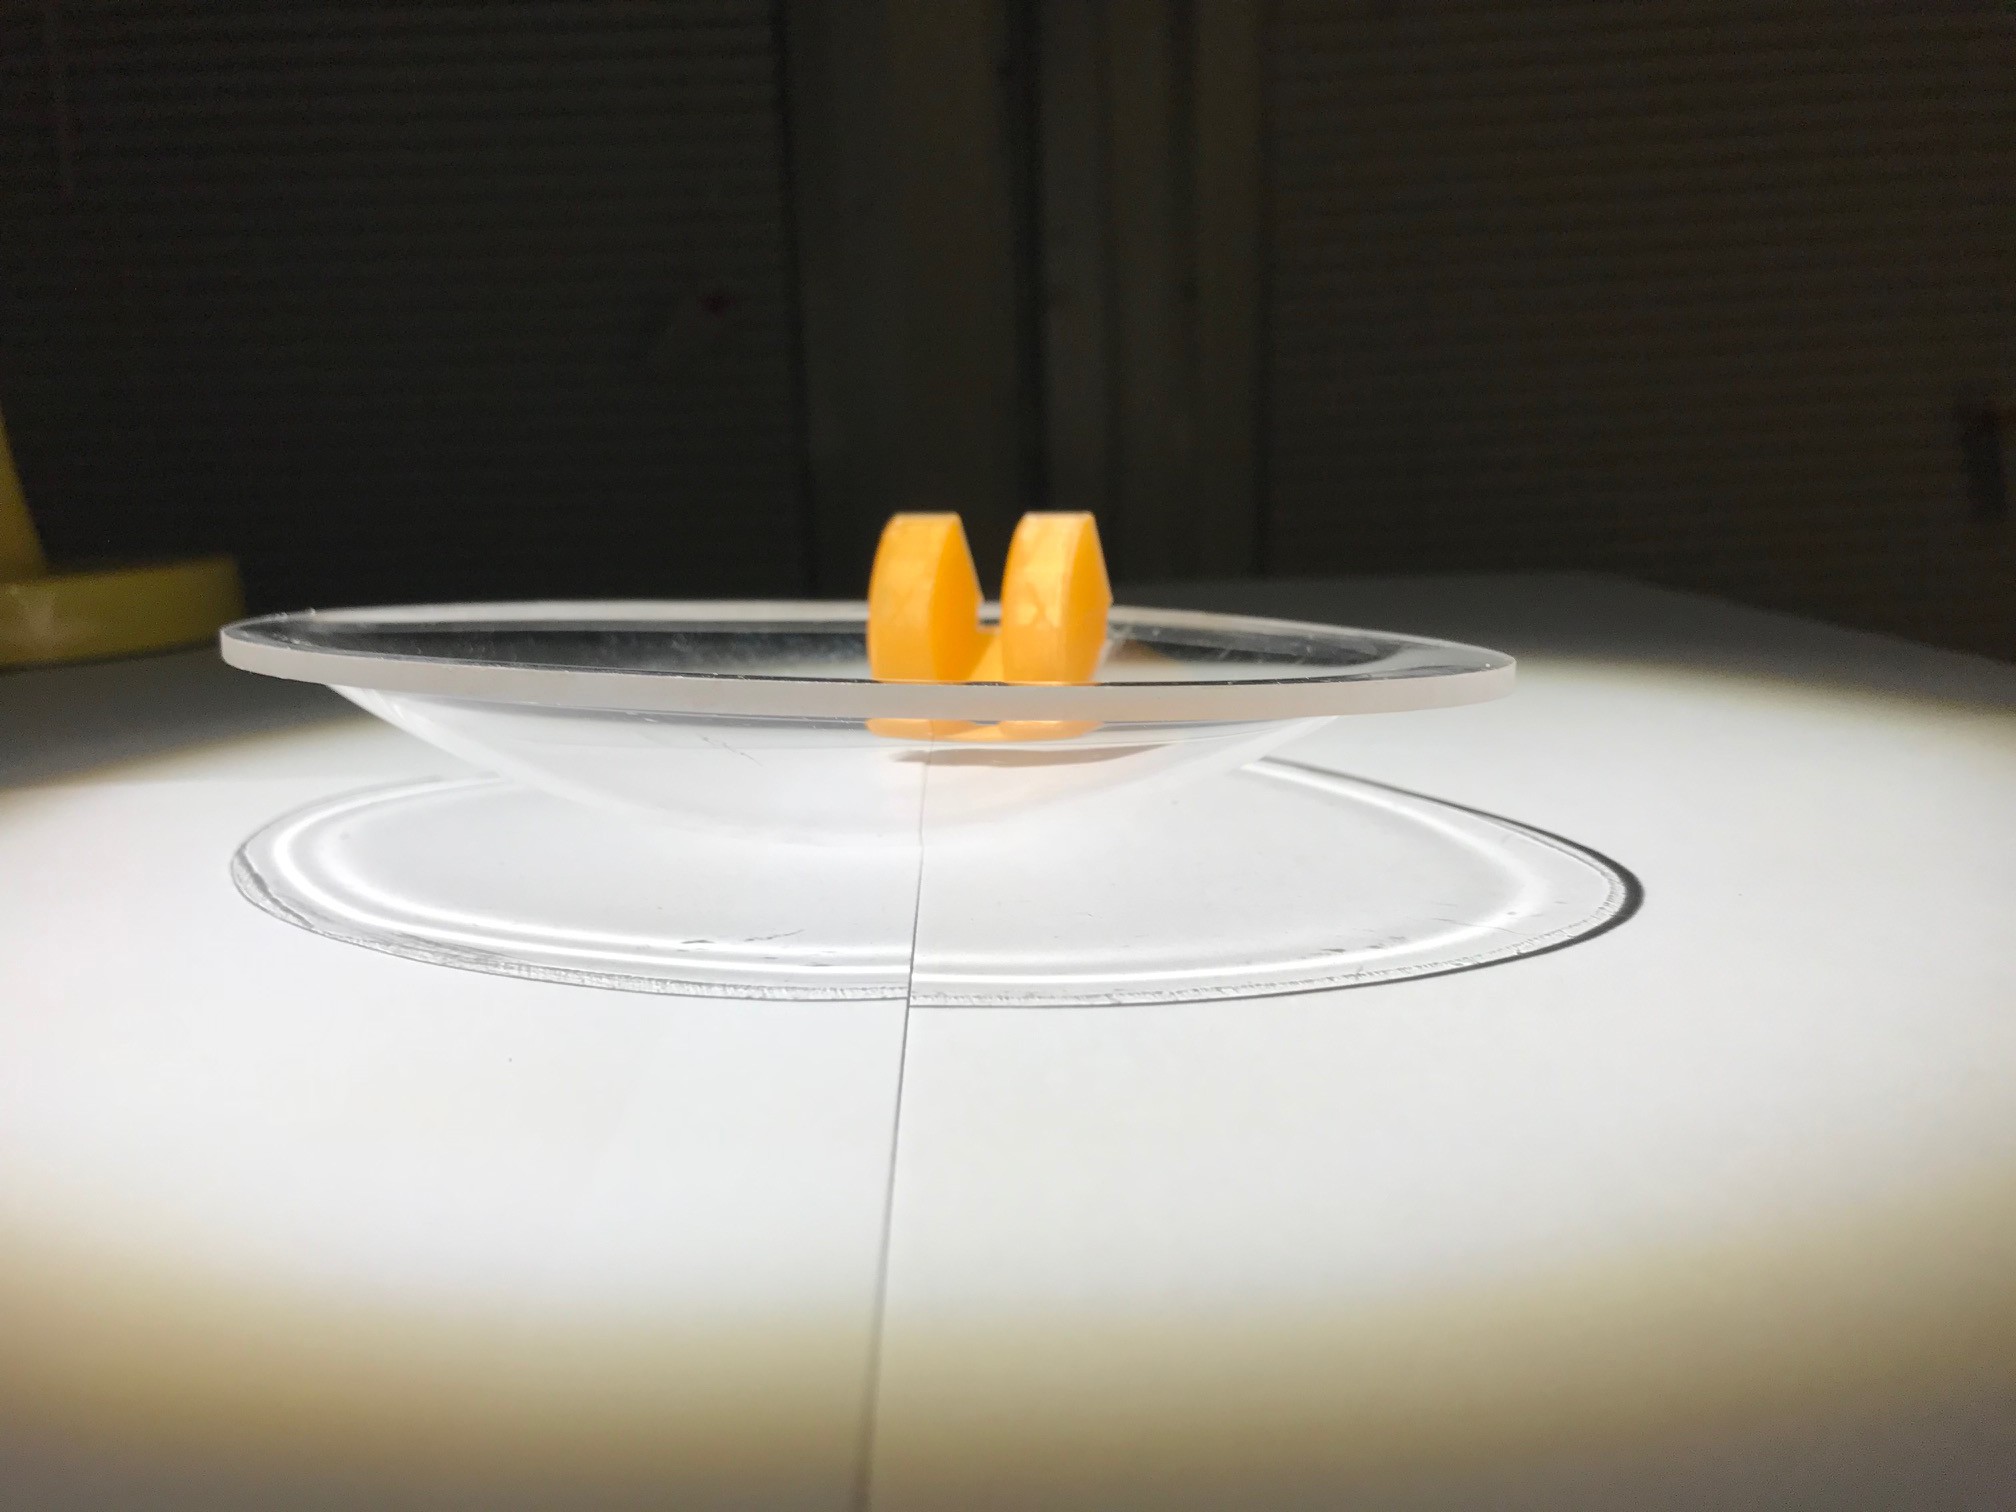
10/22/2018 at 12:24 • 0 commentsI used FreeCAD to make all of the 3D designs. I primarily used the Part Design, Part and Mesh workbenches. My workflow was to make sketches, and pad, pocket or revolve in Part Design, then move to Part for boolean operations (for interlocking parts), then export the shape as a mesh.
I redesigned the teeth, solenoids, and valves for the siphon pump. I used a clear acrylic shell, because I am still focused on placement and the relationships between the teeth, solenoid and valve. Once I know their placement, they will be integrated into the shells.
![]()
![]()
![]()
![]()
-
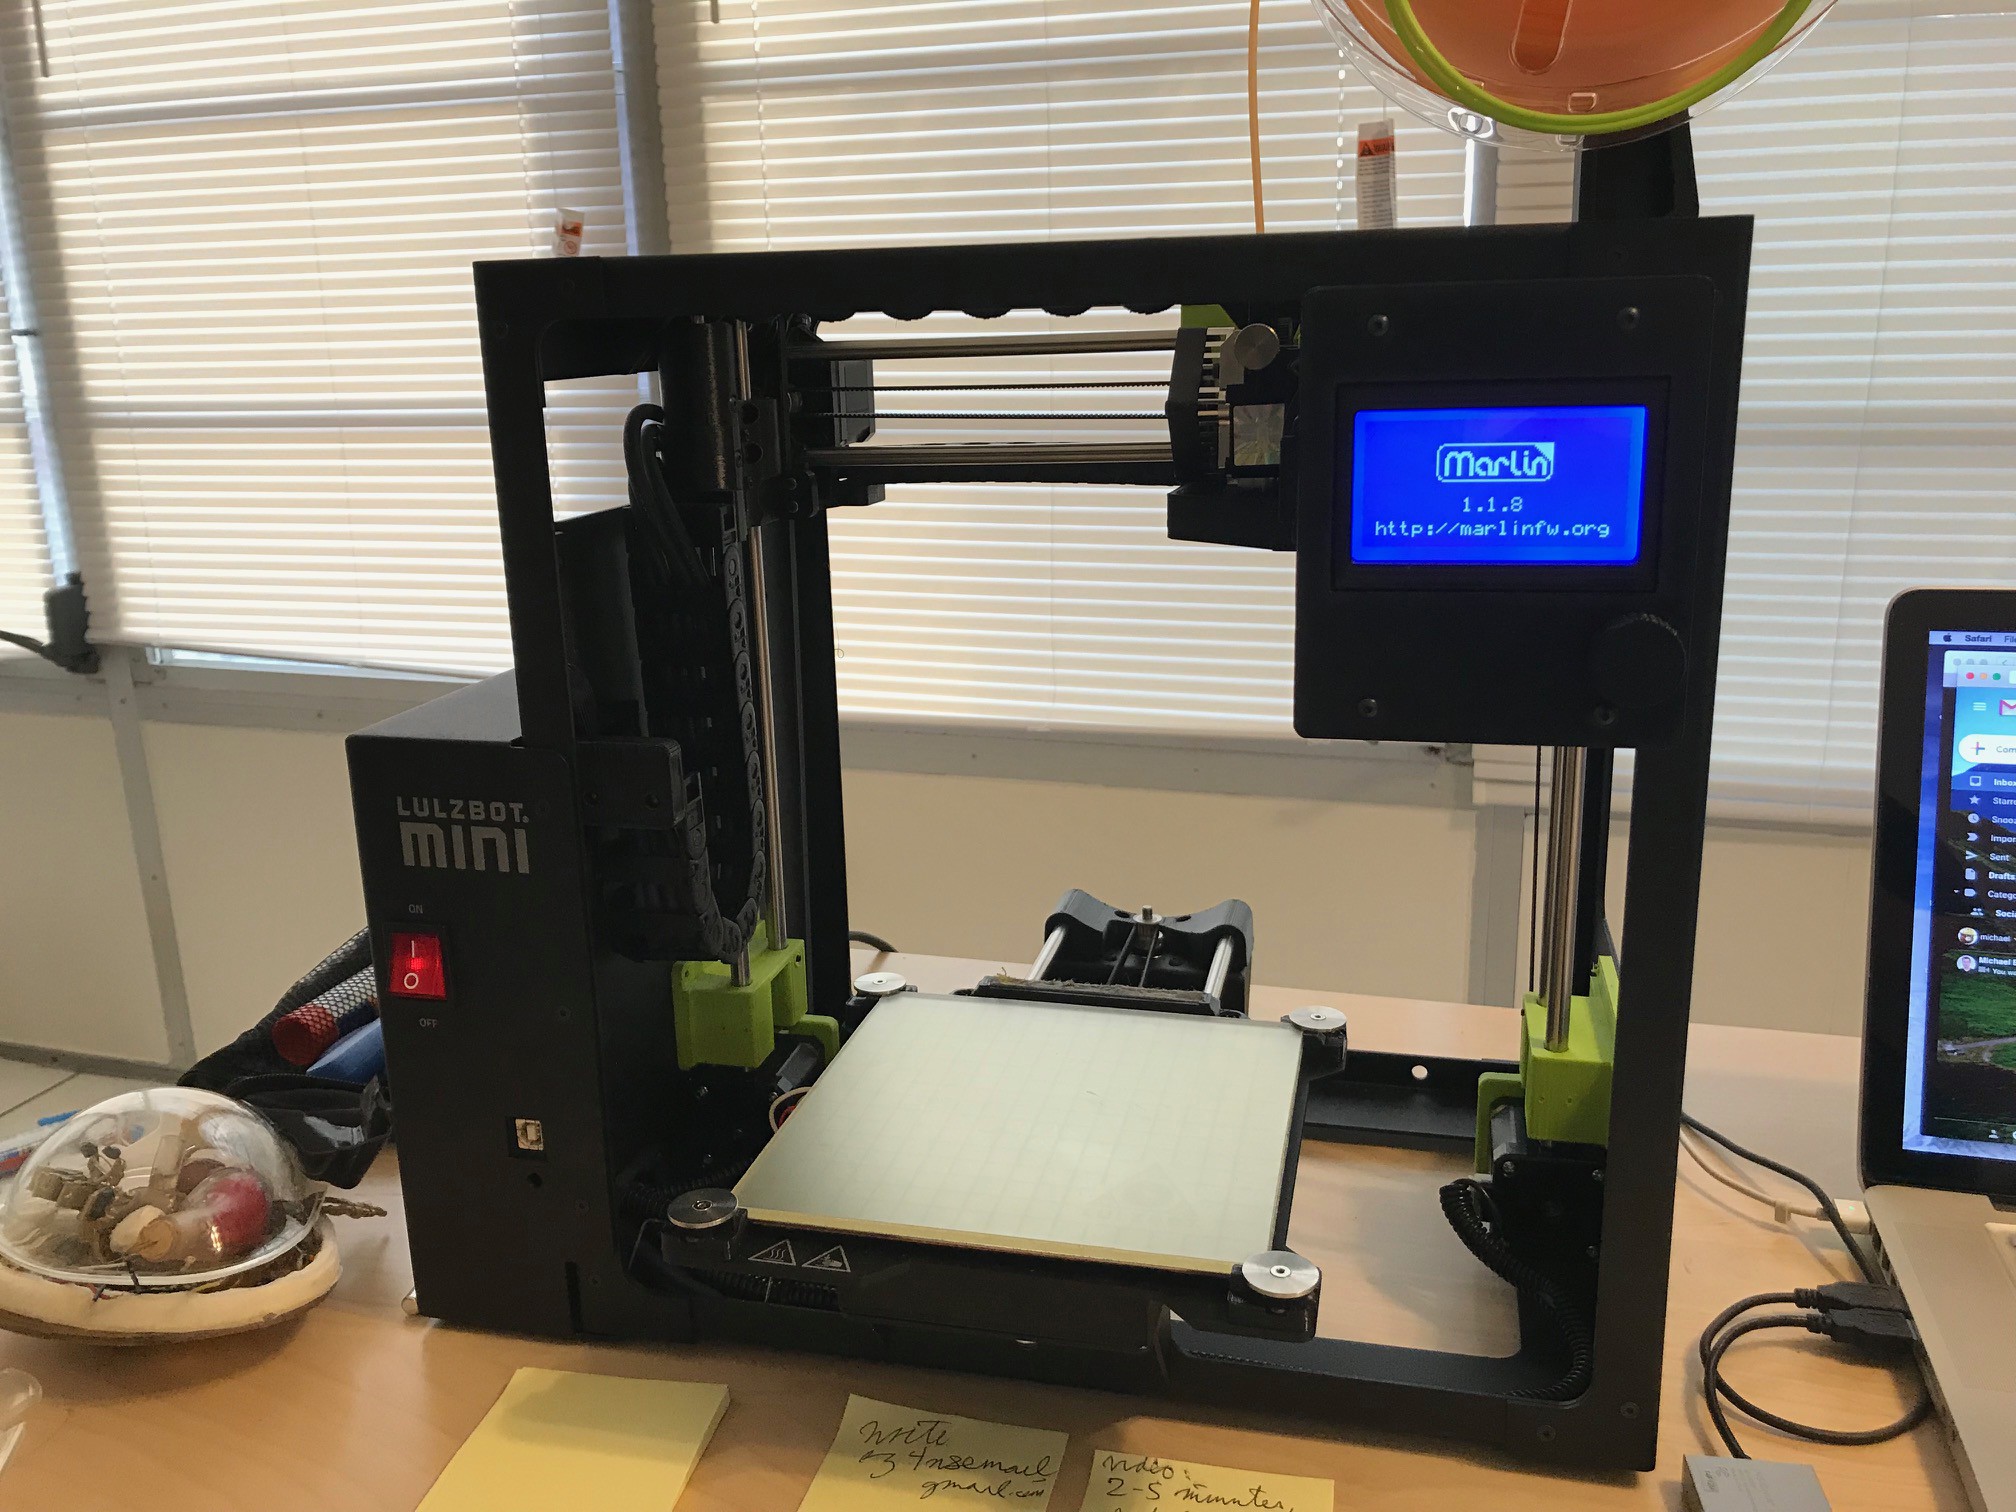
3D Printer
10/22/2018 at 12:12 • 0 comments
I haven't updated in awhile. I got a new job this summer working for a startup, and moved cross country to Florida. That soaked up most of my time, but I have made some progress on the project.
Given my limited time, I made a big mistake with how I went forward with the 3D printing. I spent several weekends trying to resurrect my old Kossel (RepRap delta printer), and achieved only dismal results. There were a lot of little problems that were frustrating to overcome. In this case, my instincts of trying to implement everything myself really failed me. If you have infinite time, it is a great ethos, but if you have a deadline, it's terrible.
With the deadline looming, I ordered a Lulzbot Mini 2, and it arrived just in time to give me one last weekend to produce a new prototype before the last round of Hackaday Prize qualifications. Thankfully, the Lulzbot was plug and play, so I was able to focus on the project and not the 3D printer.
![]()
-
Saturometer & Siphon
05/02/2018 at 01:27 • 0 commentsThe clam is a sensor platform for measuring water quality. So far, I have experimented with thermistors as stand-ins for more complex water quality sensors. I am developing a new saturometer, in order to bootstrap the capabilities of the clam. Saturometers are used to measure the total dissolved gas (TDG) in water. Monitoring TDG is important for understanding and mitigating issues related to supersaturation of water, which can cause large fish kills. I will take a naturalistic approach to how I develop the new saturometer probe, and will apply a machine learning technique, linear regression, for its calibration.
Acknowledgements
I am basing my work off of one of my dad's patents for the saturometer he developed in the early 1990's. I want to thank him for talking with me about my new design, and for letting me learn in his shop while I was a kid.
Introduction
My dad developed his saturometer before the internet was widespread. Powerful computers, SMD technology, and 3D printing were not widely available, nor was knowledge of machine learning techniques. My design for the clam is taking advantage of the developments over the last two decades. The redesign of the saturometer will focus on improving the ease of fabrication of the probe and improving the ease of calibration by incorporating linear regression, a simple machine learning technique.
Saturometers are used to measure total dissolved gas (TDG) in water. It is important to measure TDG, in order to study and mitigate supersaturation (for example, in this study of using microbubbles). Supersaturation can be caused by spillways at dams, in water turbine vents, hatcheries and other man-made or natural structure that entrain air in water. Additionally, it can be caused by other processes, such as photosynthesis of algae. Gas bubble disease (GDB) is caused by supersaturation and can cause large fish kills. Fish have a limited ability to detect supersaturation and cannot avoid it if present, so it is imperative that we monitor and mitigate it.
Sweeney Saturometer
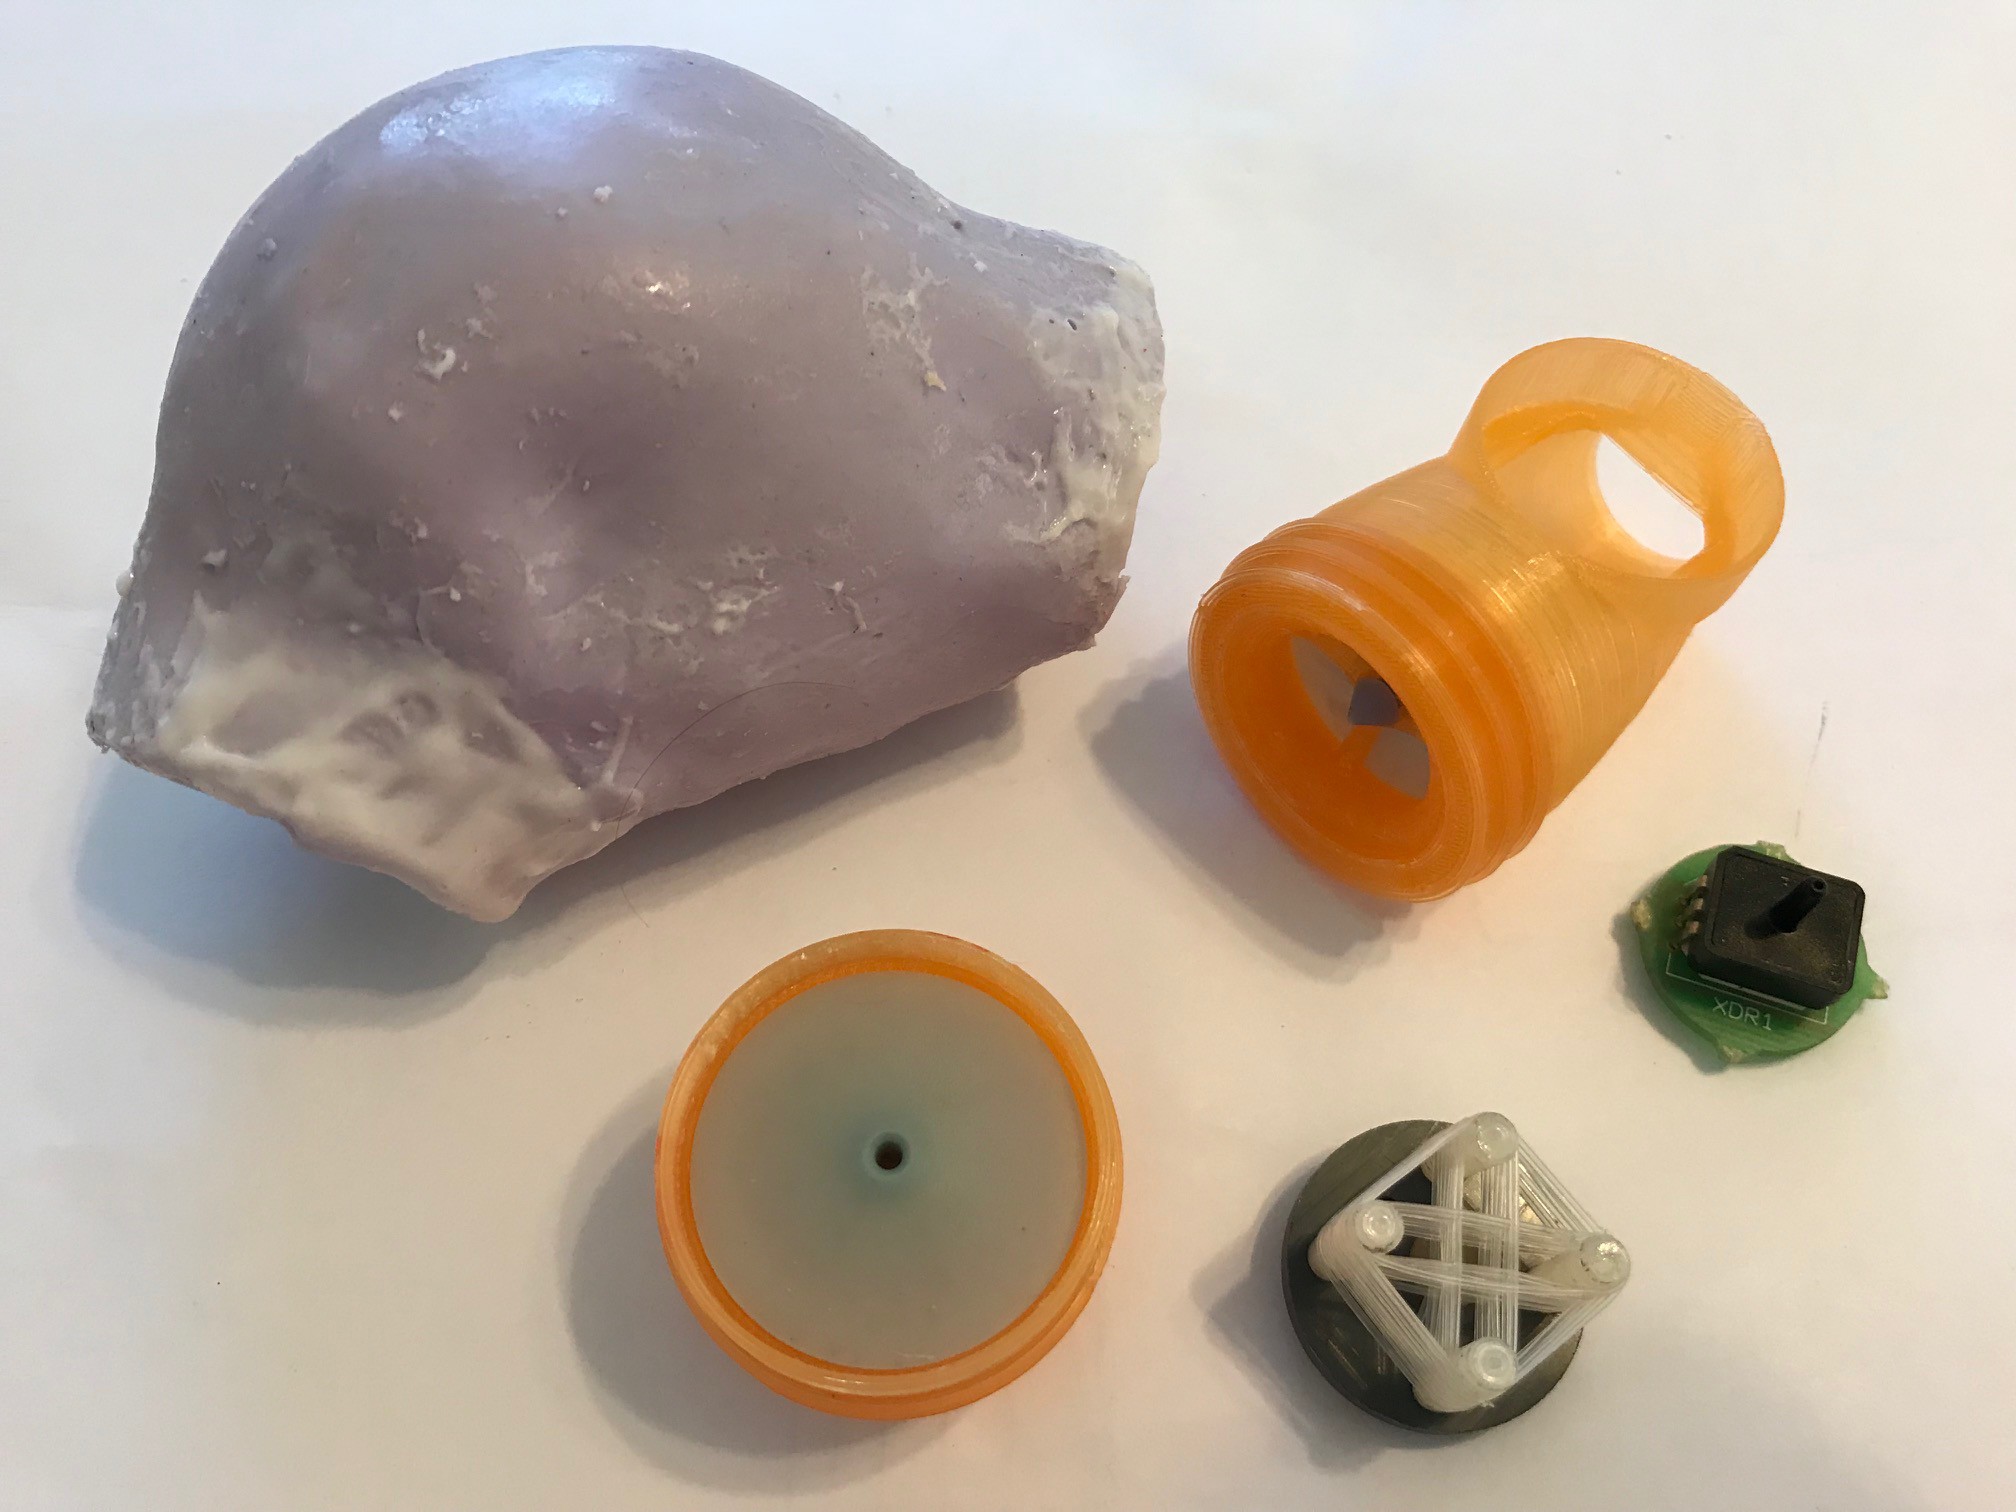
Saturometers are able to measure TDG by taking advantage of a property of silicone: permeation. Gases are able to pass through silicone tubing, so by measuring the pressure within the silicone tubing, the saturometer is able to measure the TDG within the fluid. The saturometer probe is composed of silicone tubing wound around a support structure and connected to a pressure sensor inside a protective mesh cover. The probe is attached to a metal tube that produces waterflow across the probe when moved in the water column. Waterflow is important for getting accurate readings. Here is a Youtube video of the saturometer in action.
To calibrate the saturometer, it is necessary to use an external device. The probe can be calibrated without the silicone tubing using an air compressor, a manometer and a coupling. It can also be calibrated submerged in water with a controlled pressure and another saturometer.
In order to make fast measurements, the thickness of the tubing needs to be decreased, and the surface area of the tubing increased by increasing the length of the tubing. The volume of the tubing can be decreased by inserting a filament like fishing line into the tubing. Additionally, by adjusting the calculations of the measurements and looking at the rate of change, fast estimates can be made before the pressures have reached equilibrium.
Siphon: Initial Design & Fabrication
My design for the saturometer probe will use a coil of silicone tubing without an armature. The tubing will be placed inside a silicone siphon, and be packed loosely.
I will use the same methods and materials that I used for the previous clam experiments. I will use the same electronic circuit but add op-amps and an absolute pressure sensor. I will pick through the old inventory of saturometer parts and use what is available. There are some inexpensive modern SMD pressure sensors that I would like to experiment with, but that part of the design can be updated later.
There is a lot of fascinating work being done in soft robotics and printing soft 3D structures, but I will construct this siphon in the same way that I constructed the initial bladders.
The saturometer needs waterflow for accurate measurements, so the siphon needs to be pumped. I think that the existing adductor solenoid can be repurposed to pump the siphon. The design for the siphon is inspired by the heart, and in effect, is half a heart. It will be made up of one atrium and one ventricle with two valves. The atrioventricular valve closes under pressure from the ventricle, and the semilunar valve opens under pressure from the ventricle. There are many ways to make artificial valves, including using encapsulated balls.
I will need to experiment where the silicone tubing is placed inside the siphon. It would be less disturbed before or after the ventricle, but there might be an advantage to having it inside the ventricle.
ML Calibration: Linear Regression
The calibration process that my dad did by hand is well-suited for linear regression. In his saturometer, there are a series of potentiometers that need to be adjusted to fit the sensor input to the target output. I will use the bluetooth module to receive the target output from another device, and on the atmega fit the incoming sensor data on the ADC to the target output.
There are many interesting potential applications of machine learning techniques, like anomaly detection. Additionally, if underwater communication could be established, group calibration and other interesting behaviors could be developed.
-
Additional Material Considerations
04/23/2018 at 18:54 • 0 commentsIn addition to the previous considerations about shells and batteries, the materials for the seals, bladders and circuits need to be considered too. All of the clams will be put in the water, and face the potential of getting lost. They all need to withstand the environment and not pollute it.
Here are some thoughts on the different materials, and their durability, toxicity, accumulation in the environment, and fabrication. The choices available right now for rubbers and electronics are not ideal, but are adequate for this stage of the project. Further research should be conducted and a complete life-cycle assessment of the clam should be made.
Seals and Bladders
Silicone seems like the best rubber for the seals and bladders right now. It is extremely durable, has low toxicity, and it is easy to fabricate parts with it. On the other hand, because of its low degradation, it has very high accumulation in the environment.
Silicone rubber is a siloxane made of long chains of silicon and oxygen with attached organic groups. It gets its durability from the silicon-oxygen bond. It is resistant to many chemicals, including salt water, hydrogen peroxide, acetic acid and sodium bicarbonate, so it is suitable to be used as part of the buoyancy system in the clam.
High molecular weight siloxanes, like silicone rubber are not toxic, but low molecular weight siloxanes, like silicone fluid used in cosmetics and as defoaming agents, can be toxic. Because the clam will use high molecular weight siloxanes, toxicity to the environment is probably not a concern.
On the other hand, accumulation in the environment is a major concern. As a result of the durability of silicone rubber, it has low degradation. It does not photodegrade or biodegrade, and is considered a 'very persistent chemical.' This is an area of active research, so I would like to find studies that look at it in a marine environment (here is an example study that I found for a lake).
It would be nice to use a rubber that does not accumulate. I experimented with natural rubber latex, but I did not find it suitable. I did not vulcanize the rubber and it deteriorated rapidly in use.
Natural rubber is made of polyisoprene chains. During vulcanization, polyisoprene chains are cross-linked with sulfur, making a more durable rubber. Natural rubber and vulcanized rubber can be degraded by a variety of mechanisms, including chlorine, metals, photodegradation and biodegradation.
Natural rubber in a marine environment has been extensively studied by the Navy, and the aging process is well understood. If a simple DIY vulcanization process could be figured out, it might be possible to use natural rubber for the seals and bladders. It would be beneficial to use natural rubber, but because of the difficulties involved in making it suitable, I will not be investigating it for now, but will use silicone instead.
It is easy to fabricate parts with silicone. I used Oogoo for the seals for the clam, and laid them up in place by hand using tape. I like using Oogoo, because it is made with readily available silicone I caulk from the hardware store, but it contains cornstarch, which may make it unsuitable for long-term use. I did not notice any problems with the seals, but silicone is permeable and the cornstarch could attract microorganisms. I made the bladders by coating a form with rubber (natural rubber latex or Smooth-on Sorta-Clear).
For the new design, I will translate the process, so that molds can be 3D printed. Instead of one seal between the shells, the clams will have two seals (one for each shell). The seals will be made by casting silicone on the lip of the shell, bounded by a 3D printed mold that will look like a mouth guard or dental tray. The bladders will either be cast in two parts and bonded, or they could be cast around a dissolvable filament form. Silicone does not perform well with terpenes, so the dissolvable filament will need to be PVA or Hydrofill and not HIPS. Another interesting method for making bladders would be to use a silicone spraying machine, but that would require a specialized machine and some investigation.
Electronics
We do not have much choice over the material in the electronic components except the PCB. The major choices for PCB material are FR-2 and FR-4. Right now, it is a toss up as to which would be better for the clam, but I believe that FR-2 should be the preference.
FR-2 is a composite material made of phenol-formaldehyde resin and paper. It is not as durable as FR-4, but it is more degradable. FR-2 can be biodegraded by some bacteria and fungus.
FR-4 is composed of epoxy and fiberglass. It is has excellent chemical resistance and it is more durable than FR-2. Although it does physically age, it does not biodegrade and performs well in a marine environment.
Both FR-2 and FR-4 require toxic precursors, and their toxicity is comparable.
Right now, the choice is not very important, because both PCBs will have a conformal coating of epoxy. If a different conformal coating can be found that works well in a marine environment, then the choice of PCB will become more important.
I currently use the toner process for producing my PCBs. It is laborious, so I will investigate alternatives. One alternative would be to order PCBs, and just have longer design times (and use SPICE). Another alternative would be to get a PCB milling machine or etcher. There are many people pursuing this, so I will need to do more research to find the best approach for this project.
The most difficult part of the PCB fabrication process for me is the pick & place step. If a machine could fabricate the PCB, populate the boards and do the reflow, that would be ideal.
Open Source Underwater Distributed Sensor Network
Robotic platform for water quality sensors inspired by clams.