Blecky
-
End of the Ranger
02/24/2017 at 10:24 • 0 commentsHi everyone, I'm back from a bit of a break and to tear the band-aid off, I have decided to discontinue this project.
I have tried for a while to work out a way to manufacture smaller batches of this project, but it just isn't feasible on such a scale. Prices for smaller batches would push the price up nearly to what you can get a pre-made Decawave module for.
I was also working on tweaking the hardware to support passive time of flight (no communication required between node and client, just one way signals from the nodes). This would have allowed a more scalable and faster system at the cost of slightly lower accuracy. Unfortunately the Atmel AT86RF233 time of flight measurement module is both documented poorly and doesn't seem to work at all through testing. And with the release of this sort of functionality on the Decawave modules, it just doesn't make sense to continue with the Atmel hardware.
Having said that, I have a completely new and exciting project coming up soon.
It's certainly been a fun ride with a lot learnt. I thank everyone for their support throughout this project.
![]()
-
ZigBit RTB Sources
07/21/2016 at 08:15 • 0 commentsHere is the source code modifications to allow you to run the Atmel Ranging Toolbox on an Atmel ATxmega256A3U-and-AT86RF233-ZigBit module - http://www.atmel.com/devices/ATxmega256A3U-and-AT86RF233-ZigBit-Wireless-Module.aspx.
This was the code that ran on the original demo here:
https://hackaday.io/project/9242/log/30491-ranging-working
https://hackaday.io/project/9242-subpos-ranger/log/30704-ranging-demo
![]()
You can obtain the sources and the precompiled hex from the github repo:https://github.com/subpos/atmel_ranging_toolbox_zigbit
Note you will need an Atmel ICE or equivalent to program the Zigbit as the serial bootloader doesn't work with this.
The Ranger supports much more functionality over the ZigBit modules, such as antenna diversity, USB and many more software features, however this gives you an idea of the functionality of the RTB libraries if you have some ZigBits laying about.
-
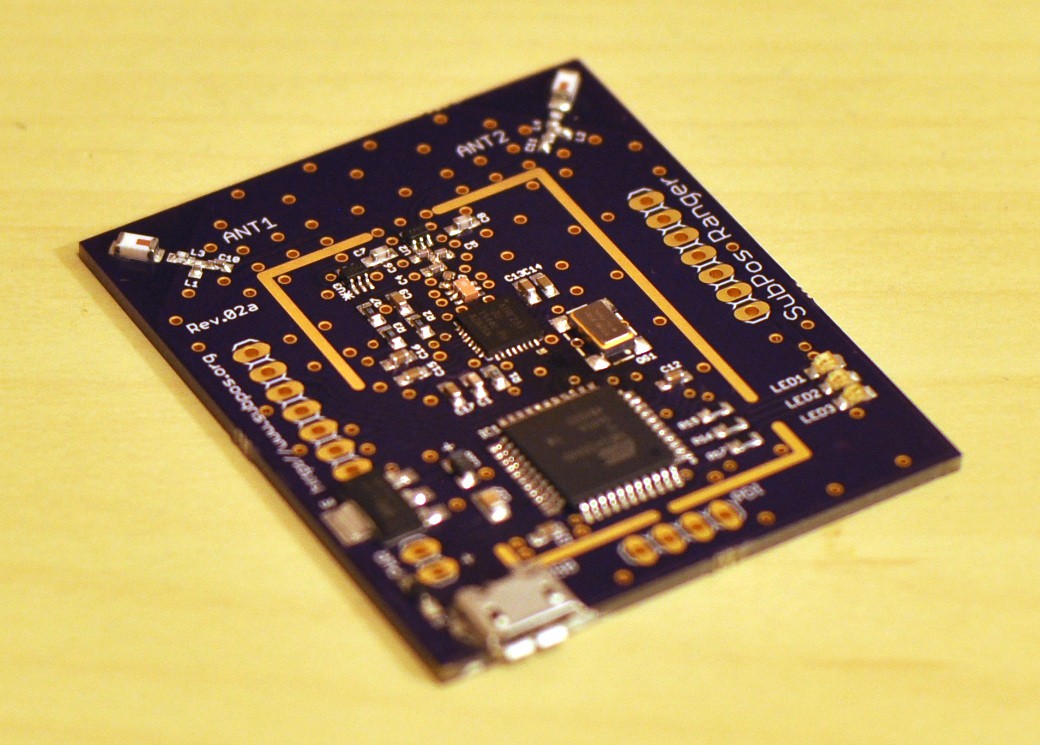
Making A Ranger
07/18/2016 at 15:40 • 0 commentsMaking up some Rev.02a boards. These boards have more bypass caps, better RF components and placement, more efficient via stitching as well as as few minor tweaks over the Rev.02. The final version (b) will have a dashed RF shield fill to make manufacturing easier, but the rest is pretty much final.
![]()
End result:
![]()
-
Now With Double the Measurement Rate!
07/15/2016 at 17:43 • 1 commentWhile working on getting the accelerometer to aid the update rate when averaging is enabled, it was discovered that the distance measurements themselves weren't occurring as fast as they should.
It turns out the original Atmel libraries for ranging had quite a large arbitrary delay set (100ms) between each distance calculation for display purposes. This delay has now been removed and it now effectively doubles the measurement rate. This in turn halves the amount of time it takes to reach a desired result, when averaging is performed across a large number of samples. So if you look at the current demo video again, just imagine it running at twice the speed.
How exciting is that!? Free hardware upgrade!
New demo update:
-
802.15.4 Sniffer
07/12/2016 at 05:20 • 0 commentsHere's a quick demonstration of the 802.15.4 sniffing firmware you can load onto a Ranger Board via the USB bootloader. It can be used to diagnose issues with the Ranger Positioning System or for general purpose protocol analysis. The output can also be forwarded to Wireshark for nicer protocol decoding and logging.
-
Motion Detection
07/09/2016 at 07:03 • 0 commentsHere's a quick demo of the motion detection that you can perform between two or more nodes. With this you can use the Ranger boards as an occupancy sensor, door beam or even for fitness tracking.
-
Kickstarter Live
07/07/2016 at 03:43 • 0 commentsSo after many hours of sleepless coffee fueled crazy times, a surprise Kickstarter campaign for the Ranger is now live!
https://www.kickstarter.com/projects/subpos/subpos-ranger-indoor-positioning-system
![]()
-
Demo Video
07/03/2016 at 10:56 • 3 commentsI finally got the time to put together a demo video:
The client is connected to the laptop with a USB connection. However, the client does all the positioning calculations, the laptop is just displaying the node positions and the current client position.
Averaging is turned right up which is why it takes a little while to update the position. This is because I live in an apartment block with lots of 2.4GHz RF flying about, so this helps to cope with that. I am integrating an accelerometer on the client to provide better intemediate updates when averaging is turned up too. But as you can see, it's pretty spot on in terms of accuracy. -
Small Update
06/28/2016 at 16:57 • 0 commentsI had meant to get a demo video up the other day but was battling with random issues with the system.
The issue was that the node batteries were running low as I hadn't charged them in a while. The MCU was still running, but the TRX chipset was failing to transmit. I have implemented a battery low warning monitor by using the internal bandgap reference on the xmega to solve this (I will implement functionality that sends this info to the client too, but for the moment it's just a blinky LED).
I have also been running into intermittent lockups on the Ranger. It turns out there is some errata in the TRX that leads to a "potential long PLL settling times". While this was handled, what wasn't handled was an unknown errata issue where the PLL never settles or initialises. This looks to be settled now as I perform a TRX reset when this occurs (after a longer timeout period; a few ms).
So, the video will have to wait a day or so. -
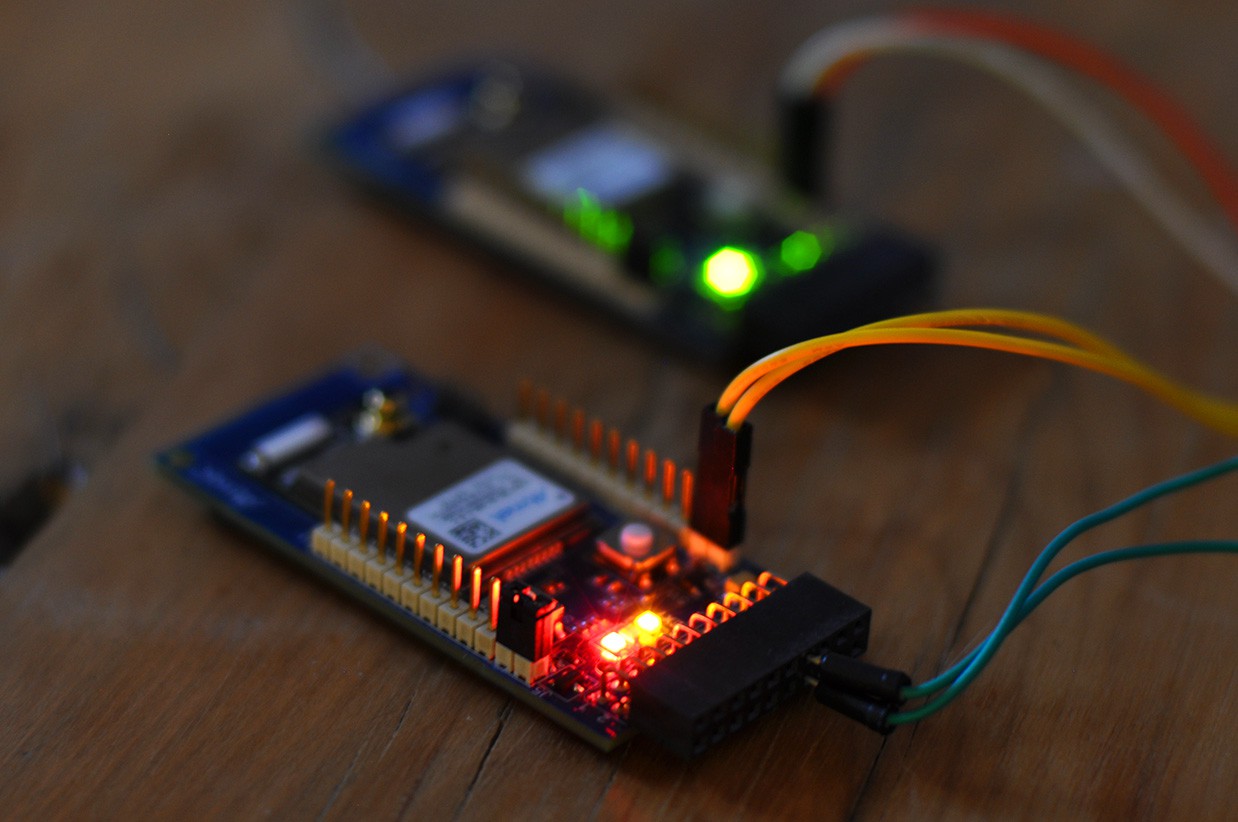
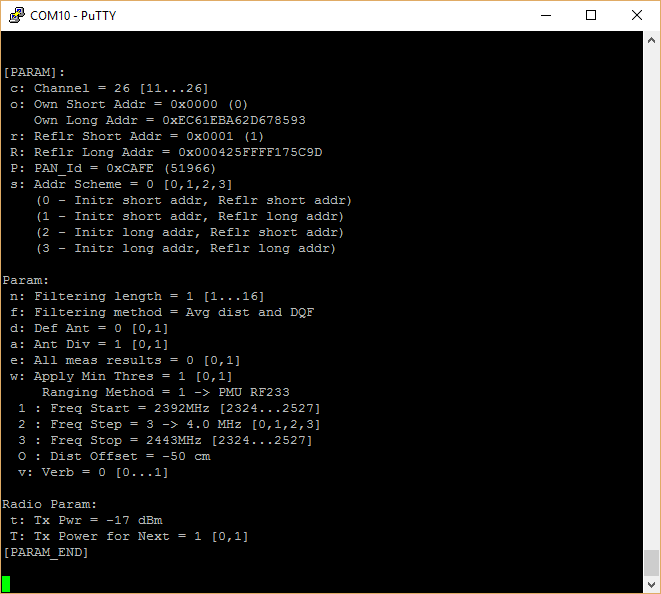
USB Bootloader and Serial
05/30/2016 at 13:39 • 0 commentsNot a huge update, but I've just been getting the USB bootloader and serial interface working with the ATXMEGA1284U on the ranging board, so the firmware can be updated once released and you don't need a USB->UART adapter to configure it:
![]()
![]()
If anyone is doing any XMEGA work with USB and wants to know the different clock options, this post with ASCII art helped immensely - http://www.avrfreaks.net/comment/829504#comment-829504
In case it gets removed, here is a copy of it for posterity:
The best way to do this is to:

a) Enable the 32MHz RC oscillator, using the 48MHz
calibration values in the signature row.
b) Enable the DFLL on the 32MHz RC oscillator, using
the USB Start Of Frame as the reference.
c) Enable the PLL and connect it to the internal 2MHz
RC oscillator to upscale it to your desired system frequency.

This will give you a rock-solid, always synched to the
USB bus 48MHz clock with no external crystal required,
as well as a less accurate PLL scaled system clock for
the CPU (which you can choose to also DFLL calibrate
from a clock source).

ASCII art!

       _______USB SOF Reference_______
      /                               \
    [DFLL]==[32MHz RC Osc @ 48MHz]-->[USB]<-->(PC)

    [2MHz RC Osc]-->[PLL]-->[CPU]

Or for better accuracy with a fast XTAL:

       _______USB SOF Reference_______
      /                               \
    [DFLL]==[32MHz RC Osc @ 48MHz]-->[USB]<-->(PC)

    [XOSC]-->[PLL]-->[CPU]

Or better accuracy without crystal:

       _______USB SOF Reference_______
      /                               \
    [DFLL]==[32MHz RC Osc @ 48MHz]-->[USB]<-->(PC)

    [Int 32KHz RC Osc]
      |
      |
    [DFLL]==[2MHz RC Osc]-->[PLL]-->[CPU]

Or better accuracy with a 32KHz crystal:

       _______USB SOF Reference_______
      /                               \
    [DFLL]==[32MHz RC Osc @ 48MHz]-->[USB]<-->(PC)

    [TOSC]
      |
      |
    [DFLL]==[2MHz RC Osc]-->[PLL]-->[CPU]

Good accuracy with low power consumption, but slow system
clock (24MHz):

       _______USB SOF Reference_______
      /                               \
    [DFLL]==[32MHz RC Osc @ 48MHz]-->[USB]<-->(PC)
                    |
                 [DIV /2]-->[CPU]

Low power consumption with a fast enough (up to 16MHz)
external crystal:

       _______USB SOF Reference_______
      /                               \
    [DFLL]==[32MHz RC Osc @ 48MHz]-->[USB]<-->(PC)

                [XOSC]-->[CPU]
SubPos Ranger
The SubPos Ranger allows you to accurately measure distance or obtain your position indoors for all hobbyist robotics applications.