 Pinomelean
In this project i will document the design and build process of my second Gauss rifle.
In every log i will walk you through the design and construction of this second Gauss rifle or "projectile accelerator" as i like to call it, i will explain the changes i make; why and how they improve upon the design of the first version and suggest further improvements in case anyone chooses to replicate my project.
I hope you enjoy reading it and take inspiration from my work.
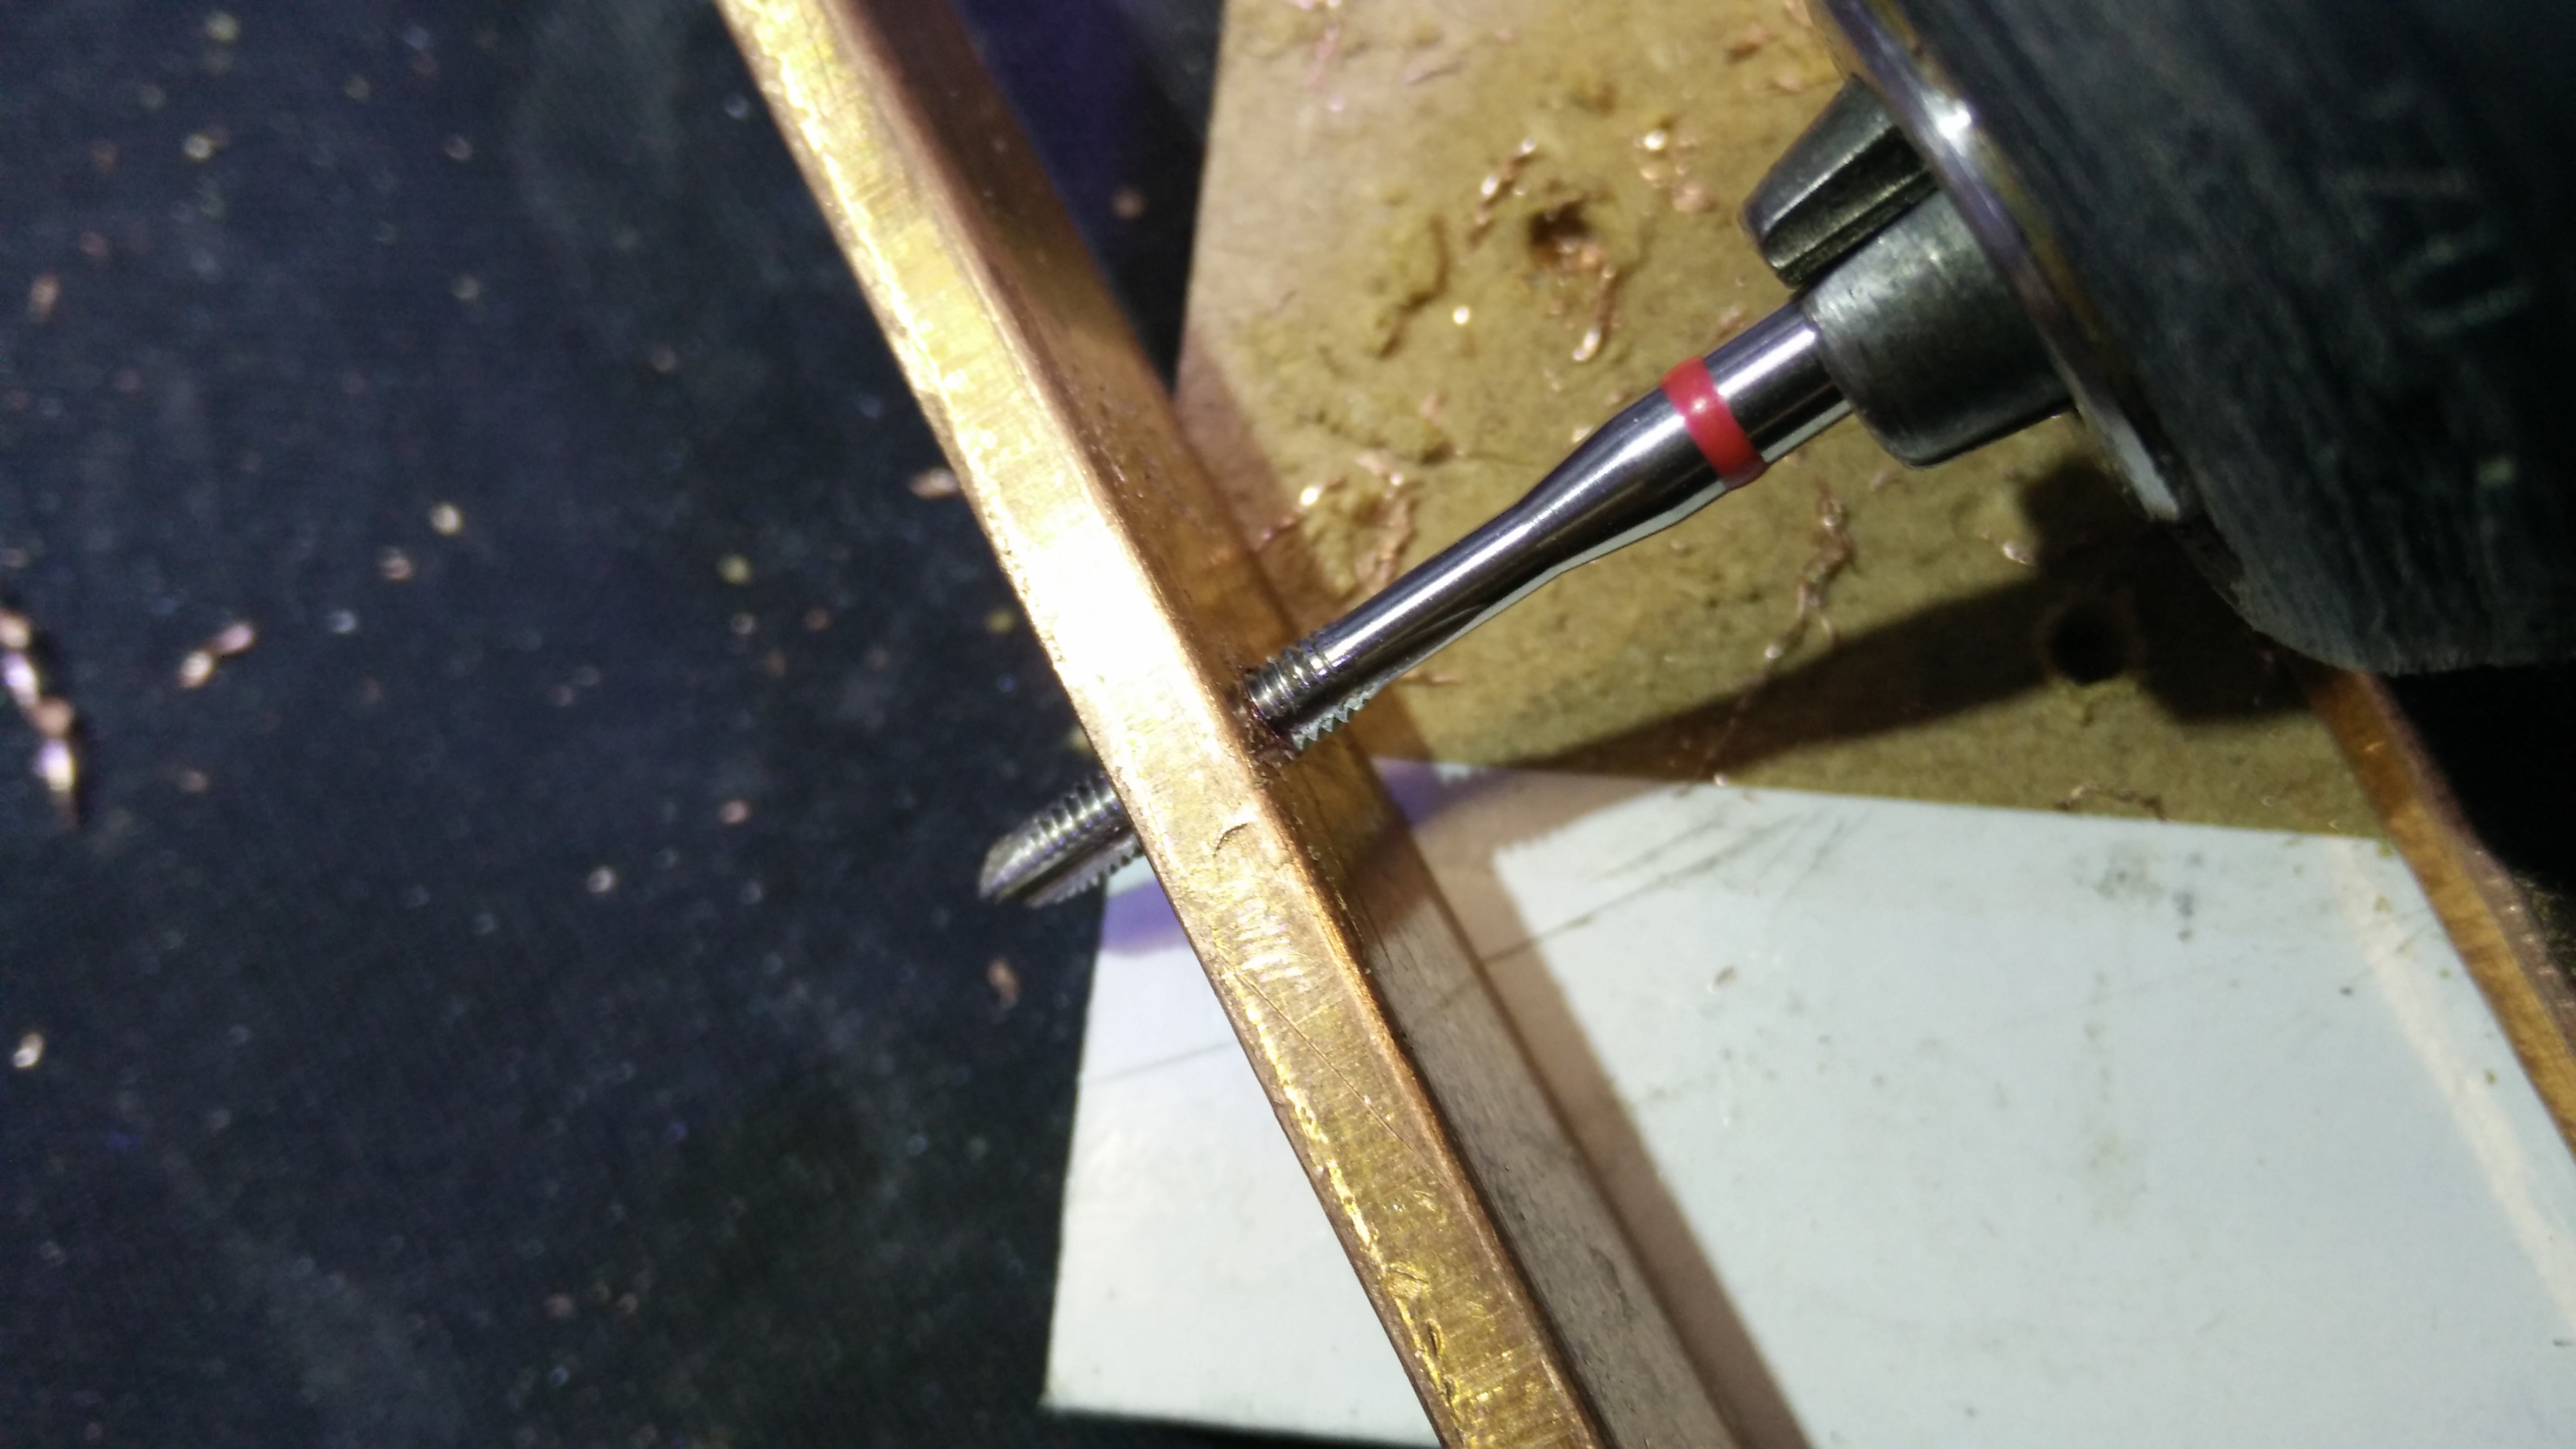
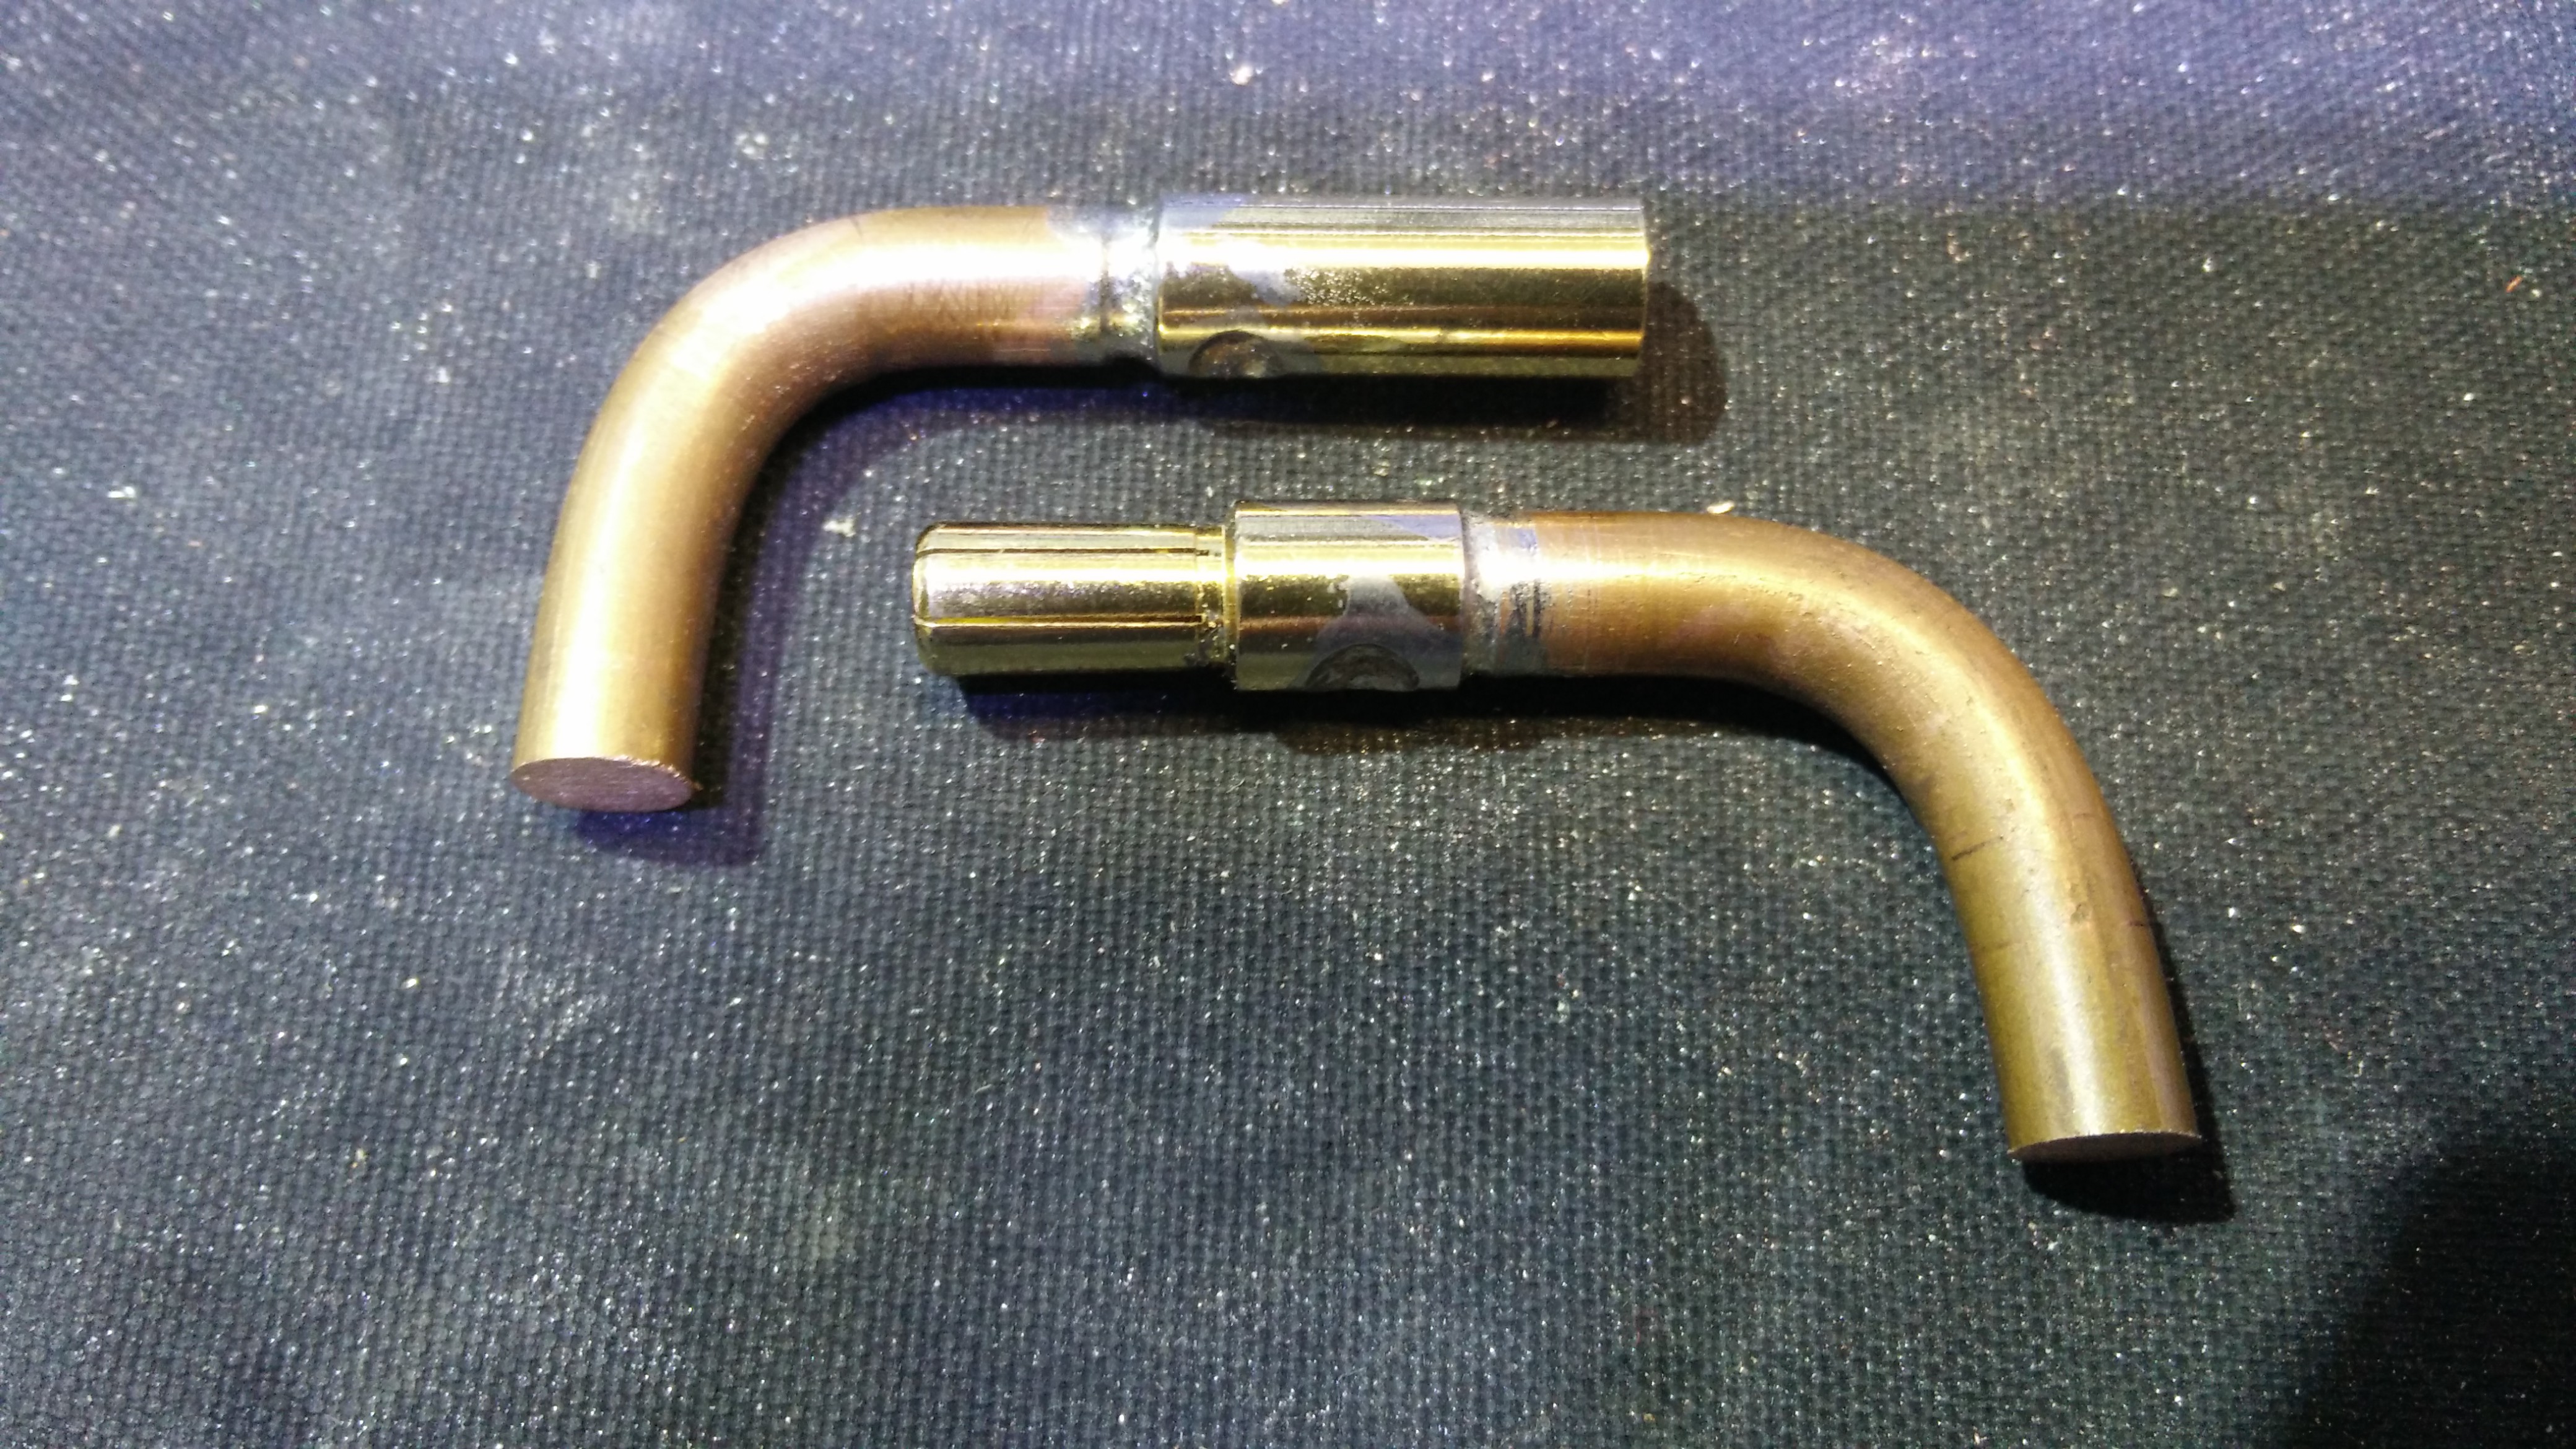
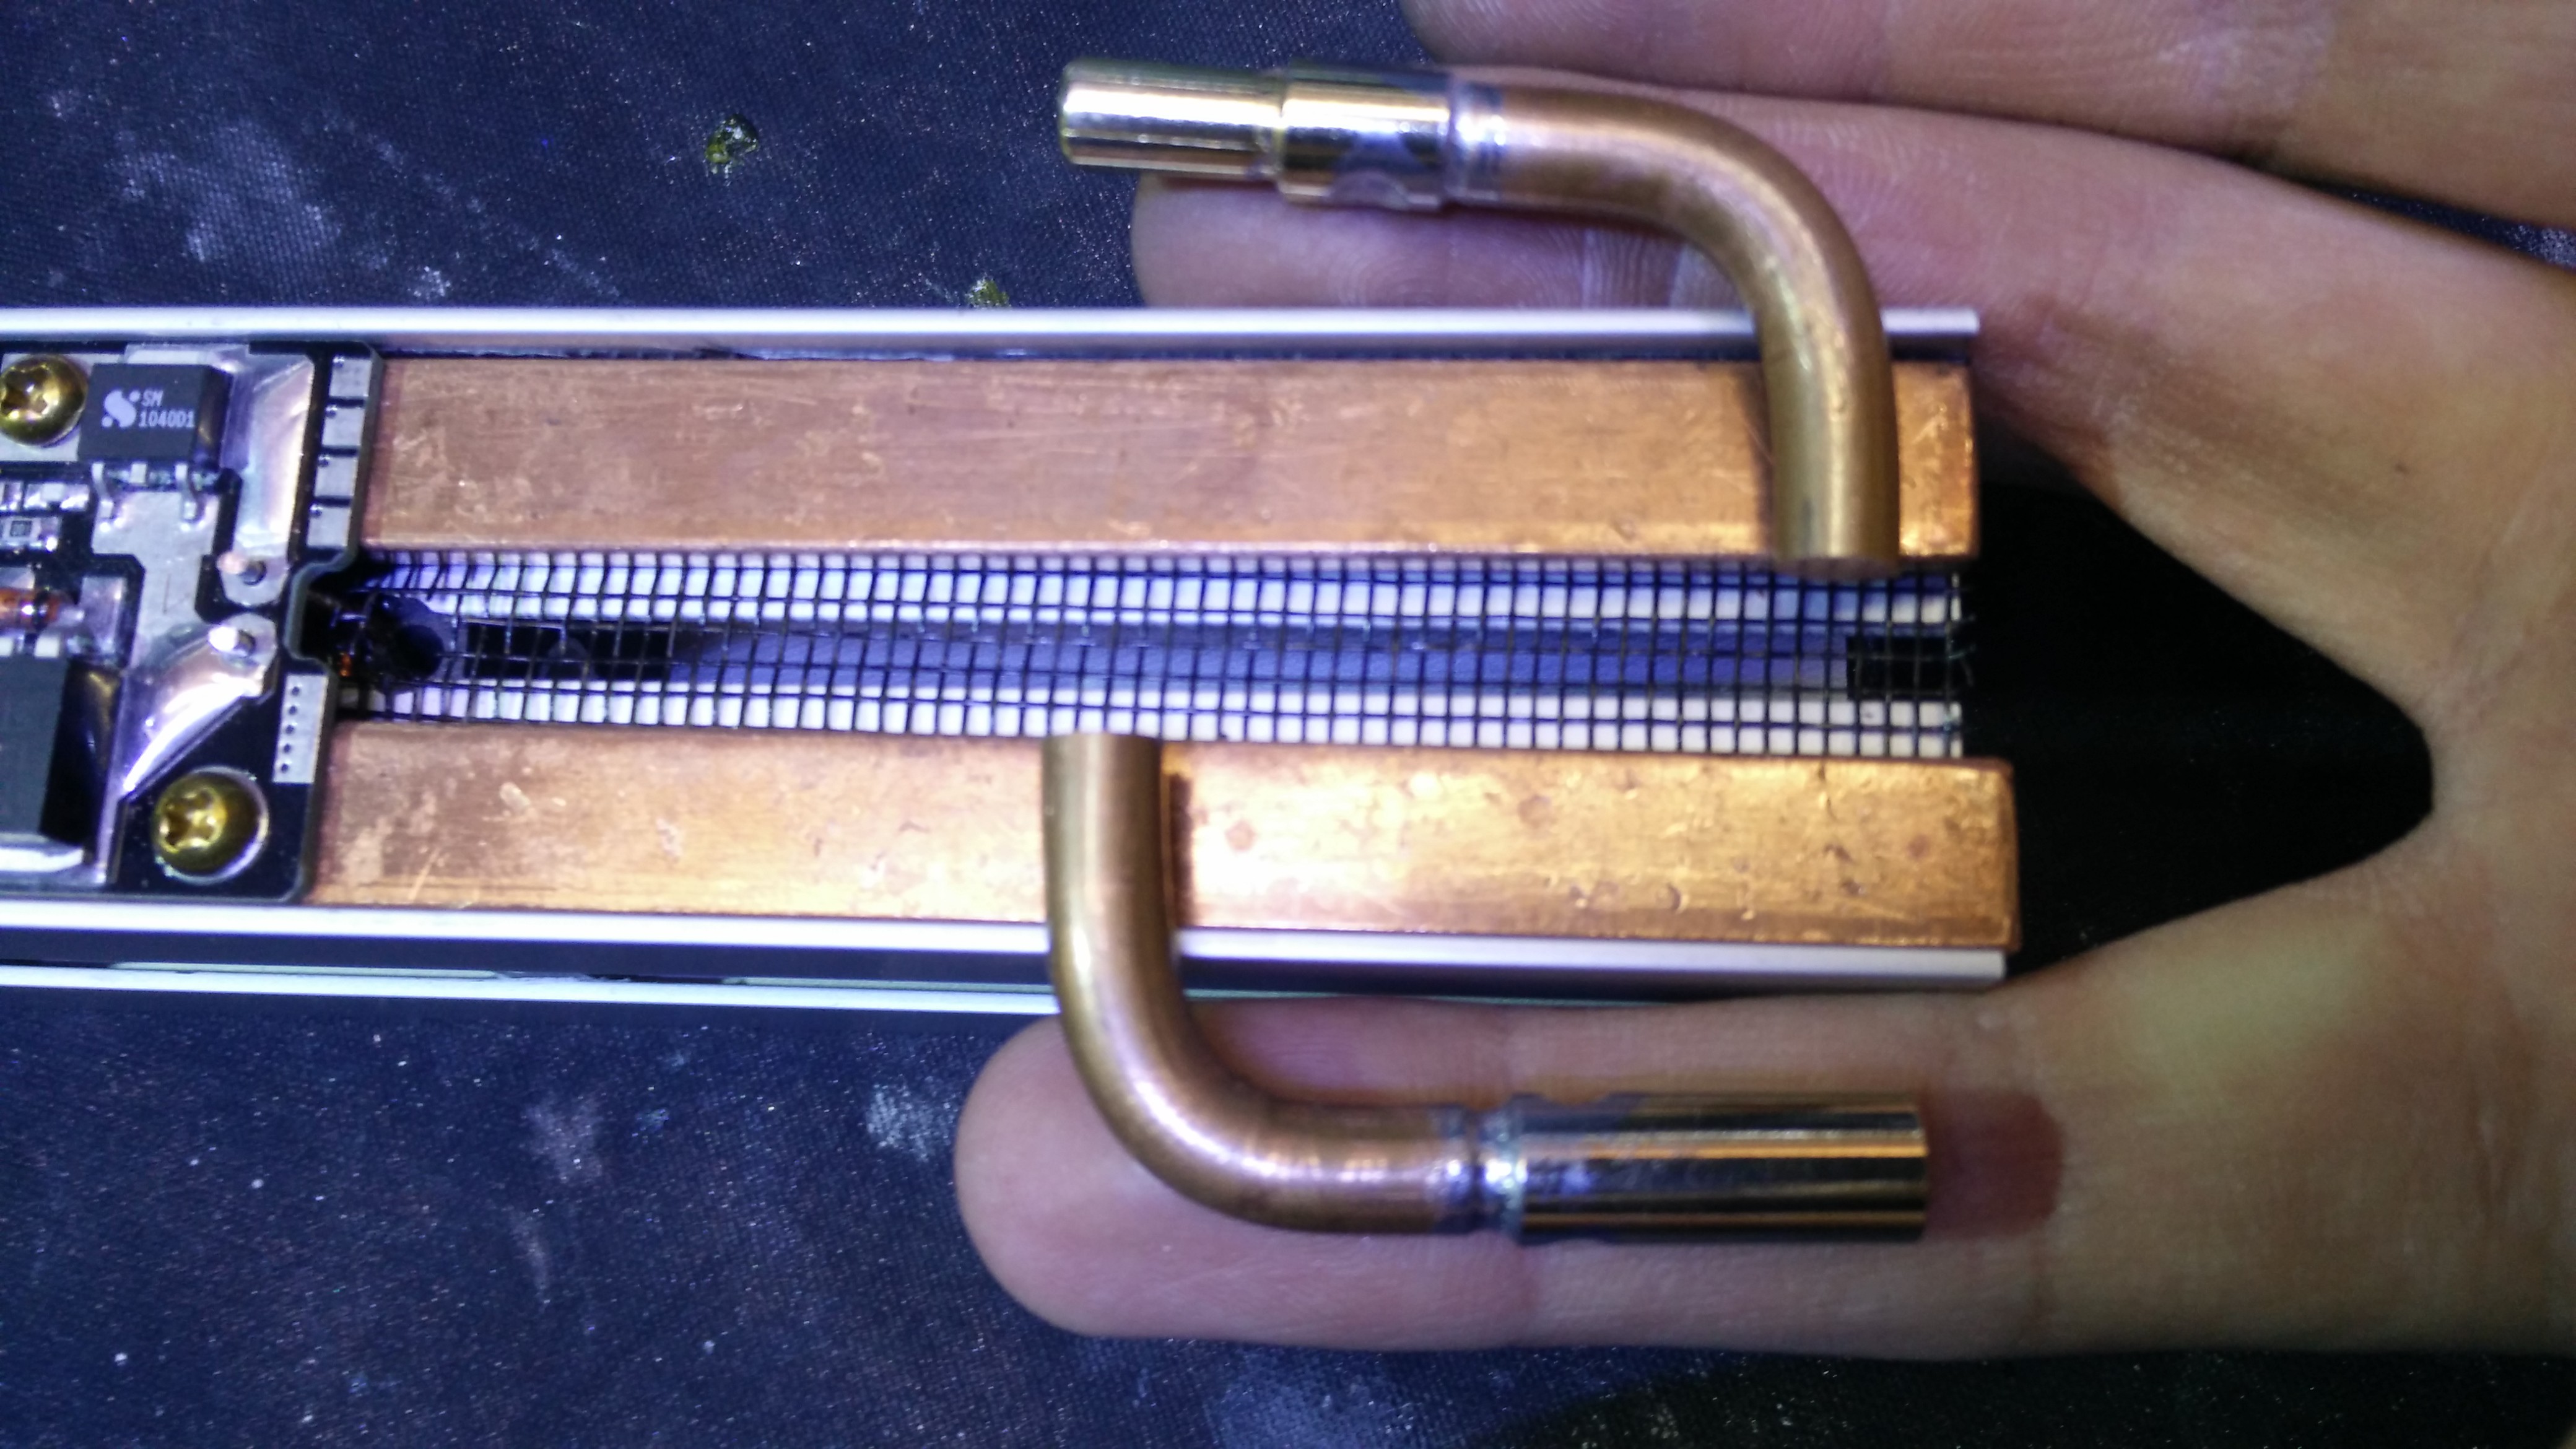
 I cut two pieces of round copper bar and turn down the ends to press fit the connectors.
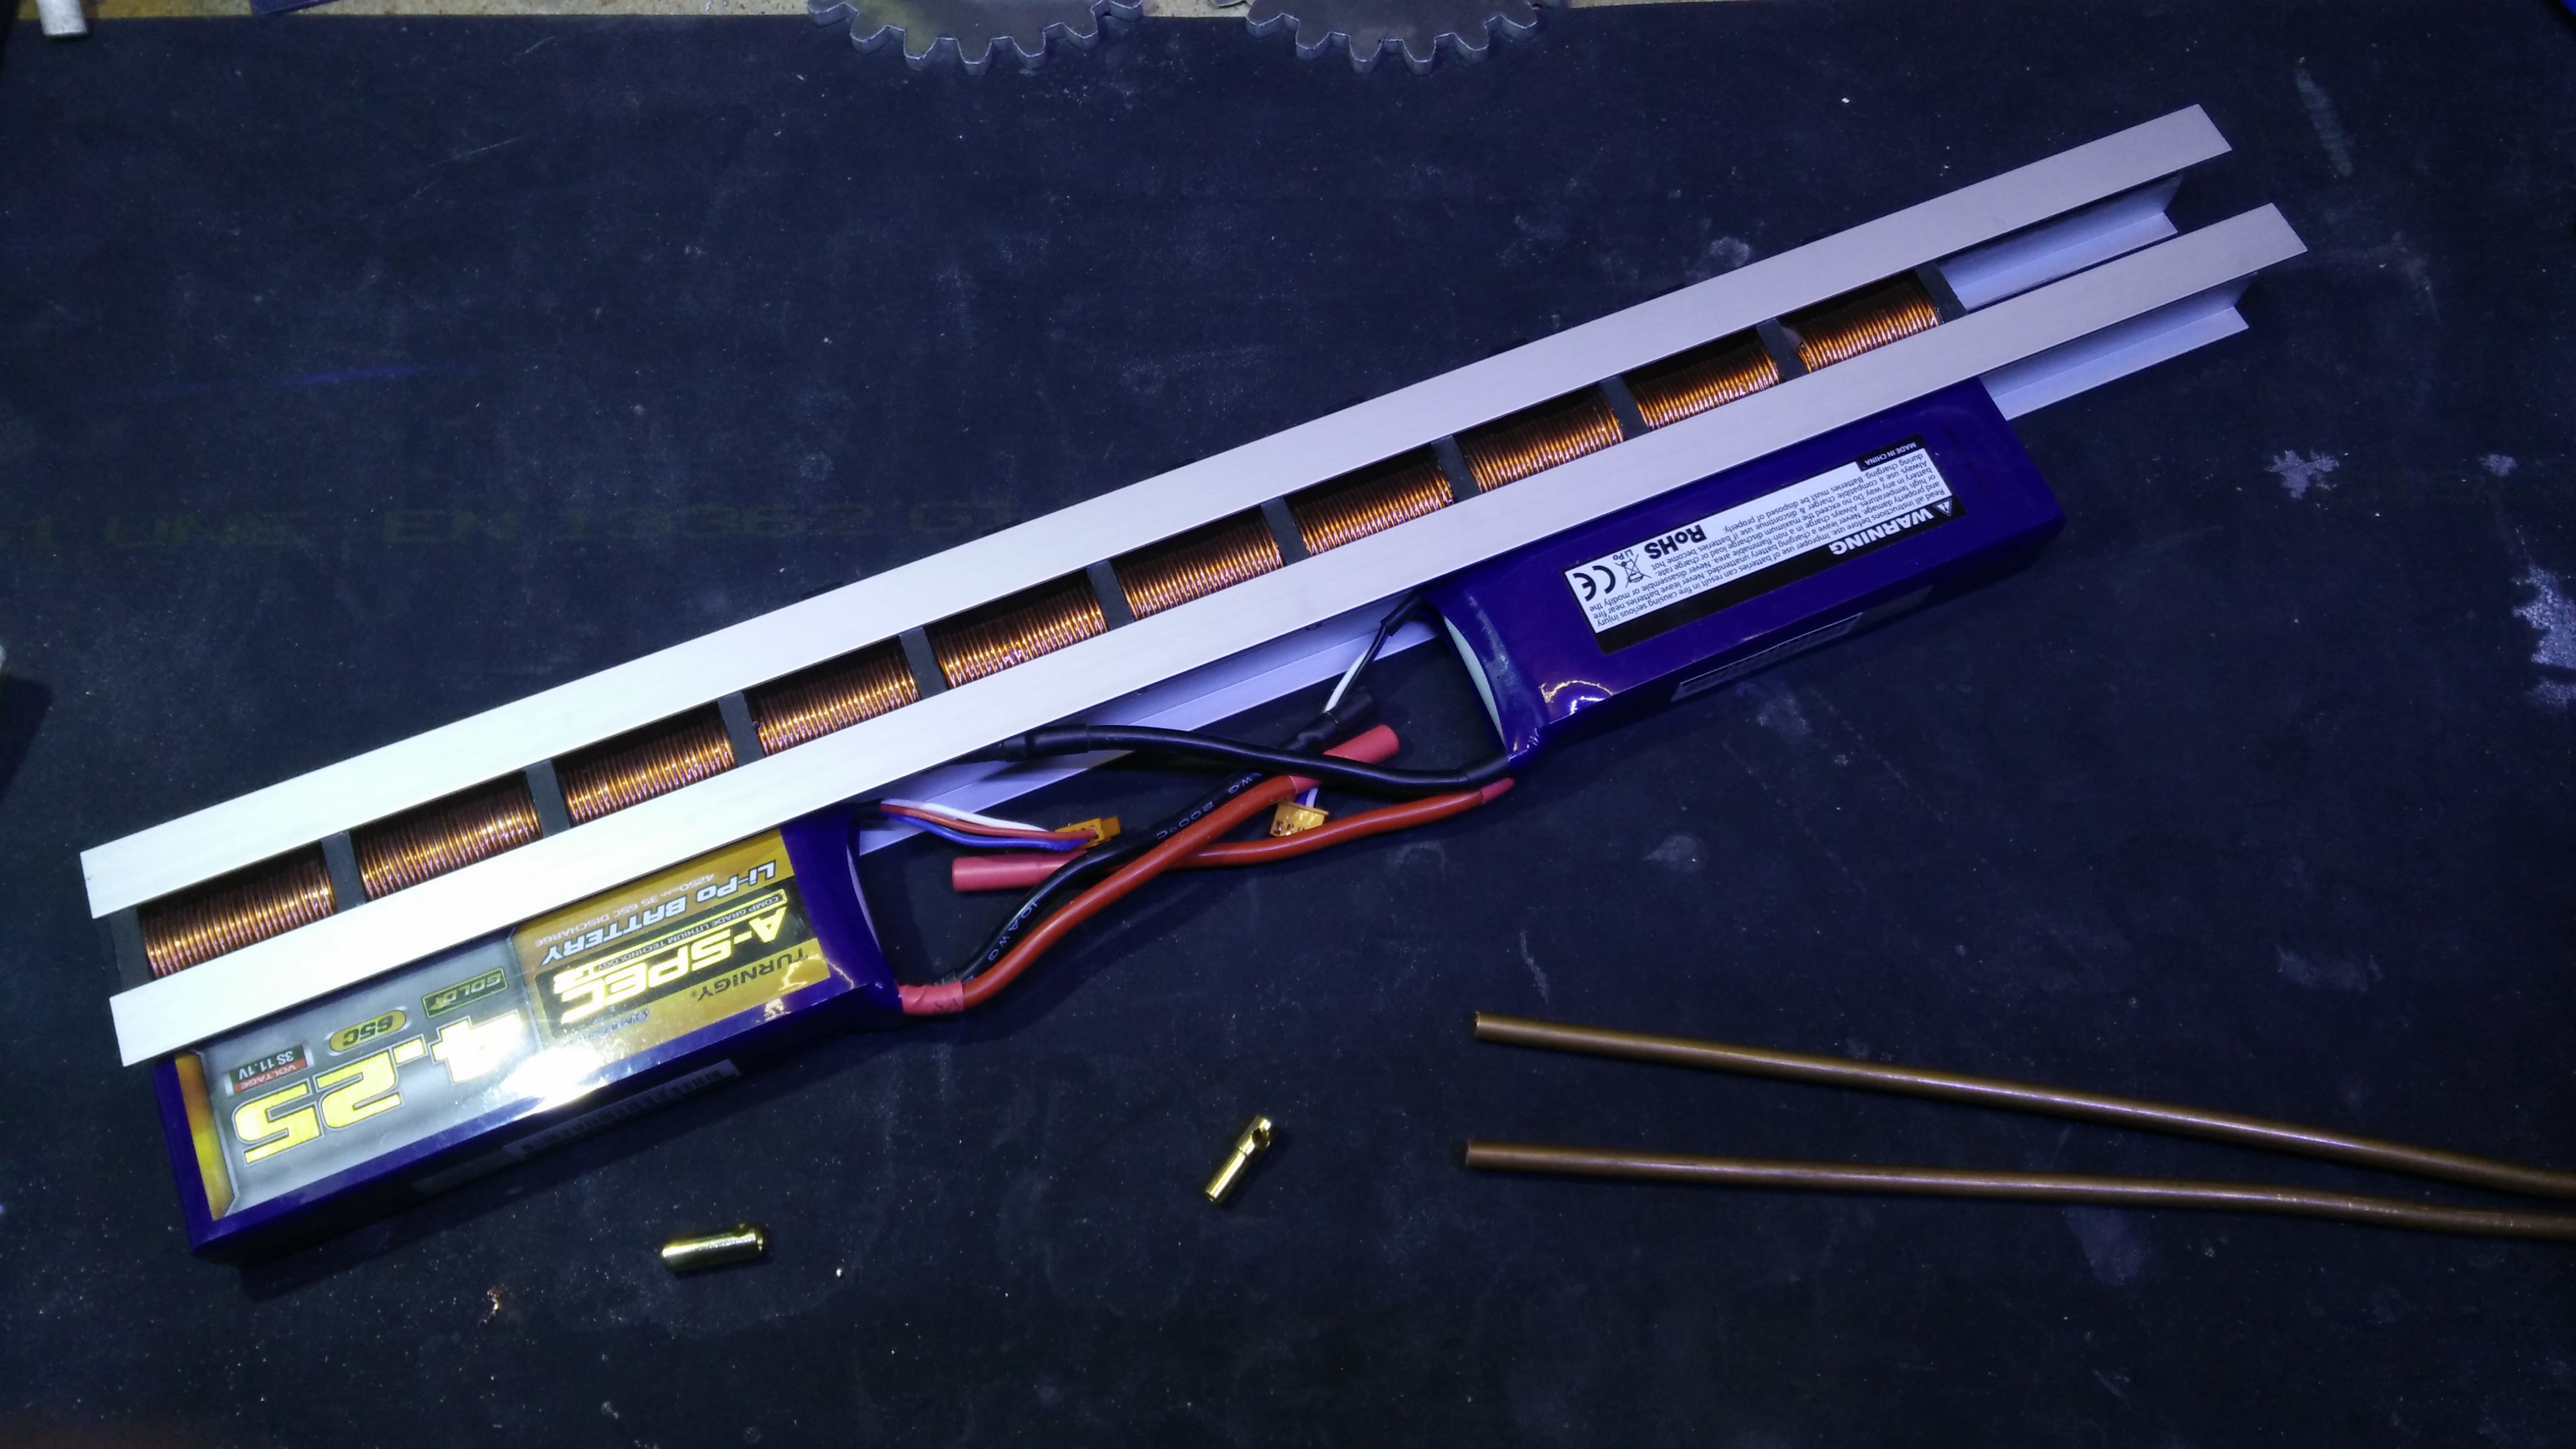
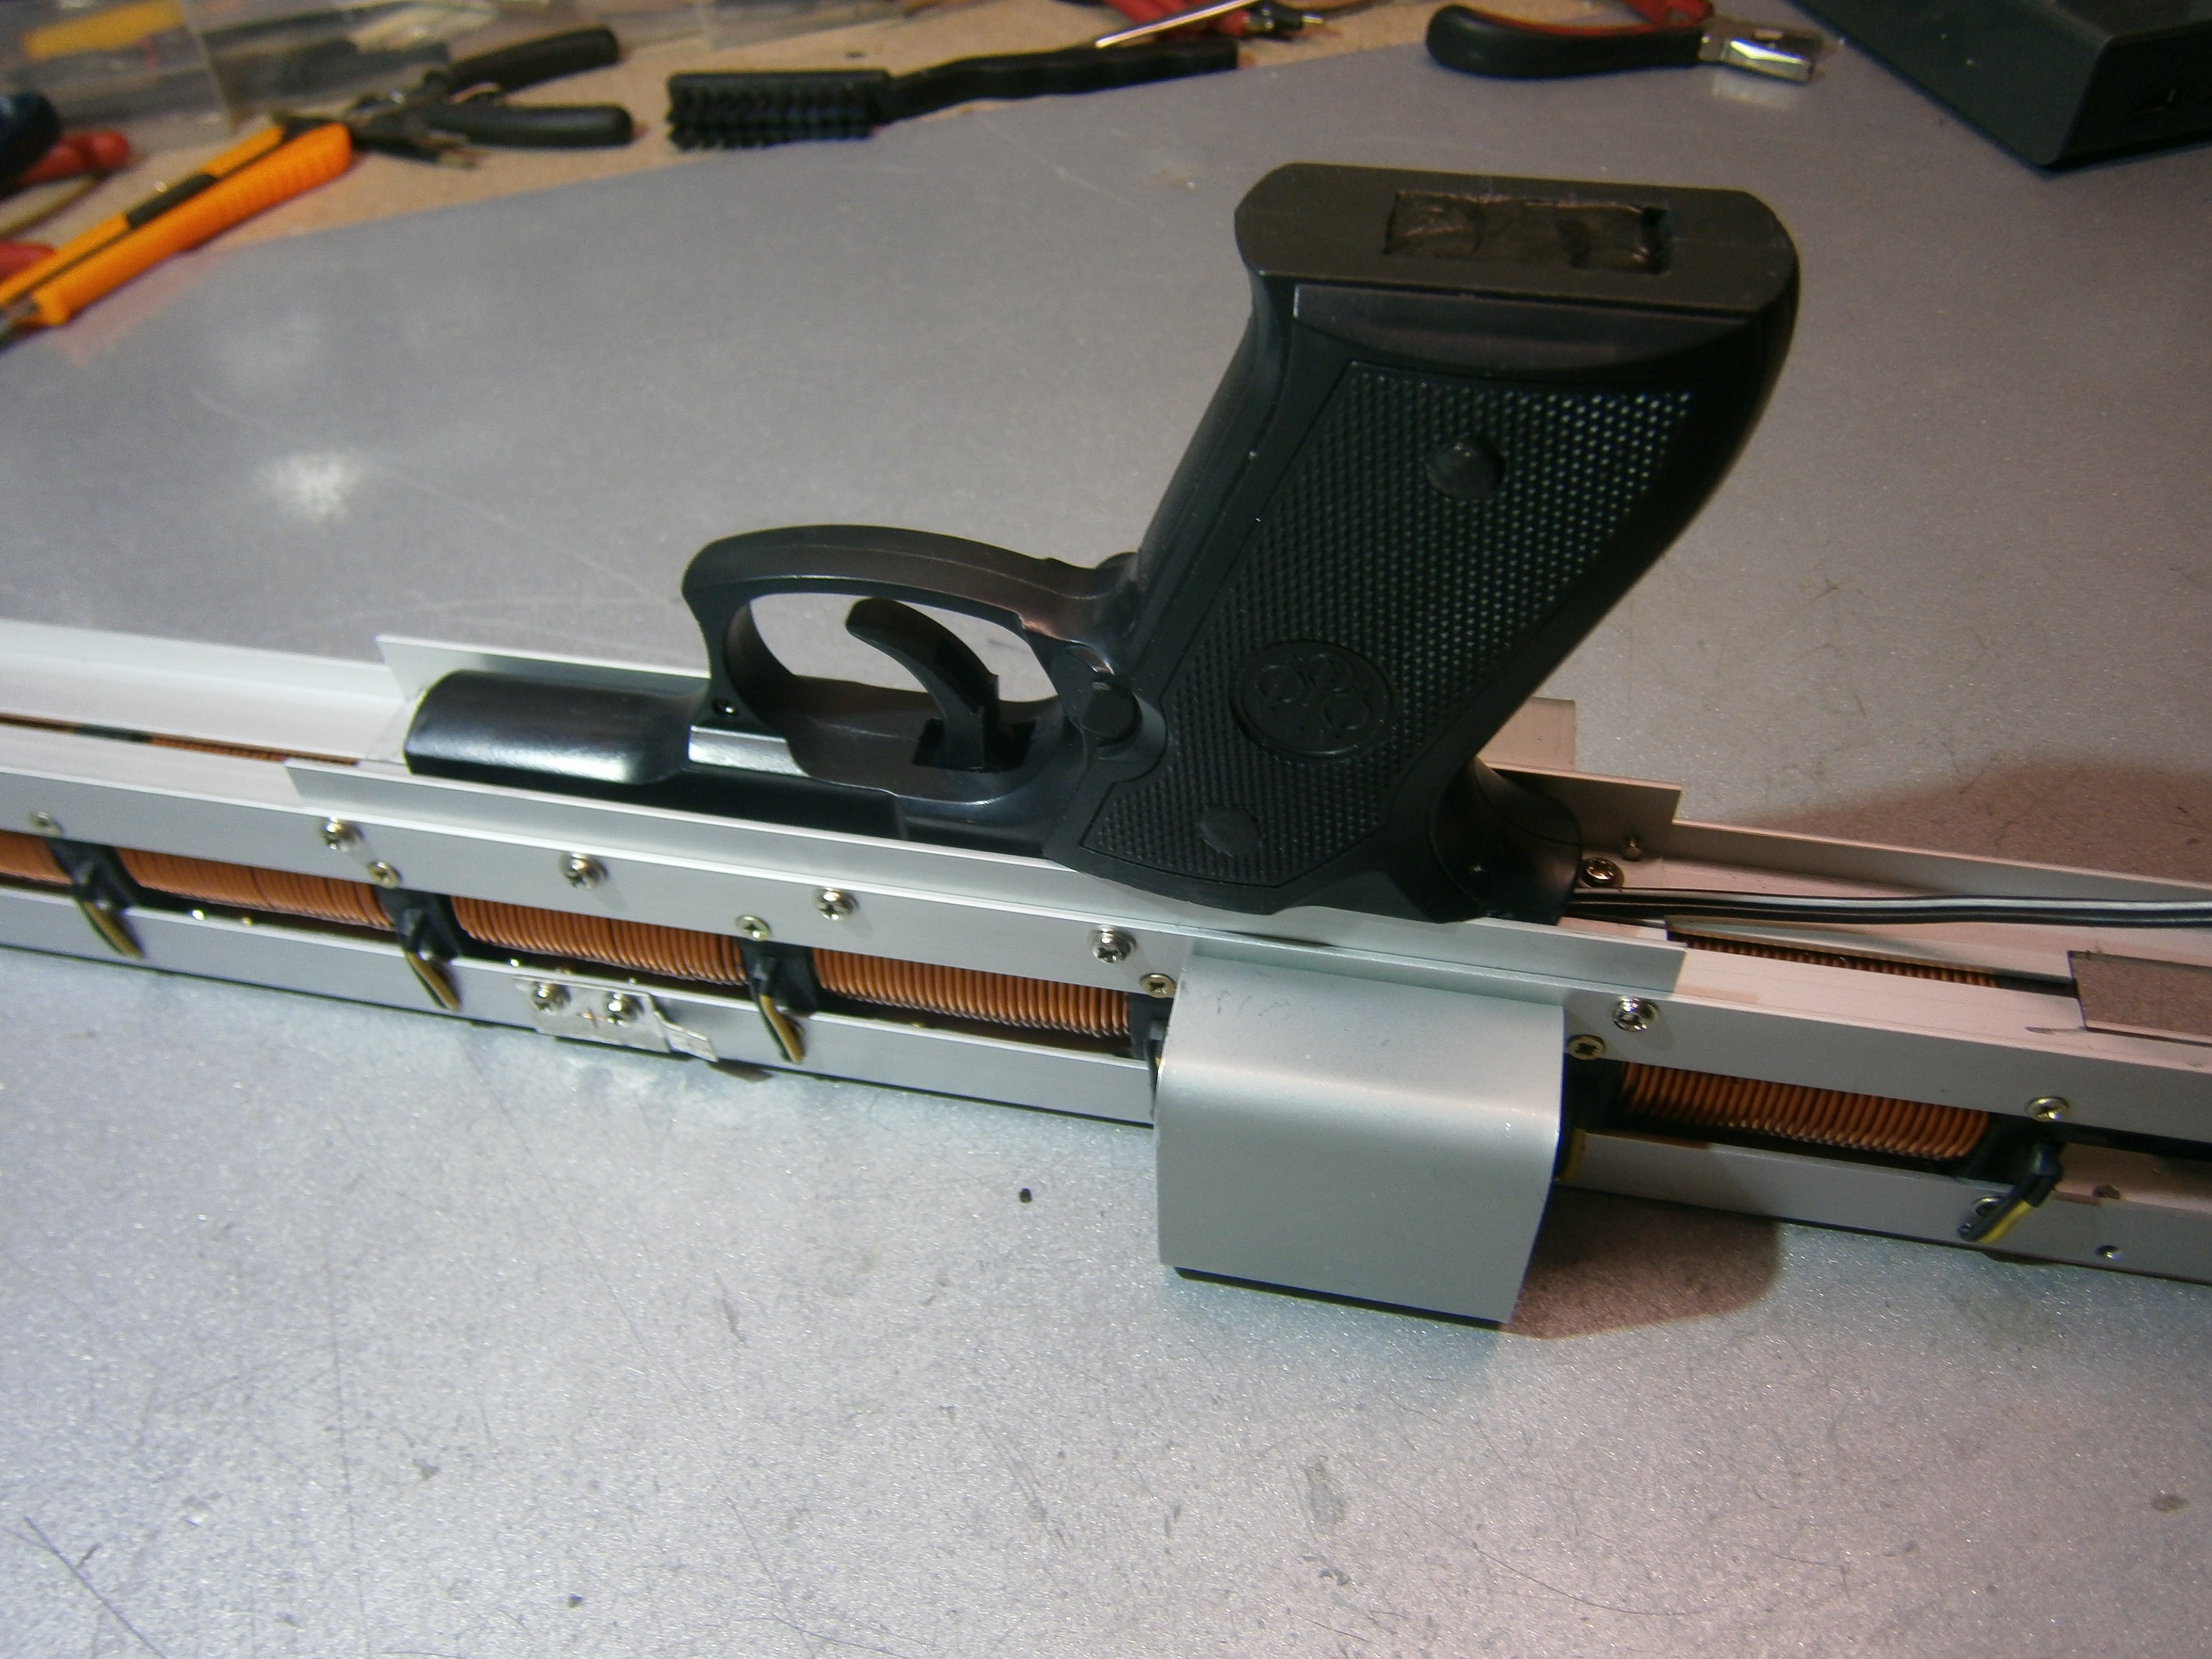
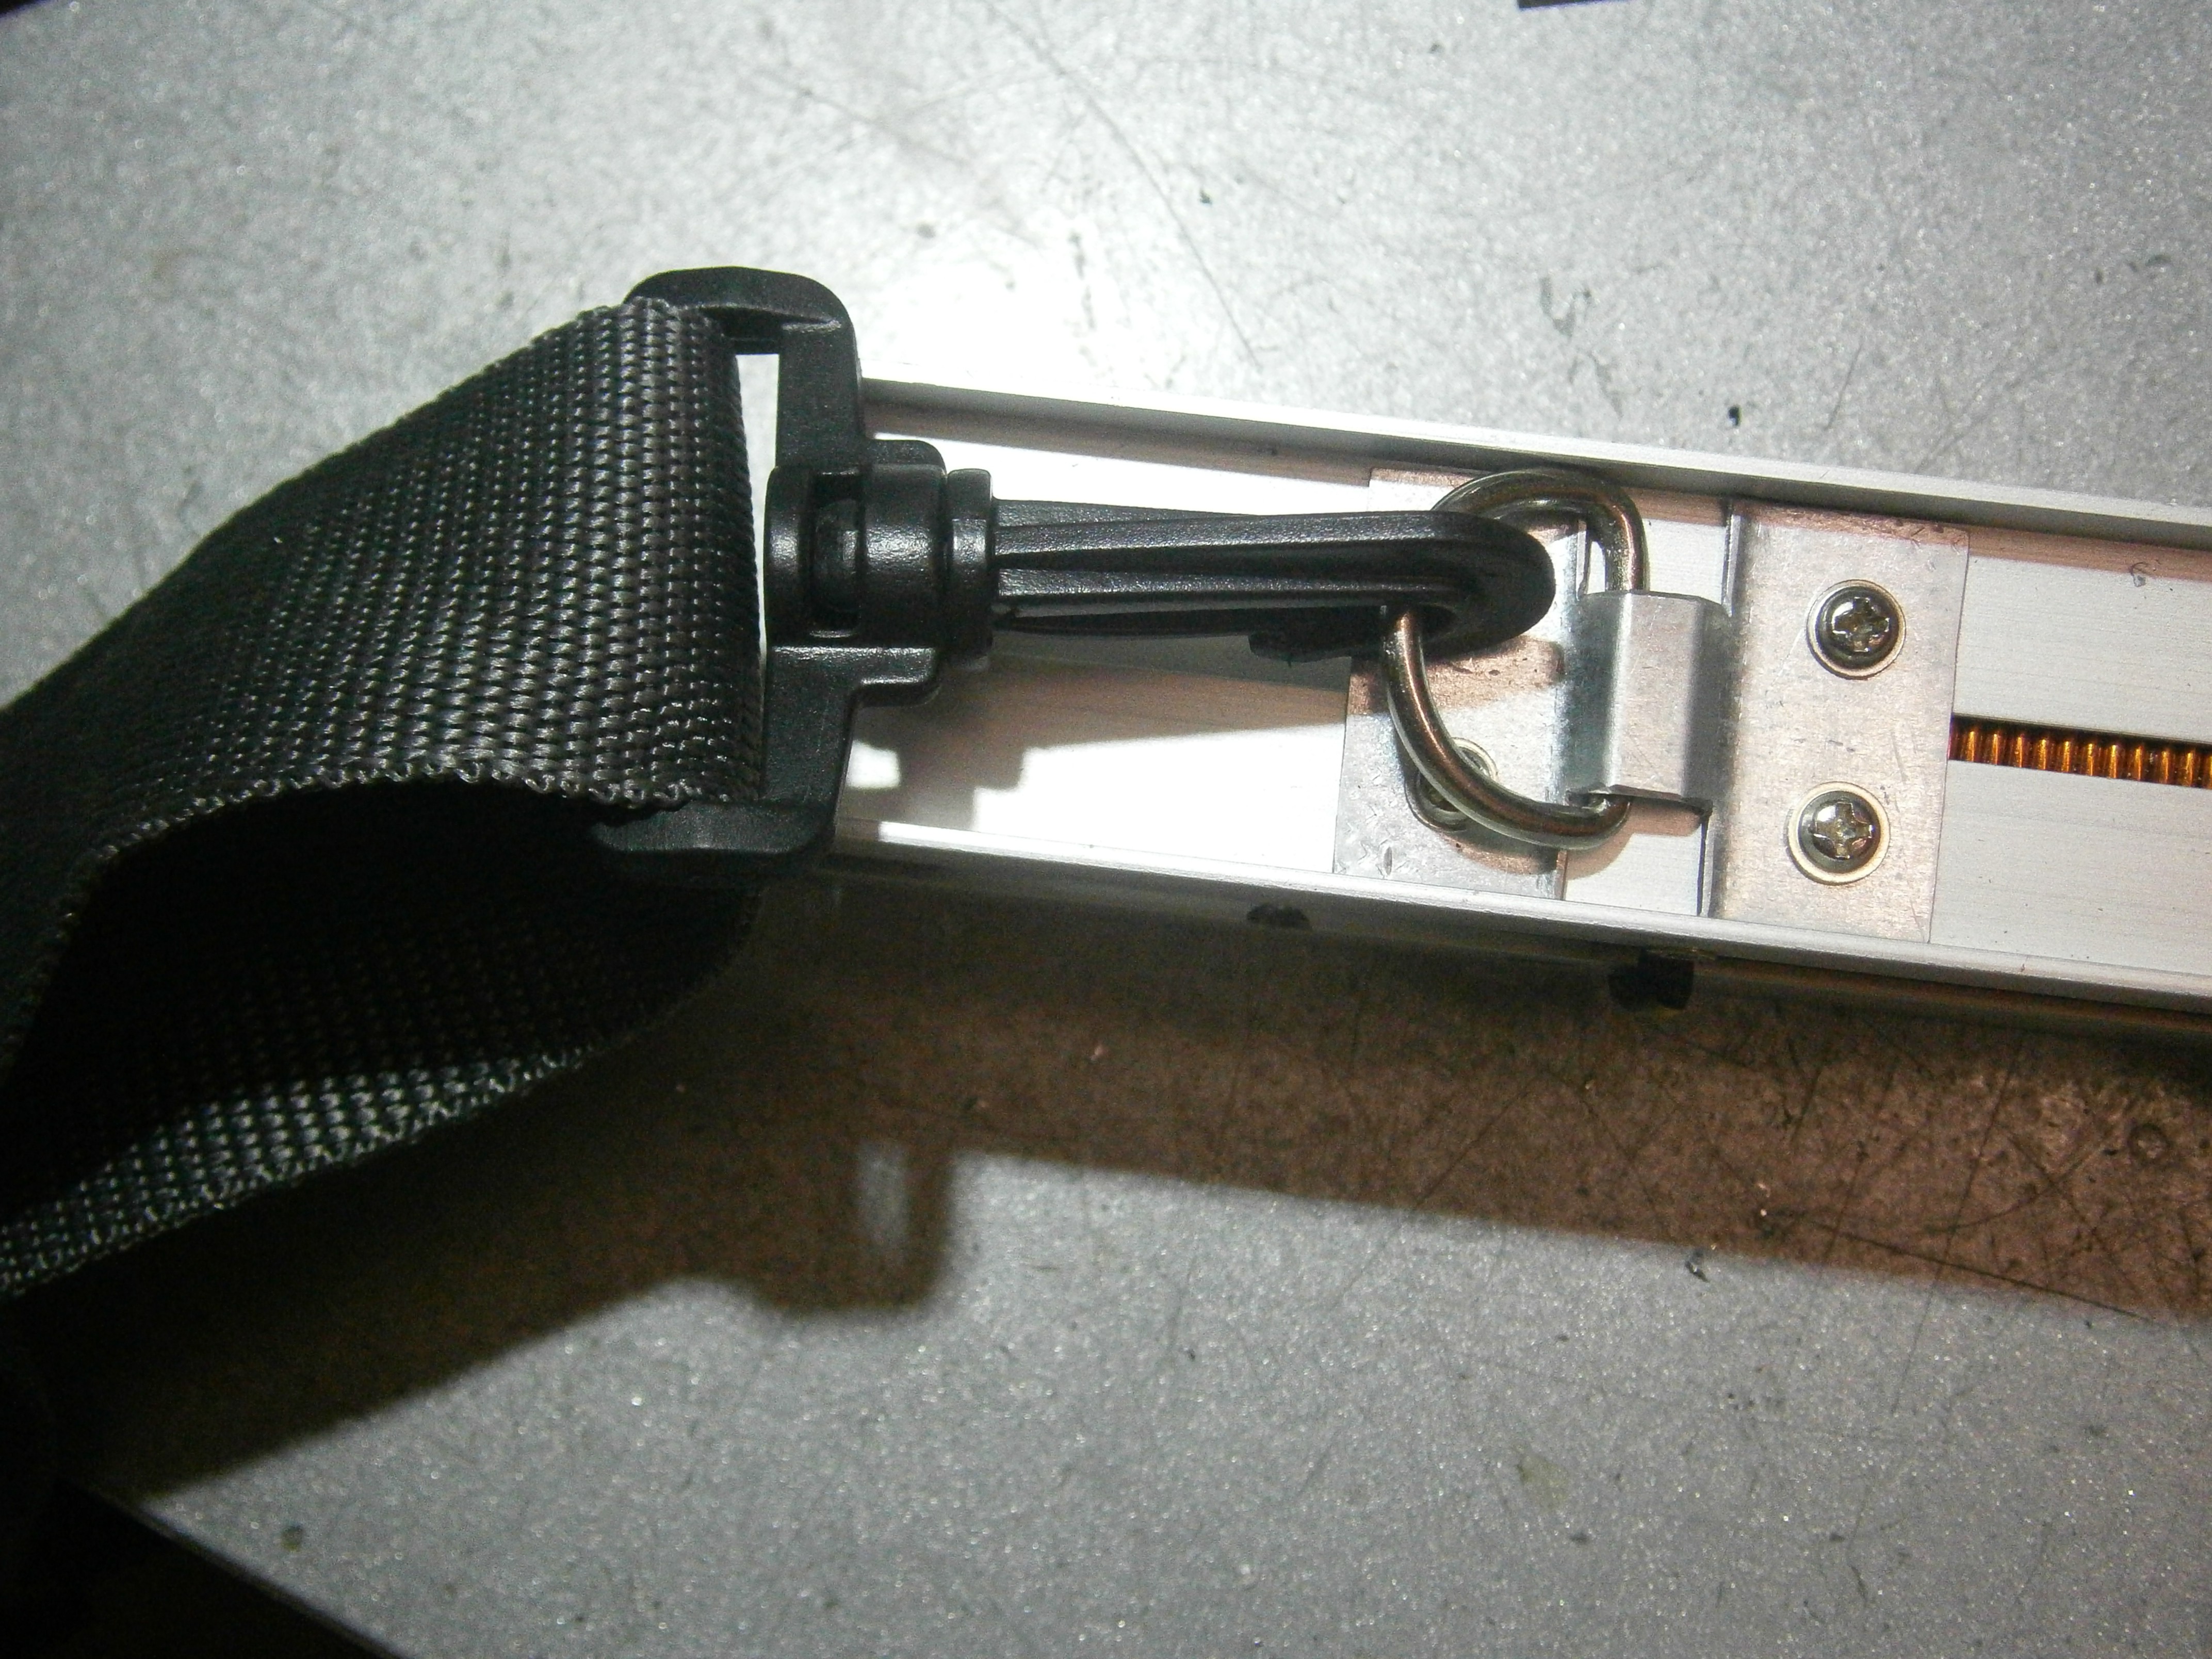
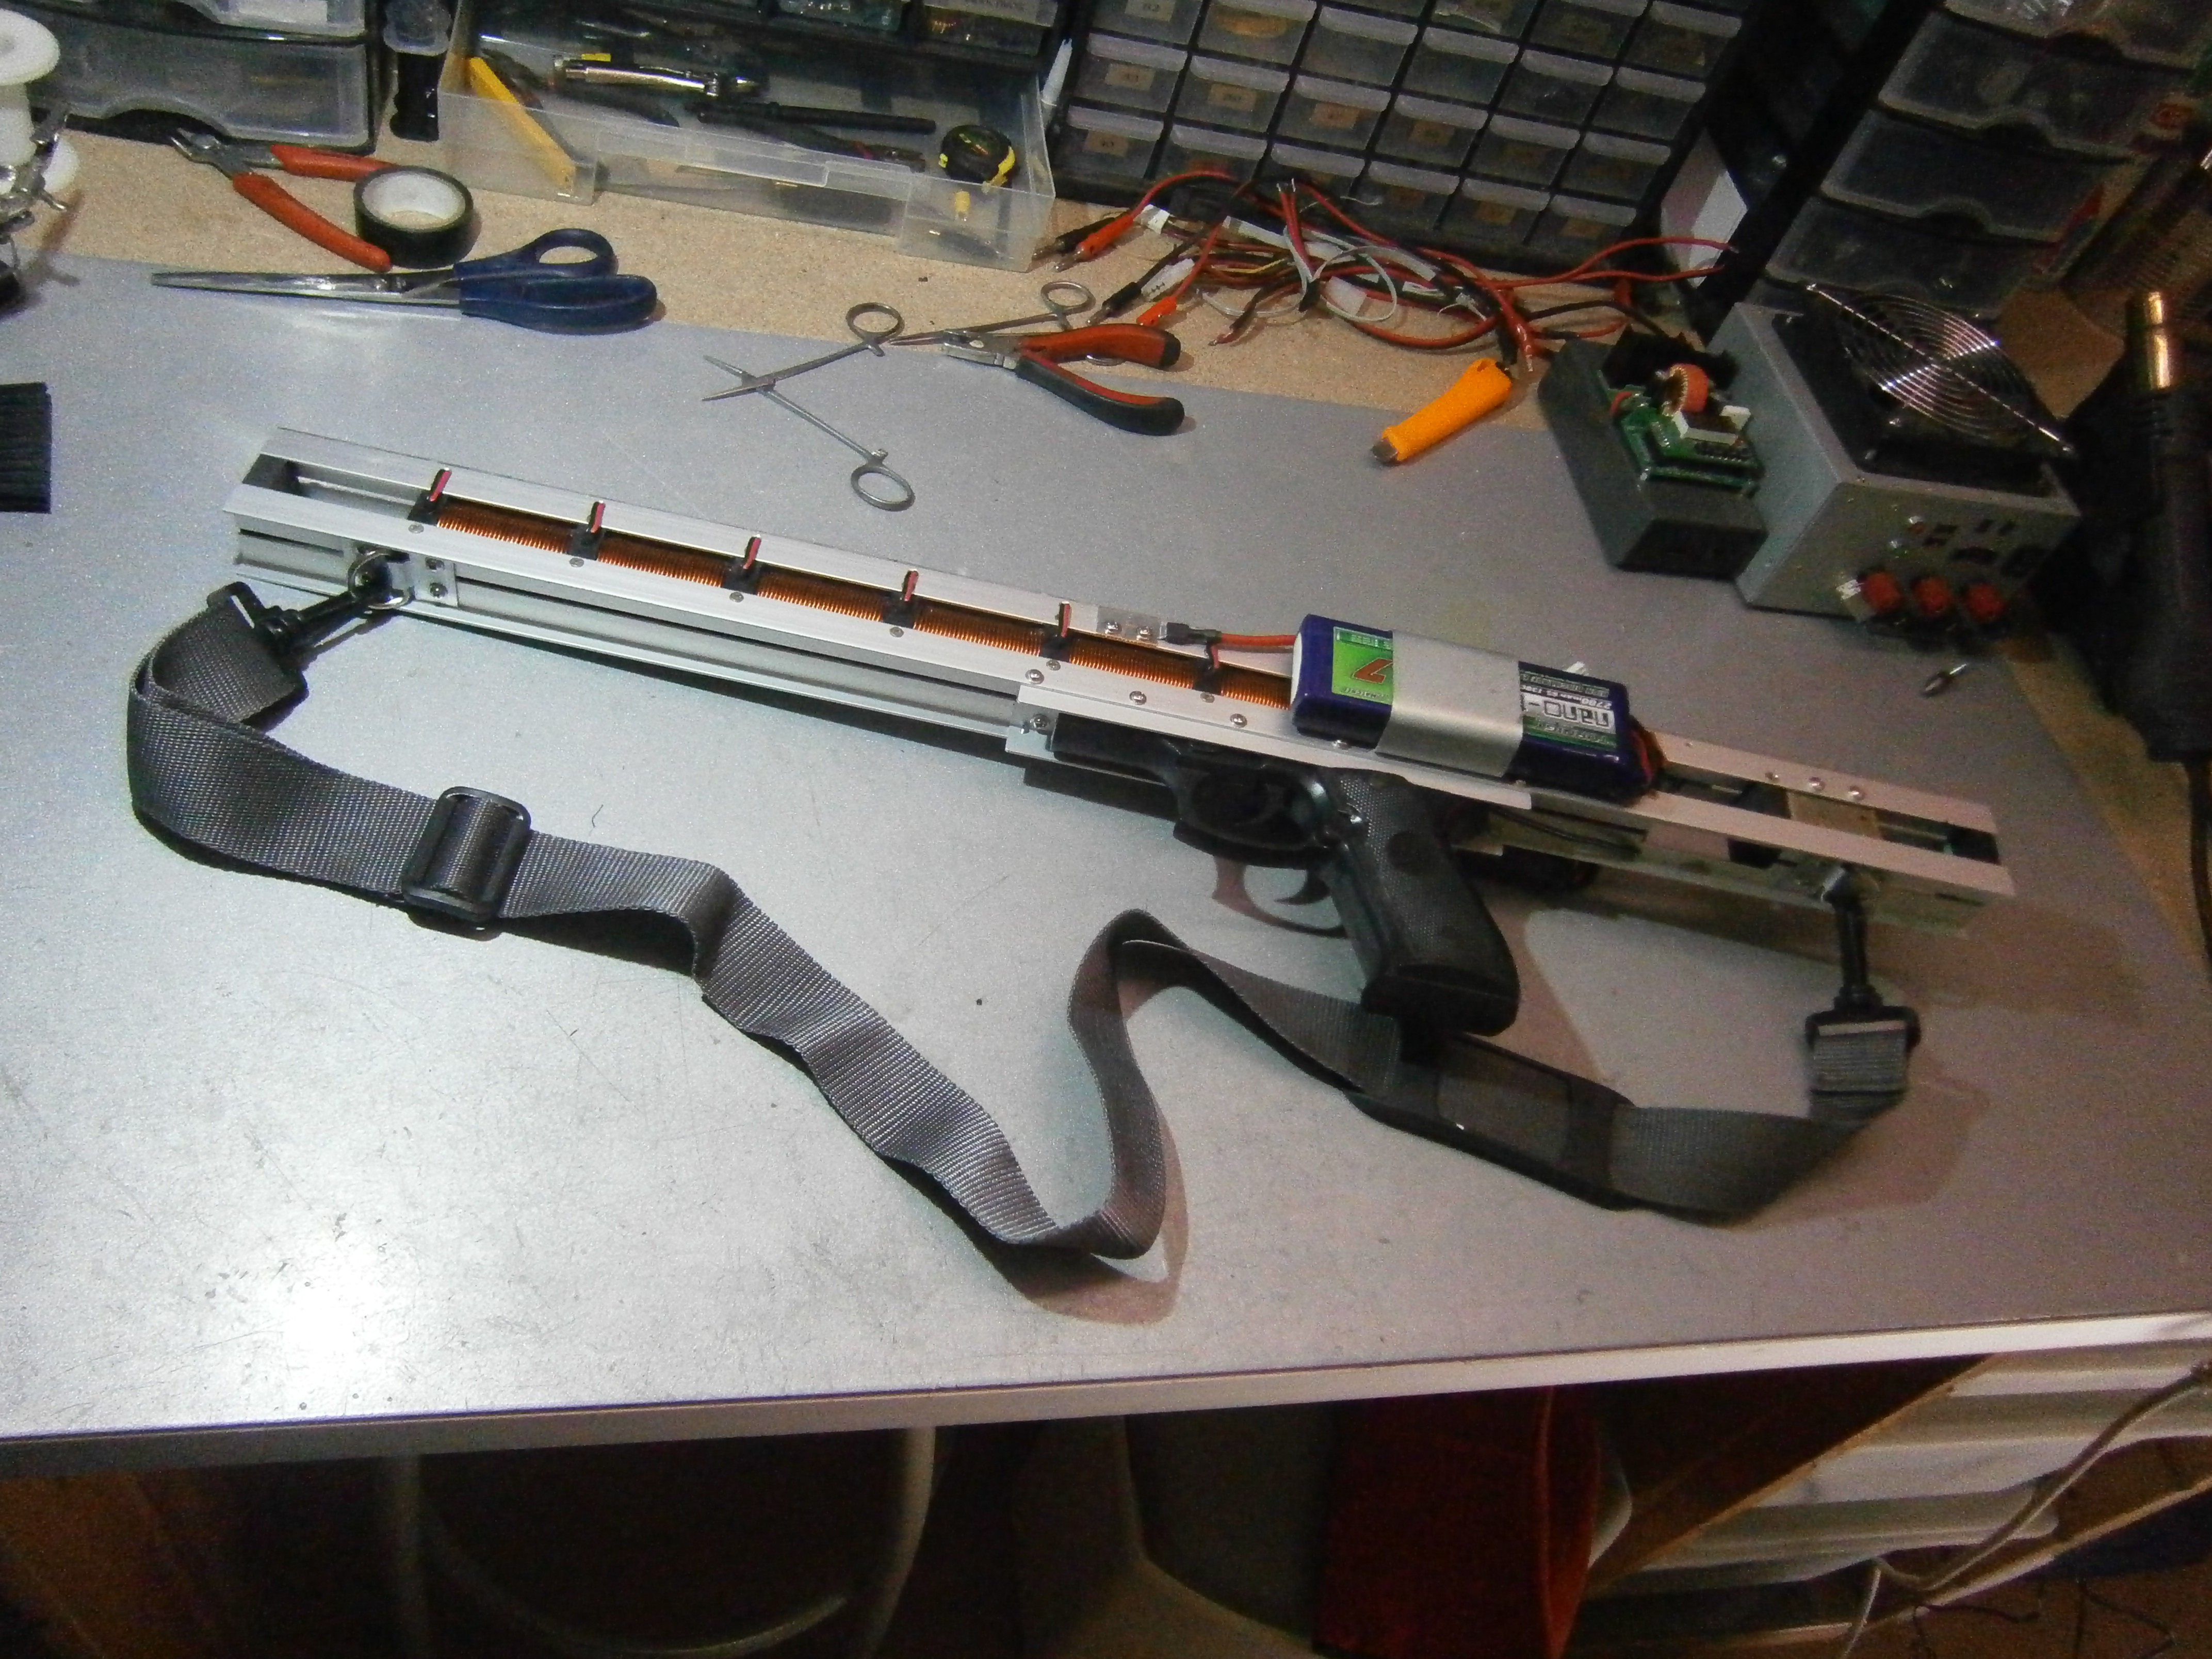
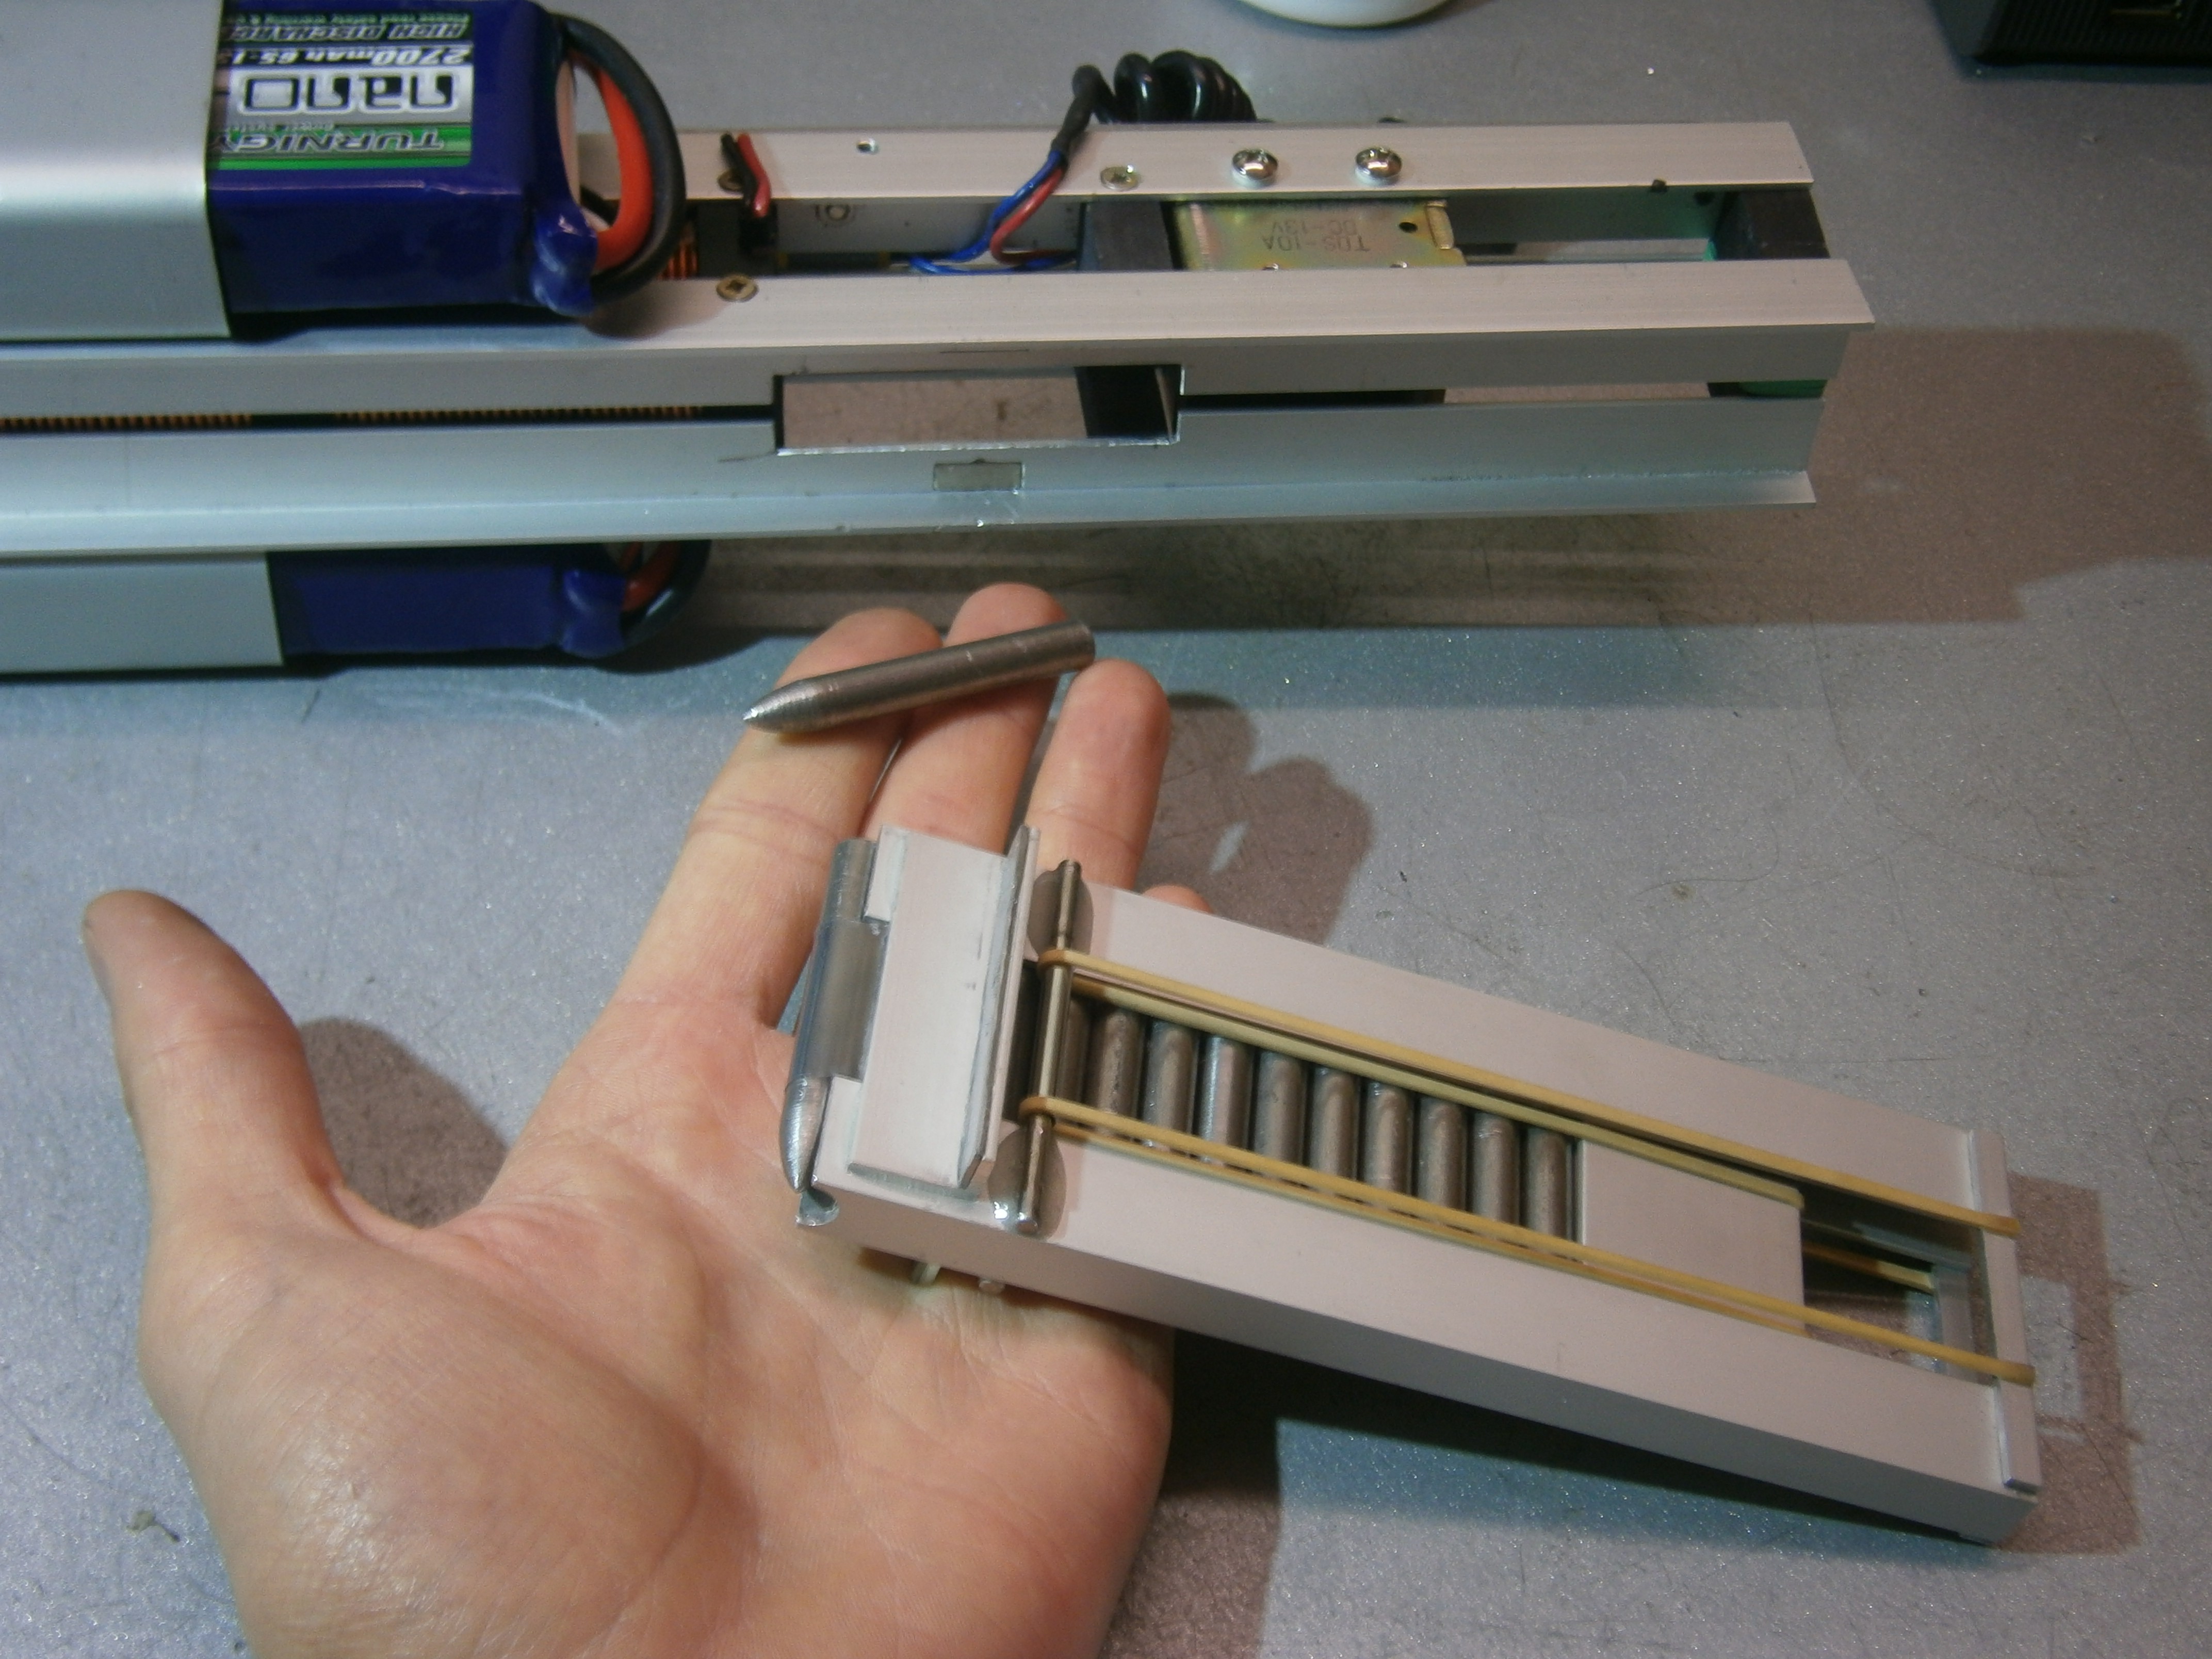
 The batteries wil be placed under the coil section of the rifle, leaving a gap between them where i will place a grip for the rifle and the connection between the batteries, which will likely include a protection circuit.

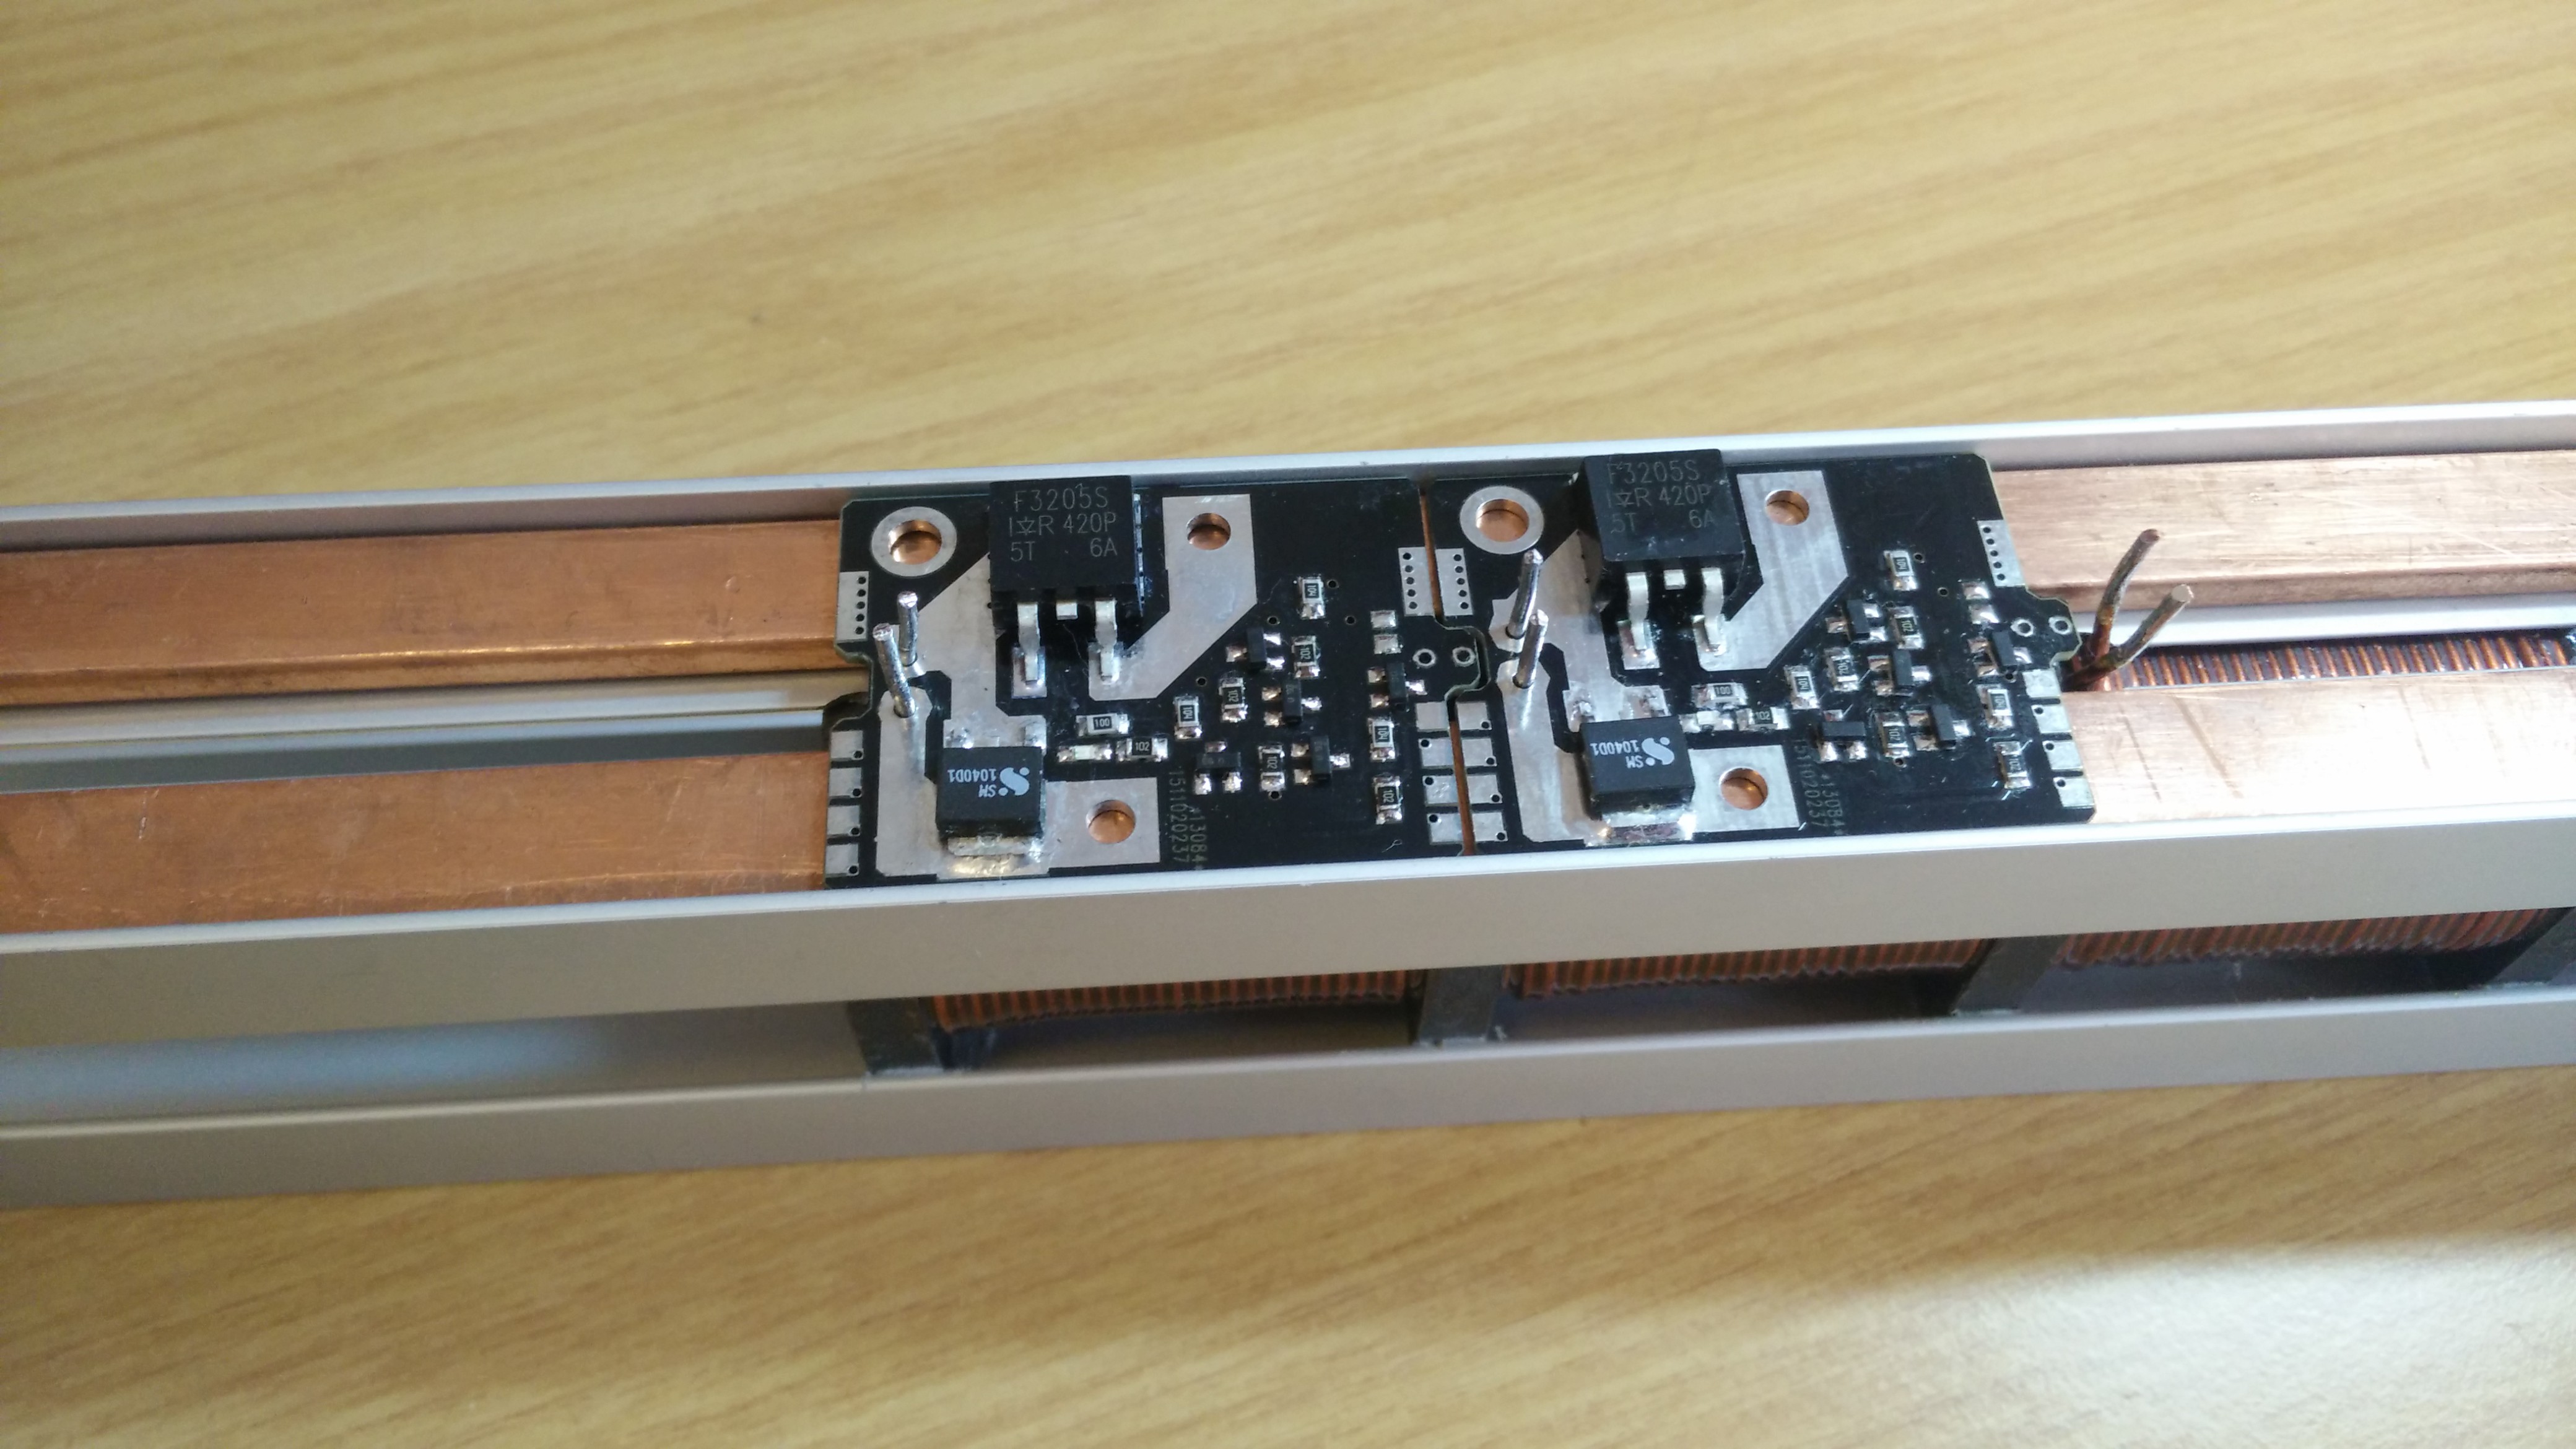

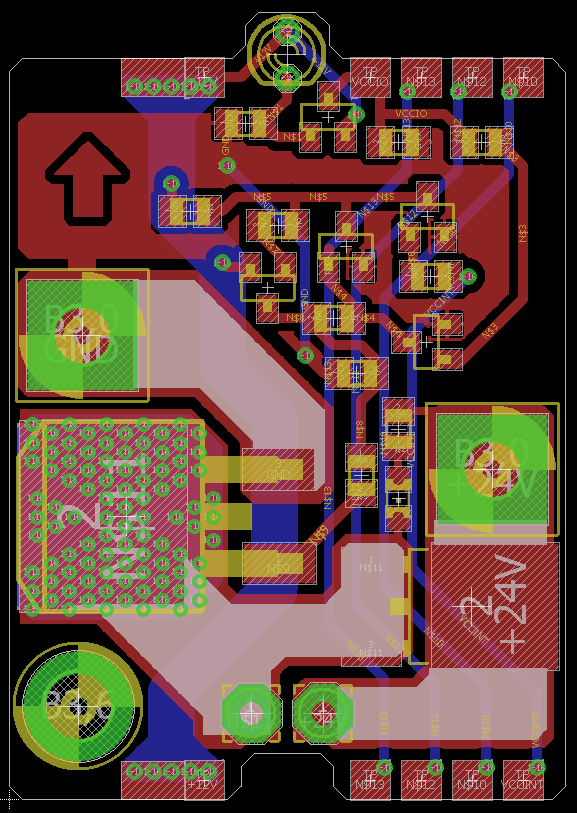
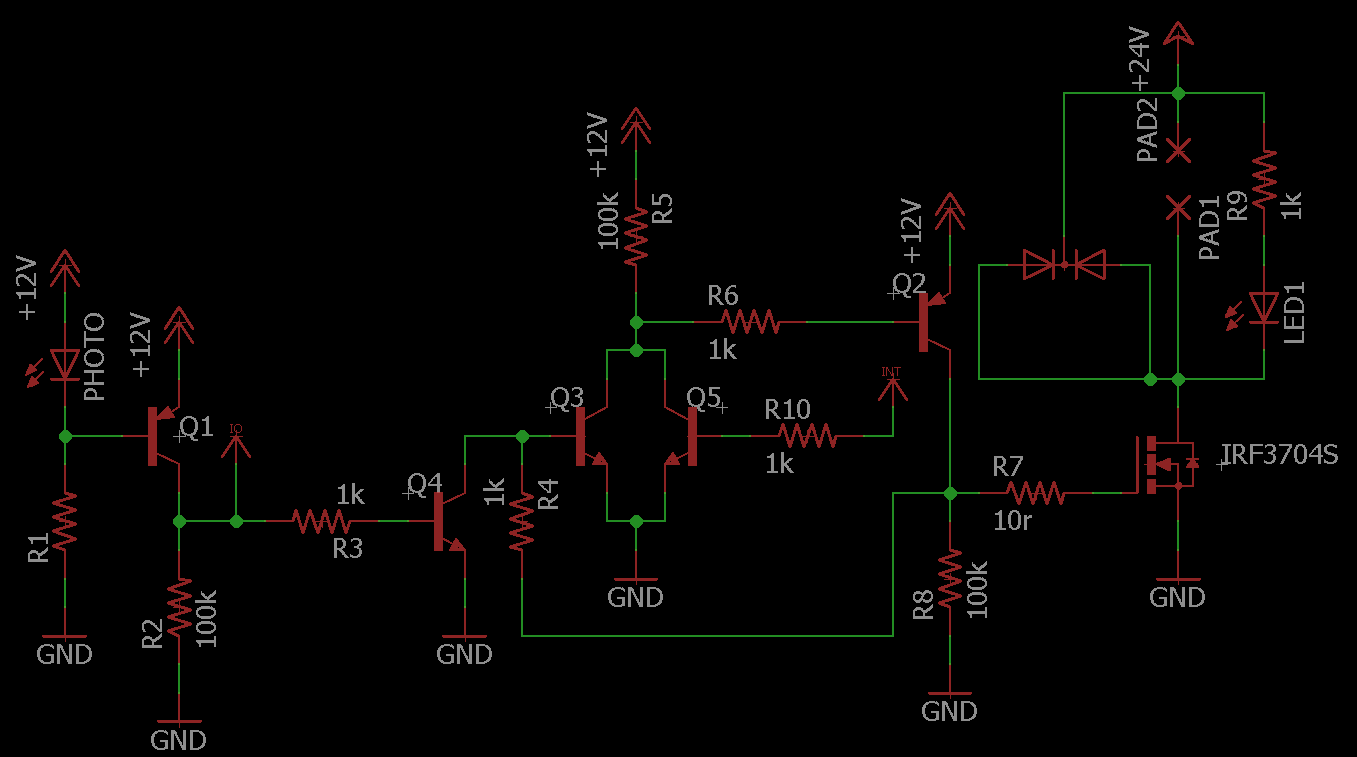
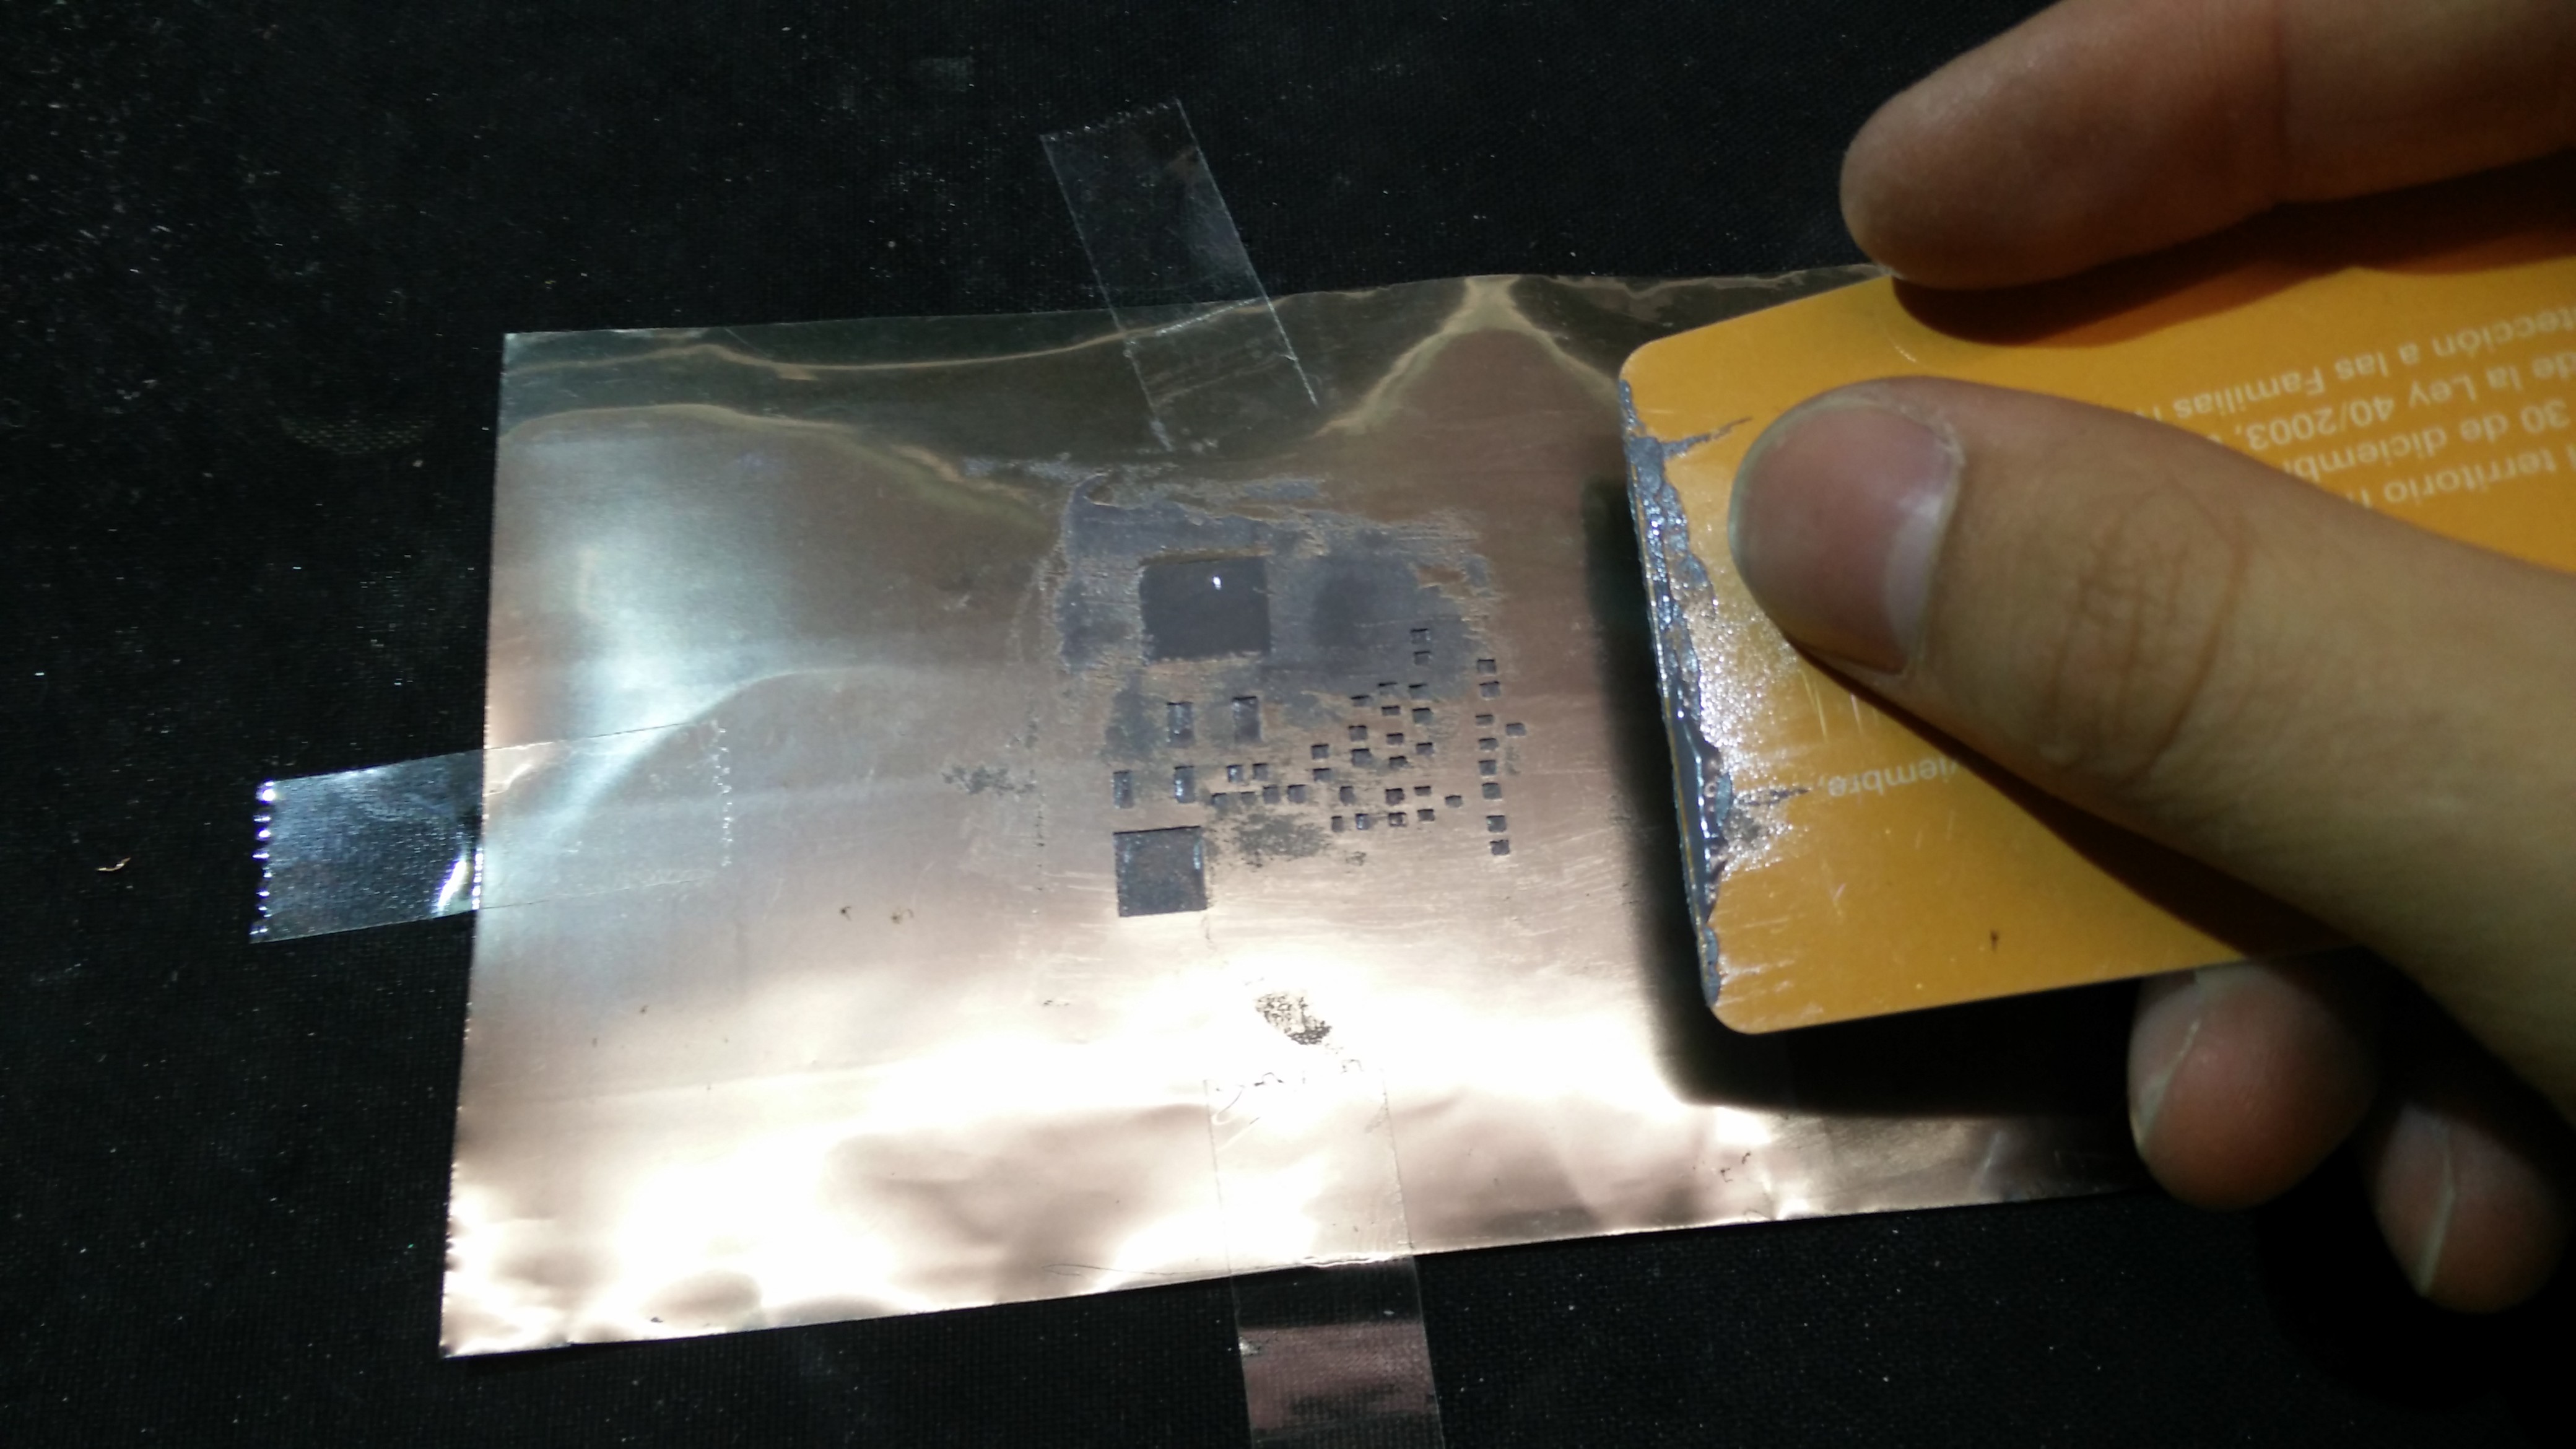
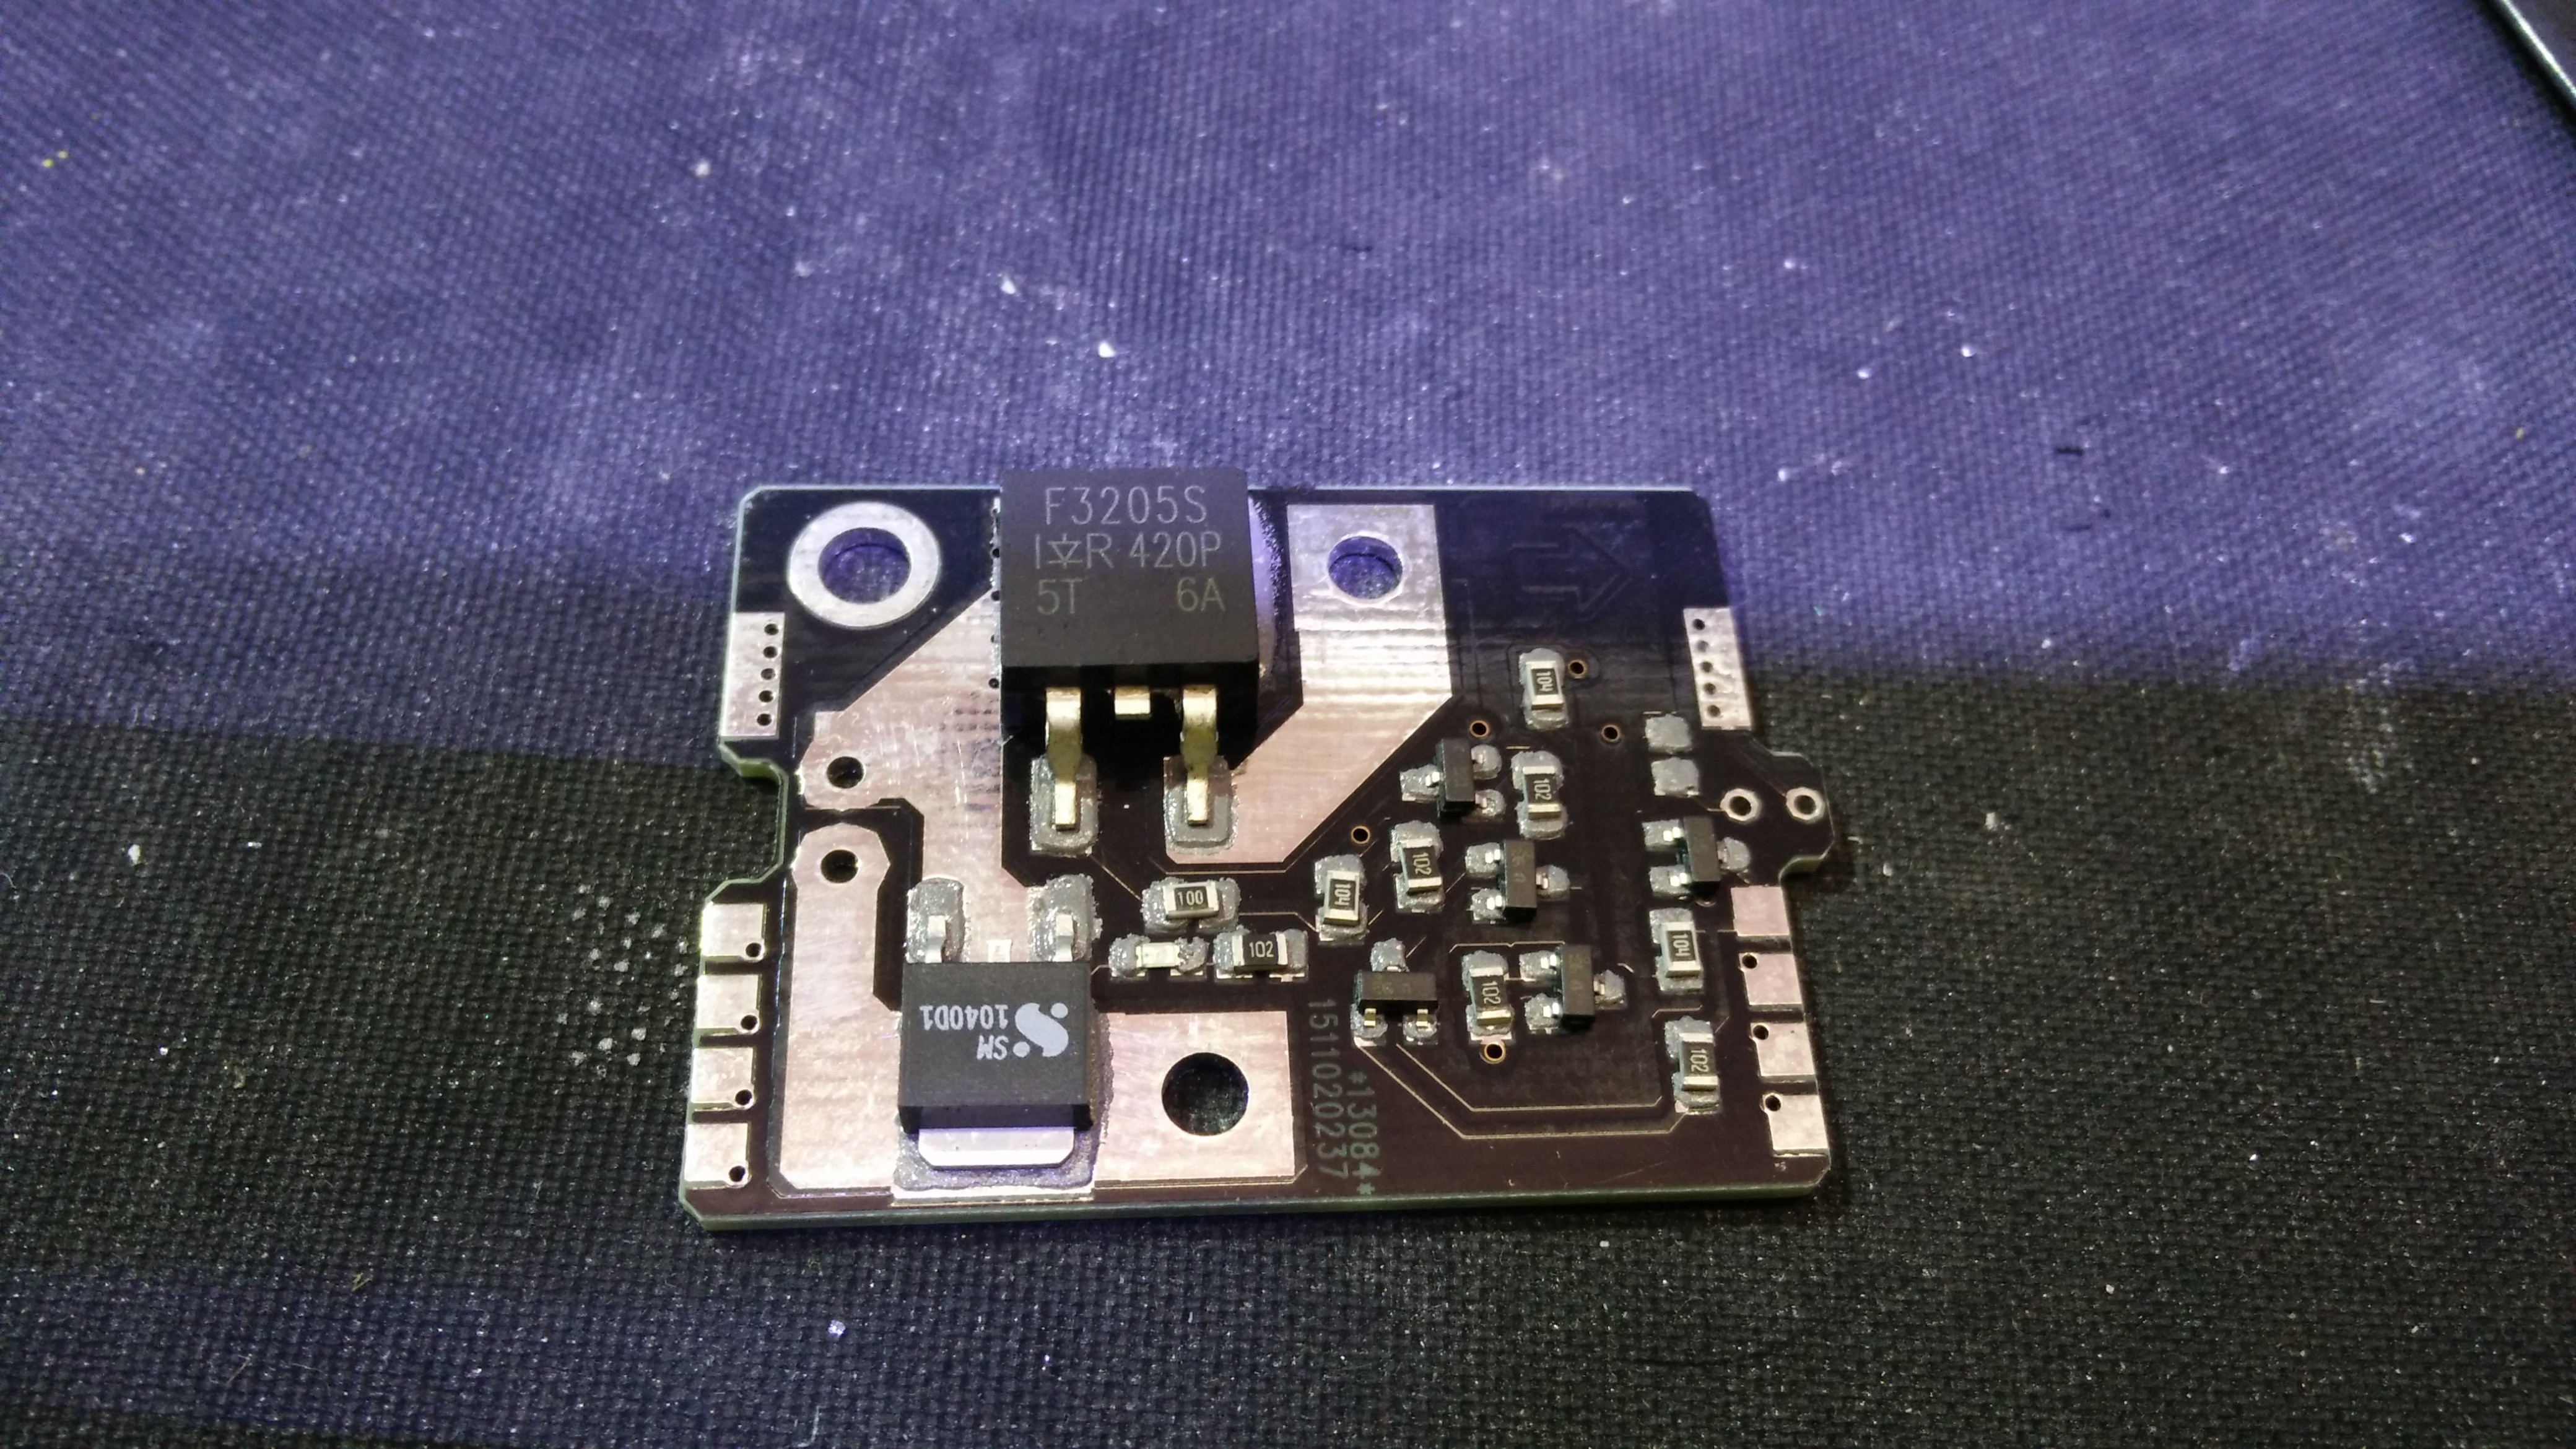
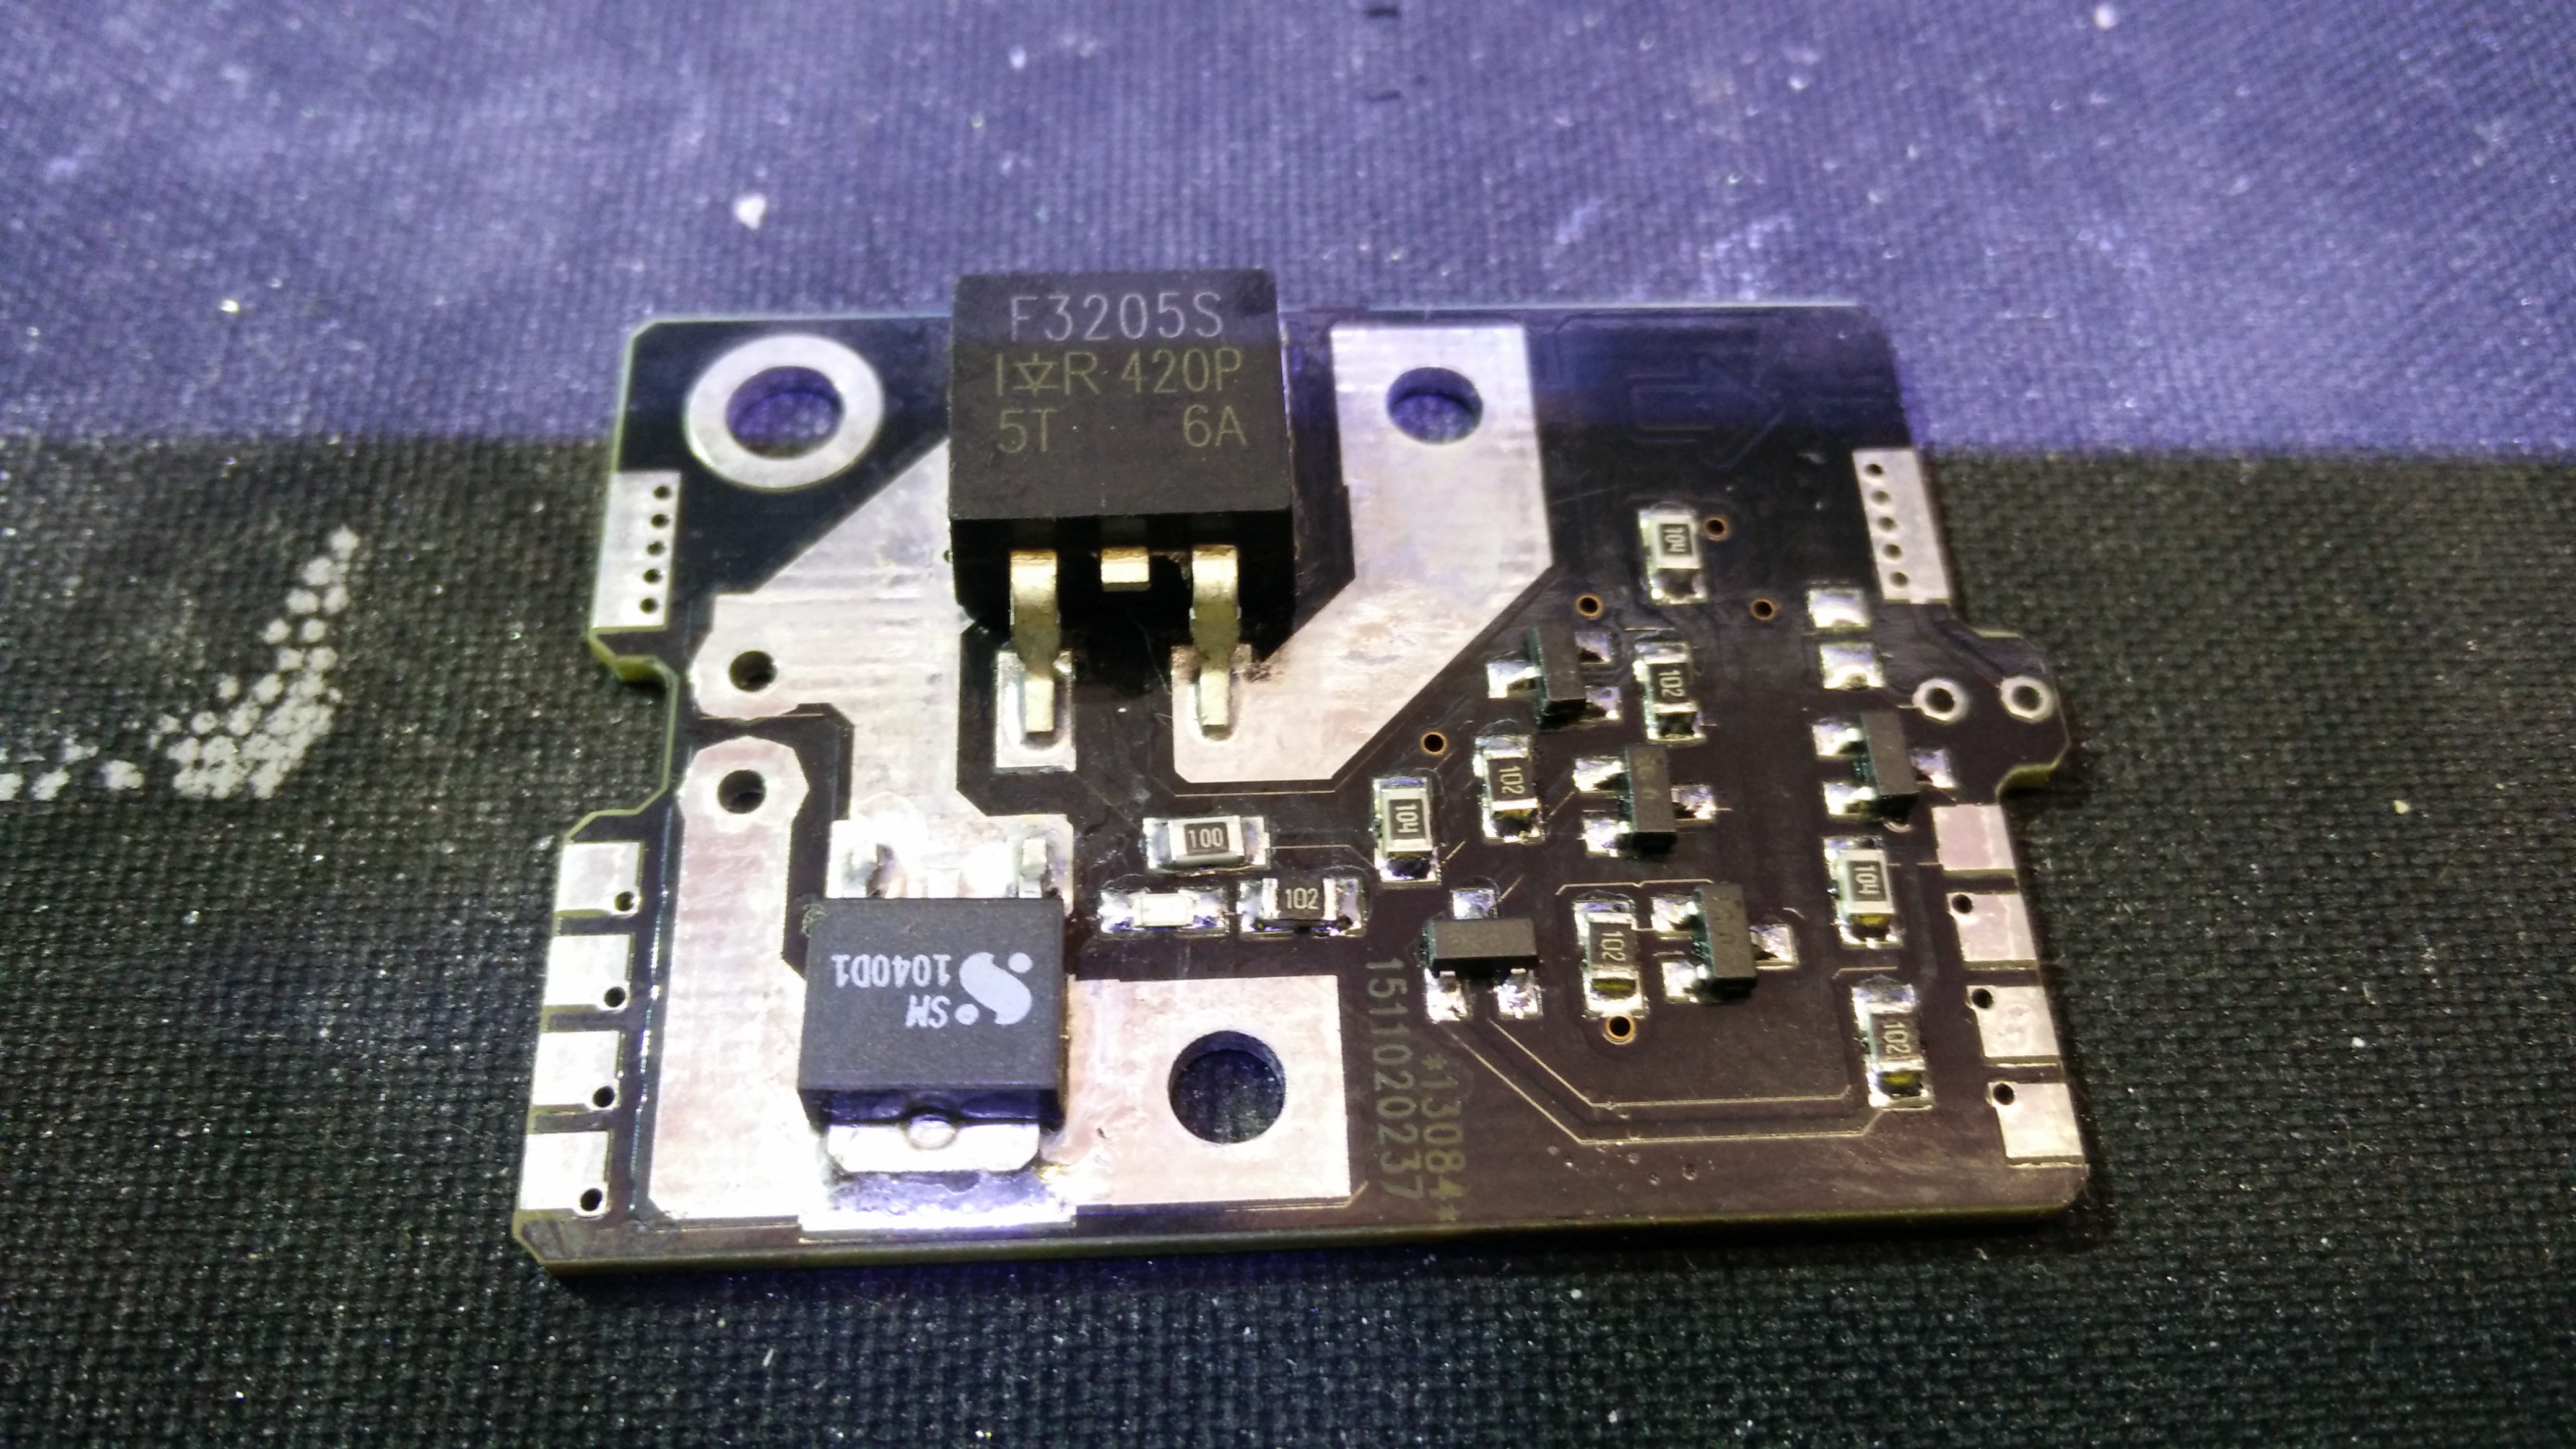
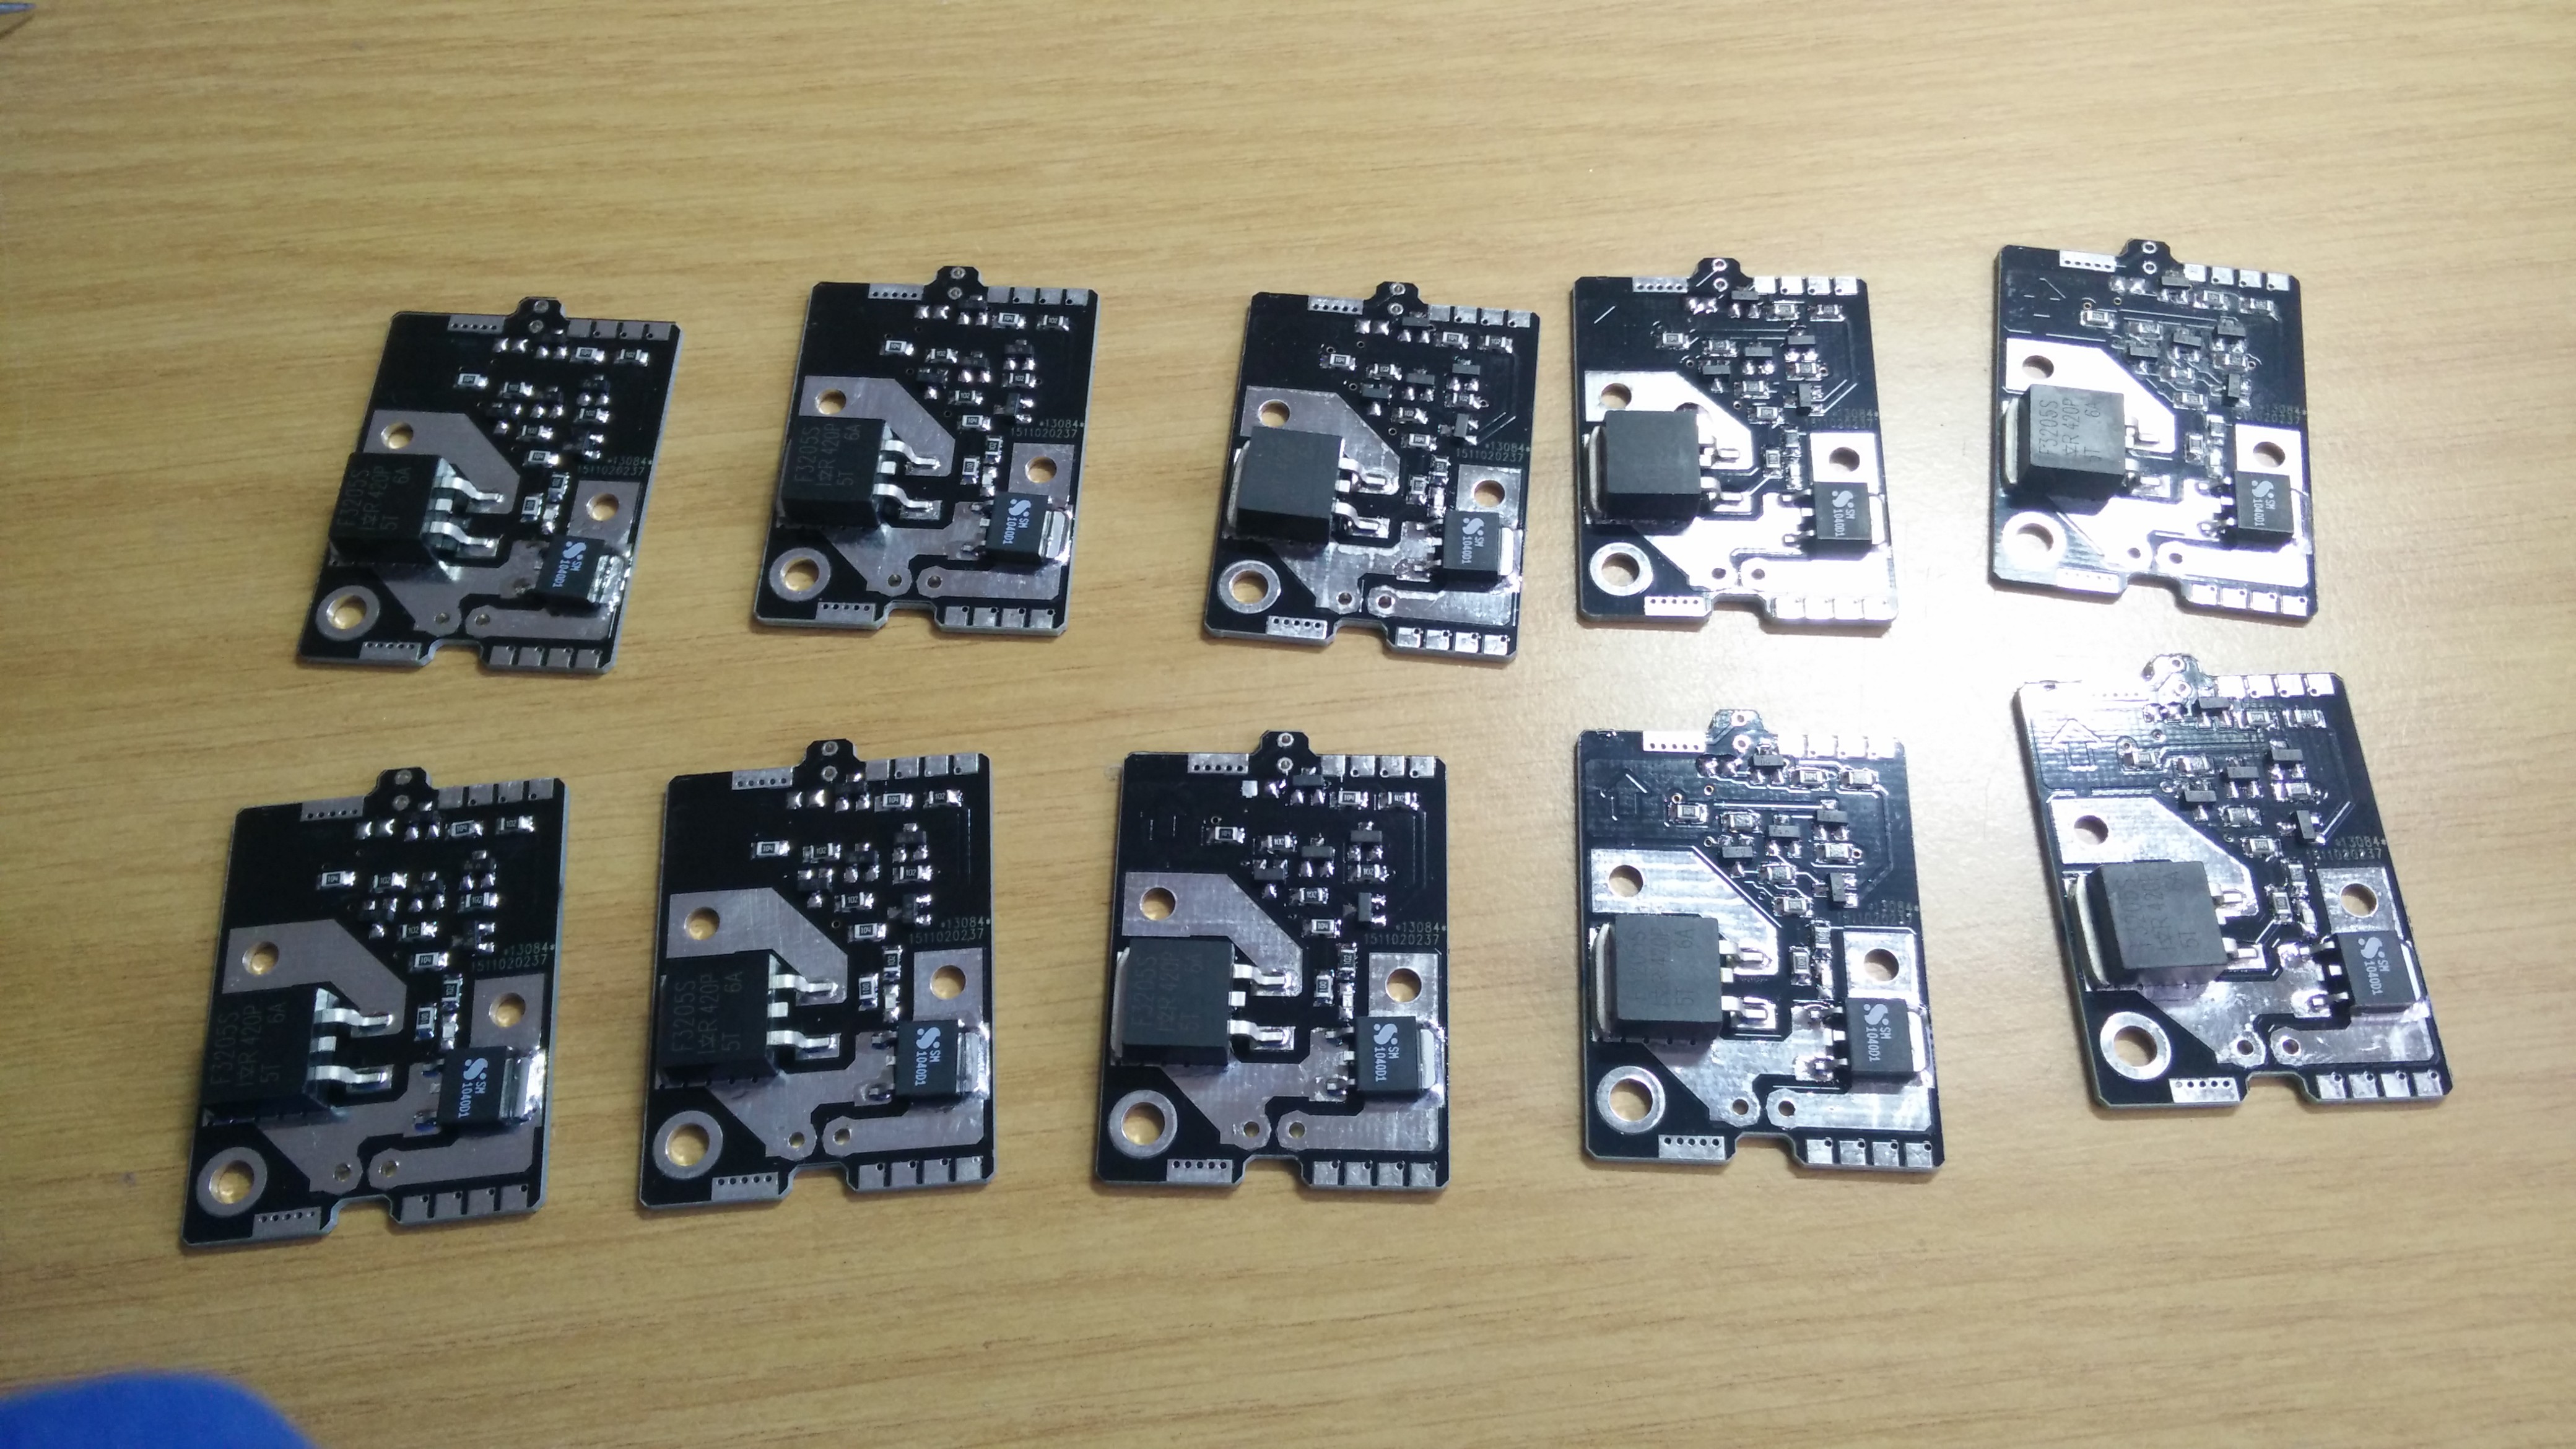
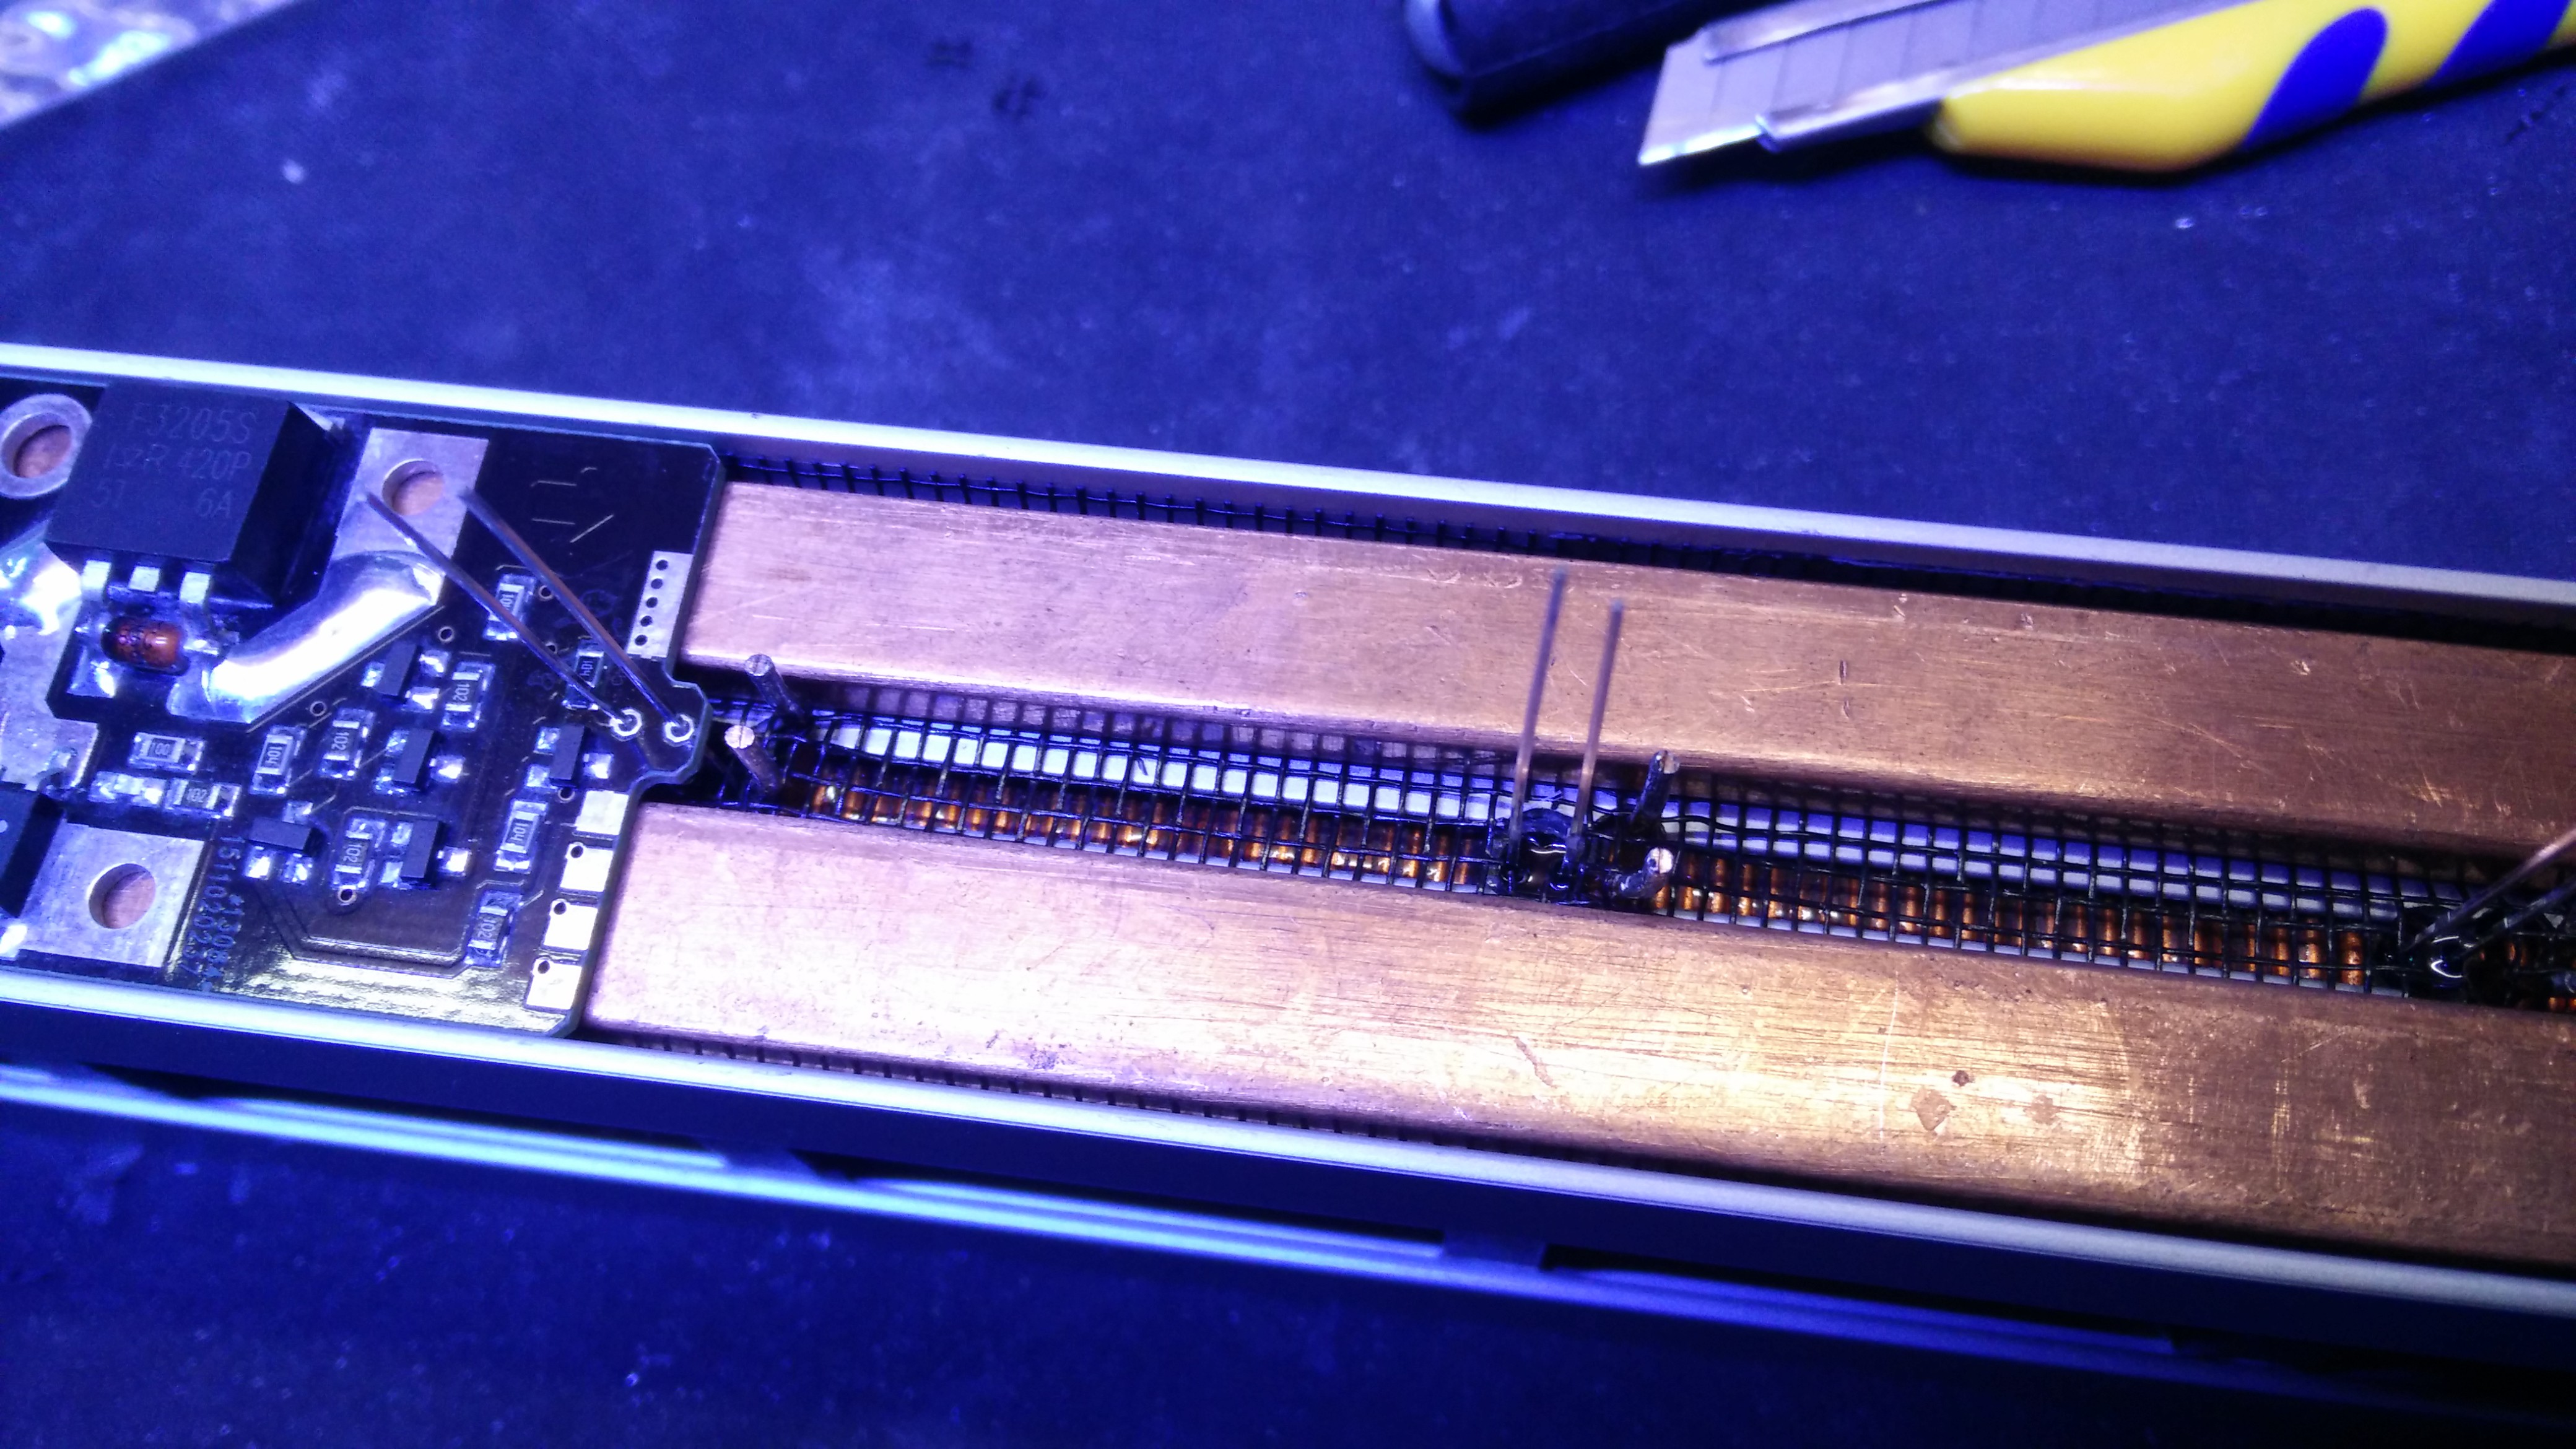
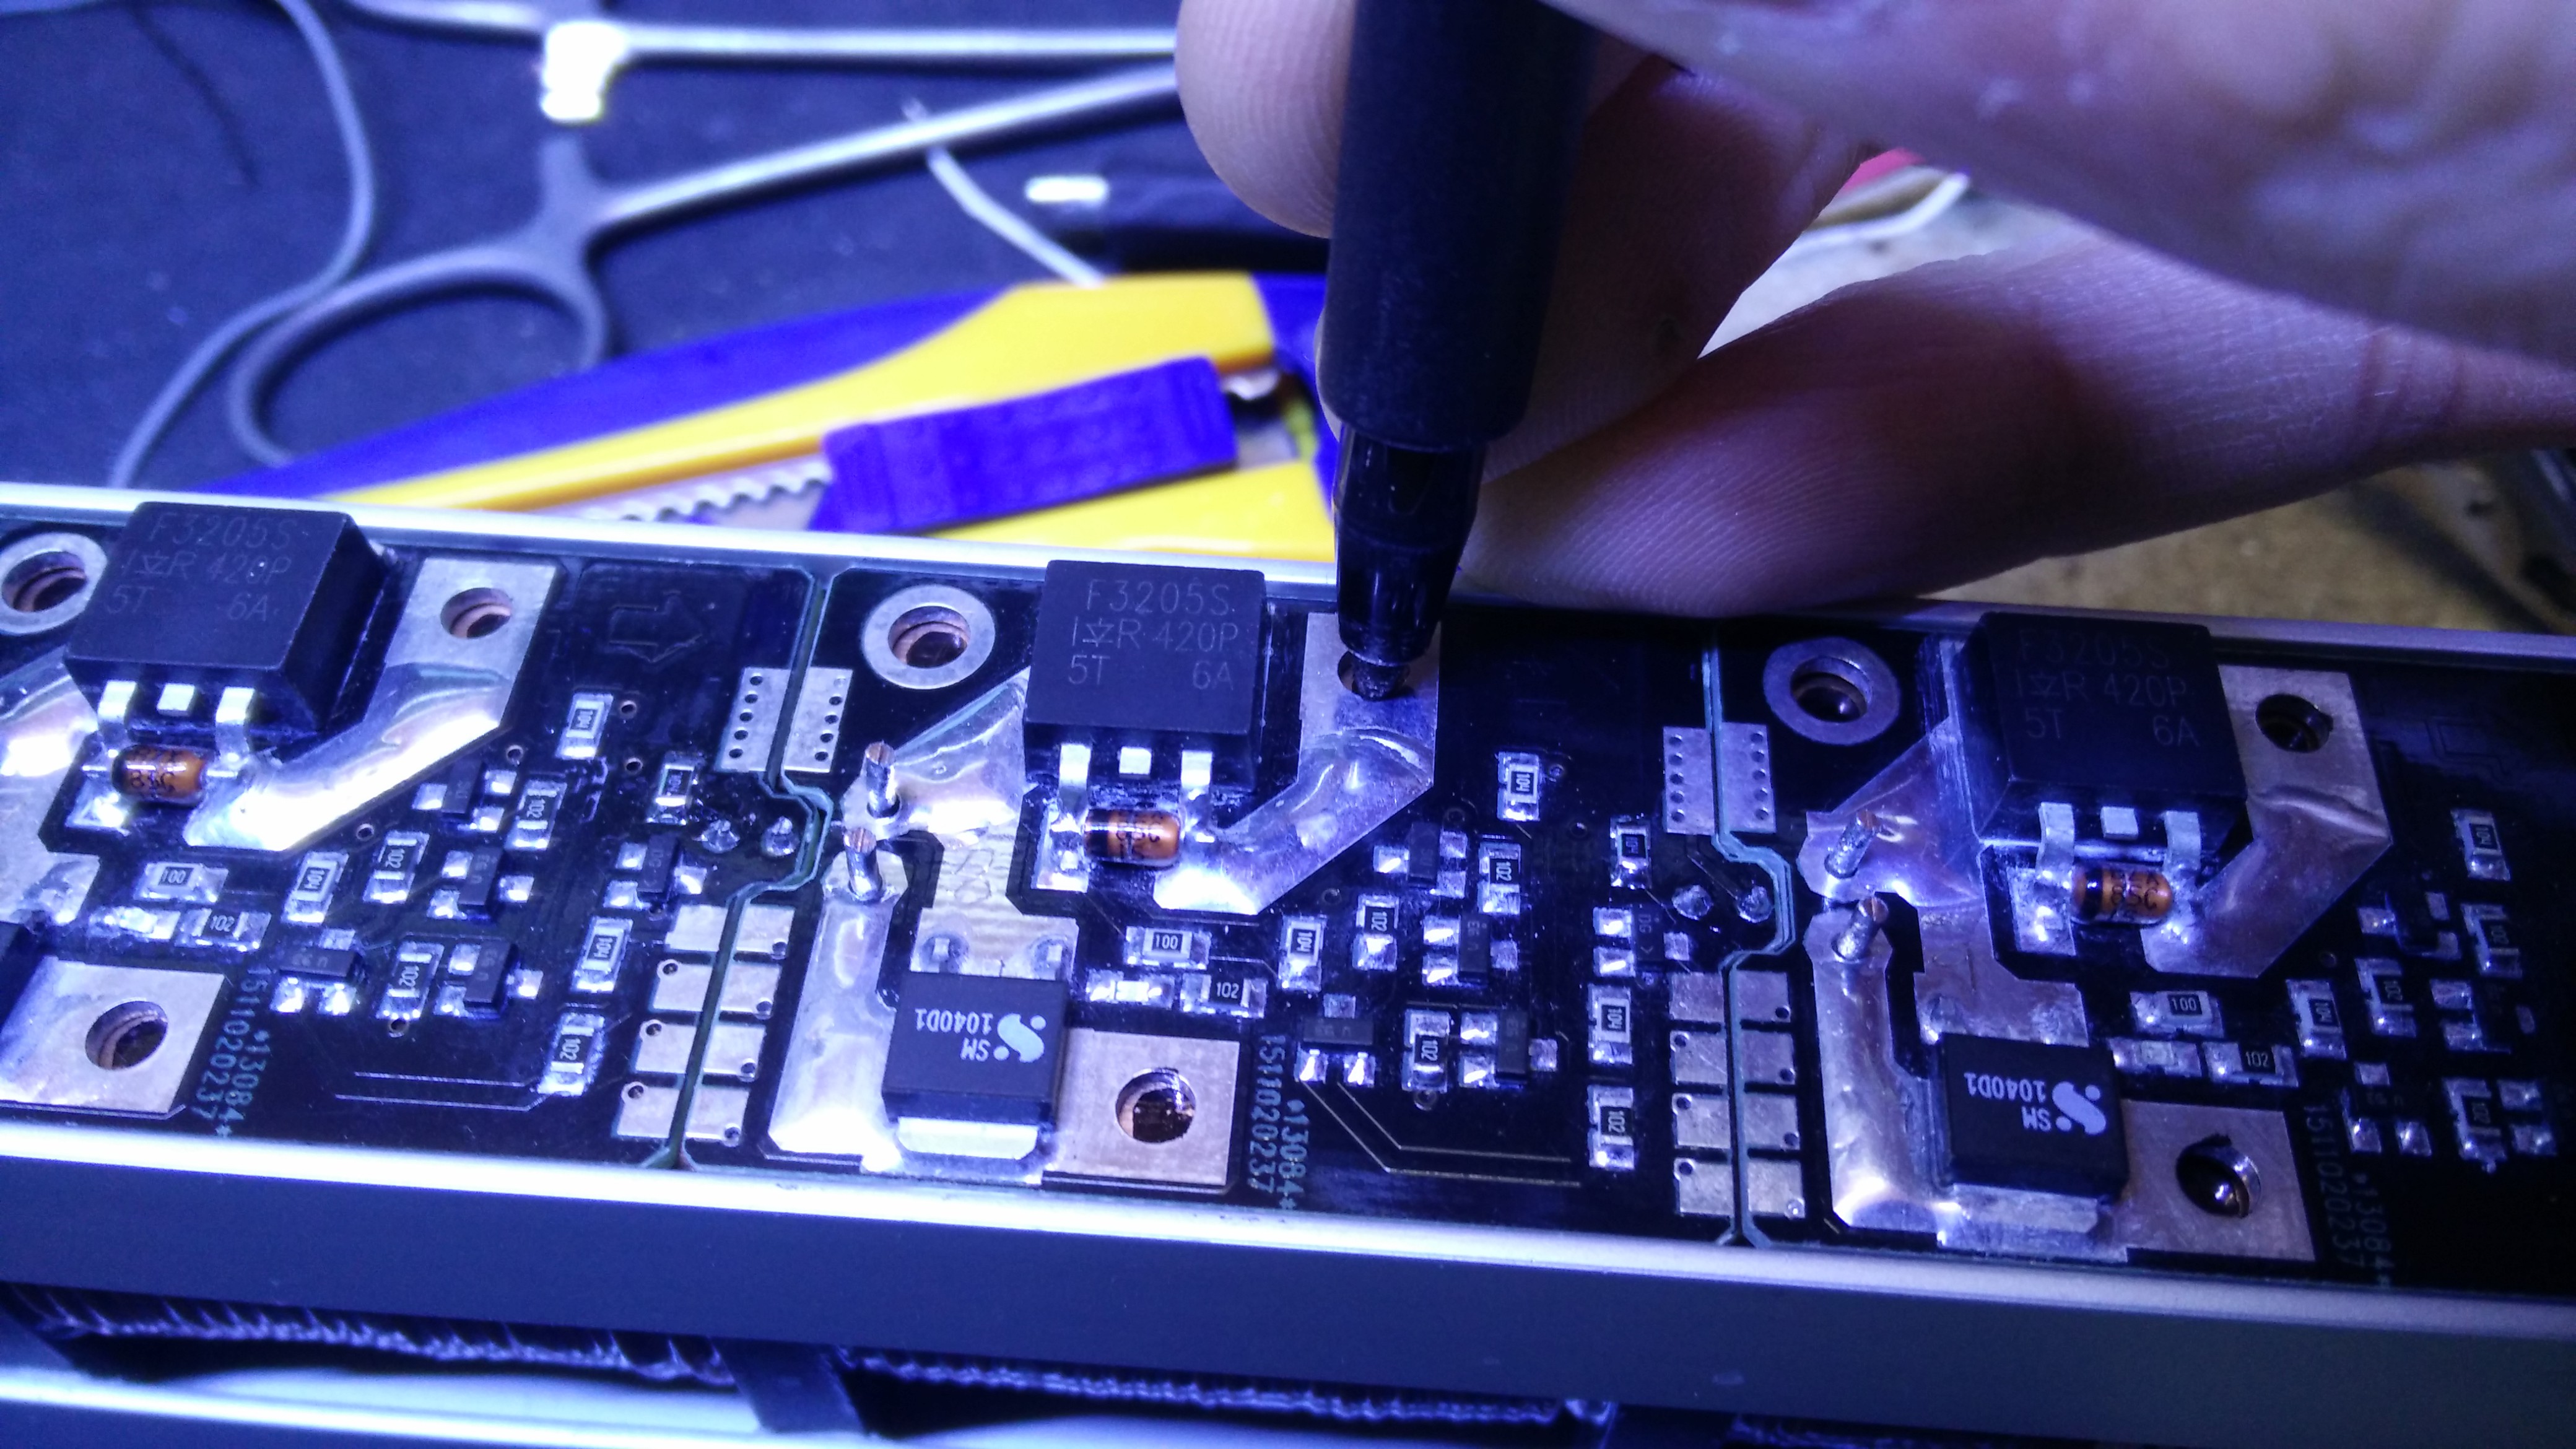
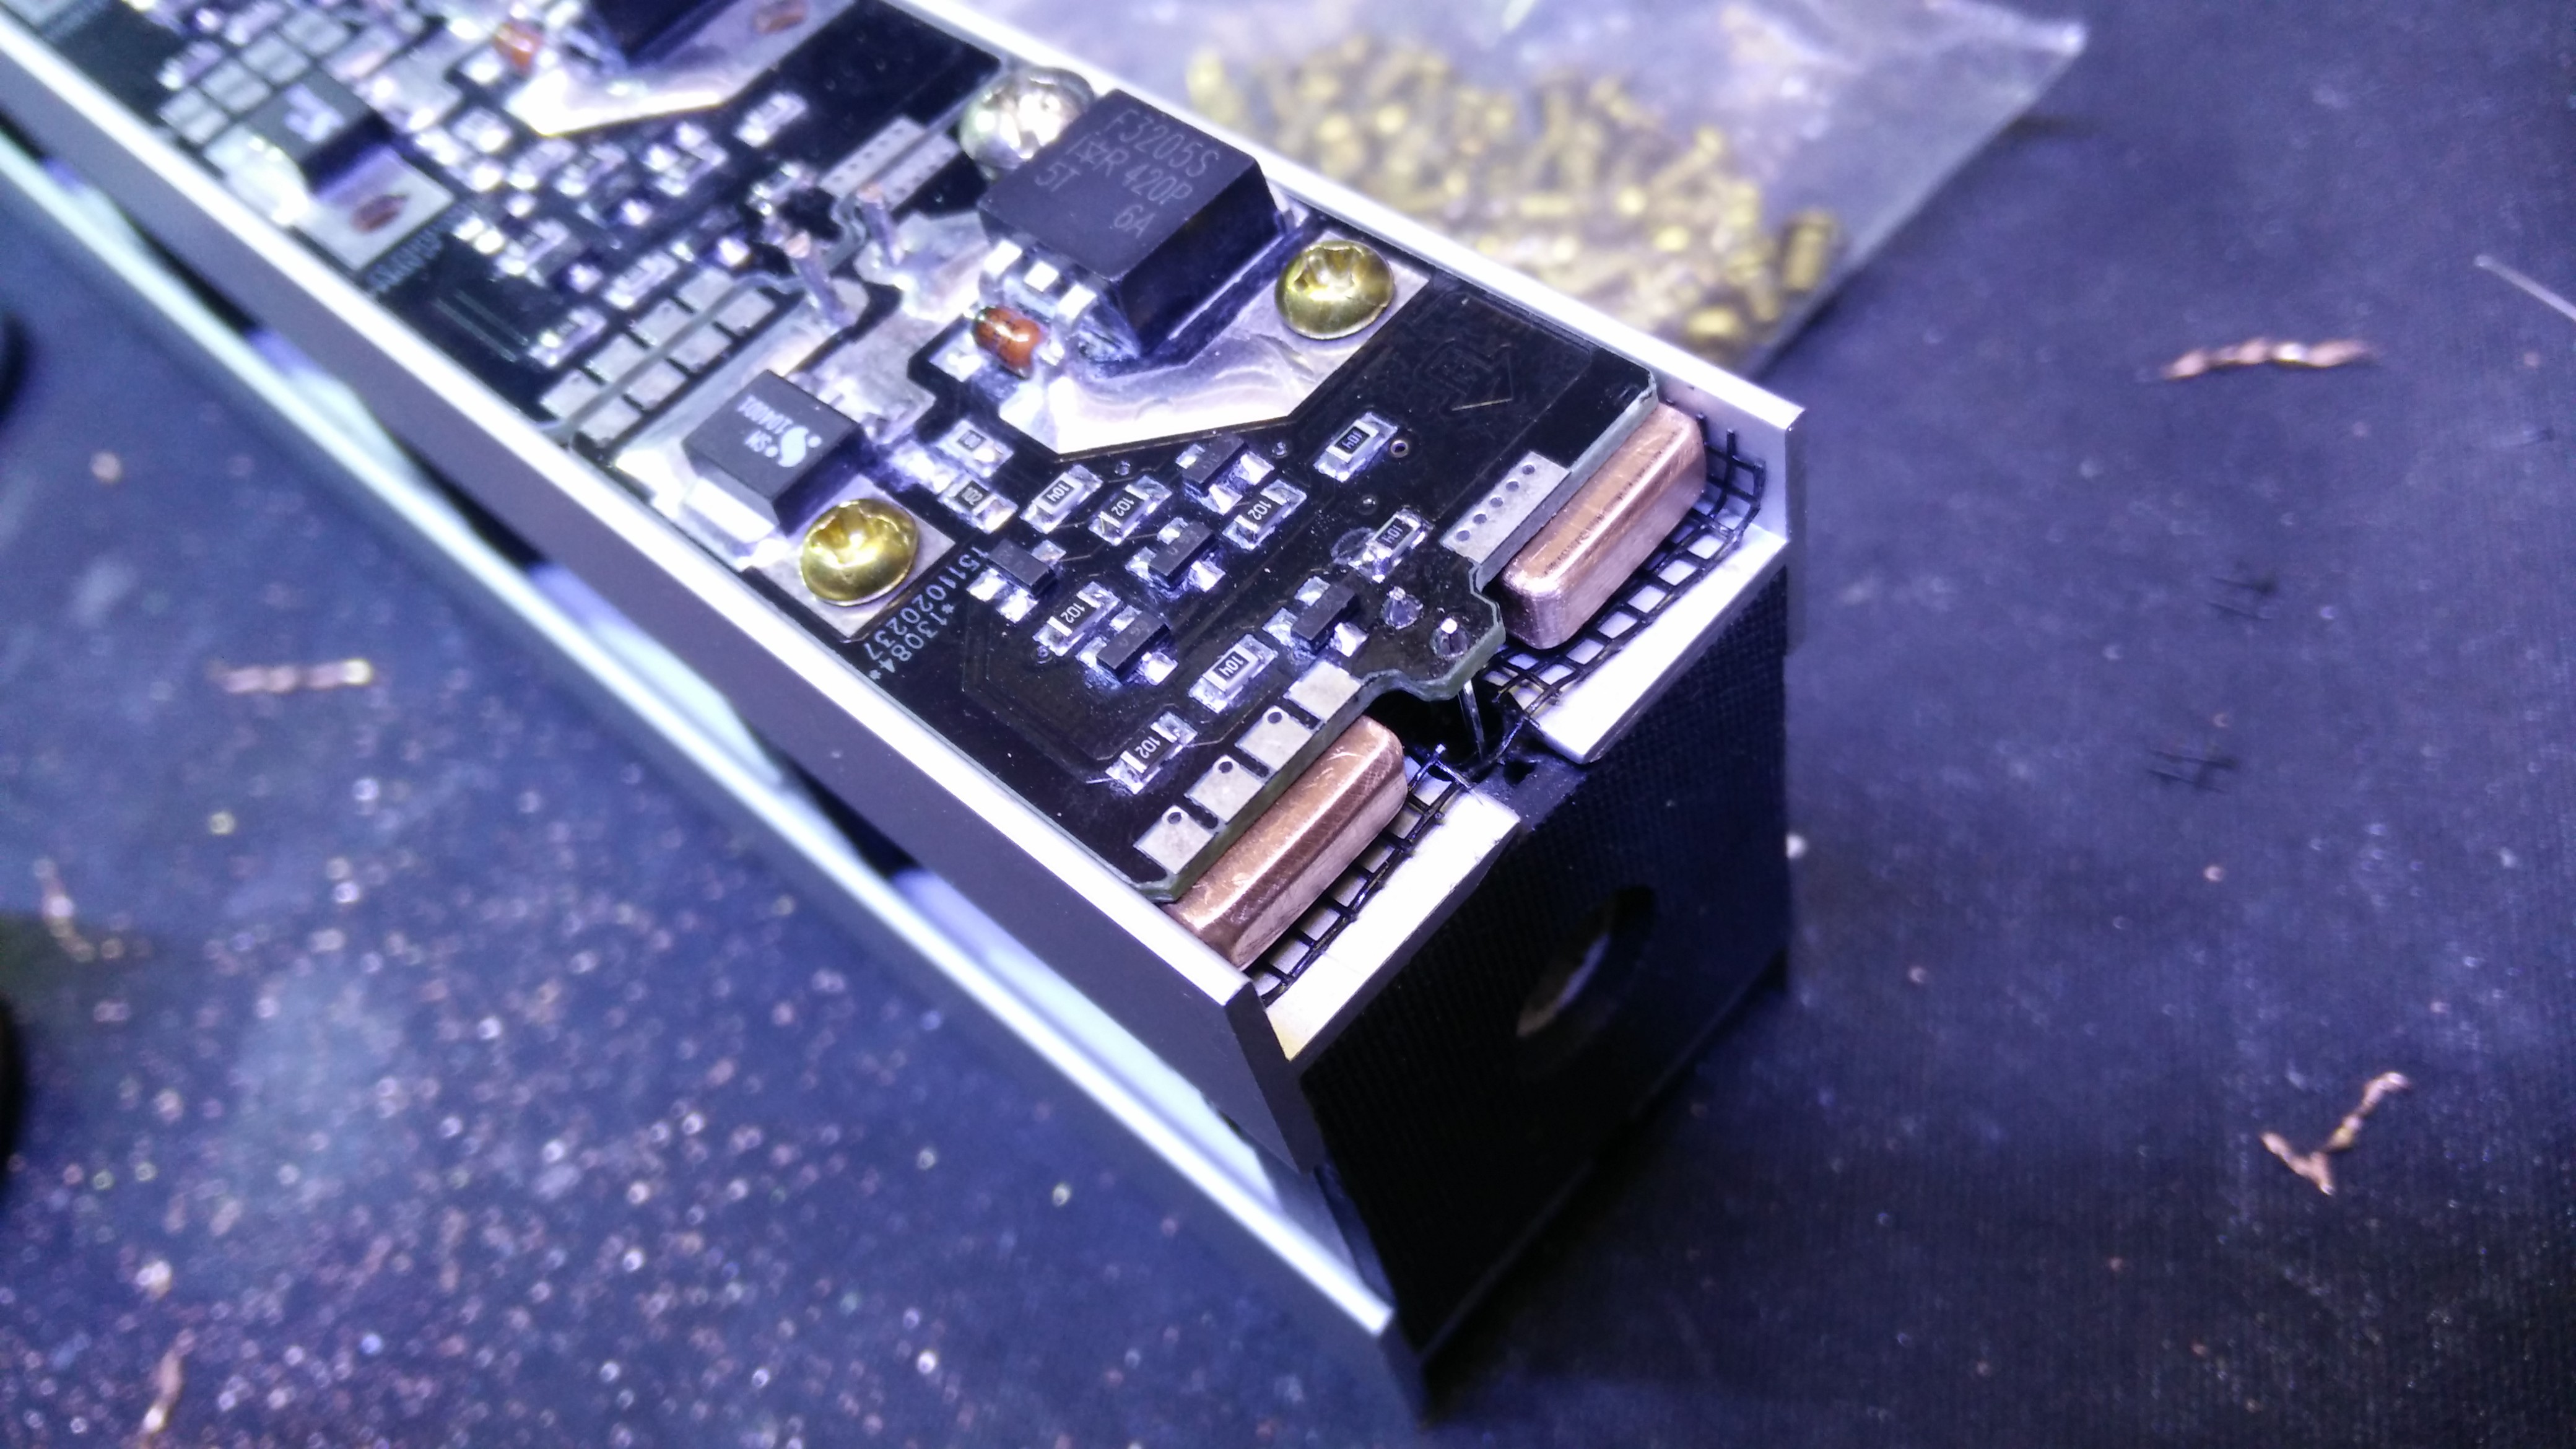
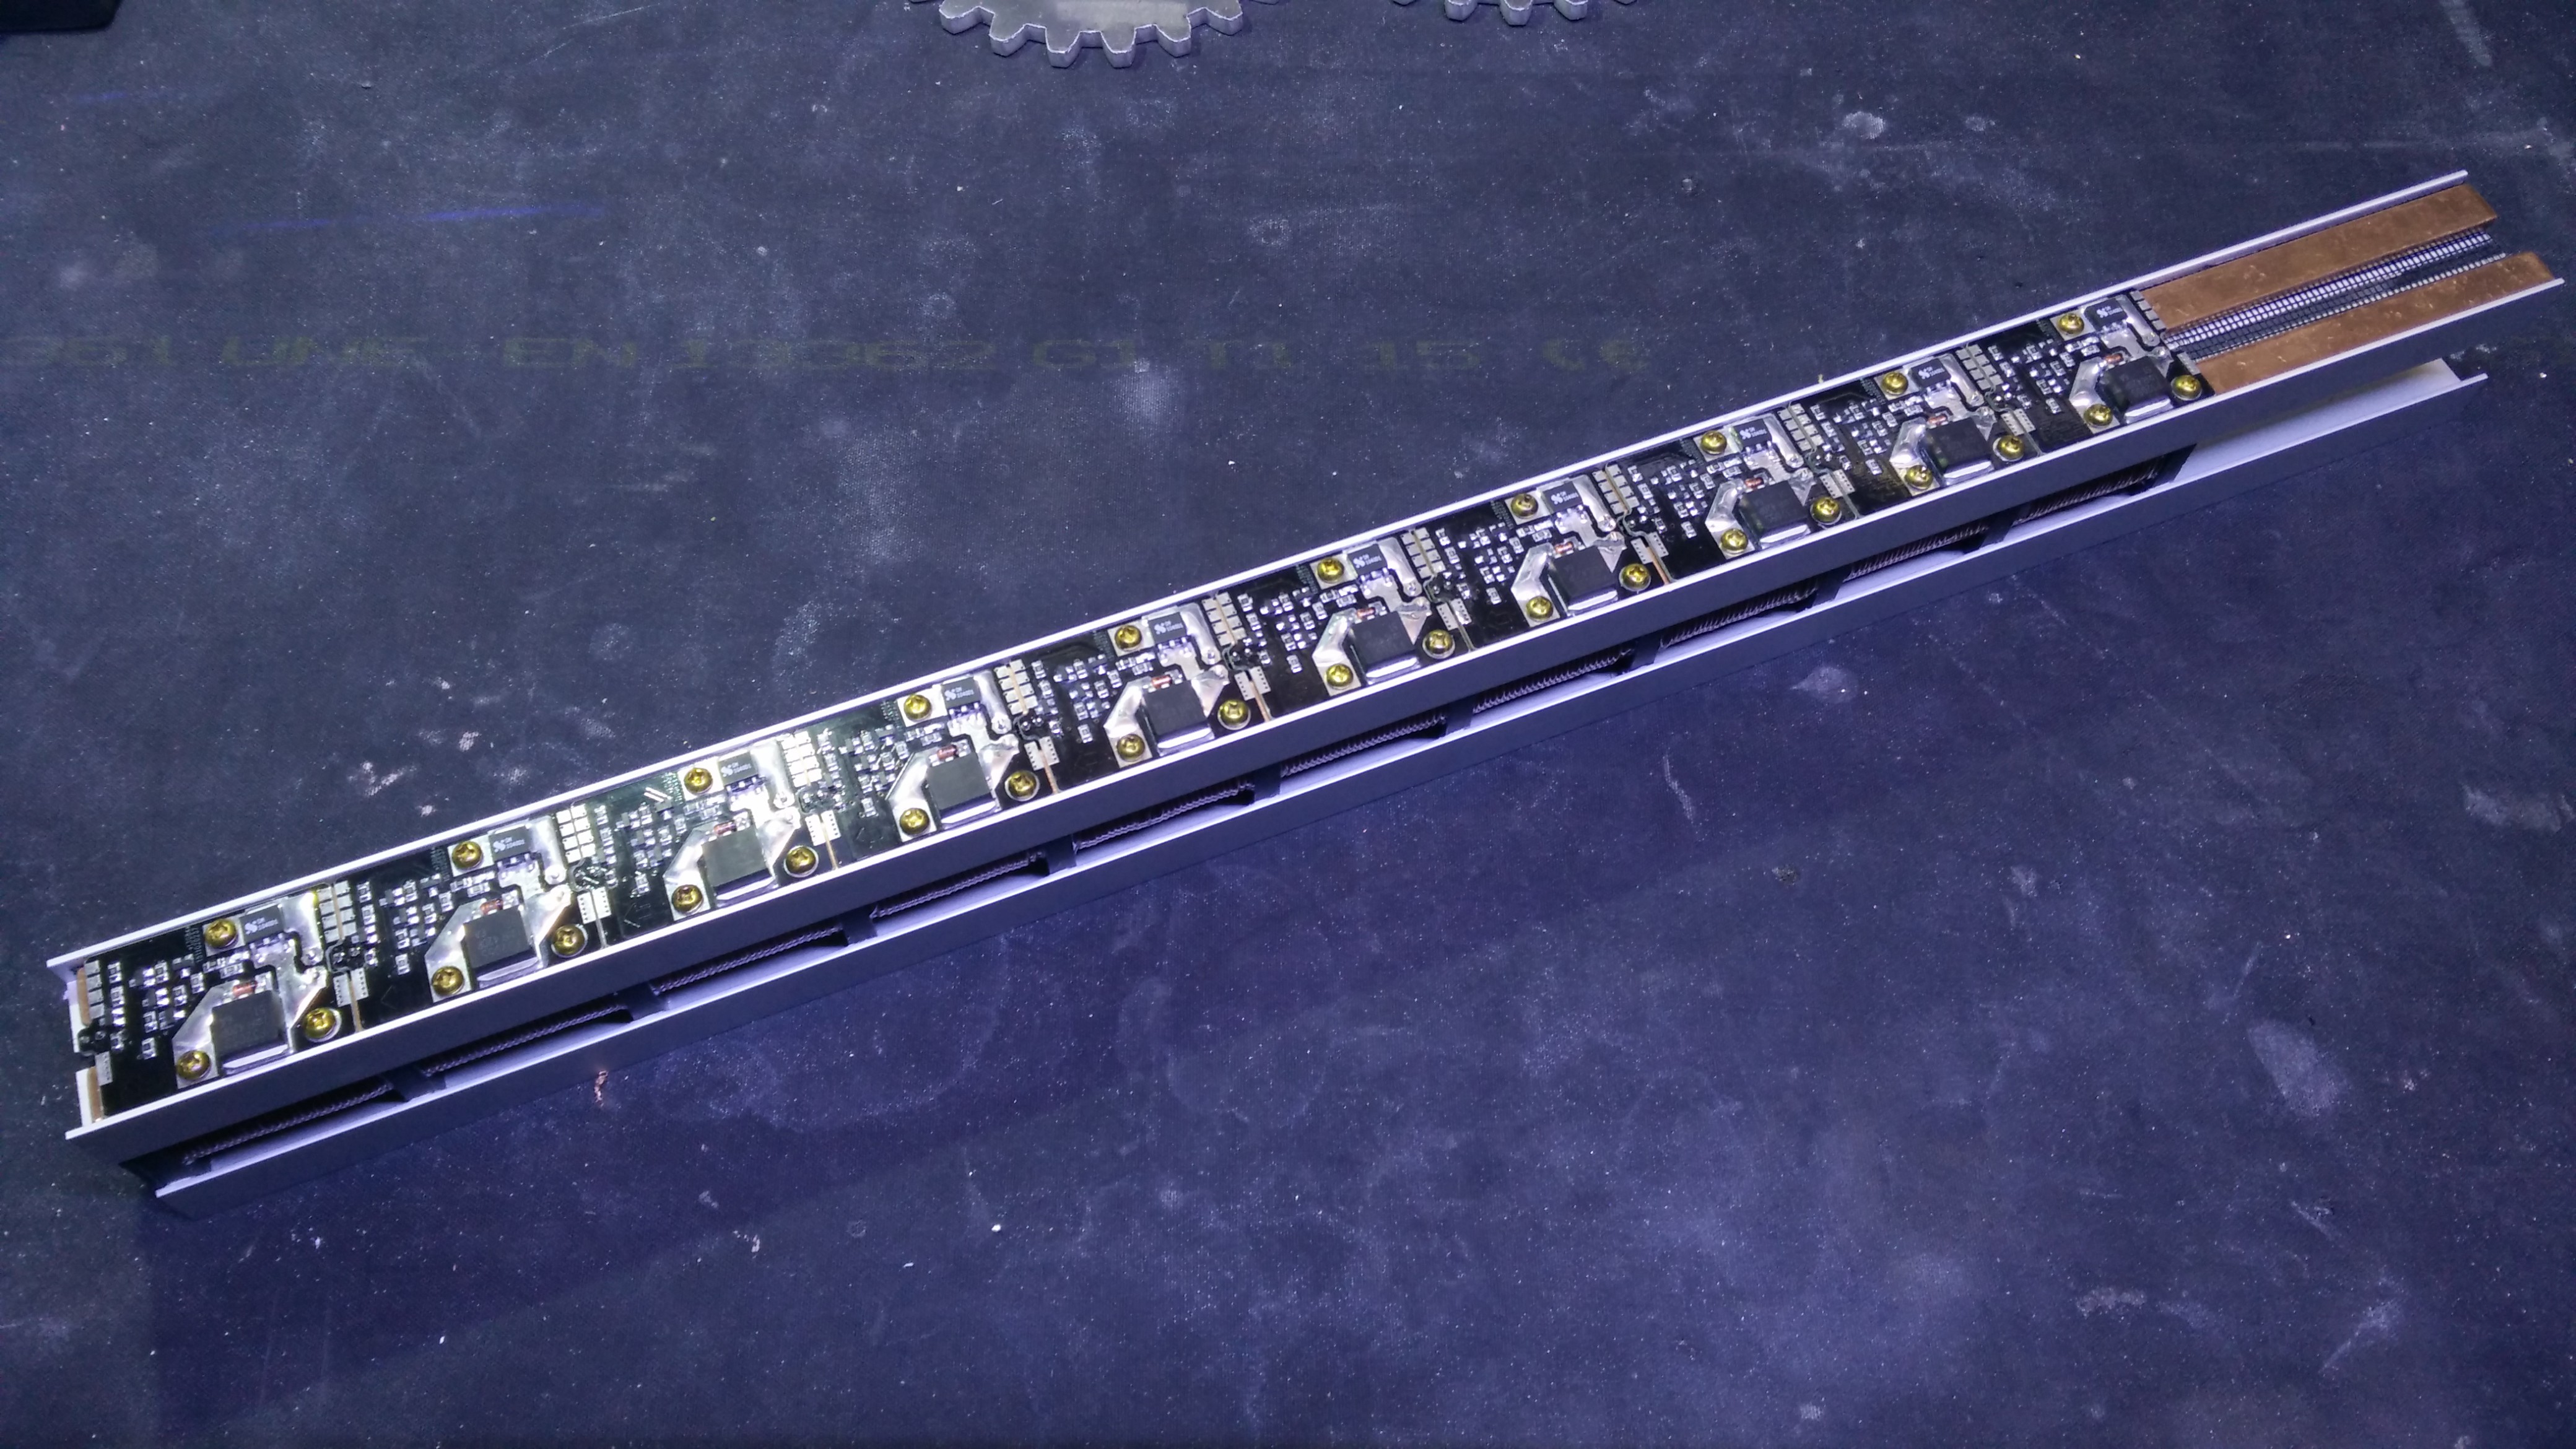
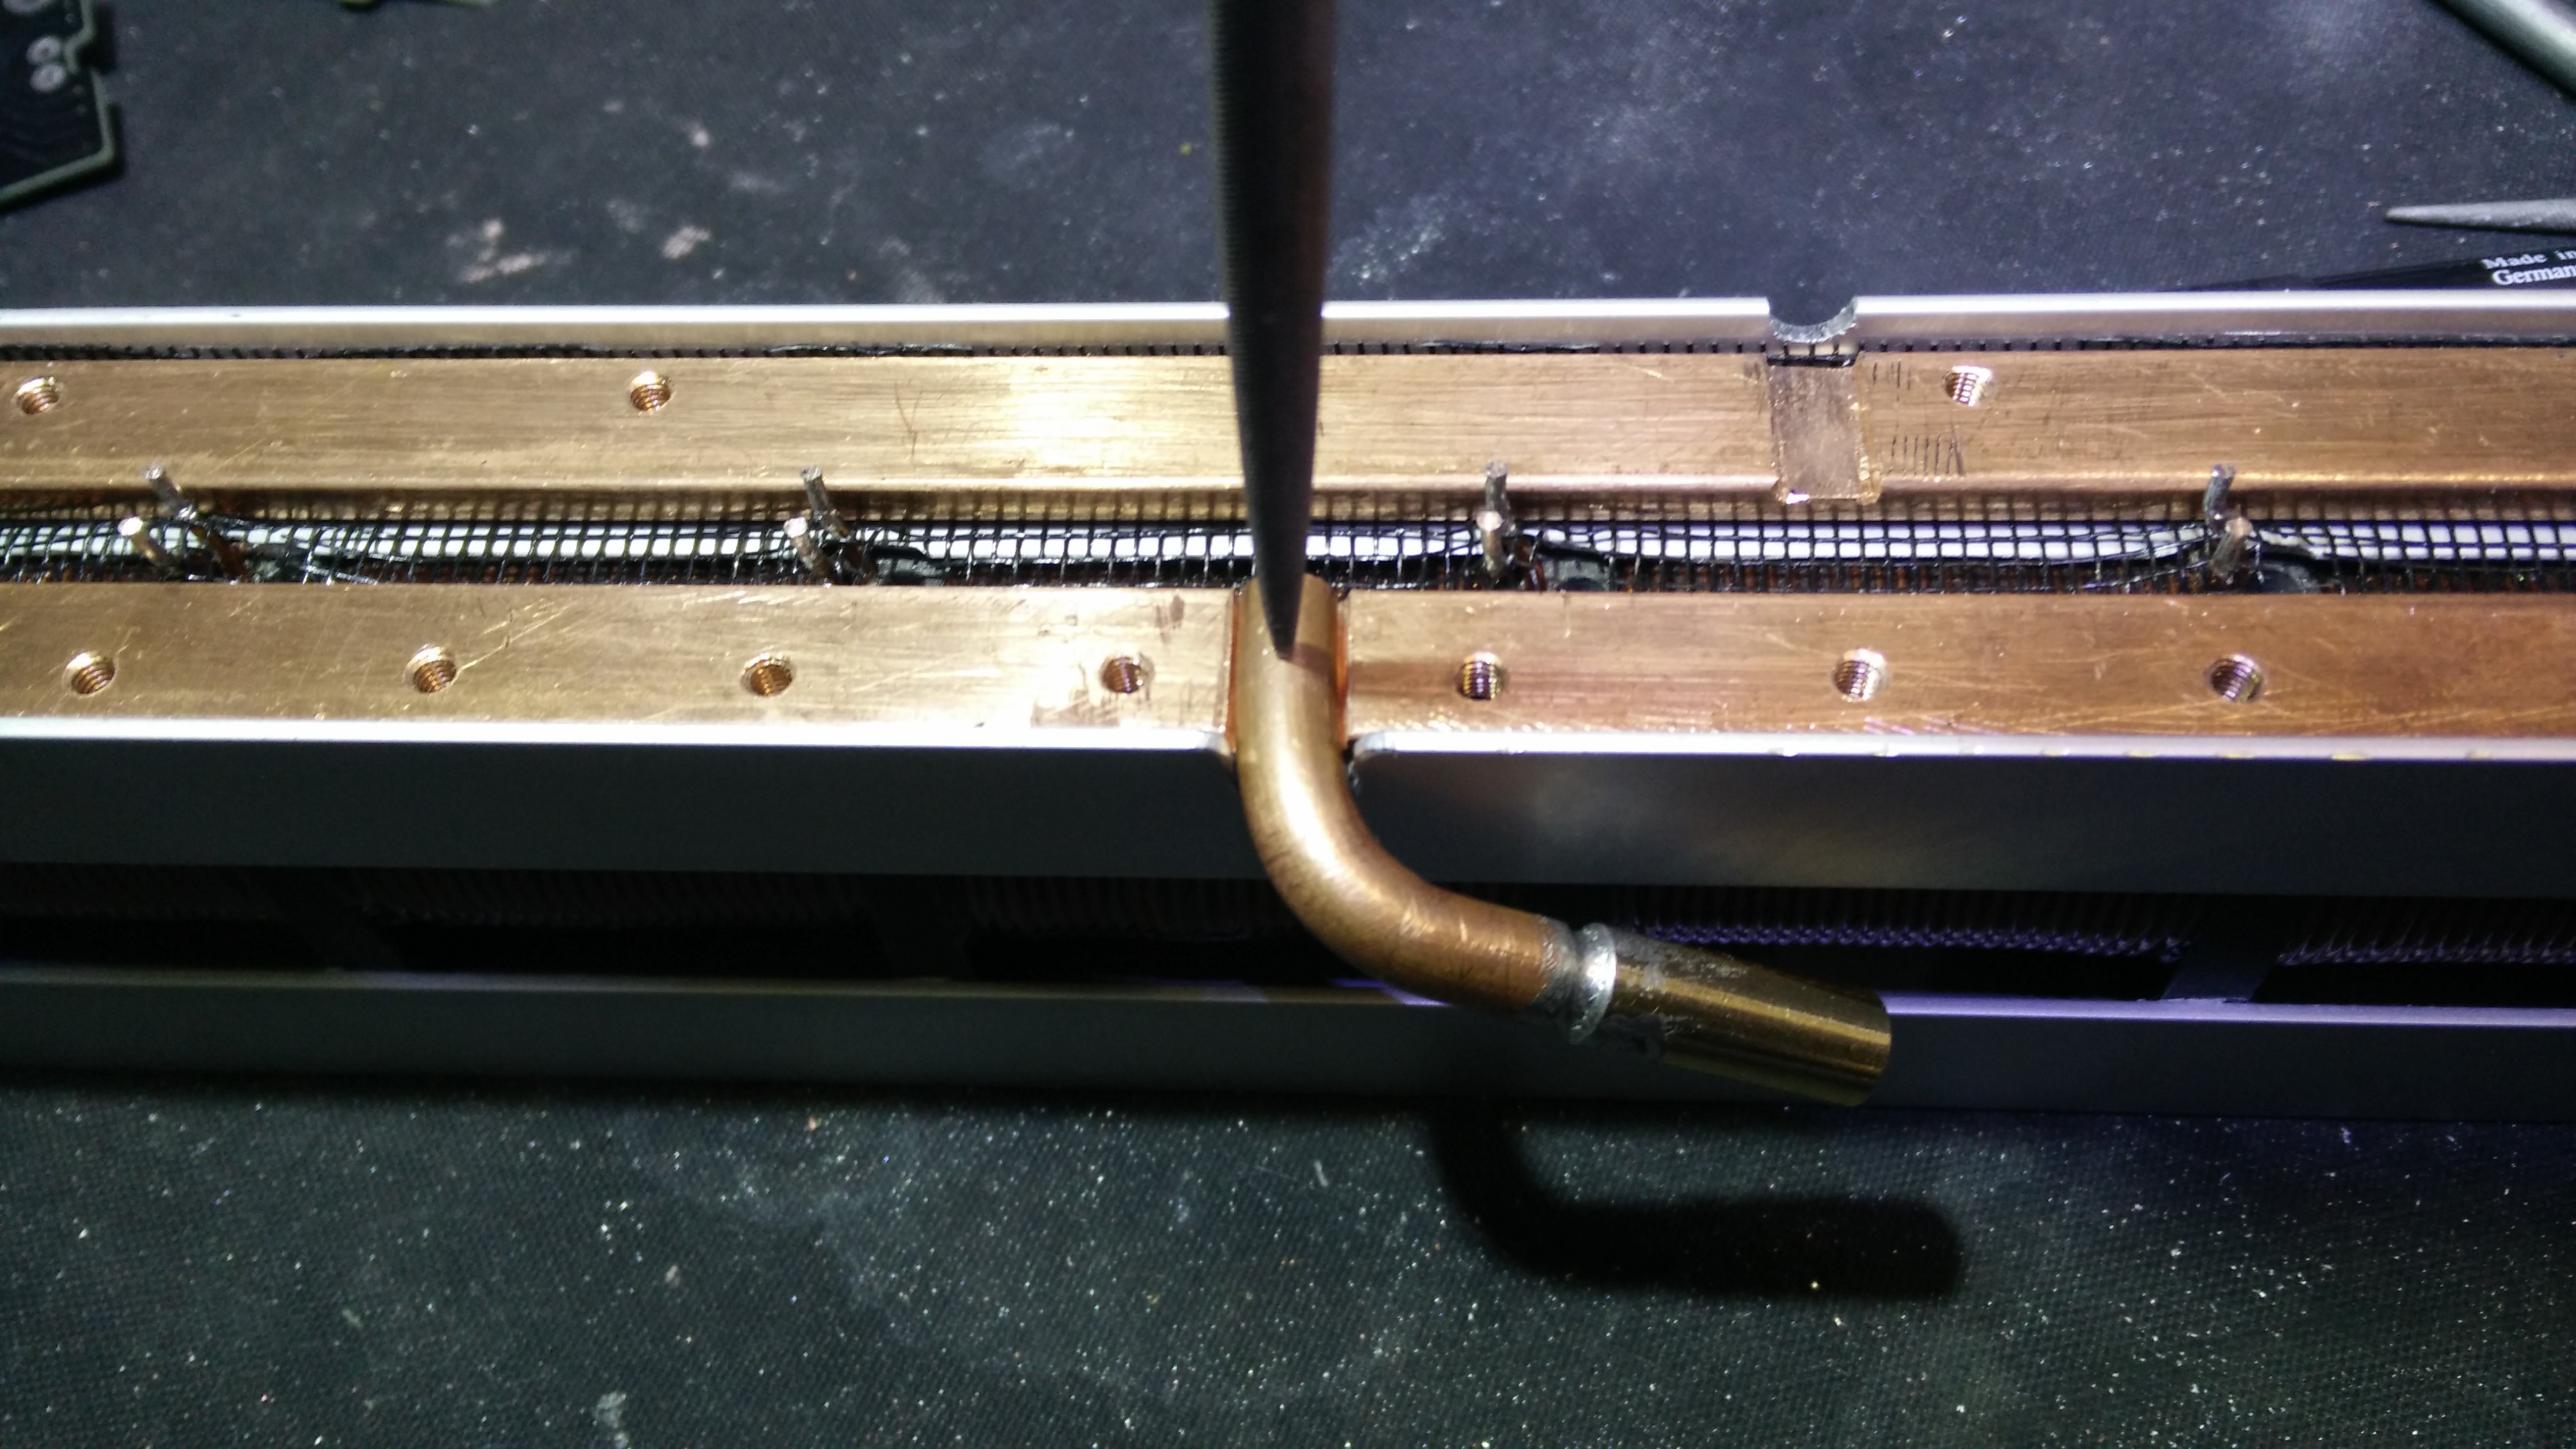
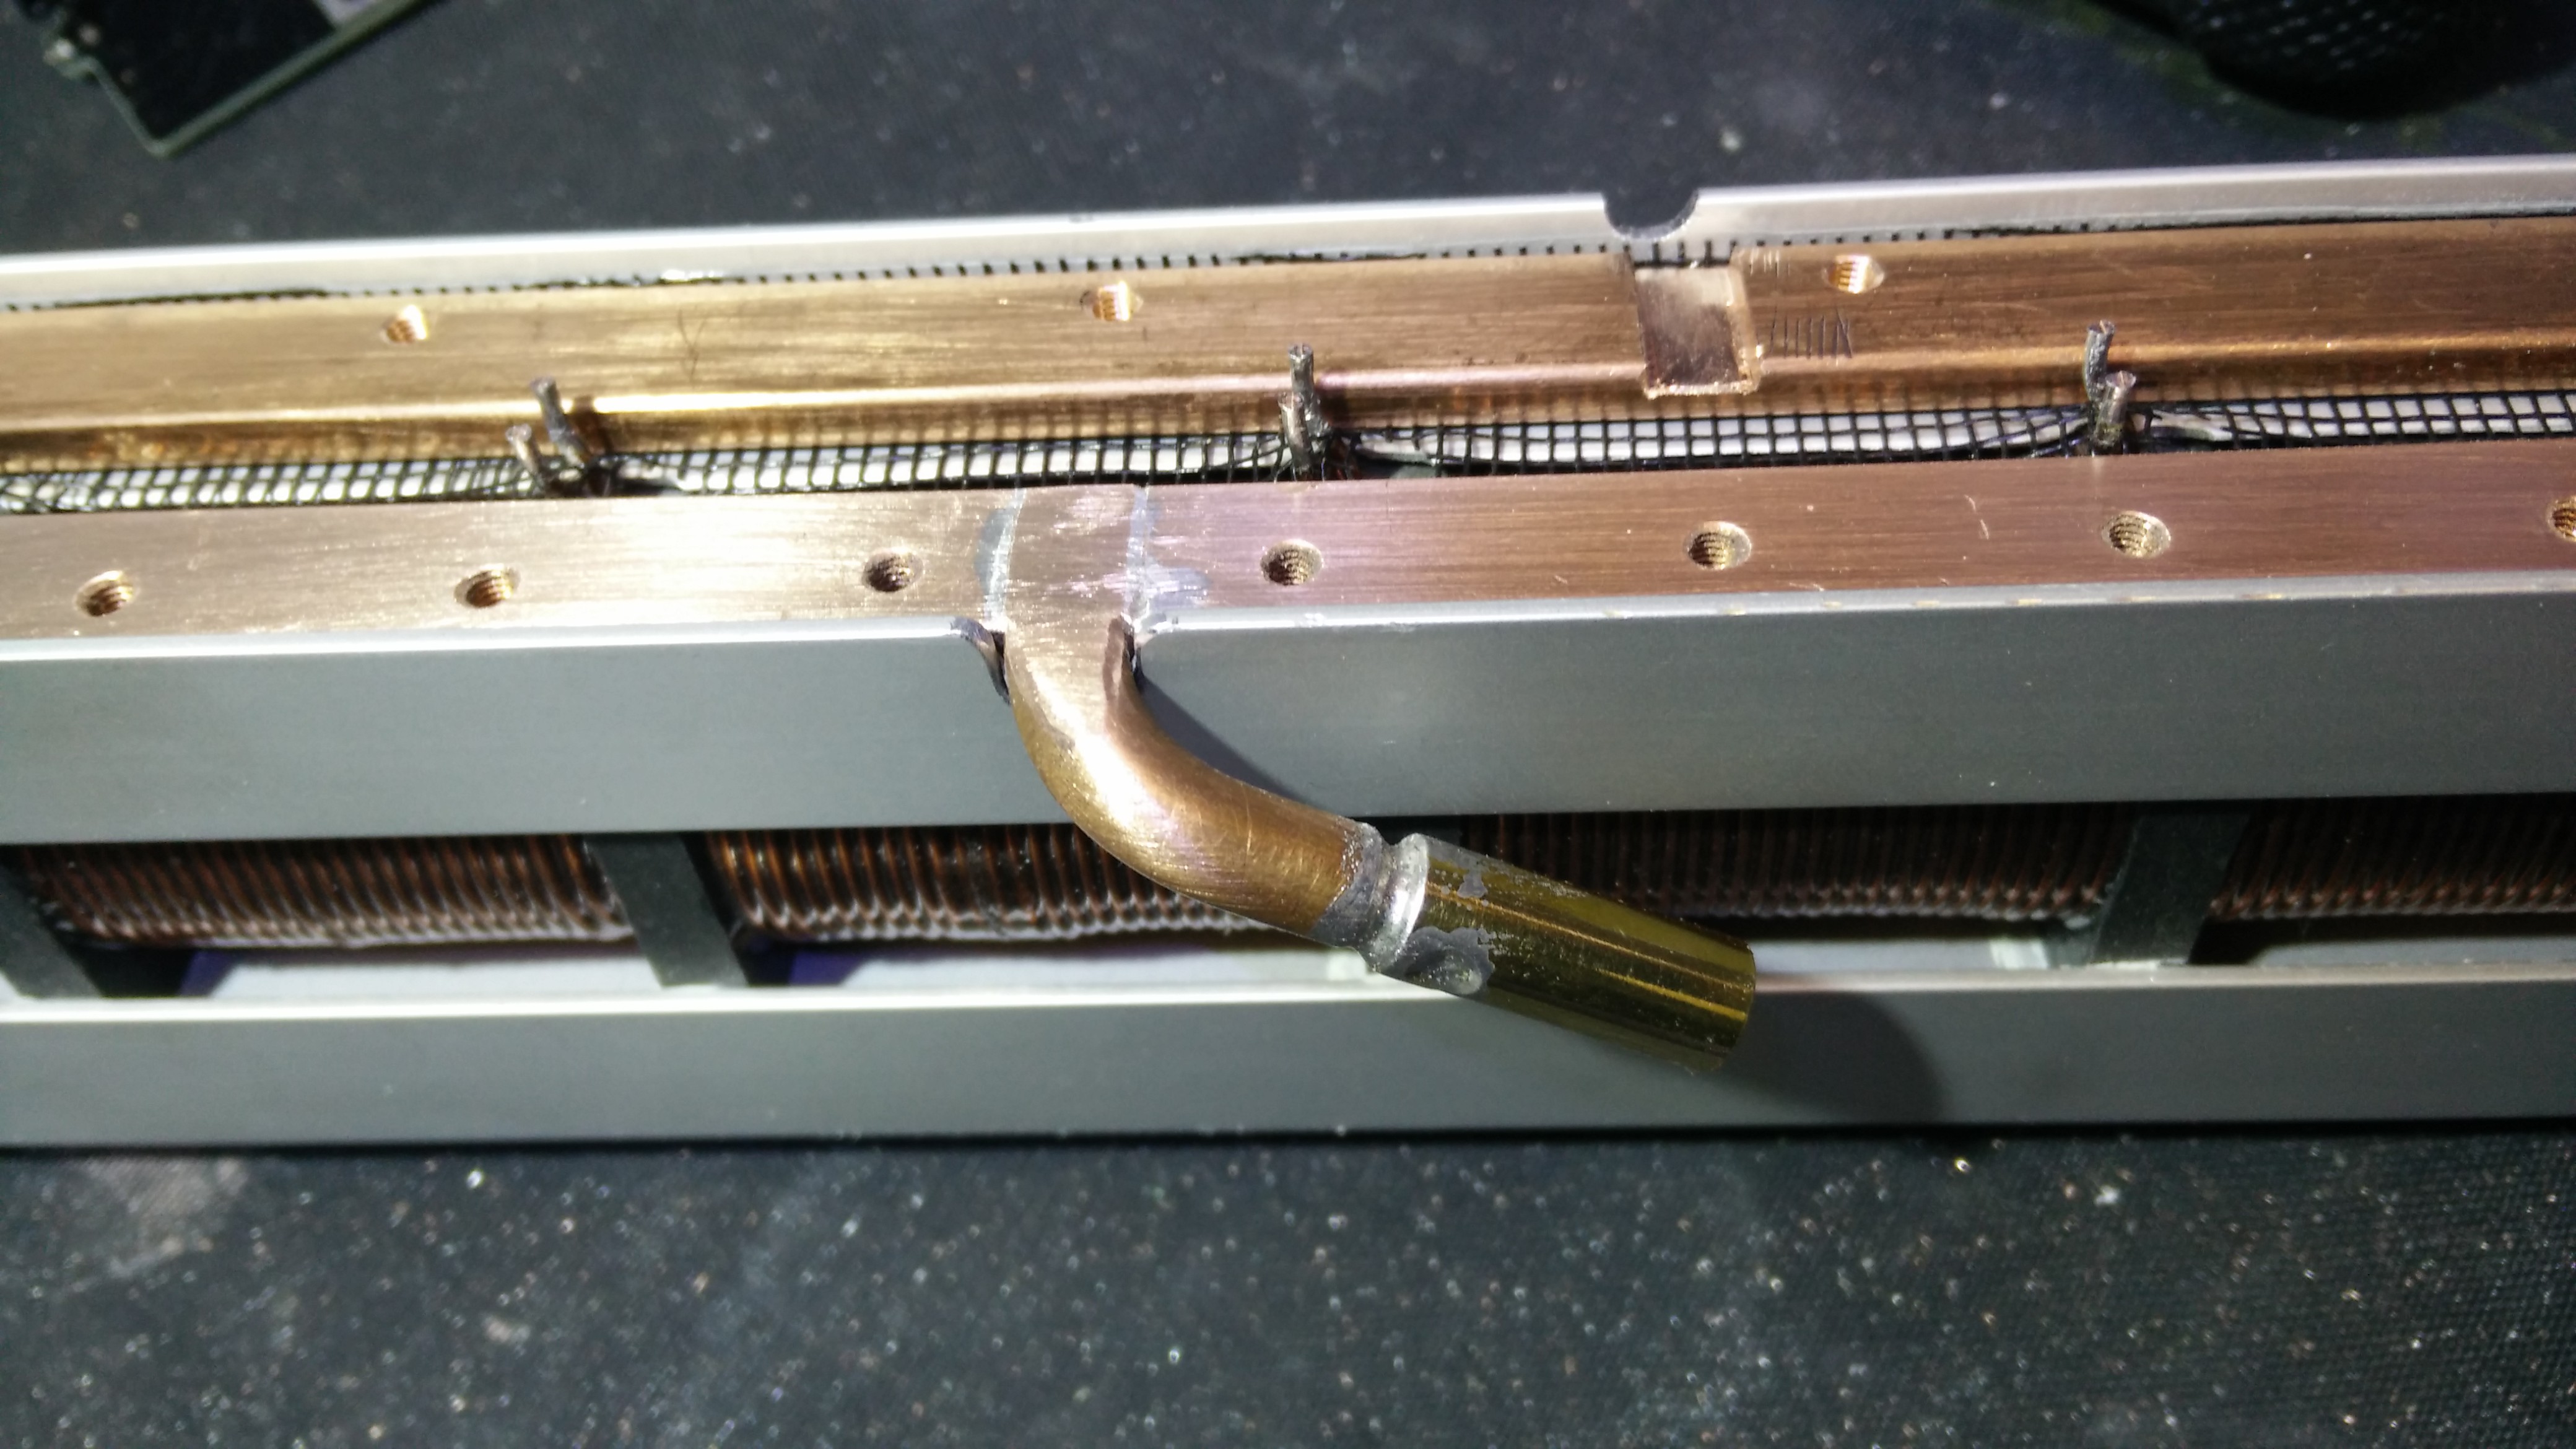
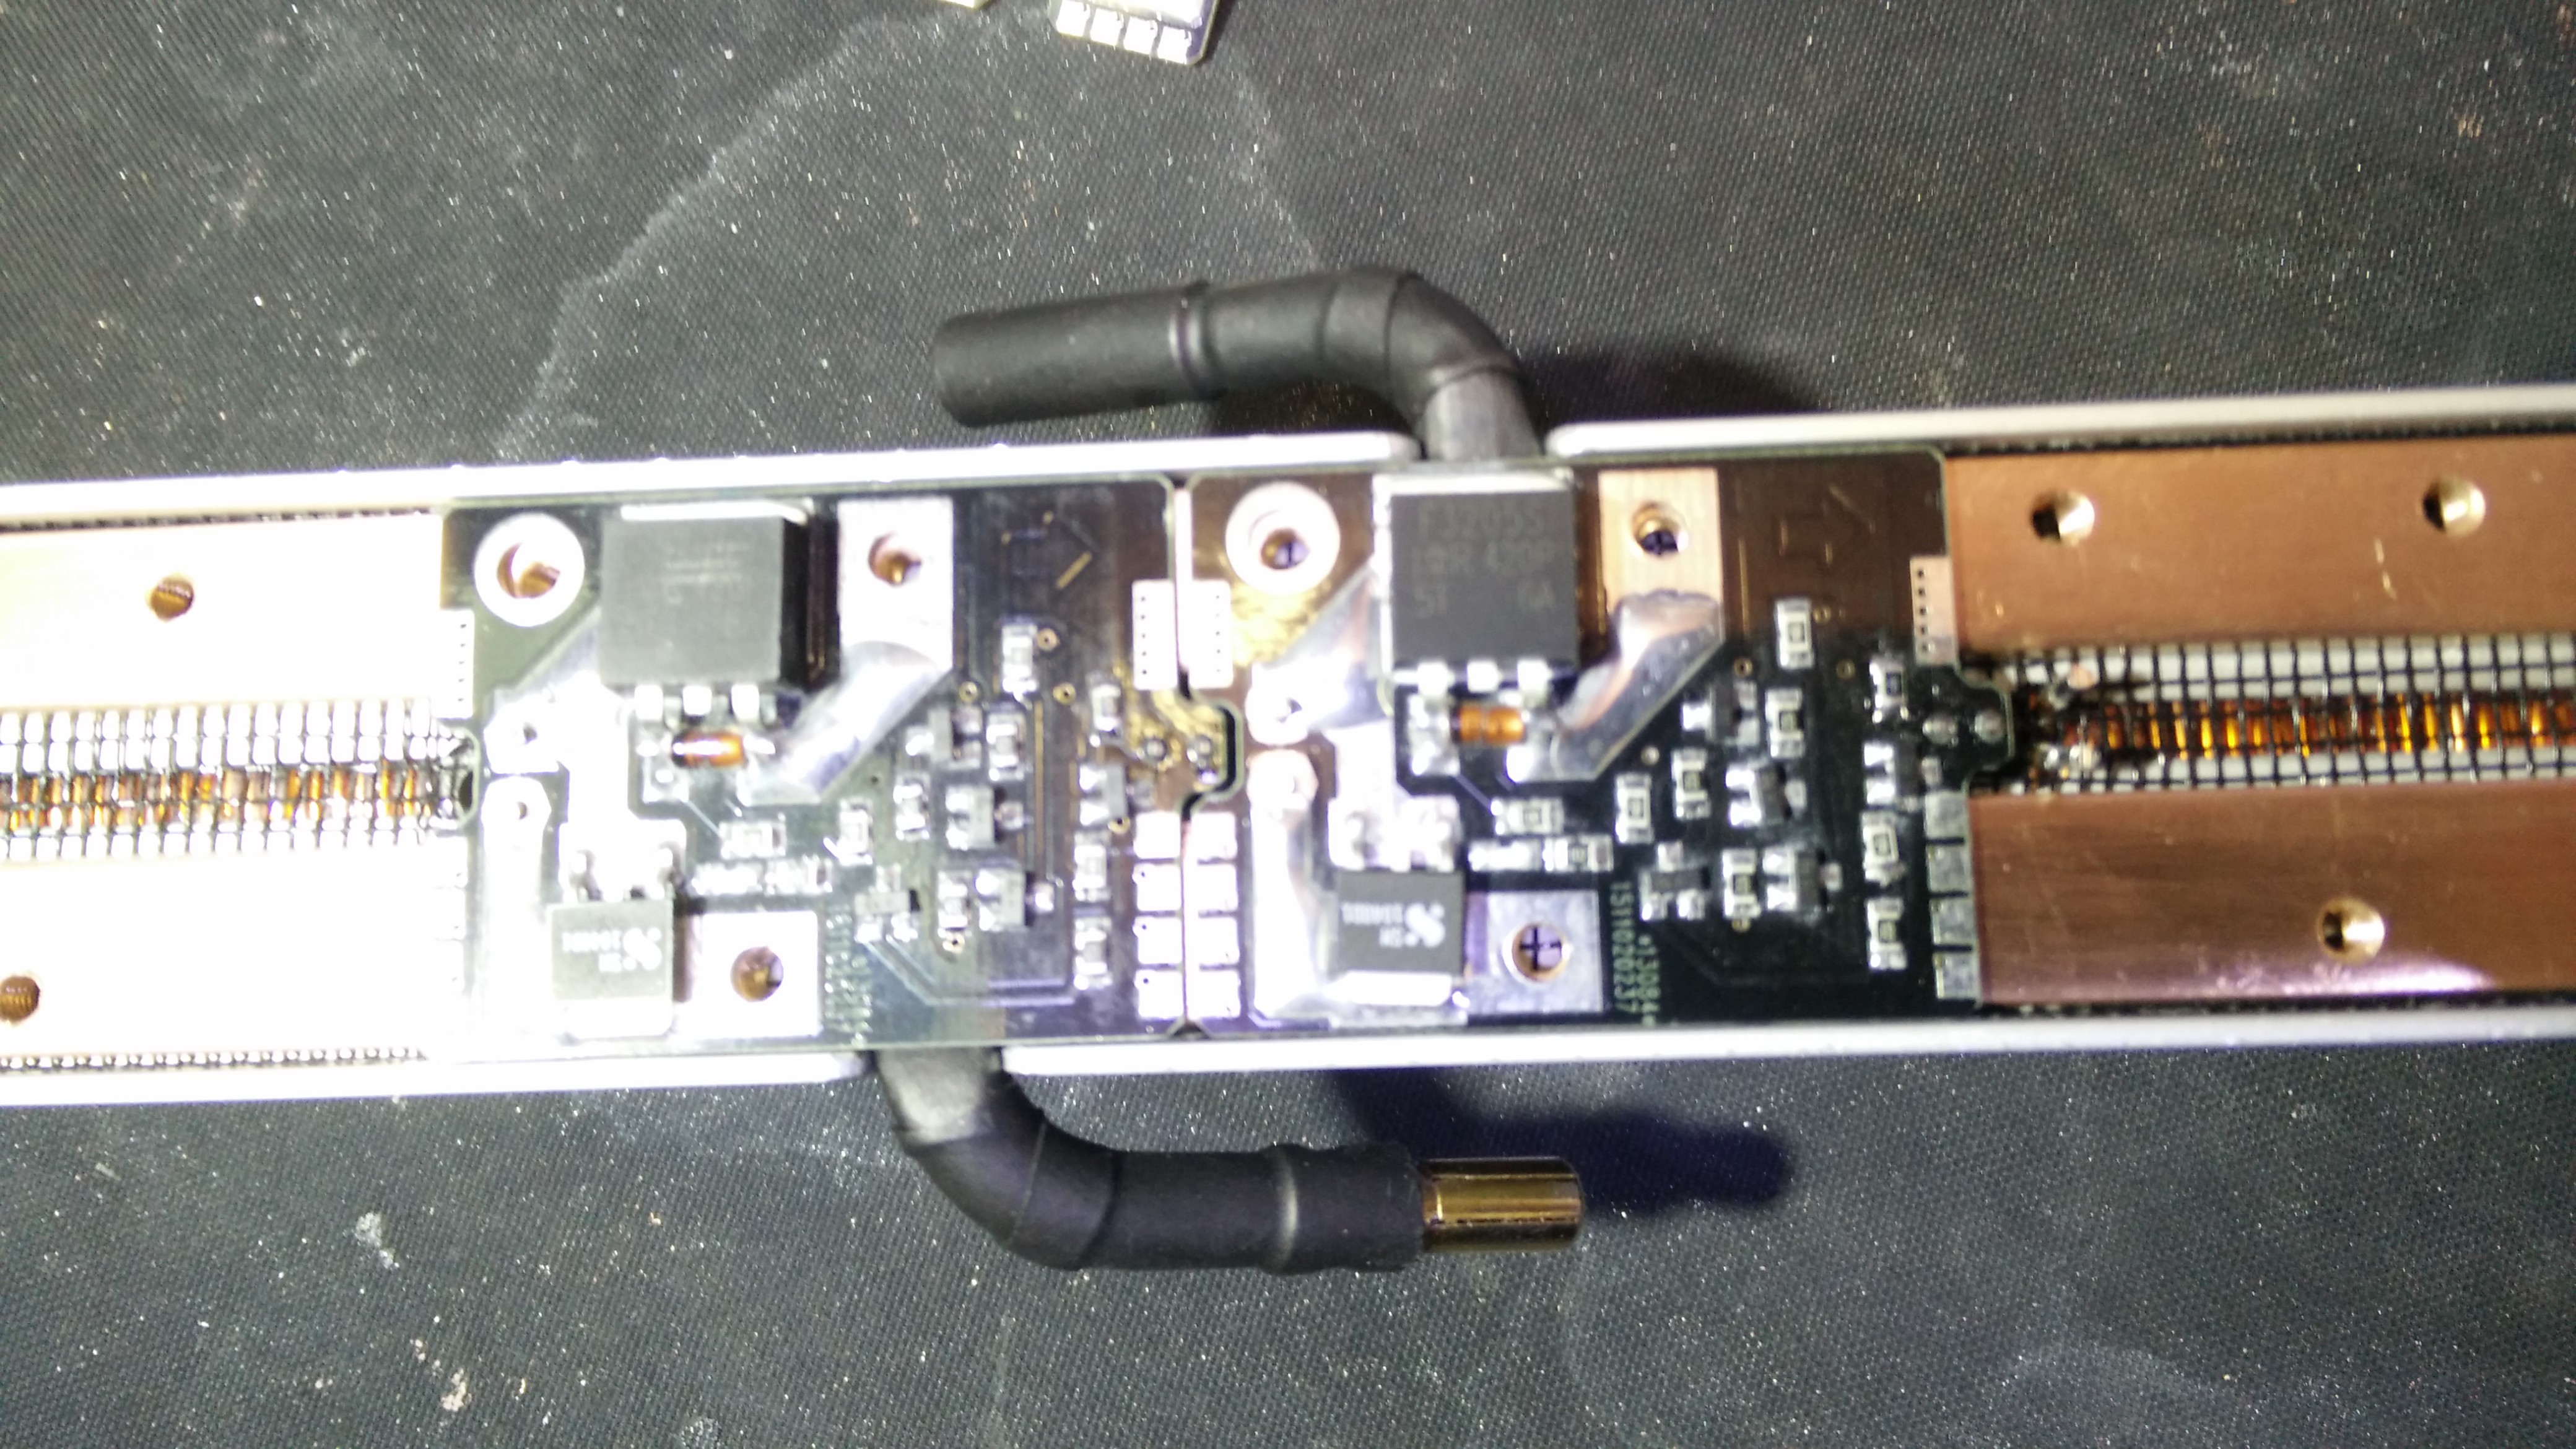
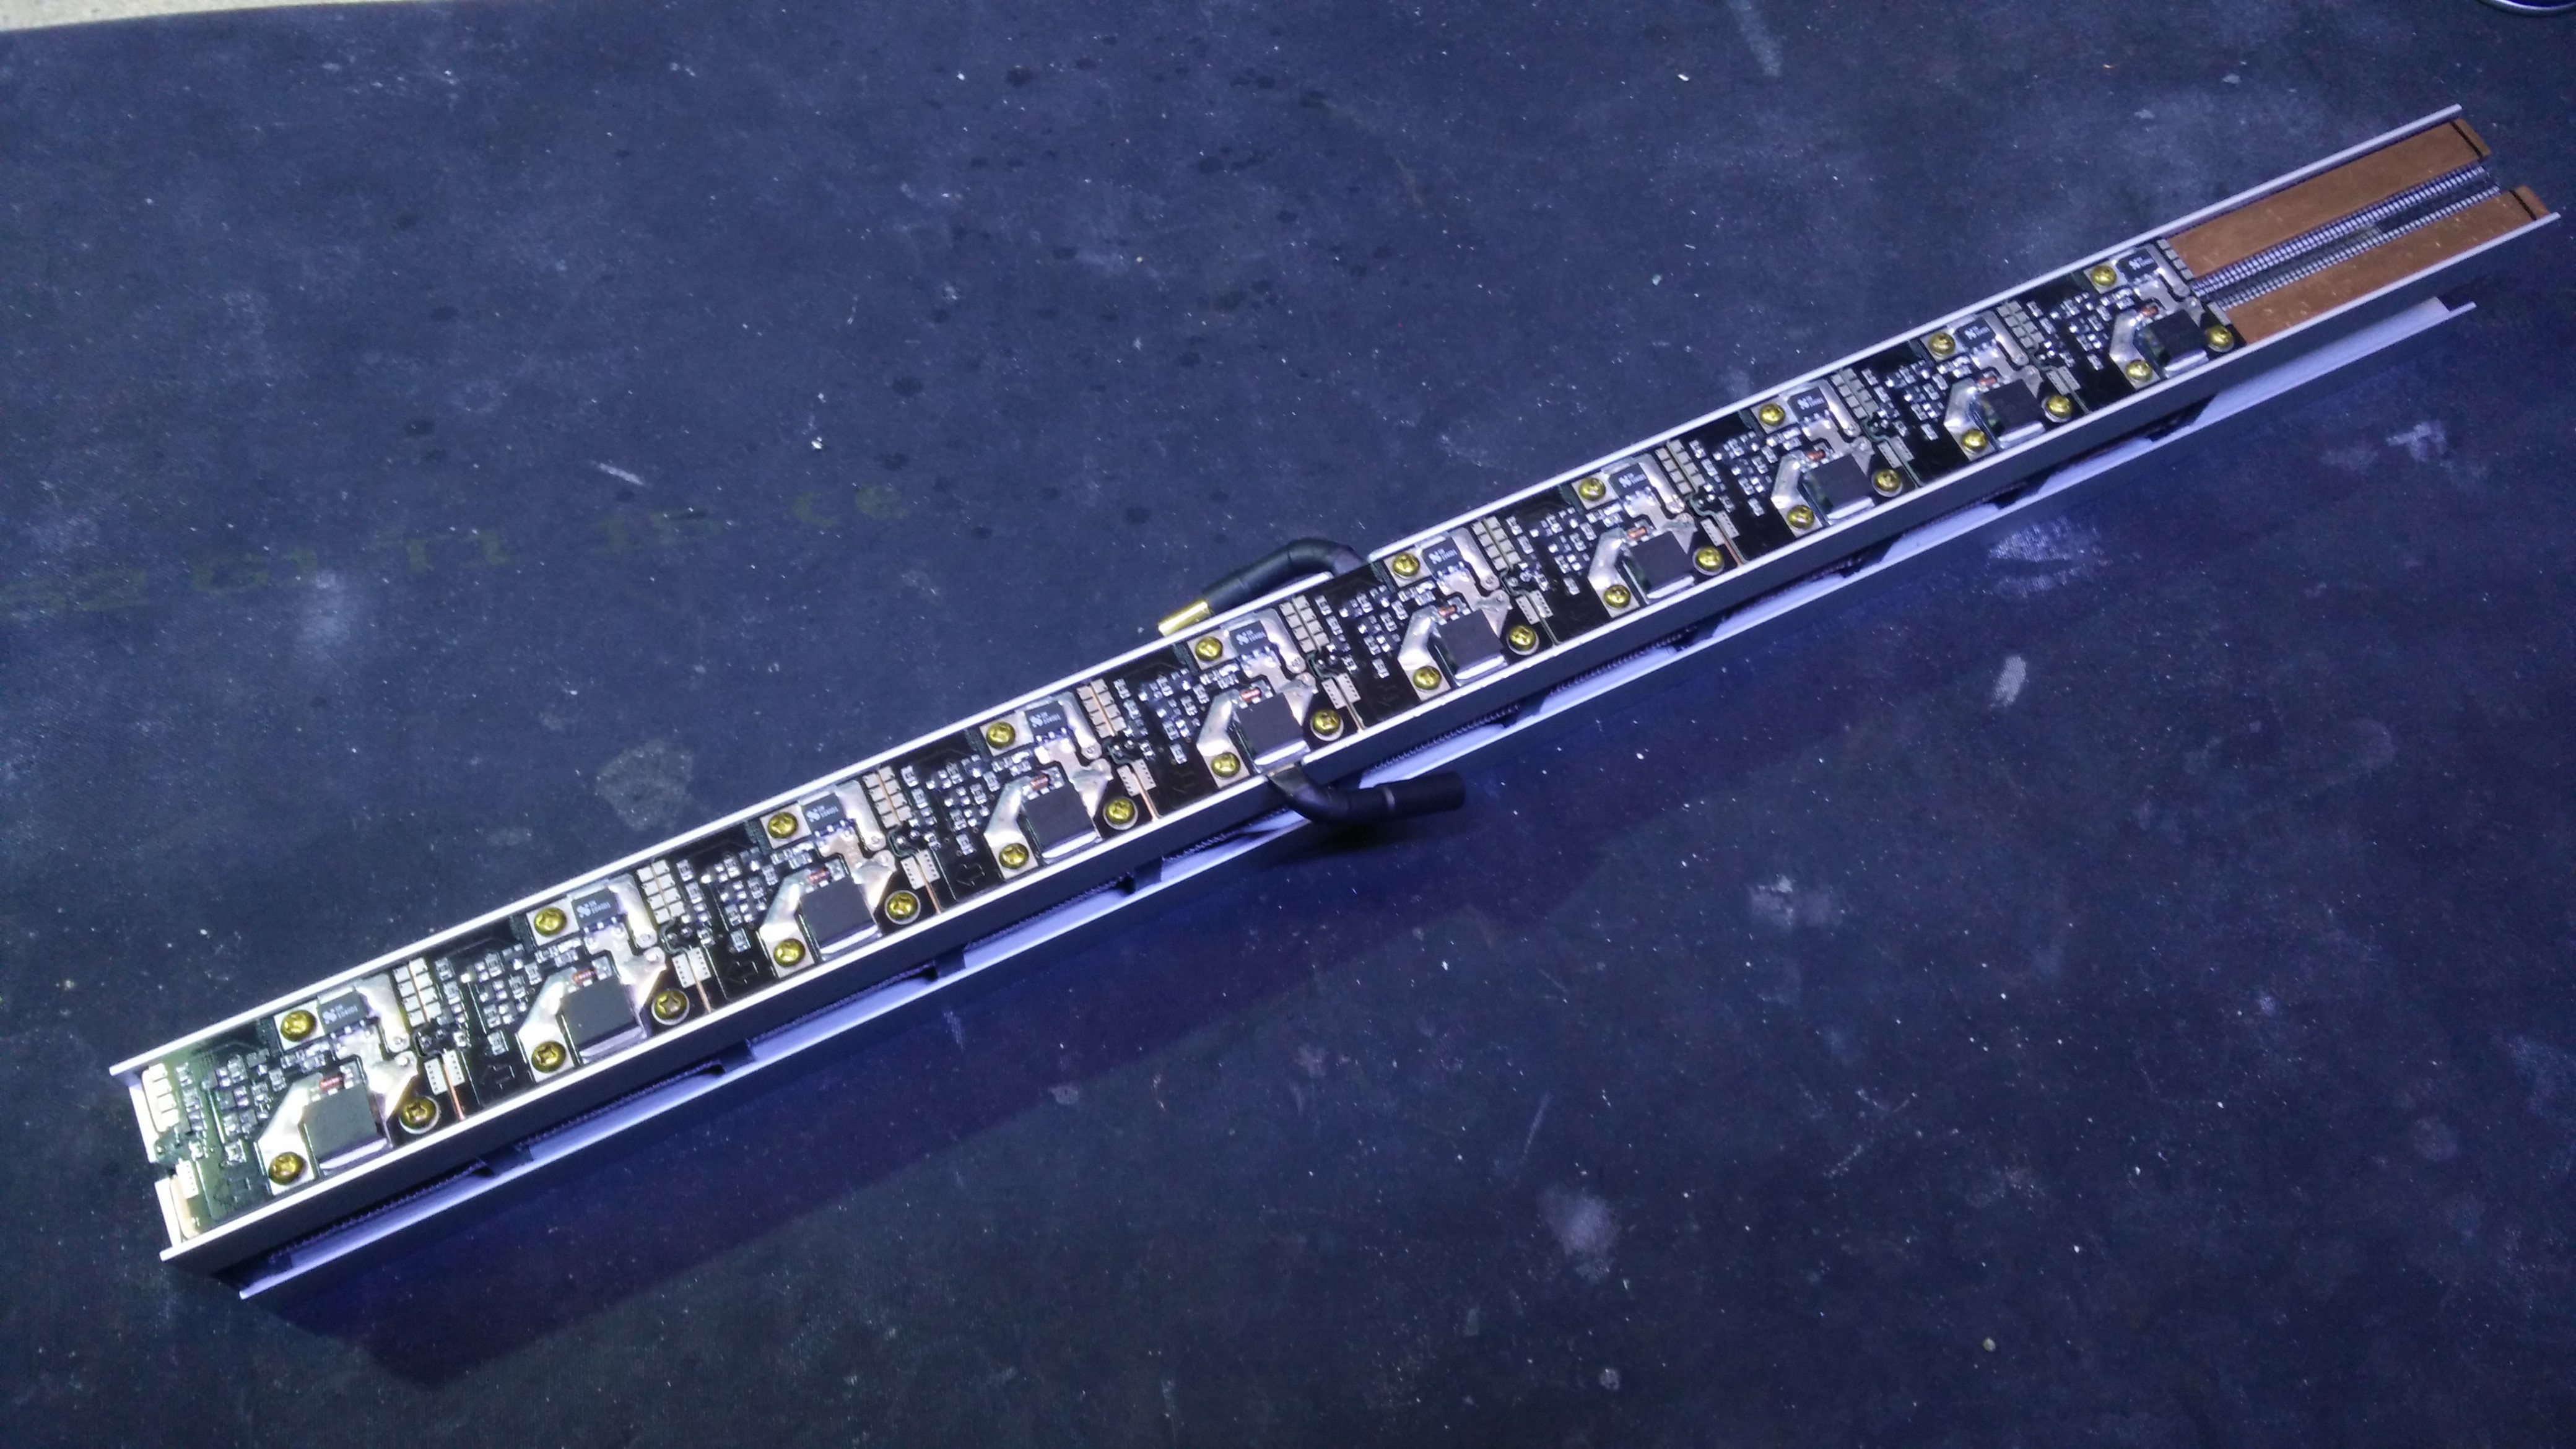
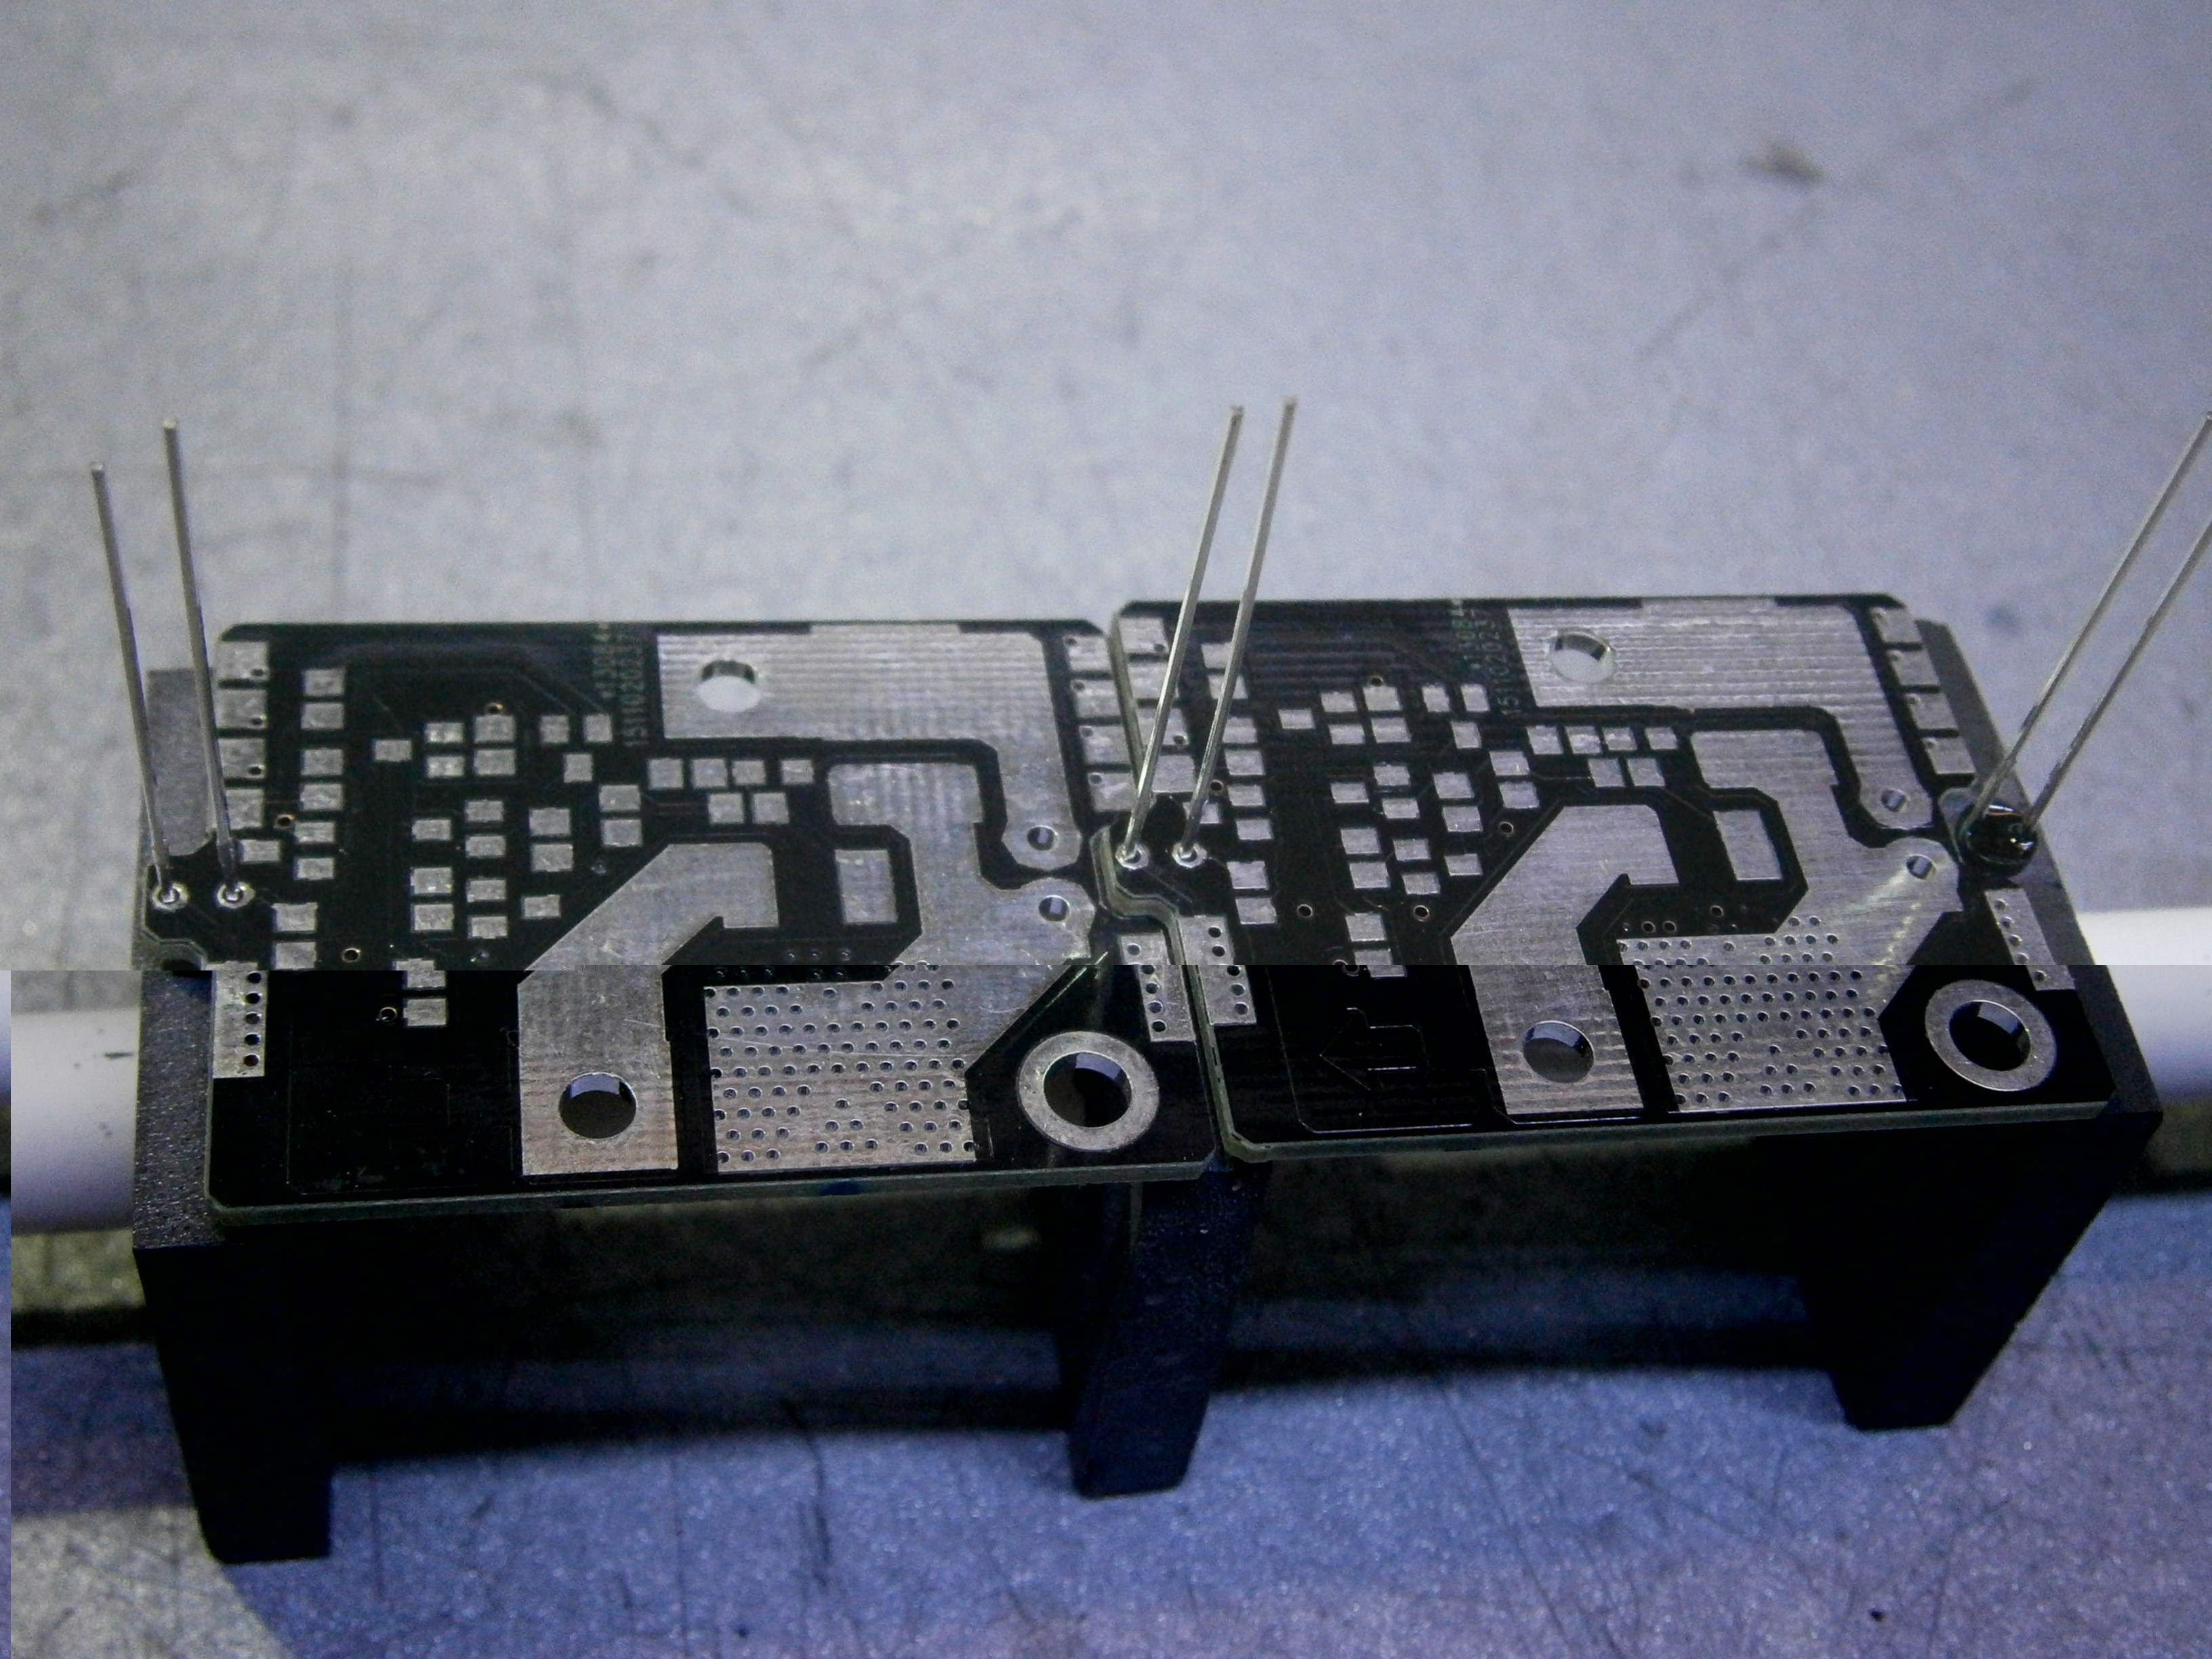
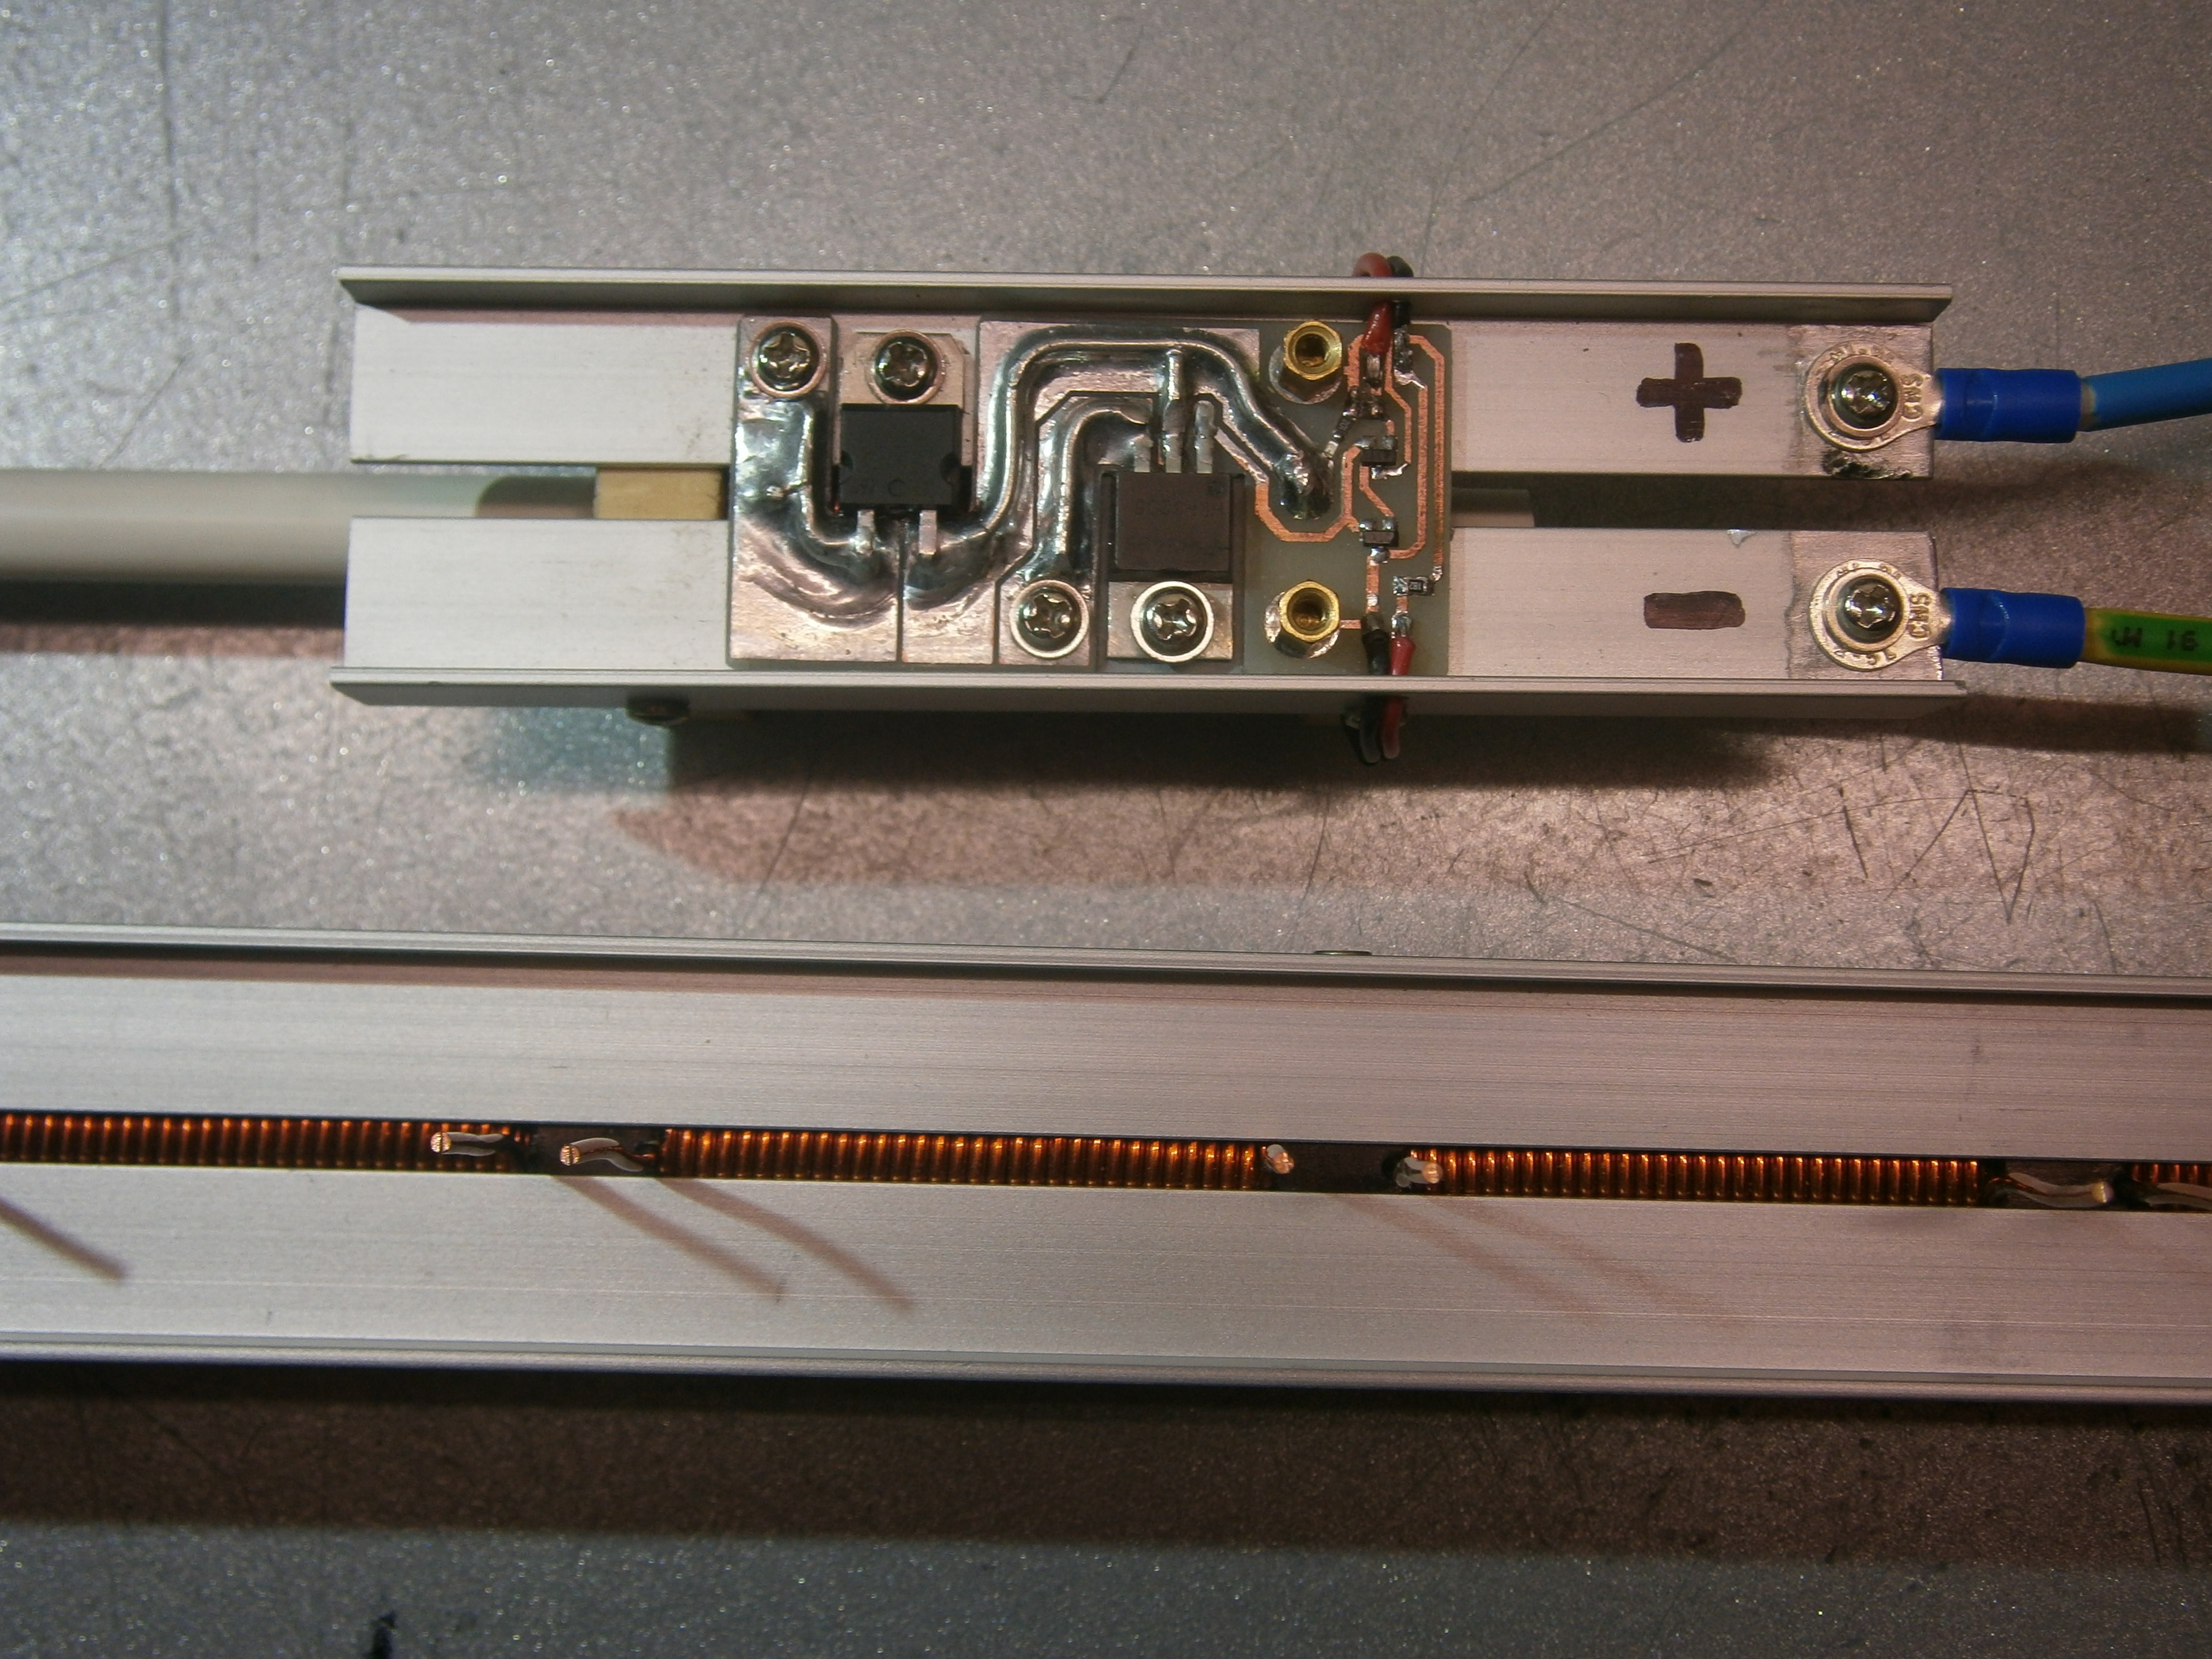
 The boards are designed to make electrical contact with busbars through the screw mounting holes. But the bare pads under the MOSFETs are there just for thermal purposes and will be isolated from the busbars with silicone pads.
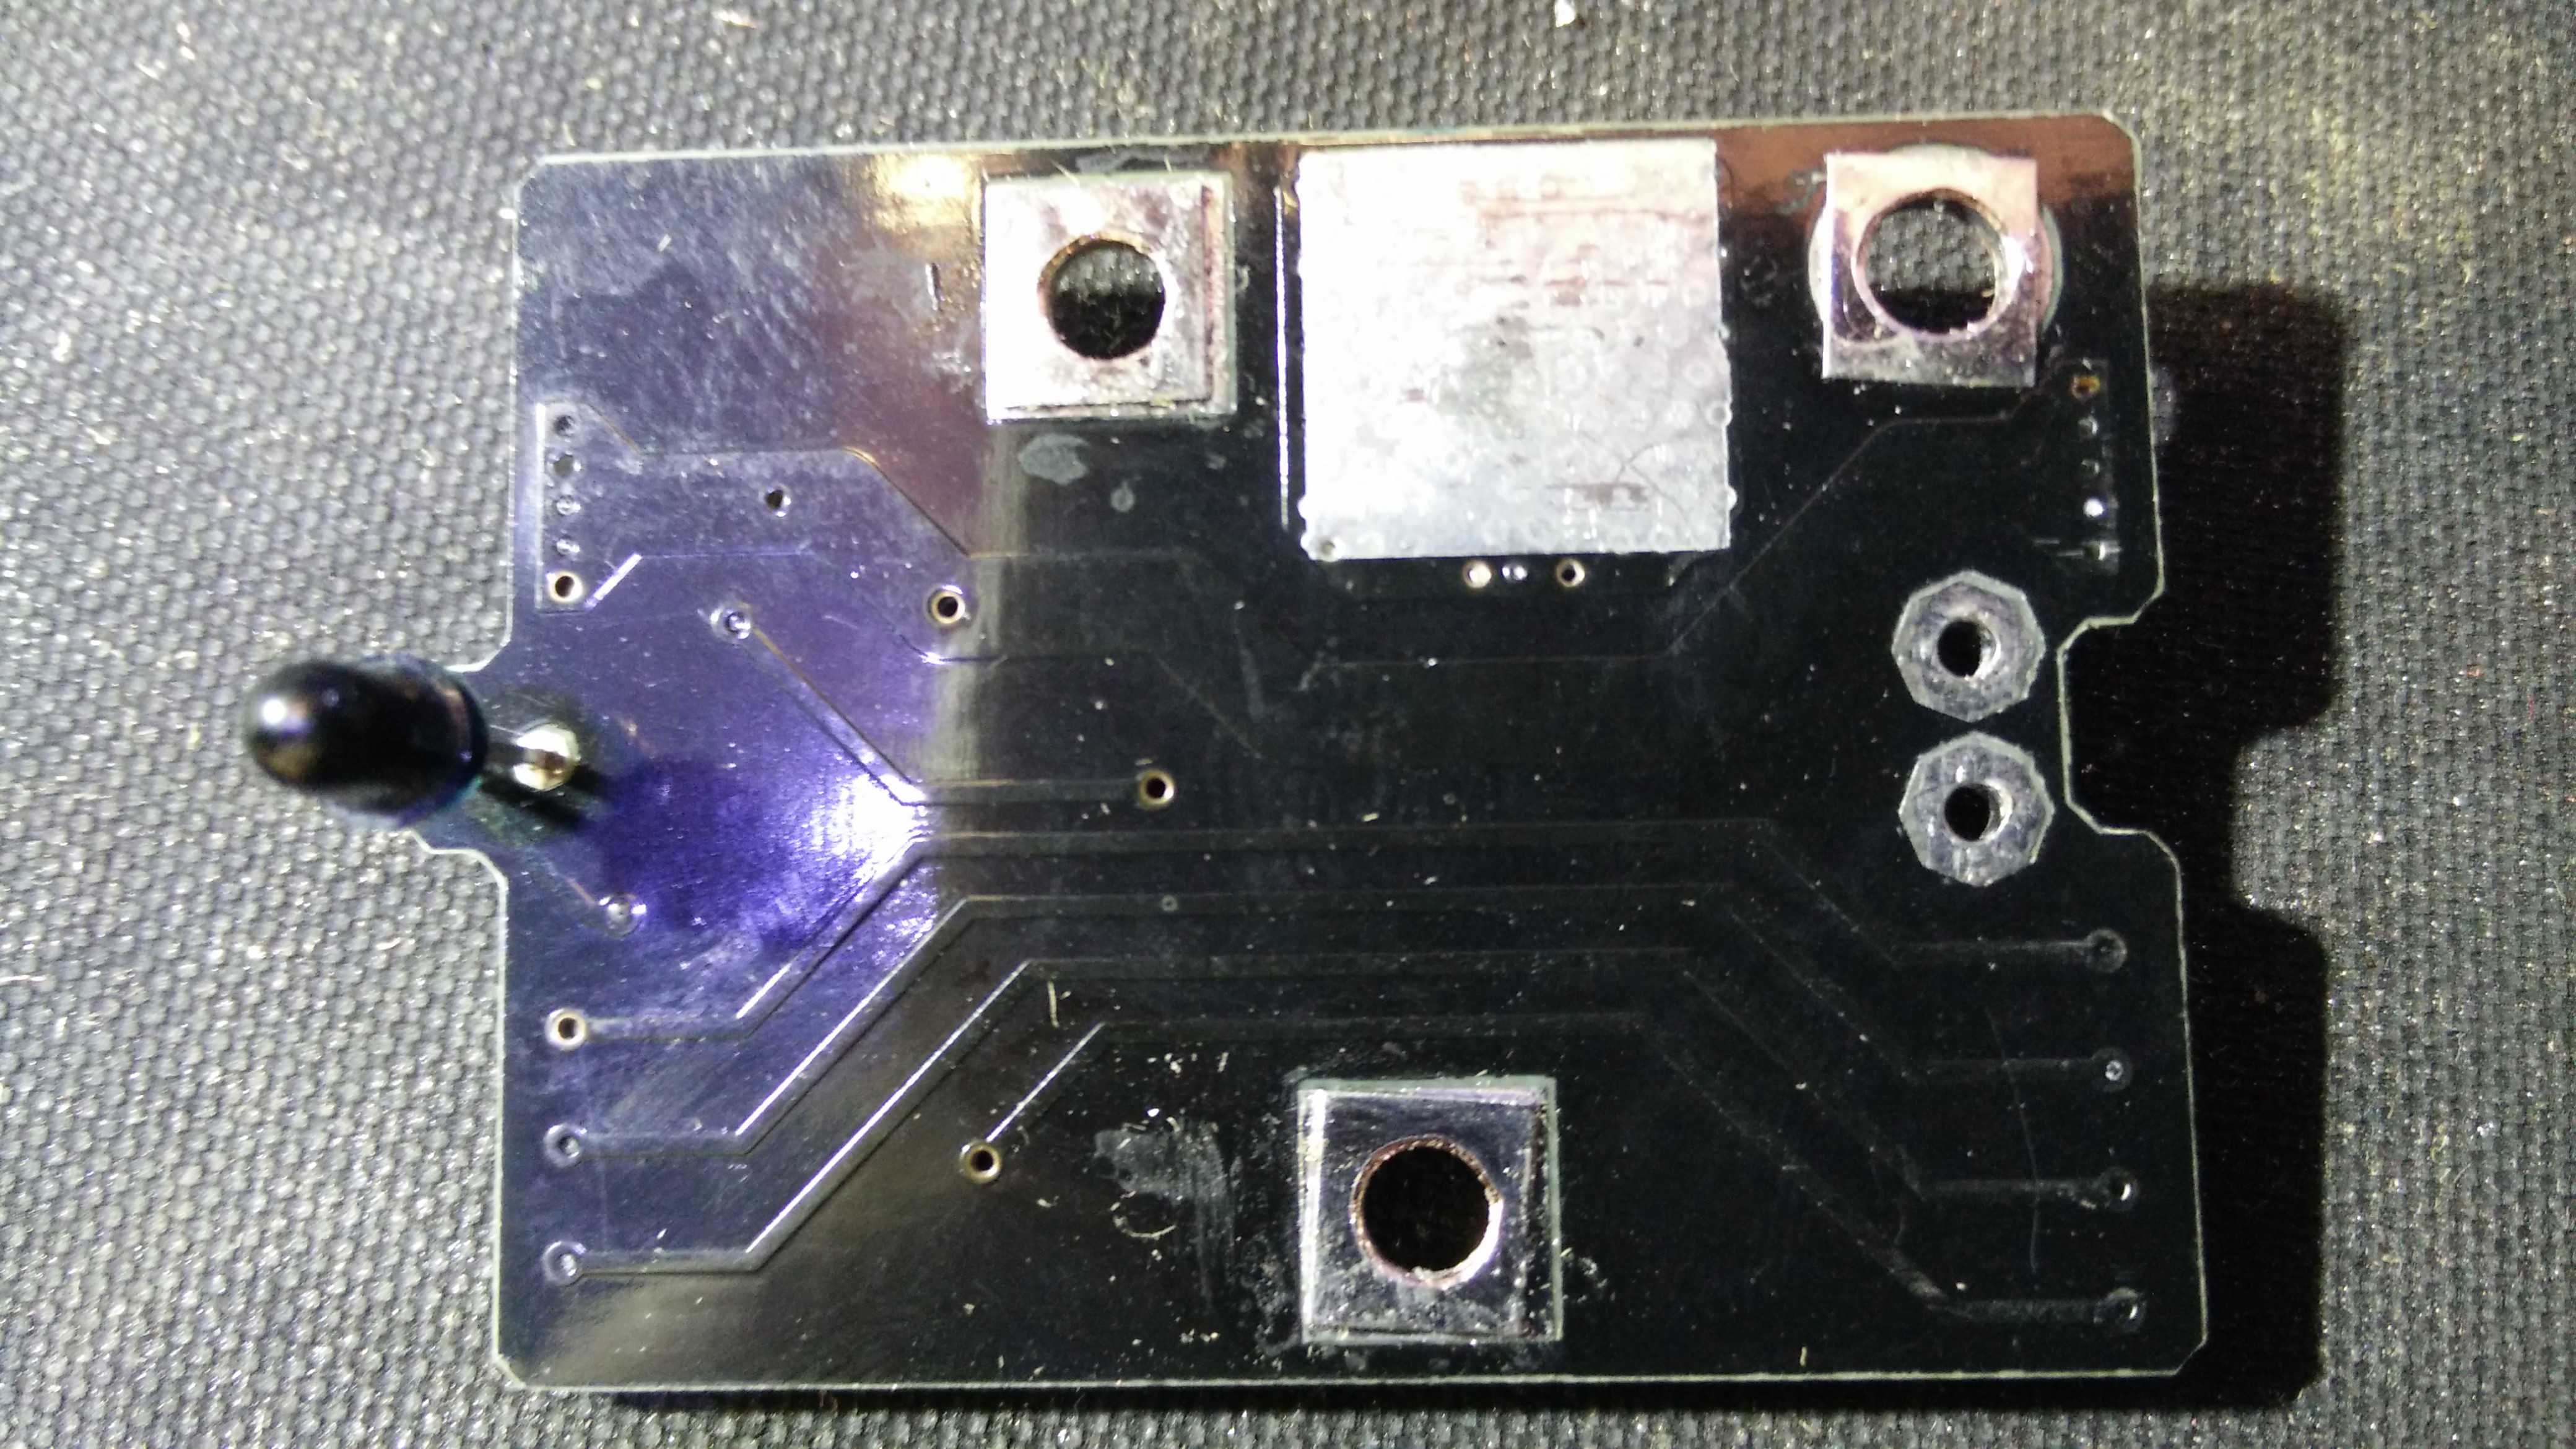
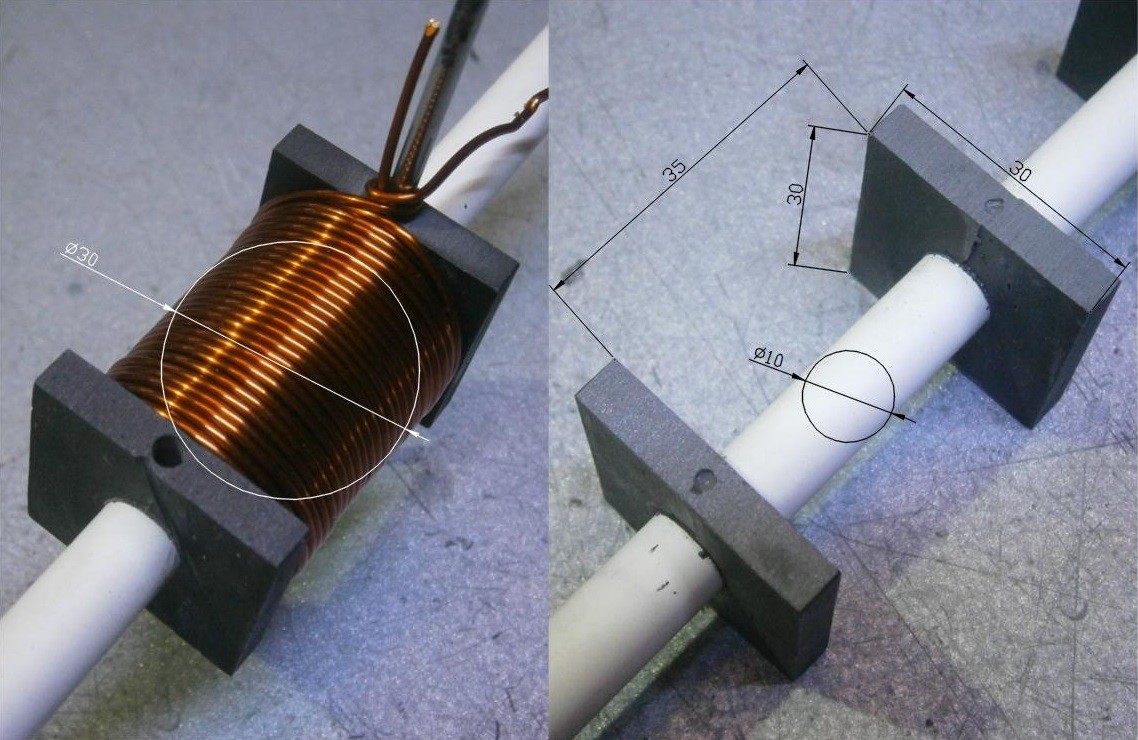
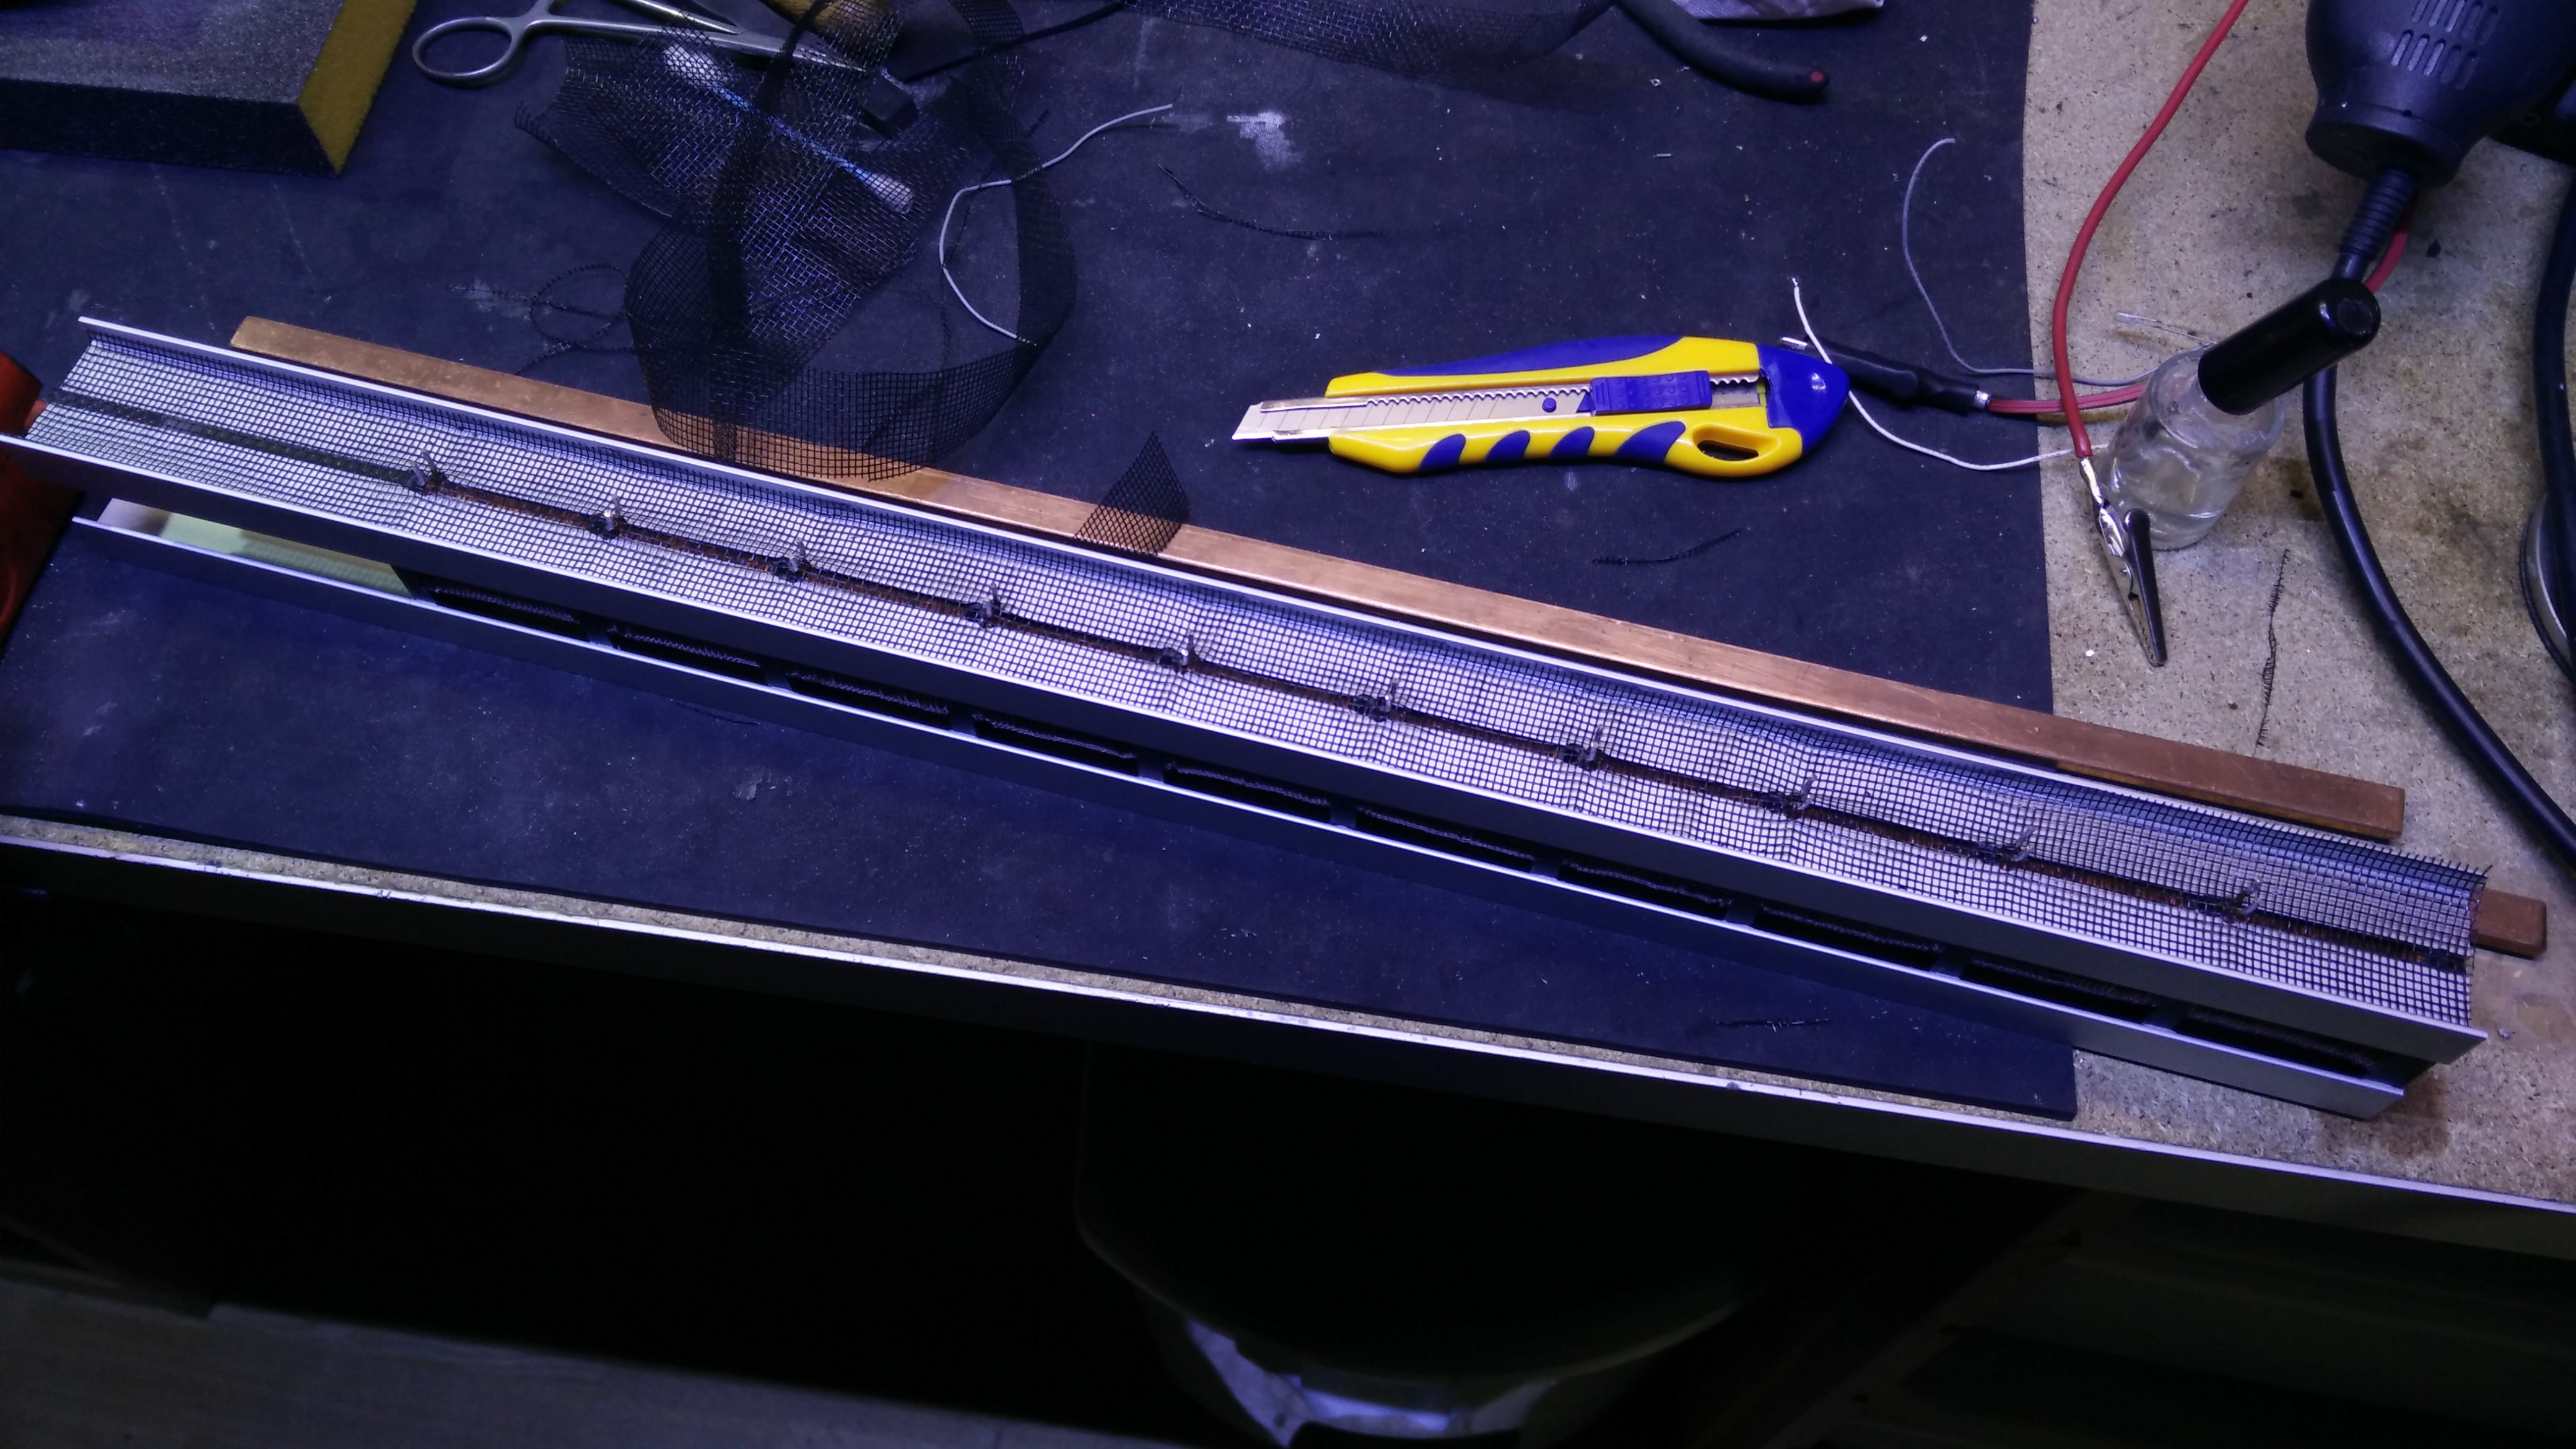
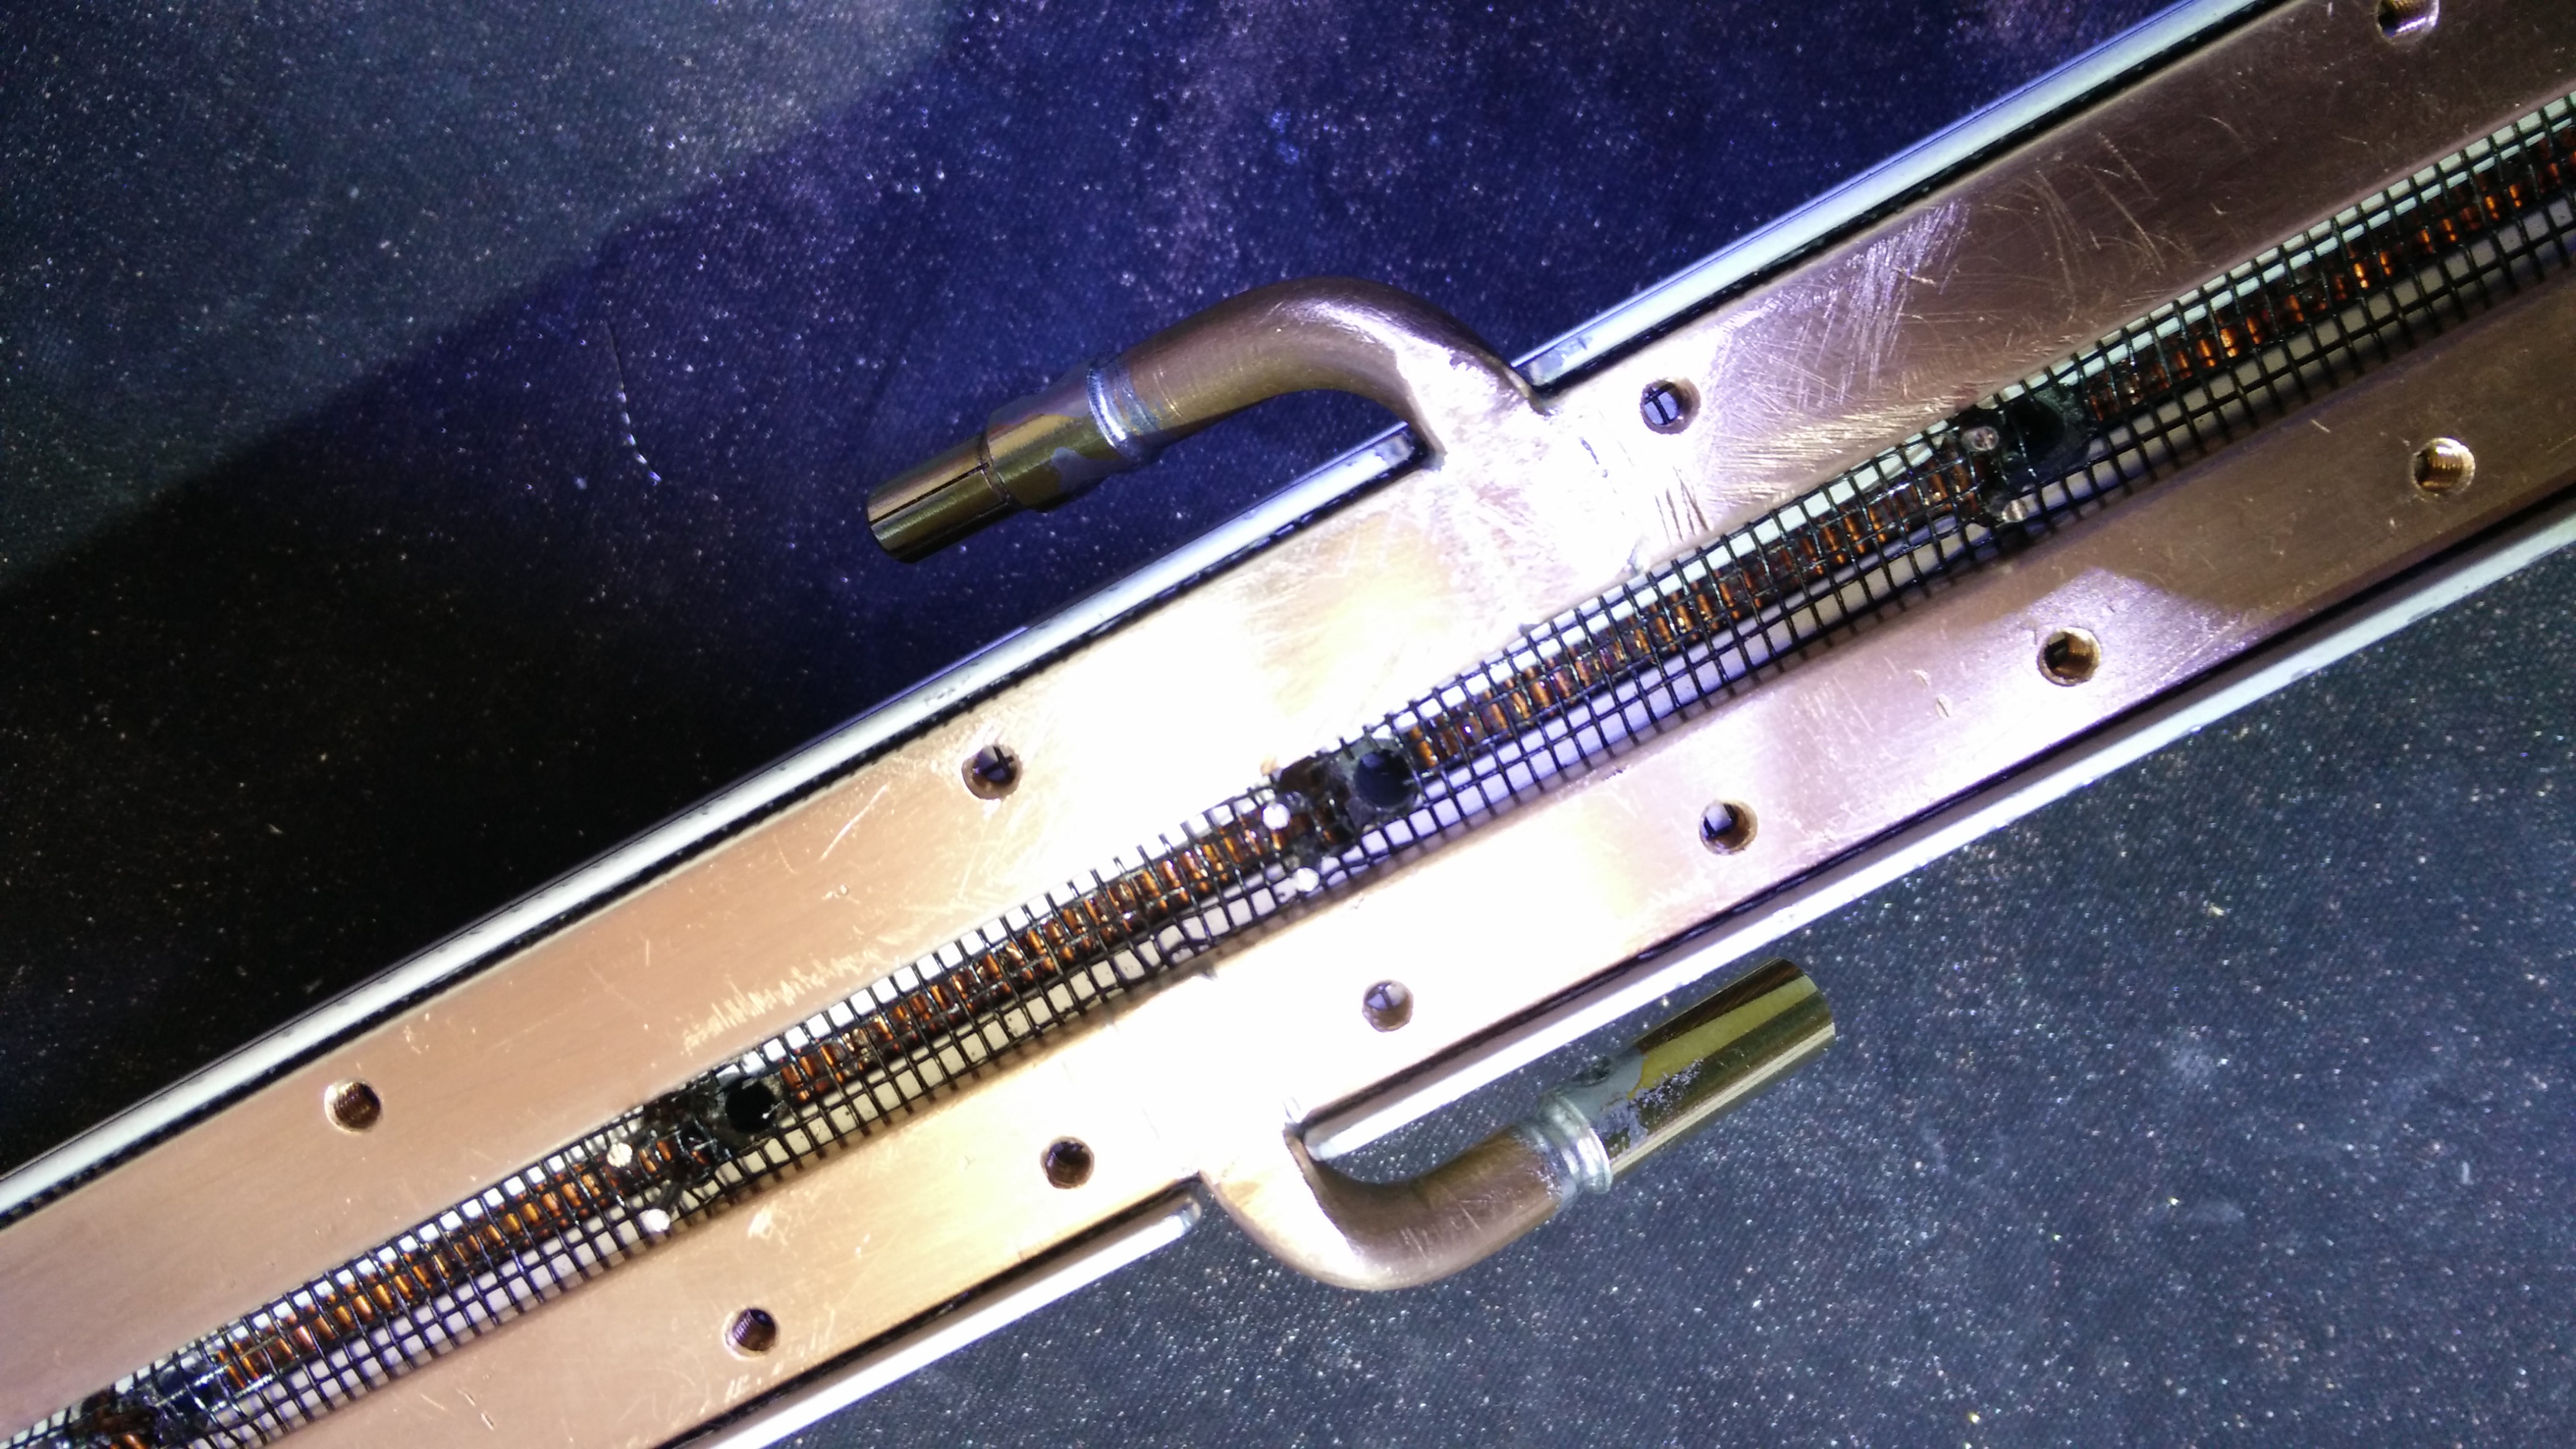
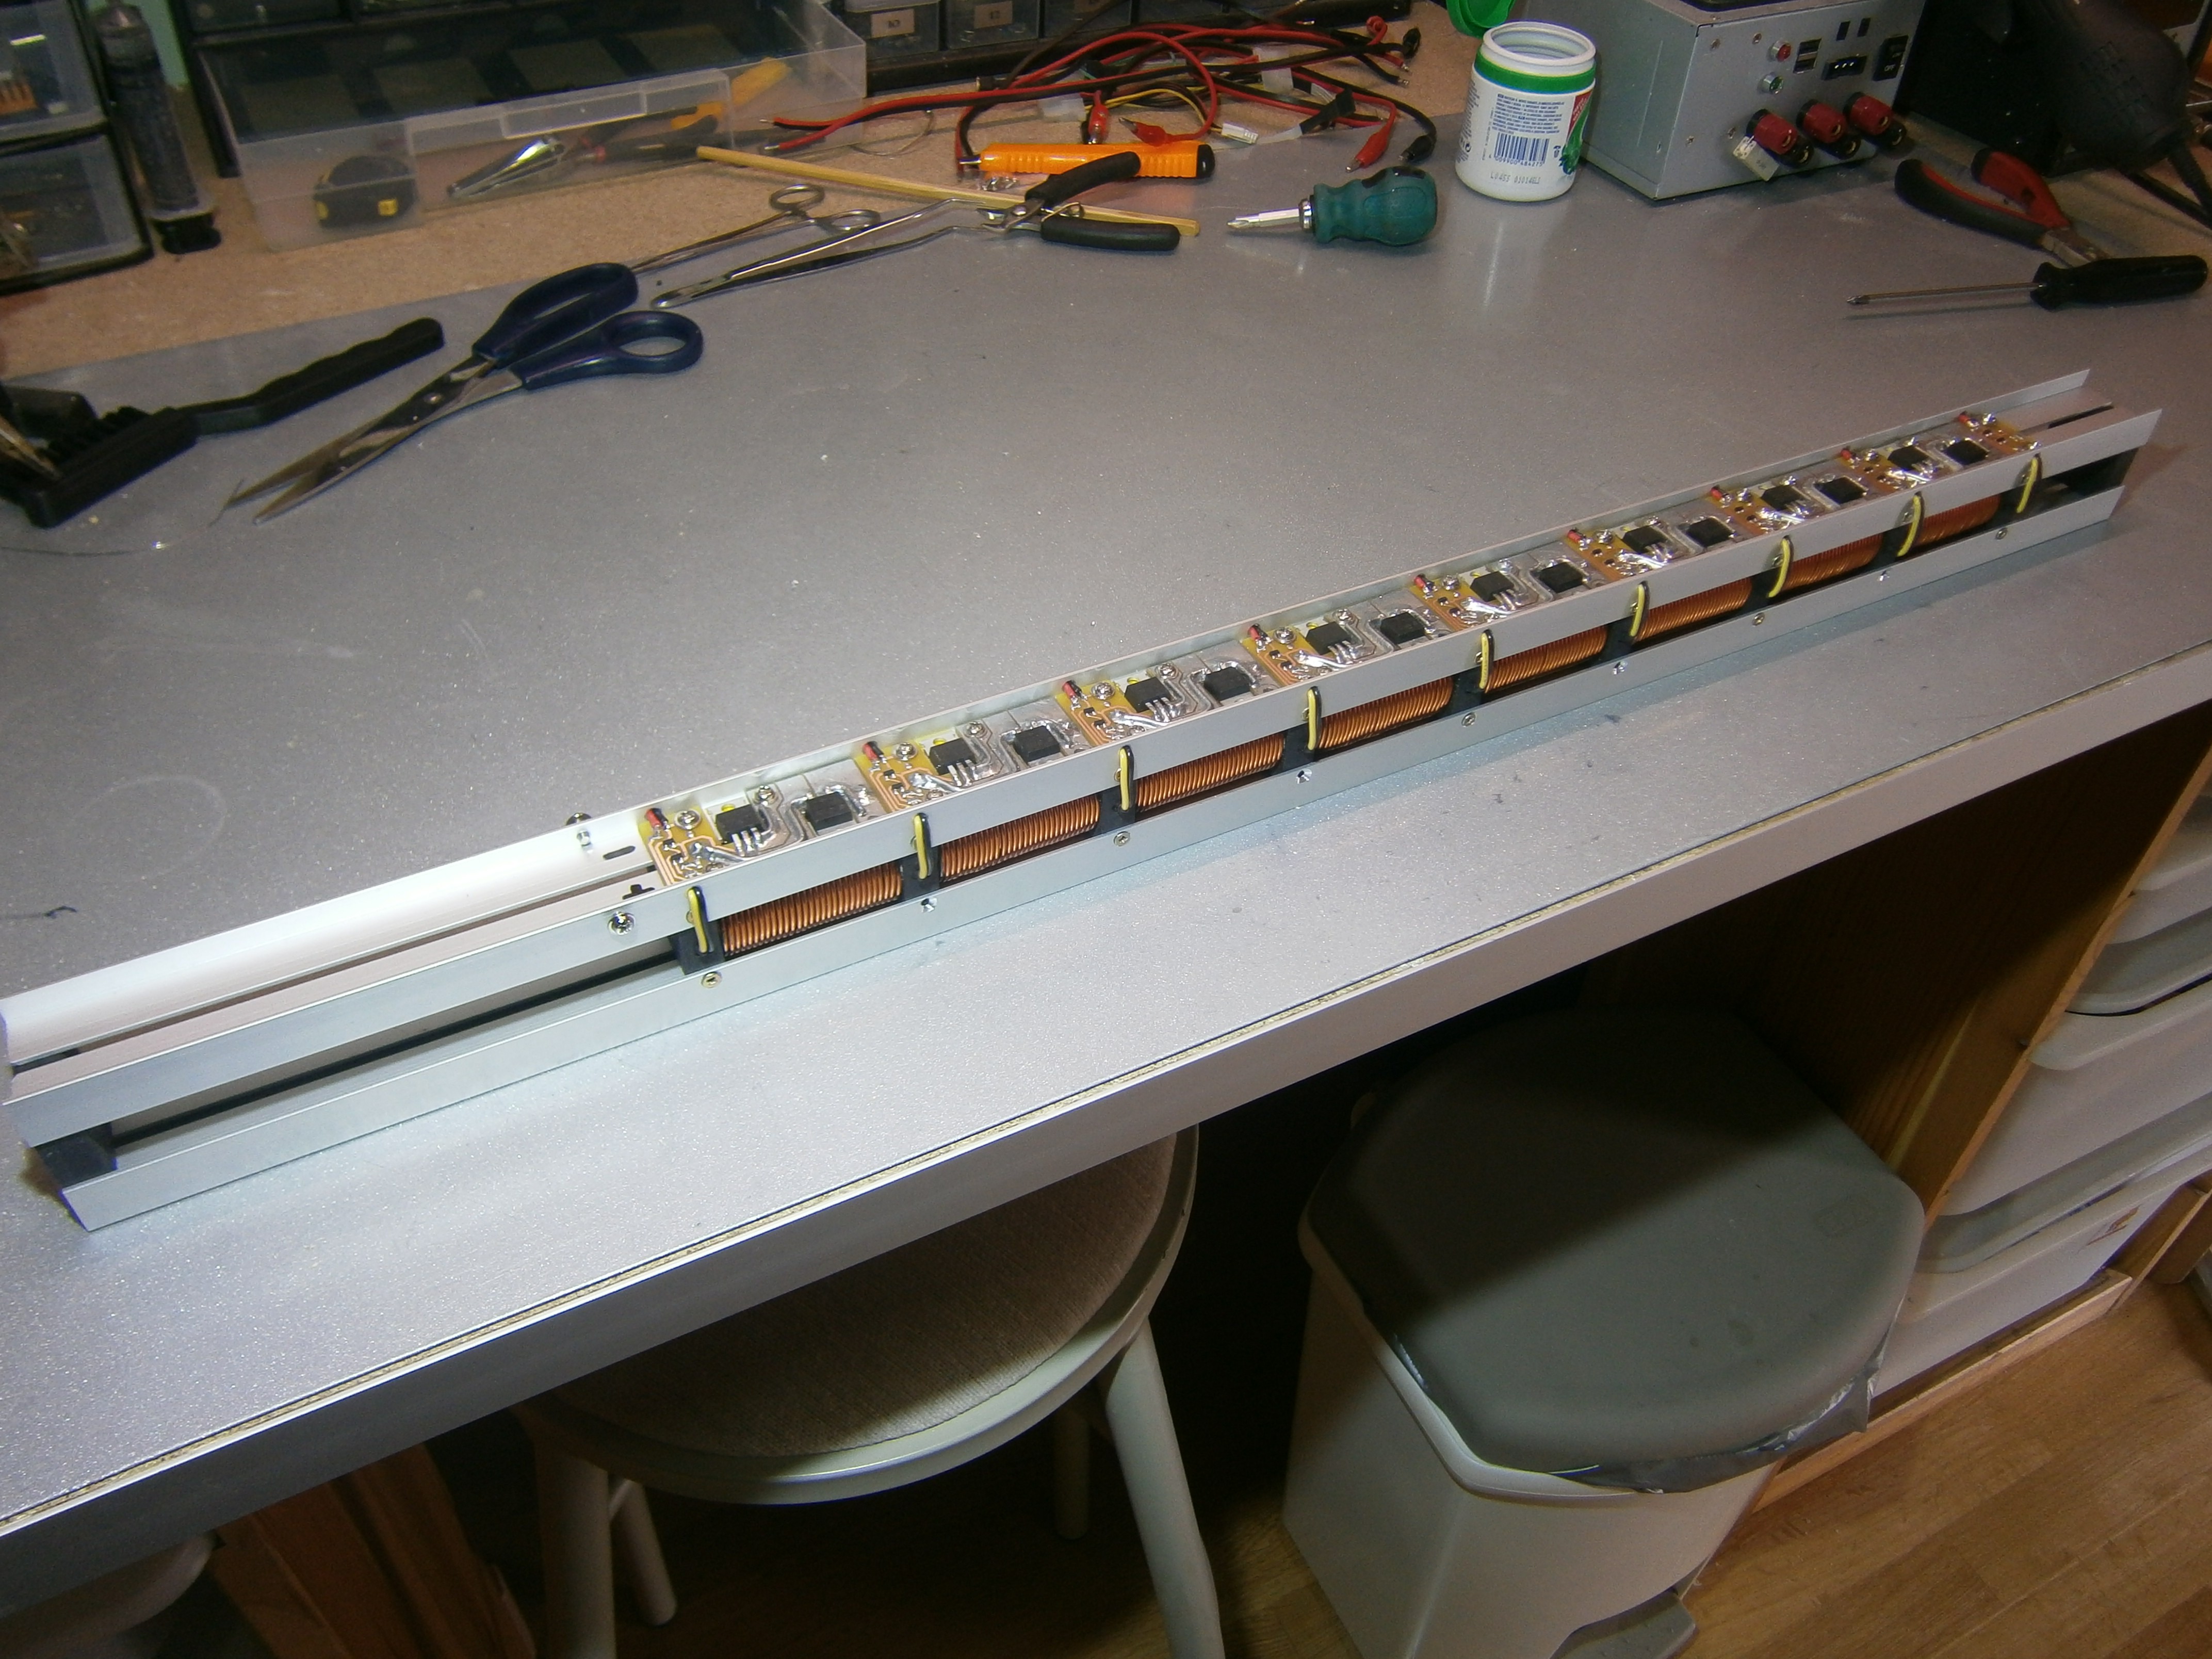
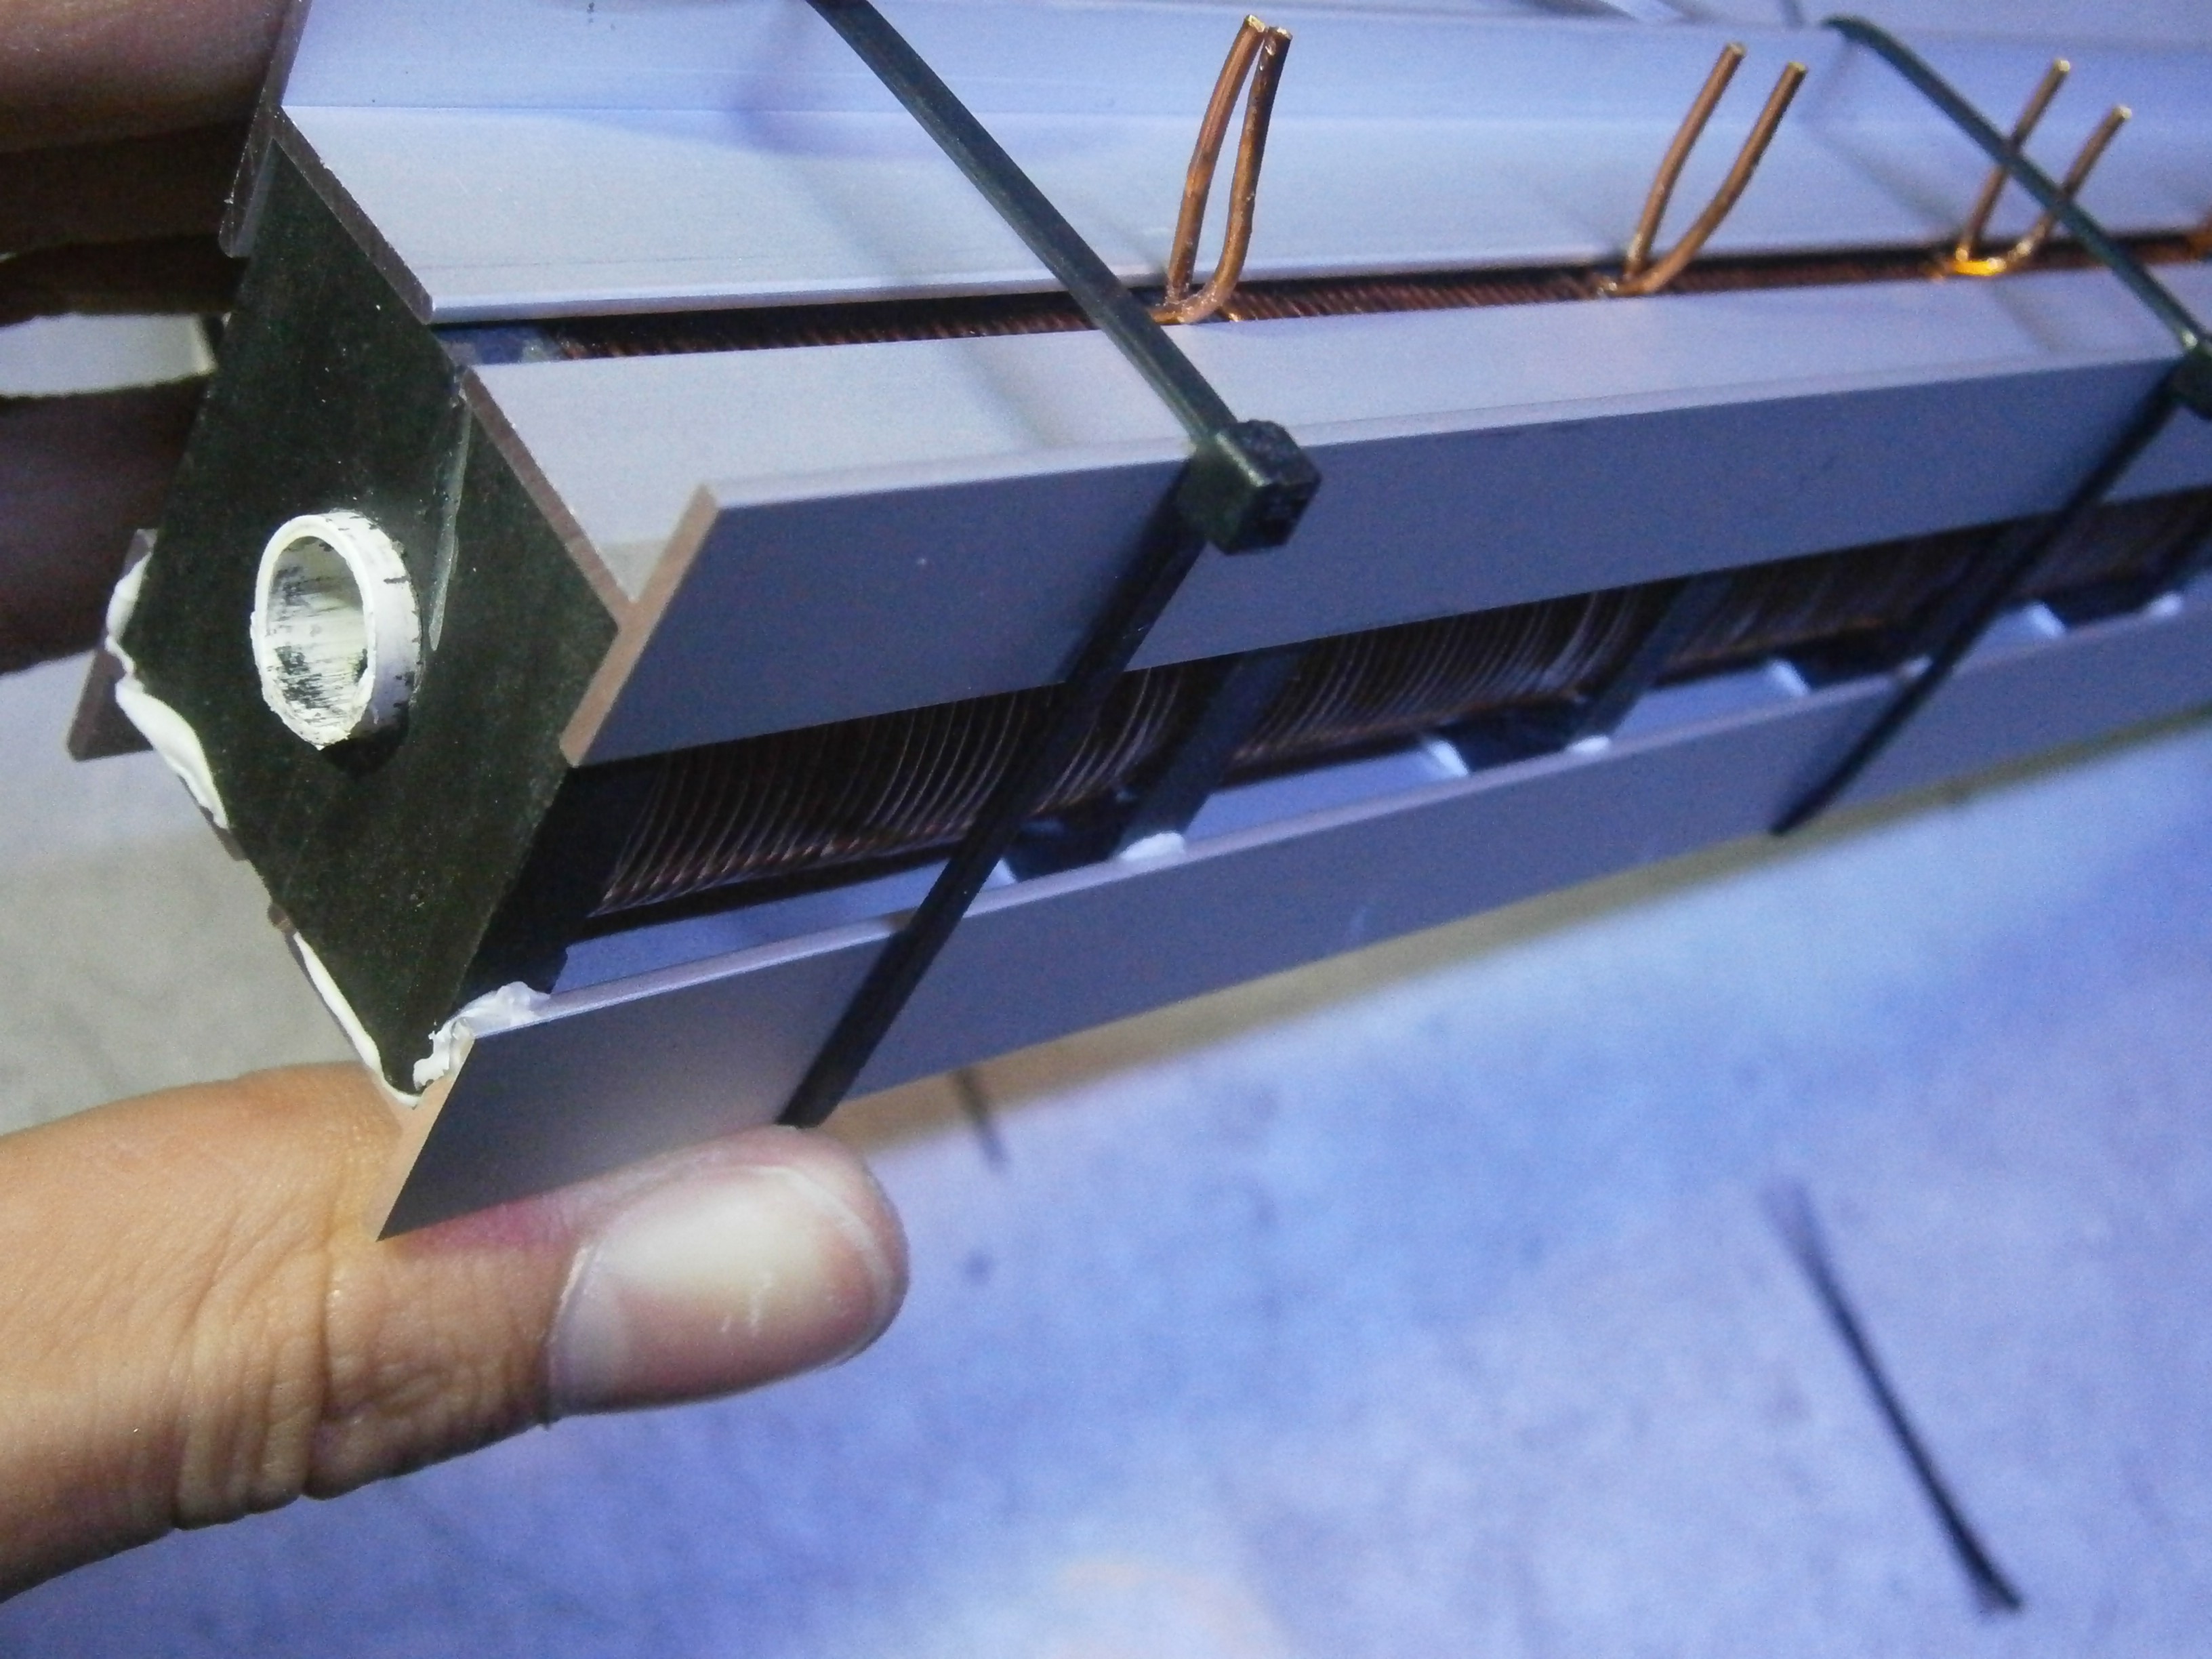
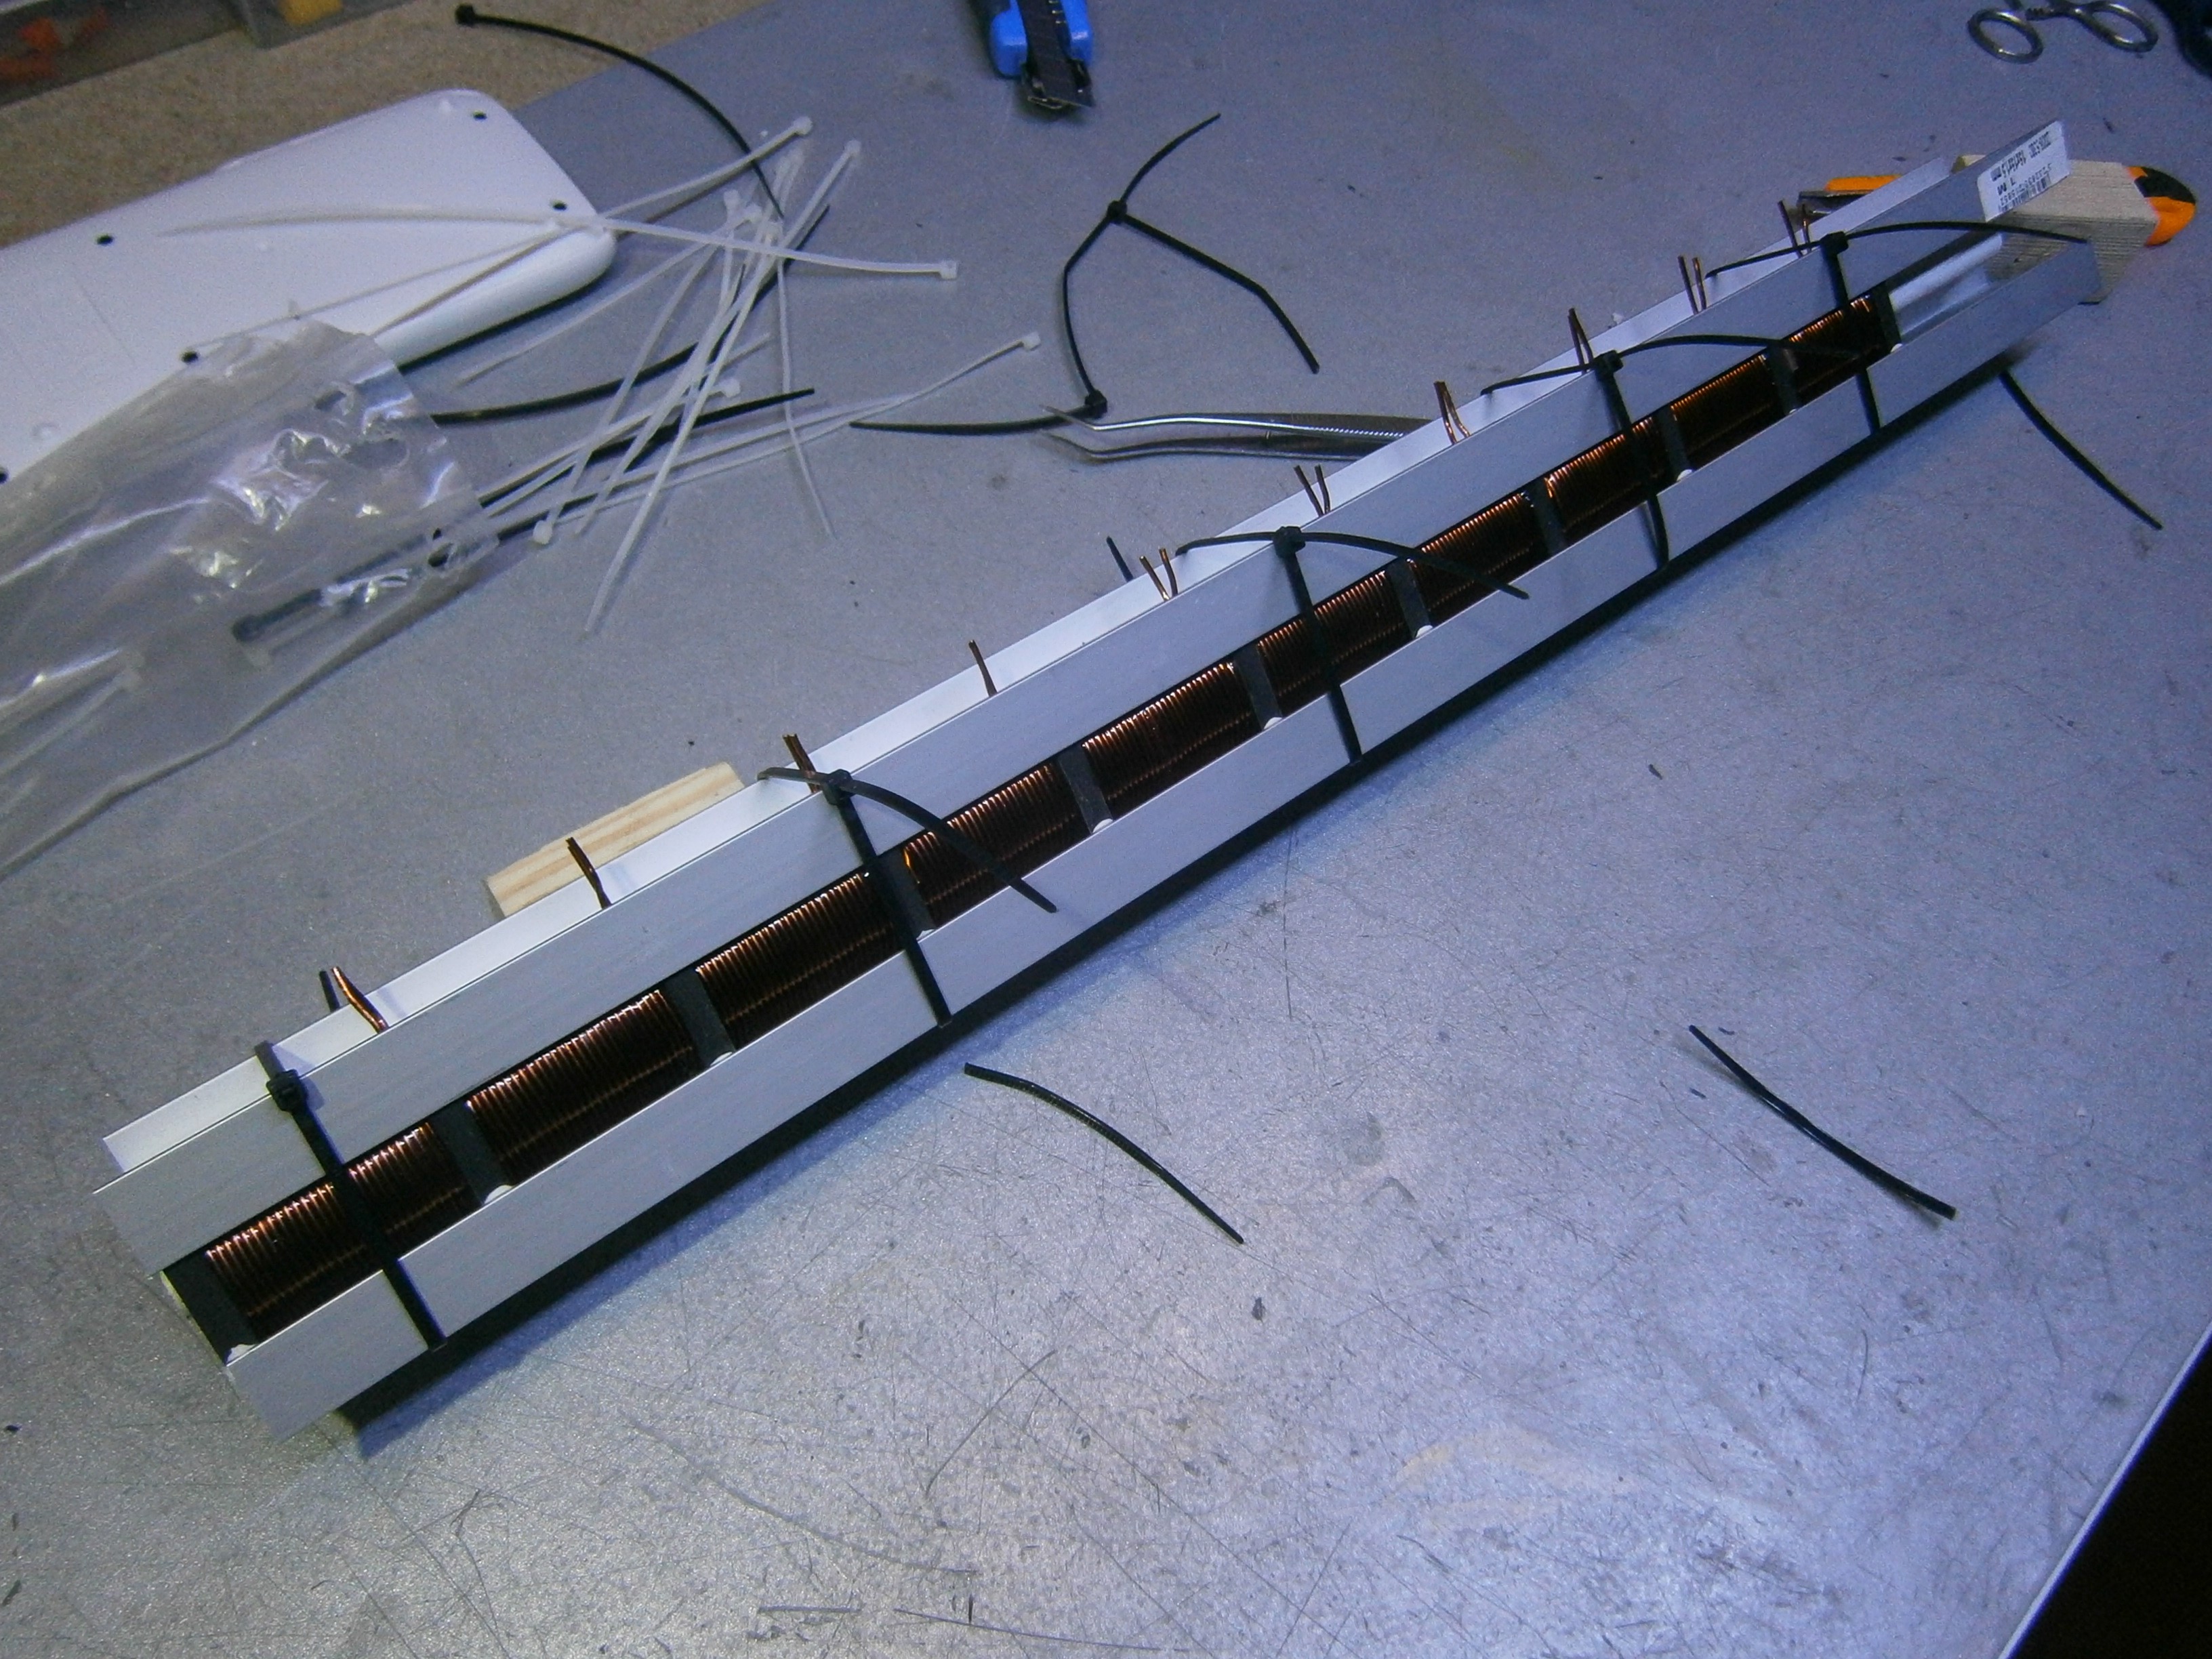
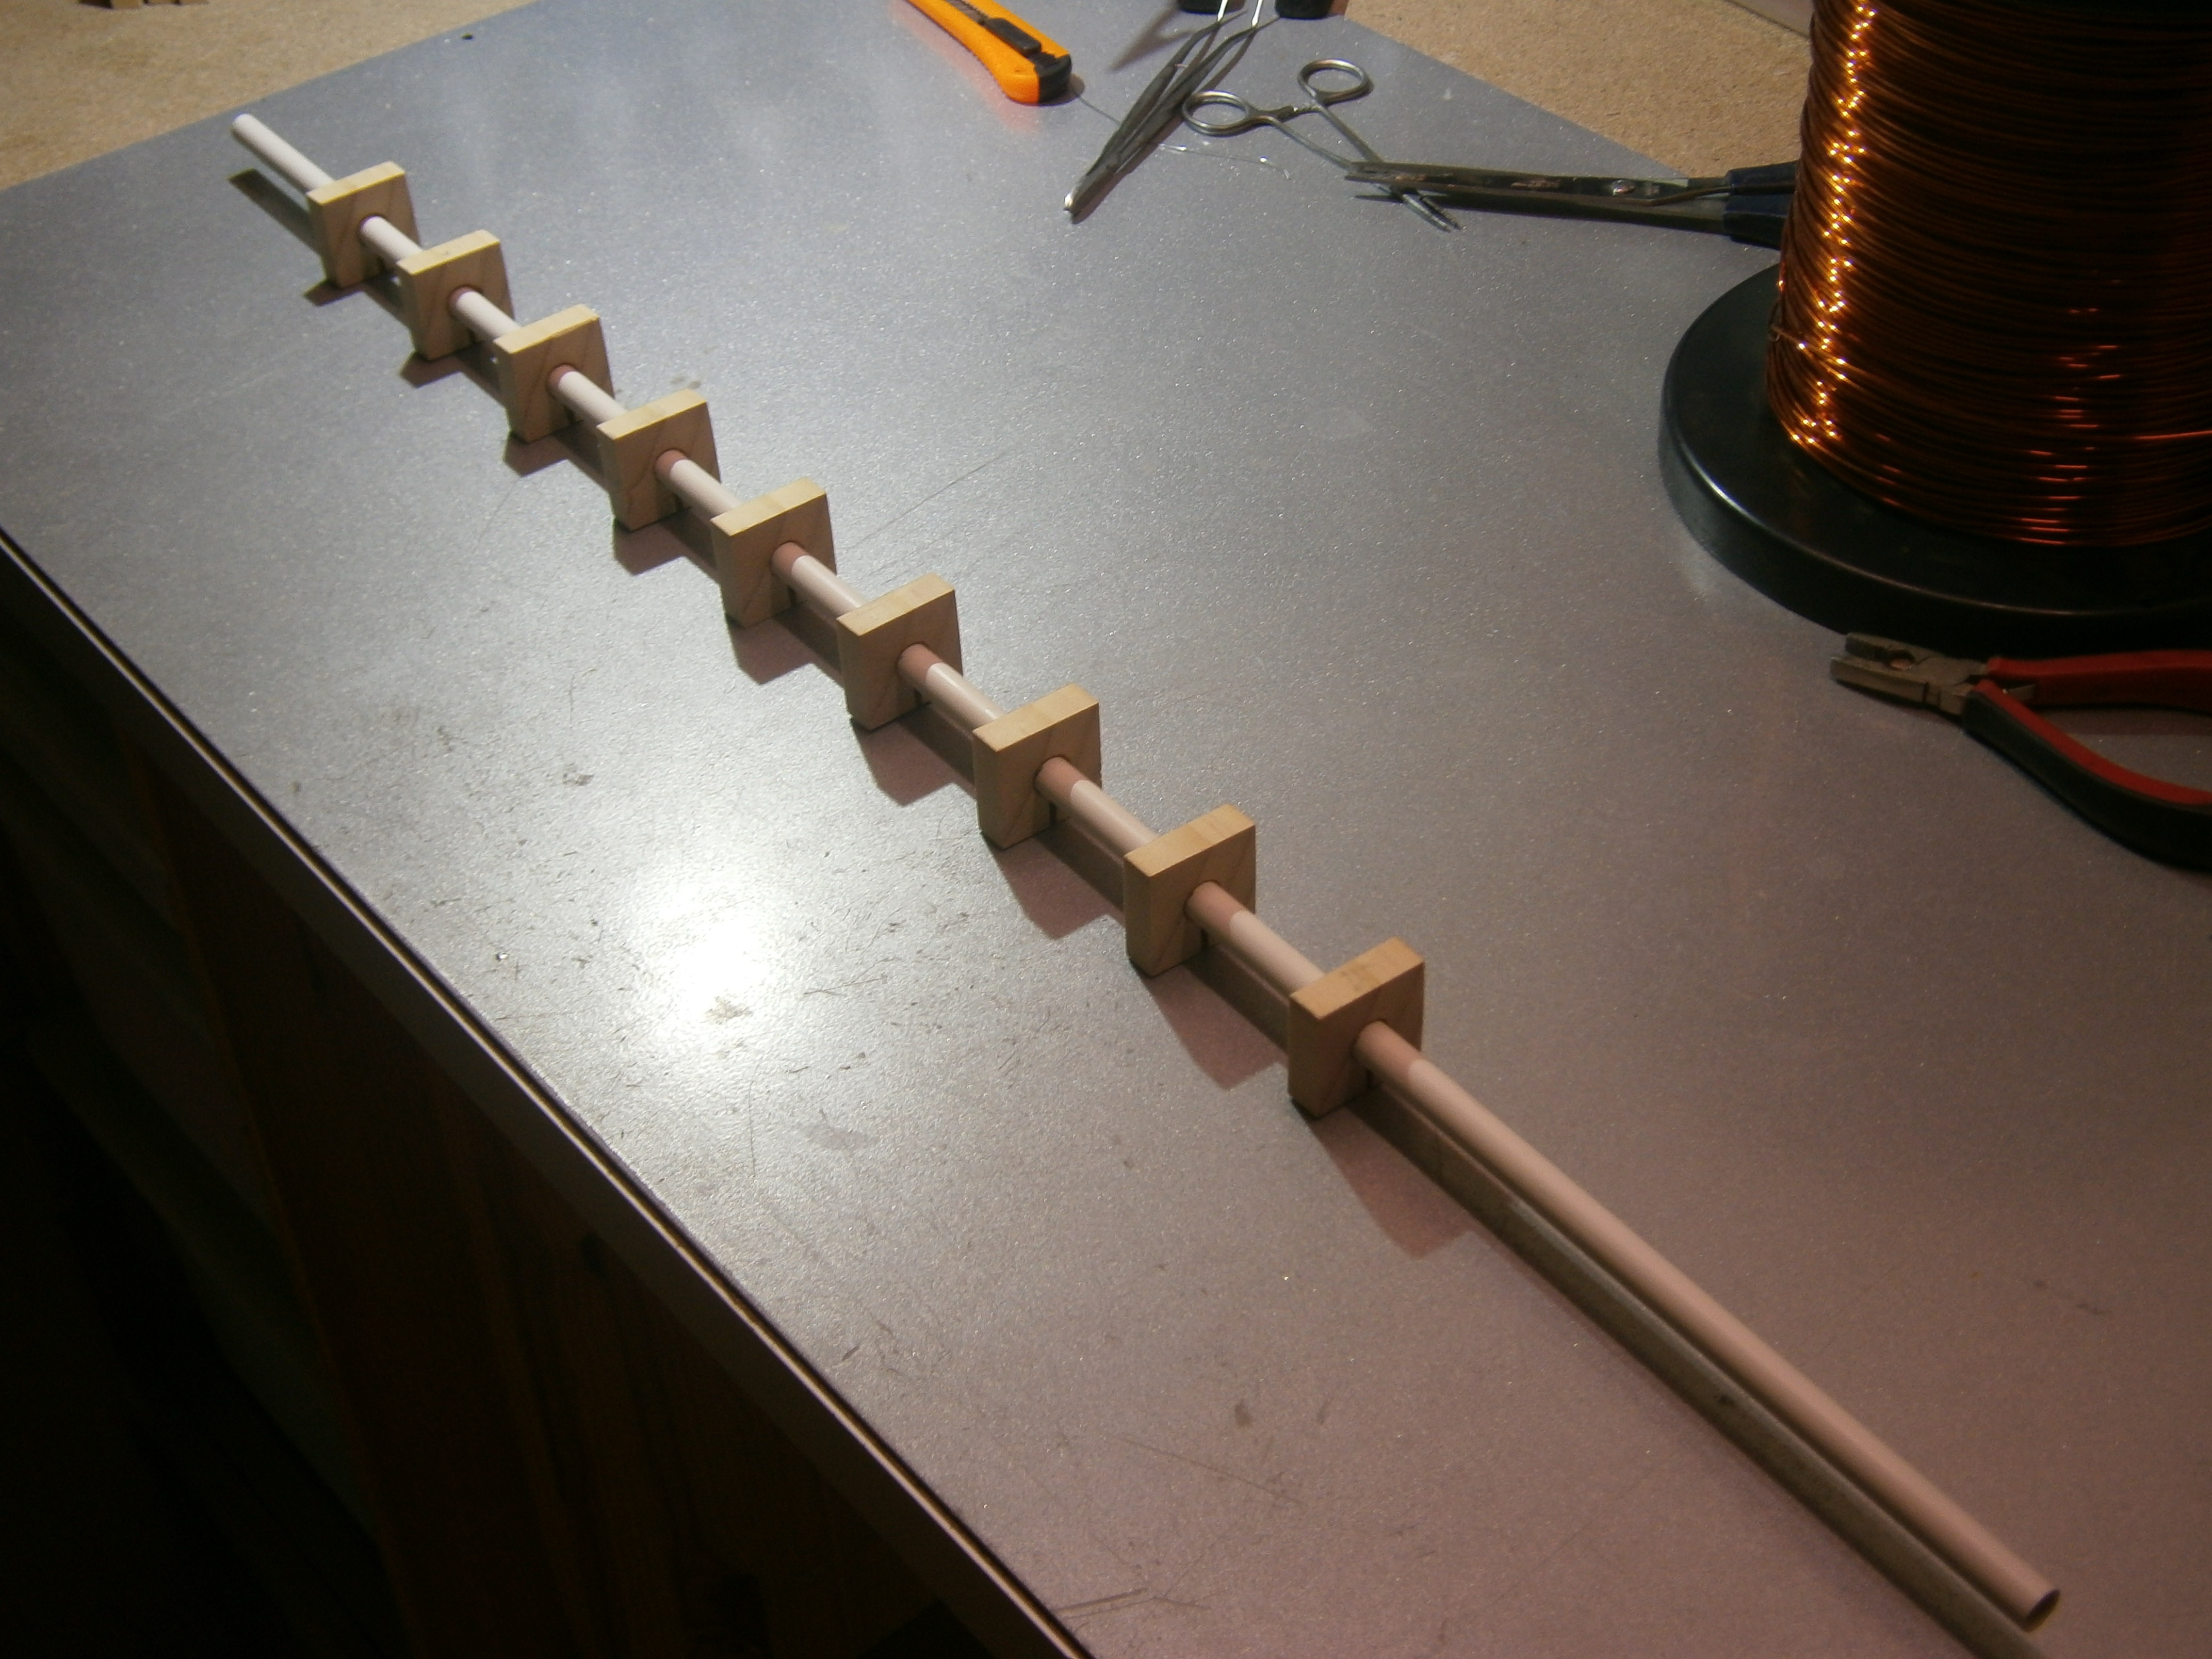
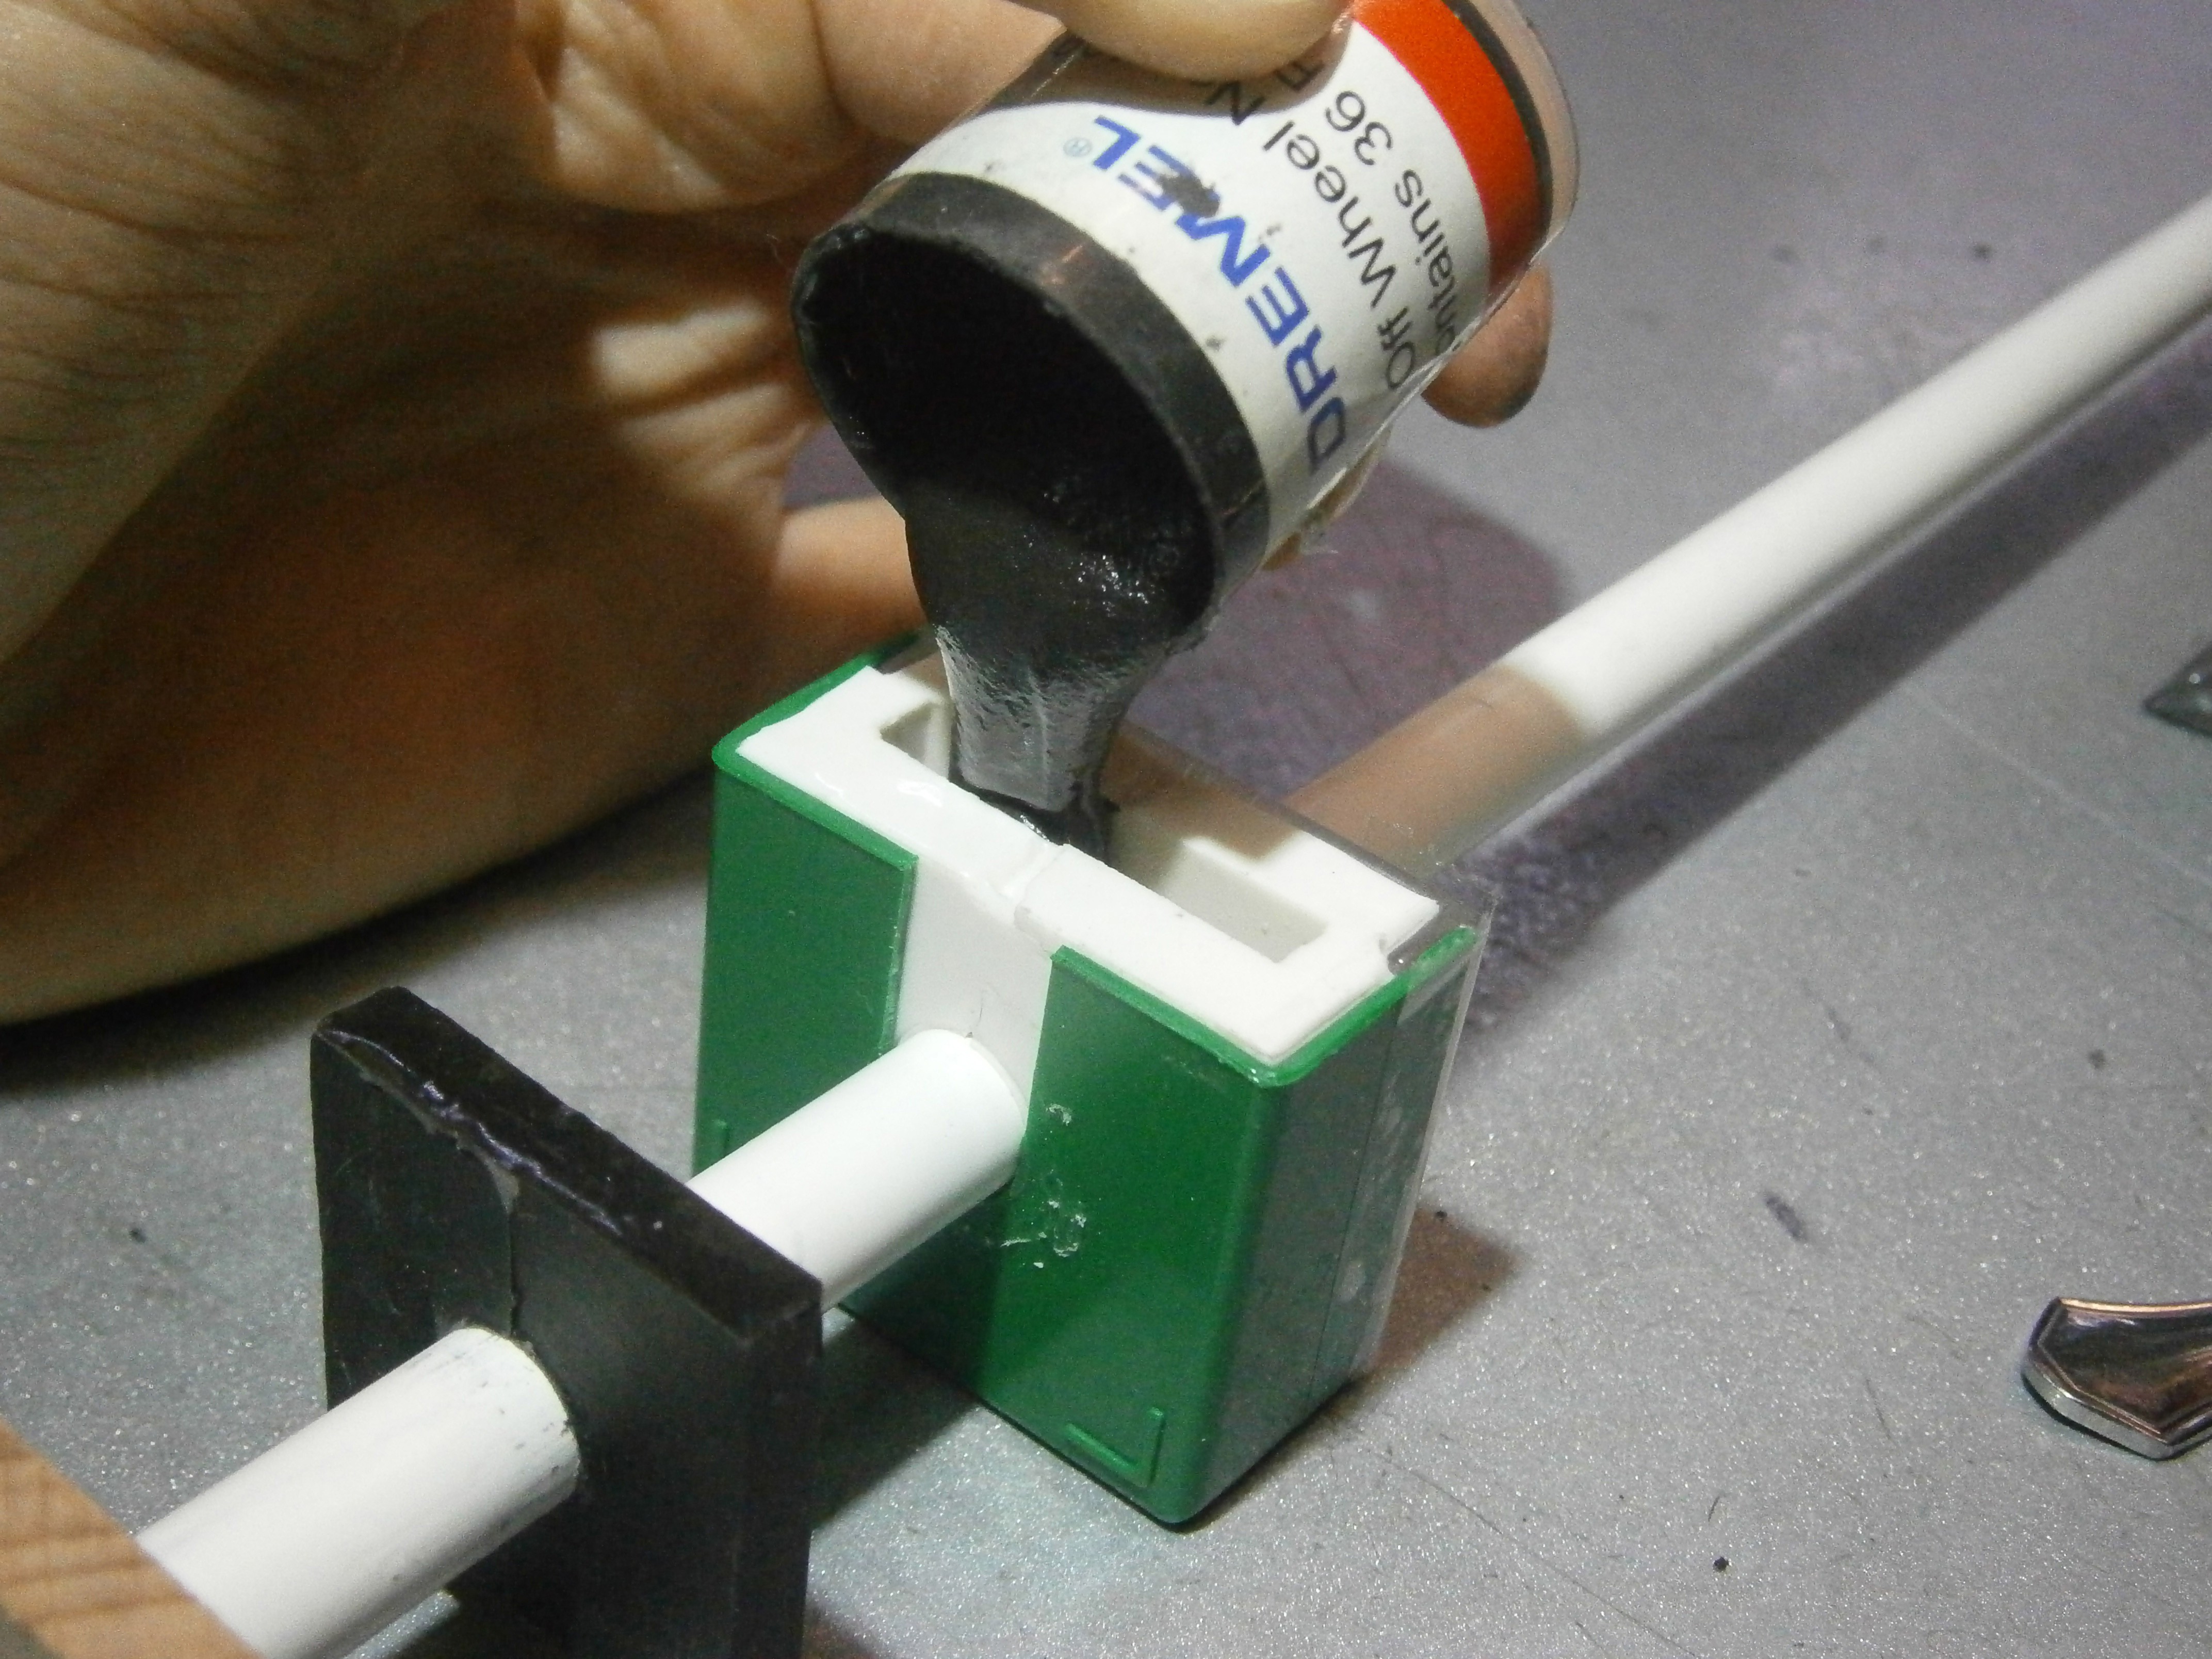
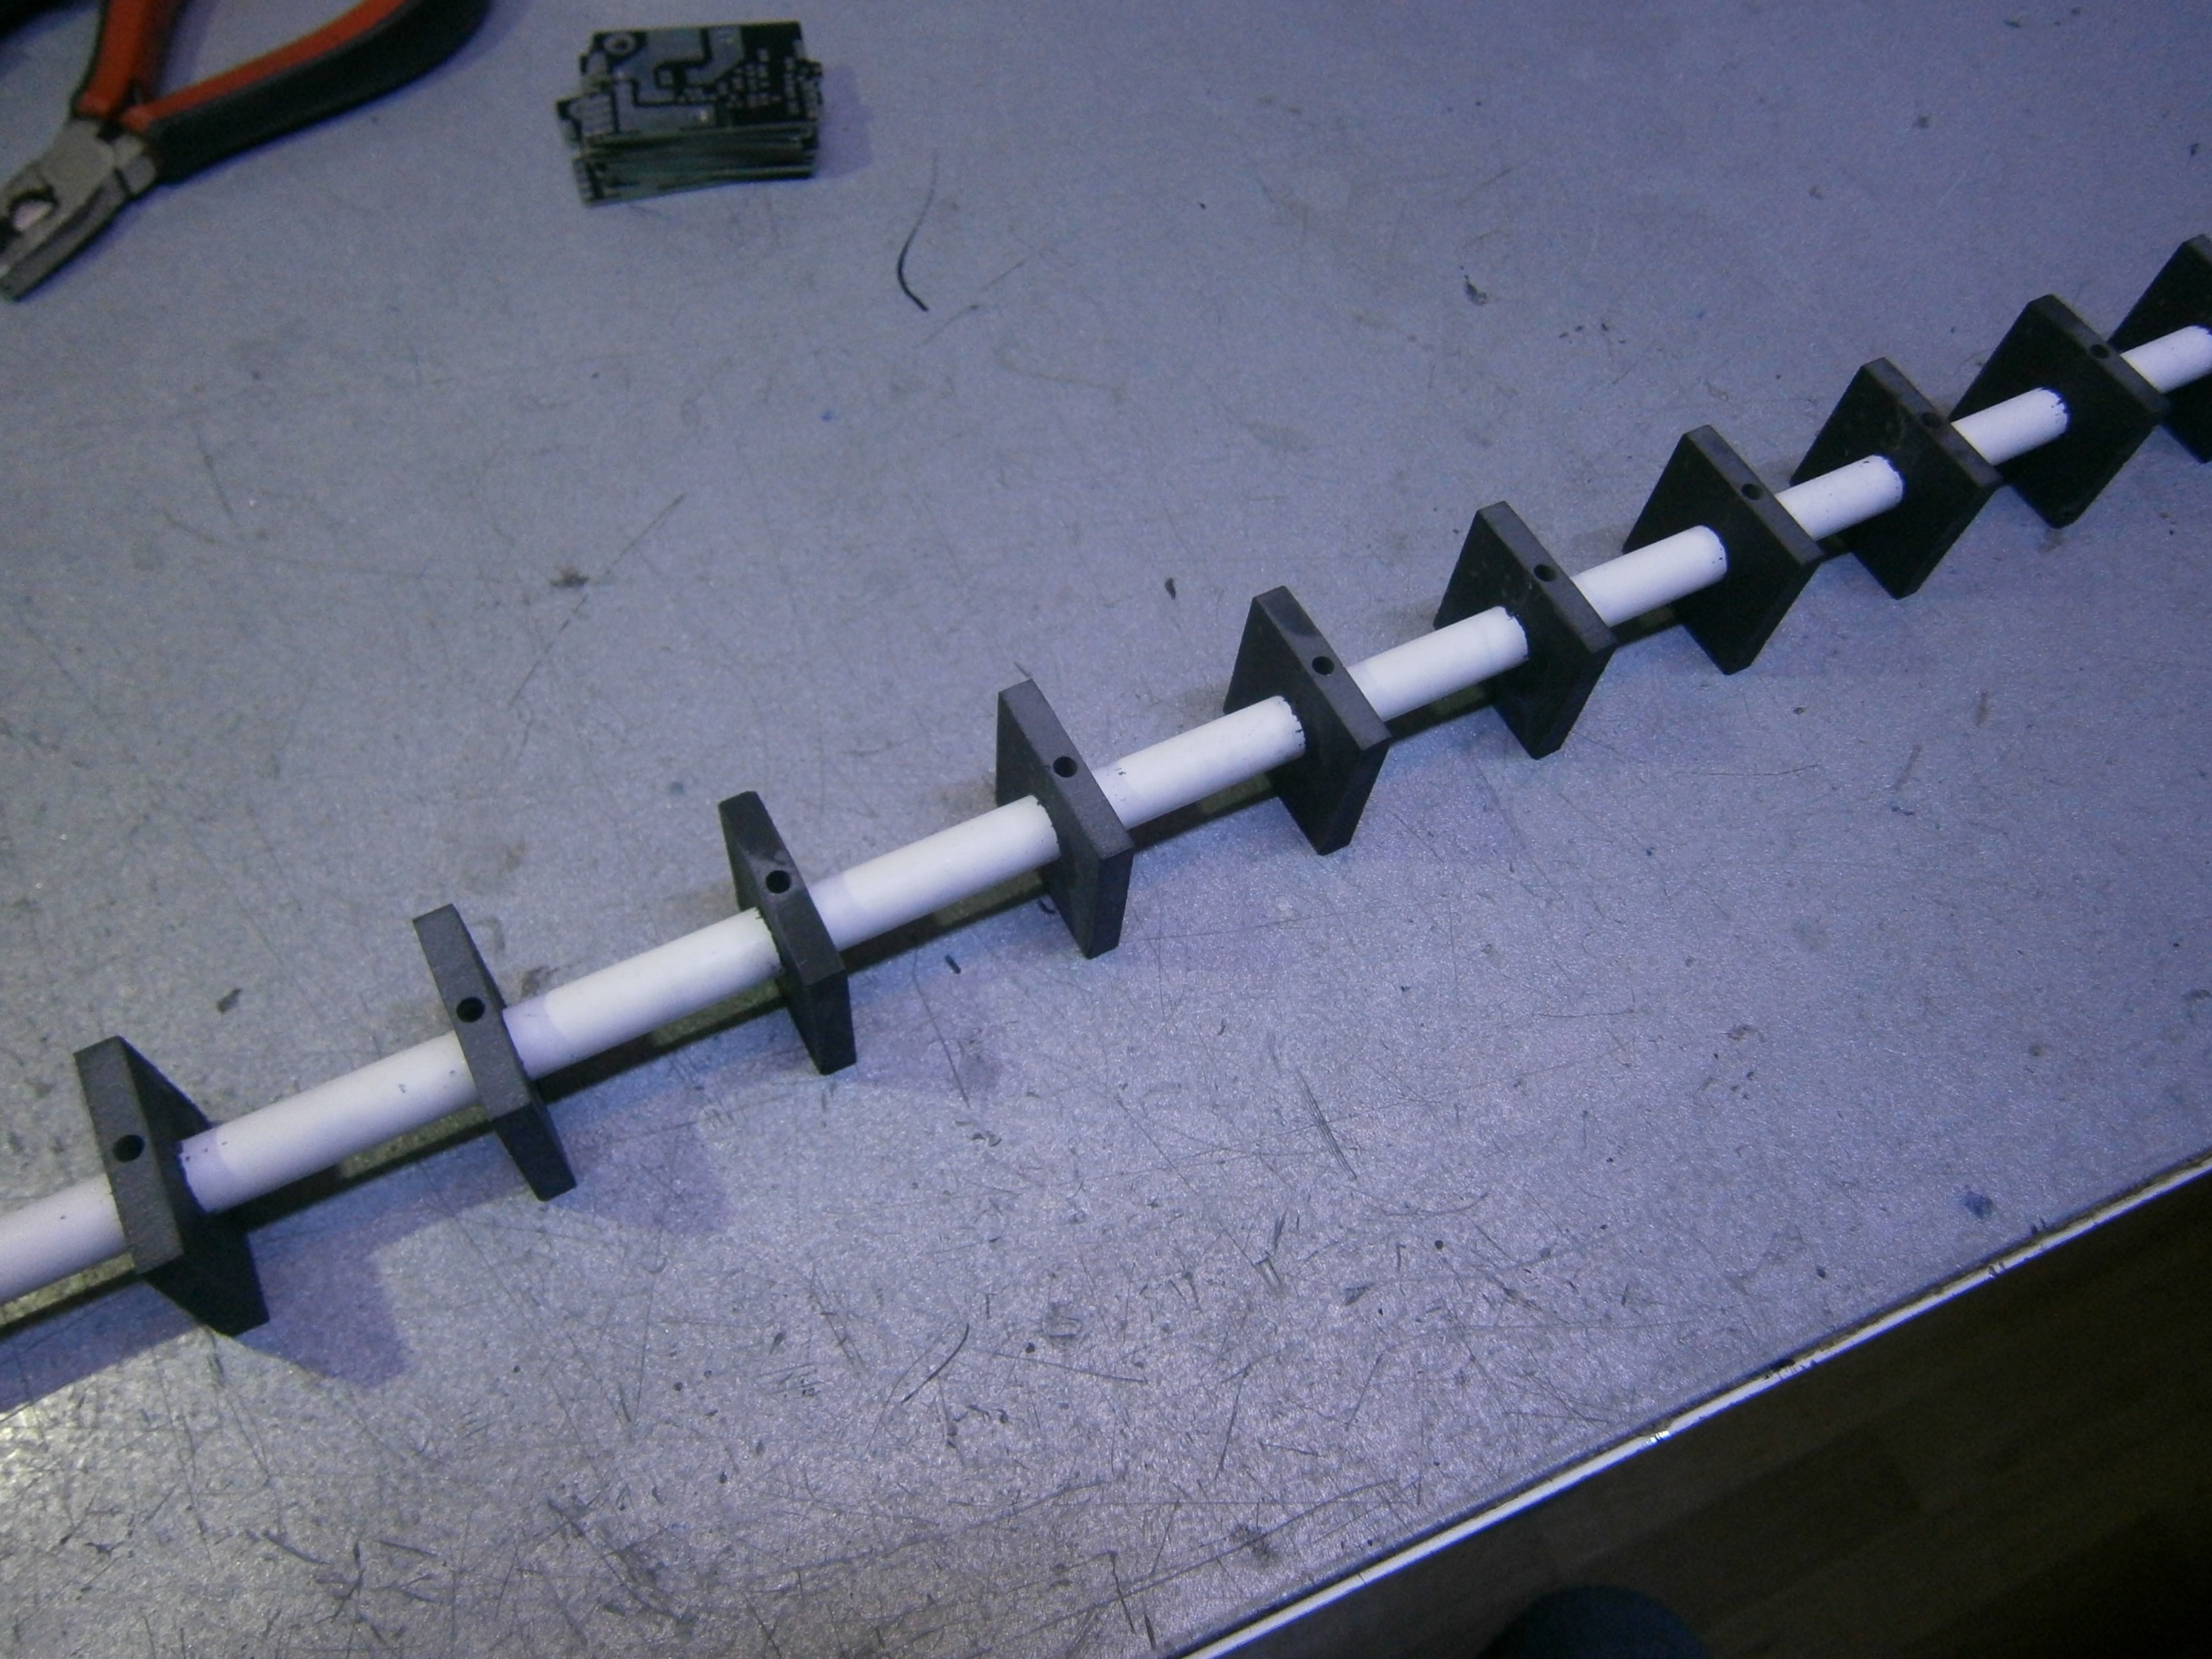
 Each coil was coated with clear epoxy for protection.
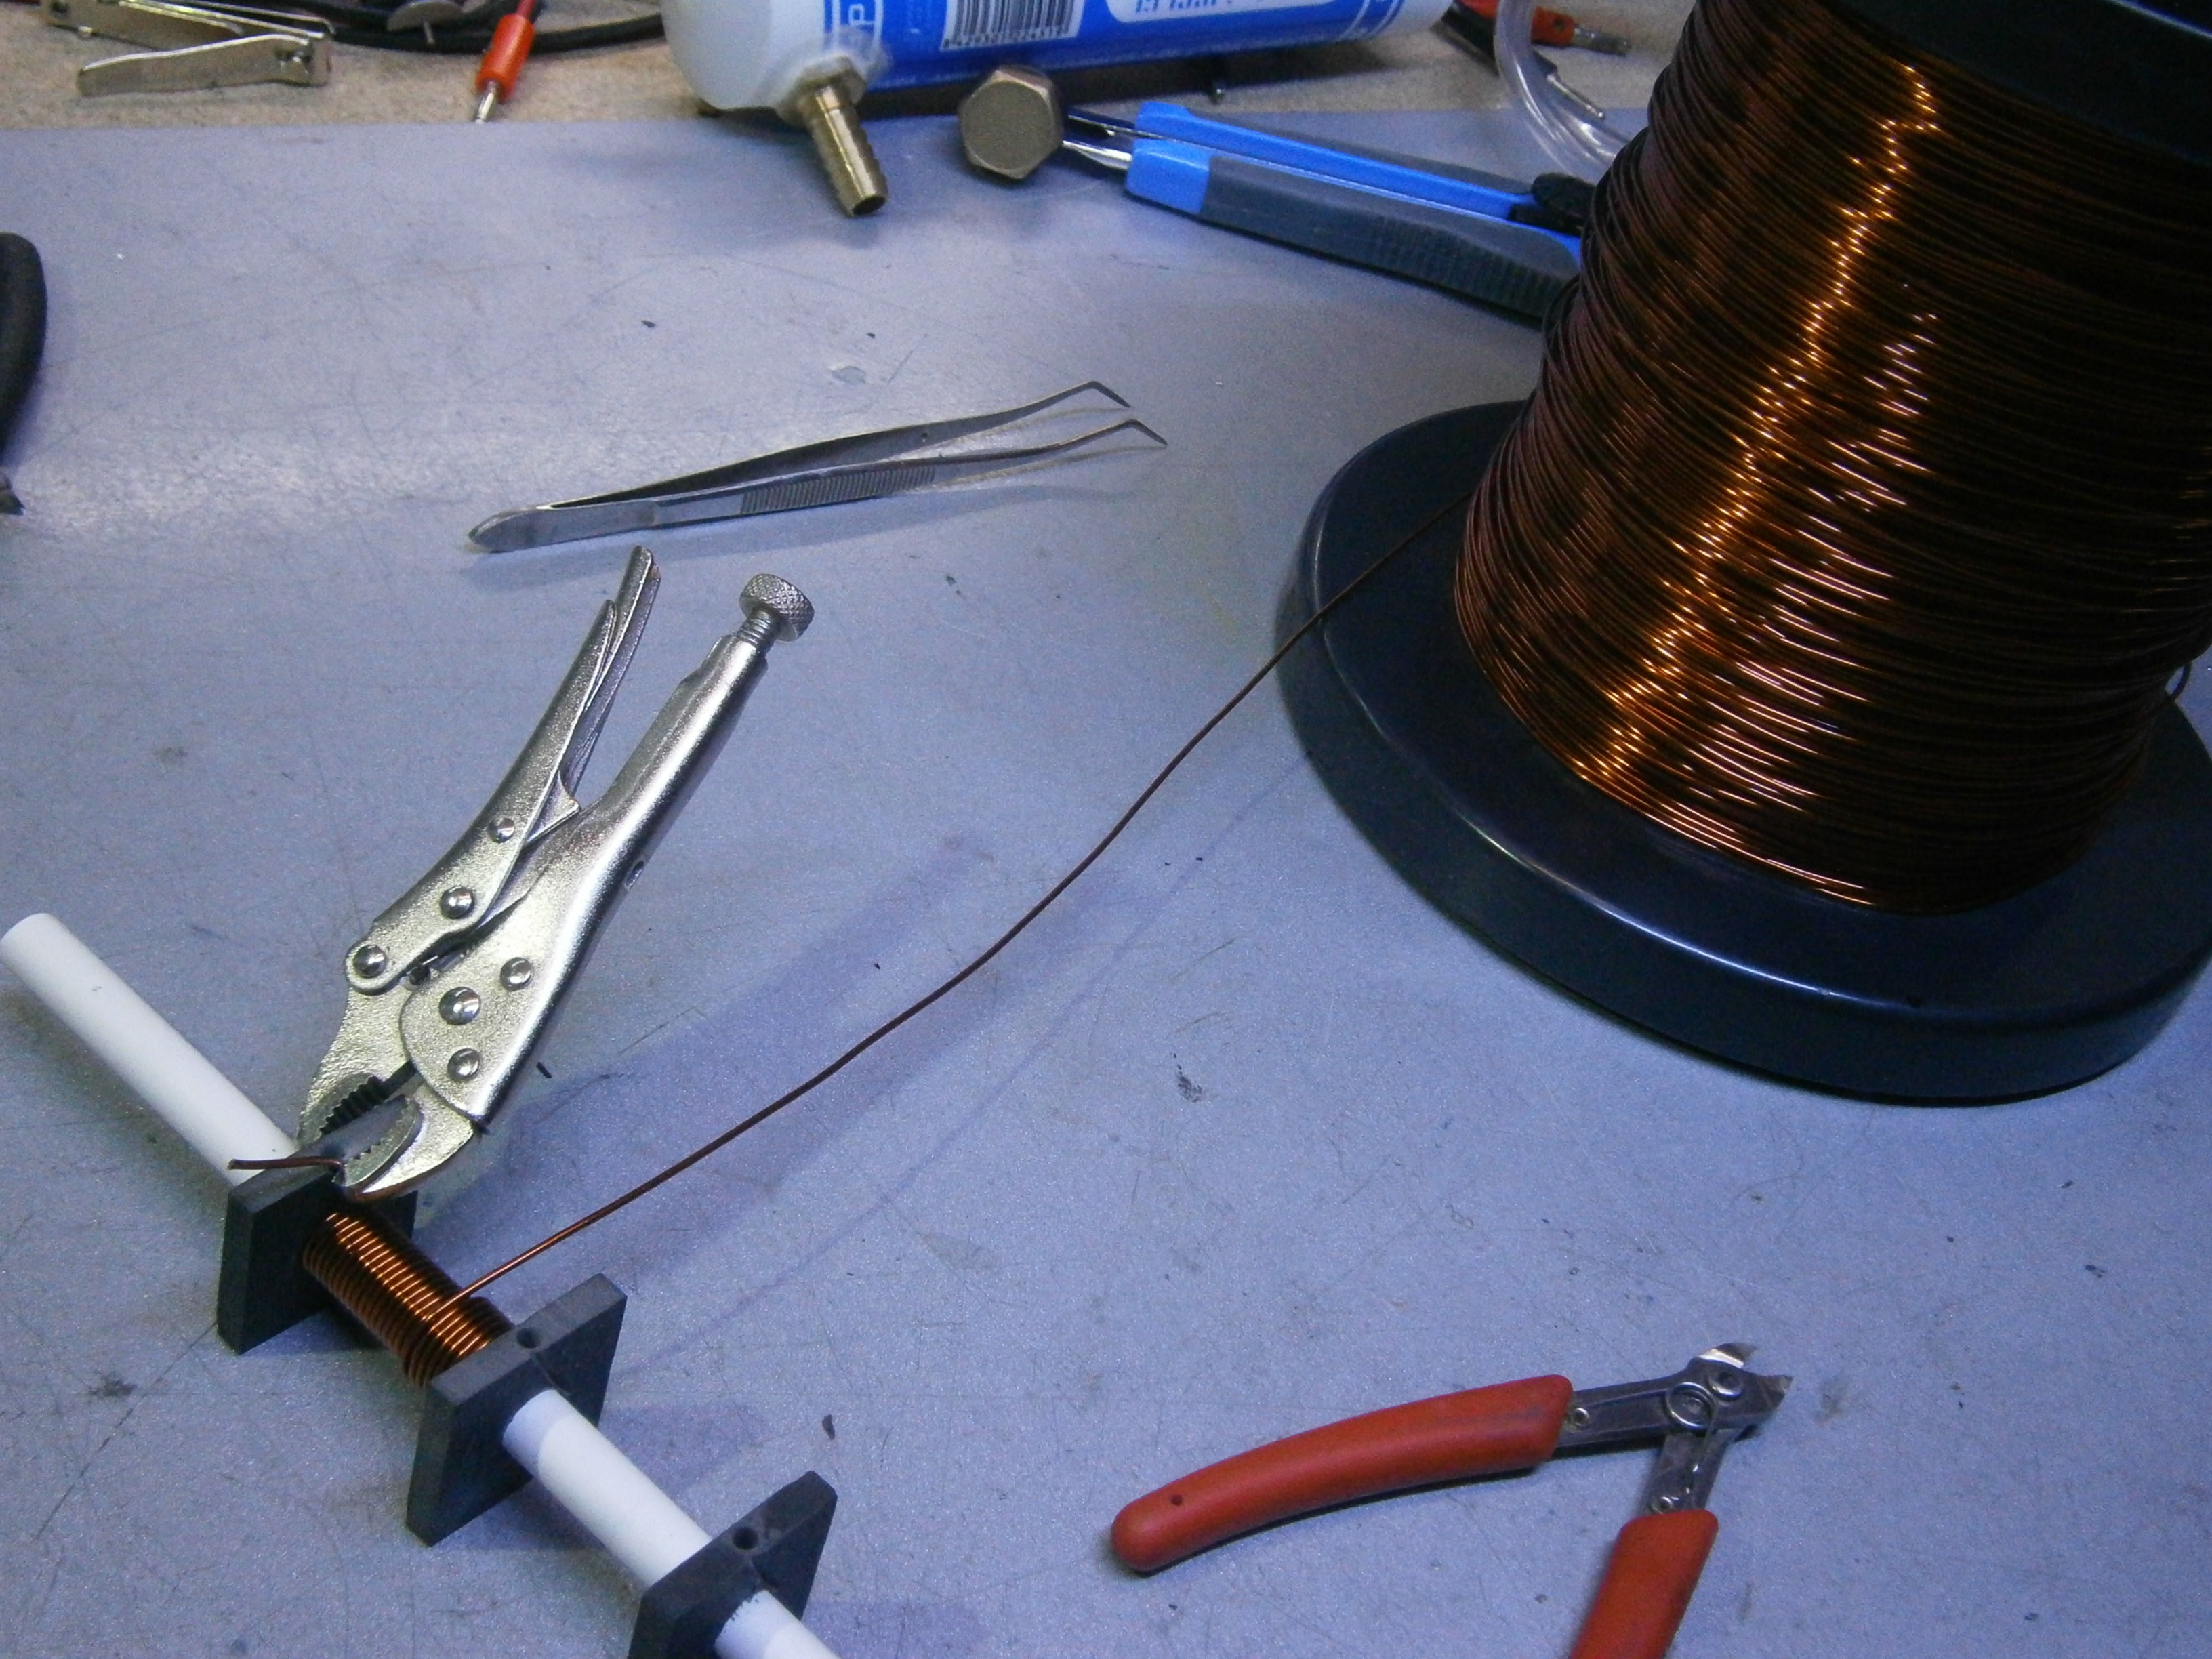
 i ended up winding the coils by turning the barrel with a drill. This could be done with a lathe too, but i would advise to drill the holes in the spacers for the IR bridges AFTER you wind the coils and not before;
 Once all the coils were done, i gave them a second coat of epoxy alf left it to cure.
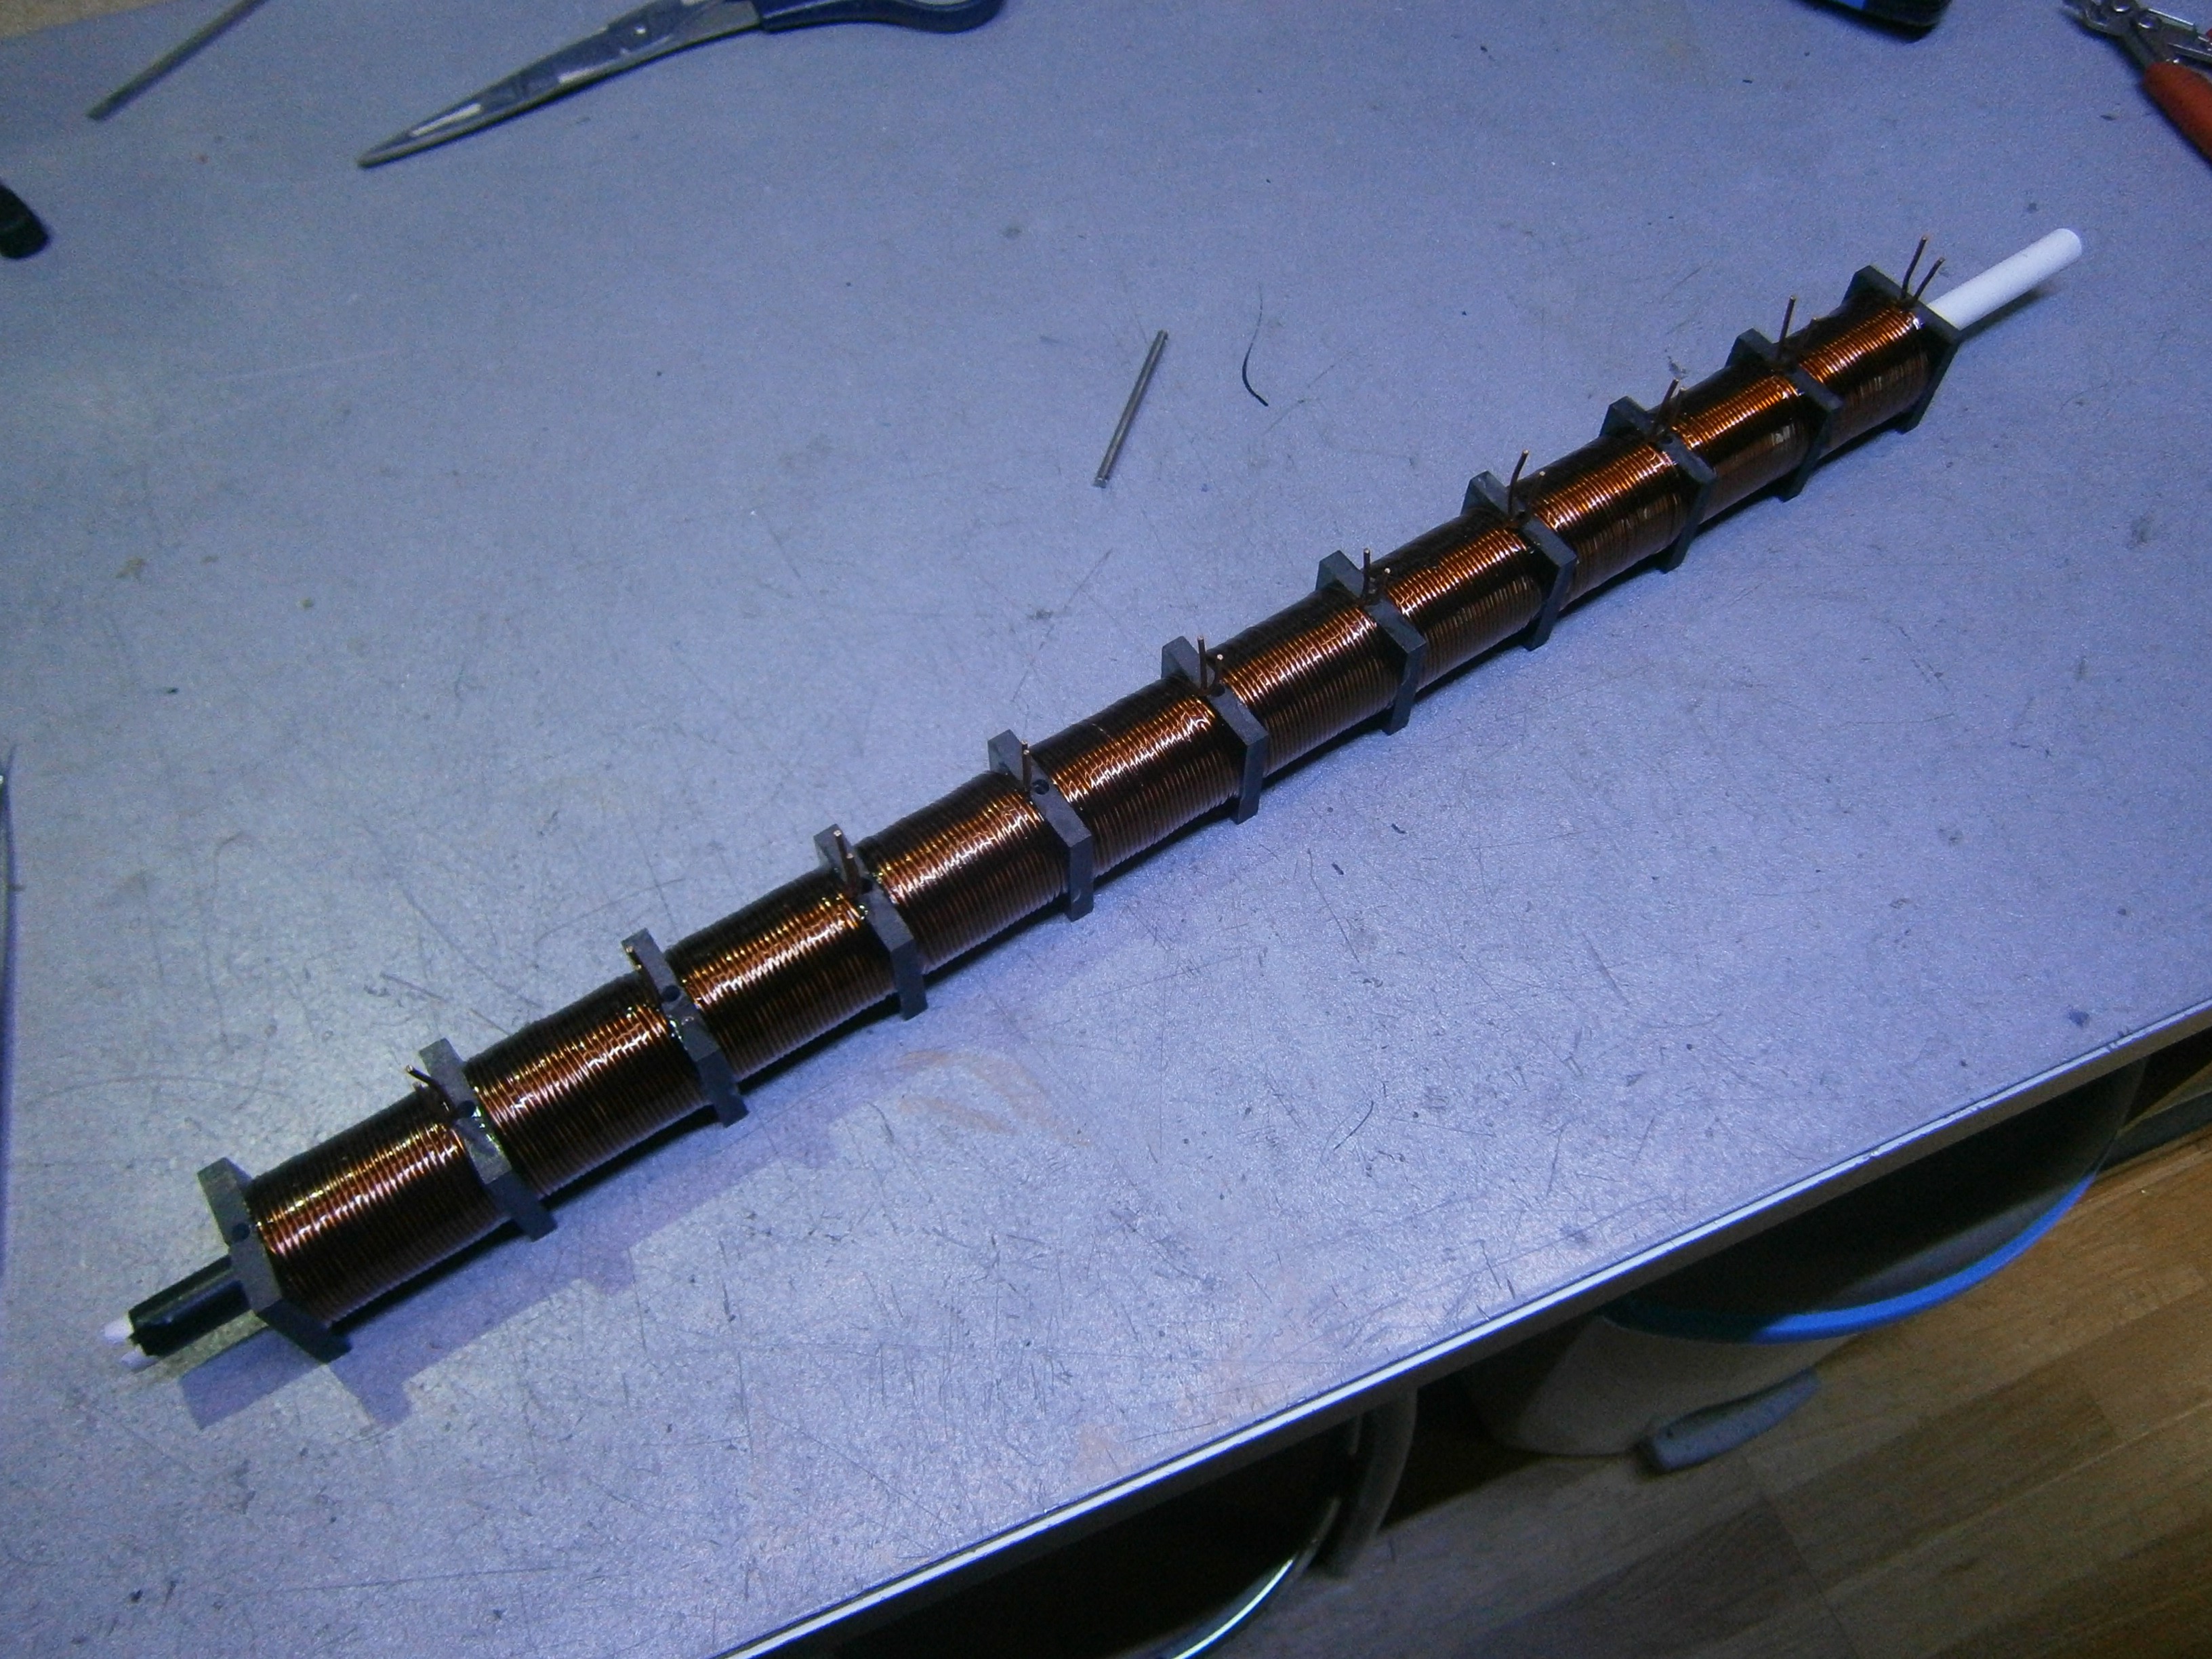


Sorry, I can't find any information about "Gauss Rifle v1.0", such as the length of the bullet, the voltage and size of the solenoid valve, the structure of the clip, the specific parameters of the battery, the winding mode of the coil, the electrical connection (switch) of the trigger, etc. I really want to copy your work. Can you provide more information? h2968917469@gmail.com Thank you!!