The RPi will have a touchscreen interface with a selection of buttons which will change depending on the mode, both in color and wording. "Off", "Automatic/Constant", "Timed", "Boost/Timer Countdown", "Upstairs" and "Downstairs". The touchscreen interface will be programmed using python and pygame to display on the screen.
The Pi will also have nginx installed on it and host a password protected php website which will interface with the touchscreen using xml. When a HTML command is issued the command will be sent over TCP to the python program which will be listening on a port for HTML commands. The webpage will refresh every 5 seconds to ensure that no conflict occurs and will not write to the XML file directly.
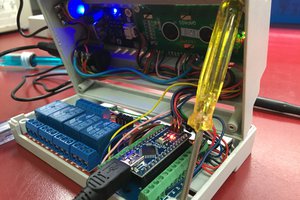
The Pi will also act as a TCP server to receive messages from ESP8266s around the house with thermometers and connected to one will be an arduino pro mini which will control stepper motors to control the upstairs/downstairs zones.
Another ESP8266/Arduino with 433mhz module will be outside the house on the oil tank with an ultrasonic sensor to measure the level of the tank.
Modes
"Off" - this will turn the heating system off, turning off all relays.
"Automatic/Constant" - Automatic mode will control the zones according to set temperatures received from various ESP8266s around the house, while Constant will turn everything on and allow the burner to work constantly only turning itself off when the water temperature/pressure has been reached.
"Timed" - this enables a timed mode, first displaying a screen with a series of blocks of 15 minute slots starting at 00:00 and ending with 23:45. Each slot can be highlighted and when ok is clicked, the blocks are saved to a variable and in a json file in a series of True/False values. When the time reaches a key time (eg 00:15) it checks the variable and if its true and the relay pin is false it enables the Relay and vise versa.
"Boost/Timer" - This allows a quick boost in 30 minute intervals (eg pressing 3 times will add 90 minutes). The button display will change to a countdown or perhaps show a countdown below the button in plain text. Pressing any other button other than "Downstairs" or "Upstairs" will reset the timer and enable that mode.
"Upstairs" - This sends the TCP message "upstairs" and a 1 or 0 to indicate on or off, to an ESP8266 to enable the "Upstairs" zone. This then turns a pin High which is read by an Arduino pro mini. The arduino enables a transistor to allow 12v power to flow to a stepper motor and then issues the steps to a stepper controller. The stepper controller will turn a 12v stepper motor 90 degrees, turning on/off a butterfly valve which is at the base of the pipe that is fed to the radiators upstairs. The ESP8266 will wait until the arduino turns a separate pin high before it sends a TCP message back to the Pi to indicate that flow to the zone is now open/closed. In the event of a powerdown the arduino writes the current position to eeprom once completed and writes a pin High/Low to indicate if that zone is active. When booting up the ESP8266 reads this pin which changes a boolean to True/False. When a "Status" TCP message is received from the Pi it sends back the current zone status.
"Downstairs" - This sends a TCP message to the same ESP8266 as in the "Upstairs" command, except the message is "downstairs" which turns a different pin on the ESP8266 to High and waits for a different pin to go High.
When the main project is finished I'm hoping to install a few other ESP8266s on radiators in key rooms which will control a stepper to turn the thermostatic valve on each radiator when it reaches a given temperature. The temperature will be set by a rotary encoder and displayed on an LCD screen at each ESP8266. Each of these ESP8266s will report back to the Pi and will be sent Enable/Disable values according to the status of the timer.
At the moment powering each of the ESP8266s is an issue as each radiator may not be close to a power socket. One option I am currently...
Read more »


 Craig Hissett
 Guy Dupont
 Will
Will
Great project Colin, I need to start doing more Pi projects :)