 shane kirkbride
-
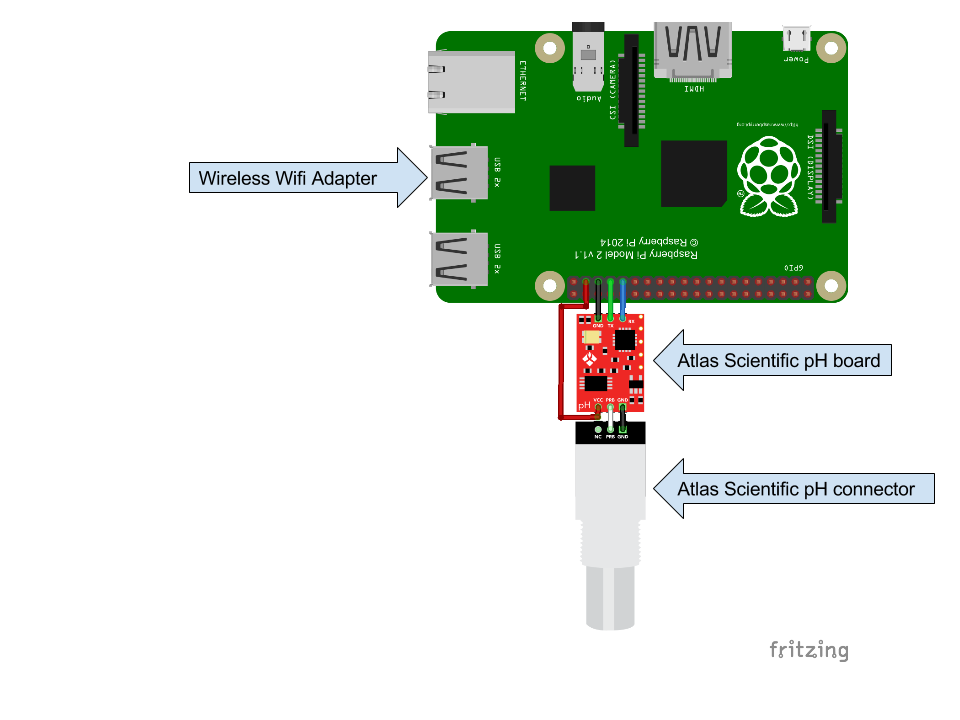
1Step 1
Step 1: Connect all of the necessary electronics
This is the easiest step. Since I got the Cana Wireless kit all I had to do was connect the wireless USB wifi and my USB-UART adapter to the Raspberry Pi.
![]()
-
2Step 2
Step 2: Configure the Raspberry Pi
Step 2a: Load the operating system
First you need an HDMI card and a keyboard to do the initial configuration. Connect the Raspberry Pi the TV and your keyboard. To configure the Raspberry I used the 8Gb SD card that came with a pre-loaded version of NOOBS. I selected the option to install Raspbian. This took about 20 minutes to install. Once it was installed I configured it to connect to my wifi. With the Rasberry Pi connected to the wifi I could move it off of the TV and connect to it using putty. You can download putty from here:
http://www.chiark.greenend.org.uk/~sgtatham/putty/download.htmlTo connect with putty you first need to find the wifi port you're on. So don't disconnect yet. First do anifconfig
This will show you the Rasberry Pi's IP address. Use this address to log-on to it with putty. My Raspberry Pi's IP address was 192.168.0.40. The putty login screen then looked like this:
The default login for Raspbian is username![]()
piwith the passwordraspberry.![]()
And now you're connected. Just a few more steps.
Step 2b: Generate the SSH KEY
Generating the ssh key for the raspberry pi was extremely simple...here's how I did it. If you're starting from scratch you probably don't have an ssh key set up. Here's how you generate one.
ssh-keygen -t rsa -C "Raspberry Pi 0 Key"This might take a second to generate. Just press enter twice. You can add a password to give yourself extra protection but for this project I'm not to worried if someone takes my pH data so I just skipped it.
Now you need to print out the ssh key:
cat ~/.ssh/id_rsa.pubI use bitbucket so I just went to my settings and added another SSH Key to my bitbucket account.
Step 2c: Connect to bitbucket and download the repo
Again very simple. Here's how it's done.
mkdir /path/to/your/project
cd /path/to/your/project
git init
git remote add origin ssh://git@bitbucket.org:vivaplanet/ras-pherry.git
This will download the files that atlas scientific provided with some modifications I've made. I'll walk through how this code works in a different section but this is all you need to get going.
-
3Step 3
Step 3: Upload Data to the cloud
Step 3a: Initialize the python code
I recommend running this in the background. This is what the '&' does. Type this command:
python saveFile.py &Then this commandpython postData.py &Step 3b: Visit the data portal
go to:
Ras-pHerry: Wireless pH IoT Device
This small project demonstrates how a Rasberry Pi and an Atlas Scientific pH sensor upload measurements to the Microsoft Azure cloud.


Discussions
Become a Hackaday.io Member
Create an account to leave a comment. Already have an account? Log In.