 deʃhipu
-
1Step 1
Get the PCB from https://oshpark.com/shared_projects/JQpvX13E
You can also take the Fritzing file from the repository, generate Gerber files and order it somewhere else, or even make the PCB yourself.
-
2Step 2
Apply the solder paste, place the ATtiny85, capacitor and the accelerometer, and heat carefully with a heat gun or a reflow oven.
-
3Step 3
Solder the servo plugs and the power plug normally.
-
4Step 4
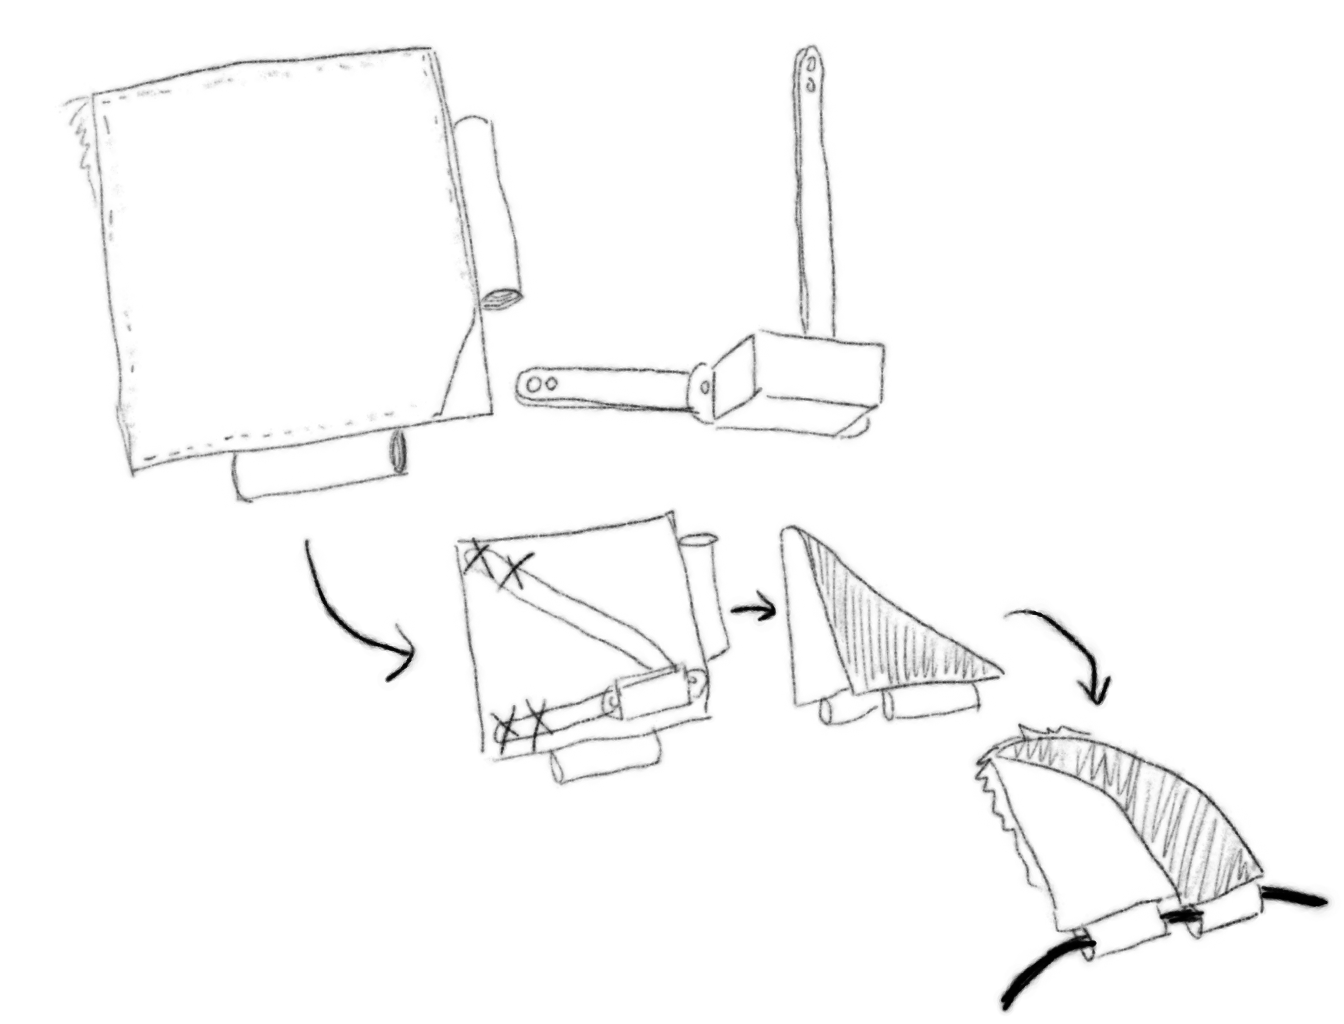
Attach the horns to the servos using screws and glue, and put them inside the ears according to this diagram:
![]()
-
5Step 5
Program the ATtiny85 using a programming clip and an ISP programmer. The code is at: https://bitbucket.org/thesheep/ears/src and you can either use the Arduino IDE to flash ears.ino, or enter the "main" directory and run "make flash".
-
6Step 6
Connect the servos and the battery, and tape the PCB at the top of the headband.
Discussions
Become a Hackaday.io Member
Create an account to leave a comment. Already have an account? Log In.