Close
0%
0%

The ZStation: an 8 bit game console

This little project is part of a series of consoles im making

Public Chat
Similar projects worth following
Hello everyone! This little guy is a Z80 powered game console, inspired by the PlayStation (even though it looks nothing like one). My goal with this is to have it be a low cost 8bit game console that is capable of running decent games at good performance. Here are the specs:

Z80 CPU clocked at 8MHz
32 KB of SRAM
32 KB Boot ROM
GPU and DSP and IO handled by an ATMEGA1284 microcontroller
Games come in the form of cartridges, uses SPI and supports up to 4GB
Ports for 2 controllers that can dual purpose as debug ports

System Architecture:

This device will operate mainly on the Z80, with an ATMEGA1284 microcontroller as a coprocessor to handle graphics, audio, and IO. Both chips are connected through an IO bus where the CPU uploads data to the MCU to do it's thing. The ROM cartridges use SPI flash and use a 3.3v supply, so are attached to the MCU through a level shifter.

CPU:

The CPU is a standard Z80 running at 8 MHz.

GPU:

The graphics are handled by an ATMEGA1284 microcontroller which uses the TVout library, and will run at 30FPS (or somewhere close to it). The GPU runs at a resolution of 120 x 96. It will support 8x8 tiles, and will have 16 KB of VRAM and uses monochrome.

The GPU operates by first reading a Command Stack, which tells the GPU what to do, such as configuring hardware settings, doing tile copies, sprites, ETC. When it does a tile copy, the tile is saved in the VRAM until it is told to delete the tile. Sprites are stored in  as sprite table, which is modified by the CPU.

DSP:

The DSP is still a work in progress, so this section will be updated when I have a working design in mind.

  • Another overdue update

    FloppidyDingo05/06/2021 at 04:32 0 comments

    Hello everyone, it's time for another update!

    I have fixed the majority of bus timing issues with the Z80 and the AVR. There are still a couple little bugs that caused failed boots, but i have managed to get text on the screen! I am also going to be redoing the case as the one i made broke.

    What's next for this project is to make a simple ROM monitor to load programs into RAM, and to write a few programs for it for testing! I also will need to write AVR code for processing sound and reading from / writing to the cartridges. Once I am sure everything works as it should I will publish all the designs and code for everyone to use.

  • I'm not dead

    FloppidyDingo07/03/2018 at 22:57 0 comments

    And i have a working system. You may have noticed i completely redid the project page. Well i kinda gave up on making it portable and made a table top version instead. Because of that i had to ditch color so it can only do black and white but that's fine! Despite this the system still gets warm so i put a fan on the top. The hardware is working so i just need to write a software renderer for the GPU and write an OS for the system to run. Then i need to write firmware for the controllers and make a game.

  • Long Overdue Update

    FloppidyDingo10/26/2017 at 23:35 0 comments

    Hello everyone! It's time for a long overdue update. The first boards for some reason wouldn't allow me to program the STM32 chip through UART. I'm not sure why so I just redesigned the board entirely. Now the STM32 is programmed through USB, plus I added more RAM and improved the power supply. The components are here now I'm just waiting on the boards to arrive.

    While I'm waiting, I've been writing the firmware for the console. It's going to be running a lightweight multitasking operating system called Walls that I've been making and it's specifically designed to be for game consoles. It has a light overhead and only provides a way to run multiple tasks at once, along with providing interfaces for loading files and driver access. This will be the operating system I will use for all of my game consoles and only provides the bare essentials. If you want features like a GUI or a file browser or even security, those can be added. It is nowhere near complete, but code will be available when I do finish it.

  • Nearing Completion!

    FloppidyDingo03/06/2017 at 01:00 0 comments

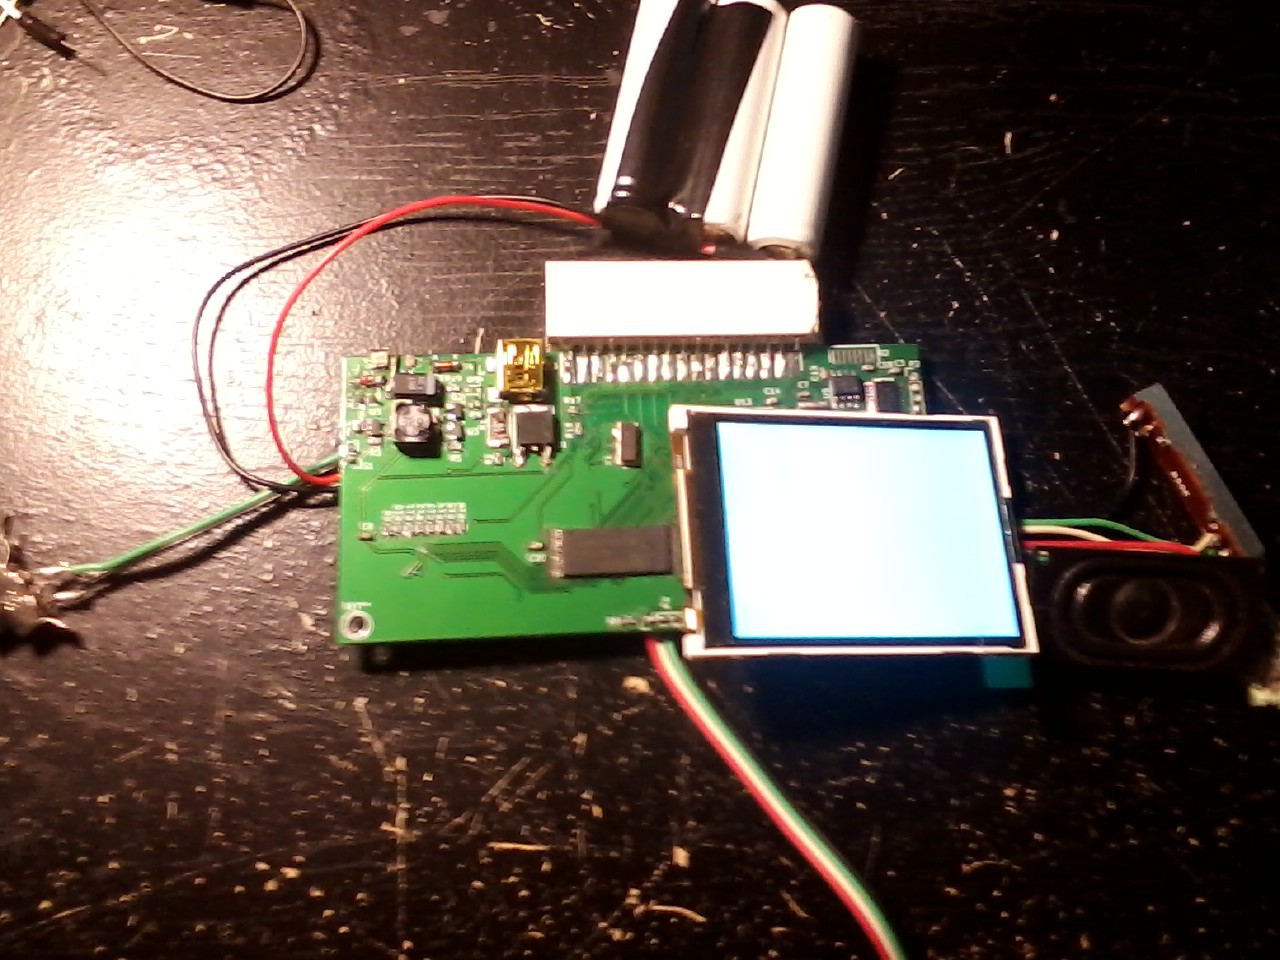
    Three boards and several hours of work and debugging, and the console is now ready to be programmed! The controls are still missing, but this is the board so far:

    It doesn't do anything yet, and I'm still writing the video core and ROM loader for the STM32 chip. Once that's done I can start writing the BIOS for the Z180 to run! Then I'll order cartridges and start writing games!

    There are some design flaws though that can be ignored at the moment:

    - The LCD connector is backwards, so the LCD had to be arranged so it's not centered on the board like I wanted it to

    - The IRDA connection is also backwards, making me have to put the transceiver chip upside down

    - The low battery indication doesn't work

    - The charge indicator indicates a charged battery way too soon

    - The charger, cartridge slot, and IRDA are too close together

    - IT'S NOT BLUE!!!

  • New design, new hardware

    FloppidyDingo01/03/2017 at 05:57 0 comments

    Thanks to an increased budget, I have been able to improve the specs on this game console by a lot. Now it's something I like a lot and I have the parts ordered and on the way. I also have a development studio in progress so games are easier to make. Everything about this console has been redone and improved, and expect a lot more updates on this since I'm able to finally build it!


    I have found a minor design mistake already, and a pretty embarrasing one too. On the board layout, the IRDA module is BACKWARDS!!! It's a pretty easy fix, I'll just solder the module upside down so the pins are in their correct place and the module isn't facing the wrong way. Still don't know how I managed to do that.

  • Going even more retro

    FloppidyDingo08/12/2016 at 04:57 0 comments

    Because i can't afford color, I decided to make the first version have a monochrome display, and have the Z80 run the video routines. I am using an Attiny85 for the sound chip, configured as an SPI slave. Also, I tried to make a pierce oscillator to clock the system, but i failed at it and used a crystal driver IC. The updated schematics and dev manual will be uploaded soon. There will be a color version. When i can afford it.

  • Emulator Complete, new console design, BIOS template, and dev manual

    FloppidyDingo07/29/2016 at 05:59 0 comments

    The emulator is now complete and fully functional, or at least it looks like it. Grab a copy here and check it out! For the most part it works, there are a few missing/broken features, but those will be fixed eventually. The console also got its final redesign, removing useless parts and making things more cost effective and simpler in design, and using an ARM microcontroller to handle video, and also redid the video capabilities and cleaned up the quite messy memory map i had going. And i designed an LCD controller board, which i uploaded the schematics and gerber files for. I have also made a BIOS template so that people can write their own BIOS files. And then i wrote a developer's manual so people know how to write games/BIOS files for this console. All of the relevant files are available now. The first prototype is almost finished. Also, my prototype is going to be slightly overclocked to 10.5 MHz, since i only have resonators at that frequency.

  • New cartridge design and other updates

    FloppidyDingo07/08/2016 at 23:50 0 comments

    I have redesigned the old cartridge board, which by the way is flawed and might not even work at all due to a goof i did, so yeah revision 1 isn't going to be available until i know if it works or not. But revision 2 uses a CPLD, so it's reprogrammable. YAY! It's also cheaper than the first cartridge (the first one costs $15 per cartridge, the second one costs around $10).

    I've also started working on the BIOS, and i'm writing a programmers manual so people know how to write games for this thing. And then I'm patching up the emulator, which has a few issues on its own. AAAAAND i'm designing a slim version of the console, that's supposed to have longer battery life and is supposed to be lighter and with a few features added.


    I fixed revision 1 of the cartridge, and made a cheaper revision 1.1. aaaaaaand that's about it...

  • Emulator Finished

    FloppidyDingo07/02/2016 at 02:52 0 comments

    I've finished version one of the emulator. For the most part it's working, it's only version one though so there are bound to be bugs. If you want a copy, you can get one at Github

  • Writing an Emulator

    FloppidyDingo04/10/2016 at 23:33 0 comments

    While I slowly work on the hardware, I'll be writing an emulator in Java. This will make it easier to to debug and test games. The emulator will be able to show you numerous things, such as the CPUs status, program counter and register values, the entire memory map, and hopefully where any exceptions occur in realtime. The hardware emulation is complete, I just need to get a working GUI going.

View all 15 project logs

Enjoy this project?

Share

Discussions

james wrote 12/12/2019 at 00:12 point

Curious if this is still being worked on. I had a similar idea and found this as inspiration. Would love to see the work continue!

  Are you sure? yes | no

FloppidyDingo wrote 12/12/2019 at 00:15 point

Don't worry, it's still being worked on. I'm just working out some issues with the voltage regulators and timing issues with the GPU interface. Slowly but surely!

  Are you sure? yes | no

Ivan Kuzmenko wrote 02/28/2016 at 16:26 point

That sounds good! Good luck!

  Are you sure? yes | no

Similar Projects

Does this project spark your interest?

Become a member to follow this project and never miss any updates