 leadacid44
-
1Step 1
![]()
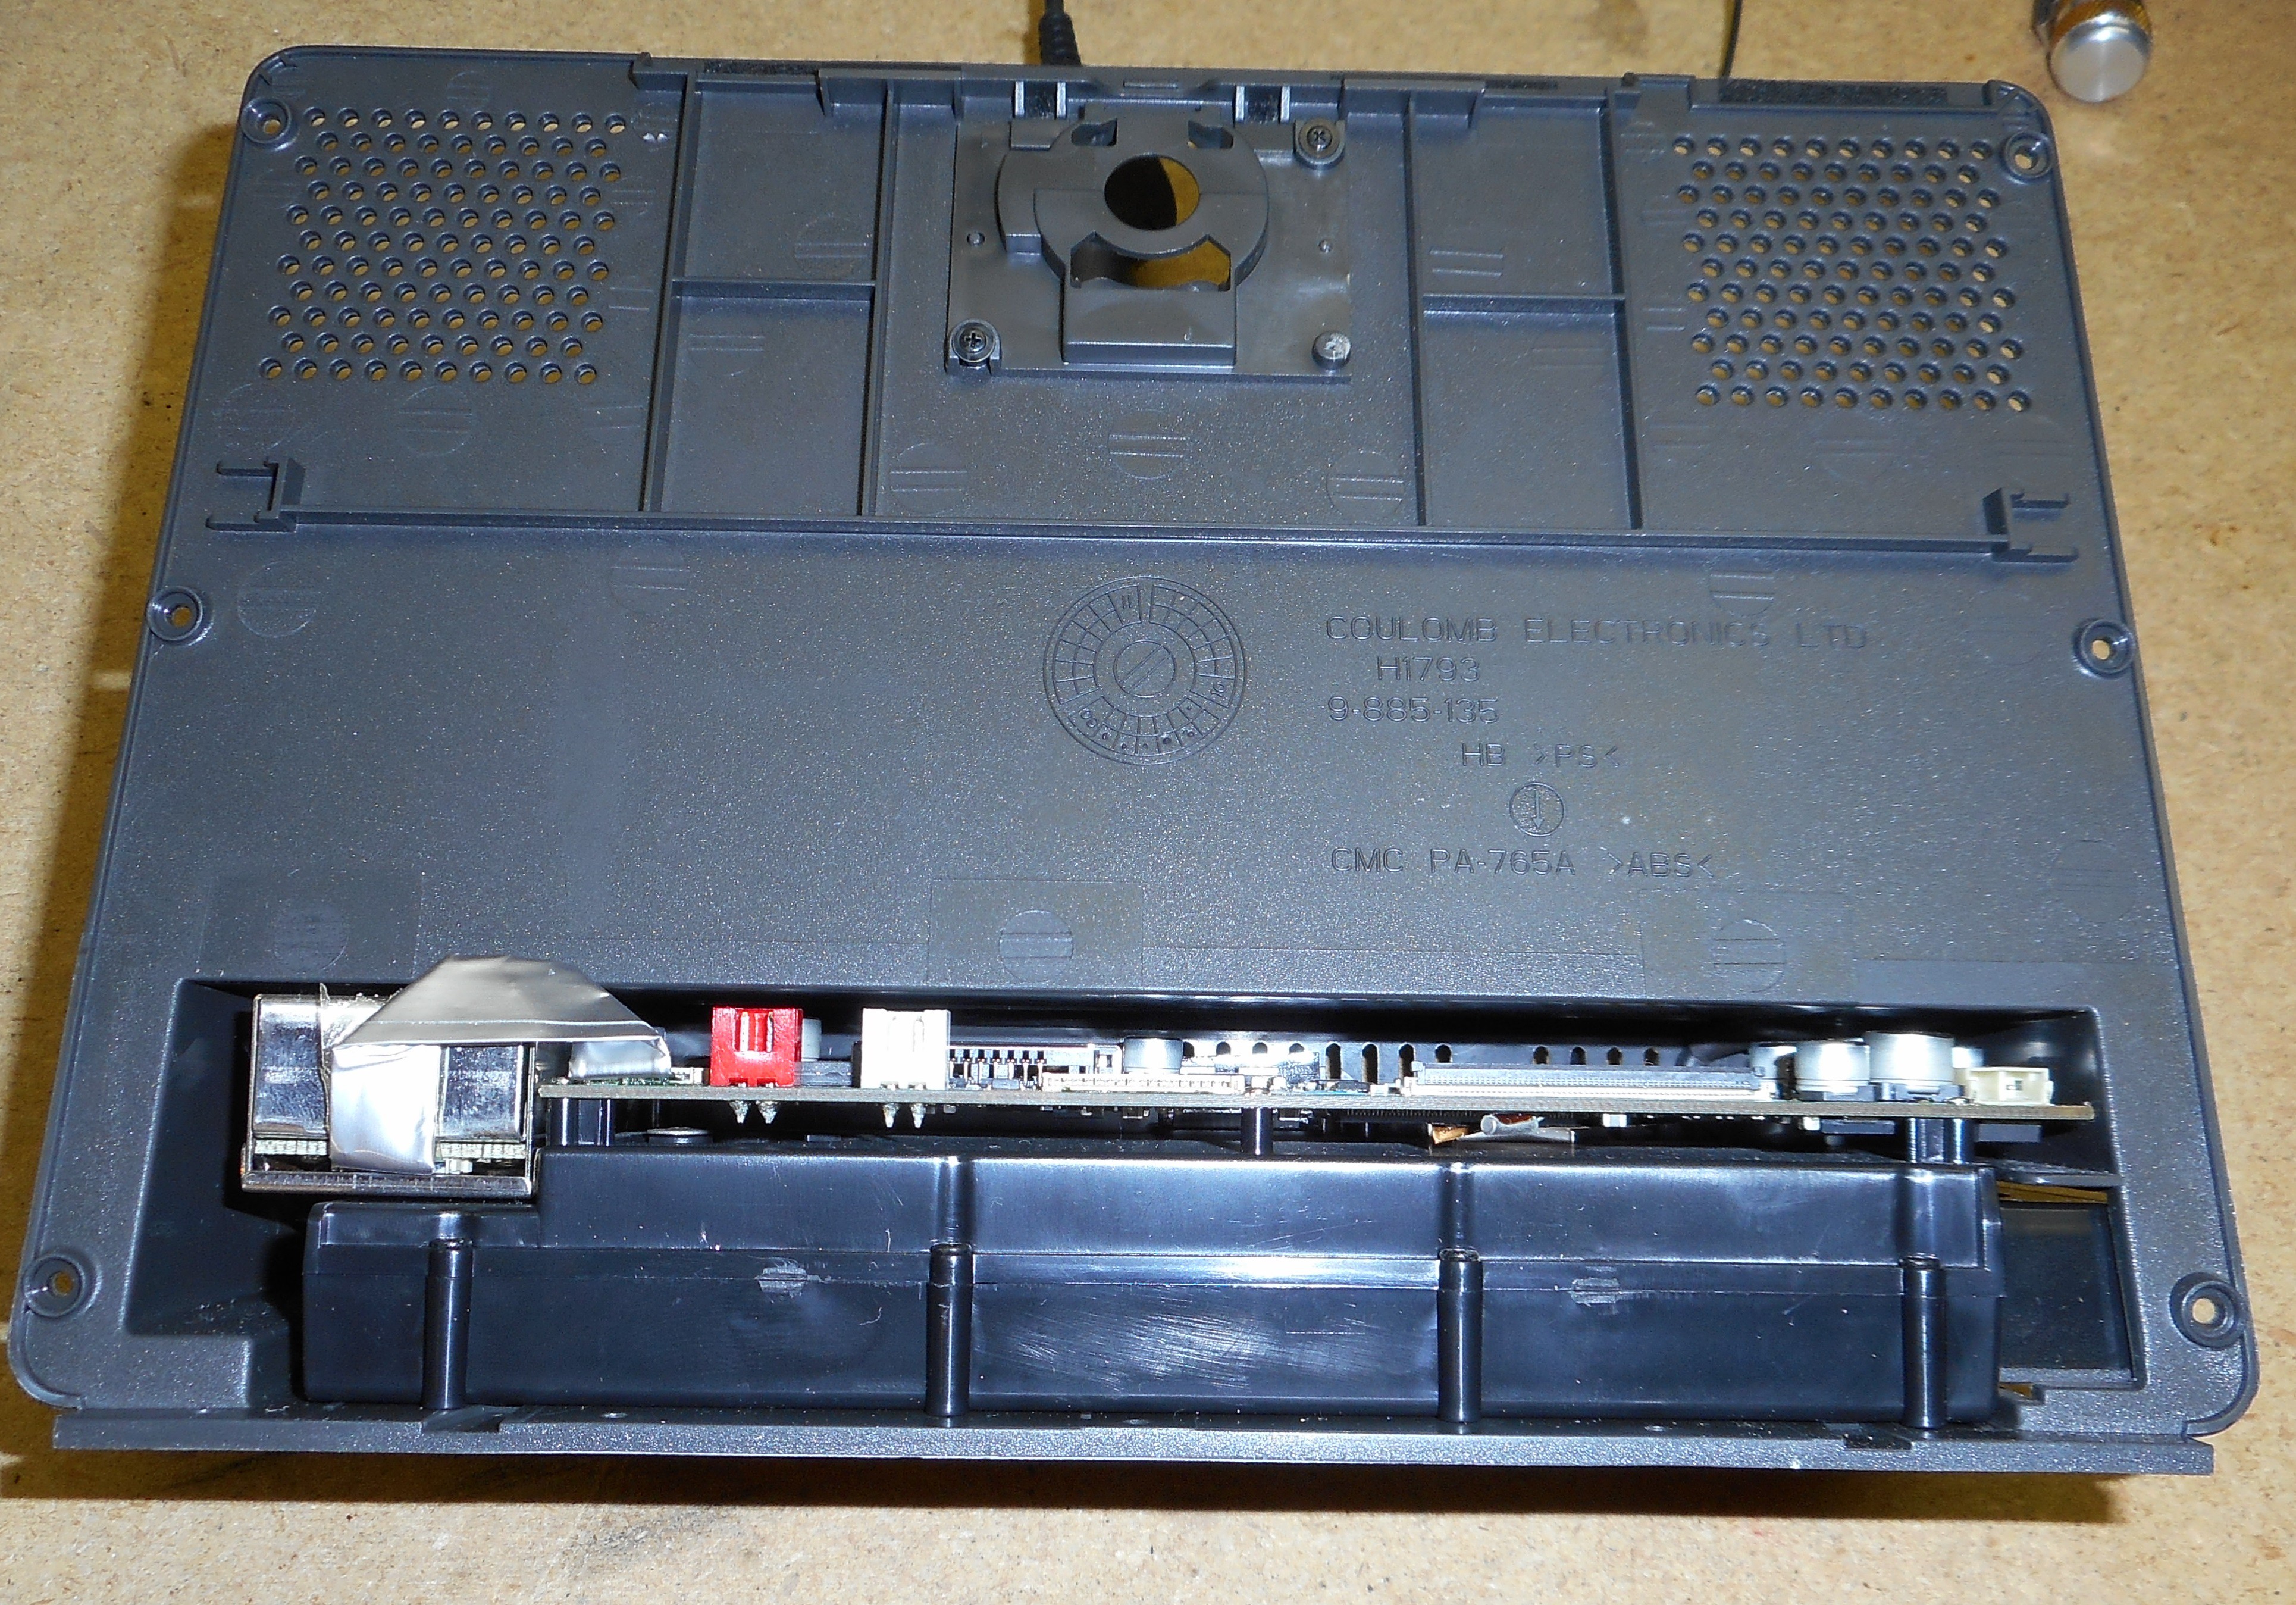
Obviously, the first order of business to repair the clock is to open it up. While looking at the back of the clock, remove the six extremely small black Phillips screws. While you're at it, remove the little door for the backup battery and the battery itself.
![]()
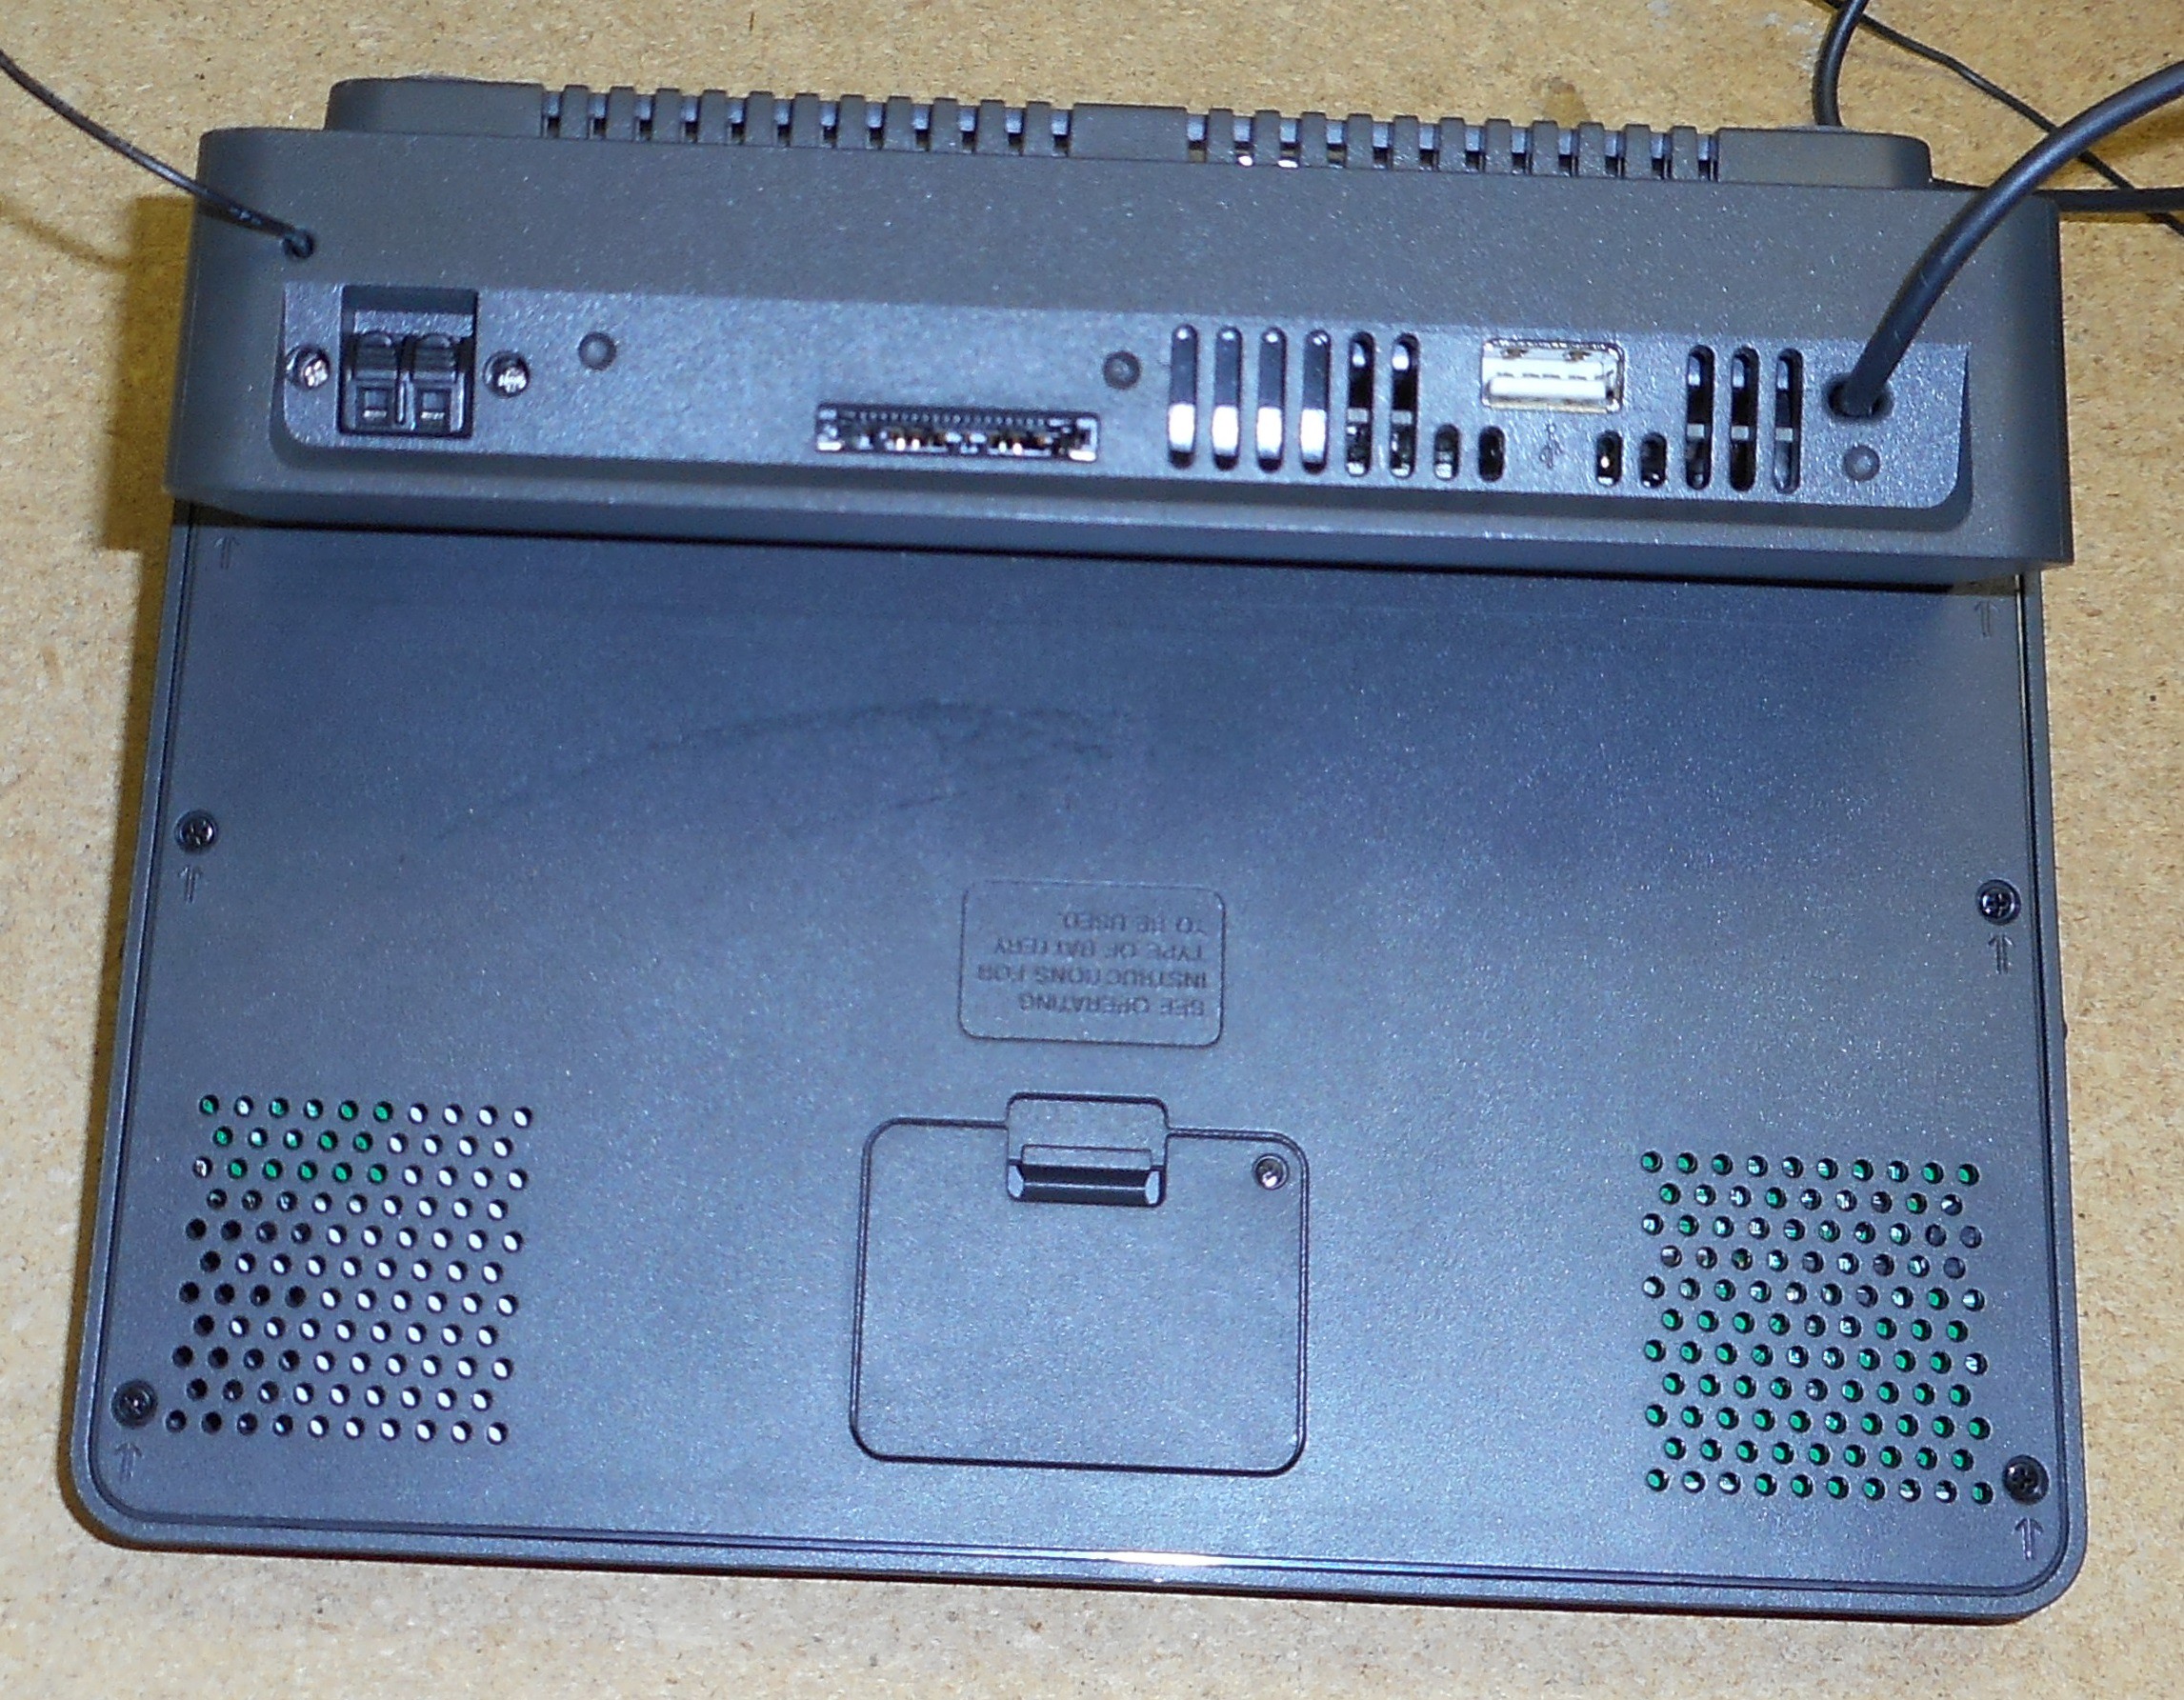
Next, remove the 12 small black Phillips screws from the base of the unit. Don't remove the screws from the iPod tray, or the silver screws from around the AM antenna connector. Once removed, you should be able to pry apart the base of the clock. The top will be stubborn, as there are small catches up there. Be gentle and pry the case apart.
![]()
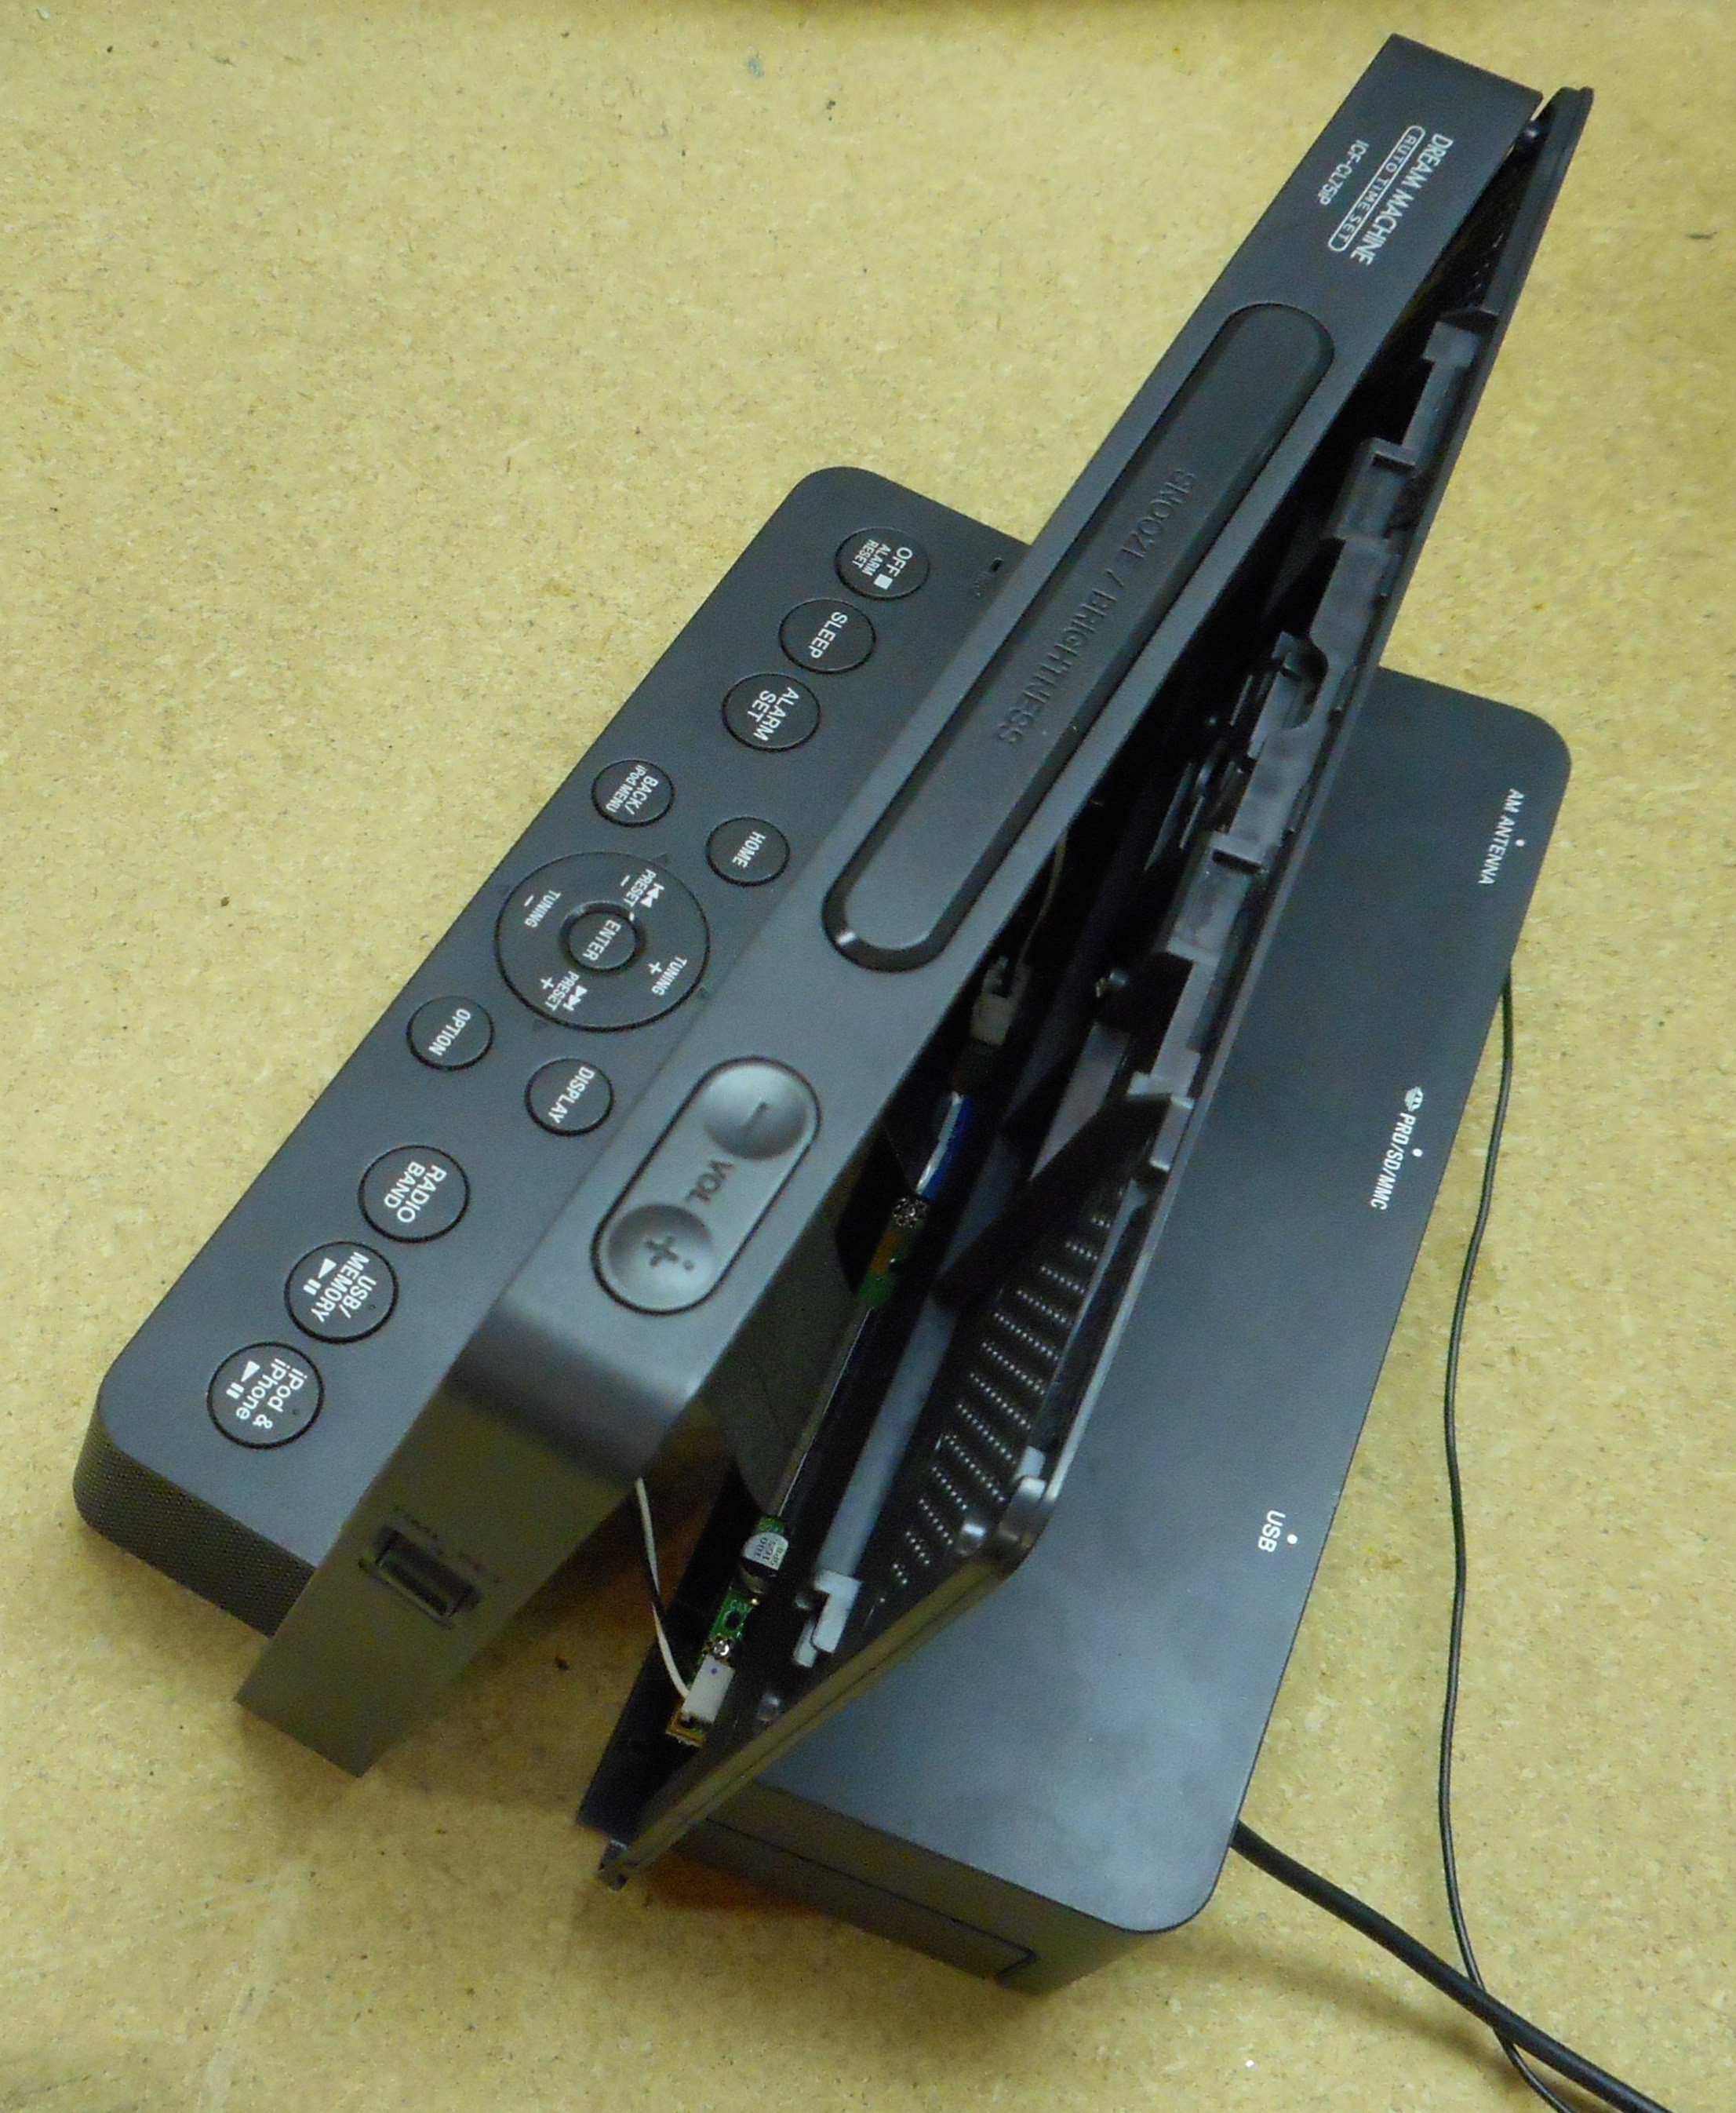
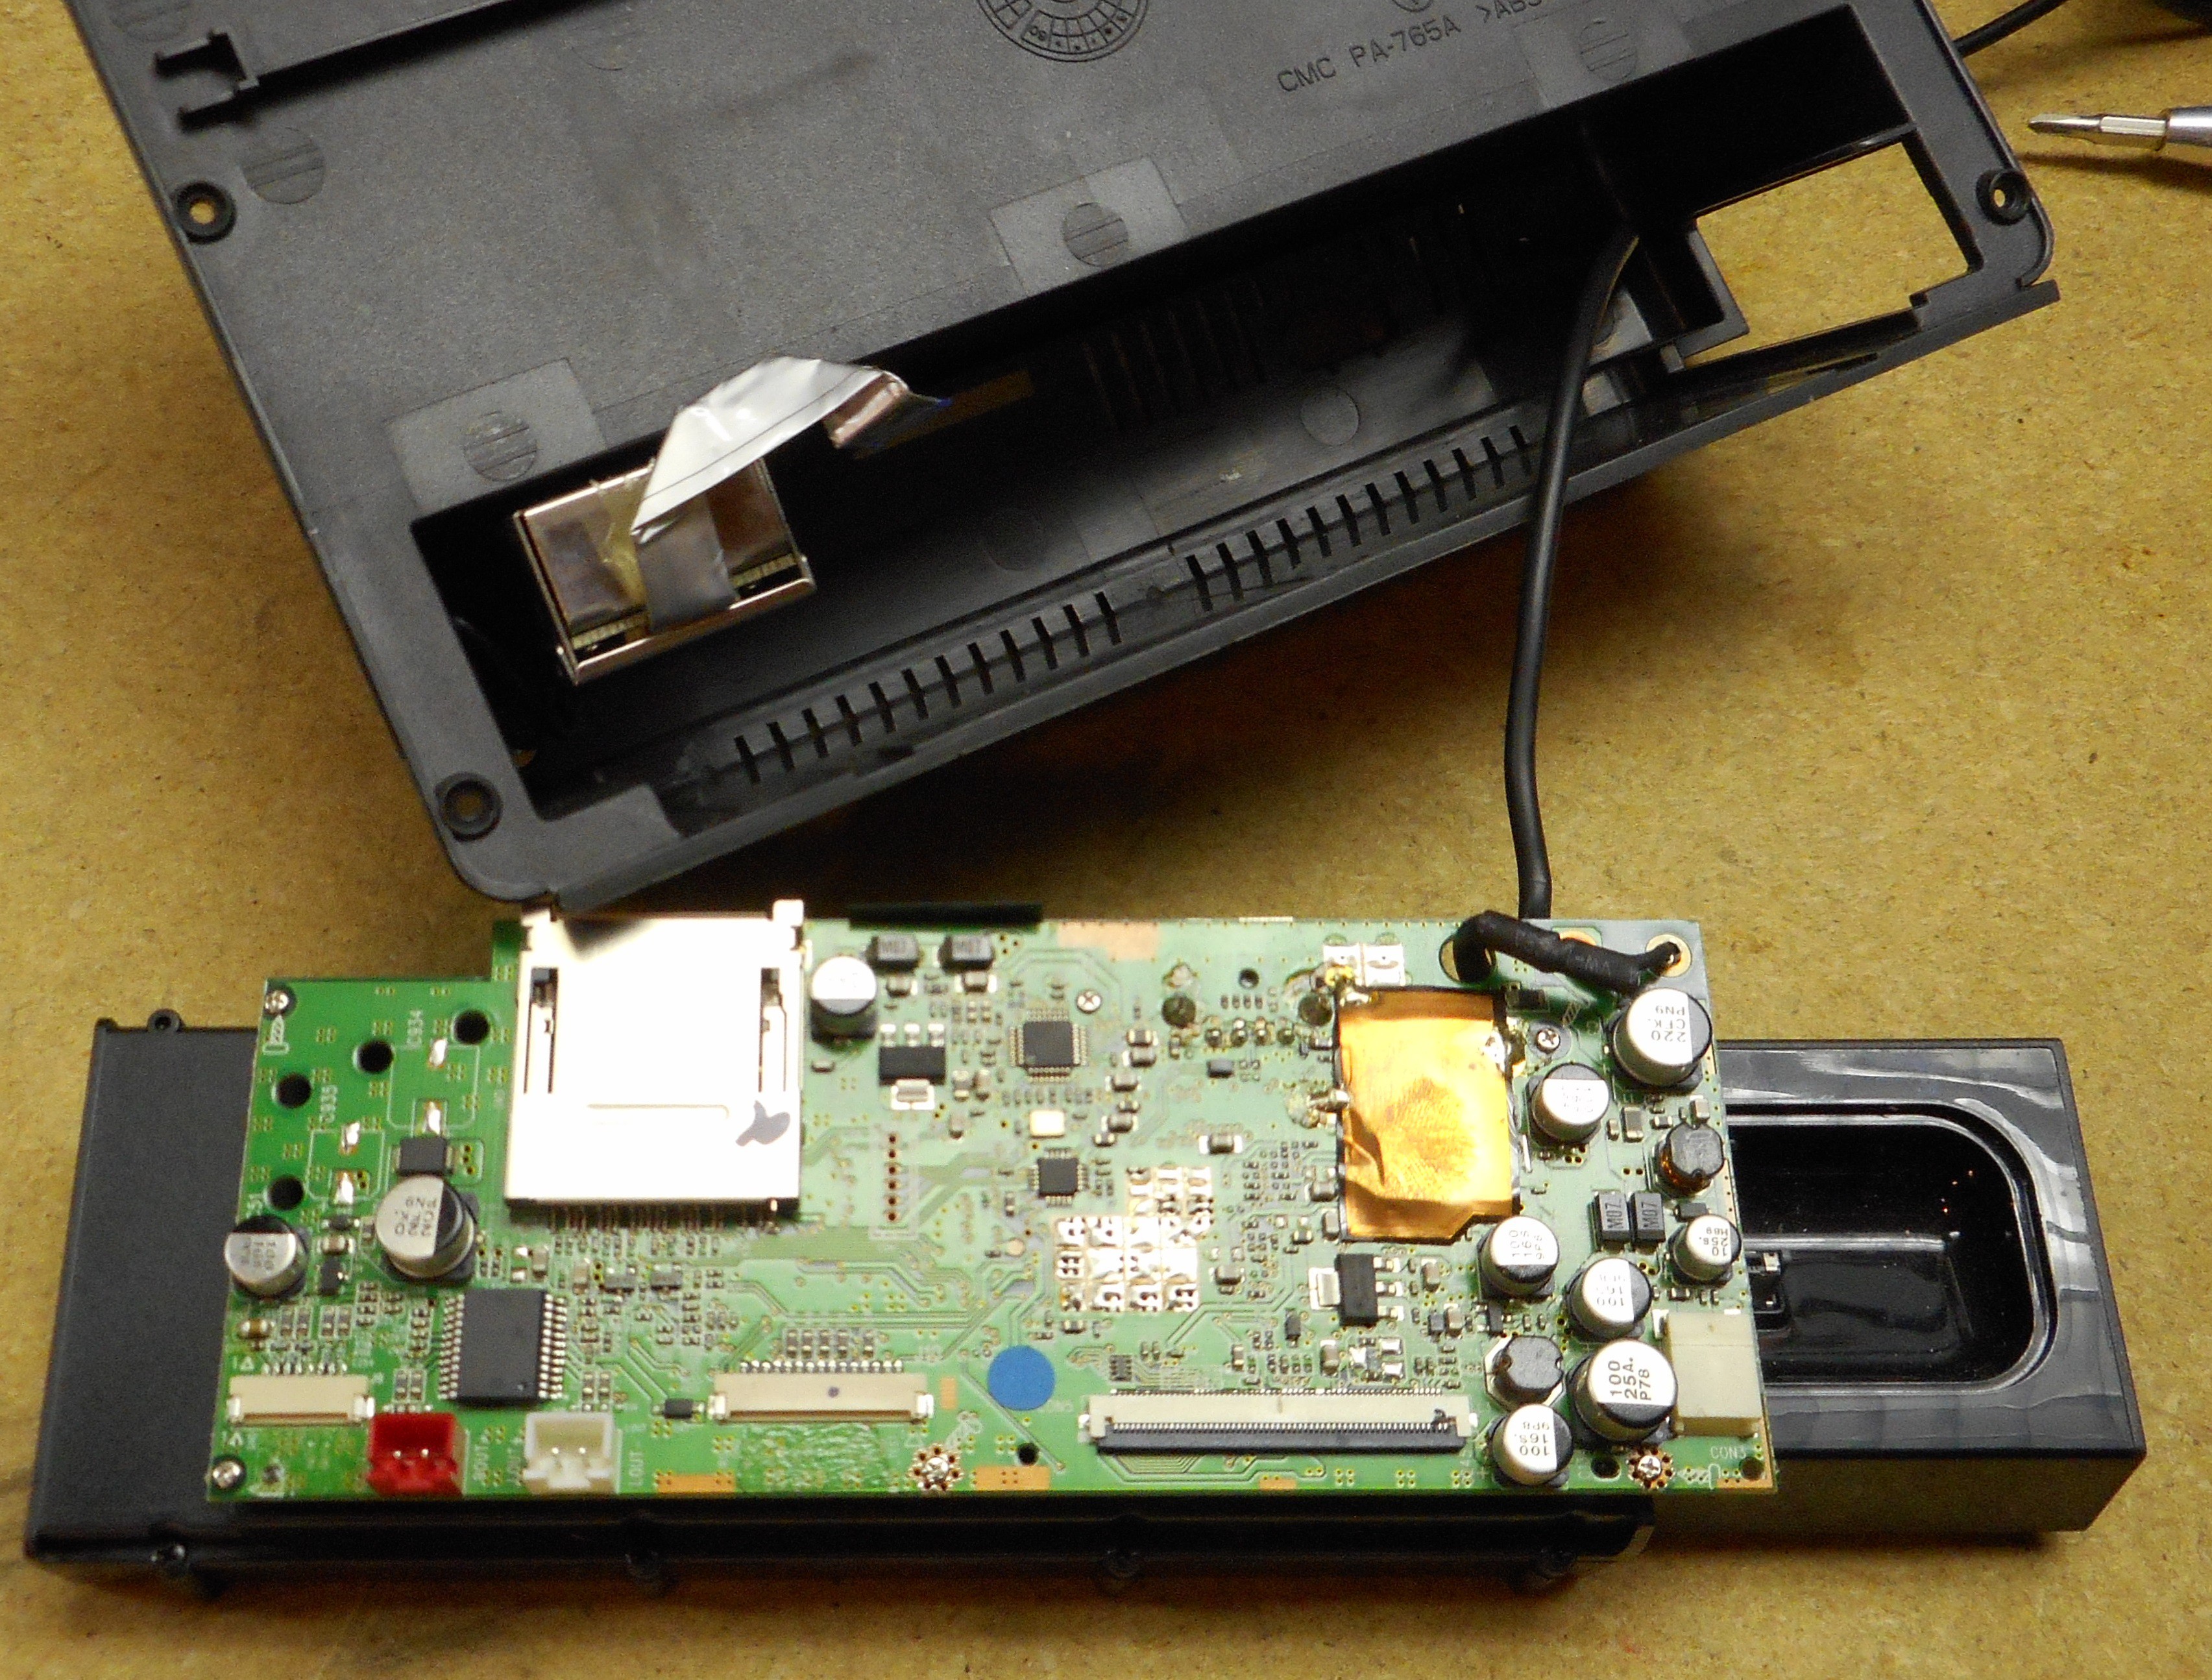
At this point, you can disconnect the front LCD half of the clock from the rear of the clock. Gently unplug the backlight connector, the LCD data cable, the button cable, and the two speaker cables. Place the LCD half in a safe location, we won't need to do any work with it.
![]()
-
2Step 2
Now examine the back half of the clock.
![]()
On the lower left side, you will see the tuner module connected via a silver ribbon cable to the main CPU board. Disconnect that cable from the CPU board.
While pressing the iPod dock tray inwards so that it will clear the side of the case, slowly work the CPU board + iPod dock from the plastic housing. You won't be able to separate it completely from the clock housing because of the power cable, but that's okay. Be sure to feed the power cable along while you remove the part.
![]()
-
3Step 3
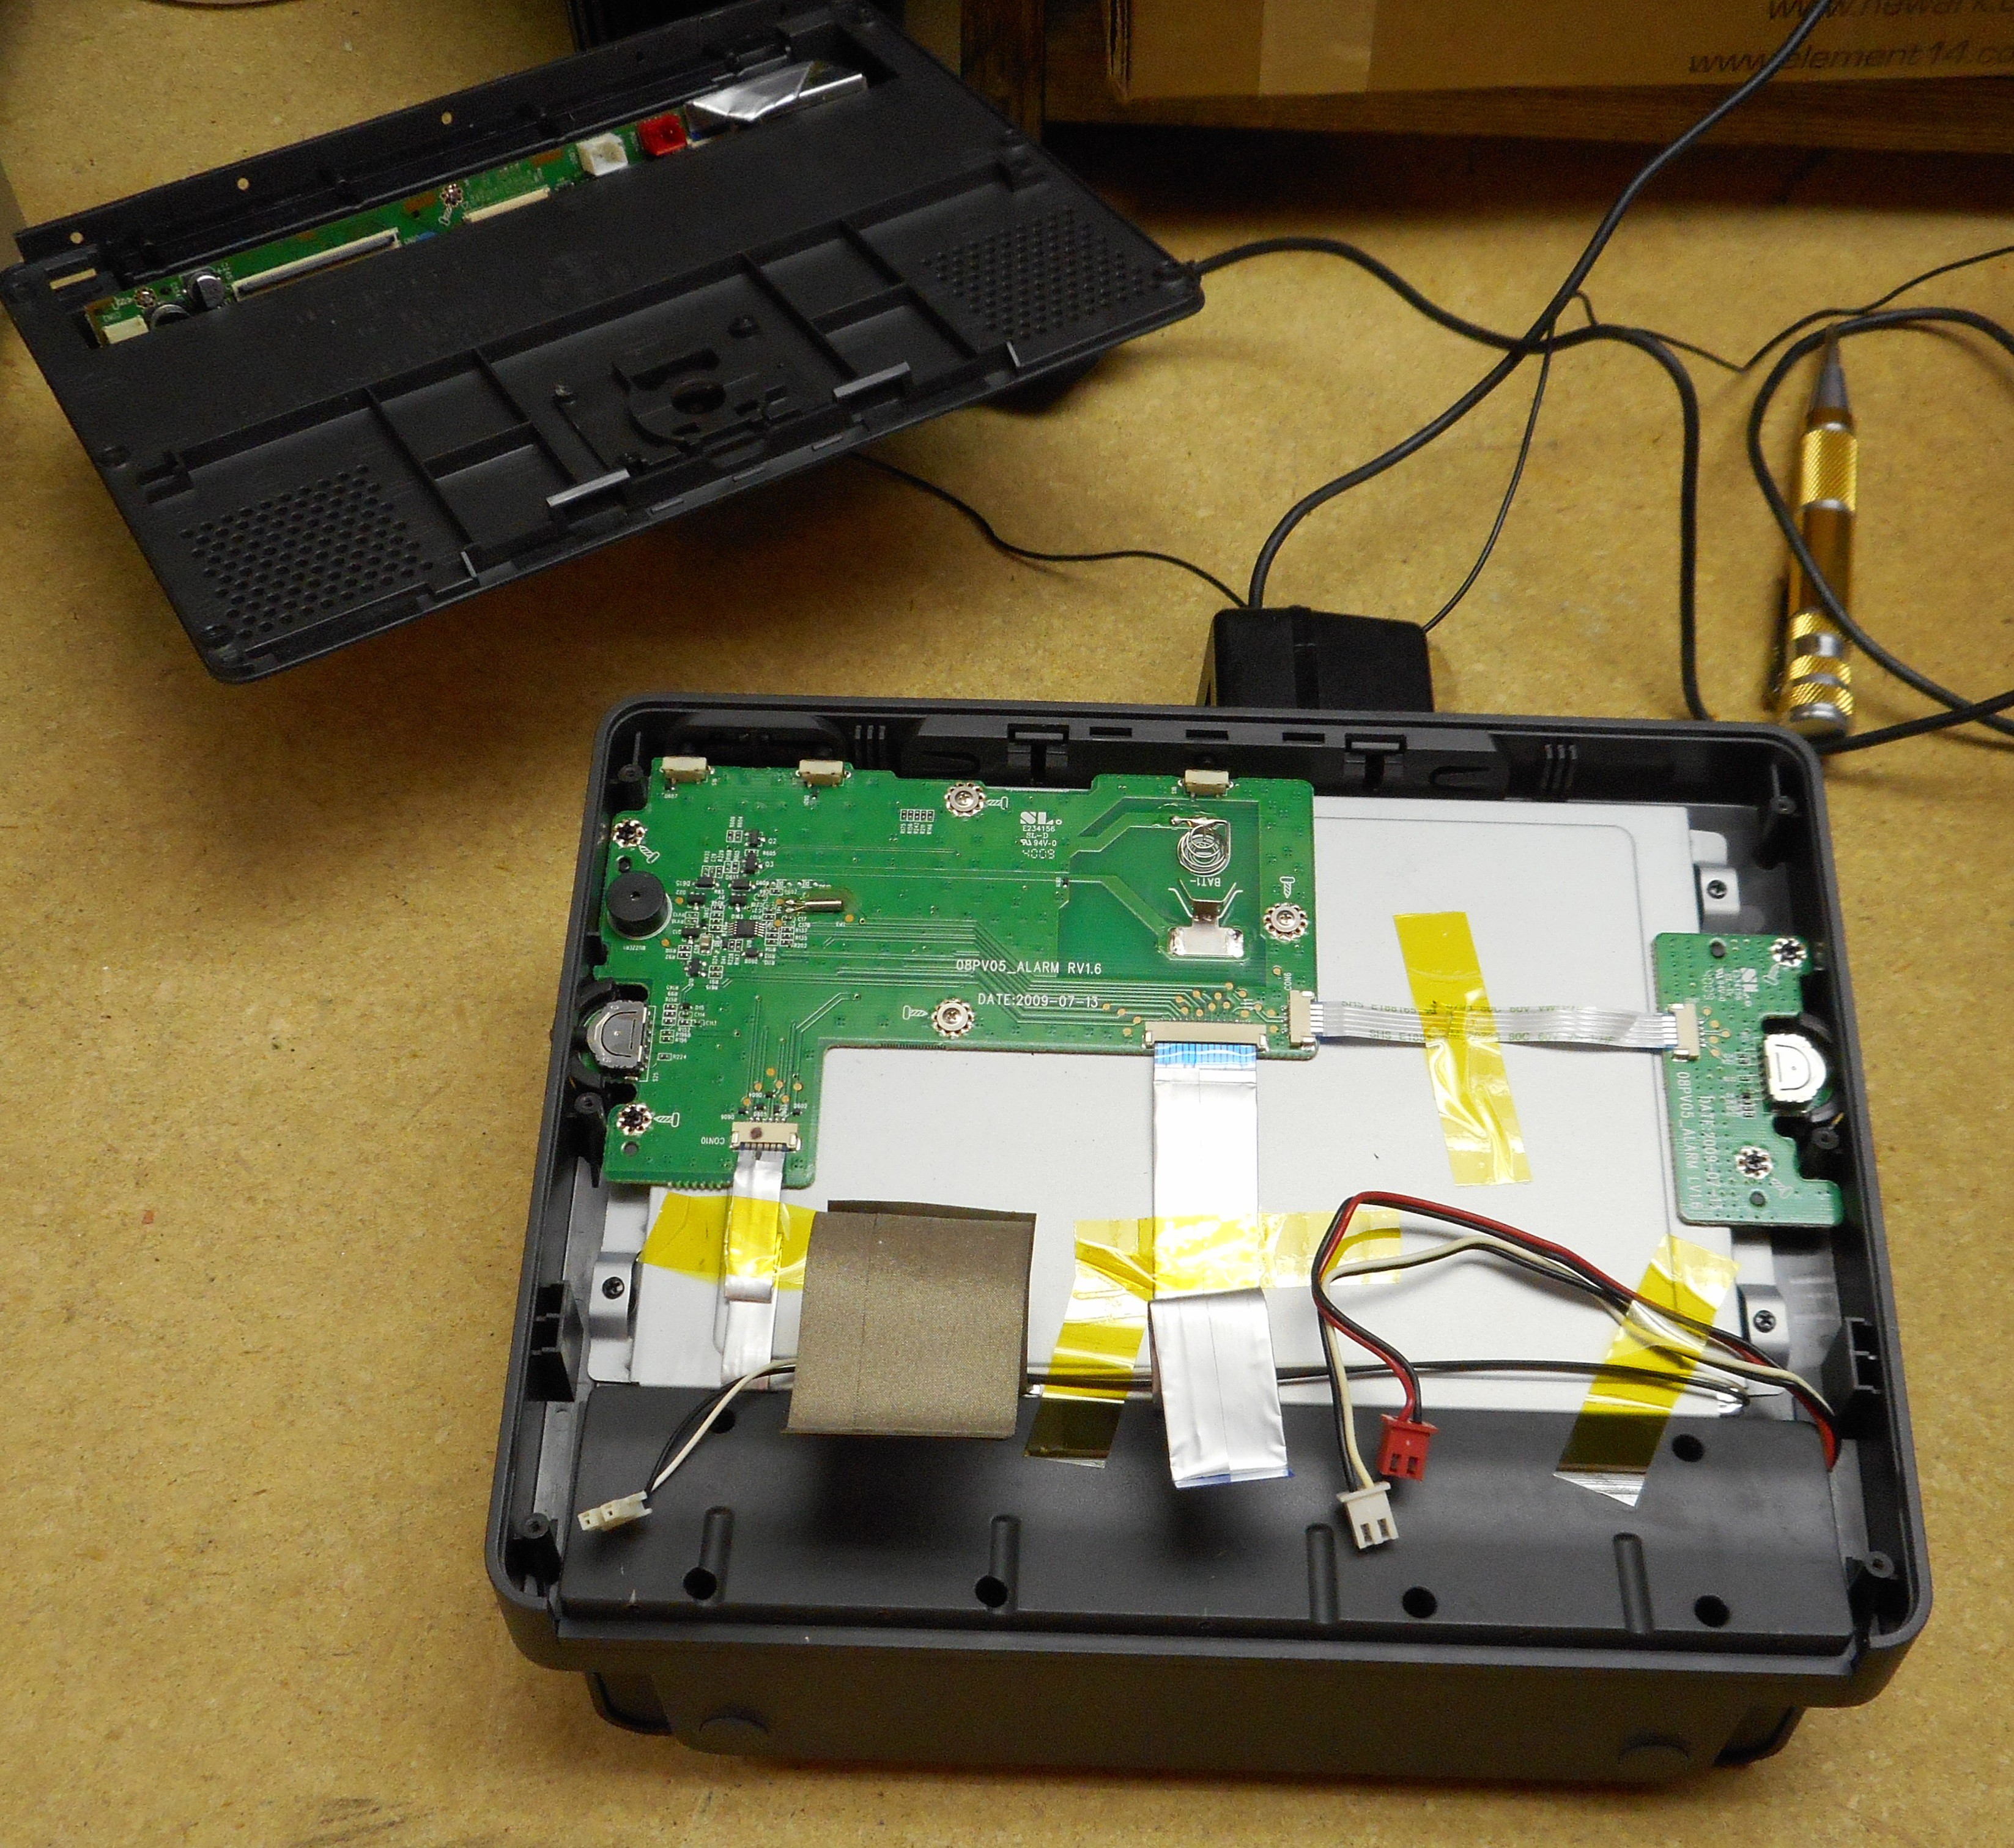
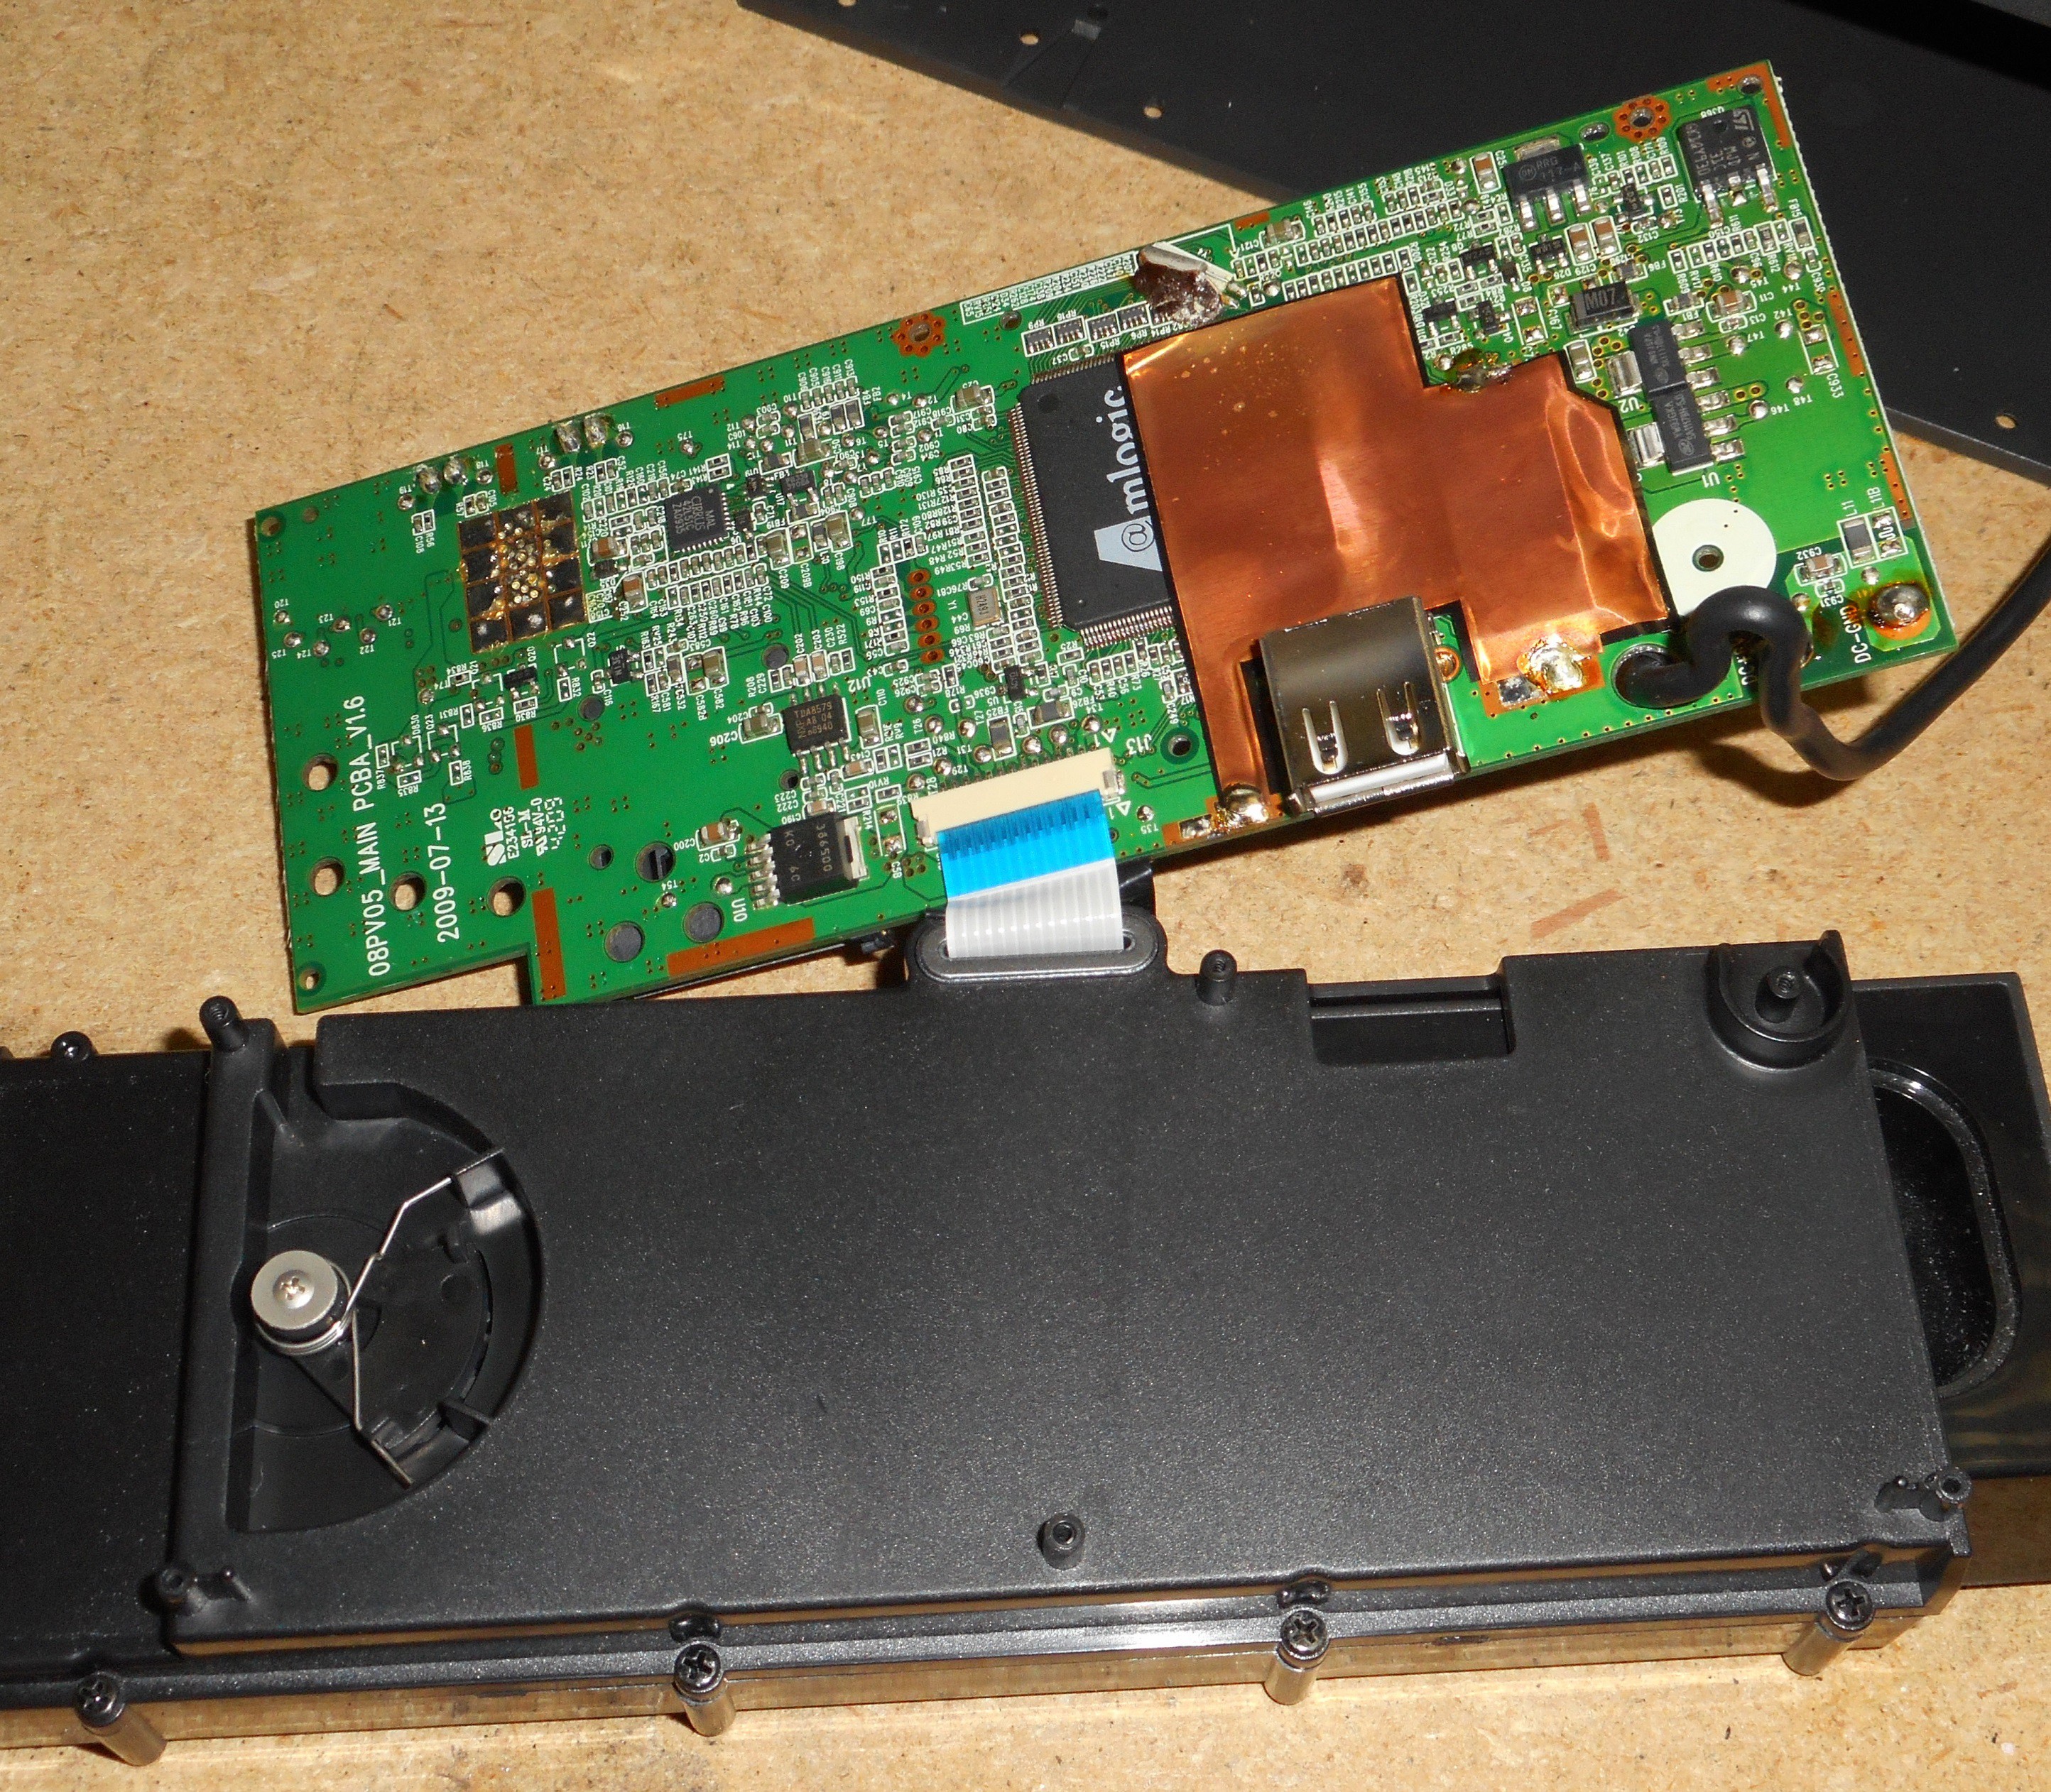
Next, remove the six tiny silver Phillips screws from the CPU board to disconnect it from the iPod dock. Gently lift the CPU board from the plastic dock, being careful to not damage the power cable or its strain relief. If you like, you can disconnect the ribbon cable to separate the board from the dock, but it is unnecessary for this repair.
![]()
-
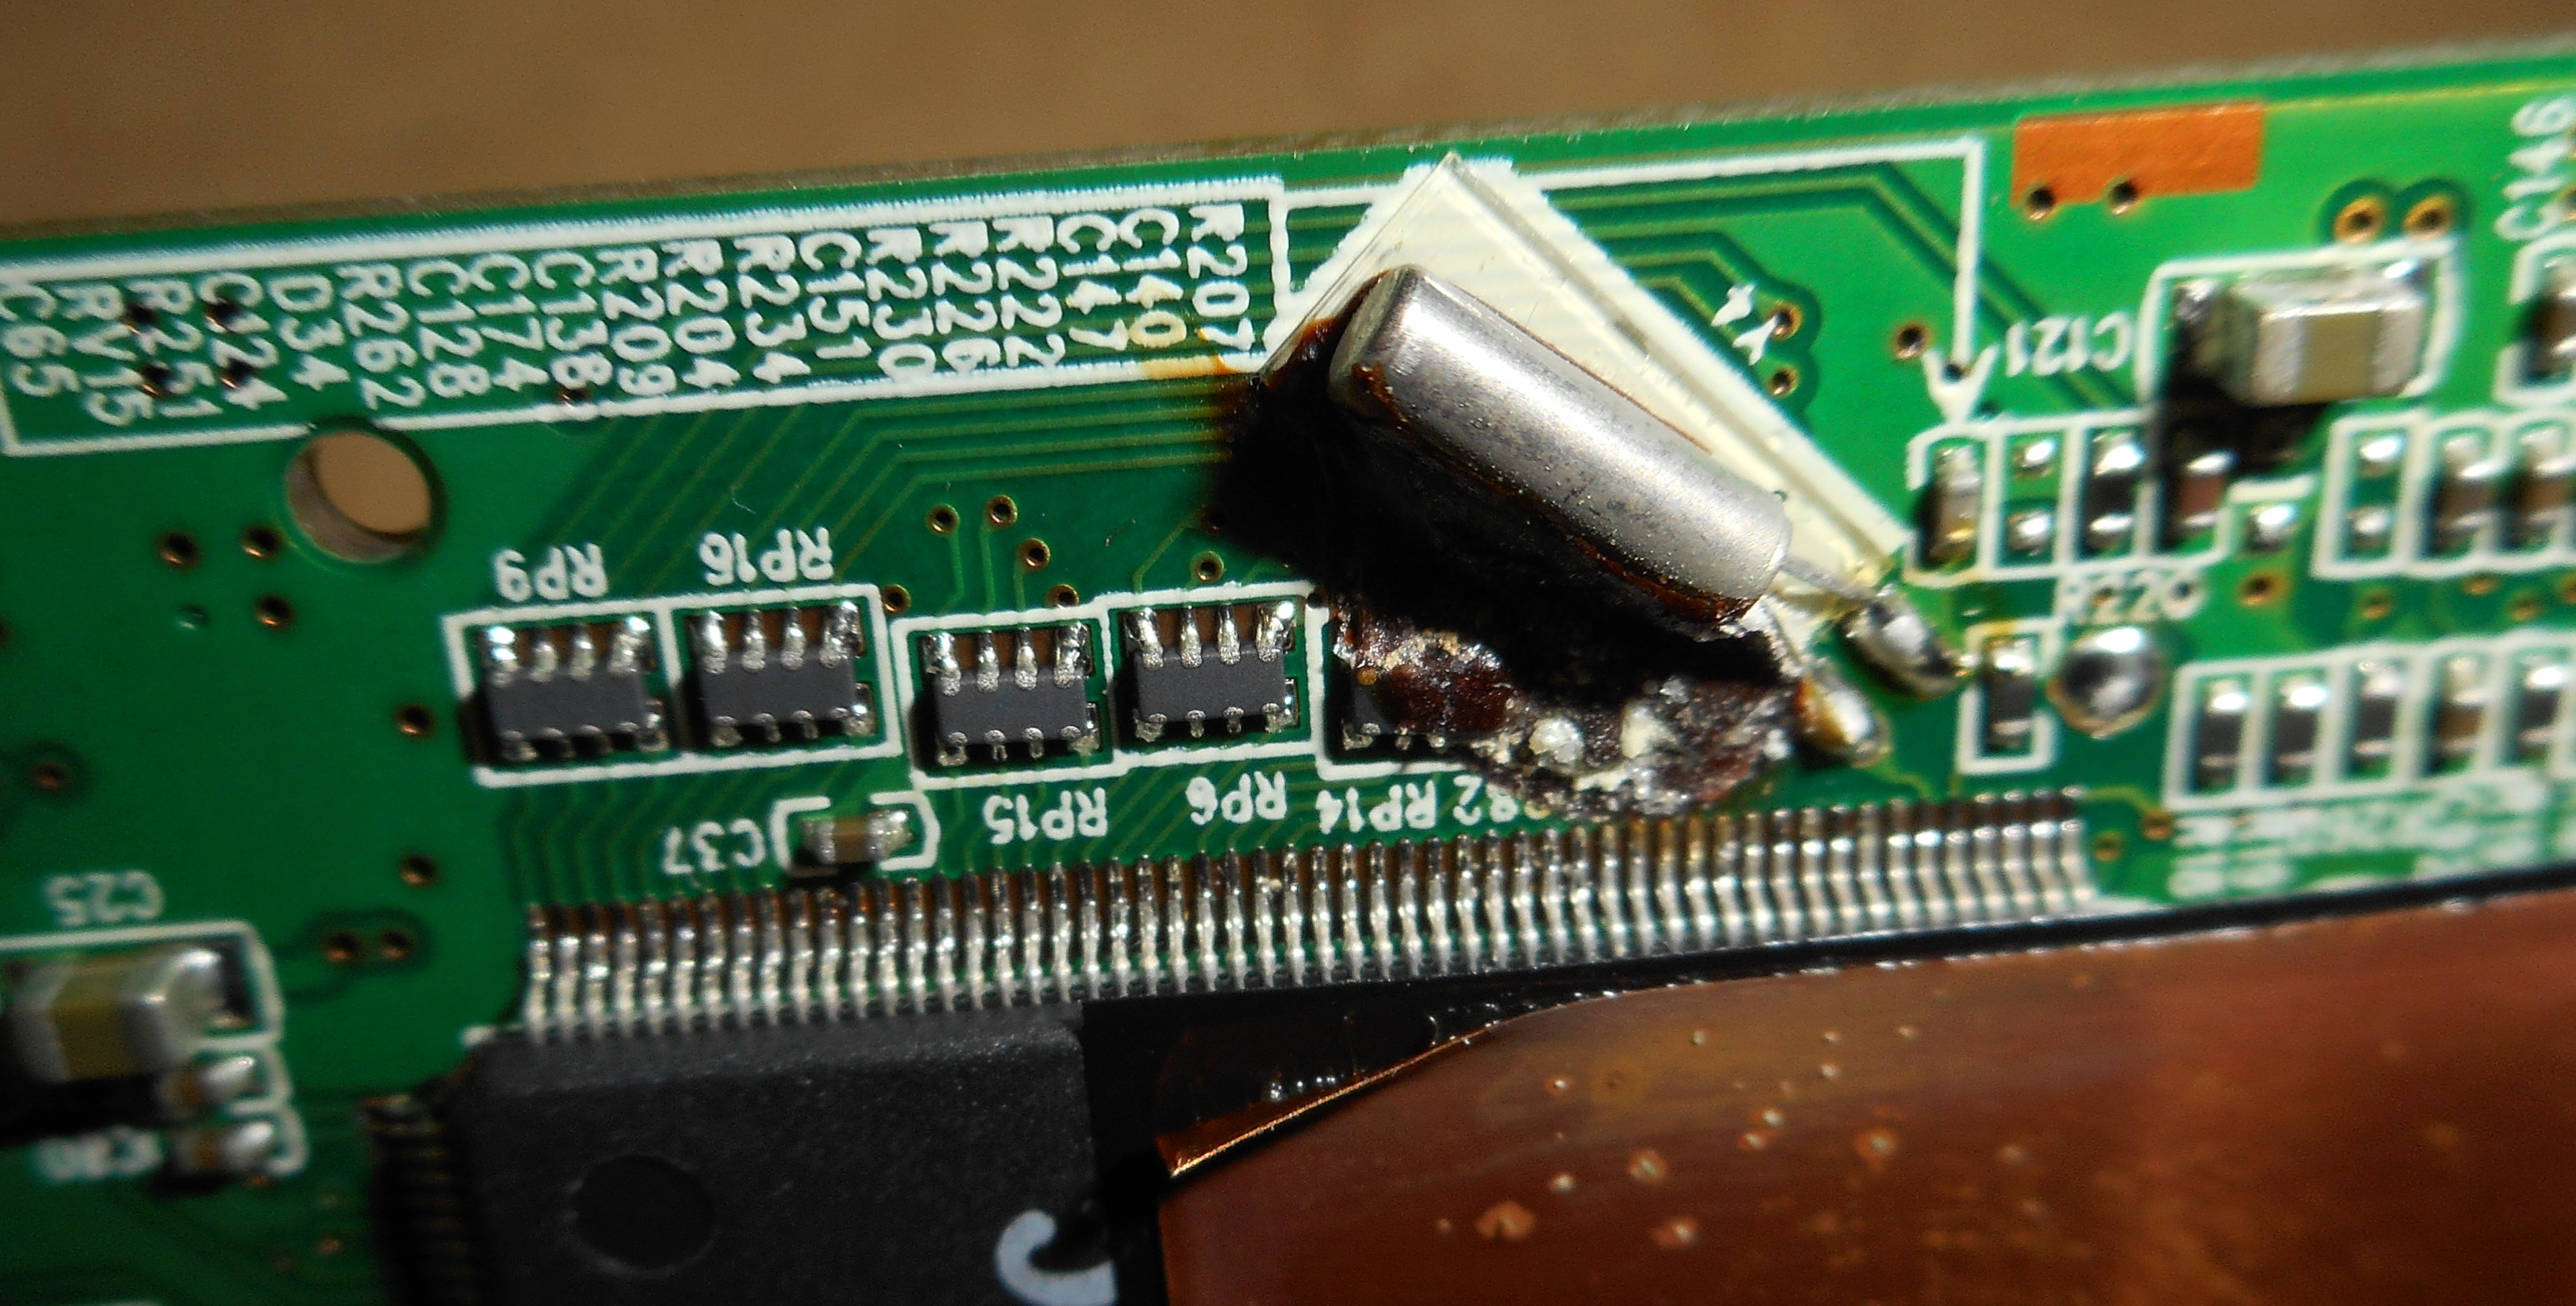
4Step 4
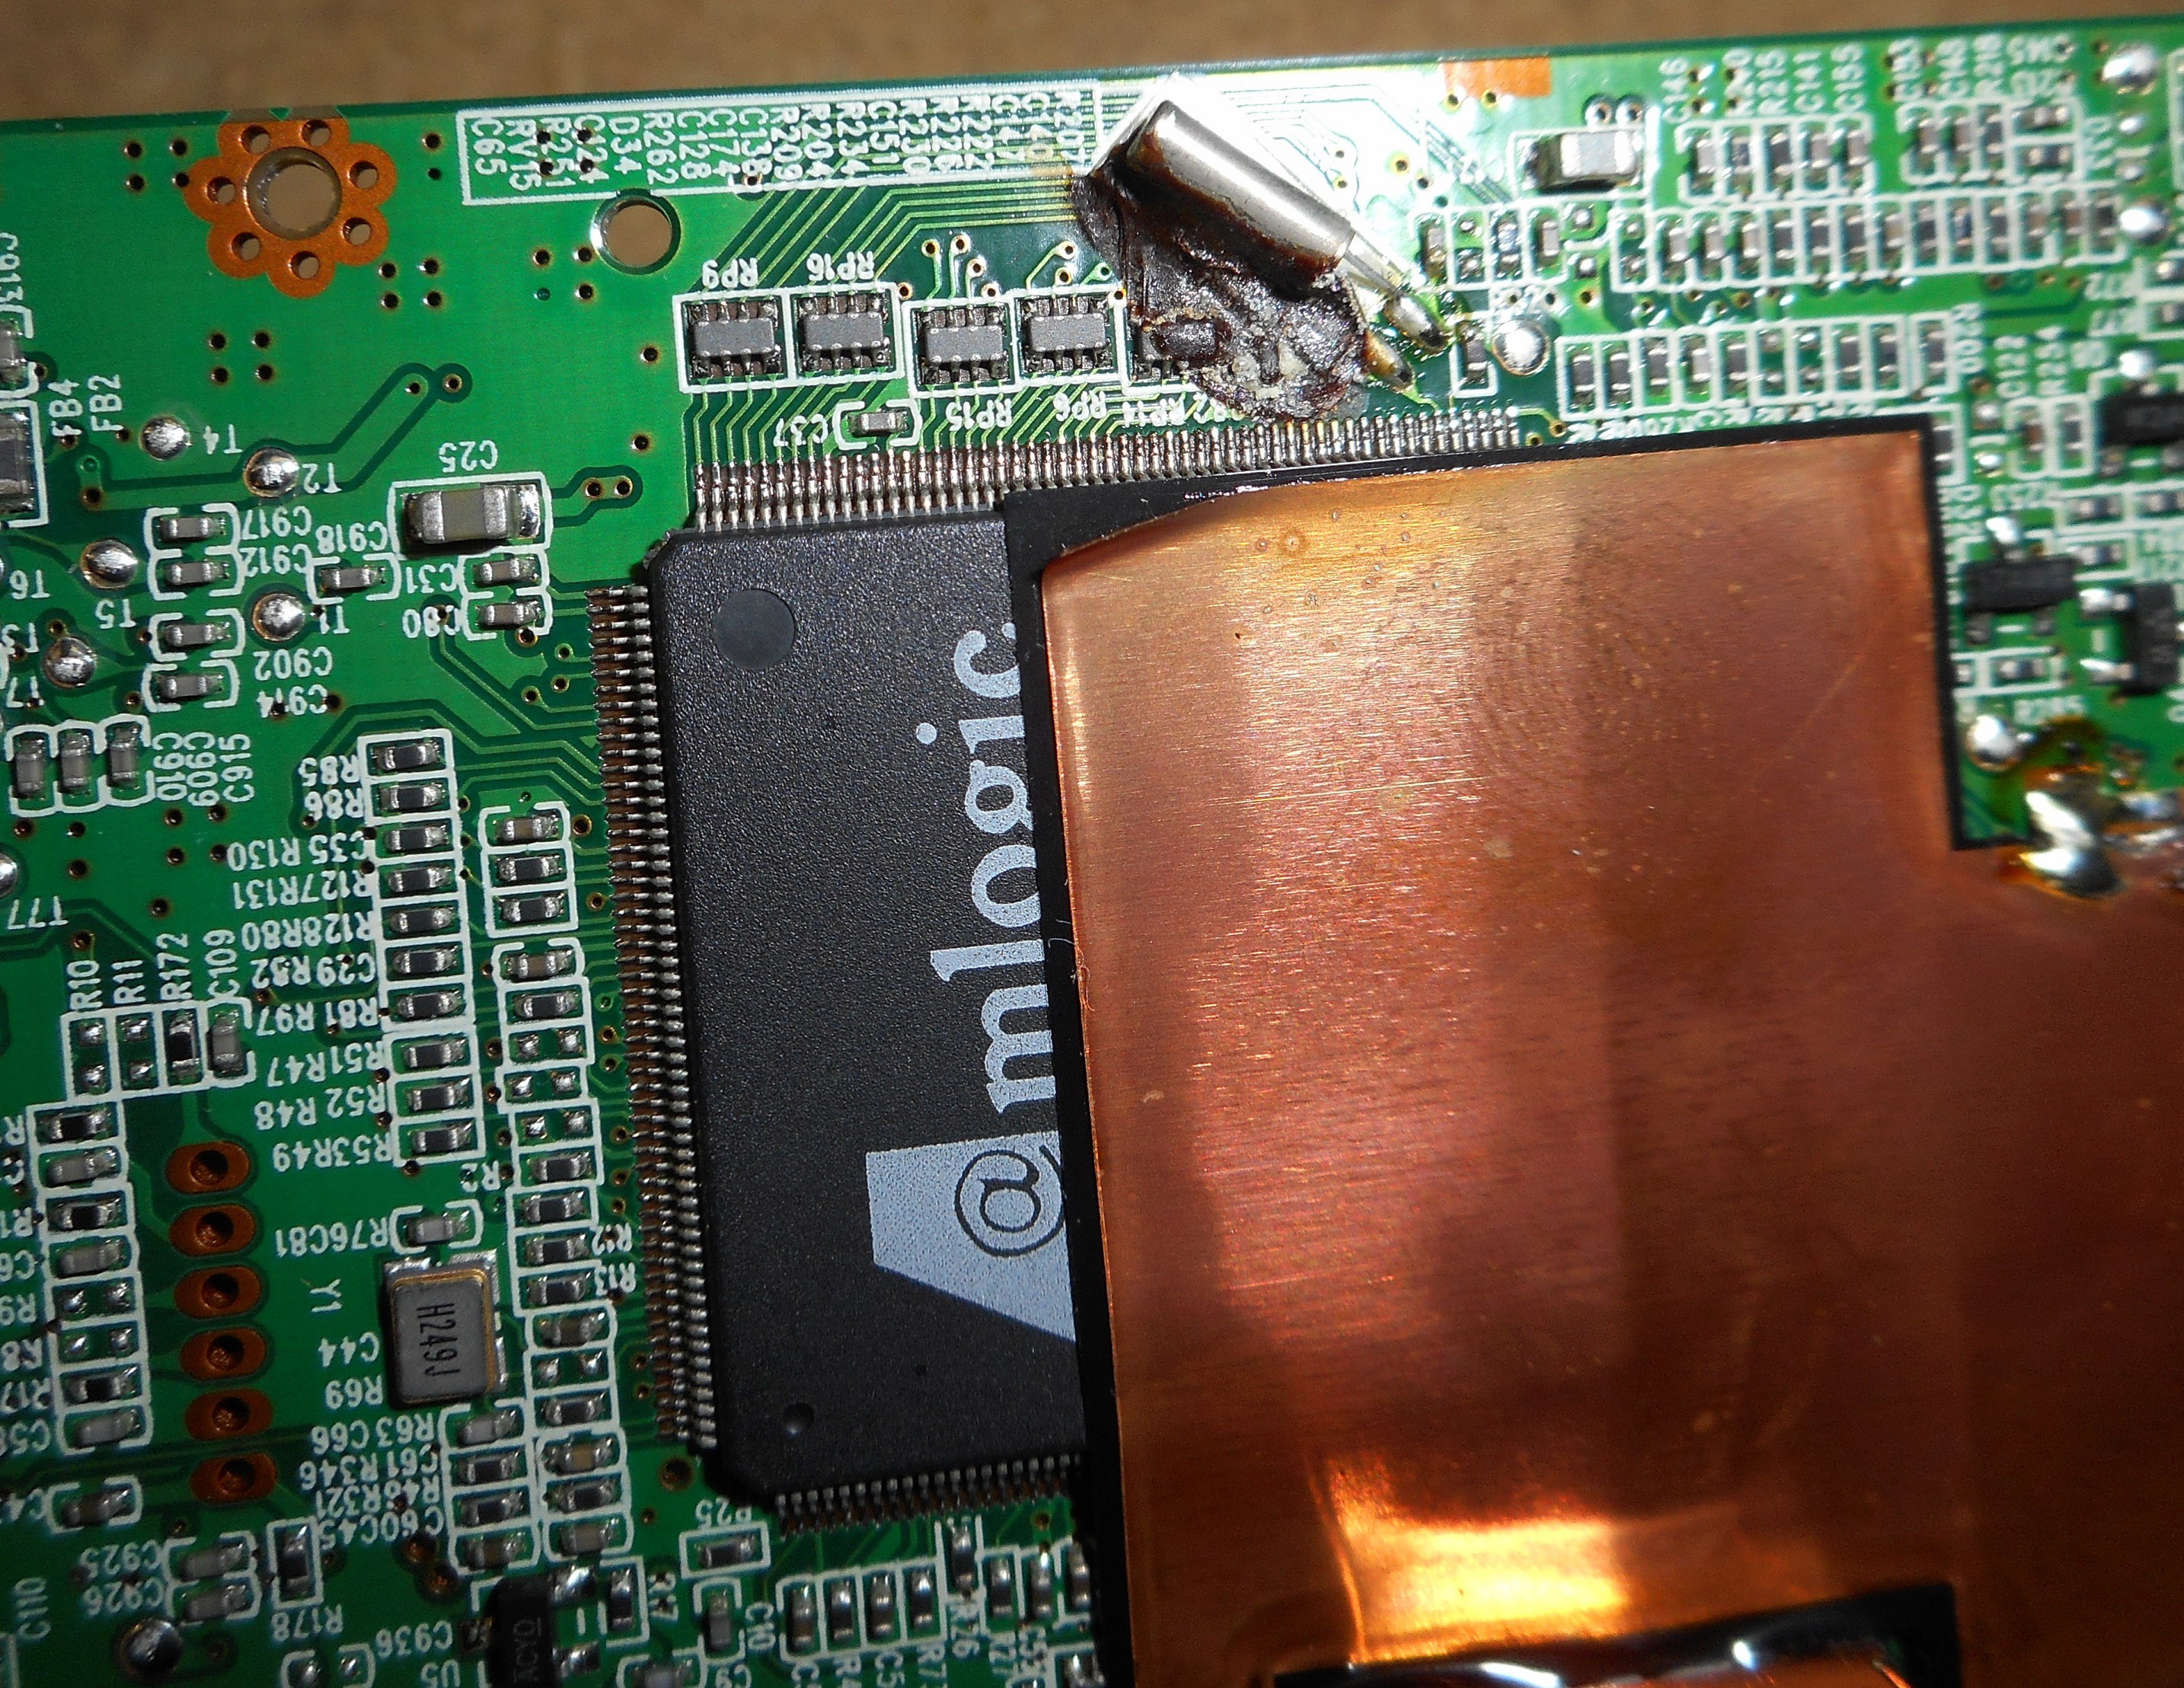
Now, assuming your clock has the same problem that mine did, you should see the small crystal oscillator at the top of the board above the CPU. You should see it covered in some kind of crud. Most likely decomposed potting compound or glue to secure the crystal in place.
![]()
![]()
(On a side note, it is incredibly hard to get a good picture of this!)
As you can see, the goop was touching the left pin of the crystal, as well as several of the resistors to its left. My current theory is that this glue has turned somewhat conductive over the years, causing the clock circuit to not function.
It is this goop that you need to remove.
I was able to remove it from my clock using a toothpick, some contact cleaner, some alcohol, and some cotton swabs. It seemed to help to remove as much as possible while it was dry and brittle, and then soak the rest in alcohol to soften it.
Since I was already there, I reflowed the solder for the crystal, just to be certain the connection was good. I'm not sure if this was necessary, but it didn't seem to hurt.
-
5Step 5
Now, in tried and true Haynes manual-lingo, re-assemble in reverse order.
Be sure to seat the ribbon cables properly. The LCD data cable is a tough one. Also, be sure that you seat the LCD backlight connector all the way, otherwise you'll have to take the clock all apart again, just like I did.
-
6Step 6
After reassembly, be sure to have a good backup battery installed. That seems to matter. Also, I had to futz with the settings a bit to get it to take time. I turned ON the auto-dst setting, which seemed to cause the clock to jump about 75 years into the future, but after that, the clock was keeping good time and I was able to set the time and date appropriately.
This same ritual seems to be needed to be done after every power outage, but for now, it seems to work.
Once that was complete, the clock functioned as expected. Yay!
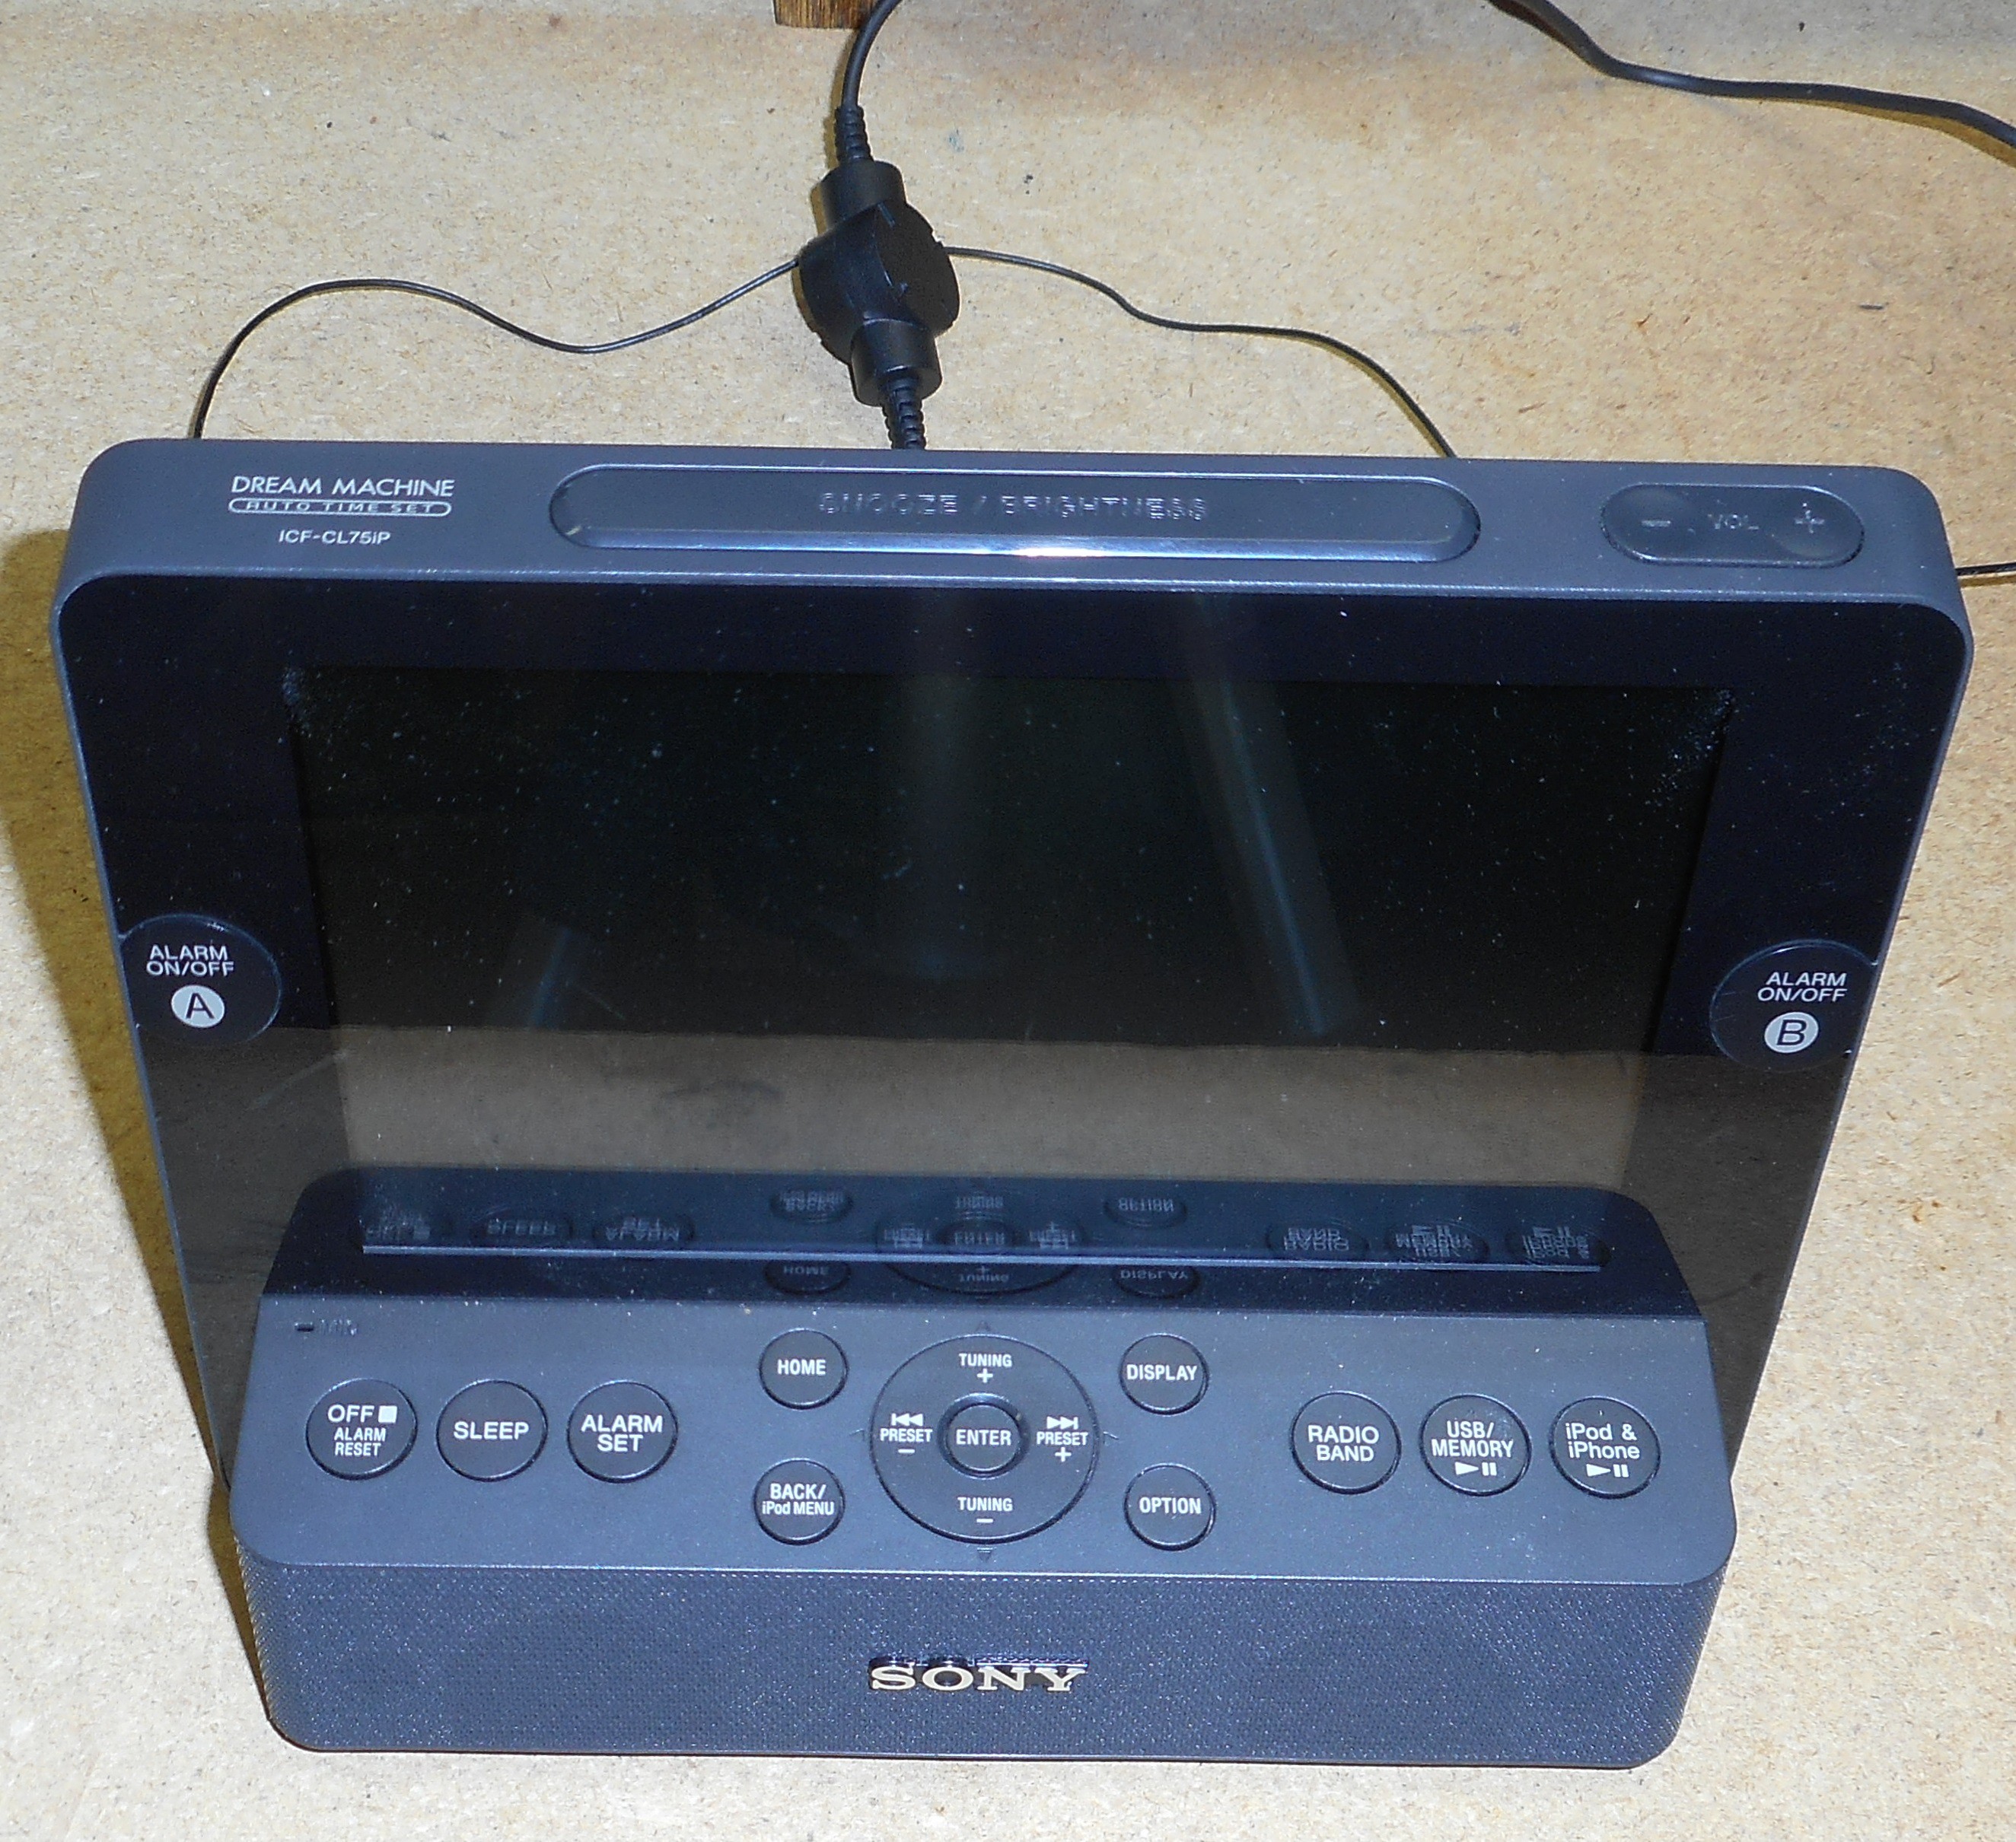
Repairing a Sony Dream Machine ICF-CL75iP
Sony's glue choice leaves much to be desired and apparently causes oscillators to malfunction.
Discussions
Become a Hackaday.io Member
Create an account to leave a comment. Already have an account? Log In.
thanks for these great instructions
my mother has this identical clock radio and it suddenly stopped keeping the correct date - always resetting to 2009, and the day of the week would toggle between Sun/Mon a couple times a second - but otherwise the radio and clock seemed to work. I found this page, followed the instructions to disassemble and found the same crud deposit near/around the crystal. Took a while to clean it off using alcohol, Qtips and small tweezers, but in the end the solution worked just as advertised and the clock radio is functioning normally again. Trickiest part was probably reattaching the LCD data cable.
Thanks again, the instructions and photos too were very helpful.
Are you sure? yes | no
Thanks for your notes and photos. I had the same problem and could not set the clock. I cleaned up the glue and it seems to be back to life now with the clock running just fine. However I found the clock did not start working straight away, I left it and after an hour or so and it seemed to magically spring into life again. Perhaps the acetone I used to dissolve the glue had not totally evaporated. Anyway, it's working again now!
Thanks for documenting the solution so clearly.
Are you sure? yes | no
THANK YOU very much to leadacid44 for the well illustrated information supplied here!...
A neighbours Sony Dream Machine had the same problem......even the colon flashed but the time would not advanced....Maybe good for use on Ground hog Day..
Don't think I would have bothered pulling it down if not for the encouragement here..
Sure enough, it was the monkey snot (as we call it in the trade), plastered all over the crystal and worst still, the I C next to it that caused the problem....It goes dark brown after a while and turns hygroscopic, trapping water under it which shorts things out..
It's contact glue and should be kept for purposes such a gluing the soles on shoes .
Having cleaned all that up, it worked well..
You would think that after 50 odd years, manufacturers would have woke up to this..or maybe they like to plant time bombs !
NOTES...
The connector for the LCD data cable has a brown flap along the front...You can prise this up vertically..Then the cable will slip very easily in and out of the connector...A sort of zero force arrangement....Quite common with these screen type connectors...I had one in a tablet that had been knocked open by a loose battery, causing no display.
Have a look at the back of the screen board while you have it apart...There is another crystal there that might have some of the dreaded brown stuff on it
Cheers all.
Are you sure? yes | no