-
1Step 1
Introduction:
If you are new to the SparkFun ESP8266 Thing Dev Board, I highly recommend you work through the hookup guide (at least through the "Example Sketch: Posting to Phant" page):
https://learn.sparkfun.com/tutorials/esp8266-thing-development-board-hookup-guide
Note: I had to connect pin 0 to ground during boot-up to be able to program it. This appears to no longer be needed with Arduino 1.6.7 + ESP Arduino 2.1+.
I also recommend looking at the MAX31855K hookup guide:
https://learn.sparkfun.com/tutorials/max31855k-thermocouple-breakout-hookup-guide
-
2Step 2
Data Stream:
Create a data stream at https://data.sparkfun.com/streams/make.
The Arduino sketch I provided uses field names "id" and "temperature_f". If you plan to change these in the sketch, make sure to change the names when creating the data stream, and vice versa.
Make sure you save the public and private keys somewhere.
-
3Step 3
Arduino Code:
There are a few libraries that you will need:
- SparkFun MAX31855K Thermocouple Digitizer
- Phant by SparkFun
- DNSServer
- SPI
- ESP8266WiFi
- ESP8266WebServer
These can all be downloaded in Arduino IDE by going to Sketch > Include Library > Manage Libraries and searching.
And one more that you will need:
- WiFiManager
To add this one, go to https://github.com/tzapu/WiFiManager and click "Download Zip" in the top right. Then, in the Arduino software, go to Sketch > Include Library > Add .ZIP Library.
Once you've done all of that, download the sketch I've provided, KilnShark_Wifi_Setup_example.ino, open it, and make the modifications described below.
Modify the example sketch to match your data streams public and private keys.
////////////////
// Phant Keys //
////////////////
const char PhantHost[] = "data.sparkfun.com";
const char PublicKey[] = "wpvZ9pE1qbFJAjaGd3bn"; //This is the demo key. Add yours here.
const char PrivateKey[] = "wzeB1z0xWNt1YJX27xdg"; //This is the demo key. Add yours here.
You can also modify the upload interval. The default is 30,000 milliseconds (5 minutes).
/////////////////
// Post Timing //
/////////////////
boolean postSparkFun = 1;
const unsigned long postRate = 300000; //milliseconds
unsigned long lastPost = 0;
The default SSID and password for the connecting to the device to program it can also be changed. It needs to be changed in two places - in this section,
int resetWifiSettings() {here://first parameter is name of access point, second is the password wifiManager.autoConnect("KilnTempSetup", "password");and in this section,
void setup()here://first parameter is name of access point, second is the password wifiManager.autoConnect("KilnTempSetup", "password");Upload the code. See the intro above and the SparkFun hookup guide for details.
-
4Step 4
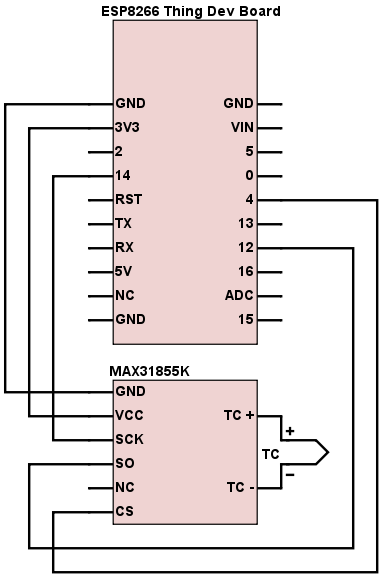
Wiring it up:
Here is how everything is wired up:
![]()
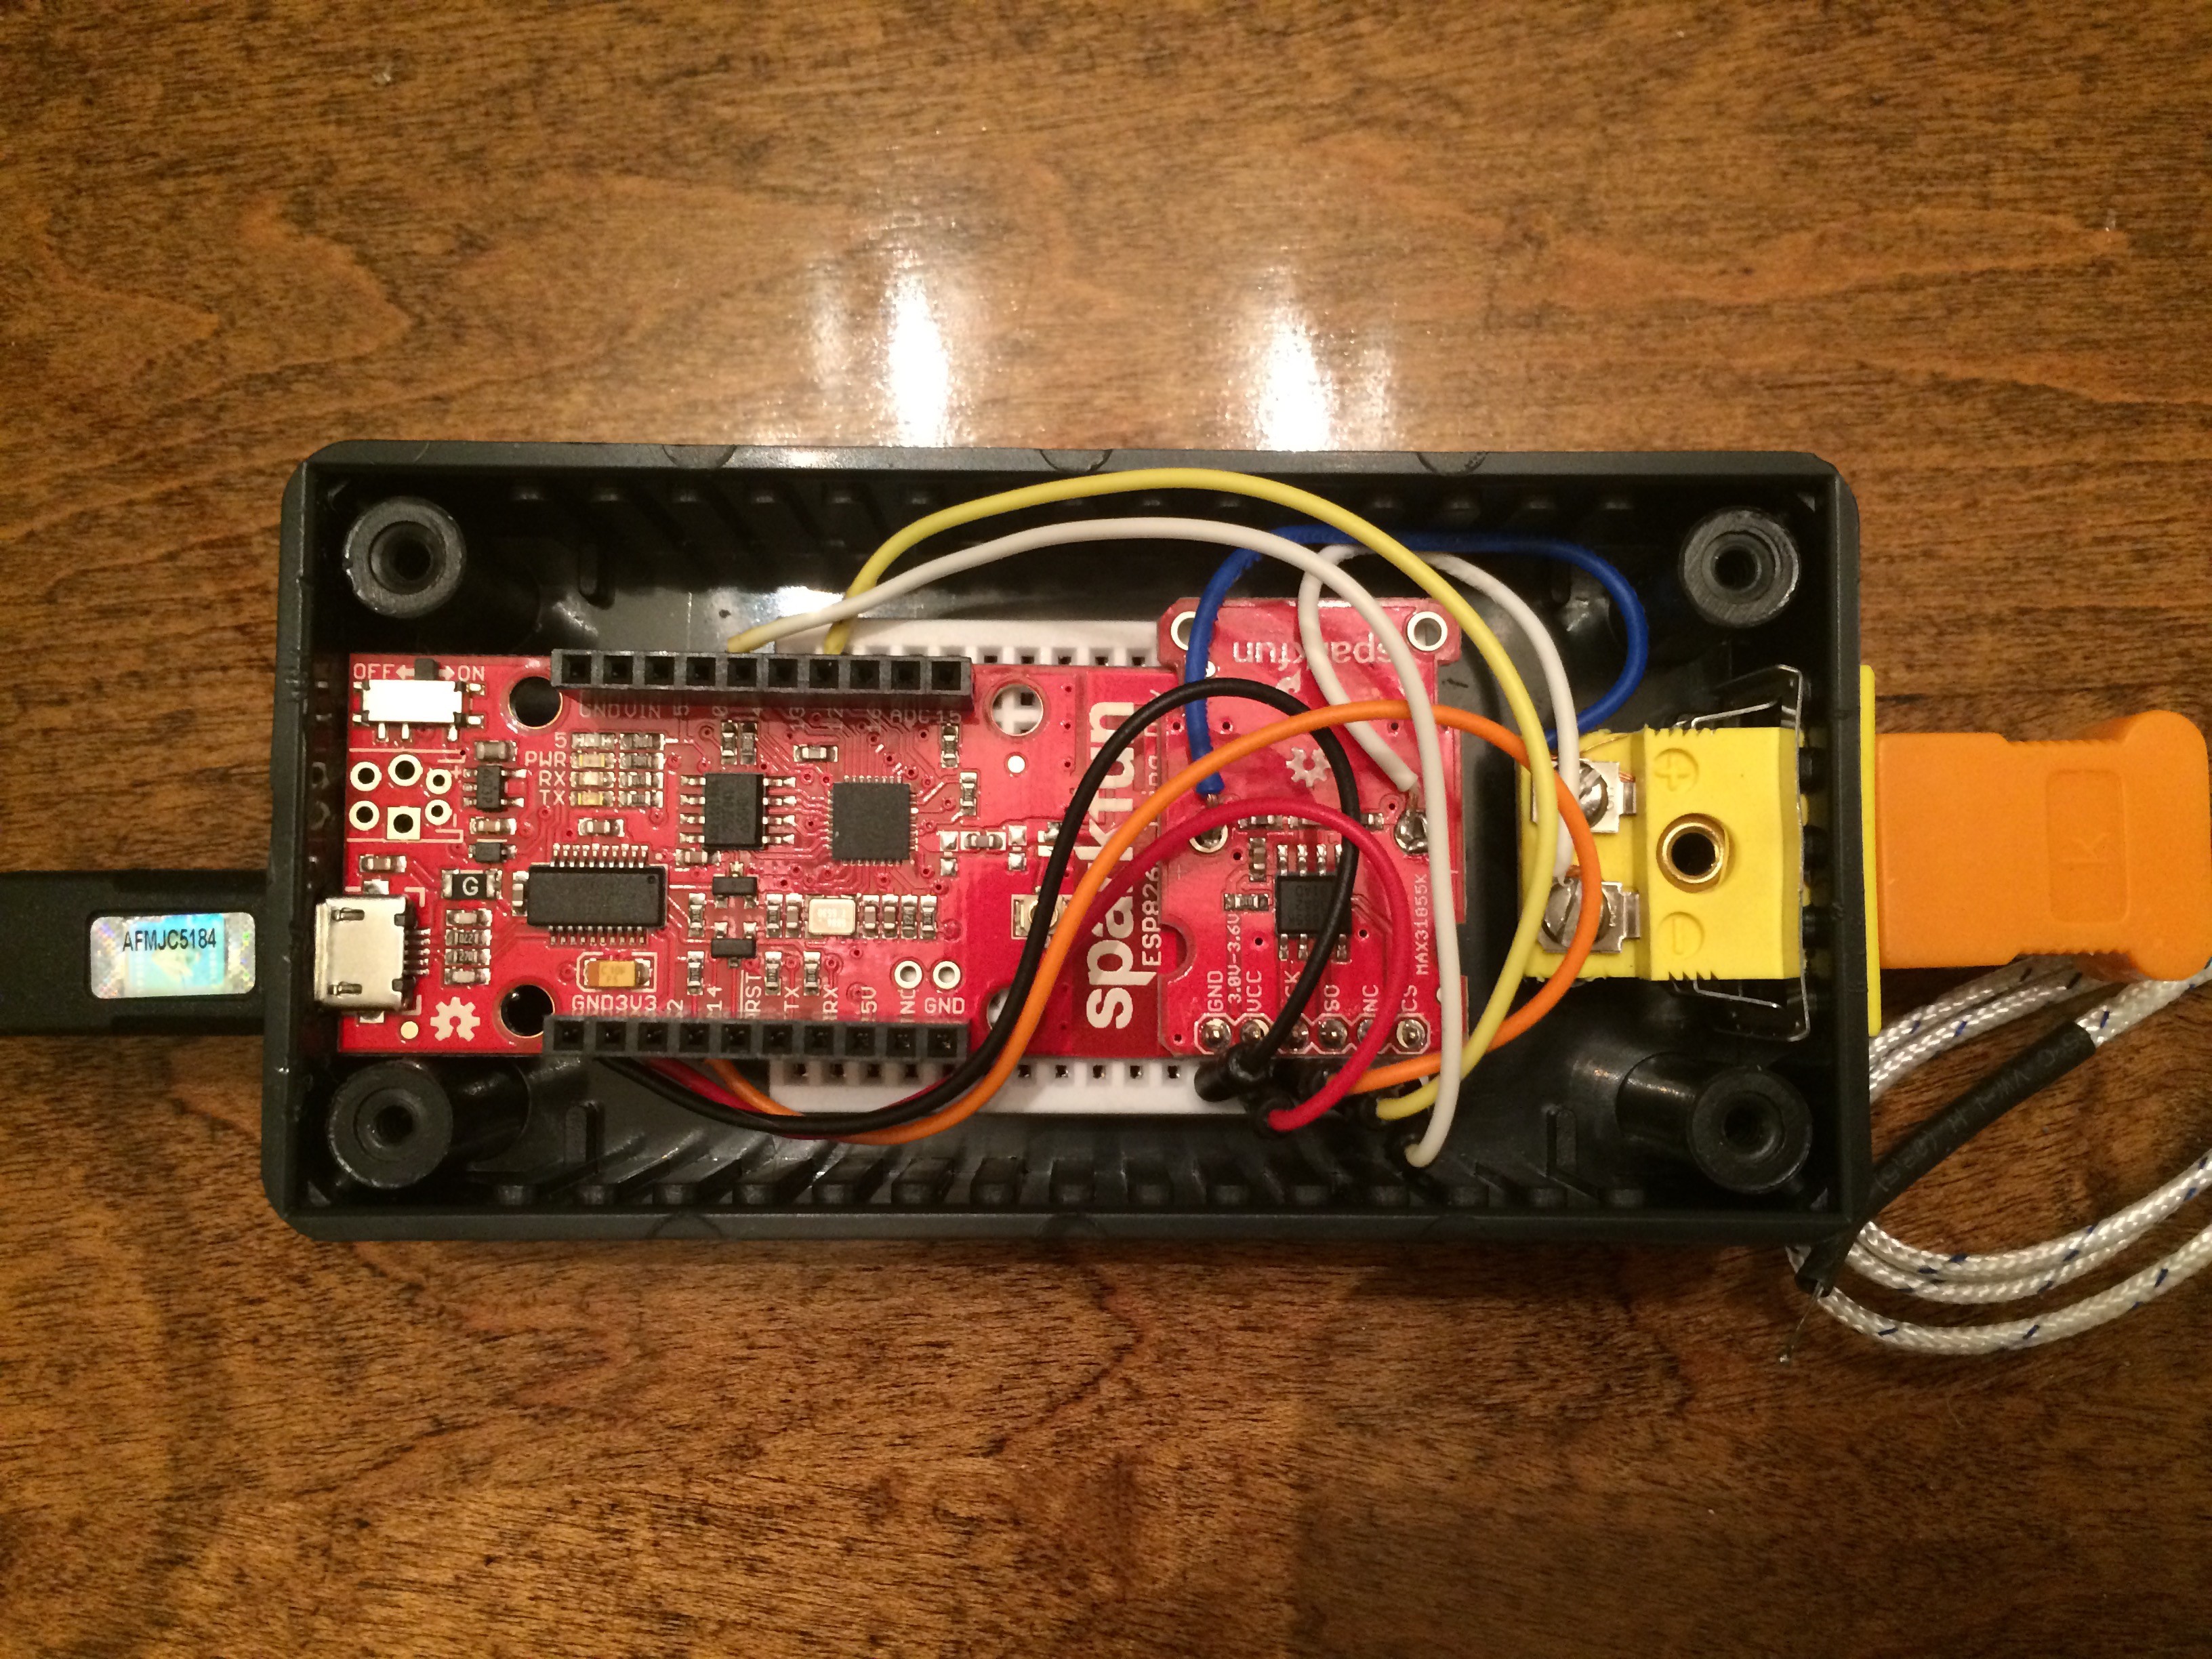
And a photo:
![]()
I used a messy combination of soldering to header pins and jumper wires inserted into the breadboard. I also slightly overlapped the two boards to get everything to fit nicely.
I used a rotary tool (e.g., Dremel) to cut out holes for the USB cable and the thermocouple jack. I had to shave/grind down some of the support ribs in the enclosure on the side with the USB port to get a good connection.
Everything is held in place with double-sided tape on the bottom of the breakout board. This could be done better, but it seems to be working.
-
5Step 5
Thermocouple:
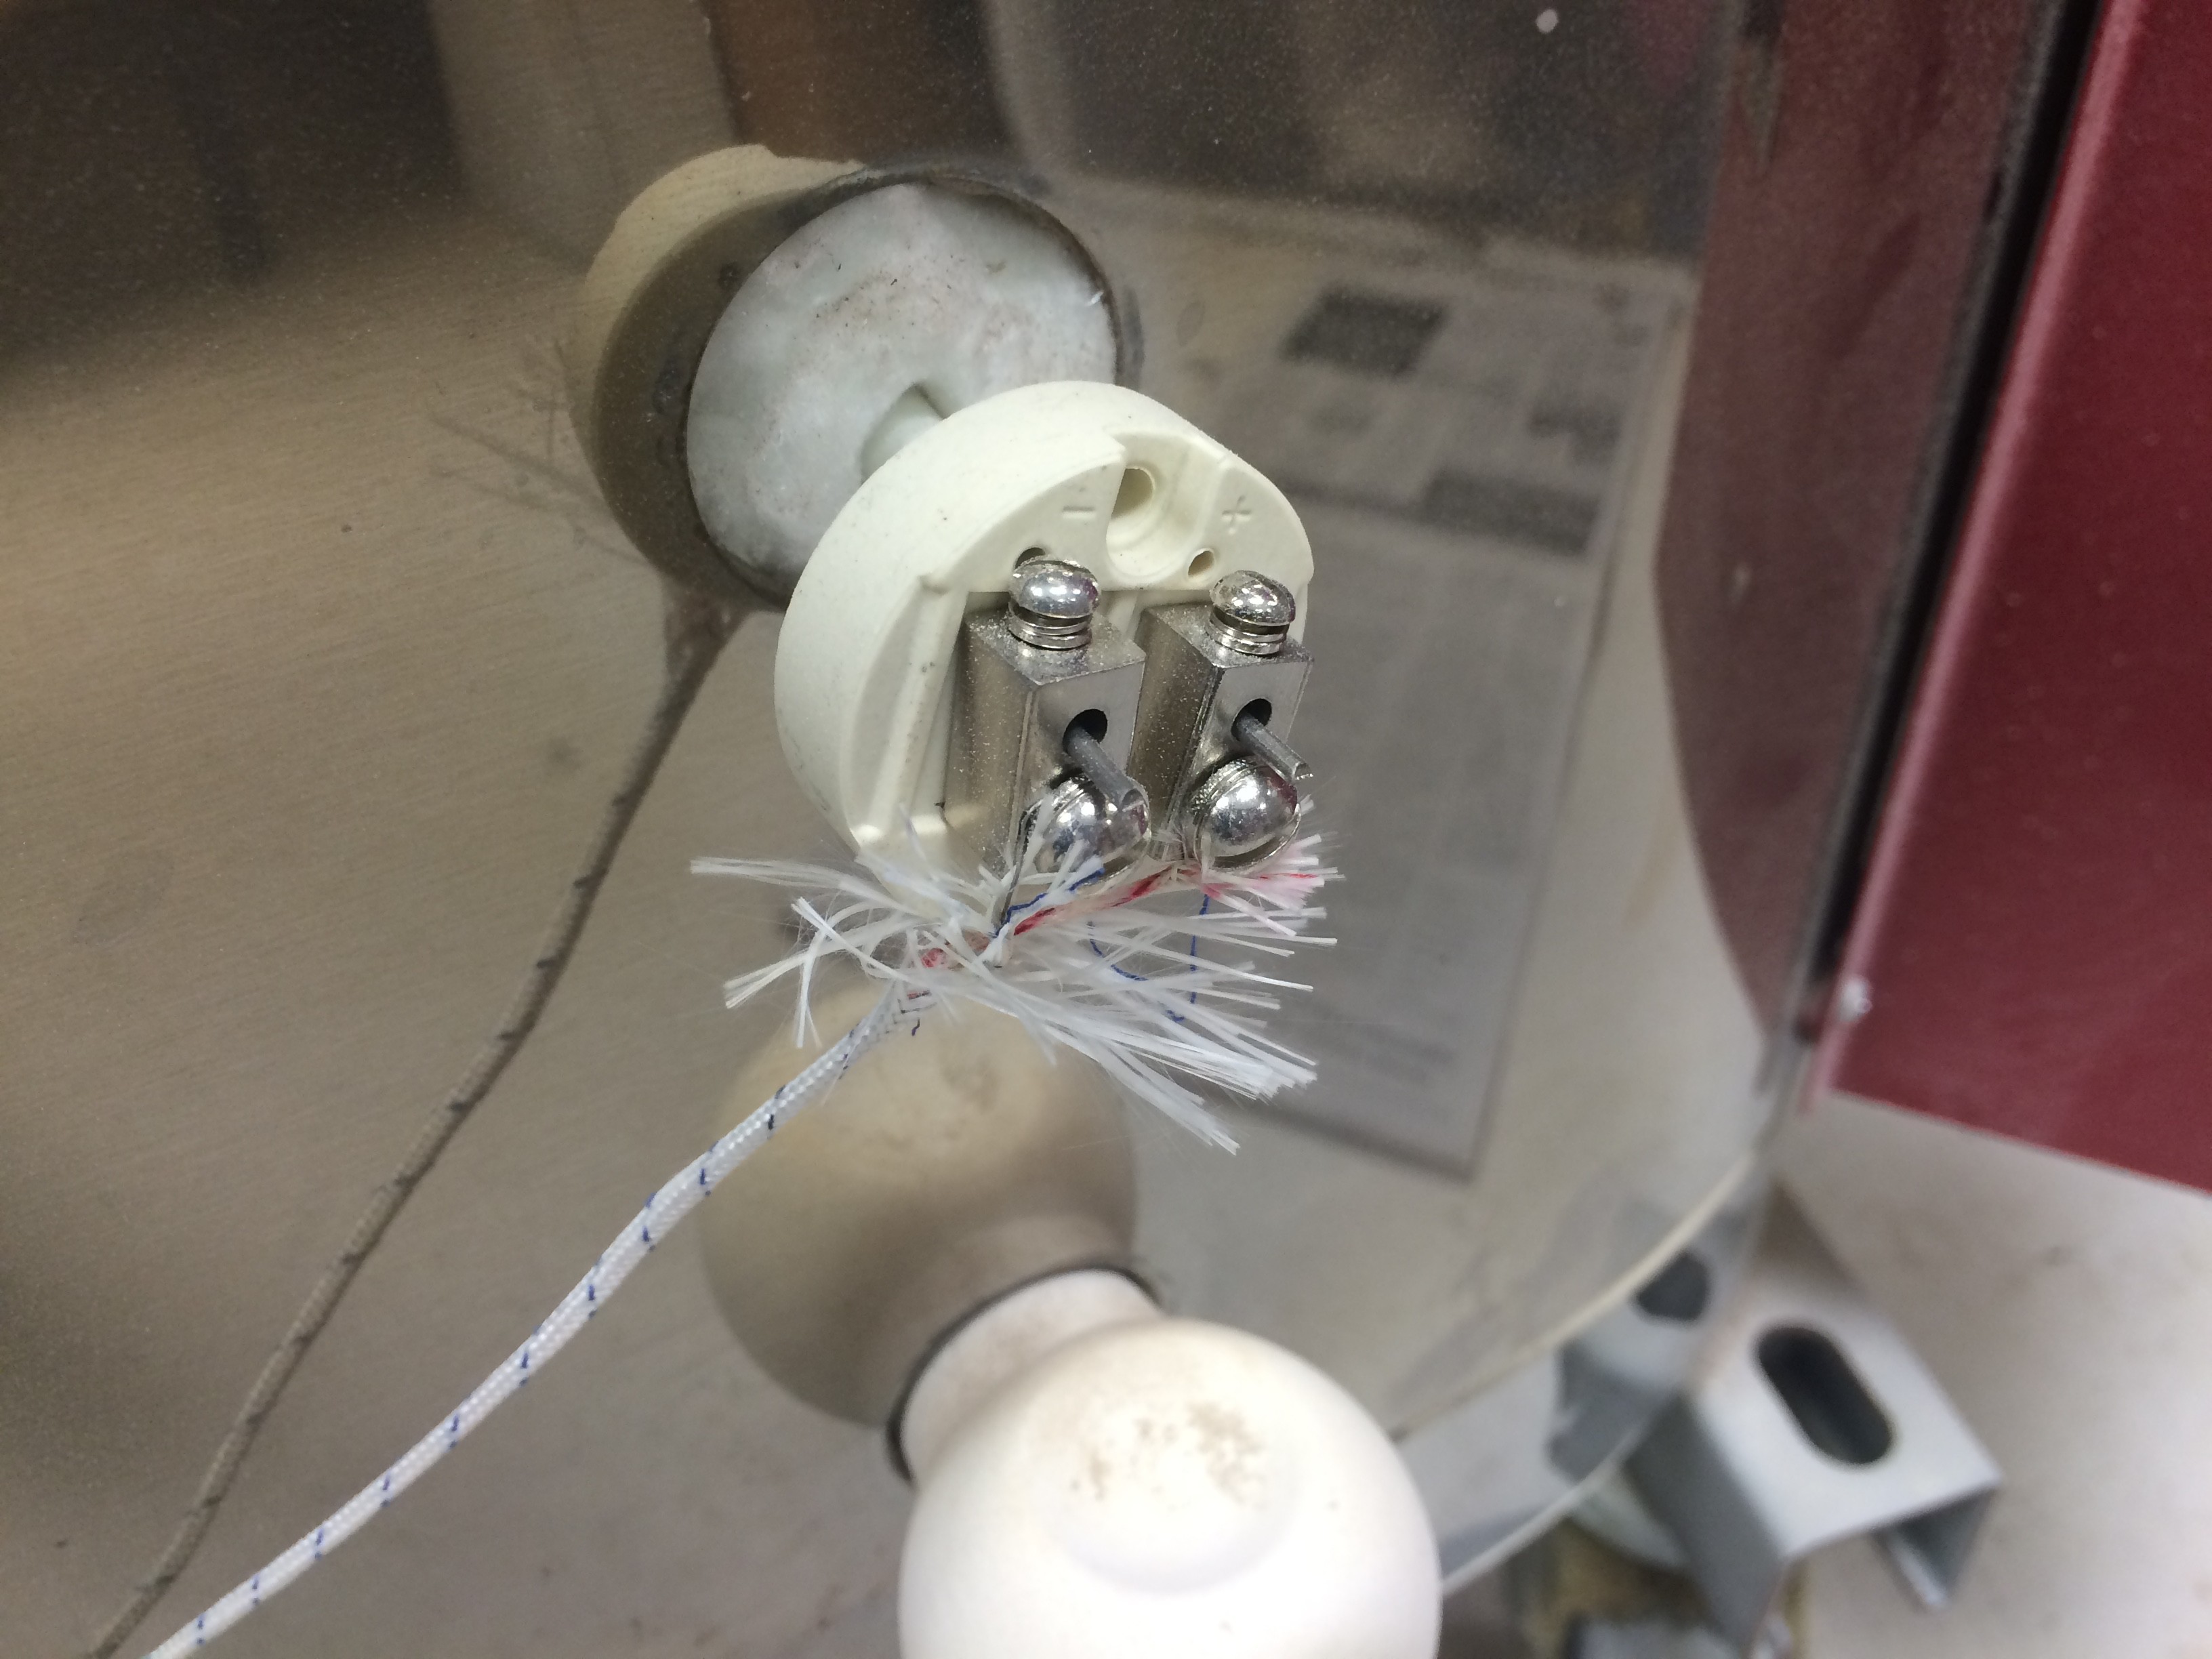
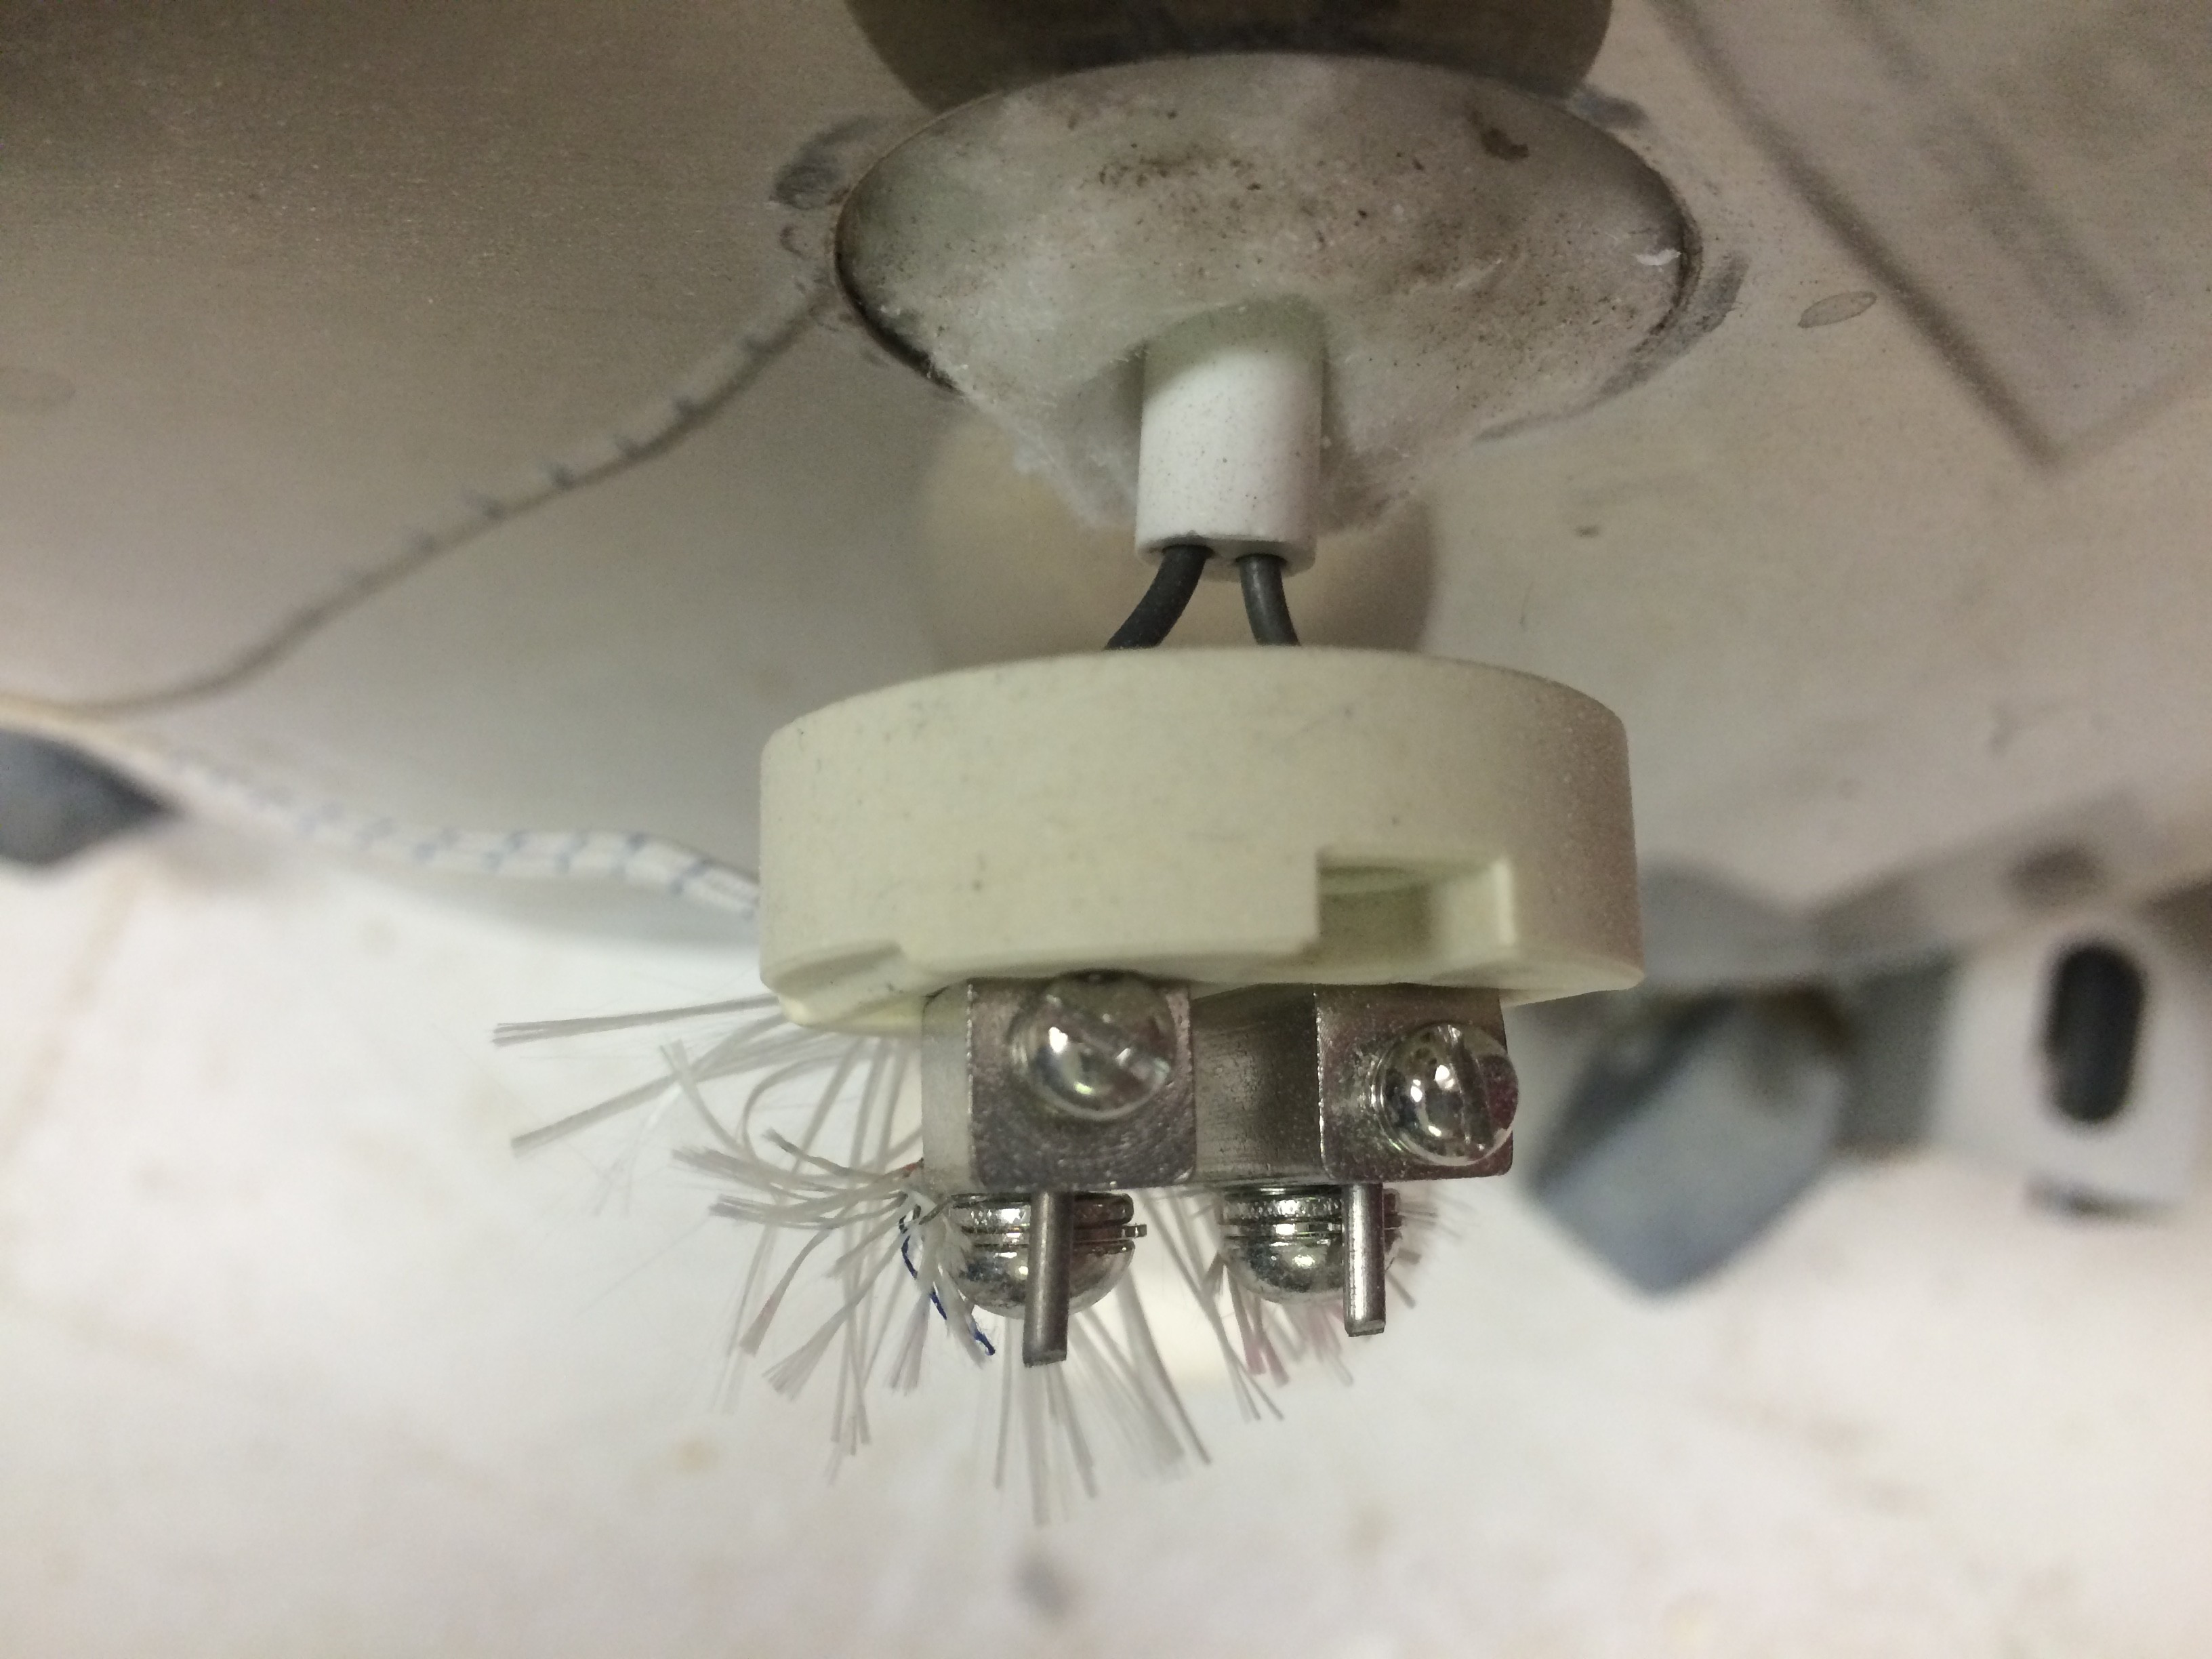
The thermocouple from Amazon is only used for the wire and the plug. Cut the welded junction off of the end with wire cutters. Its wires are then connected to the terminal block from Omega by wrapping them under the screws on the blocks. Insert the Omega thermocouple with ceramic insulators through the ceramic disk and the holes that go through the terminals. Slide insulating sections off and trim the thermocouple as needed.
The two images below show everything connected with the thermocouple inserted into the kiln. I used a few small pieces of kiln wool (ceramic fiber insulating blanket) stuffed in one of the peep holes to hold the thermocouple in place.
![]()
![]()
I've found that the color-coding on cheap thermocouples is not reliable, so you may need to try reversing polarity and checking the readings to make sure everything looks right. You could also use a multimeter to check continuity between the labeled blades on the plug and each wire.
-
6Step 6
Connecting to WiFi:
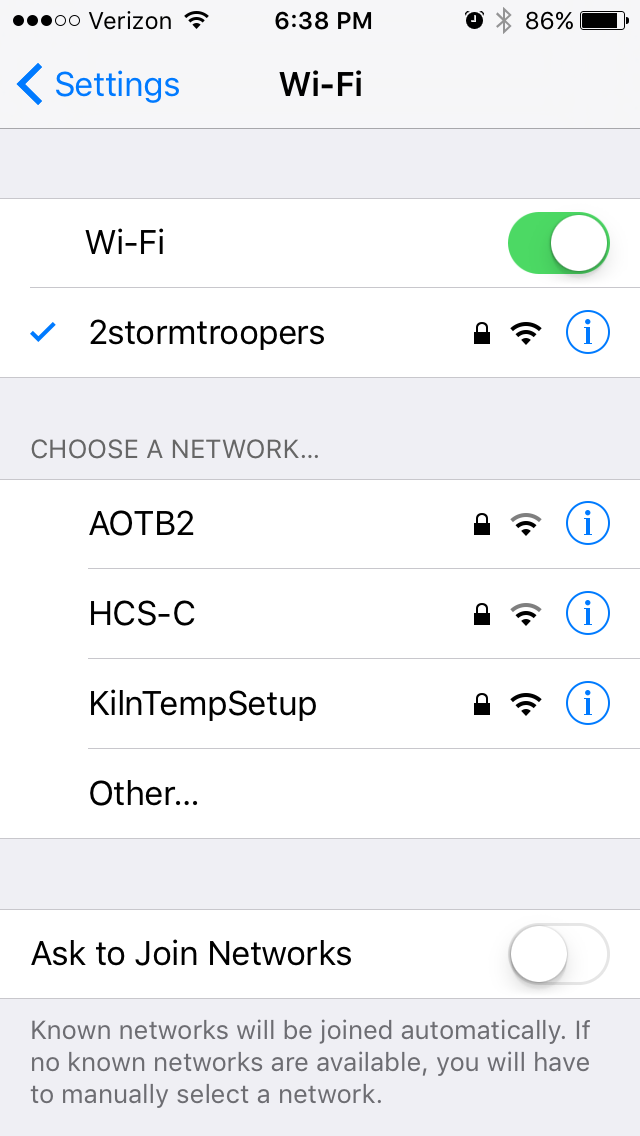
Everything in this section is made possible with tzapu's WiFiManager. Turn on the KilnShark and then check available WiFi networks. It should show up as "KilnTempSetup". Connect to it and enter the password ("password" is the default in the Arduino code).
![]()
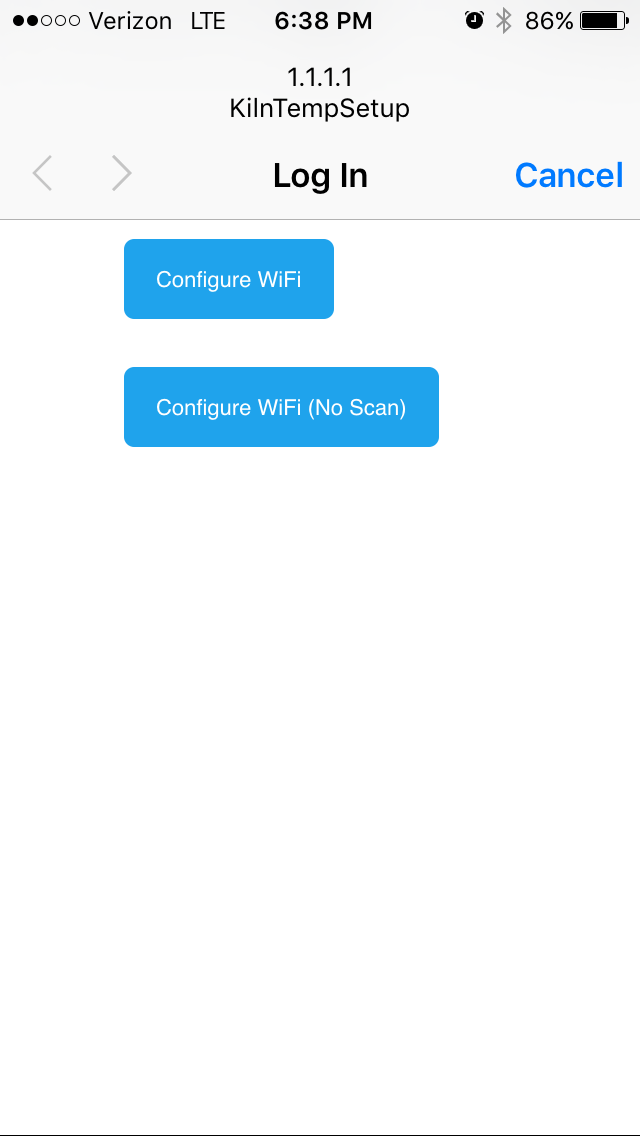
After you connect, it should direct you to a captive portal, similar to hotel or airport WiFi that redirects you. If it doesn't do this automatically, open a web browser and enter the URL "1.1.1.1" (no quotes). You should now be at a page with two buttons. If you know the SSID of the network you want the KilnShark connected to, select "Configure WiFi (No Scan)", otherwise, click the top button.
![]()
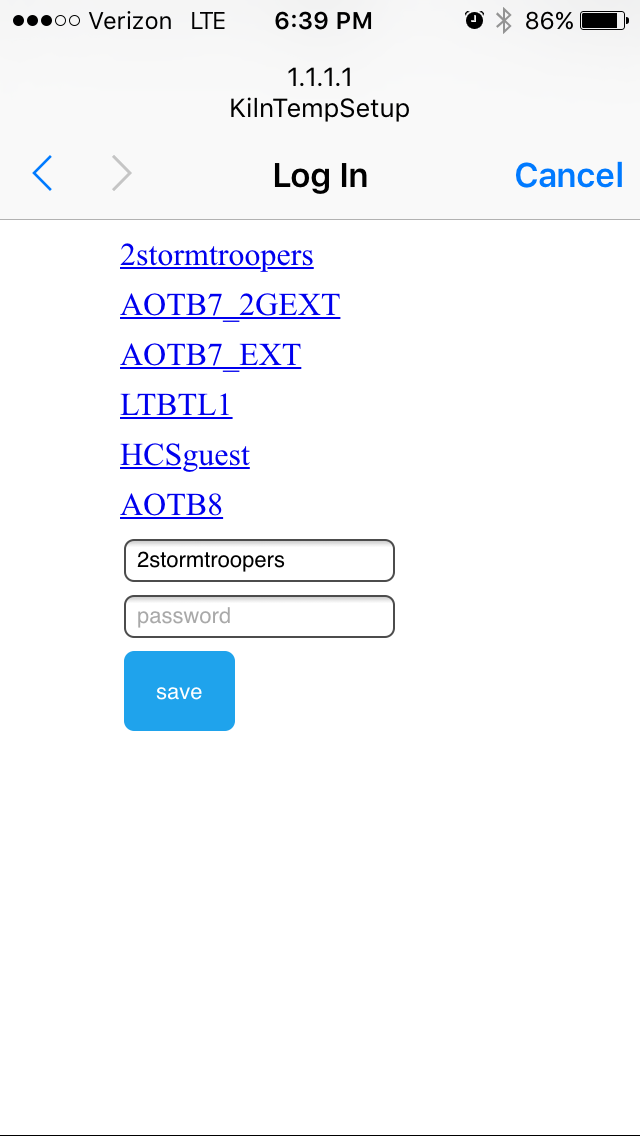
It will scan for available networks and give you a list. Select the one you want, and it will automatically fill in the SSID for you. Enter the password and click save.
![]()
You will briefly see a page that tells you it is trying to connect, and then it should kick you off the network as it connects. If it doesn't connect, it will come back as KilnTempSetup, reconnect directly to it, and try again.
Security note: I believe your password is transmitted over regular HTTP during the setup process, so be careful about doing this with a network that you don't want other people to gain access to.
-
7Step 7
Website
There's a good overview on using Google Charts to display data from data.sparkfun.com here: http://phant.io/graphing/google/2014/07/07/graphing-data/. I also found a great example website by Brian Studio, http://www.esp8266.com/viewtopic.php?f=11&t=3569, which also has a great step-by-step overview of an ESP8266 weather station.
I modified Brian Studio's example HTML a bit to get what I wanted, including custom ranges and colors on the dial to indicate acceptable (<275F) and ideal (<110F) temperatures when the kiln can be opened:
![]()
To create your own version, download the file KilnShark_website.html, and change the public key at the bottom of this block of code to match your data stream's:
        var cloud_url = 'https://data.sparkfun.com/output/';
        // Public Key from https://data.sparkfun.com
        var public_key = 'YGL30z4wMXsvlzbYxopd';
then upload it to your web server or just view it locally. The website should be mobile-friendly, but I had to tweak an .htaccess file so that mobile users didn't get redirected somewhere else on my site.
KilnShark
Wireless pottery kiln sensor that pushes temperature readings to data.sparkfun.com for remote monitoring

Discussions
Become a Hackaday.io Member
Create an account to leave a comment. Already have an account? Log In.