 zakqwy
In a previous post, I mentioned that I wanted to build a duct around the propellers in an attempt to increase their efficiency. I located a company that owns a 9.63" mandrel for fabricating CFRP tubes out of pre-preg, so I ordered a chunk intending to finish up the design when it showed up. UPS dropped the tube off this afternoon, so I spent the evening modifying the CAD model and fabricating the duct sections.
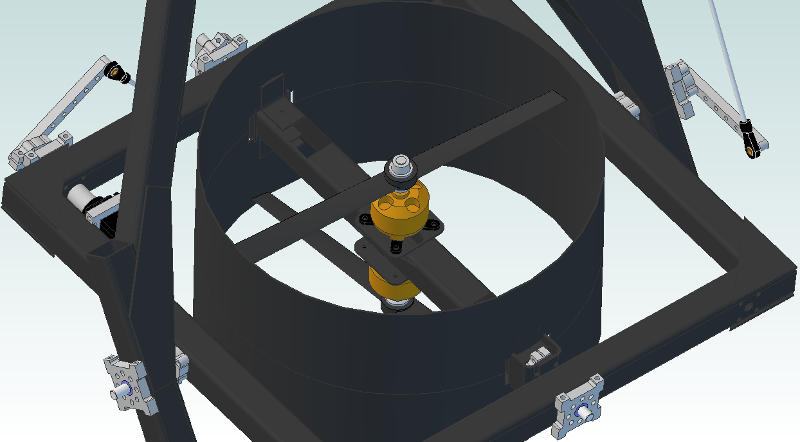
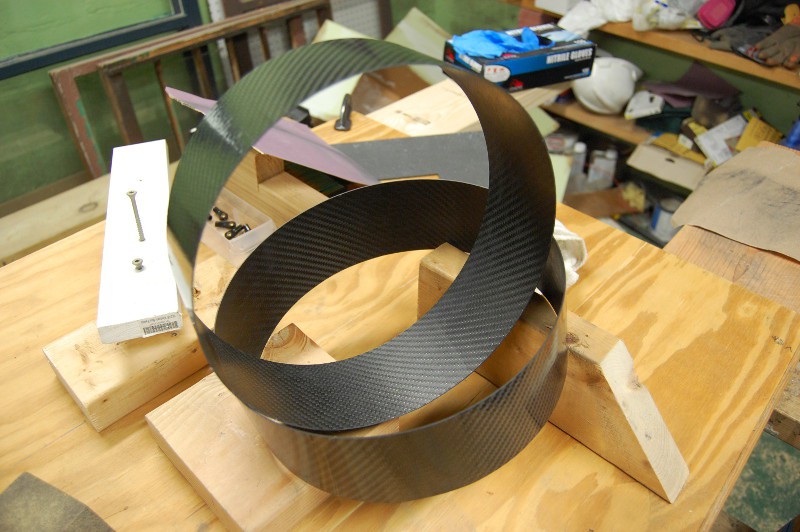
The duct consists of two lengths of the tube notched to accommodate the motor mount and bolted on using a few CFRP brackets. I thought about building the duct out of a single length of the tube, but the motor mount plates would require a large clearance hole (and it would make the motors tough to work on). Length is limited by the range of motion of the propellers; since I'm back to using 9" units, I was able to make the duct extend roughly 1 cm beyond the top of each prop:
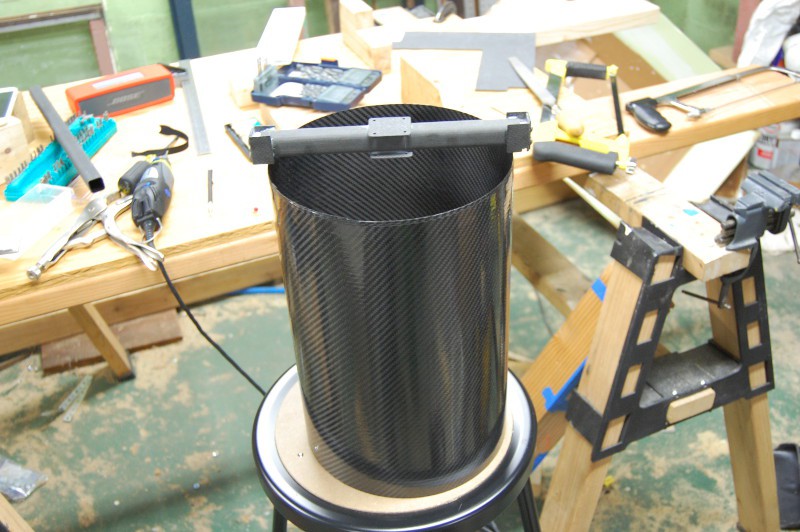
Here's the tube as it arrived with the motor mount sitting on top. It's a bit long with one slightly rough end, as expected:
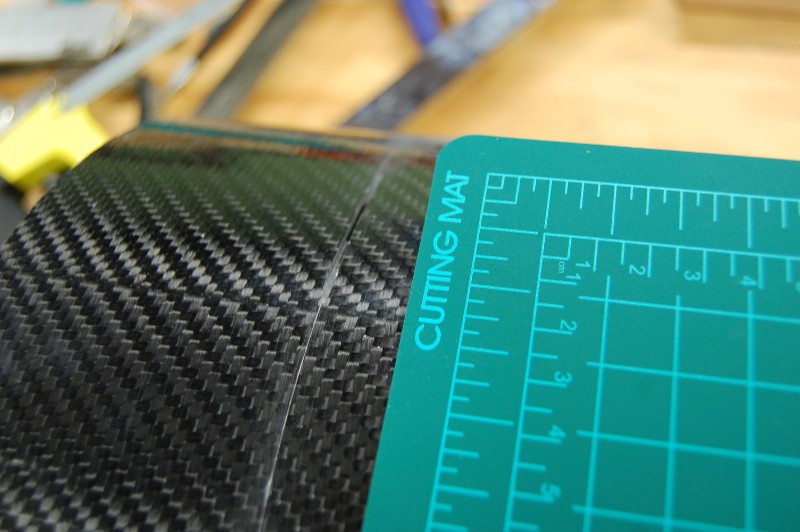
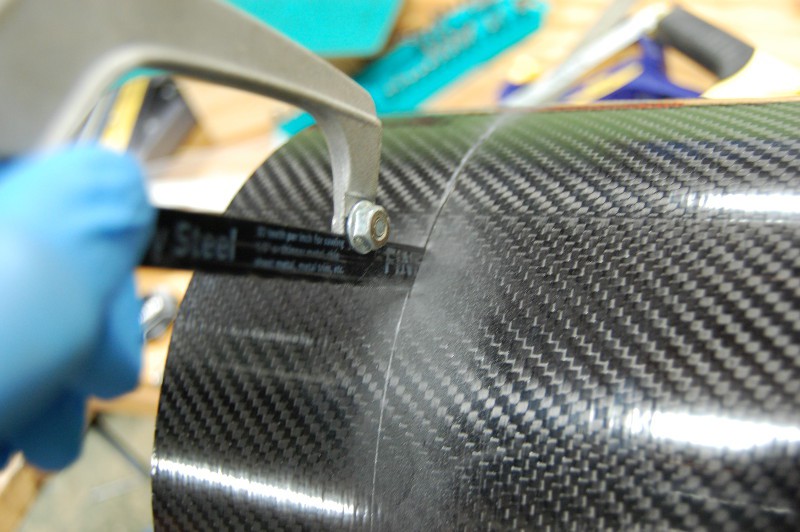
I used a square to mark the tube in several places along its circumference, then scribed a line using a bent cutting mat as a guide. I started cutting the tube using a steel-bladed hacksaw, hoping to minimize blade kerf to save material:
This was ridiculously slow going. I made it about six inches, then did a bit of math in my head (9.6" * 3.14) and considered changing course:
I decided to not worry about blade kerf and got the jigsaw out. Great choice. A bit of sanding and I had two 75mm long tubes:
I outlined one of the tubes on the plywood and did a bit of geometry to find its exact center, then used that to mark the location for a few notches. I also removed a bit of extra bracket material from the motor mount so everything fit:
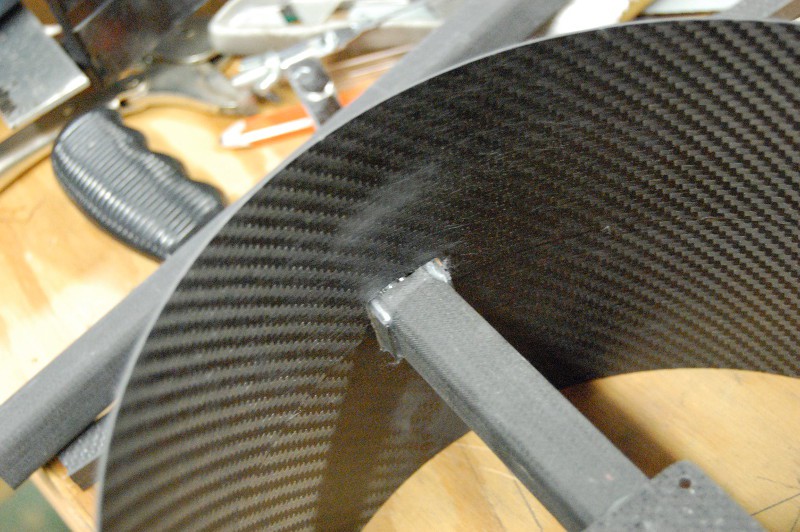
The props have roughly 6mm of clearance on each side, give or take. Getting that number tighter would probably improve the positive effects of the duct, but I was concerned about my ability to precisely locate the slots (and it's the size that was available, so I made do). I cut some brackets for mounting the duct to the motor mount but haven't glued them on yet; I'm going to hold off until I start on the motor cooling modifications (which are waiting on the rapid prototyped parts) so I can epoxy everything at once. When the whole assembly is together, I'll probably use some tape to seal the gap up. In any case, here's where things stand for now:
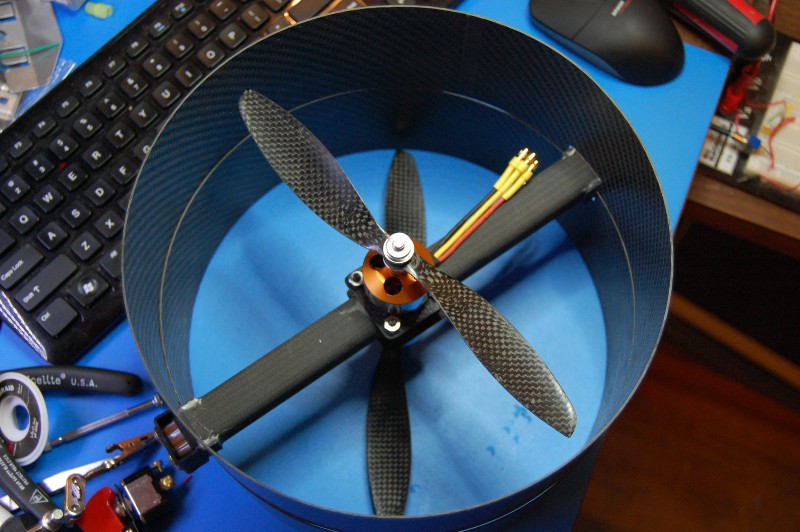
Yup, it passes the "does it look cool" test. More to come!
Zach
Discussions
Become a Hackaday.io Member
Create an account to leave a comment. Already have an account? Log In.
Are you sure? yes | no
From looking at your CAD, I'm not sure how much clearance you have, and it'd be extra weight, but it's something to think about.
Are you sure? yes | no
Are you sure? yes | no