Close
0%
0%

60W CO2 Laser Cutter Mk2

a second beloved effort in slicing through paper and plastics under numerical control

Similar projects worth following
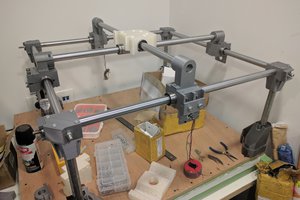
Notwithstanding the terrible backlash, my first attempt at building a laser cutter wasn't half bad. From a handful of (now spare) extruded tubes from V1, and with a few home-milled aluminium plates, V2 is almost ready to rock!

Just before leaving college, I realized that I'd be walking away from a phenomenal cutting tool: the CO2 laser cutter. Now a few years later, I've decided to try my hand at building one at home.

I've built smaller gantries in the past, and I've just finished mocking up a proof-of-concept of this project (video below).

With some promising end-to-end results in both software and hardware, I've decided to "just go for it" and finish off a polished second iteration. Fingers crossed! This is a dive into CAD, machininng, and tweaking some source code--not to mention figuring out how not to breathe all those noxious fumes!

It's been 4 good months since I've begun, and some pieces are finally coming together! Thanks for joining me on this adventure in hardware.

  • Designing for Calibration

    Joshua Vasquez03/13/2016 at 02:54 0 comments

    Designing parts to fit perfectly together is hard. Whether it's the coarseness of our fabrication tools or that of the vendor selling us these parts, nothing is perfect. Engineering has cute word for it: tolerances. Maybe it's me: "I can drill that hole to 8 [mm] plus-or-minus 0.1[mm]" or some datasheet: "Thicknesses are plus-or-minus 0.05[in]." Either way, there's a penalty we pay by living in the real world, and that penalty is that none of our procedures (or even our measurement tools) are perfect.

    Sometimes the tolerances very tight. For a dowel pin that needs to be press-fit into a hole drilled in aluminum, the difference in hole and dowel sizes is no more than 0.0005[in]! In other cases, they're pretty "meh--as long as there's a hole drilled in this metal tube, I should be able to string my kite cord through it and use it as a handle."

    The laser cutter is a machine. It's supposed to produce parts repeatably and to a high enough degree of accuracy to satisfy my craving for mini plastic combat robot parts. I don't have any hard numbers for "good enough," but let's say that If I can nail the distance between two laser cut holes to within 0.005[in] repeatably, I'll be happy.

    To design for a machine that's supposed to be precise and accurate, I'm using a trick that I discovered a couple years ago making smaller gantries: make parts with adustable set points. If the majority of my parts can be slid back-and-forth between a range of positions, one of which minimizes error, then I can just keep adjusting them until I'm satisfied. This design concept actually gives me a bit of "wiggle room," literally, in that I can machine/chop/3D-print parts, make a few mistakes, and still get a precise machine at the end of the day.

    This idea isn't anything novel, and it's exactly why "alignment" of any metalworking machine is necessary before cutting parts out with it. What I'm doing is essentially pushing off the responsibility of holding tight tolerances off to my measurement equipment, which is far more accurate than any of my messy garage processes for making parts. Luckily, machinists have been operating under this idea too, so good-quality, measurement equipment is actually pretty widespread and, hence, affordable.

    I'm almost certain that there's a name for this procedure; I just don't know it. For now, I'll call it "tunable design" since I can keep adjusting the positions of my parts and measuring them with my measuring tools until I'm satisfied.

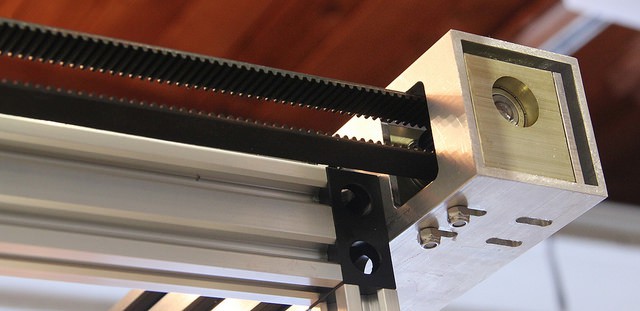
    This idea of "tunable design" shines in my belt tensioners. (I'm really happy with how well these turned out.) The Y-axis is driven with 2 open belts that are cut to length and then clamped to the moving axis with clamping plates. Since these are timing belts, the entire length of the belt can only be shortened/lengthened in discrete steps, about one belt tooth long. I could calculate the correct number of teeth needed to fix the belt in its final location on the gantry with the proper tension, but there are wayy too many other parts that will also need to measured and cut to exact lengths for the belt to truly fit correctly. Furthermore, the belt length might change ever-so-slightly with age, and my entire design is hosed if it can't accommodate for a belt that becomes marginally looser over time. Ok, it's "tunable design" to the rescue here!

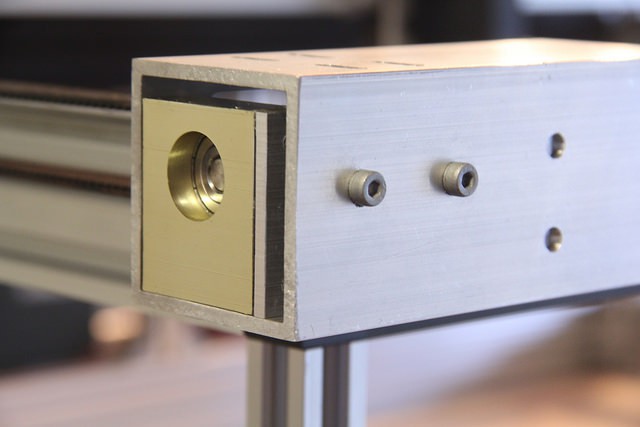
    Pulleys are installed in their own pulley blocks, but their final placement can be slid back and forth to accommodate for both the actual number of belt teeth and the amount of tension that I want to tighten them to. On these pulley blocks, I've affixed an aluminum plate to the back with threaded holes where I can install screws. Adjusting the tension is just a matter of rotating these screws from the back.

    Now that my machine can be calibrated, it's starting to stray out of the world of hacks and into the world of engineering design! I'm pretty jazzed. Don't worry, though. There are plenty of hot-fix and hot-glue moments up ahead that'll keep this baby from...

    Read more »

  • Head Plates Machined

    Joshua Vasquez03/05/2016 at 09:18 0 comments

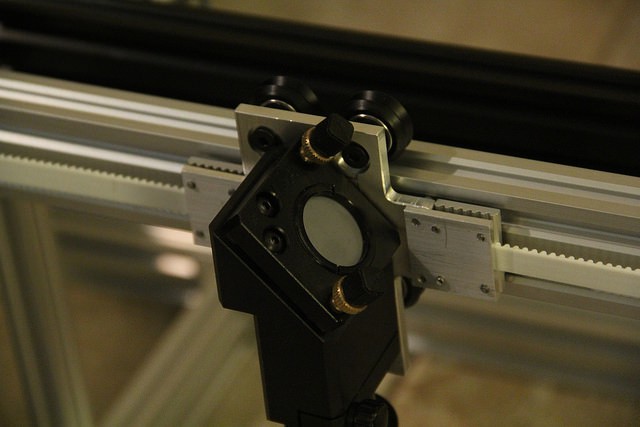
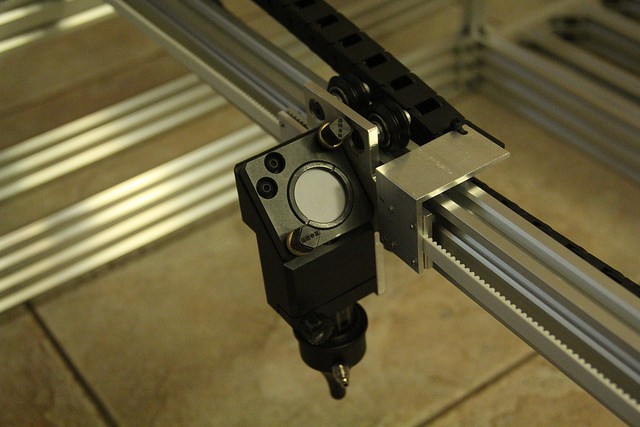
    The head plates for the laser head were probably the most complicated pieces I've done yet on the manual mill. Luckily, that complexity bubbles down to a finite number of measurable, repeatable operations. In this case, I'm fitting four delrin v-slot pulleys into a plate while using an eccentric spacer to apply compression and deliver that "wiggle-free" glide that we'll need for a laser head. Those eccentric spacers needed to slip into a 7.1[mm] hole such that they could hold their screws without losing their position. Since reamers were just a bit too tall to be easily mounted into the mill, I crossed my fingers and drilled the hole out with a 7.1 [mm] drill bit. Success! I got the slip-fit that I needed to insert the eccentric spacers! No Loctite-409 needed this time!

    Since the Taig Mill is so tiny, I'll usually rough out as much material as I can with the band saw first, getting the general shape of what I want. I'll then finish it off to its final dimensions on the mill.

    On my first pass, I didn't take into consideration any mounting points for the cable track that routes the air assist down to the nozzle.

    I gave it some thought, and figured that an angled extrusion would be far easier to mount onto. 30 minutes of milling later, I had an upgraded clamping plate cut down from an extruded U-Tube.

    This plate provides a nice mount point for the cable track while also holding the clamping plate in place.

  • Bringing the Micro Mill to Life

    Joshua Vasquez03/04/2016 at 09:45 0 comments

    The laser cutter is an amalgamation of off-the-shelf parts with a little "glue logic" that I'll need to make at home. Most off-the-shelf parts, like pulleys, belt, and extruded tubes, are from either OpenBuilds or LightObject. As for that "glue logic," I put the micro mill to work for the first time cranking out parts by hand.

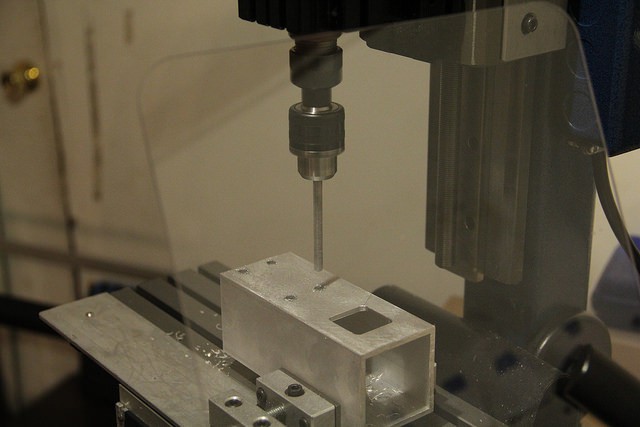
    The milling machine is a Taig 2019 manual mill. It's tiny--hilariously tiny in fact! Nevertheless, it's overbuilt for it's size, so taking cuts out of 6061 aluminium is a breeze.

    Before firing up the spindle for the first time, I needed to make a few modifications to the mill itself. Nothing too elaborate, just a Digital Readout (DRO). To fit the DRO onto the mill, I picked up a couple extruded aluminum angle channels from OnlineMetals. Hilariously enough, I made all the cuts and holes with a bandsaw and a hand drill, so these "adaptor plates" aren't pretty, but they'll get the job done of holding the DRO sliders in place.

    Having a digital readout has been a tremendous speed boost to milling parts. Rather than having to count revolutions of the hand crank, I just read a small display!

View all 3 project logs

Enjoy this project?

Share

Discussions

Similar Projects

Does this project spark your interest?

Become a member to follow this project and never miss any updates