
-
How to program the ad9361
12 hours ago • 0 commentsThe article discusses the process of creating a program for initializing and controlling the ad9363 chip. The described approach is applicable for the entire ad936x family. Everything is implemented under the clone of ADALM-Pluto using Vivado 2021 and Vitis 2021 in C.
I am not an expert in ad9361 programming. This is an area that I want to explore. I’m trying to figure out the basics and it’s easier for me to learn when I see how it works. That’s why I’m doing this. Not because I already know everything about the ad9361. And if you also learn something from reading my article, that would be great. But please don’t rely on my articles to understand the theory. There are many excellent books and other sources on this topic where you can find more information. I hope that through this article you will learn how to apply some of the basic principles of ad936x programming in real systems. If you notice a bug or something that can be improved, please write to me in the comments or private messages. Then we can study together, and maybe I can fix it and show it in new articles.
![]()
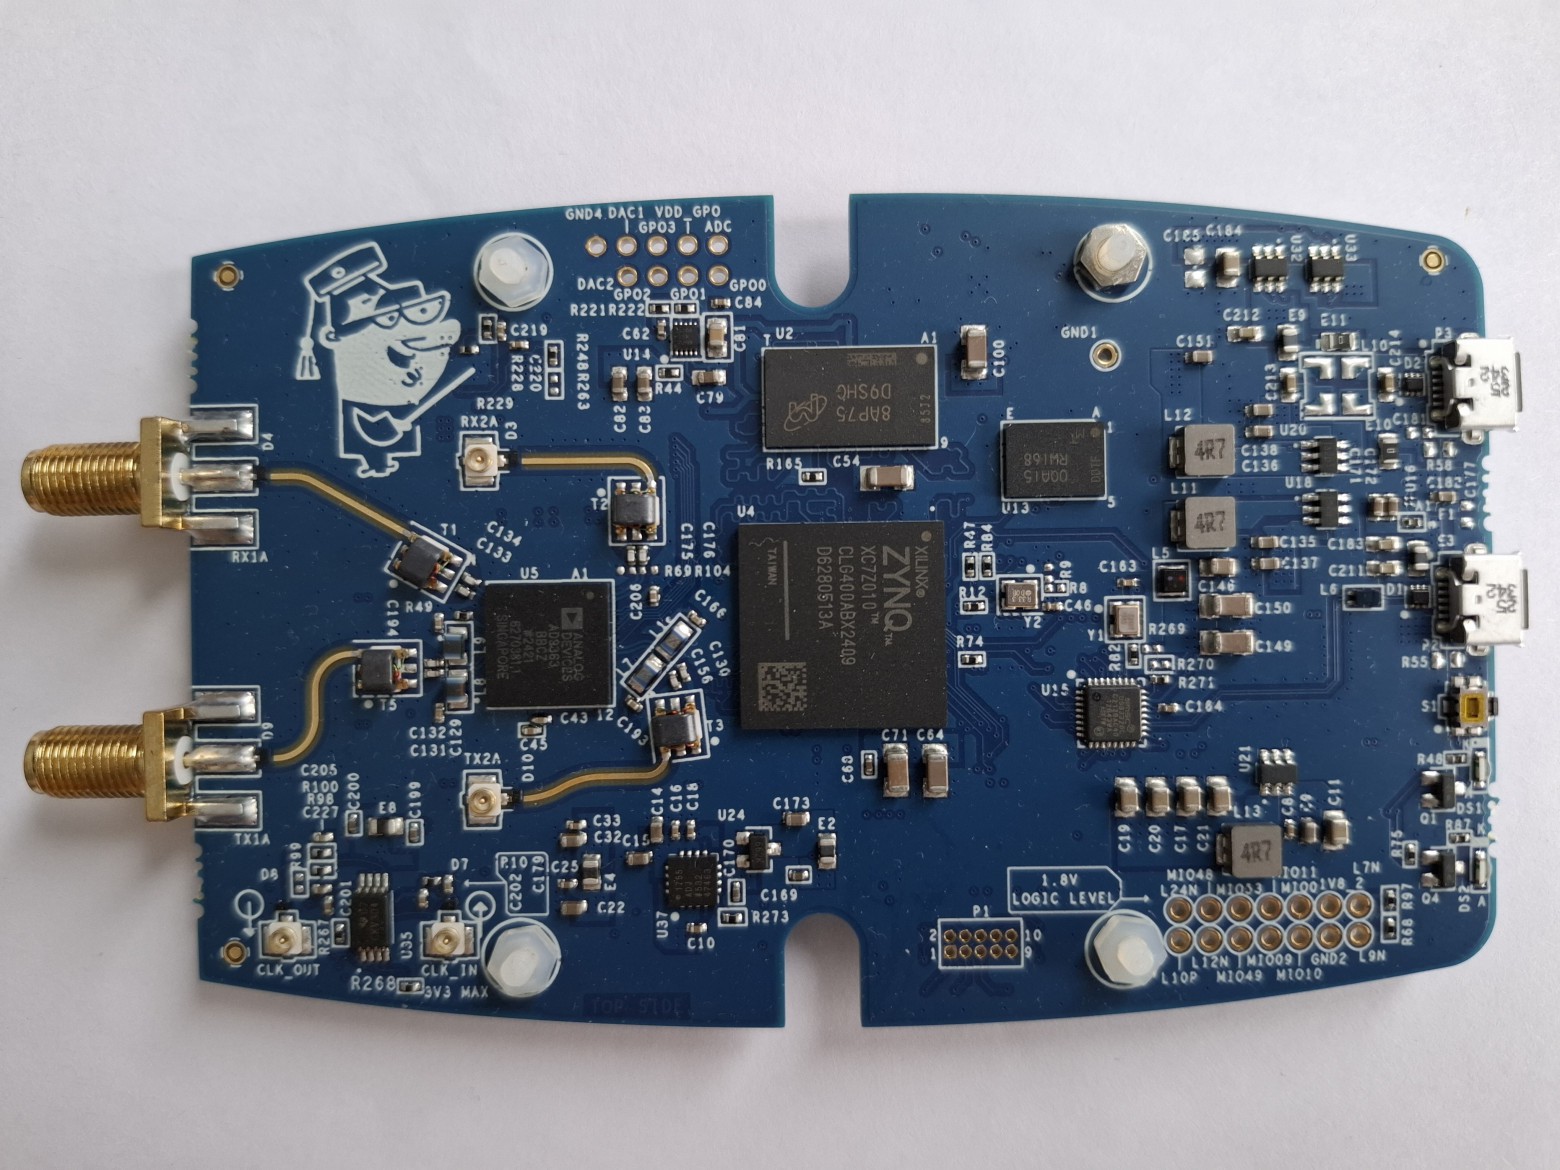
Fig. 1. General top view of the ADALM-PLUTO clone
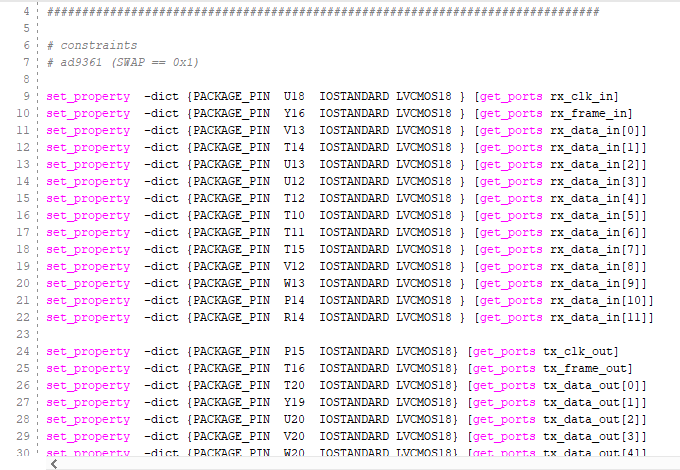
So, we have a clone of a fairly popular SDR called ADALM-PLUTO and we need to write our own firmware for it. This clone differs from the original board in that it uses a slightly different FPGA — XC7Z010-CLG400. What does this mean for the firmware developer? And the fact that you will have to contact the seller and ask for a scheme. In this case, we were lucky, and the seller shared the .xdc file.
![]()
Fig. 2. A fragment of the provided .xdc file
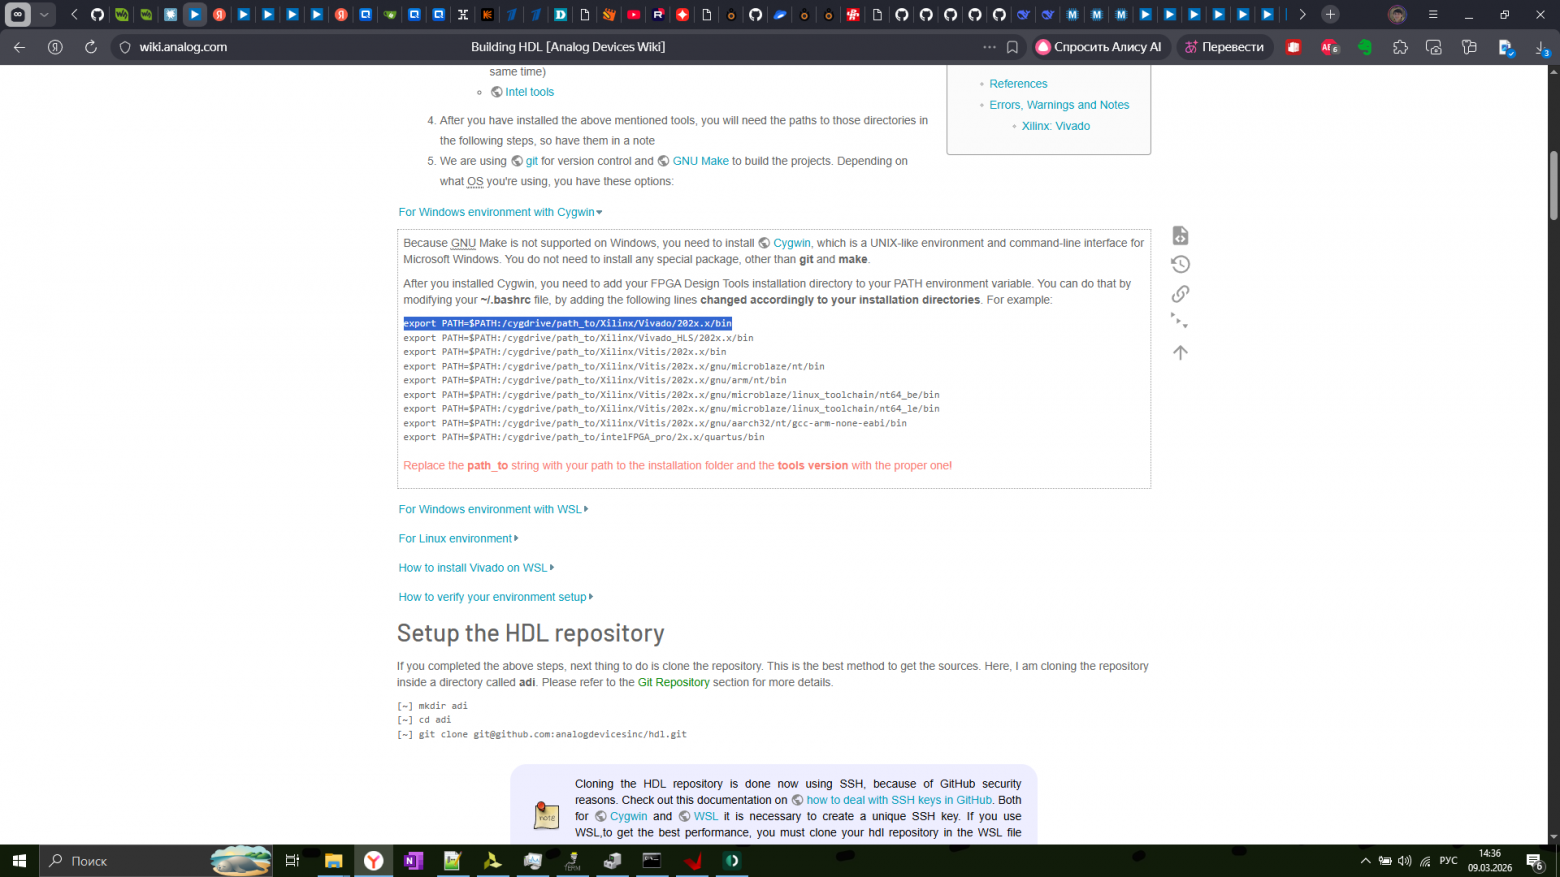
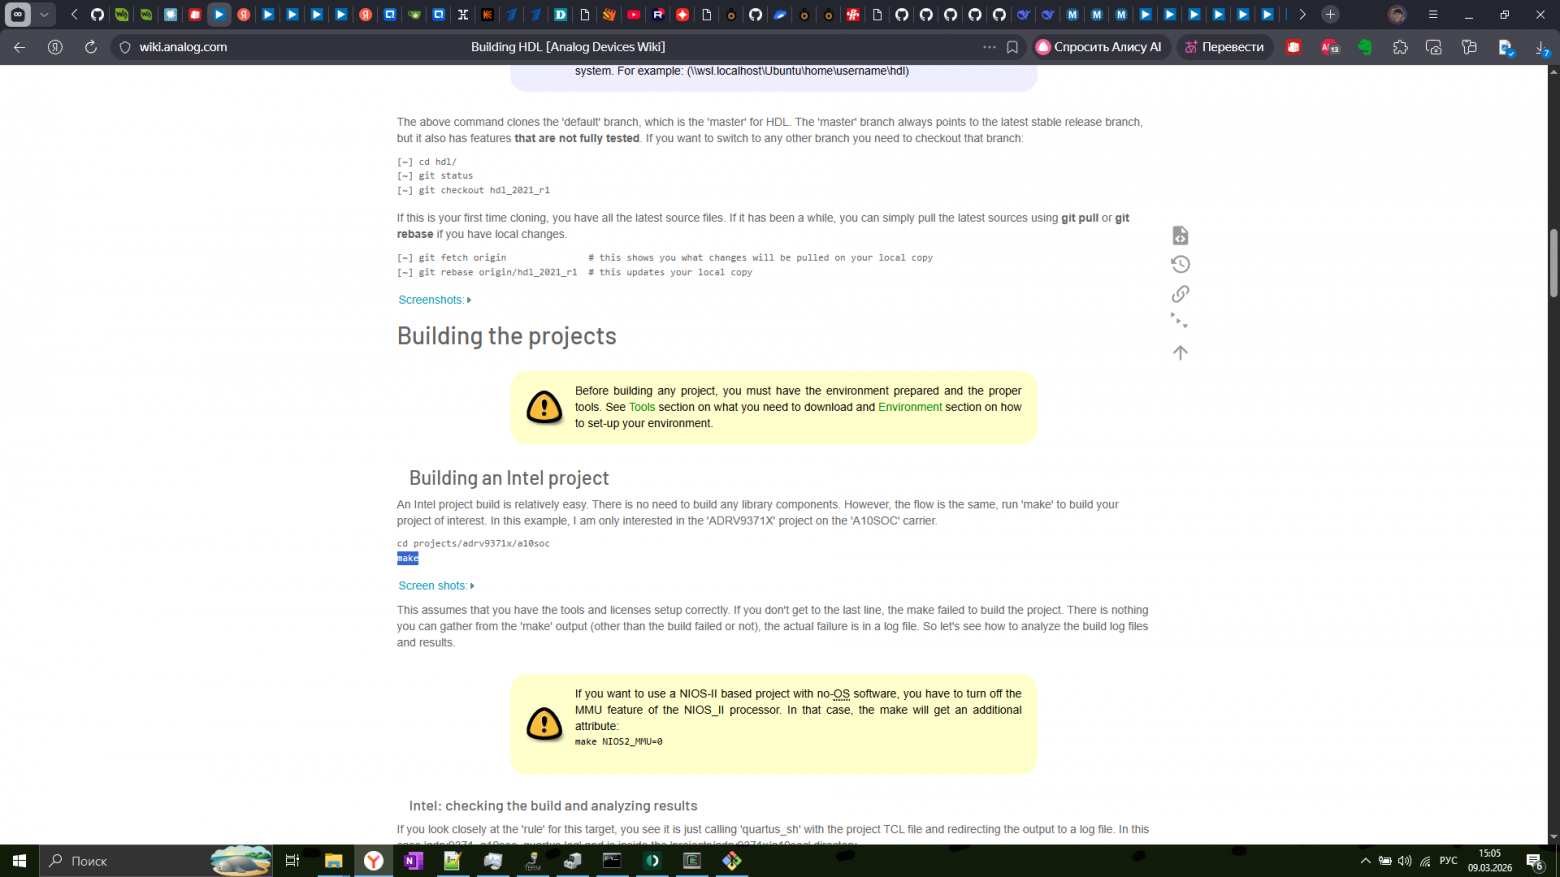
There are many ways to create firmware for the ad936x and PlutoSDR, in particular. Here it is suggested to follow one of the simplest ones. There is such a resource https://wiki.analog.com . He can be very helpful in developing such software. For example, there is a page https://wiki.analog.com/resources/fpga/docs/build . Let’s go through these steps.
![]()
Figure 3. Screenshot of the Building HDL page
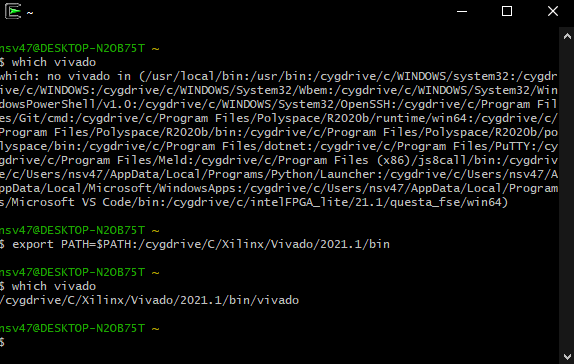
In this article, development will be carried out on a Windows system , so in CYGWIN we will execute the command
export PATH=$PATH:/cygdrive/C/Xilinx/Vivado/2021.1/binPlease note that path_to has been replaced with C and the Vivado version is specified. After executing the which command , vivado returns the correct path to Vivado.
![]()
Fig. 4. Screenshot of Cygwin terminal
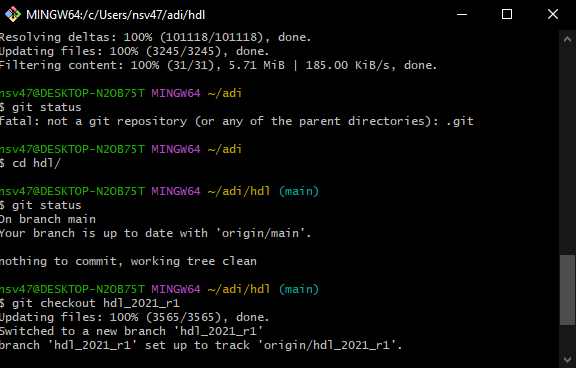
Now you can clone the repository and switch to the hdl_2021_r1 branch, because in this article the development is carried out using Vivado 2021.1.
![]()
Fig. 5. Screenshot of the Git Bash terminal with the result of cloning and switching to a branch.
We are using a clone from another FPGA, so it is necessary to correct the sources. First of all , we 'll replace it .xdc on the provided one.
![]()
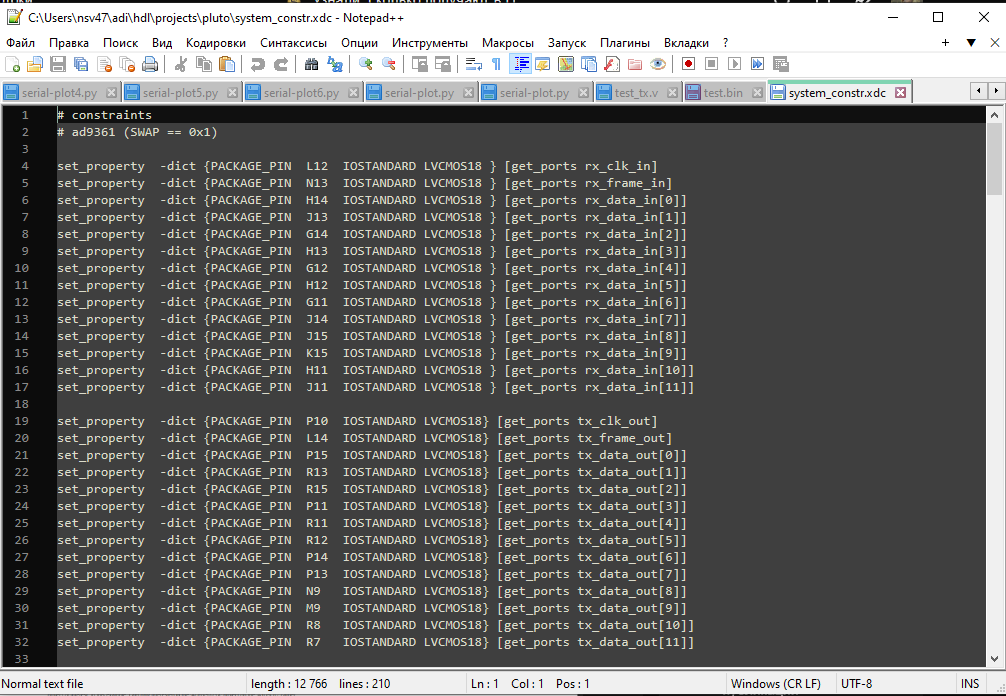
Fig. 6. Screenshot of a fragment of the original .xdc file
![]()
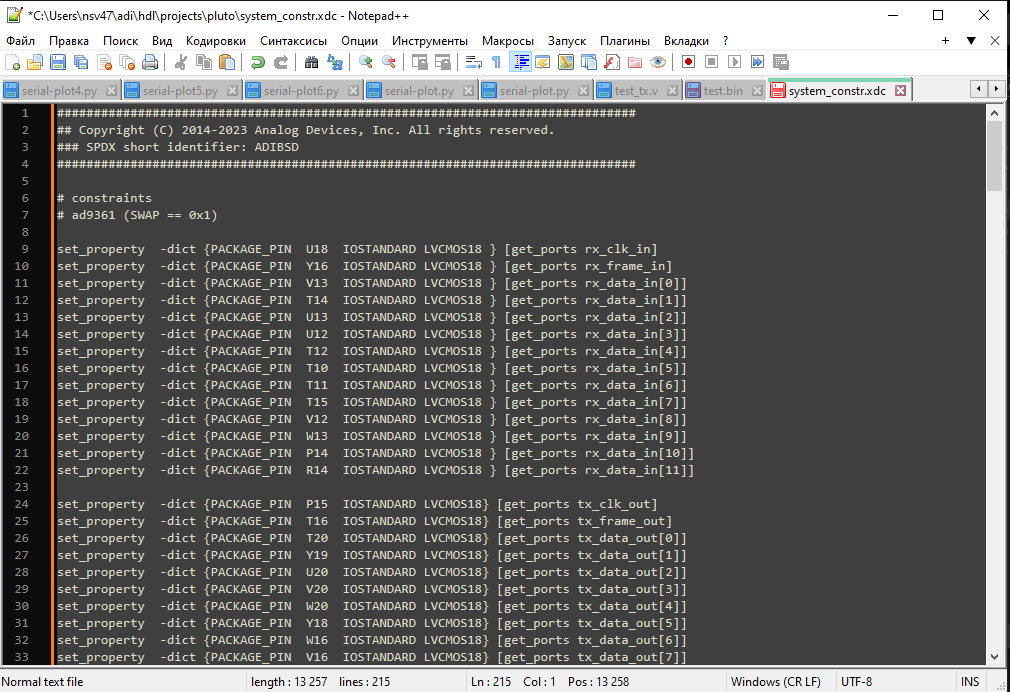
Fig. 7. Screenshot of a fragment of the .xdc substitution file
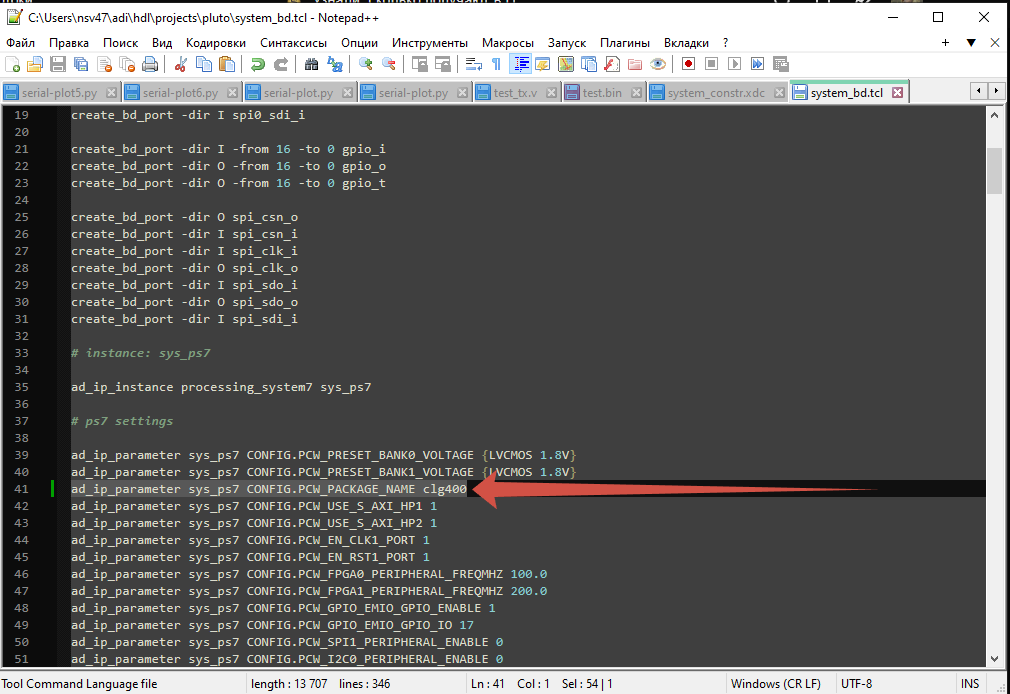
The two images above show that the destinations are different. For example, rx_clk_in was on L12, but it became on U18. In the system_bd.tcl file, on line 41, there is a parameter whose value must be replaced in accordance with the FPGA clone used on the board.
![]()
Figure 8. Screenshot of a fragment of the system_bd file.tcl with the changed parameter
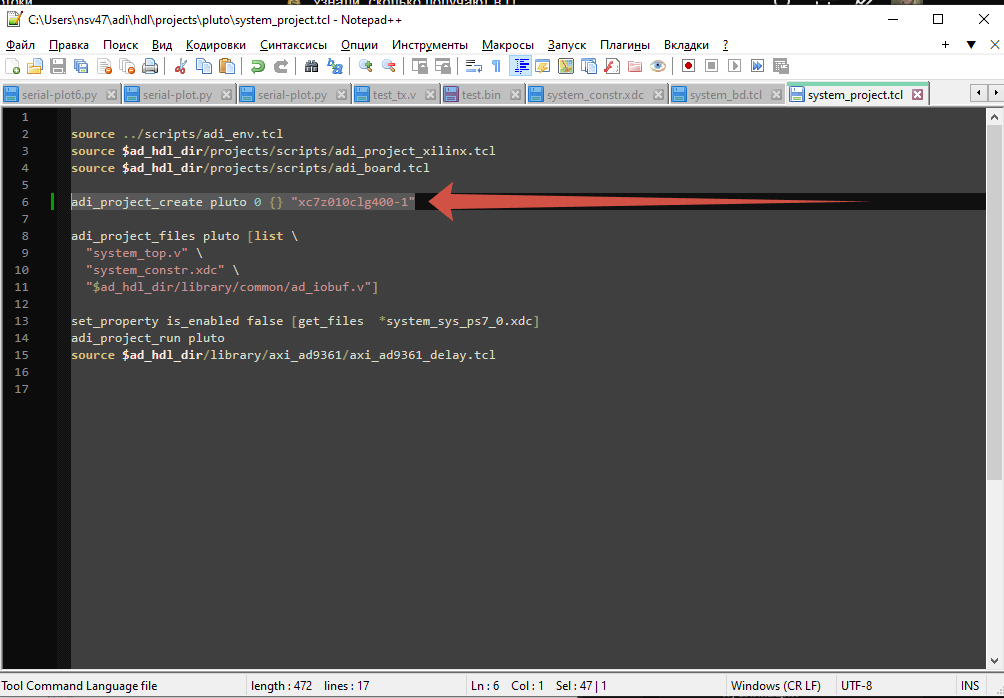
In the system_project.tcl file, the FPGA model must be replaced on line 6.
![]()
Fig. 9. Screenshot of a fragment of the system_project.tcl file with a modified FPGA model.
These are all changes that relate to hardware in terms of HDL design assembly.
![]()
Fig. 10. Screenshot of the Building HDL page
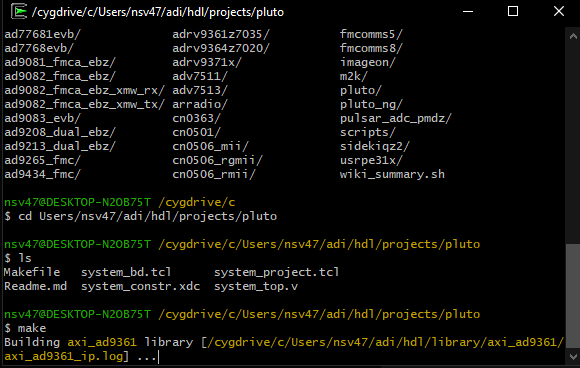
Now, on the WIKI page, it is suggested to go to the required project and execute the make command. Please note that the make utility must be installed in Cygwin and the which make command must return the correct path, for example,
$ which make /usr/bin/make![]()
Fig. 11. Screenshot of the Cygwin terminal during the execution of the make command in the pluto project directory.
This process can be long....
Read more » -
Packet retransmission via ad9361 using the BFS algorithm
7 days ago • 0 commentsThis article discusses how to transfer data in packets via the baremetal no-os application on the ad9361. The liqid-dsp library, which is compiled for the arm core in the zynq-7000, is used to generate the frame on the transmitting side and process the frame on the receiving side. To relay messages, the BFS graph traversal algorithm (Breadth-First Search, breadth-first search) and a simple addressing system for transceivers in the payload of a message packet are used.
I am not an expert in ad9361 programming. This is an area that I want to explore. I'm trying to figure out the basics and it's easier for me to learn when I see how it works. That's why I'm doing this. Not because I already know everything about the ad9361. And if you also learn something from reading my article, that would be great. But please don't rely on my articles to understand the theory. There are many excellent books and other sources on this topic where you can find more information. I hope that through this article you will learn how to apply some of the basic principles of ad936x programming in real systems. If you notice a bug or something that can be improved, please write to me in the comments or private messages. Then we can study together, and maybe I can fix it and show it in new articles.
Breadth-first graph traversal algorithm
As you know, a huge advantage of this algorithm is that the paths it searches for in an unweighted graph are the shortest. Thus, this algorithm will search for paths with the minimum number of edges.
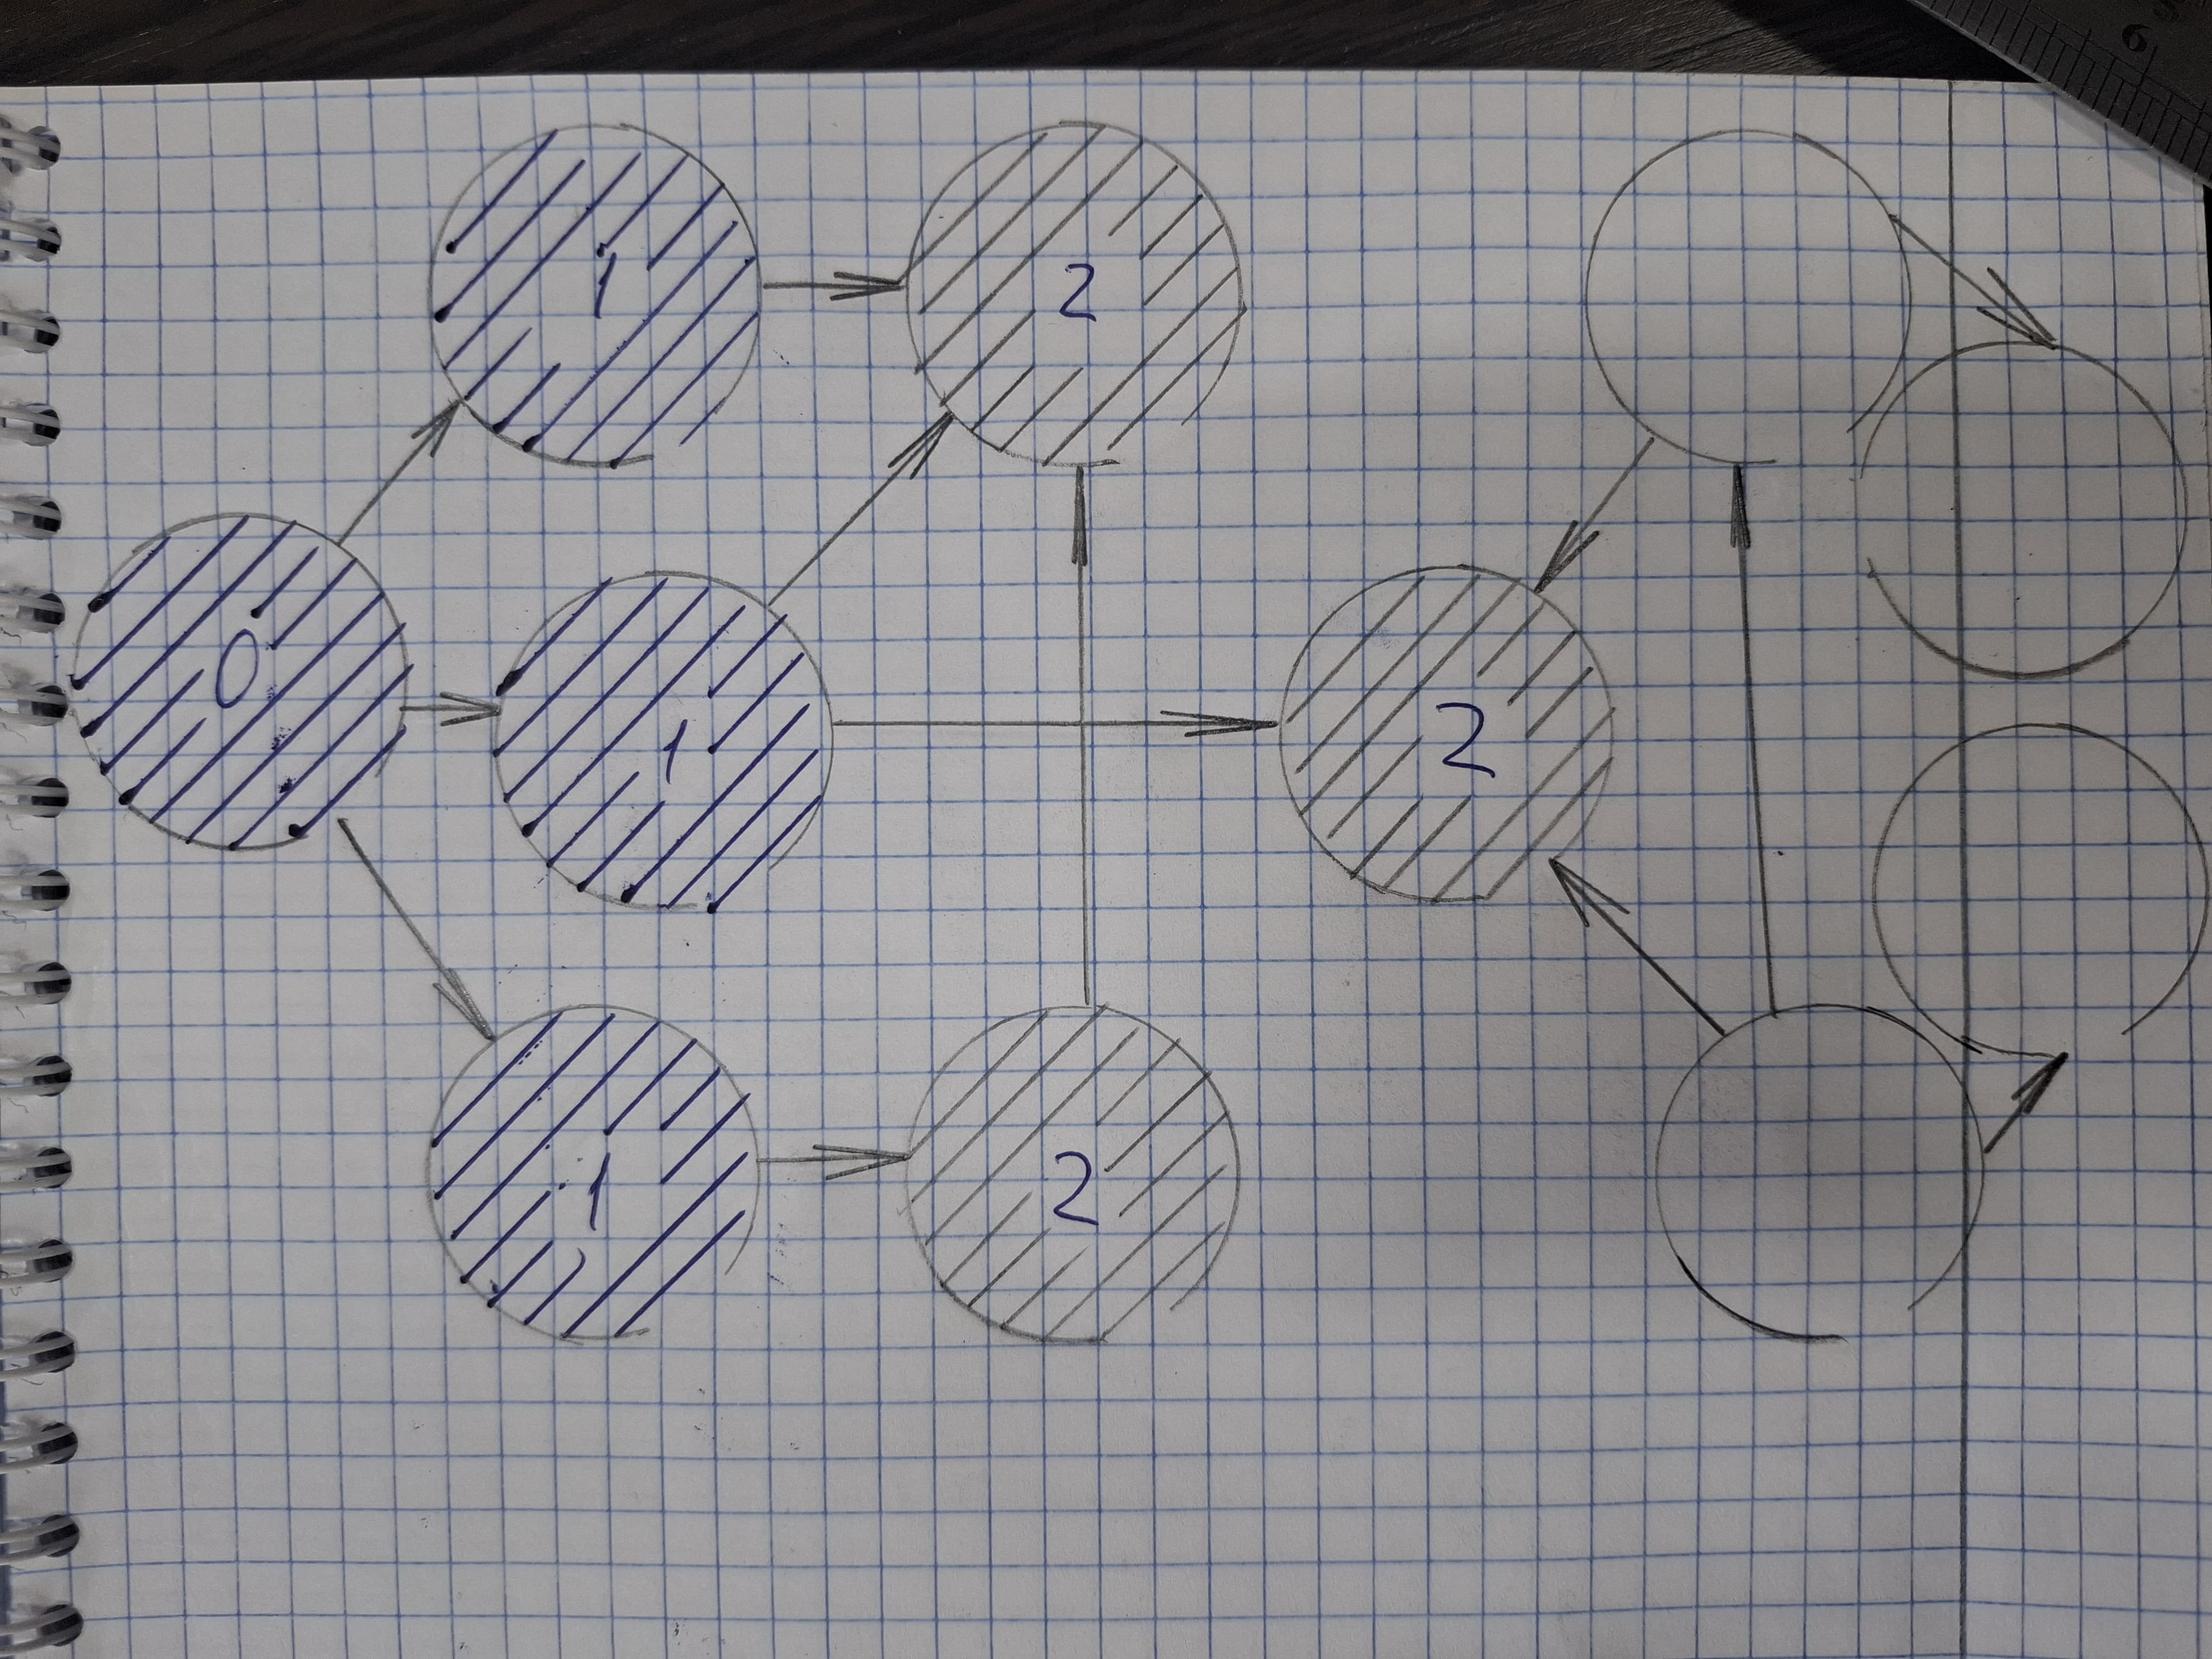
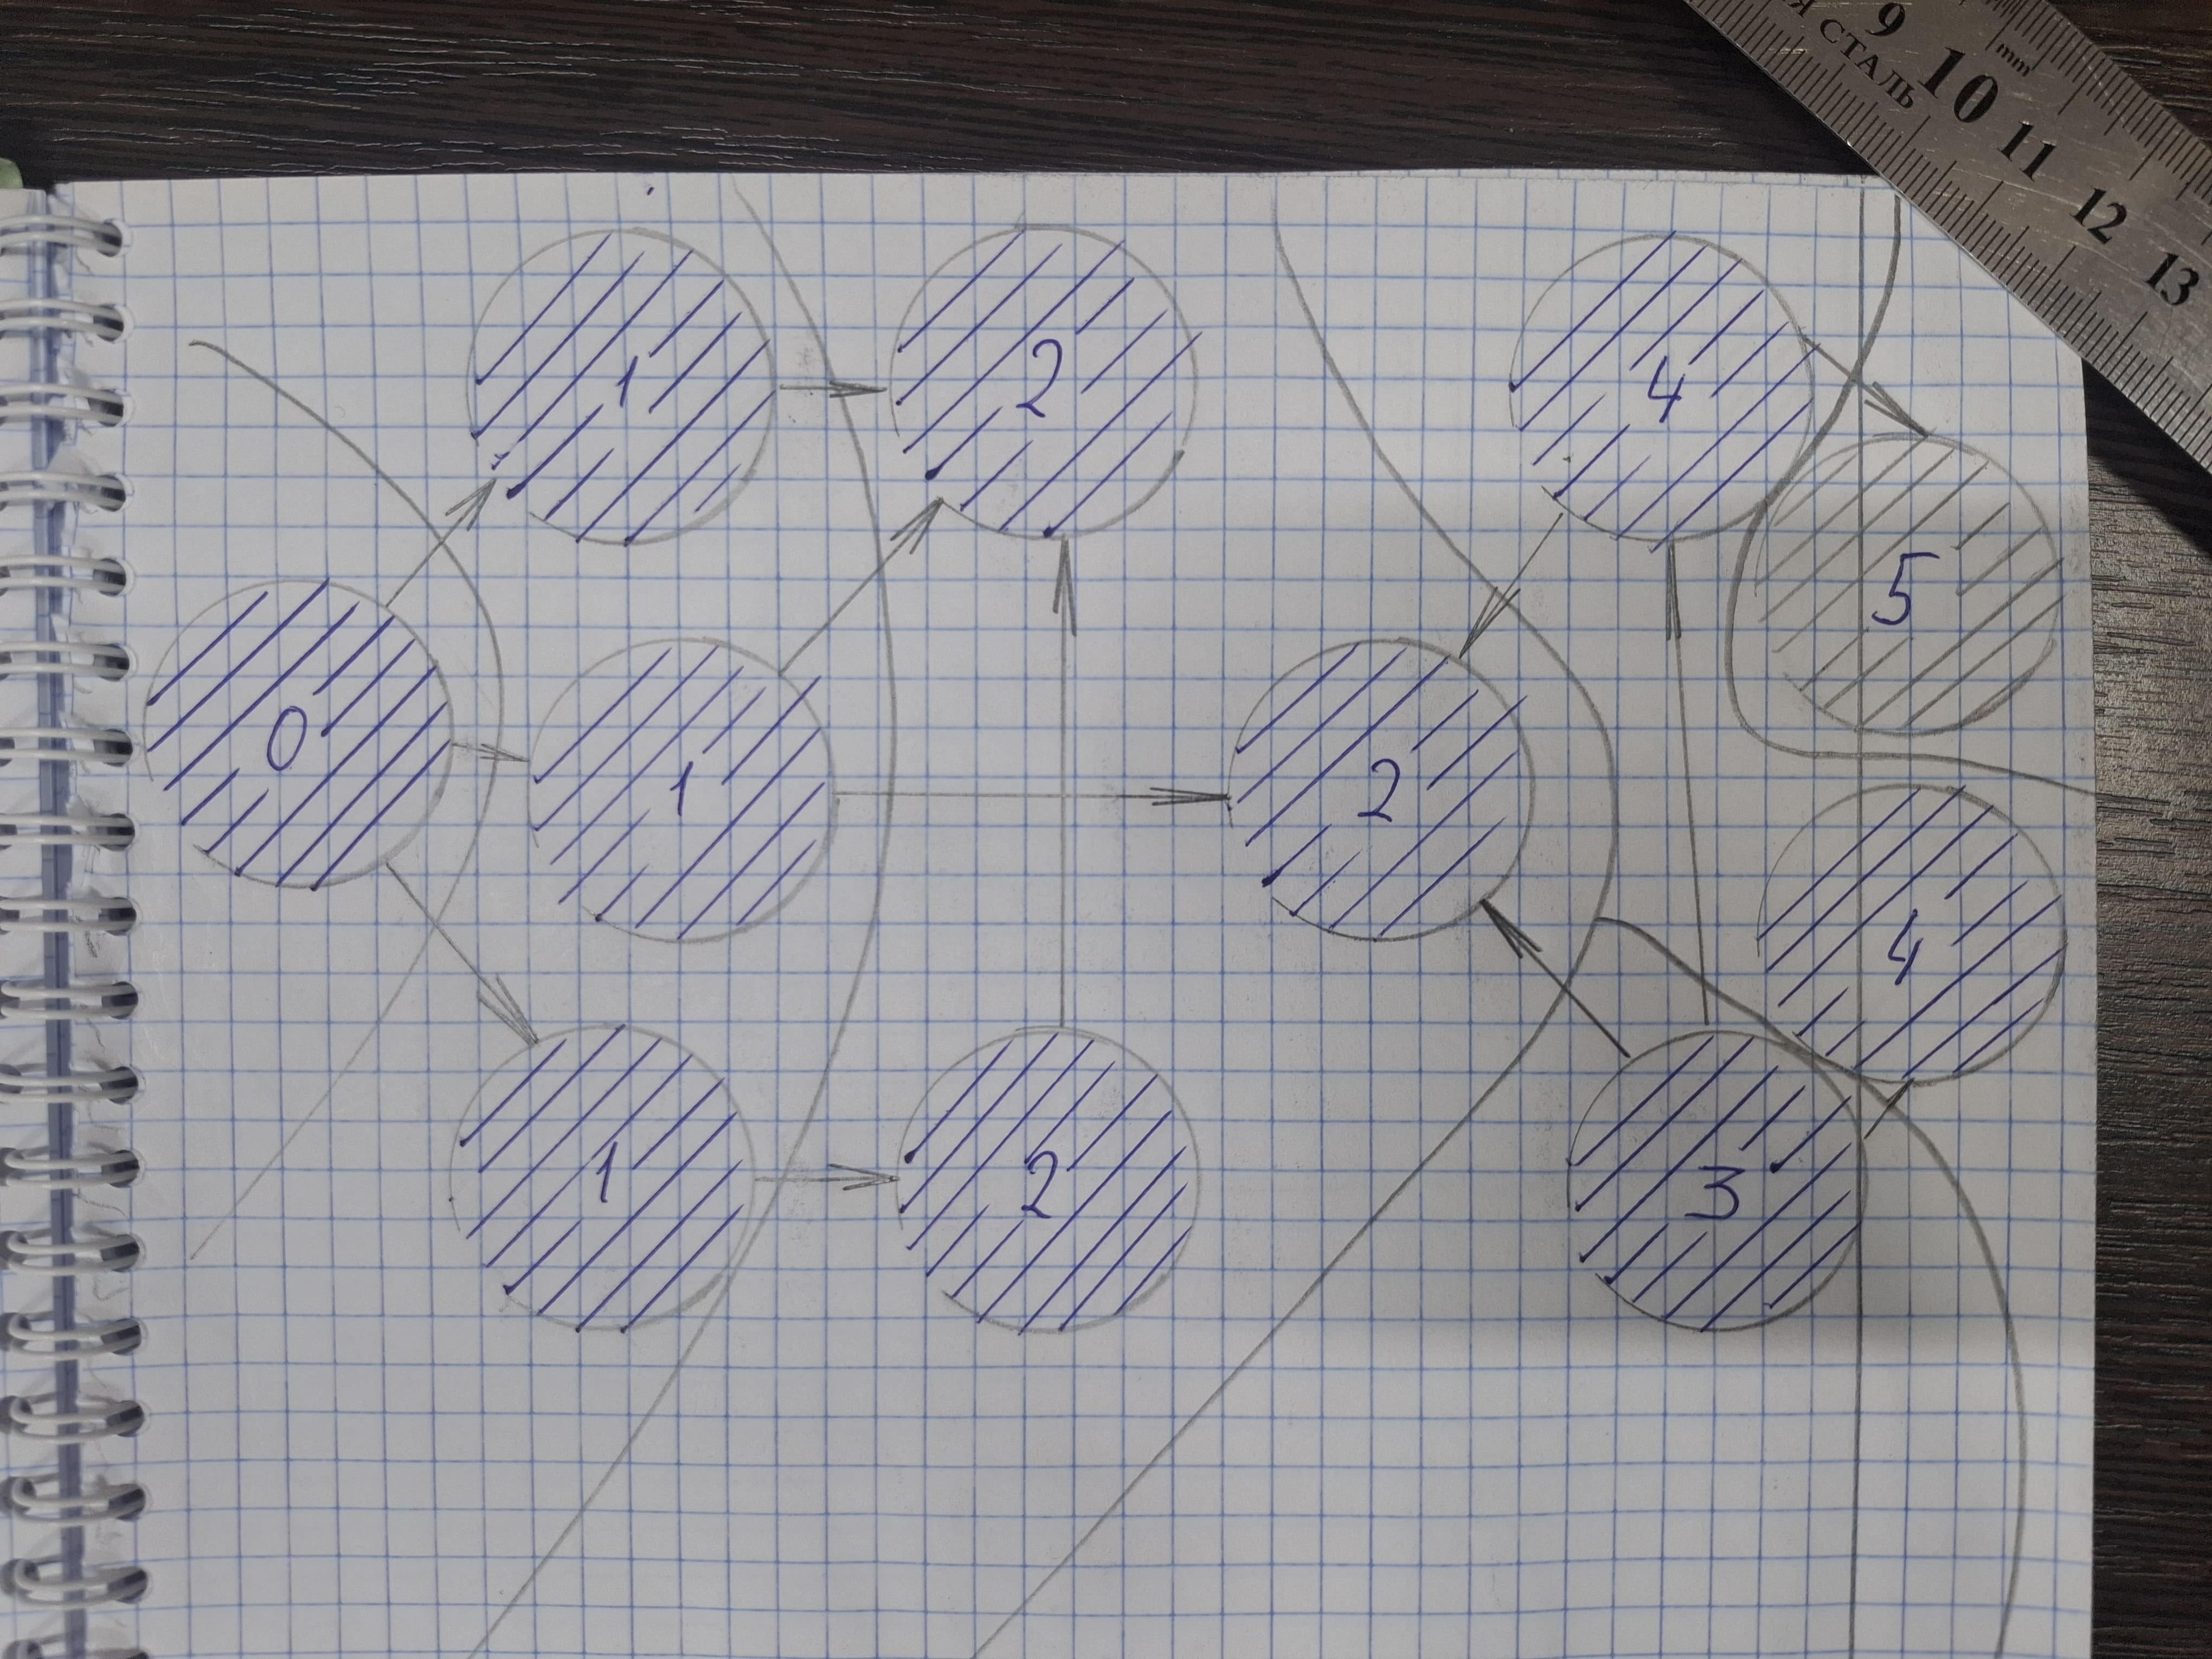
First, we take turns going to all the vertices that are at a distance of 1. If we have vertices A, B, and C that lie in the adjacency list from the starting vertex x, then vertex A is considered first. Then we move from it to vertex B, and from vertex B we move to vertex C. We will go through all the vertices that are at a distance of 1.
![]()
Fig. 1
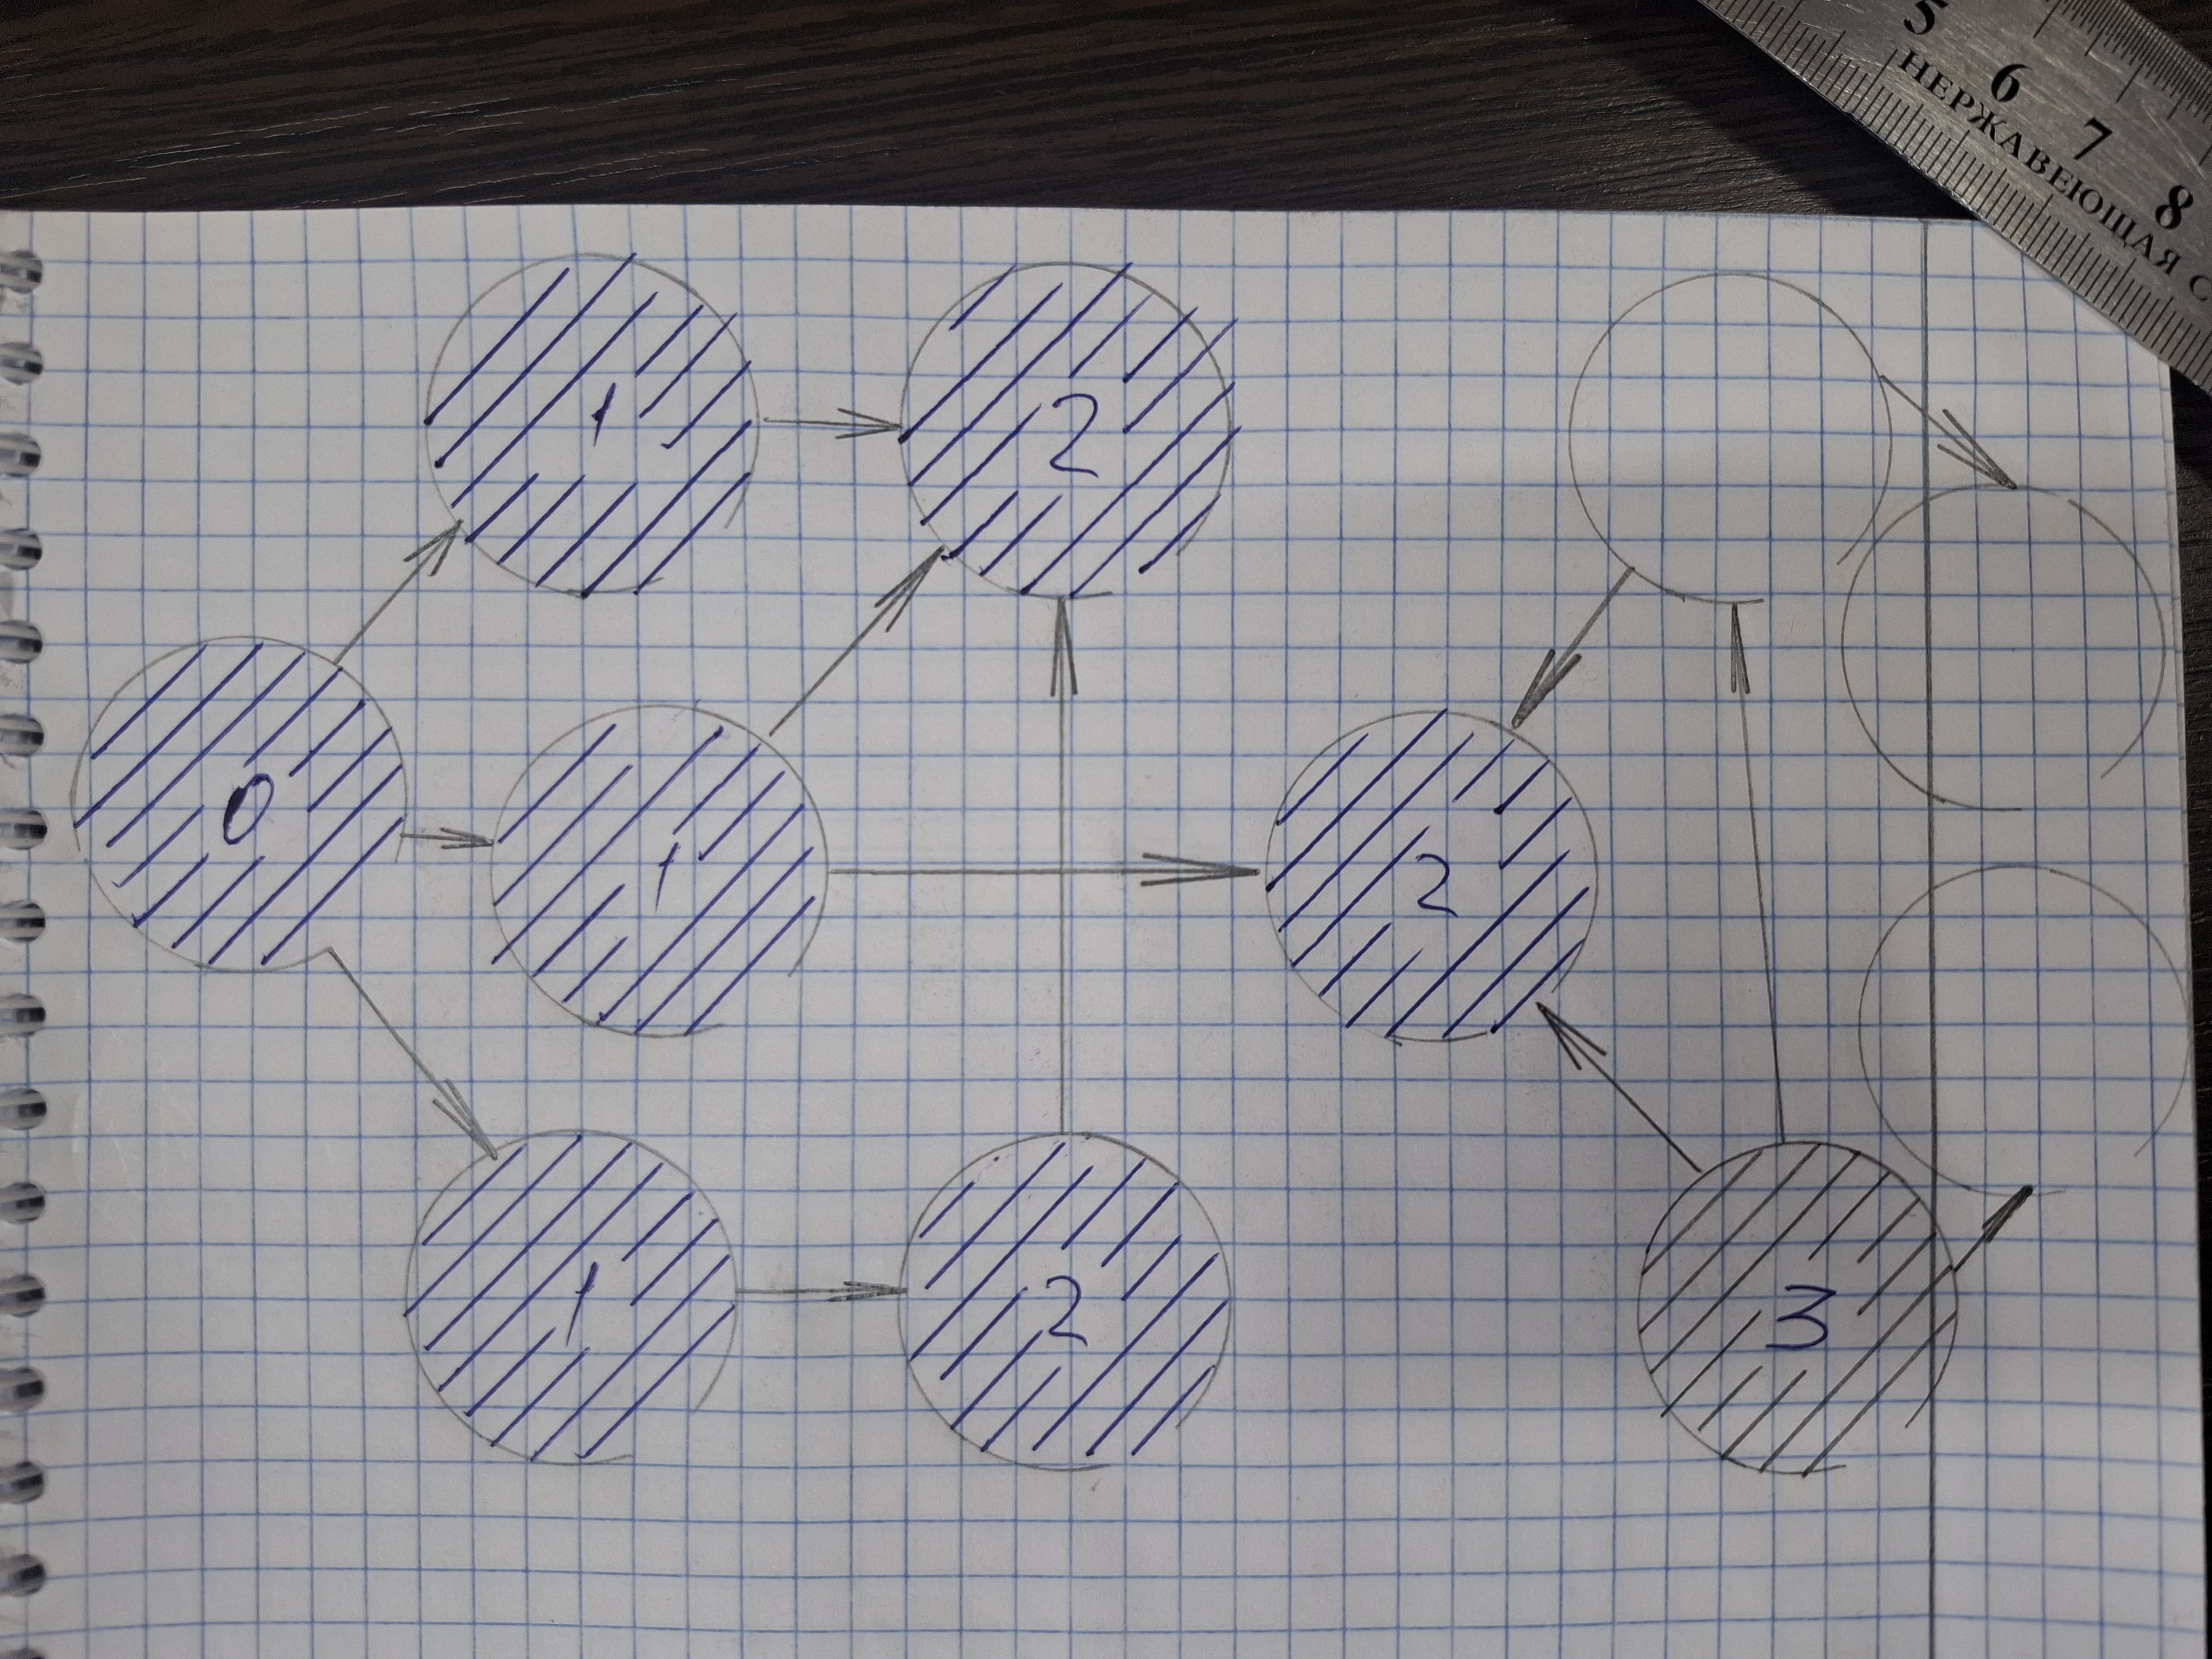
Then, when they are over, we will go along the peaks at a distance of 2.
![]()
Fig. 2
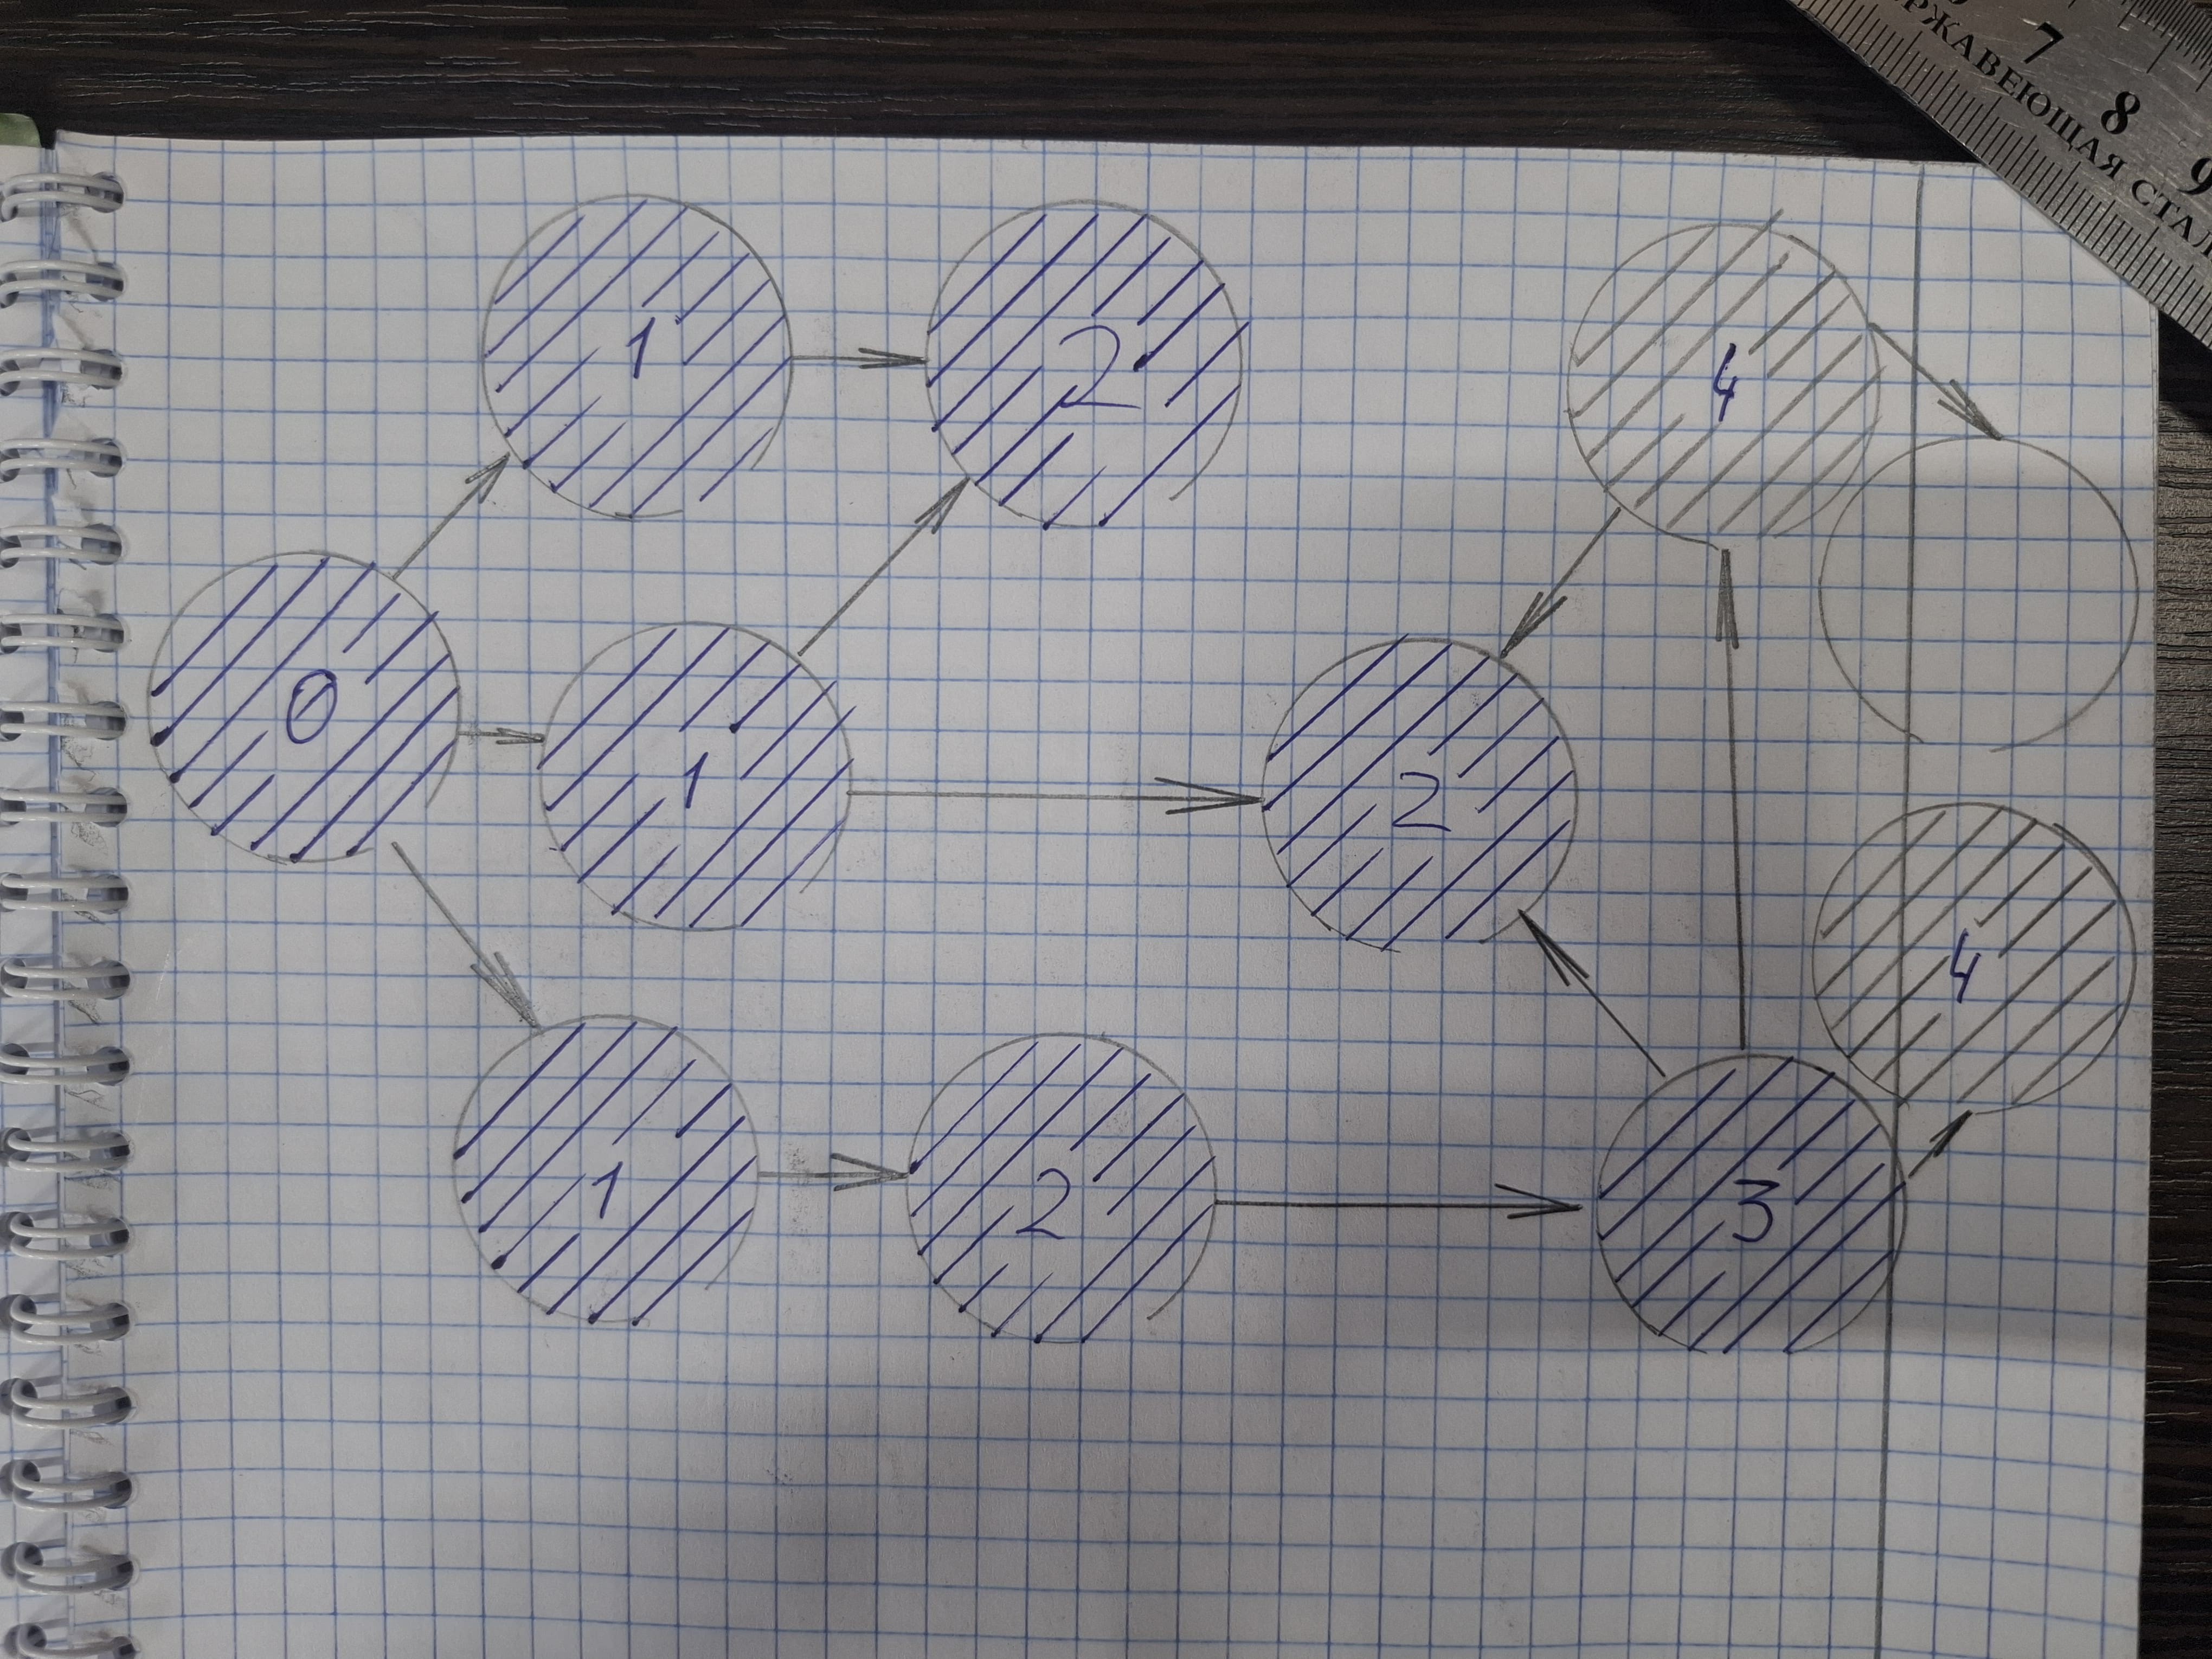
Then follow the vertices at a distance of 3.
![]()
Fig. 3
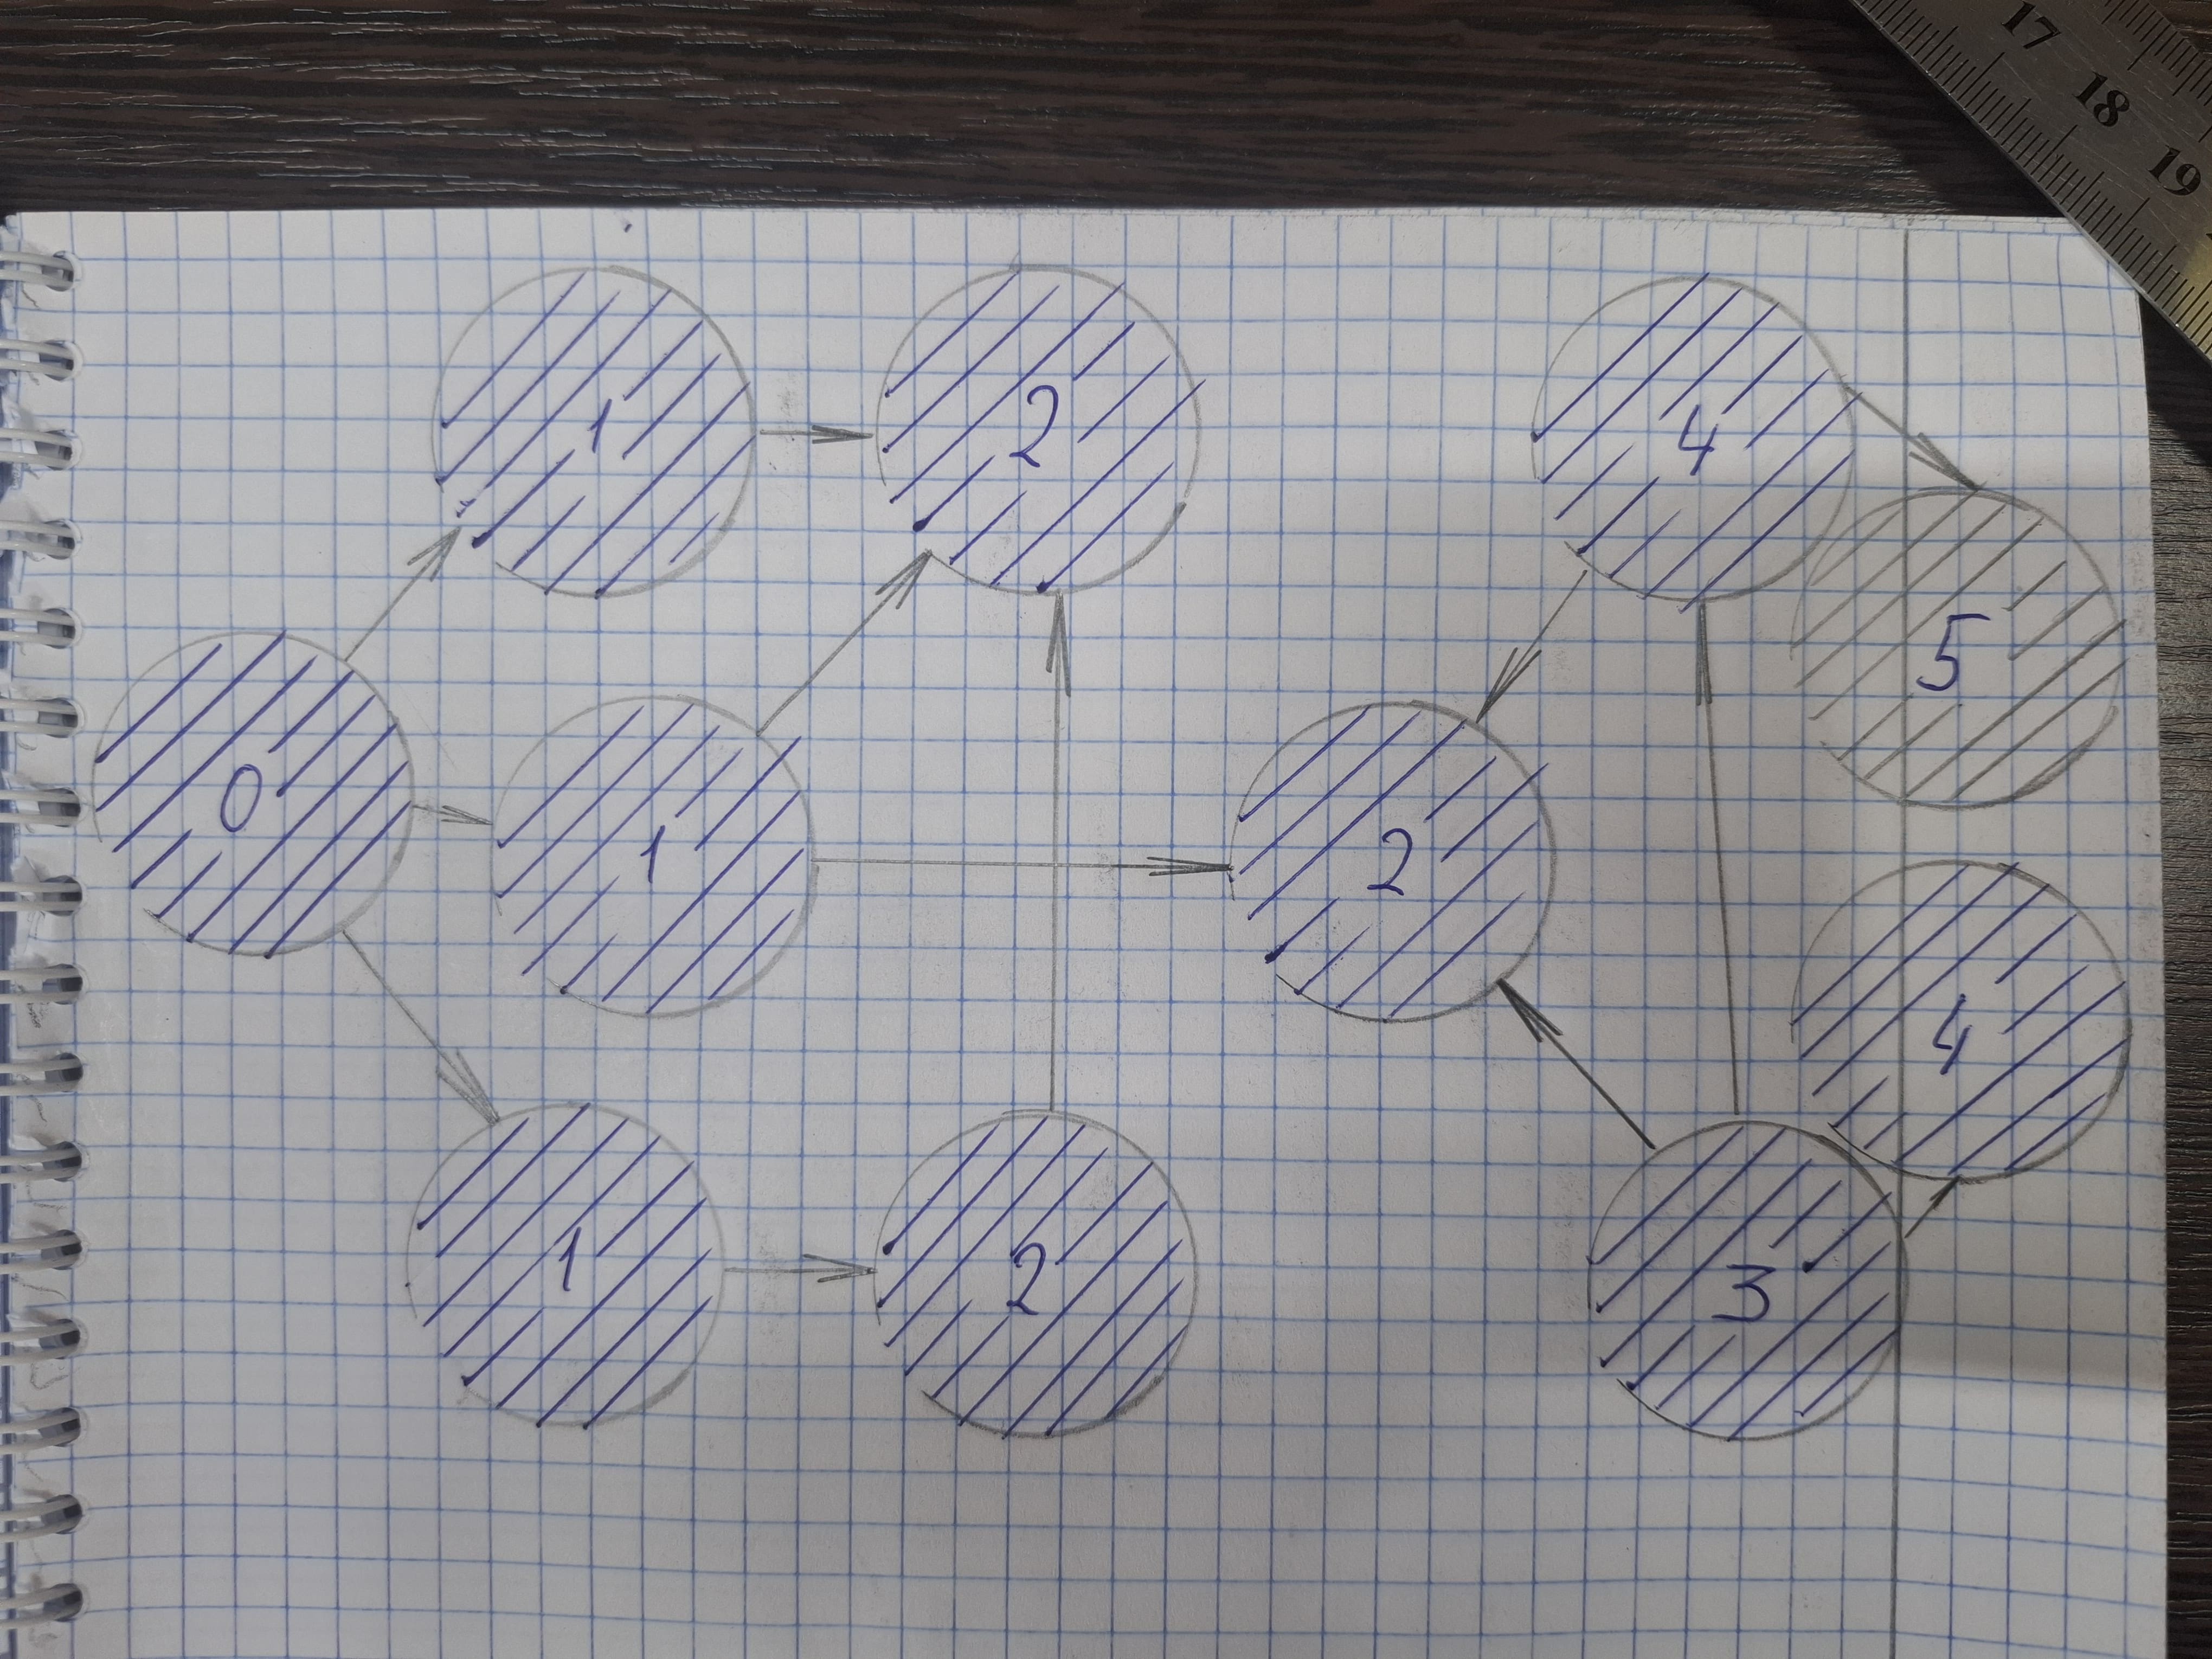
4 and 5
![]()
Fig. 4
![]()
Fig. 5
This is how we will go through the layers. And diverge further and further and further from the starting point.
![]()
Fig. 6
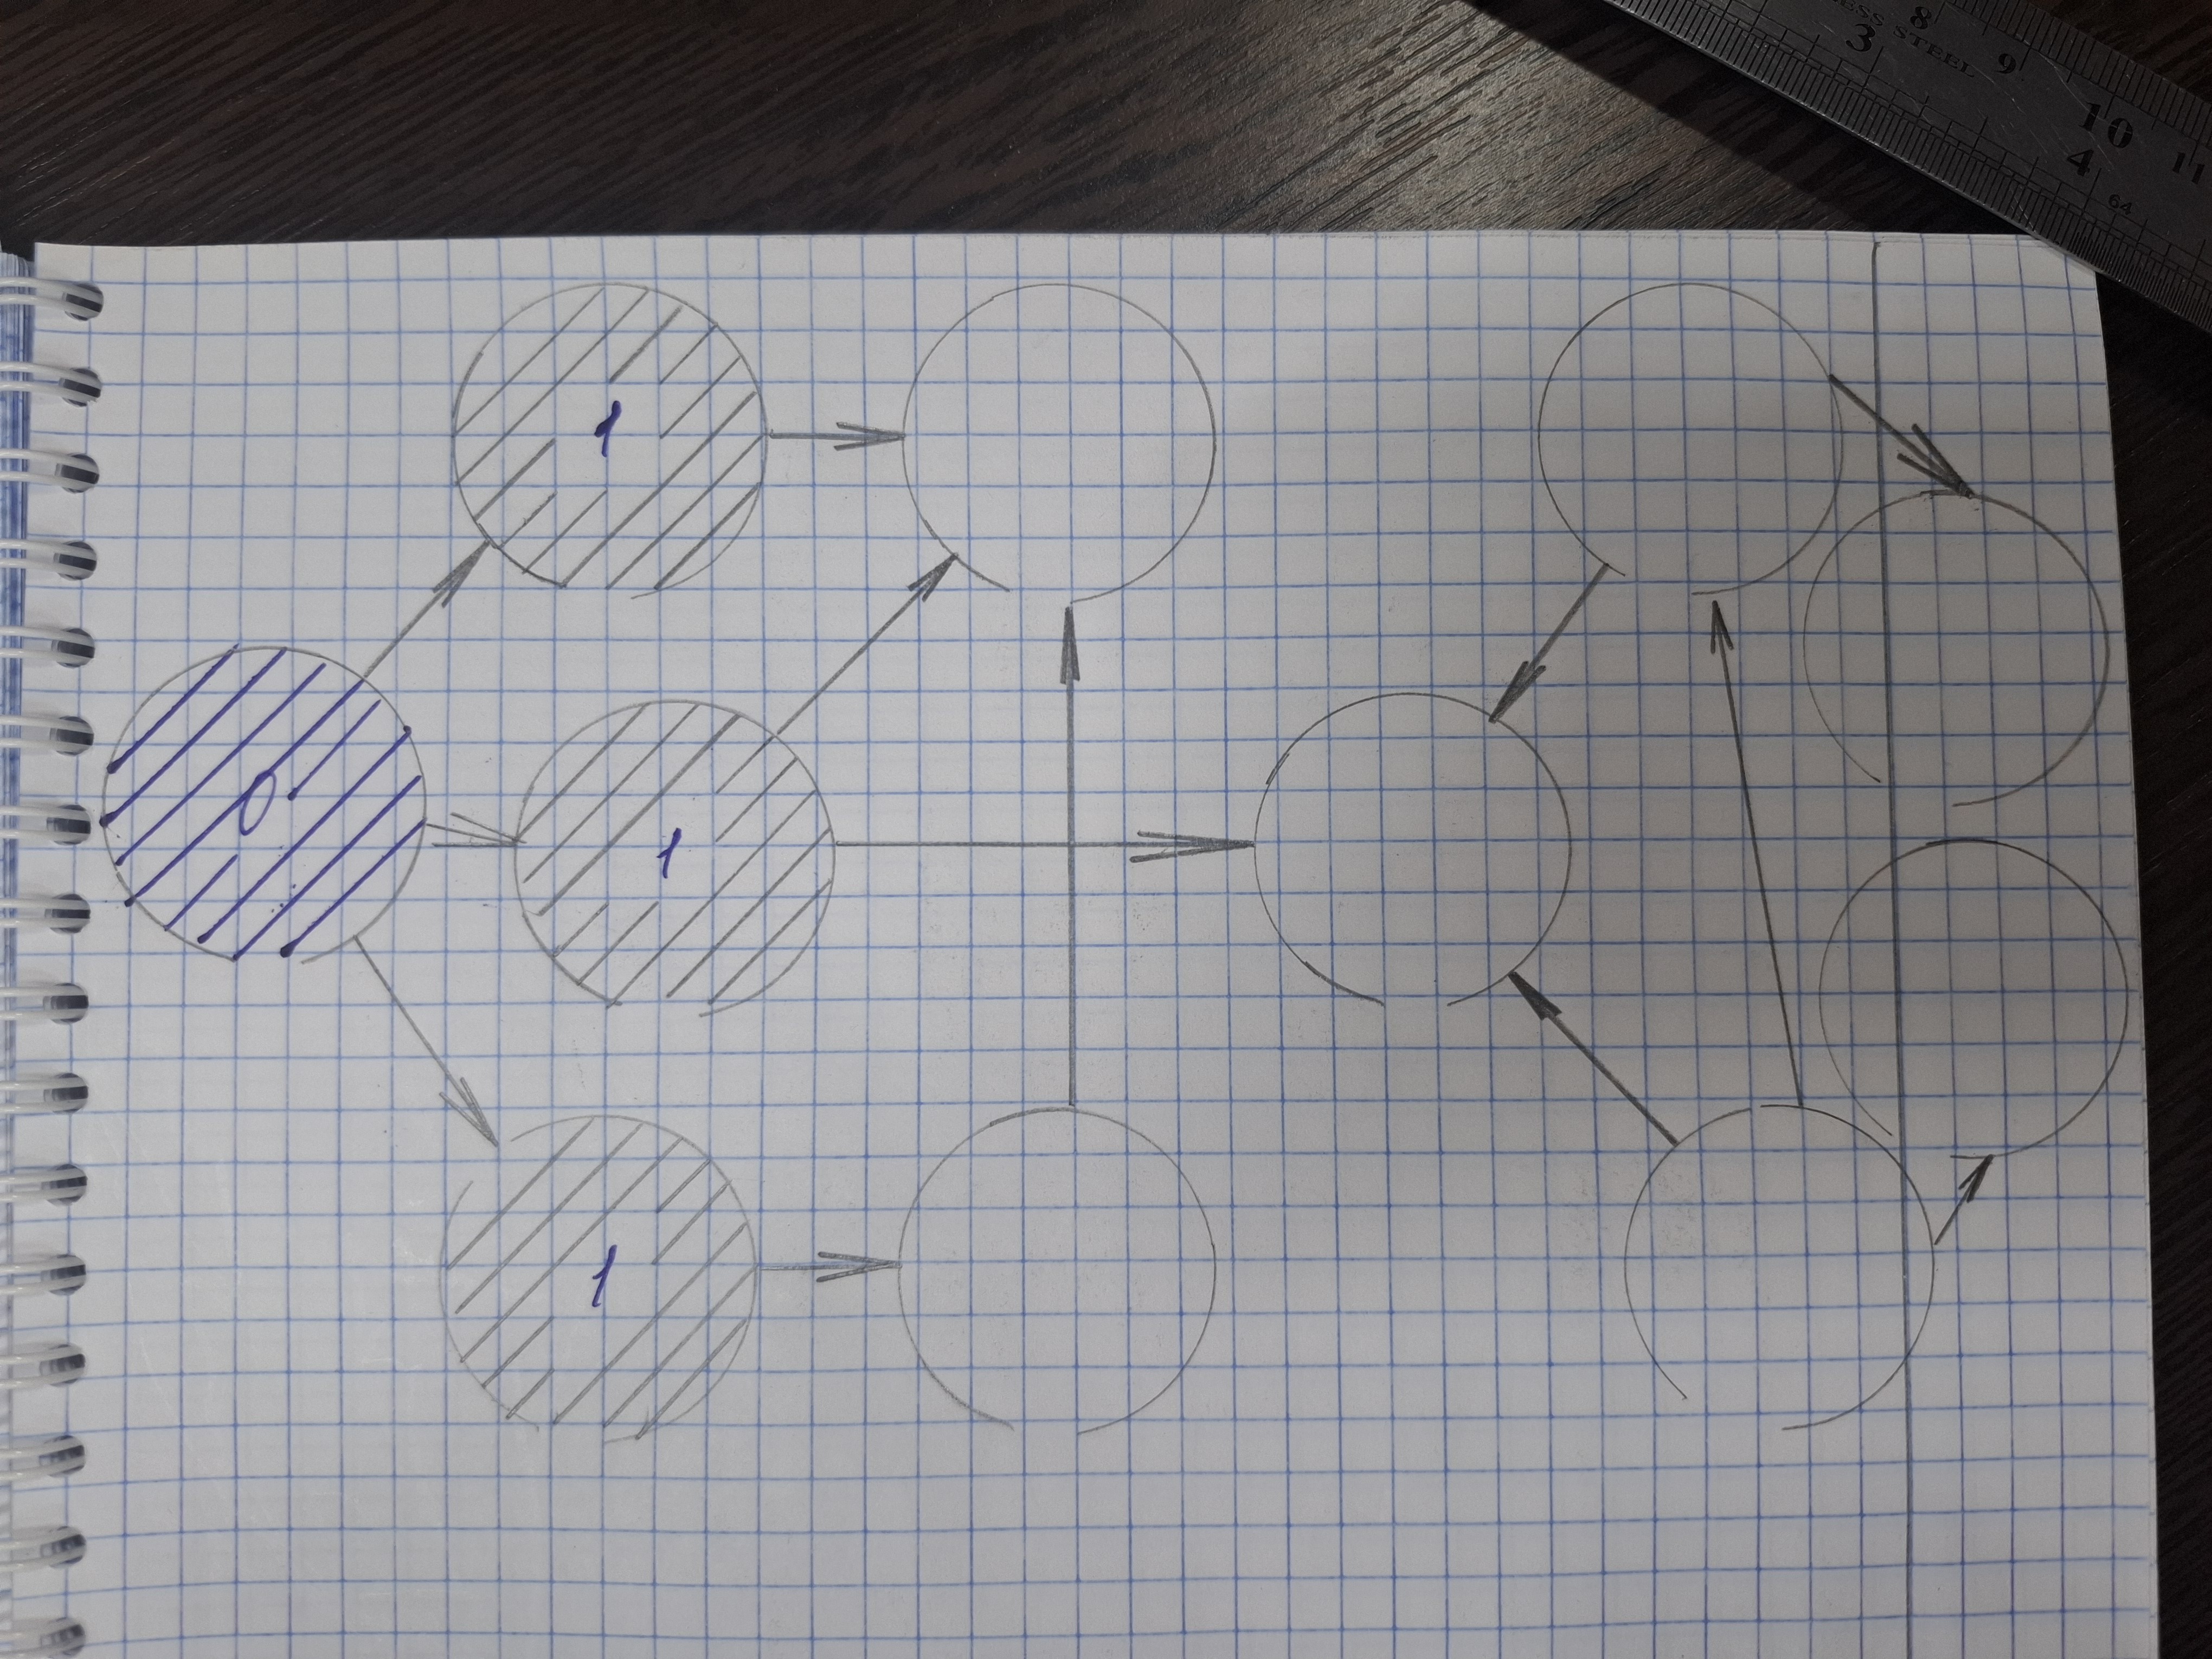
When we traverse the graph and consider the vertices that are adjacent to the vertex V. Let's add the vertices that we want to consider to the queue. Thus, when we consider them in layers, we will first consider vertices at a distance of 0. Then we add vertices at a distance of 1 to the queue and consider them. And after we consider them at a distance of 1, we will add vertices at a distance of 2 to the queue. If we are going to run a breadth-first traversal from some vertex V, we need to create two arrays. The array dist[i] is the distance from V to i. And the visited[i] array, which stores information about whether a vertex has been added to the queue. Then:
void bfs(int v){ // v is the initial vertex
  push(v); // adding the starting vertex to the queue
  visited[v]= true;
  dist[v] = 0; // the distance to the starting vertex is 0

  // while there is something in the queue
  while(queueSize() > 0){
  // taking the first vertex out of the queue
  int x = queuePop();

  // iterating over all edges from vertex x
  // to the vertices of i, which are still white
  for(int i : G[x])
    if(!visited[i]){
      // adding to the queue and
      // we assign a distance of 1 more
      queuePush(i);
      visited[i] = true;
      dist[i] = dist[x] + 1;
    }
  }
}
In the end, when the algorithm finishes its work, all the vertices that can be reached will be marked as visited. The dist distance will be calculated for all the vertices that you managed to reach.
![]()
Fig. 7
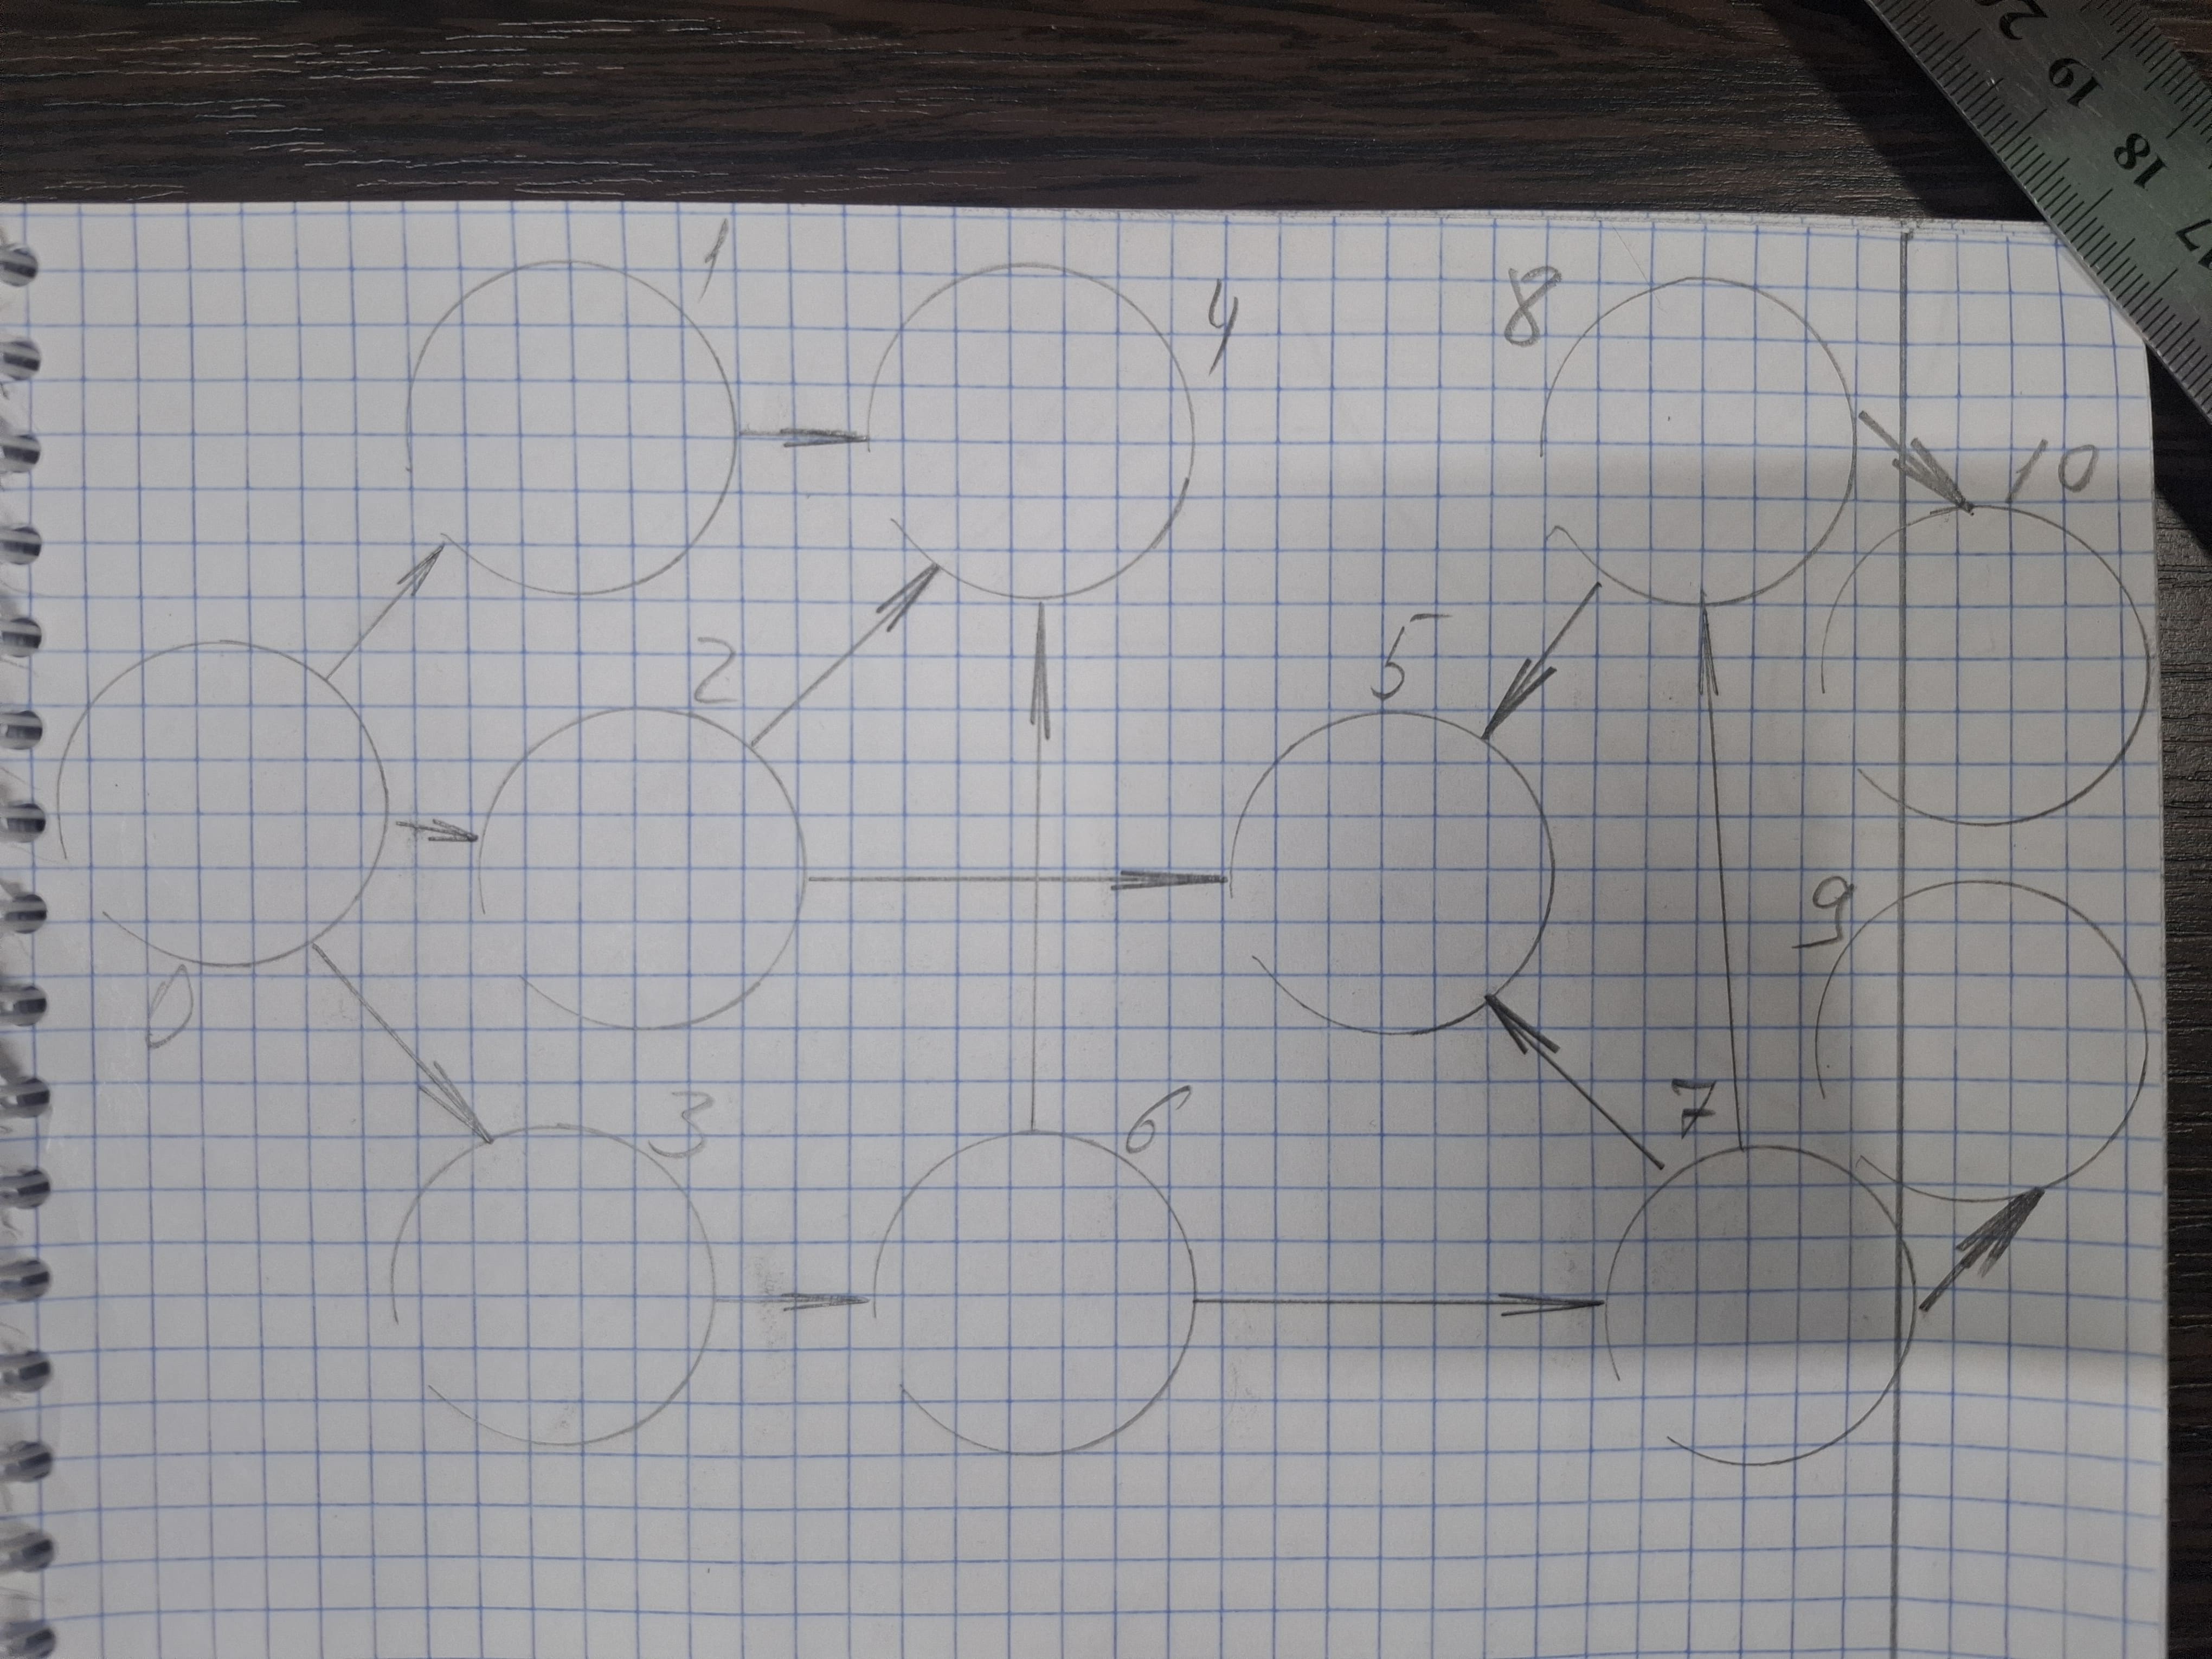
For example, on such a graph, we will first add vertex 0 to the queue. Then we will extract vertex 0 from the queue and add all the vertices that are reachable from it. [0] -> [1, 2, 3]. In the next step, we will extract vertex 1 and add everything that is achievable from it, in this case the vertex 4 - [1, 2, 3] -> [2,...
Read more »
 f4hdk
f4hdk Lutetium
 Daniel Nikolajsen
 Jan Gromeš
 shenning