-
How to Connect Cricut via Bluetooth? (Full Guide!)
03/17/2025 at 12:17 • 0 commentsLearn ‘how to connect Cricut via Bluetooth’. In order to setup any Cricut machine on your phone or computer, laptop it is essential to connect the device to your machine. You can choose either a phone or a computer for this. If you have a desktop, it must be either a Windows or Mac. An Android or iOS device is required for mobile devices. Once you have one of these things, you can connect it to your machine with Bluetooth. After successfully connecting, you can proceed with the rest of the setup and start working on your projects. So, without any further delay, let’s start with the connection process.
How to Connect Cricut via Bluetooth on Mac System?
A Mac computer is an excellent computer for using the Design Space app on it. The computer is compatible with the app, and you can easily download it. You just have to make sure that you are using a macOS 11 or later version of the operating system on your computer. These are the steps for downloading the app on your MacBook.
- First, turn on your computer. To do so, connect it to an electric socket with the help of a power adapter, and after that, press and hold the power key.
- Keep in mind that the distance between the computer and your machine should be less than 10-15 feet.
- Now, open the Apple menu on the computer and go to the System preferences.
![]()
- After that, you have to go to Bluetooth settings and turn it on.
![]()
- Once you turn on Bluetooth on your computer, you will see that all the devices that are available to be connected to your computer appear on the list. You have to click on your machine, and you will be able to connect them.
- Now, the connection between your machine and the computer has been established.
- To confirm the connectivity on your computer, go to the app and open New Product Setup. You will see there that they are connected.
How to Connect Cricut via Bluetooth on a Windows?
A Windows commuter is equally good to use with a crafting machine. To work on a Windows PC, you need to connect it to a machine with the help of Bluetooth. Below are the steps to follow:
- Turn on the machine and keep it closer to your computer, within 10-15 feet.
- Then, open the Start menu on the computer, go to Settings, and click the Devices option.
![]()
![]()
- Next, open the Bluetooth on the computer and turn it on.
- After that, click on Add Bluetooth or other device.
![]()
- Now, choose the Bluetooth option and wait until the computer detects the machine.
- Upon seeing the machine, you have to click on it, and it will connect.
- Once you connect the machine, you can make sure of it by going to the Design Space app.
How to Connect Cricut via Bluetooth on an Android Device?
Instead of a computer, a phone can also be a good option for connecting it to a crafting machine. To connect your Android device to a machine, you have to follow these steps:
- Start by powering the machine and keeping it within 10-14 feet.
- Then, go to your phone’s Settings and then open Bluetooth.
- If the Bluetooth on the phone is off, you will have to turn it on.
- Once you turn on the Bluetooth, you have to search for the machine, and you will have to tap on it upon seeing that.
- Very soon, the phone will connect to your machine via Bluetooth.
- In the last step, you can continue with the steps to set up your machine on an Android phone.
How to Connect Cricut via Bluetooth on iPhone?
An iPhone is also good for working on a machine. You can connect the phone to your machine via Bluetooth and make projects however you want. The steps you have to follow for that are in the section below:
- Just like you with any other device, start by giving the machine a power supply so that you can turn it on by pressing the power button.
- Once the machine is on, it is going to connect to your phone.
- Now, go to your phone’s settings and turn on Bluetooth.
![]()
- Then, search for your machine, and you will see it appear on your screen.
- When it appears, you need to tap on it, and it will...
-
How to Use Cricut Explore Air 2: Create DIY Projects at Home
02/24/2025 at 15:26 • 0 commentsAre you excited to express your creativity with the Cricut Explore Air 2 machine? This flexible cutting machine can make your crafting dreams come true. It cuts over 100+ various materials, like paper, cardboard, vinyl, and even leather.
Whether you’re a pro crafter or a beginner, this machine is perfect for bringing your ideas to life. This stepwise guide will walk you through ‘how to use Cricut Explore Air 2‘, download the Design Space app, and create your first project.
So, get ready to venture on a crafting adventure and discover the joy of DIY projects. Let’s dive in and explore the world of Cricut!
Downloading Cricut Design Space on Your Computer
The first thing to use the machine is to download the Cricut Design Space software. To download it, navigate to design.cricut.com from your Windows or Mac. If you already have a Cricut account, log in to the app after downloading it.
![Cricut Design Space software for windows]()
If you want to download the software on your mobile device, either Android or iPhone, go to their Play Store/App Store and look for the app in the search bar. It will be a square icon with Cricut written at the center.
NOTE: You must have an account beforehand to use the app. If you don’t have one, you should create one on the sign-up page. Also, you don’t need a Bluetooth adapter to use the machine, as it comes with built-in Bluetooth. The earlier Explore series, such as the Explore One, required a Bluetooth adapter.
Connecting Cricut Machine to Your Computer With USB
Although you can use your machine wirelessly, let’s examine how to use it through USB.
Step 1: First, place it on a clean and flat surface with 10-15 inches of space behind and front to let the cutting machine move freely.
Step 2: After that, you must plug in your Explore cutting machine.
Step 3: And then attach the USB cable and power adapter.
Step 4: Next, you need to turn on your Explore machine and your computer.
Step 5: Open the Cricut Design Space software discussed in the previous section and log in using your credentials.
Step 6: Within the app, select the Menu icon visible at the top and choose New Machine Setup. This will guide you through the installation, the first project you will make, and a greeting card.
Now, you are almost ready to use the machine. The next section will examine how to make a project on your machine. So, let’s get into that.
How to Use Cricut Explore Air 2: Creating Your First Project
Now, let us walk through a project that can be made with the materials that came with the box of your machine. If this is your first project, don’t worry—it will be easy!
Step 1: From the “Cricut New Machine Setup,” you will see a design on your screen. If you don’t find it, head over to cricut.com/setup. Then, find the Menu on the top side and click “New Machine Setup.”
Step 2: Prepare all the materials that came with the machine, such as cardstock, mat, paper, and pen. Remove the plastic film from your machine and keep it aside for future use.
Step 3: Afterward, you need to load the cardstock on the machine mat. The textured side should be facing up and lined up on the machine mat vertically. Make sure to line it up on the upper side, right below the Cricut logo.
Step 4: In the next step, you must insert your cutting mat into your Explore machine. Ensure that you load the machine mat as per the guidelines. You also need to take care that it is pressed against the roller while you press the “load/unload” buttons, which are located at the top of your cutting machine. The icon looks like a set of double arrows.
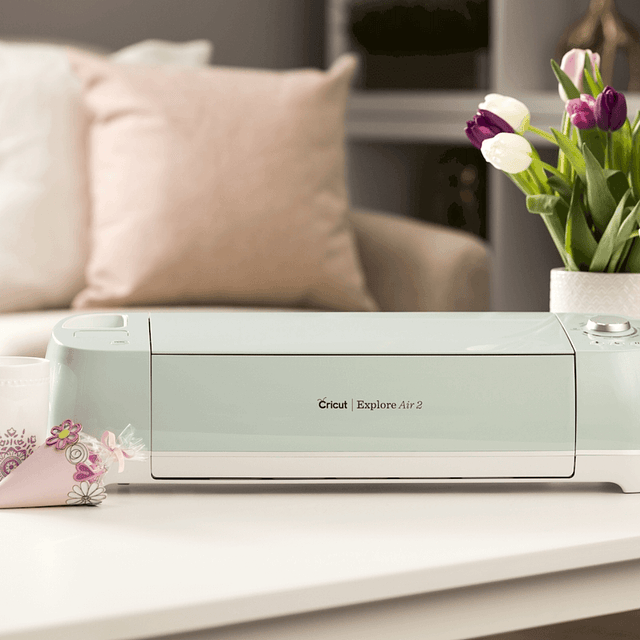
![how to use Cricut Explore Air 2]()
Step 5: Now, you need to insert the pen in clamp A. To do that, you need to remove the cap and place it tip-down until the arrow on the...
Read more » -
How to Connect Cricut Explore Air 2 Bluetooth to Computer?
09/02/2024 at 12:46 • 0 commentsIn this post, I will explain how to connect Cricut Explore Air 2 Bluetooth. Whether you are a Windows or Mac user, this blog will help you connect your machine and device easily.
When I got my crafting machine for the first time, I was a little overwhelmed, as I didn’t know how to connect it to my computer. But one of my friends, John, who is a professional crafter, helped me with this. Since then, I have been setting up my machine without anyone’s support. Now, I want to help you in the same way, as this is a beginner-friendly blog specially curated for novice crafters.
In this blog, I will explain how to connect your machine to the computer of your choice. Before that, I will also explain the system requirements for both Windows and Mac. Let’s start!
System Requirements for Connecting Cricut to Your Computer
Before you learn how to connect Cricut Explore Air 2 Bluetooth, you must review the system specs. This is very important before you set up your machine.
For Windows
- Supported Operating System: macOS 11 or later
- Display Resolution: 1024px x 768px
- Internet: Minimum 2 - 3 Mbps Download & 1 - 2 Mbps Upload
- RAM: 4 GB
- CPU: 1.83 GHz
- Hard Disk Space: 2 GB required at least
- Connection Type: wireless Bluetooth or wired USB
- Offline Feature: Yes, it is available for Mac
For macOS
- Supported Operating System: macOS 11 or later
- CPU: 1.83 GHz
- Hard Disk Space: 2 GB required at least
- RAM: 4 GB
- Internet: Minimum 2 - 3 Mbps Download & 1 - 2 Mbps Upload
- Offline Feature: Available for Mac
- Connection Type: wireless Bluetooth or wired USB
- Display Resolution: 1024px x 768px
How to Connect Cricut Explore Air 2 Bluetooth to Windows?
I will show you how to establish a connection between your machine and Windows PC. Although the following steps can be used for another Cricut model, here I am specifically explaining it for the Explore model. Let’s take a look at the below steps:
- Ensure you have placed your machine at a distance of 10 to 15 feet from your computer.
- After that, open the Settings.
![]()
- To open settings, click on the Windows logo icon located in the taskbar and search for Settings app.
- On the settings window, head to the Devices option.
![]()
- Next, confirm whether the Bluetooth is on.
- Now, select Add Bluetooth or other device.
![]()
- By clicking on the above option, you will see the next pop-up screen.
- On the pop-up screen, select the Bluetooth option.
- Then, wait for a moment and see if your PC detects any nearby machine.
- After some time, you will see that your PC detects your machine and confirms that it is your machine model.
- If you found your model, select the machine from the given list of detected devices.
- Afterward, your machine is now connected to your Windows PC.
How to Connect Cricut Explore Air 2 Bluetooth to MacBook?
On a MacBook, you can connect the machine using Bluetooth wirelessly. After this connection, you can set up your machine with your Mac and start using it. Let’s have a look at the following steps to connect:
- Ensure the proper gap between your machine and computer.
- Then, turn these devices on.
- Once done, you will need to go to the Apple menu.
- After that, select the System Preferences.
![]()
- Next, you have to select your Bluetooth app from the System Preferences.
- Now, you need to turn on the Bluetooth.
- Afterward, wait for a moment and see if your Mac detects your machine.
- Once detected, you will need to tap the Pair button to connect it.
- Finally, your crafting machine is paired now.
Final Words
In this blog, I have explained how to connect Cricut Explore Air 2 Bluetooth on Windows PC and Mac. Following the above methods will help you connect your machine easily to your system via Bluetooth. Although I could connect my machine via a USB cable, I prefer a wireless connection. With a wireless connection, you don’t need to manage those tedious wires or cords.
FAQs
Question 1: Why is Cricut Explore Air 2 not connecting...
Read more »


 Lutetium