-
Hack Chat Transcript, Part 3
10/13/2021 at 20:12 • 0 comments![]()
![]() I've made mechanical assemblies printed fully dense on the Mars 2 Pro, and shrinkage was not something I had an issue with
I've made mechanical assemblies printed fully dense on the Mars 2 Pro, and shrinkage was not something I had an issue with![]() The radical polymerization leads to sometimes fairly significant shrinkage. (Low single percents in linear dimensions, worst case.) This can be mitigated by using bigger molecules with lower total mass contribution of the acrylic groups, or adding fillers (either discrete particles or dissolved polymer - but both can wreck your viscosity).
The radical polymerization leads to sometimes fairly significant shrinkage. (Low single percents in linear dimensions, worst case.) This can be mitigated by using bigger molecules with lower total mass contribution of the acrylic groups, or adding fillers (either discrete particles or dissolved polymer - but both can wreck your viscosity).![]() There are other chemistries that don't suffer from that, eg. cationically polymerized epoxies. But I didn't see any such printing resin yet.
There are other chemistries that don't suffer from that, eg. cationically polymerized epoxies. But I didn't see any such printing resin yet.![]()
![]()
![]() Talking about fillers. Any recommendations? how about mixing resins?
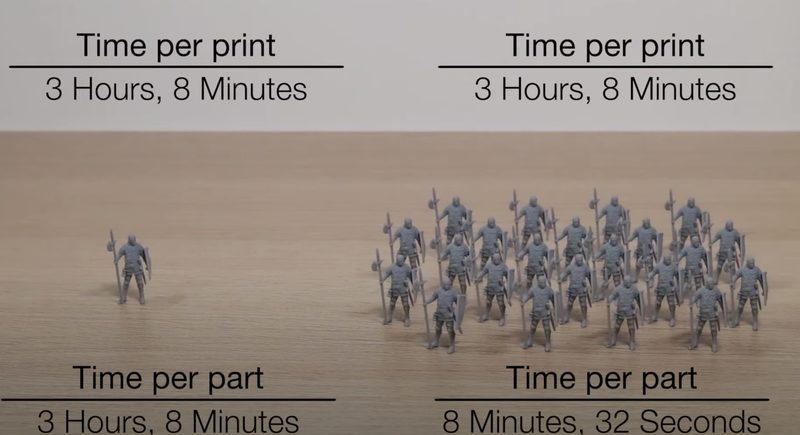
Talking about fillers. Any recommendations? how about mixing resins?![]() Another fun fact about resin printing (possibly my favorite fact), is the super fast print speed for printing in parallel!
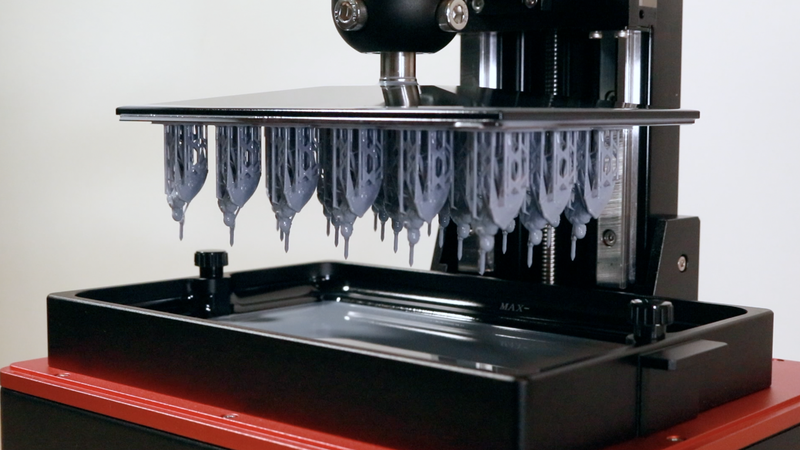
Another fun fact about resin printing (possibly my favorite fact), is the super fast print speed for printing in parallel!![]() Because the resin is exposed one layer at a time, your build time is always a function of the tallest part
Because the resin is exposed one layer at a time, your build time is always a function of the tallest part![]() Are there any resins as strong as nylon?
Are there any resins as strong as nylon?![]() So, build time roughly equals number of layers!
So, build time roughly equals number of layers!![]()
![]()
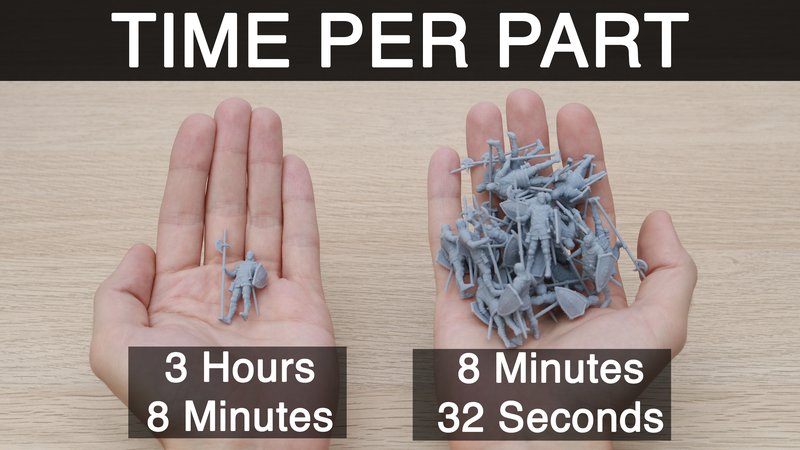
![]() This means, when printing multiple parts, your cycle time drops DRAMATICALLY!
This means, when printing multiple parts, your cycle time drops DRAMATICALLY!![]() Wow
Wow![]() So, filling a print surface with parts comes with no time penalty
So, filling a print surface with parts comes with no time penalty![]() Fillers, any way how to prevent the particulates from settling? Any way to have a high particulate loading without crippling increase in viscosity (eg. the aluminium hydroxide for fire-retardant resins)?
Fillers, any way how to prevent the particulates from settling? Any way to have a high particulate loading without crippling increase in viscosity (eg. the aluminium hydroxide for fire-retardant resins)?![]() FDM 3D printing is a volumetric equation, so printing 2x parts will take roughly 2x time
FDM 3D printing is a volumetric equation, so printing 2x parts will take roughly 2x time![]() Though cleaning all those little figurines....
Though cleaning all those little figurines....![]() Want to hear something fun?
Want to hear something fun?![]() Cleaning all of them took the same amount of time as cleaning one of them, @David Geller!
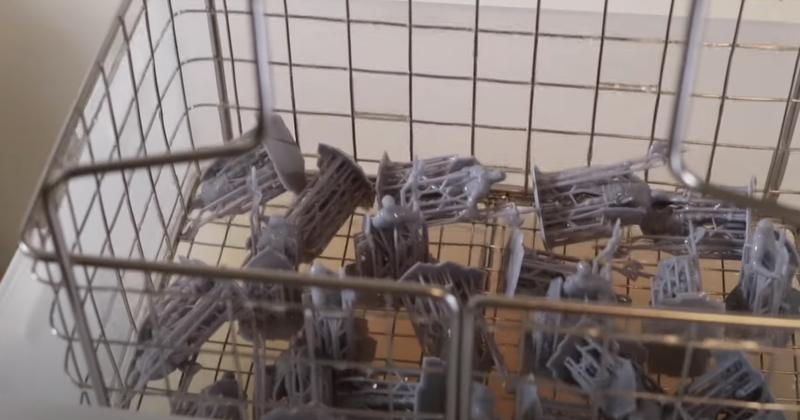
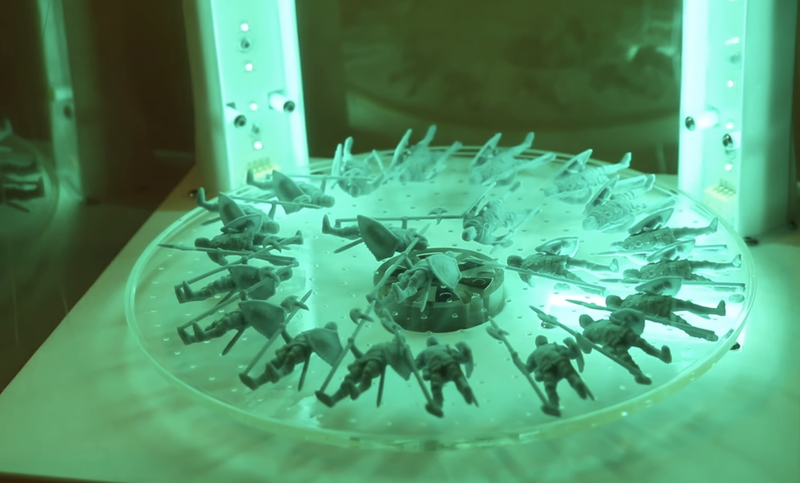
Cleaning all of them took the same amount of time as cleaning one of them, @David Geller!![]() I processed them as a batch, so they were all washed together, and cured together!
I processed them as a batch, so they were all washed together, and cured together!![]()
![]()
![]()
![]()
![]() So, resin printing can be ideal for printing lots of small things quickly!
So, resin printing can be ideal for printing lots of small things quickly!![]() @Thomas Shaddack , not exactly, just in general, taking a stock resin and modifying it with X to give you better Y and Z.
@Thomas Shaddack , not exactly, just in general, taking a stock resin and modifying it with X to give you better Y and Z.![]() Nice!
Nice!![]()
![]()
![]() Interestingly enough, I had originally intended to make 24 parts, but 2 of them failed
Interestingly enough, I had originally intended to make 24 parts, but 2 of them failed![]() So the cycle time (time per part) could have actually been lower!
So the cycle time (time per part) could have actually been lower!![]() And with some optimization of the placement of the parts, it could be driven down further than that!
And with some optimization of the placement of the parts, it could be driven down further than that!![]() On the right side, are you counting time to remove supports?
On the right side, are you counting time to remove supports?![]() @Brian McEvoy Great question "Are there any resins as strong as nylon?"
@Brian McEvoy Great question "Are there any resins as strong as nylon?"![]() Nylon is a thermoplastic, unlike most resins which are thermosets
Nylon is a thermoplastic, unlike most resins which are thermosets![]() Thermoplastics tend to be more mechanically tough, and can be deformed readily before breaking
Thermoplastics tend to be more mechanically tough, and can be deformed readily before breaking![]() Most thermoset resins tend to be on the brittle / stiff side, so it's hard to compare to Nylon, a material that is desirable for its ability to be deformed
Most thermoset resins tend to be on the brittle / stiff side, so it's hard to compare to Nylon, a material that is desirable for its ability to be deformed![]() The toughness may be influenced by using a less brittle less-crosslinked resin formulation.
The toughness may be influenced by using a less brittle less-crosslinked resin formulation.![]() @Involute, No, I didn't count the time to remove supports, but it probably added something like 20 - 30 seconds per model
@Involute, No, I didn't count the time to remove supports, but it probably added something like 20 - 30 seconds per model![]() The supports for that model were VERY well designed, and quick twist was all that was needed to remove them!
The supports for that model were VERY well designed, and quick twist was all that was needed to remove them!![]() A carefully supported model helps there
A carefully supported model helps there![]() It sure does, @Nicolas Tremblay!
It sure does, @Nicolas Tremblay!![]() Here we should touch the concept of Tg, glass transition temperature. Below that, polymers are generally brittle, above that they are more tough. A piece of rubber in liquid nitrogen is an example of freezing a polymer below its Tg.
Here we should touch the concept of Tg, glass transition temperature. Below that, polymers are generally brittle, above that they are more tough. A piece of rubber in liquid nitrogen is an example of freezing a polymer below its Tg.![]() I want to print some coins for Dungeons and Dragons. They have some fine detail. Will I get a better print with a resin printer than an ABS filament printer?
I want to print some coins for Dungeons and Dragons. They have some fine detail. Will I get a better print with a resin printer than an ABS filament printer?![]() Definitely!
Definitely!![]() Hi @SimonAllen!
Hi @SimonAllen!![]() Any general statements about support-removal damaging/marring the surface of the model with resin vs/ FDM?
Any general statements about support-removal damaging/marring the surface of the model with resin vs/ FDM?![]() Absolutely, most resin printers will be capable of providing you more detail than an FDM printer, but you'll want to scroll up to read about the process involved before making a decision!
Absolutely, most resin printers will be capable of providing you more detail than an FDM printer, but you'll want to scroll up to read about the process involved before making a decision!![]() @Involute, another great question!
@Involute, another great question!![]() Support material on FDM (Stratasys / Industrial) tends to be a secondary soluble material, but most home printers will create a support structure from the same material
Support material on FDM (Stratasys / Industrial) tends to be a secondary soluble material, but most home printers will create a support structure from the same material![]() Resin support break-off can tear a little piece from the material, making a dimple in the surface. Fortunately this can be touched up with a little drop of the resin and a bit of UV light.
Resin support break-off can tear a little piece from the material, making a dimple in the surface. Fortunately this can be touched up with a little drop of the resin and a bit of UV light.![]() Resin supports are actually integrated directly into the model, so removing them can leave a small divot in the model. Typically, a quick prime is all that's needed to remove those, or they can be sanded flush
Resin supports are actually integrated directly into the model, so removing them can leave a small divot in the model. Typically, a quick prime is all that's needed to remove those, or they can be sanded flush![]() I've found I spent less time concerned about resin support removal; it's much harder to "fix" FDM support removal!
I've found I spent less time concerned about resin support removal; it's much harder to "fix" FDM support removal!![]() OK! This has been a ton of fun, but we're down to the last 9 minutes!
OK! This has been a ton of fun, but we're down to the last 9 minutes!![]() Are there any questions that I missed? Anything that you're interested in learning about? Speak now!
Are there any questions that I missed? Anything that you're interested in learning about? Speak now!![]() Removing supports with a scalpel is much easier when the print is still not fully cured, when it is still a bit elastic and rubbery instead of hard and britlte.
Removing supports with a scalpel is much easier when the print is still not fully cured, when it is still a bit elastic and rubbery instead of hard and britlte.![]() Resin printing is a VERY satisfying experience, but typically, it can be a bit messier than FDM, and the post-processing requires some discipline to keep a tidy space!
Resin printing is a VERY satisfying experience, but typically, it can be a bit messier than FDM, and the post-processing requires some discipline to keep a tidy space!![]() What would you say is the most valuable advice you can give to someone who is already somewhat versed in resin printing (i.e. what do you know now that you wished you knew before)?
What would you say is the most valuable advice you can give to someone who is already somewhat versed in resin printing (i.e. what do you know now that you wished you knew before)?![]() Great question, @Shayan S.!
Great question, @Shayan S.!![]() @Andrew Sink - just watched some of your videos. Excellent content. Very pleasing narrating style.
@Andrew Sink - just watched some of your videos. Excellent content. Very pleasing narrating style.![]() The MOST IMPORTANT thing is always safety, so even though it's a chore, ALWAYS wear gloves, and ALWAYS be careful
The MOST IMPORTANT thing is always safety, so even though it's a chore, ALWAYS wear gloves, and ALWAYS be careful![]() Barring that, don't cheap out on materials or tools
Barring that, don't cheap out on materials or tools![]() I've seen people go absolutely wild trying to "fix" a printer, and the problem was material that was well past its expiration date!
I've seen people go absolutely wild trying to "fix" a printer, and the problem was material that was well past its expiration date!![]() And don't panic. Occasional contact with the raw resin won't harm you. Repeated frequent job-like contact may lead to sensitization and allergies.
And don't panic. Occasional contact with the raw resin won't harm you. Repeated frequent job-like contact may lead to sensitization and allergies.![]() I always wear eye protection and gloves for all my resin-related tasks. Always.
I always wear eye protection and gloves for all my resin-related tasks. Always.![]() OK, @Thomas Shaddack, that's actually pretty bad advice, sorry!
OK, @Thomas Shaddack, that's actually pretty bad advice, sorry!![]() The proper amount of skin / resin contact is 0!
The proper amount of skin / resin contact is 0!![]() Smart move, @David Geller!
Smart move, @David Geller!![]() ALARA. As Low As Reasonaby Achievable.
ALARA. As Low As Reasonaby Achievable.![]() I got my start on YouTube making videos for college courses; my mom held the camera and told me to "SLOW DOWN", my natural speaking voice is WAY fast
I got my start on YouTube making videos for college courses; my mom held the camera and told me to "SLOW DOWN", my natural speaking voice is WAY fast![]() So when I make my videos, I have her in mind, so I speak slow and clear!
So when I make my videos, I have her in mind, so I speak slow and clear!![]() @Andrew Sink - agree about fixing vs. materials. I had bad print after bad print until I switched to a Siraya Tech resin and, since then, every single print has been spectacular. I'm on an Anycubic.
@Andrew Sink - agree about fixing vs. materials. I had bad print after bad print until I switched to a Siraya Tech resin and, since then, every single print has been spectacular. I'm on an Anycubic.![]() That's great!
That's great!![]() Speak slow and clear, so people can watch you at 150% speed. :P :D
Speak slow and clear, so people can watch you at 150% speed. :P :D![]() LOL
LOL![]() The Siraya Simple Clear Resin is a favorite of mine; it's about as clear as you can get, even post-curing
The Siraya Simple Clear Resin is a favorite of mine; it's about as clear as you can get, even post-curing![]() and it just...works?
and it just...works?![]() it just works.
it just works.![]() Most slicers have very conservative settings, so if you're having consistent part failures, check A) the model, then B) the resin
Most slicers have very conservative settings, so if you're having consistent part failures, check A) the model, then B) the resin![]() Tweaking settings is a fast way to get to a frustrating afternoon!
Tweaking settings is a fast way to get to a frustrating afternoon!![]() I can't recommend Elegoo water washable resin. It stinks.
I can't recommend Elegoo water washable resin. It stinks.![]() I originally liked the Water Washable resins, but I had issues with parts cracking after printing, so I've moved away from them
I originally liked the Water Washable resins, but I had issues with parts cracking after printing, so I've moved away from them![]() They don't seem to be as reliable long-term, and the smell does tend to be much worse
They don't seem to be as reliable long-term, and the smell does tend to be much worse![]() Also, adjust the exposure per layer vs layer thickness. There is a tradeoff between the time and the strength achieved in-printer, and the bottom adhesion force. If the latter is higher than the strength of the part, it will tear off.
Also, adjust the exposure per layer vs layer thickness. There is a tradeoff between the time and the strength achieved in-printer, and the bottom adhesion force. If the latter is higher than the strength of the part, it will tear off.![]() I use Elegoo Standard Photopolymer as my "daily driver", it's cheap, comes in interesting and easy-to-see colors, and works well on most machines!
I use Elegoo Standard Photopolymer as my "daily driver", it's cheap, comes in interesting and easy-to-see colors, and works well on most machines!![]() Alright, with that last comment, my time is up!
Alright, with that last comment, my time is up!![]() My printer got banned to the garage because of it. Glad I got the air purifier.
My printer got banned to the garage because of it. Glad I got the air purifier.![]() I want to take a minute to thank @Dan Maloney and the rest of the @Hackaday team for having me this afternoon!
I want to take a minute to thank @Dan Maloney and the rest of the @Hackaday team for having me this afternoon!![]() We're up against our allotted hour now, so I'm going to call an "official" time on the chat. Of course the channel is always open, so feel free to keep the conversation going. But we'll just say a big thanks to Andrew for his time today, and a great Hack Chat. Great questions too from everyone -- thanks!
We're up against our allotted hour now, so I'm going to call an "official" time on the chat. Of course the channel is always open, so feel free to keep the conversation going. But we'll just say a big thanks to Andrew for his time today, and a great Hack Chat. Great questions too from everyone -- thanks!![]() Thank you Andrew and HAD, very informative!
Thank you Andrew and HAD, very informative!![]() Oops, crossed in the mail...
Oops, crossed in the mail...![]() I appreciate the chance to talk about resin printing, feel free to reach out on Twitter if you want to ping me with anything else! https://twitter.com/AndrewASink
I appreciate the chance to talk about resin printing, feel free to reach out on Twitter if you want to ping me with anything else! https://twitter.com/AndrewASink![]() Thanks @Andrew Sink and @Thomas Shaddack <
Thanks @Andrew Sink and @Thomas Shaddack <![]() Haha! Thanks @Dan Maloney! Have a great afternoon, everyone!
Haha! Thanks @Dan Maloney! Have a great afternoon, everyone!![]() Thank you Andrew
Thank you Andrew![]() Are there any resins that would make functional gears?
Are there any resins that would make functional gears?![]() All of them. For different mechanical requirements.
All of them. For different mechanical requirements.![]() Yes thank you @Thomas Shaddack!
Yes thank you @Thomas Shaddack!![]() Thought. A resin with built-in reducing agent that would cover itself with copper when immersed in copper sulfate. (Then continue with electroplating. Voila, small metal parts!)
Thought. A resin with built-in reducing agent that would cover itself with copper when immersed in copper sulfate. (Then continue with electroplating. Voila, small metal parts!)![]() Another thought I am nurturing. Borrow the thermolabile crosslinkers from reworkable epoxies, where they have issues with their too low thermal stability. Print a hard stiff thing. UV-cure. Bake thermally to a rubbery thing.
Another thought I am nurturing. Borrow the thermolabile crosslinkers from reworkable epoxies, where they have issues with their too low thermal stability. Print a hard stiff thing. UV-cure. Bake thermally to a rubbery thing.![]() Just a dip in the reducing agant before post-cure?
Just a dip in the reducing agant before post-cure?![]() That maaaaaaaay work...
That maaaaaaaay work...![]() or a 50/50 solution, agent/resin to dip. And may need some oxygen protection?
or a 50/50 solution, agent/resin to dip. And may need some oxygen protection?![]() A related thought is some reducing agent that is activated by another wavelength (molecule splitting similar to the photoinitiator, without the radical). Then we could print "two-color", with locally activating the reducing moieties, and then selectively deposit metal just by immersion. Voila, potential way of printing metamaterials for microwaves and millimeter waves.
A related thought is some reducing agent that is activated by another wavelength (molecule splitting similar to the photoinitiator, without the radical). Then we could print "two-color", with locally activating the reducing moieties, and then selectively deposit metal just by immersion. Voila, potential way of printing metamaterials for microwaves and millimeter waves.![]() I had the same idea a few years ago. Relatively easy on paper.
I had the same idea a few years ago. Relatively easy on paper. -
Hack Chat Transcript, Part 2
10/13/2021 at 20:11 • 0 comments![]() Is the minimum layer height you can achieve dependent on the resin used (i assume different resins may be more sensitive to the UV light?) along with the stepper motor?
Is the minimum layer height you can achieve dependent on the resin used (i assume different resins may be more sensitive to the UV light?) along with the stepper motor?![]() Absolutely!
Absolutely!![]() That's a great question, with a LOT of variables
That's a great question, with a LOT of variables![]() I use car analogies a lot, so hopefully this makes sense!
I use car analogies a lot, so hopefully this makes sense!![]() What entry level machine would recommend?
What entry level machine would recommend?![]() But it's sort of like asking "What's the fastest you can go?"
But it's sort of like asking "What's the fastest you can go?"![]() One of my biggest hurdles and one that is not taken into consideration enough is how toxic resin is for not only humans but the environment @Andrew Sink But with proper precautions and making sure everything is cured, it can work out well and safely
One of my biggest hurdles and one that is not taken into consideration enough is how toxic resin is for not only humans but the environment @Andrew Sink But with proper precautions and making sure everything is cured, it can work out well and safely![]() It depends on the car, how many people are in it, what road you're driving on, etc!
It depends on the car, how many people are in it, what road you're driving on, etc!![]() I think my obstacle to adopting MSLA is the mess, but we've already seen that can be managed. I guess the odor might be next -- I have a small shop, can't really ventilate it well.
I think my obstacle to adopting MSLA is the mess, but we've already seen that can be managed. I guess the odor might be next -- I have a small shop, can't really ventilate it well.![]() But basically, with layer heights, a widely accepted standard is 50 microns (.05mm)
But basically, with layer heights, a widely accepted standard is 50 microns (.05mm)![]() An interesting fact is you can print a thicker layer using a translucent resin, as the UV light is able to penetrate deeper through the resin itself!
An interesting fact is you can print a thicker layer using a translucent resin, as the UV light is able to penetrate deeper through the resin itself!![]() Using a thick opaque resin, this would be more of a challenge!
Using a thick opaque resin, this would be more of a challenge!![]() The Lambert-Beer law.
The Lambert-Beer law.![]() @SimonAllen, I'm VERY partial to the Elegoo Mars 2 Pro
@SimonAllen, I'm VERY partial to the Elegoo Mars 2 Pro![]() It's inexpensive, and it provides reliable results
It's inexpensive, and it provides reliable results![]() same^^
same^^![]() @Dan Maloney I haven't found the odor to be too bad. In fact, I print in my office, which is a room in my apartment.
@Dan Maloney I haven't found the odor to be too bad. In fact, I print in my office, which is a room in my apartment.![]() It's also heavy enough to not worry about tipping over, and it's a popular-enough model that there is a large user base online to bounce ideas off of!
It's also heavy enough to not worry about tipping over, and it's a popular-enough model that there is a large user base online to bounce ideas off of!![]() Since SLA printers have a smaller build volume than Filament printers, is there a way to fuse smaller SLA prints together into a larger piece?
Since SLA printers have a smaller build volume than Filament printers, is there a way to fuse smaller SLA prints together into a larger piece?![]() @controlmypad, GREAT question!
@controlmypad, GREAT question!![]() I have the Mars Pro and it's great with the seperate air purifier.
I have the Mars Pro and it's great with the seperate air purifier.![]() There are MANY options for fusing parts, the easiest is by creating models as an assembly (think dovetail joint) to assemble after printing
There are MANY options for fusing parts, the easiest is by creating models as an assembly (think dovetail joint) to assemble after printing![]() @Dan Maloney a god carbon filter and HEPA filter goes a long ways.
@Dan Maloney a god carbon filter and HEPA filter goes a long ways.![]() Assemble together with mating surfaces wetted with the printing resin, before the final curing.
Assemble together with mating surfaces wetted with the printing resin, before the final curing.![]() The material used for 3D printing is not as important or critical to learning this, as the basic 3D design and compiler (to convert to instructions. Cost and time management, knowing the market or need, having a good application that helps people or groups. On Mars and the moon, they will use molten materials, electrochemical and plasma separation, and the tools will start with "3D". The chemistry, physics of materials will be critical to making things that last. Keep in mind the needs of the rest of the century for reliable tools and methods for other worlds.
The material used for 3D printing is not as important or critical to learning this, as the basic 3D design and compiler (to convert to instructions. Cost and time management, knowing the market or need, having a good application that helps people or groups. On Mars and the moon, they will use molten materials, electrochemical and plasma separation, and the tools will start with "3D". The chemistry, physics of materials will be critical to making things that last. Keep in mind the needs of the rest of the century for reliable tools and methods for other worlds.![]() You can also add a bit of UV-curable resin and cure it with a UV light to permanently bond two parts
You can also add a bit of UV-curable resin and cure it with a UV light to permanently bond two parts![]() Great question, @controlmypad!
Great question, @controlmypad!![]() I agree with @Nicolas Tremblay, the built-in air filter on the Mars 2 Pro is another great feature!
I agree with @Nicolas Tremblay, the built-in air filter on the Mars 2 Pro is another great feature!![]() When we do the gluing-together-with-resin step before the final curing, we have a lot of unreacted acrylate groups left on the surface and we can achieve higher bonding strength.
When we do the gluing-together-with-resin step before the final curing, we have a lot of unreacted acrylate groups left on the surface and we can achieve higher bonding strength.![]() I made a UV laser holder for tacking parts together.
I made a UV laser holder for tacking parts together.http://www.24hourengineer.com/2021/04/2021-04-05-m-uvlasermodule-completed.html
![]() I used a tower fan put on its side, and open my window just enough to lay it sideways!
I used a tower fan put on its side, and open my window just enough to lay it sideways!![]() This blows air outside, while another window allows air inside the room
This blows air outside, while another window allows air inside the room![]() hello, is there any real cleaning liquid alternative to IPA? :)
hello, is there any real cleaning liquid alternative to IPA? :)![]() It's basically a VERY low-tech air exchange system!
It's basically a VERY low-tech air exchange system!![]() @borelli.g92, that's another great question!
@borelli.g92, that's another great question!![]() Thank you, it sounds like it could fuse nearly seamlessly and also work for clear prints?
Thank you, it sounds like it could fuse nearly seamlessly and also work for clear prints?![]() Negative pressure ventilation works well. Stick a fan in the window blowing out.
Negative pressure ventilation works well. Stick a fan in the window blowing out.![]() I haven't used it, but I've seen Simple Green used to clean parts
I haven't used it, but I've seen Simple Green used to clean parts![]() It's a solvent that should break down the resin, but it's something I haven't personally tried
It's a solvent that should break down the resin, but it's something I haven't personally tried![]() I disabled the chamber fan, and just leave it form saturated vapors. Limits the total amount of evaporated material, if the vapor pressure at the printing temperature is sufficiently low, which is easily the case with the big-molecule reactive diluents. (The oligomers don't contribute to the vapor pressure, nor the photoinitiators.)
I disabled the chamber fan, and just leave it form saturated vapors. Limits the total amount of evaporated material, if the vapor pressure at the printing temperature is sufficiently low, which is easily the case with the big-molecule reactive diluents. (The oligomers don't contribute to the vapor pressure, nor the photoinitiators.)![]() IPA is definitely not something you want to be careless with, but it works great for cleaning parts!
IPA is definitely not something you want to be careless with, but it works great for cleaning parts!![]() @David Geller, great point!
@David Geller, great point!![]() @controlmypad, yes, you can use the resin to fuse parts together! However, if there is any resin that is uncured, it will be visible through the clear surface
@controlmypad, yes, you can use the resin to fuse parts together! However, if there is any resin that is uncured, it will be visible through the clear surface![]() @Andrew Sink yes. that's right. A friend of mine who is a chemist suggested me to find the right dilution of acetone. That should work as well. Any feedback on that? :)
@Andrew Sink yes. that's right. A friend of mine who is a chemist suggested me to find the right dilution of acetone. That should work as well. Any feedback on that? :)![]() Making *fully* clear parts that are made from multiple pieces is difficult, and at a certain point, it becomes more attractive to move to a casting process
Making *fully* clear parts that are made from multiple pieces is difficult, and at a certain point, it becomes more attractive to move to a casting process![]() @borelli.g92, I don't know that I would use Acetone
@borelli.g92, I don't know that I would use Acetone![]() Note on side. The curing reaction is fairly exothermic. I spilled a little bit of the resin on myself, wanted to peel the drop off instead of smearing it with a tissue, and lit it with UV LED. OUCH. Got a nice drop-shaped blister (and scar).
Note on side. The curing reaction is fairly exothermic. I spilled a little bit of the resin on myself, wanted to peel the drop off instead of smearing it with a tissue, and lit it with UV LED. OUCH. Got a nice drop-shaped blister (and scar).![]() @Thomas Shaddack is correct, you don't want to spill the resin on yourself!
@Thomas Shaddack is correct, you don't want to spill the resin on yourself!![]() NOPE!
NOPE!![]() I saw a picture of someone who spilled the resin on their leg before walking outside; once the sun cured the resin it led to a particularly nasty burn
I saw a picture of someone who spilled the resin on their leg before walking outside; once the sun cured the resin it led to a particularly nasty burn![]() eek, didn't realise it was that dangerous. are the fumes bad too then?
eek, didn't realise it was that dangerous. are the fumes bad too then?![]() @anfractuosity: the short answer is: "It depends"
@anfractuosity: the short answer is: "It depends"![]() Some people are very sensitive to the smell of UV-curable resin, and some aren't
Some people are very sensitive to the smell of UV-curable resin, and some aren't![]() ahh
ahh![]() If you've ever been to a nail salon, a UV printer smells almost exactly the same
If you've ever been to a nail salon, a UV printer smells almost exactly the same![]() In fact, the same principles used to create a resin 3D printed part are used to make UV-curable acrylic nails!
In fact, the same principles used to create a resin 3D printed part are used to make UV-curable acrylic nails!![]() They even use the same wavelength UV LEDs that we do!
They even use the same wavelength UV LEDs that we do!![]() It's relatively harmless, the oligomers are big molecules that won't get through skin, the reactive diluents are the biggest concern (they can be nasty irritants and some people can get allergic to them, but there are some that are fairly good - I chose the one for my mix that didn't make my skin feel itchy after exposure, it has one of the lowest irritation indexes).
It's relatively harmless, the oligomers are big molecules that won't get through skin, the reactive diluents are the biggest concern (they can be nasty irritants and some people can get allergic to them, but there are some that are fairly good - I chose the one for my mix that didn't make my skin feel itchy after exposure, it has one of the lowest irritation indexes).![]() Thanks. I have been working since 2 am and have to get back to it. Best to everyone.
Thanks. I have been working since 2 am and have to get back to it. Best to everyone.![]() These are all really great questions!
These are all really great questions!![]() Bye @RichardCollins, thanks for stopping in!
Bye @RichardCollins, thanks for stopping in!![]() Ok, so, let's talk about washing / curing!
Ok, so, let's talk about washing / curing!![]()
![]()
![]() for postcuring, one nasty thing to deal with is the oxygen inhibition. The presence of oxygen interferes with the radical polymerization. Major issue with printing inks.
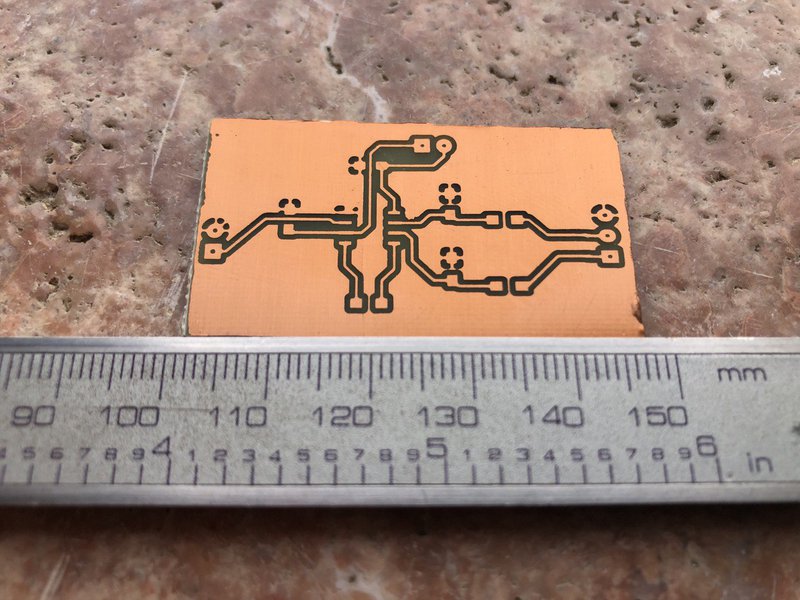
for postcuring, one nasty thing to deal with is the oxygen inhibition. The presence of oxygen interferes with the radical polymerization. Major issue with printing inks.![]() Another nice usage of UV-based 3d printers is to make PCBs.
Another nice usage of UV-based 3d printers is to make PCBs.Have you ever tried?
![]()
![]()
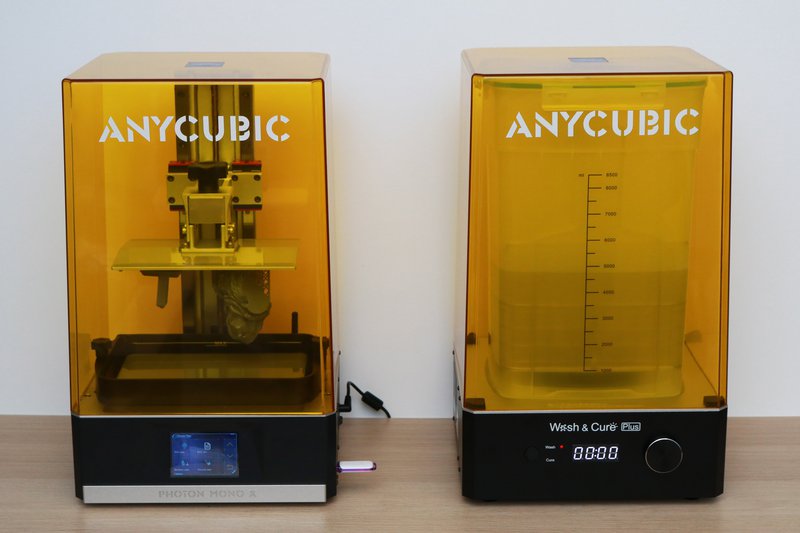
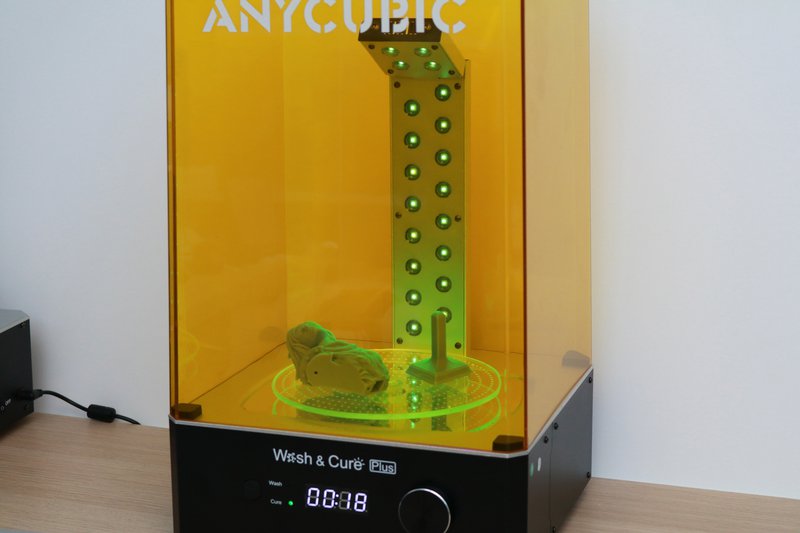
![]() Here's an example of a resin 3D printer, next to a Wash / Cure station!
Here's an example of a resin 3D printer, next to a Wash / Cure station!![]() This station has two functions: 1) wash the part, 2) cure the part!
This station has two functions: 1) wash the part, 2) cure the part!![]()
![]()
![]() Looks like the washing step generates a far amount of waste. What's the best practice for disposing of that?
Looks like the washing step generates a far amount of waste. What's the best practice for disposing of that?![]() After printing, the part is washed in IPA to rinse any excess resin off. Printing models hollow is a great way to reduce material usage as well as minimize the wear and tear on the part!
After printing, the part is washed in IPA to rinse any excess resin off. Printing models hollow is a great way to reduce material usage as well as minimize the wear and tear on the part!![]() *fair amount
*fair amount![]() Great question @Dan Maloney!
Great question @Dan Maloney!![]() It actually generates *FAR* less than you may think
It actually generates *FAR* less than you may think![]() You can use IPA multiple times
You can use IPA multiple times![]() The IPA is heavily reusable
The IPA is heavily reusable![]() So, for instance
So, for instance![]() I filled this wash station with 3 liters of IPA, several months ago
I filled this wash station with 3 liters of IPA, several months ago![]() What is your experience with dunk tanks, vs agitated tanks (with magnet string), vs ultrasonic cleaning?
What is your experience with dunk tanks, vs agitated tanks (with magnet string), vs ultrasonic cleaning?![]() and it is still potent enough to remove the material from parts!
and it is still potent enough to remove the material from parts!![]()
![]()
![]() @Andrew Sink - That's the same cure station I have. It's been the difference between me using my mars elegoo, and not. The cleanup was just not fun. I've had the same experience with my IPA, and have not replaced it yet.
@Andrew Sink - That's the same cure station I have. It's been the difference between me using my mars elegoo, and not. The cleanup was just not fun. I've had the same experience with my IPA, and have not replaced it yet.![]() It does this by inducing cavitation (making little bubbles) and actively rinsing the parts!
It does this by inducing cavitation (making little bubbles) and actively rinsing the parts!![]() My favorite is ultrasound. Improvised setup with eyeglasses cleaner with water, and in it a beaker with alcohol.
My favorite is ultrasound. Improvised setup with eyeglasses cleaner with water, and in it a beaker with alcohol.![]() This way, instead of just soaking, the uncured resin is actively removed!
This way, instead of just soaking, the uncured resin is actively removed!![]()
![]()
![]() Once the part has been washed off, it can then be cured after the support has been removed!
Once the part has been washed off, it can then be cured after the support has been removed!![]() The UV lights in the chamber will fully polymerize the part, turning it into a completed model!
The UV lights in the chamber will fully polymerize the part, turning it into a completed model!![]() From there, you can paint, sand, post-process to your hearts desire!
From there, you can paint, sand, post-process to your hearts desire!![]() An interesting note, once the part has been fully cured, it will be significantly stiffer (and more brittle) than it's previous semi-cured state
An interesting note, once the part has been fully cured, it will be significantly stiffer (and more brittle) than it's previous semi-cured state![]() If you take a part pre-curing and tap it on a desk, you will hear a "thunk"
If you take a part pre-curing and tap it on a desk, you will hear a "thunk"![]() a post-cured part will make a "click"
a post-cured part will make a "click"![]() Are there any dimensional changes after curing? Shrinkage perhaps?
Are there any dimensional changes after curing? Shrinkage perhaps?![]() Indeed. So some operations (thread-cutting, removing of supports...) can be better done on only briefly surface-cured part.
Indeed. So some operations (thread-cutting, removing of supports...) can be better done on only briefly surface-cured part.![]()
![]()
![]() Any rules for determining how long to cure?
Any rules for determining how long to cure?![]() Great question, @Dan Maloney !
Great question, @Dan Maloney !![]() Dimensional change is a really hard subject to tackle, as the number of variables (including the geometry and features of the object) can influence the final part size
Dimensional change is a really hard subject to tackle, as the number of variables (including the geometry and features of the object) can influence the final part size![]() I rarely have parts that don't mate up, so I've never spent a lot of time chasing down the tolerance post-cure
I rarely have parts that don't mate up, so I've never spent a lot of time chasing down the tolerance post-cure![]() @Involute, Not really, but it's worth noting that curing does generate heat in the part
@Involute, Not really, but it's worth noting that curing does generate heat in the part![]() So for practical purposes, not an issue.
So for practical purposes, not an issue.![]() So I'll typically cure for 1 minute
So I'll typically cure for 1 minute![]() then let it sit for several minutes
then let it sit for several minutes![]() then cure for one more minute
then cure for one more minute![]() And to be fair, FDM prints have some dimensional issues too, after they cool.
And to be fair, FDM prints have some dimensional issues too, after they cool.![]() That's true!
That's true!![]() So, practically, again, the answer is "It depends"
So, practically, again, the answer is "It depends"![]() It's such an unsatisfying answer!
It's such an unsatisfying answer!![]() Trust me, I know!
Trust me, I know!![]()
Hack Chat Transcript, Part 1
10/13/2021 at 20:10 • 0 comments![]() OK, folks, let's get started. Welcome to the Hack Chat, I'm Dan and I'll be moderating today along with Dusan for Andrew Sink. As you can probably tell from the pre-Chat, we'll be talking about Resin Printing today -- stereolithography or SLA if you want to be proper about it.
OK, folks, let's get started. Welcome to the Hack Chat, I'm Dan and I'll be moderating today along with Dusan for Andrew Sink. As you can probably tell from the pre-Chat, we'll be talking about Resin Printing today -- stereolithography or SLA if you want to be proper about it.Welcome Andrew, thanks for joining us today. Can you fill us in a little on your background?
![]() Looks like @Thomas Shaddack picked up a good bit of slack and started doing a deep dive here; thanks Thomas!
Looks like @Thomas Shaddack picked up a good bit of slack and started doing a deep dive here; thanks Thomas!![]() Hello and welcome!
Hello and welcome!![]() Thanks for the introduction, @Dan Maloney!
Thanks for the introduction, @Dan Maloney!![]() I've been involved in the additive industry for about 9 years, first as a student, then a hobbyist, and currently a full-time additive engineer!
I've been involved in the additive industry for about 9 years, first as a student, then a hobbyist, and currently a full-time additive engineer!![]() Hi @Andrew Sink !
Hi @Andrew Sink !![]() I turned my attention to resin 3D printing earlier this year, and I've been absolutely fascinated with it since!
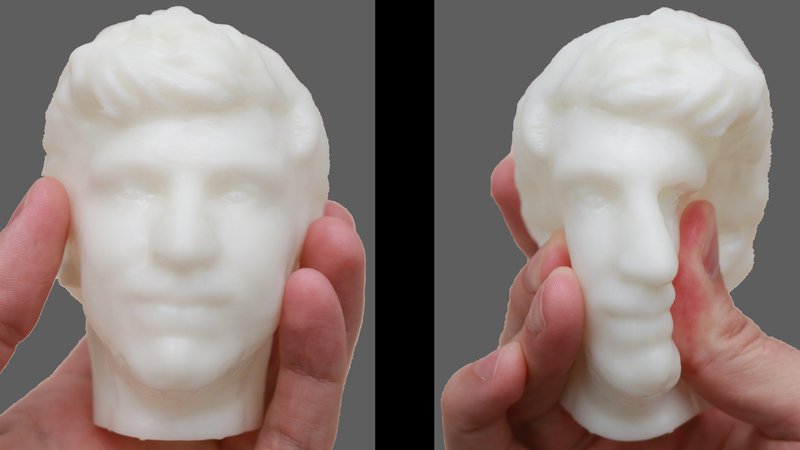
I turned my attention to resin 3D printing earlier this year, and I've been absolutely fascinated with it since!![]() To answer the question I posed earlier, that part was printed hollow and upside down using a flexible resin with a 3mm thick wall!
To answer the question I posed earlier, that part was printed hollow and upside down using a flexible resin with a 3mm thick wall!![]() It is pretty awesome!
It is pretty awesome!![]() You can see the deformation is lateral in the print, and squishing from top to bottom results in FAR less deformation
You can see the deformation is lateral in the print, and squishing from top to bottom results in FAR less deformation![]()
![]()
![]() An interesting side-effect of the layer-by-layer exposure process of an MSLA 3D printer!
An interesting side-effect of the layer-by-layer exposure process of an MSLA 3D printer!![]() I'd like this chat to focus on resin printing, with an emphasis on questions from beginners on the "How-To" of MSLA 3D printing!
I'd like this chat to focus on resin printing, with an emphasis on questions from beginners on the "How-To" of MSLA 3D printing!![]() Is there as wide a range of material types in resins as there is in filaments?
Is there as wide a range of material types in resins as there is in filaments?![]() Let's start with a quick definition of the term
Let's start with a quick definition of the term![]() There sure are! We'll dive into those in a just moment!
There sure are! We'll dive into those in a just moment!![]() "MSLA" stands for "Masked SLA (Stereolithography)"
"MSLA" stands for "Masked SLA (Stereolithography)"![]() The breaking depends on the mechanical properties of the resin. Again, degree of crosslinking and the nature of the diluent and the main oligomer. The more the matrix can deform and absorb energy, the tougher it is, the less brittle it will be. ABS, acrylonitrile-butadiene-styrene, uses the butadiene rubber parts of the polymer chains to make softer domains in the material where the stresses dissipate. That's the impact toughening principle in general. I also saw a trick with graphene addition into the matrix, where the graphene particles do crack pinning - cracks going through the material are attracted to the particles, and then they get stuck there as the energy for the crack propagation shoots insanely up. Small fraction of percent, if I rememer correctly, increased impact toughness by almost order of magnitude.
The breaking depends on the mechanical properties of the resin. Again, degree of crosslinking and the nature of the diluent and the main oligomer. The more the matrix can deform and absorb energy, the tougher it is, the less brittle it will be. ABS, acrylonitrile-butadiene-styrene, uses the butadiene rubber parts of the polymer chains to make softer domains in the material where the stresses dissipate. That's the impact toughening principle in general. I also saw a trick with graphene addition into the matrix, where the graphene particles do crack pinning - cracks going through the material are attracted to the particles, and then they get stuck there as the energy for the crack propagation shoots insanely up. Small fraction of percent, if I rememer correctly, increased impact toughness by almost order of magnitude.![]() It's a VERY interesting process, and the low cost of these machines have made them very popular in the past few years
It's a VERY interesting process, and the low cost of these machines have made them very popular in the past few years![]() Newbie Q: What is the average cost of admission for SLA printing?
Newbie Q: What is the average cost of admission for SLA printing?![]() Essentially, instead of a motor and motion system for each axis, the average MSLA 3D printer only has one moving part; the Z axis
Essentially, instead of a motor and motion system for each axis, the average MSLA 3D printer only has one moving part; the Z axis![]() Great question @controlmypad !
Great question @controlmypad !![]() I recently saw an MSLA 3D printer from Voxelab that sold new for $111
I recently saw an MSLA 3D printer from Voxelab that sold new for $111![]() They also sell a model for about $150 or so, and it's a surprisingly decent machine!
They also sell a model for about $150 or so, and it's a surprisingly decent machine!![]() But it's sort of like buying a bike; you also need a helmet, a pump, and a few other things
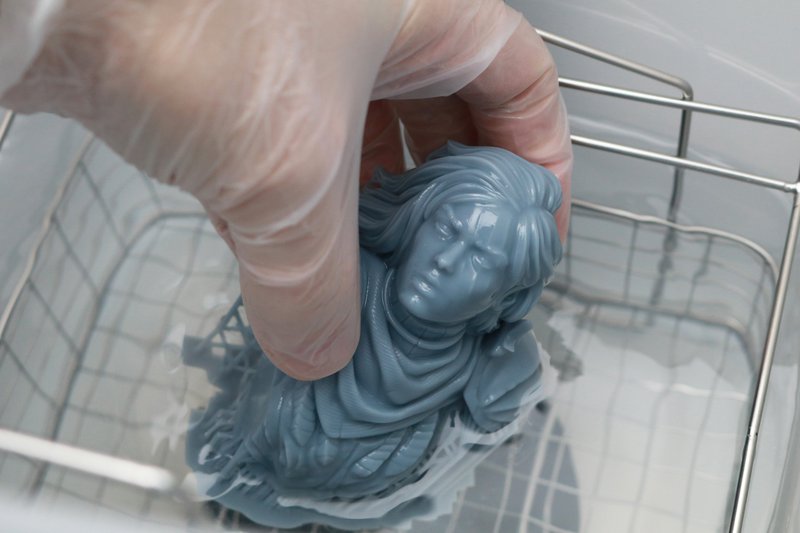
But it's sort of like buying a bike; you also need a helmet, a pump, and a few other things![]() When a part is made on a resin 3D printer, it needs to be rinsed in a solvent to clear off any excess resin
When a part is made on a resin 3D printer, it needs to be rinsed in a solvent to clear off any excess resin![]() and then it has to be fully polymerized in a curing chamber
and then it has to be fully polymerized in a curing chamber![]() So you'll want to either buy / build one of those yourself!
So you'll want to either buy / build one of those yourself!![]() It can be as simple or as complex as you'd like!
It can be as simple or as complex as you'd like!![]() A coworker of mine got an Elgoo when Covid started and he says he never uses it because its a pain to clean up and maintain - Do you have any shortcuts/advice for maintaining/cleaning SLA printers?
A coworker of mine got an Elgoo when Covid started and he says he never uses it because its a pain to clean up and maintain - Do you have any shortcuts/advice for maintaining/cleaning SLA printers?![]() Absolutely, great question @joshua.vader !
Absolutely, great question @joshua.vader !![]() I use a silicone baking mat that stays under my printer during printing
I use a silicone baking mat that stays under my printer during printing![]() So when I remove the part, any resin that drips will stay on the silicone mat, which I can bring outside and allow to cure, followed by breaking off the resin and disposing of it
So when I remove the part, any resin that drips will stay on the silicone mat, which I can bring outside and allow to cure, followed by breaking off the resin and disposing of it![]() I've been loving resin printing - and the cleanup process has been far less messy than I thought, perhaps because I'm very methodical in how I do things - always have gloves and paper towels at the ready, have my isopropyl alcohol at the ready, etc., etc. Interestingly, I tried the water soluable resins and the results, for me, were terrible. I use Siraya Fast ABS-like resin and it has been a champ.
I've been loving resin printing - and the cleanup process has been far less messy than I thought, perhaps because I'm very methodical in how I do things - always have gloves and paper towels at the ready, have my isopropyl alcohol at the ready, etc., etc. Interestingly, I tried the water soluable resins and the results, for me, were terrible. I use Siraya Fast ABS-like resin and it has been a champ.![]() Also, you'll need a lot of paper towels
Also, you'll need a lot of paper towels![]() Excellent feedback, @David Geller !
Excellent feedback, @David Geller !![]() Do all MSLA printers use an LCD, or does MSLA include ones that may say use a laser + galvos/...? (i'd not heard the 'masked' part of the acroynym before)
Do all MSLA printers use an LCD, or does MSLA include ones that may say use a laser + galvos/...? (i'd not heard the 'masked' part of the acroynym before)![]() There is certainly a lot of work involved in the clean-up process, but there are a handful of shortcuts that make life more bearable!
There is certainly a lot of work involved in the clean-up process, but there are a handful of shortcuts that make life more bearable!![]() Here's the stuff I make (don't worry - I'm not selling here; in fact - if you want want DM me and I'll send it out to you)... https://www.etsy.com/listing/985358329/throttle-switch-for-rad-power-ebikes?ga_order=most_relevant&ga_search_type=all&ga_view_type=gallery&ga_search_query=rad+throttle&ref=sr_gallery-1-8&organic_search_click=1
Here's the stuff I make (don't worry - I'm not selling here; in fact - if you want want DM me and I'll send it out to you)... https://www.etsy.com/listing/985358329/throttle-switch-for-rad-power-ebikes?ga_order=most_relevant&ga_search_type=all&ga_view_type=gallery&ga_search_query=rad+throttle&ref=sr_gallery-1-8&organic_search_click=1![]() It paid for my resin printer many times over!
It paid for my resin printer many times over!![]() A lot of the resin can be washed off with running hot water, combination of mechanical and thermal effect. The heat greatly lowers viscosity.
A lot of the resin can be washed off with running hot water, combination of mechanical and thermal effect. The heat greatly lowers viscosity.![]() @anfractuosity, that's a great question!
@anfractuosity, that's a great question!![]() An "MSLA" 3D printer will, by definition, use a masking LCD!
An "MSLA" 3D printer will, by definition, use a masking LCD!![]() i recommend "animal feeding matts" - they always have a nice lips that prevents resin spills
i recommend "animal feeding matts" - they always have a nice lips that prevents resin spills![]() aha, makes sense, cheers
aha, makes sense, cheers![]() If it uses galvos or lasers, it's probably an SLA printer, and if it uses a light-based projector, it's a DLP printer!
If it uses galvos or lasers, it's probably an SLA printer, and if it uses a light-based projector, it's a DLP printer!![]() You're dead-on, great critical thinking!
You're dead-on, great critical thinking!![]() These are great questions, everyone!
These are great questions, everyone!![]() @WooDWorkeR - do you mean cafeteria trays kids use? That's what I use.
@WooDWorkeR - do you mean cafeteria trays kids use? That's what I use.![]()
![]()
![]() Printing clear parts with resin is another fun strength of this technology!
Printing clear parts with resin is another fun strength of this technology!![]() "How do I print a water-clear" part is a really common question in resin printing, and the short answer is, "With a lot of effort!"
"How do I print a water-clear" part is a really common question in resin printing, and the short answer is, "With a lot of effort!"![]() But using a quality clear resin is a great way to skip to the front of the line!
But using a quality clear resin is a great way to skip to the front of the line!![]() How good is the clarity? is it possible to print any sort of lens yet?
How good is the clarity? is it possible to print any sort of lens yet?![]() You can even print some rudimentary nonimaging optics. Fresnel lens worked, and focused a LED in usable way.
You can even print some rudimentary nonimaging optics. Fresnel lens worked, and focused a LED in usable way.![]()
![]()
![]() Anyone experimenting with dyes and clear resin? I bought both but haven't experimented yet.
Anyone experimenting with dyes and clear resin? I bought both but haven't experimented yet.![]()
![]()
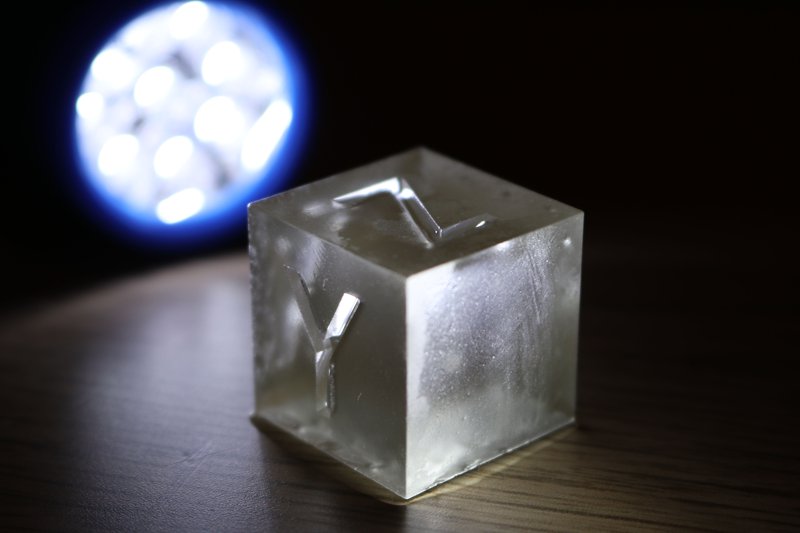
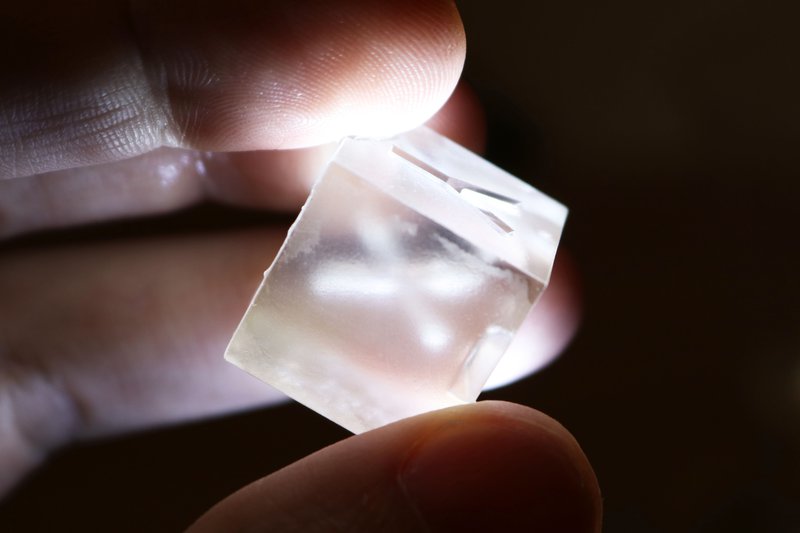
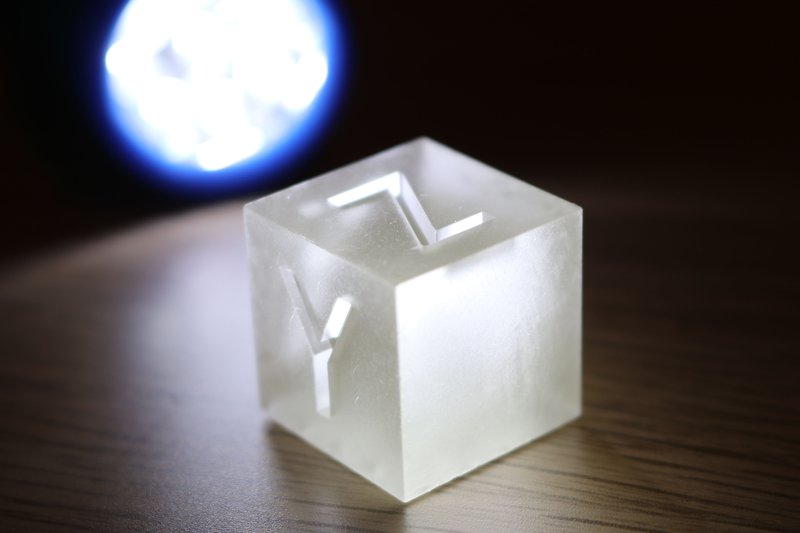
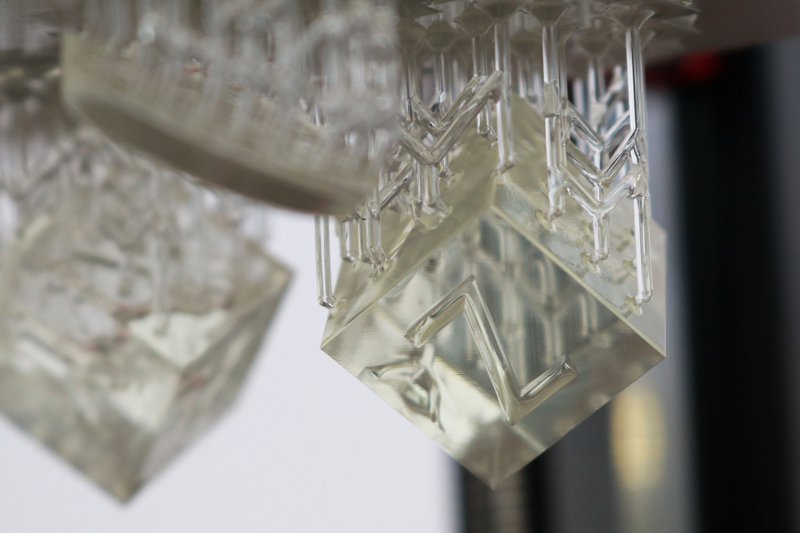
![]() Here's an example of a solid cube, printed and cured, with no post-processing
Here's an example of a solid cube, printed and cured, with no post-processing![]()
![]()
![]() Whoops, sorry, those were out of order!
Whoops, sorry, those were out of order!![]() You could also print a master, make silicone mold from it, then cast with clear resin.
You could also print a master, make silicone mold from it, then cast with clear resin.![]() The clearness depends on both the precursors, which are usually yellowish naturally, and the photoinitiator, which by the virtue of having to be sensitive to 405nm has to be yellowish at least a little bit (but some can photobleach to near-colorless).
The clearness depends on both the precursors, which are usually yellowish naturally, and the photoinitiator, which by the virtue of having to be sensitive to 405nm has to be yellowish at least a little bit (but some can photobleach to near-colorless).![]() The first one has been wetted down, and the second one is the original!
The first one has been wetted down, and the second one is the original!![]() You can see the difference in the clarity of the part
You can see the difference in the clarity of the part![]() Hey @Thomas Shaddack! Thanks for all the extra information!
Hey @Thomas Shaddack! Thanks for all the extra information!![]() Clarity depends on many things, but here's a good explanation
Clarity depends on many things, but here's a good explanation![]() When a part is printed, the cloudy surface is due to rough imperfections in the upward-facing surface
When a part is printed, the cloudy surface is due to rough imperfections in the upward-facing surface![]() Think of it like a mirror, covered in sand
Think of it like a mirror, covered in sand![]() would sanding the surface help with the cloudiness or are the flaws deeper?
would sanding the surface help with the cloudiness or are the flaws deeper?![]() @David Geller something like this https://www.amazon.com/-/en/dp/B01MEHV8YR/
@David Geller something like this https://www.amazon.com/-/en/dp/B01MEHV8YR/![]() As you reduce the overall roughness, it becomes clearer!
As you reduce the overall roughness, it becomes clearer!![]() So, sanding is a GREAT way to get a clear part
So, sanding is a GREAT way to get a clear part![]() But, it's time-consuming
But, it's time-consuming![]() So a quick way to cheat is a thin coat of Acrylic Clear Coat!
So a quick way to cheat is a thin coat of Acrylic Clear Coat!![]() I use Krylon Crystal Clear
I use Krylon Crystal Clear![]() We're encroaching on the field of UV-vis spectrometry. Anything with enough conjugated aromatic bonds will tend to be at least yellowish. If it will tend to make them over time, it will yellow later.
We're encroaching on the field of UV-vis spectrometry. Anything with enough conjugated aromatic bonds will tend to be at least yellowish. If it will tend to make them over time, it will yellow later.![]() This will help fill the valleys between the layers, and give the part a more uniform surface
This will help fill the valleys between the layers, and give the part a more uniform surface![]() @Andrew Sink awesome, thanks!
@Andrew Sink awesome, thanks!![]() I think you can use the resin itself. Thin coat, and cure in place. Or skip on the washing if the part's design allows.
I think you can use the resin itself. Thin coat, and cure in place. Or skip on the washing if the part's design allows.![]() Eric Strebel has a video on post-processing CLA prints to make them water clear:
Eric Strebel has a video on post-processing CLA prints to make them water clear:![]()
https://www.youtube.com/watch?v=nvNXCyDyTTI
![]()
![]()
![]() Like most 3D printers, the resolution and repeatability is a function of price and control software. It would be nice to print lens assembles. I was working on the microscope industry this morning and thinking how expensive it is to machine, cast metals, hand assemble. And the chaos and expense of al those threads, adapters, connectors - more cost to connect than the pieces.
Like most 3D printers, the resolution and repeatability is a function of price and control software. It would be nice to print lens assembles. I was working on the microscope industry this morning and thinking how expensive it is to machine, cast metals, hand assemble. And the chaos and expense of al those threads, adapters, connectors - more cost to connect than the pieces.The idea of printing optics as you need them. Want to change, them, make a new one, and throw the other one away or give it to a good cause.
![]() Guess it depends on how clear you like your water ;-)
Guess it depends on how clear you like your water ;-)![]() This is also visible in the parts themselves, when they are coated with resin, they are highly transparent!
This is also visible in the parts themselves, when they are coated with resin, they are highly transparent!![]() @RichardCollins, that's a great point!
@RichardCollins, that's a great point!![]() Printing a lens assembly would be a HUGE win for 3D printing, but currently, there is a lot of post-processing involved in getting those parts to an acceptable level of light transmission and clarity!
Printing a lens assembly would be a HUGE win for 3D printing, but currently, there is a lot of post-processing involved in getting those parts to an acceptable level of light transmission and clarity!![]() As Andrew said clearness depends on many variables. The surface is one major one. If surface finish is an issue some clear paints can help. They generally have a self-leveling effect that will smooth out micro roughness.
As Andrew said clearness depends on many variables. The surface is one major one. If surface finish is an issue some clear paints can help. They generally have a self-leveling effect that will smooth out micro roughness.![]() Clarity is a lot of fun to experiment with, there are LOTS of creative ways to solve the problem of making clear prints!
Clarity is a lot of fun to experiment with, there are LOTS of creative ways to solve the problem of making clear prints!![]() Speaking of which!
Speaking of which!![]() I succeeded in printing a M12x0.5 thread that didn't need chasing with a tap. (Needs a lil' adjustment, making a little bigger or smaller to account for the process variables. Print a couple of threaded holes with different adjustment factors, choose by test.
I succeeded in printing a M12x0.5 thread that didn't need chasing with a tap. (Needs a lil' adjustment, making a little bigger or smaller to account for the process variables. Print a couple of threaded holes with different adjustment factors, choose by test.![]()
![]()
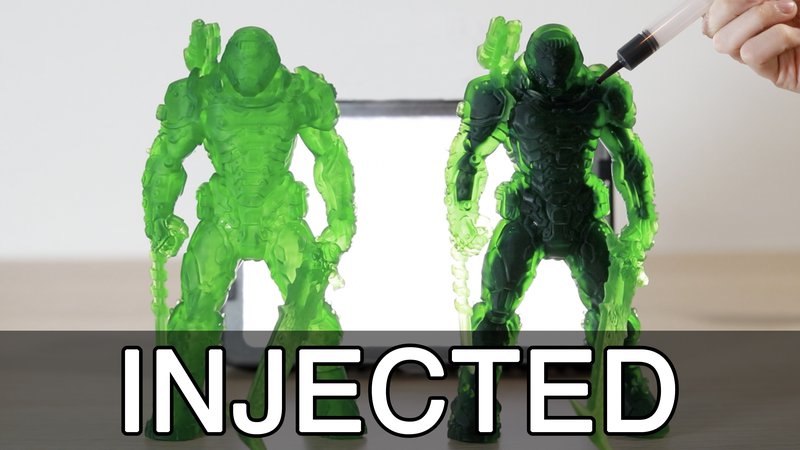
![]() Here's a thumbnail from a video I published recently (that was actually featured on Hackaday!)
Here's a thumbnail from a video I published recently (that was actually featured on Hackaday!)![]()
![]() This was an experiment in printing hollow resin parts, and filling them with paint to provide an opaque backing to the clear nature of the parts
This was an experiment in printing hollow resin parts, and filling them with paint to provide an opaque backing to the clear nature of the parts![]() I worry about global education. Low cost optics for schools leaves most without anything to use, eats up budgets and requires fairly costly human teachers. If the kids can print the experiments themselves, or as needed, it might be possible to teach the two billion first time learners at present, and more later.
I worry about global education. Low cost optics for schools leaves most without anything to use, eats up budgets and requires fairly costly human teachers. If the kids can print the experiments themselves, or as needed, it might be possible to teach the two billion first time learners at present, and more later.![]() This allowed the otherwise difficult-to-see details show right through!
This allowed the otherwise difficult-to-see details show right through!![]() Technically, using two-photon polymerization, it could be possible to get to 100nm resolution. Then even with the ridged surface we could have optical components, as we'd be at quarter-wavelength of blue light anyway.
Technically, using two-photon polymerization, it could be possible to get to 100nm resolution. Then even with the ridged surface we could have optical components, as we'd be at quarter-wavelength of blue light anyway.![]() So, let's keep talking about getting started!
So, let's keep talking about getting started!![]() What are some obstacles you've ran into when resin printing?
What are some obstacles you've ran into when resin printing?![]() I saw school-grade optics with jello cast into moulds.
I saw school-grade optics with jello cast into moulds.![]() @Thomas Shaddack I was looking for one of those this morning and wondering if they could be 3D printed. It just has to hold for many setups. Thanks!
@Thomas Shaddack I was looking for one of those this morning and wondering if they could be 3D printed. It just has to hold for many setups. Thanks!![]()
 Lutetium

