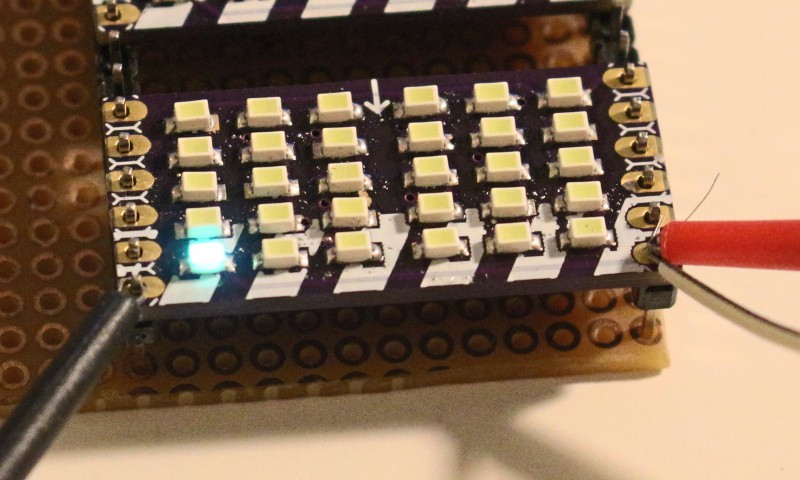
-
Tina's Display
01/10/2026 at 20:11 • 0 commentsChips:
(2x) 9x OKI MSM5260 4412(2x) 4x upside down?
1x LA6324
GEB-2294V-0 S (seems to be on a lot of boards)
proably 5V
1 Serial in, one clock and load
one handles 80 bit, so it's 160 * 640 pixel?
could also be 200x640, looking at a HTM640200-31W for exampled
![]()
-
Simple Add-ons lightning talk at supercon
09/26/2025 at 13:57 • 0 commentsThought it would be nice to have a separate video of my lightning talk at supercon about simple add-ons, so it's easier to find and point at.
-
Playing with the I2C SAO Petal for Supercon 8
11/07/2024 at 23:55 • 0 commentsMy first tripup was that GPIO1 was not soldered on the badge, glad I caught it!
I also soldered an LED leg as a jumper for the programming pin on the SAO to be always connected to GPIO1.
It seems like there's a little issue with the Supercon image and getting the programmer to run, but the programmer works with the vanilla RP2040 PICOW image. These are the files that are on the image to start with.
![]()
Followed by this file tree, when I upload the programmer onto the badge as well.
![]()
I create another file and copy in the example that is written in flash_ch32v003.py - note here that I have to comment out the "or" in between the example.
>>> %Run -c $EDITOR_CONTENT
Traceback (most recent call last):
  File "<stdin>", line 2, in <module>
  File "flash_ch32v003.py", line 35, in __init__
ValueError: StateMachine claimed by external resource
>>>
This is something that others have noticed before - by changing the used statemachine from 4 to 3, this error went away. When I run the program now, I get this output, but it is still blinking, instead of putting out touch values.
>>> %Run -c $EDITOR_CONTENT
Time spent: 545482
0x0 0x0
0x1 0x0
0x2 0x0
0x3 0x0
>>>
With the vanilla Micropython from https://micropython.org/download/RPI_PICO/ I also just copy the files onto the badge and run the code from REPL and it works. Therefore I doubt that it is a hardware issue and must have something to do with the supercon image.
It seems like just changing the state machine number in the "StateMachine" function is not enough, you also have to change the "unavoidable bit-twiddling" bit, If you want to use a statemachine smaller than zero, then you have to change the PI1_BASE value to PI0_BASE and add the correct state machine SM1_EXECCTRL. It seems like I2C on the PICO W leads to a different state machine being used, which then breaks the flasher.
Here's my pull request on github with the changes:
-
getting the pico usb host example compiled correctly
12/01/2022 at 19:51 • 2 commentsI couldn't find the picoprobe with openOCD until I flashed it with a pre compiled picoprobe.uf2 file instead of compiling it myself. If it works, it works - I guess.
found the related issue where I got the working picoprobe.uf2 got from: https://github.com/raspberrypi/openocd/issues/71
Basically pointing to this site where you can download the probe firmware:
So apparently there's a tinyusb bug that will break the usb hid example and throw something like this at you:assertion "ep->active" failed: file "~/Projects/pico/pico-sdk/lib/tinyusb/src/portable/raspberrypi/rp2040/hcd_rp2040.c", line 164, function: hw_trans_complete
This has something to do with the debug mode and you need a flag to run cmake first before compiling:
PICO_SDK_PATH=~/Projects/pico/pico-sdk cmake .. -DCMAKE_BUILD_TYPE=Release
make -j8
I have yet to find out what the difference between -j8 and -j4 means but hey, that up their worked.
link that helped: https://github.com/raspberrypi/pico-sdk/issues/649
video that helped:
-
Building openOCD for picoprobe on M1 mac
12/01/2022 at 12:35 • 0 commentsHad some trouble compiling the openOCD version for the picoprobe on the M1 macbook. This is based on a thread on github and the official guides, plus some blog posts that basically copied from each other.
https://github.com/raspberrypi/openocd/issues/7
#install additional brew libraries brew install libtool automake texinfo wget gcc pkg-config libusb # some path magic so compilers know where to look for stuff export PATH="$(brew --prefix)/opt/texinfo/bin:$PATH" # download openocd files with picoprobe branch git clone https://github.com/raspberrypi/openocd.git \ --branch picoprobe --depth=1 cd openocd ./bootstrap # this enables the picoprobe and deactivates other modules that fail to compile otherwise CAPSTONE_CFLAGS="-I$(brew --prefix)/include" \ ./configure --prefix="$(brew --prefix)" \ --enable-picoprobe --disable-presto --disable-werror --disable-openjtag make -j4 # this will probably overwrite your current installation # and will break openjtag make install # optionally remove the installation folder cd ~/git rm -rf openocd -
burning firmware onto an ST-Link to burn firmware onto anything else
06/07/2021 at 18:37 • 0 commentsat least I'm trying to find that out. The clones from aliexpress are supposed to be only able to program st chips. But I want to use it to program some SAMD-21 chips. Never done that as well. So this is a link drop first. Figuring it out for MAC OS.
install open-OCD via homebrew
for unlocking the stm for new firmware go here
https://hackaday.io/project/162597-st-link-clone-repurposing/log/156668-programming
install new firmware called cmsis-daphttps://mvdlande.wordpress.com/2015/10/05/cmsis-dap-on-a-cheap-st-link-v2-mini-adapter/
get this file
https://raw.githubusercontent.com/x893/CMSIS-DAP/master/Firmware/STM32/hex/CMSIS-DAP-STLINK21.hex
install with this line
openocd -f interface/stlink.cfg -f target/stm32f1x.cfg -c "init" -c "halt" \

    -c "flash write_image ./CMSIS-DAP-STLINK21.hex" -c "shutdown"
doing this to flash arturos latest keyboard firmware, had to install arm gcc first. Brew doesn't work as it's not trusted. Downloading here helped.
to compile arturos fine firmware, you need to add the ARM stuff to your path, otherwise you compile and wonder why he wont find "gcc-arm-none-eabi" again.
export PATH="$PATH:/Applications/ARM/bin/" -
looking back to 2019 and forward to 2020
01/05/2020 at 18:01 • 0 comments2019 Bigger Projects
- #Club Matrix
Array of 10 8x8 WS2812B LED matrices, controlled by a Raspberry PI through a DMA library. Images can be send as UDP packages to the matrix, if you happen to know the IP address. - SX-64 inspired Raspberry PI case
Inspired by portable computers from the 80ies, I started to build a case around a Raspberry PI with 10mm extrusion profiles and lasercut panels to mount stuff to. https://www.youtube.com/watch?v=vXGr7-_U_tY - #400 LED XY oscilloscope
For another video done for "elemen14presents", I cobbled together schematics out of Forrest Mims III's engineers notebook to make an LED oscilloscope that has 20 x 20 10mm LEDs. - #LED handheld
This monster pixel game uses some tricks like charlieplexing, soldering LEDs upside-down to shine through the PCBs and hours of sanding on a 3D printed case. - plenty other projects for element14presents
Here's a list of all my appearances as a video host for element14presents, plus some extra episodes of livestreams of the makercast - podcast that me and some other youtubers started.
https://www.youtube.com/playlist?list=PLN5aOBKmcf5-954RyDwuX6KYXCDLIr4BO
- #Club Matrix
-
SX-64 inspired Raspberry PI 4 thing
11/26/2019 at 15:50 • 0 commentsSo I've made this thing for element14 presents, never really had a set and forget PI to work on. I do like the optics of the SX-64 very much and all the other "portables" from the 80ies. I went with makerbeams 10x10mm aluminium extrusions for the frame and some lasercut MDF to hold everything together. Still needs an enclosure, but I'm pretty happy with it.
I tried to make the 2K display work, but it was too flickery and I couldn't get it to work properly, so I switched to the official display.
-
Quicklinks for my kindle "hacking" efforts
11/25/2019 at 20:53 • 0 commentshttps://github.com/pjimenezmateo/kindle-wallpaper/blob/master/In%20the%20Kindle/launch.sh
Type in homescreen, without USB connected:;debugOn
~usbNetwork
and then plug in USB cable
PI of kindle: 192.168.15.244
Password: mario
mntroot rw
nano /etc/crontab/root
-
new videos for element14 presents
07/27/2019 at 18:02 • 2 commentsFor the first new video I've finally worked some more on my R2-D2 vs. Johnny V mash up robot. You know, the one where I was too lazy to work on both, so I've joined them together :D Anyway, the matrix voice kit was a bit frustrating and I was all over the place with what I wanted to do with this robot, it probably shows.
The second video is an LED matrix that takes midi inputs or listens with a microphone. Inspired by close encounters of the third kind, of course! This video was so much more fun to make then the matrix voice robot. Finally a video where I was certain enough, that a bit of "regrettable acting" wouldn't hurt this time.
Third and most recent video, is a 3D printed Iron Man helmet with a head up display! I'm using two RGB 160x80 OLED displays and some cardboard lenses to show data I gathered from a BMP280 humidity sensor and an MPU9250 magnetometer.
-
MakerFaire Berlin 2019
05/21/2019 at 13:44 • 6 commentsFor this year's MakerFaire in Berlin @Alex, @bitluni, @Clemens Mayer and I formed a collective called "⅘ Sterne". Everything that happened, everyone I've met and everything I have seen, wouldn't fit in a single tweet, so I thought I would write a bit.
![]()
Setting up started on Thursday, since the next day the MakerFaire would be open to school classes. Clemens wouldn't take any projects with him on the plane and Alex's projects are - well - tiny - so I had the two tables to my self on Friday. With a red paper table cloth and yellow tape that would only be enough for 80% of a 4/5 Stars "tape art" logo. Fitting. It was my first "school day" and I noticed: those days are weird. Kids come with a totally different expectation than on the regular days. They come to be entertained and expect you to have games prepared. Luckily Bitluni arrived with a new top secret project, that we took for a test run on the parking lot.
![]()
On Saturday Bitluni was assembling his projects from the beginning of the opening. He quickly ran out of table space, even though we sneakily moved a table from our no-show neighbours. At one point I yelled "Promise me this is the last project!". We were looking forward to meet people from "all over the world", who announced that they would come. One of them was @deshipu - he didn't get a table but we were more than happy to share table space, so he could show his Tote and Pew Pews. The mighty @Stefan Kremser joined the booth for a bit, I handed him back some Game Boy mainboards that he was so kind to lend me for a video.
![]()
I was happy to see my Cousin and his son and also a friend from school I haven't seen in ages. And then there was "Great Scott" and yes, "Senpai noticed me!", because he knew me from my element14 videos :3 From the first "Hardware Happy Hour" I've seen three people (that I remembered at least). People that I only knew from twitter before where - not just Arturo182. But we were happy to drink beer with him in the afternoon, to the sweet live music by wu-tang clan and public enemy - they were playing live, very very close.
![]()
we declared @arturo182 as our fifth member on Sunday, by handing him the spare MakerFaire badge and I think he enjoyed his Berlin MakerFaire experience. There was a Mexican family with maker kids, who call themselves "moon makers" ( https://www.instagram.com/p/BxsArl_pJf4/ ) and they've interviewed me for a bit. Made me happy to see how both are interested in the making scene! For element14 I'm currently working on a video for the Matrix Voice hat and by coincidence was running into a developer. I'm also pretty sure he used a selfie to escape my questions.
As always we noticed we weren't prepared enough, really need a lot more info material / handouts to not always tell the same things. At this point it seems like we can try this again very soon in August, for the MakerFaire in Hannover. I had a lot of fun, it was also exhausting and I would have enjoyed more time with the gang to actually build something. Thank you to everyone I've met, that helped, visited etc. and sorry to the Danish guy that told me a brief excerpt of his very fascinating life story - you were always very busy when I was close to your booth to say hi again!
My favorite moments where when kids were happy about my R8-J4 robot driving towards them, even though it was basically a cheap trick and I want the robot to do so much more. But also whenever I was talking about my Game Boy music player, I saw my excitement pass on to the people I was telling them about.
--
Totally forgot Spencer from "RFC2795 Ltd" [https://www.tindie.com/stores/Semachthemonkey/] and Robert from "part fusion electronics" [https://www.tindie.com/stores/PartFusion/], fellow tindie sellers - they had a booth too and we drank some beers, was fun...
Read more -
Shameless Self Promotion
05/10/2019 at 17:39 • 6 commentsI've filmed two videos for element14 now, and I feel like I should promote this here. You don't have to watch it or click on it, I just wanted to get the word out some more. I will bring both projects with me to the MakerFaire Berlin from the 18th to 19th of May. We will have a booth there, that's me, @Alex , @bitluni and @Clemens Mayer!
I might have talked about this somewhere already, but here's my original hardware, portable music player. They call it "Gameboy Walkman", I call it DMG player.
This video shows my 2nd version of the #Skeleton Attiny85 Handheld - before the resin.
And here I am putting it in resin, like so many in the comments wanted me to do.
-
Maker Faire Hannover 2018
09/19/2018 at 15:28 • 0 commentsAs usual I tried to make a video and some up a few things I've seen and liked - this time I was also running around with some other known-here people like @bitluni, @Alex , @Clemens Mayer and @Stefan Kremser
Stefan and I did a little swap of various gaming parts, I spontaneously joined a maker slam to present my #K.I.T.T. - KNIGHT RIDER badge/brooch and there were some other events to watch. The "Hannover Arduino Treffpunkt" is also featured with an improved version of my #RGB 16 Segment LED
A lot of fun on two days compressed in an 9 minute video with subtitles (which I will never ever do again, but probably should).
-
Maker Faire Berlin 2018
06/02/2018 at 18:35 • 1 commentThis year me and @Alex were visiting the 2018 Maker Faire in Berlin together, we've met some youtubers, people known in the hackadayverse, saw some awesome projects and had a lot of fun!
Something that surprised me and made my day: I got recognised from last year where we did the unofficial hackaday.io community stand! I even got a little present as a thank you for when I gave him some PCBs and a hackaday prize shirt.
![]()
thanks Paul!
-
Hack Like Heck Audition Tape
03/04/2018 at 16:44 • 4 commentsHad some fun today :) find out more about the contest(?)
https://www.element14.com/community/community/experts/benheck/hack-like-heck
-
revamped my personal website
03/03/2018 at 19:18 • 0 commentswell, who needs one anyways? I plan on backing up stuff from here with the help of the API. My old content is converted to the new "engine". Everything is now backed up in github, I have version control and am able to rework some content.
I also want to make a #LAMEBOY - another ESP12 handheld page with all the important infos.
page link: www.davedarko.comsource code: https://github.com/davedarko/davedarkocom
-
PWNed the PWNer
01/16/2018 at 17:52 • 1 commentSo recently I thought about if it would be possible to have an ESP8266 module troll a "basic settings" deauther by @Stefan Kremser - turns out it is :) I'm a bit proud over here.
Code is here: https://gist.github.com/davedarko/87183b00e77ffb8fc59f89bf3b23d561
-
my hack(s) of the day
11/06/2017 at 19:48 • 7 commentshttps://www.instagram.com/p/BbKT75oHoso/ I didn't want to buy another module that's more "fitting", and I noticed that this might just work, and it did :)
![]()
Also this :)
![]()
-
Aisler vs. OSHPark comparison
10/21/2017 at 10:25 • 3 commentsUpdate 23rd of October
Aisler now offers free shipping!
Please keep in mind that I was able to participate in some test runs and beta tests, some anecdotes are hidden in this write up. They're definitely safe to try out :)
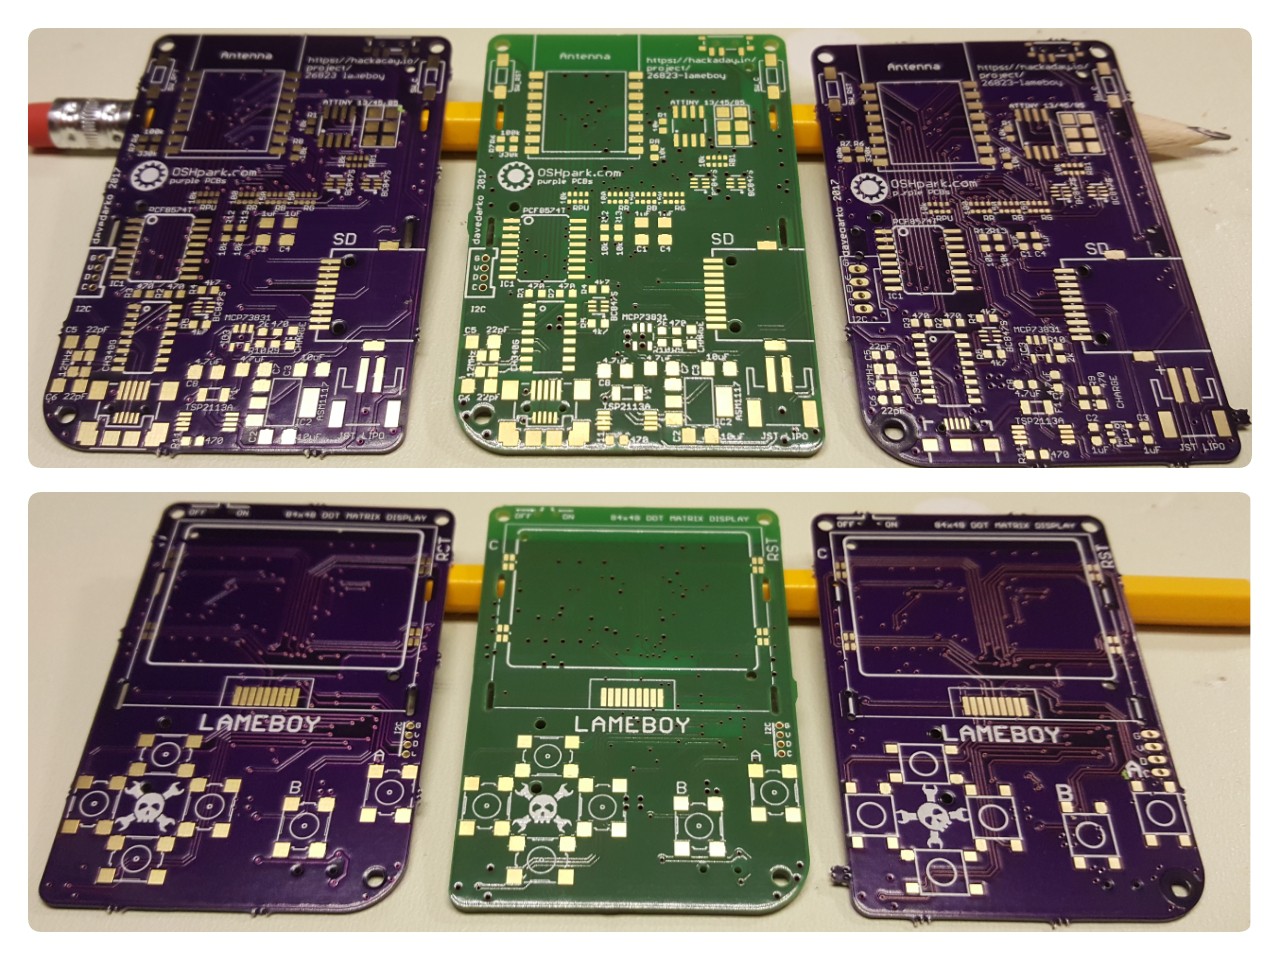
I've met @Felix Plitzko at the MakerFaire Hannover this year and we've talked about boards that AISLER has already made for the company I work for. Felix told me he likes the #LAMEBOY and offered me a free round of boards and a metal stencil to compare. Here is an overview of their service compared to OSH Park. They don't make it a secret that OSH Park is definitely an inspiration.
OSH Park AISLER Prices for shipping
to and buying in Germany20.24€ * 22.17€ 28.17€ (-6.00€ for shipping)Boards 3 3 Layer parameters 2 (0.8mm, 1.6mm)
4 (1.6mm)2 (1.6mm)
4 layers in betaDesign Rules 6mil trace clearance
6mil trace width
10mil drill size
5mil annular ring4mil trace clearance
4mil trace width
8mil drill size
10+drill size mil min padcolor of PCBs purple olive green (sadly not orange) Finish ENIG ENIG Design file support eagle, KiCad, gerber eagle, KiCad, fritzing, gerber production time 12 calendar days + shipping 12 days + shipping *no tolls bc below import tax minimum and with free shipping
The first picture shows a round of the first version of Lameboy, some parts are replaced now or moved or deleted (kind of sad about the steel stencil). I swear I replaced the OSH Park logo on the AISLER boards with an AISLER appropriate text, but I must have mixed files up. You can see a yellow "x- out" sticker, where I currently have no idea what it means, but the board's pads look pretty pierced, may be from electrical testing? The typical "byte marks" on the OSH Park boards (7 here) are sometimes slightly in the board, AISLER gives you a clean bulge.
![]() As you can see here the OSH Park silkscreen had some issues in this 0.8mm run, the C and RST labels of the buttons aren't printed well, where as the AISLER board is slightly offset to the bottom, so the OFF and ON Lines are cut in. The eyes of the skull look bigger on the AISLER board.
As you can see here the OSH Park silkscreen had some issues in this 0.8mm run, the C and RST labels of the buttons aren't printed well, where as the AISLER board is slightly offset to the bottom, so the OFF and ON Lines are cut in. The eyes of the skull look bigger on the AISLER board.![]()
In the second round of the OSH Park boards (as seen on the right of the following image) there are no errors in the silkscreen though.
![]()
The stencil of AISLER is looking pretty good, position it right and you can see only gold.
Overall I'm pretty happy with the quality of the boards since day one, but I also had some bad luck with orders. On my very first run of boards for the company I work for, I had the ground plane peeking out next to every pin, never happened with any other board manufacturer but was my fault and I could have seen it in the high resolution renders on the page. Since then they did a lot of magic to process the boards before they go in production. They seem to constantly update and upgrade their services and product, which is great if you think about it, but it might happen that you get a wild outline or your order of a "non public test run of steel stencils" (!) gets lost in an excel file :D (they don't use excel for that, now that it's public!!) But as with OSH Park the staff is communicative and interested in how they can improve and make it easier for you to make things. They're also in the process of adding PCB assembly to their services.
Their page gives you version management and the option to change board designs up until manufacturing begins, something that one person or another might miss in OSH Park (although production at OSH Park starts way sooner due to higher demand and a nice mail to support@oshpark.com might fix file problems). If they manage to nail the "order 3 complete prototypes" then AISLER would win the hearts by a lot of people, IMHO. -
can't put skulls on stuff forever
10/03/2017 at 21:07 • 7 commentsSo I started with "designing" a new logo that somehow has something to do with my chosen internet name and it's heritage. It still needs some work, but is an ok start.
![]()
-
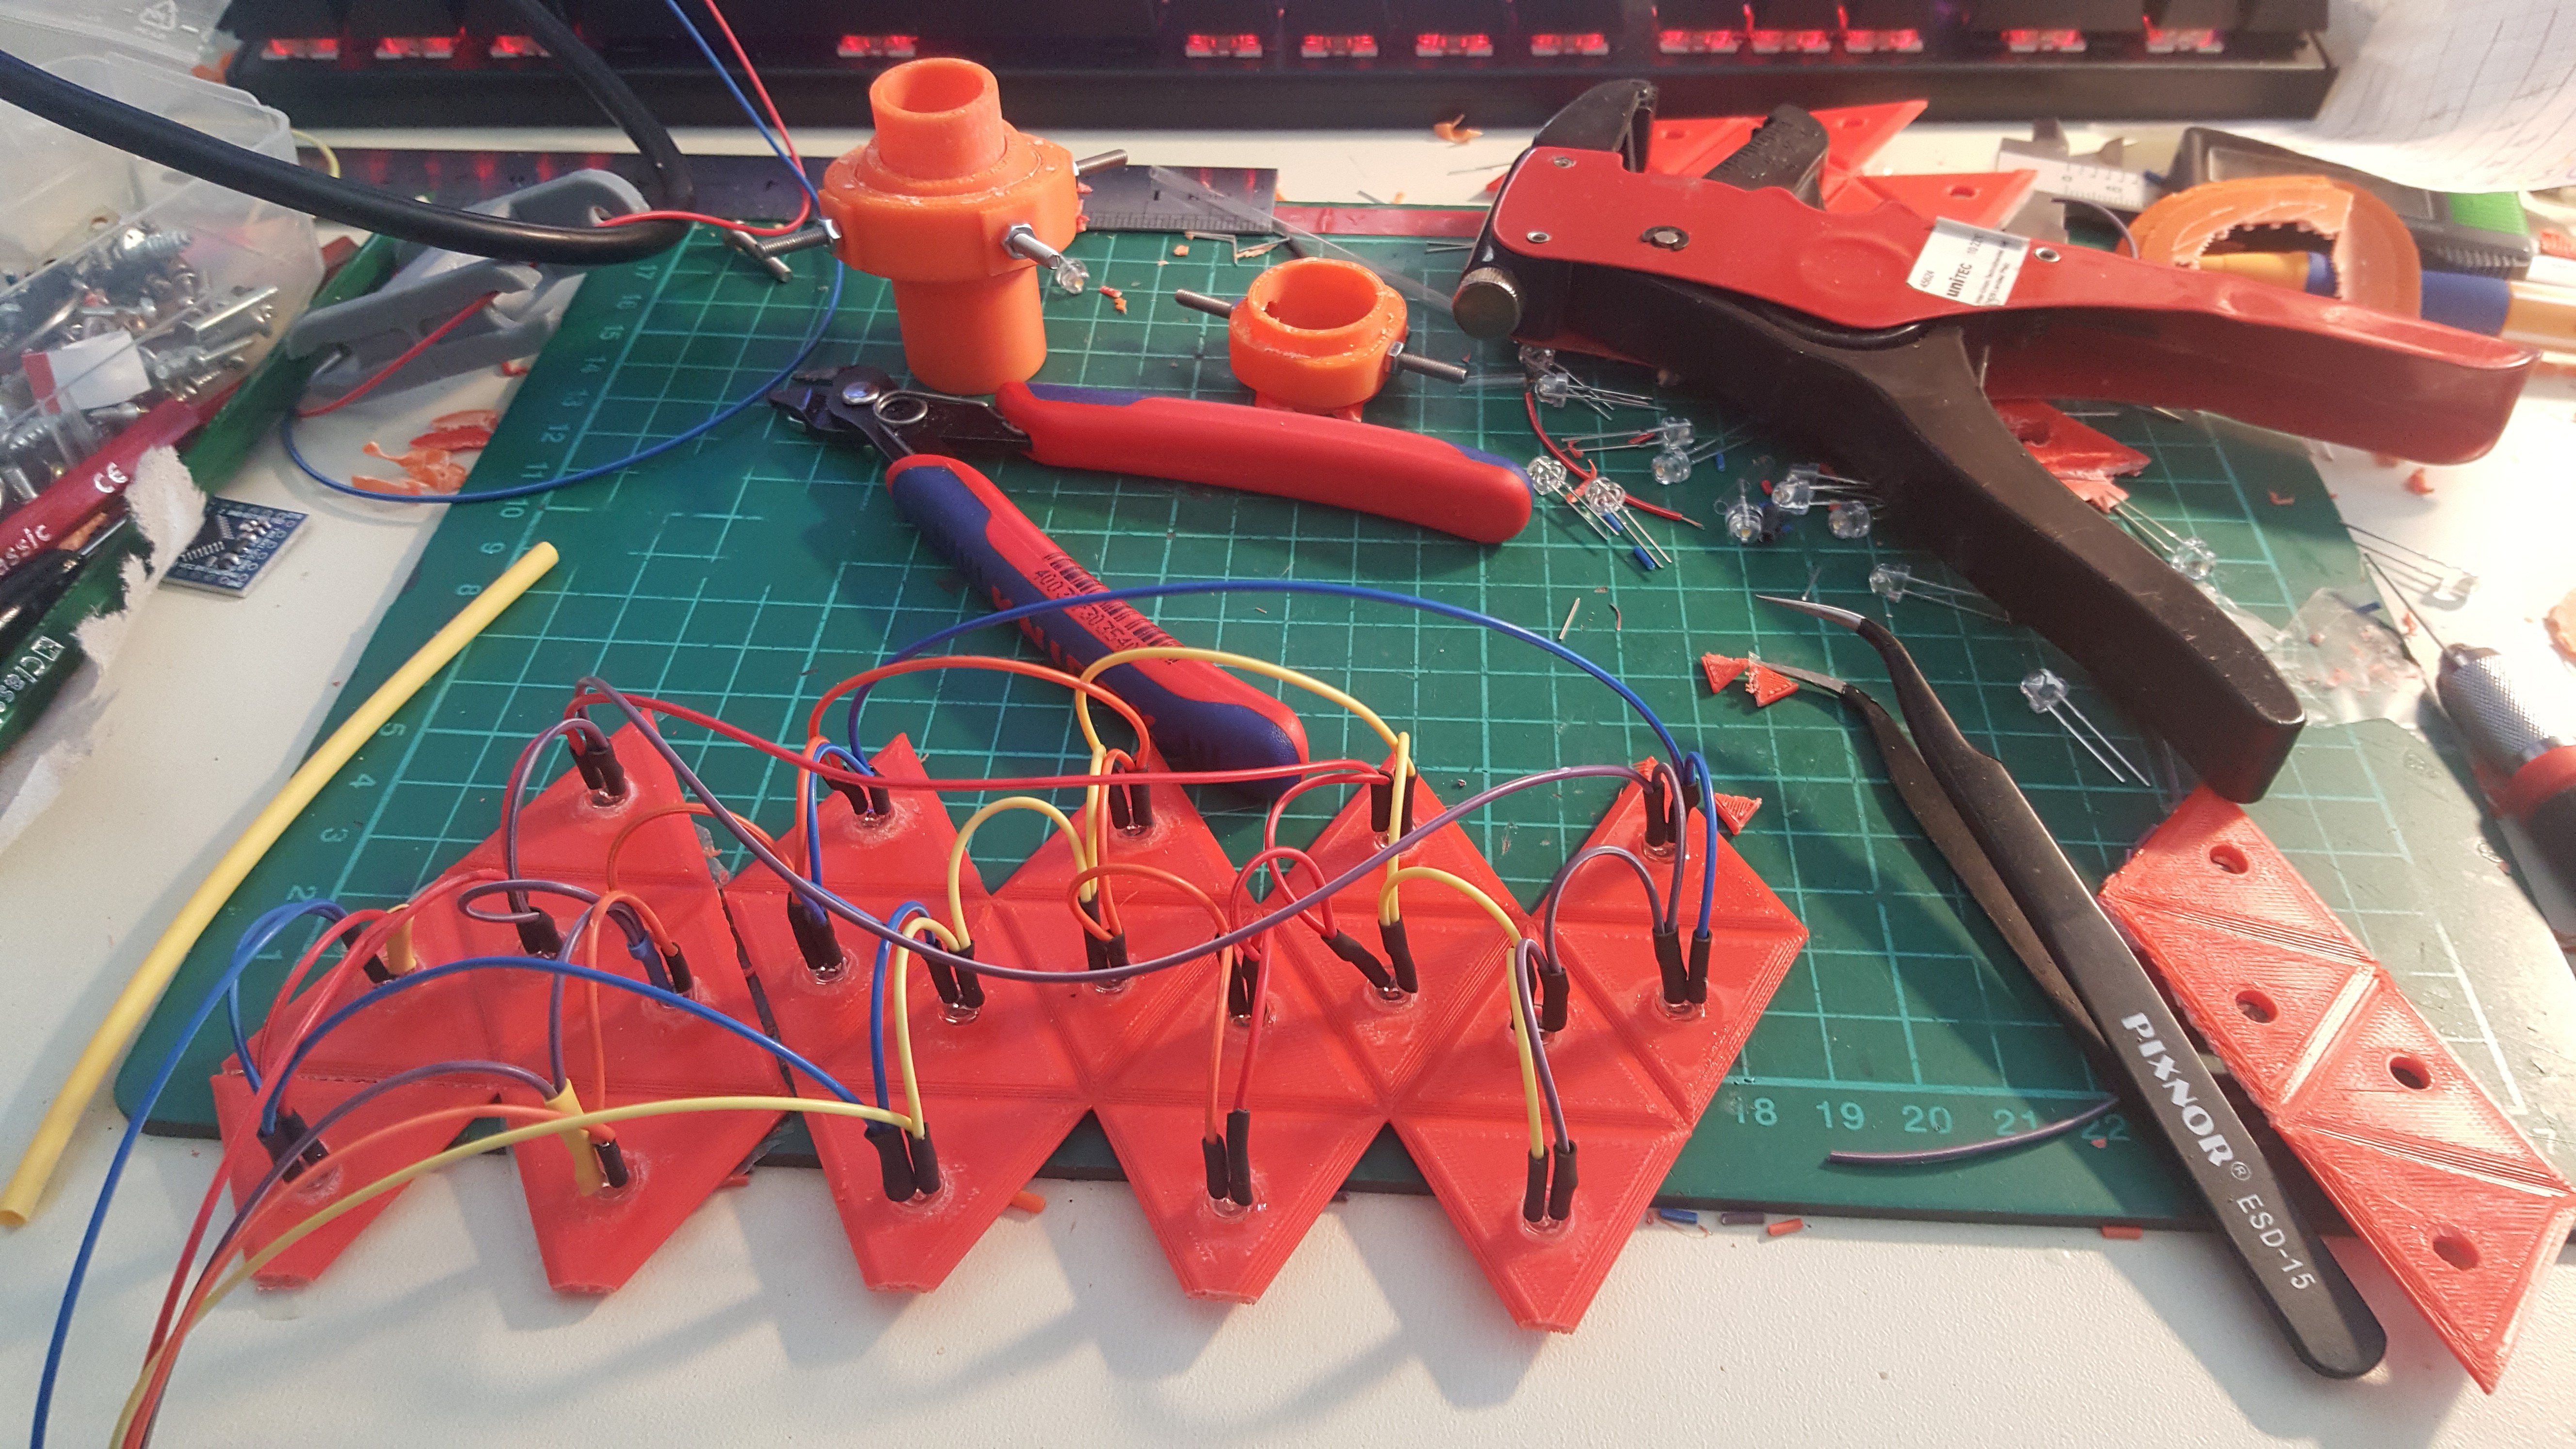
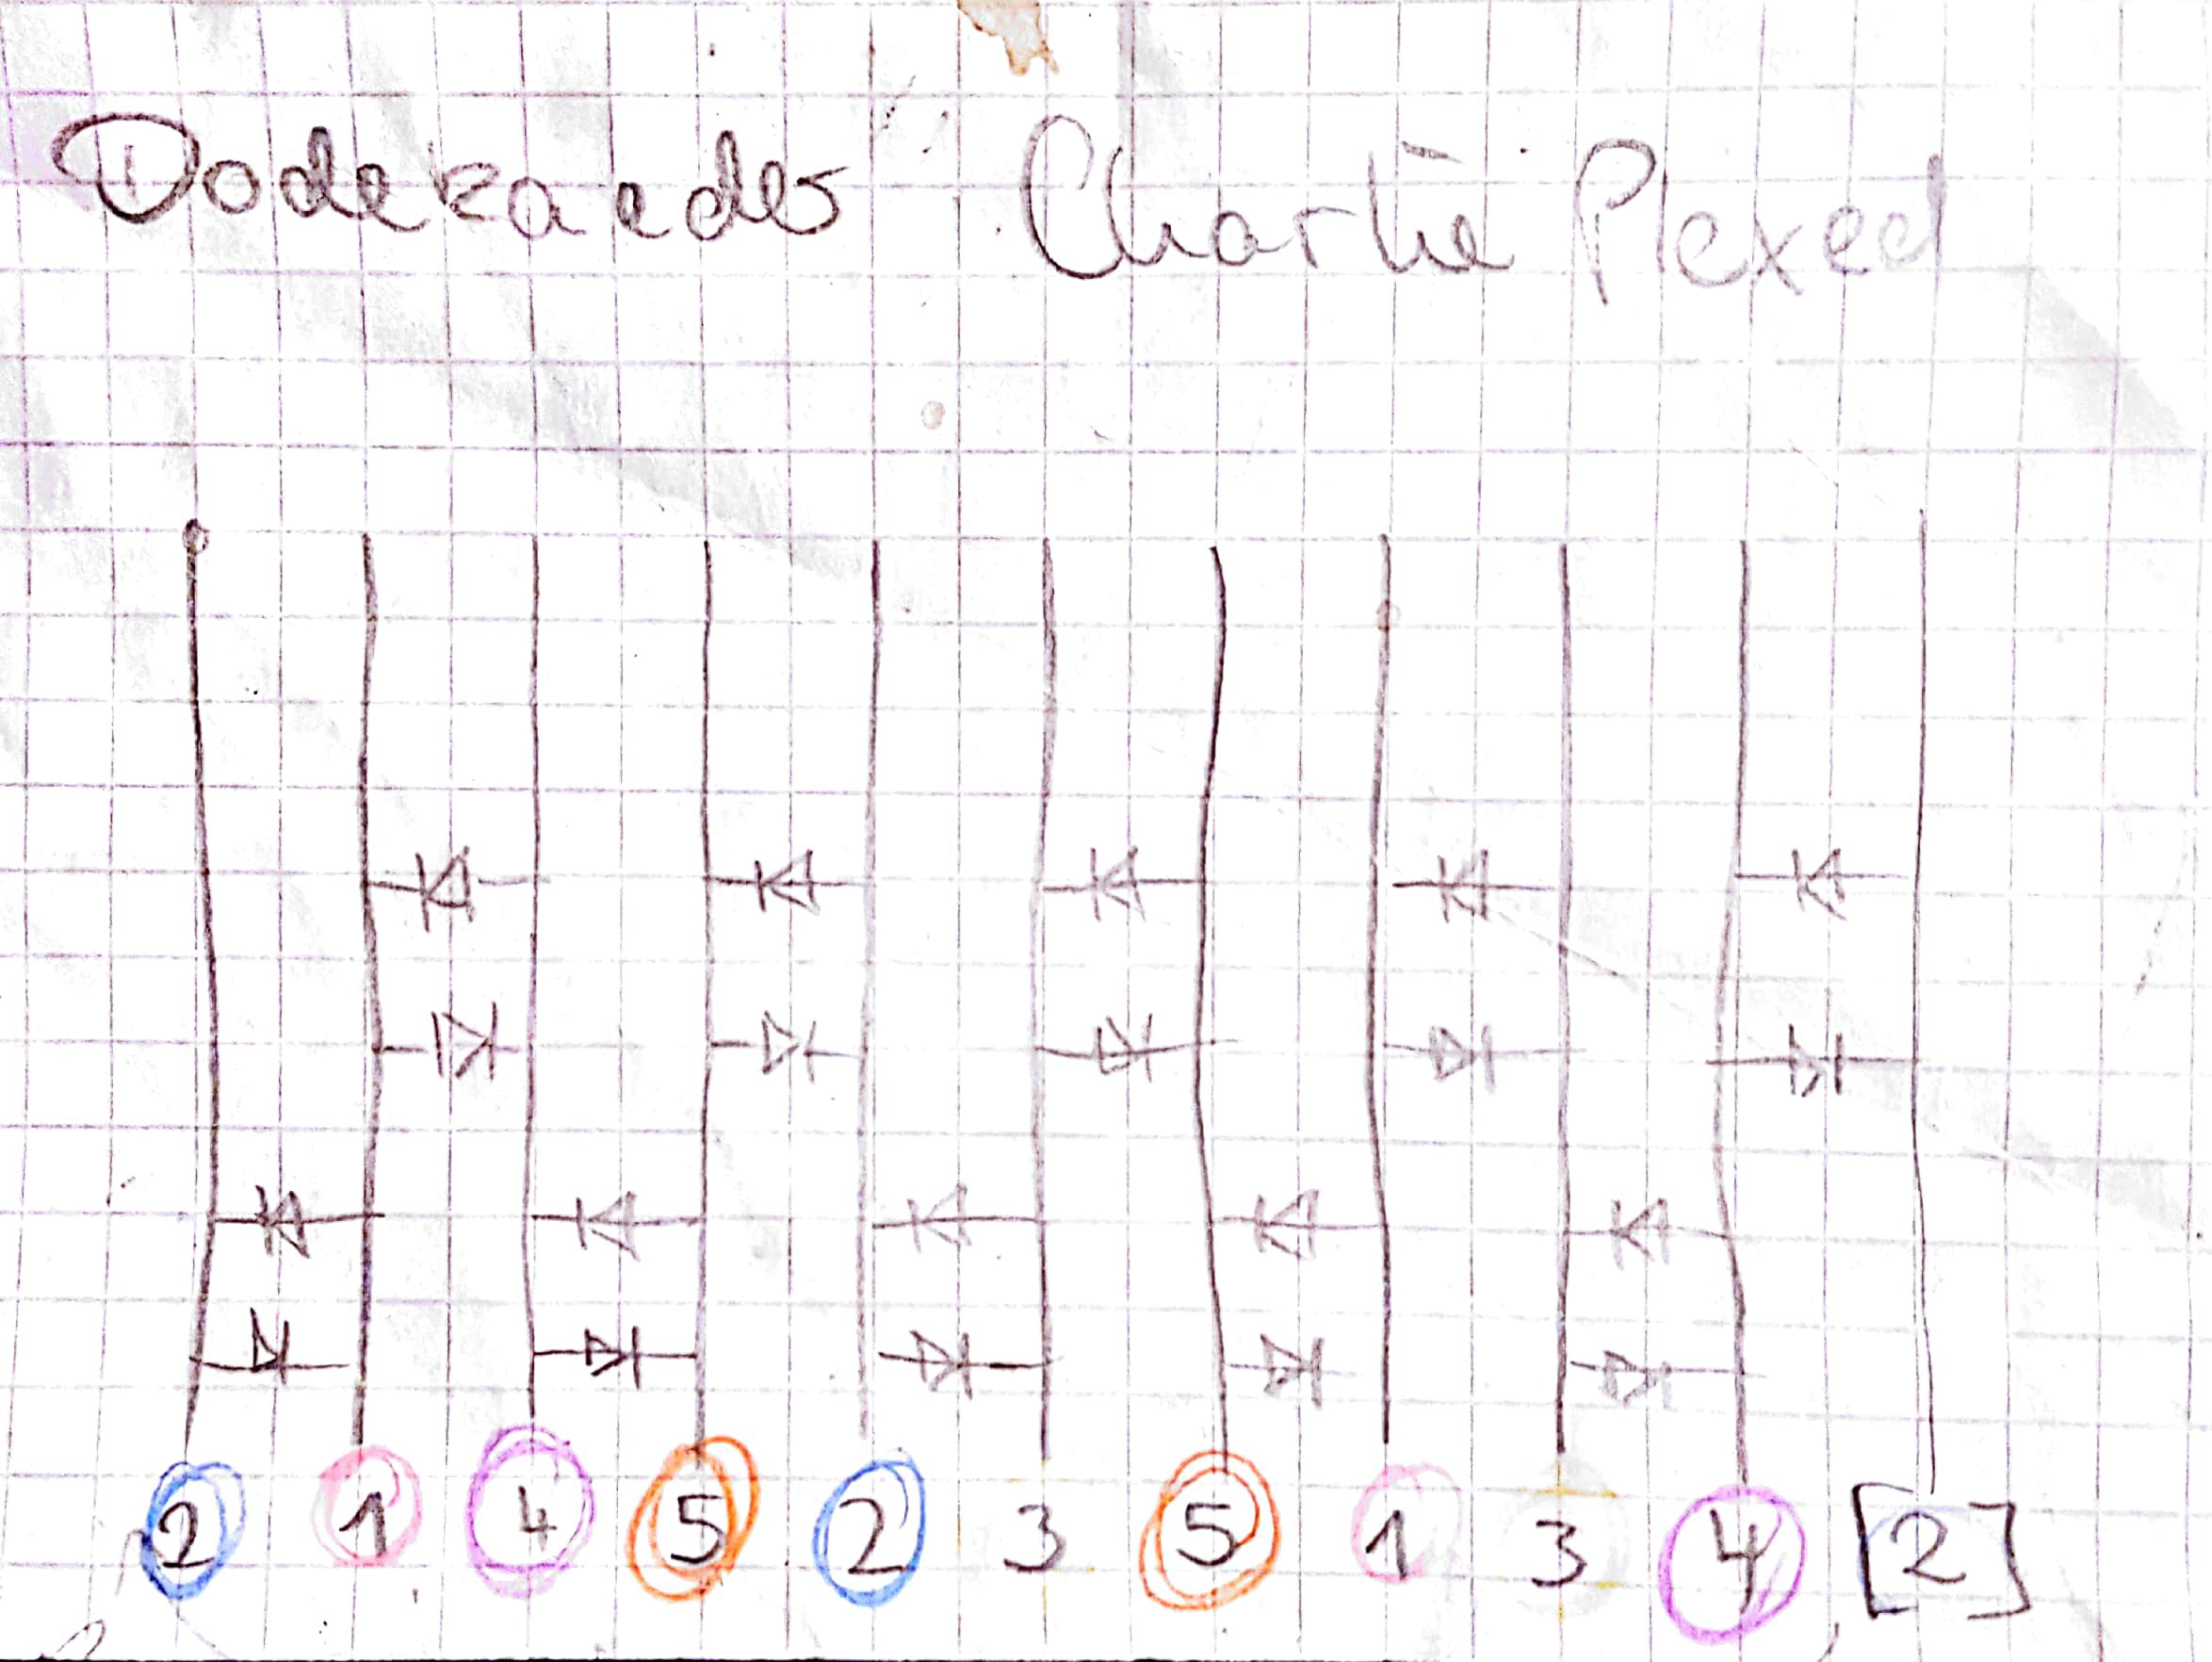
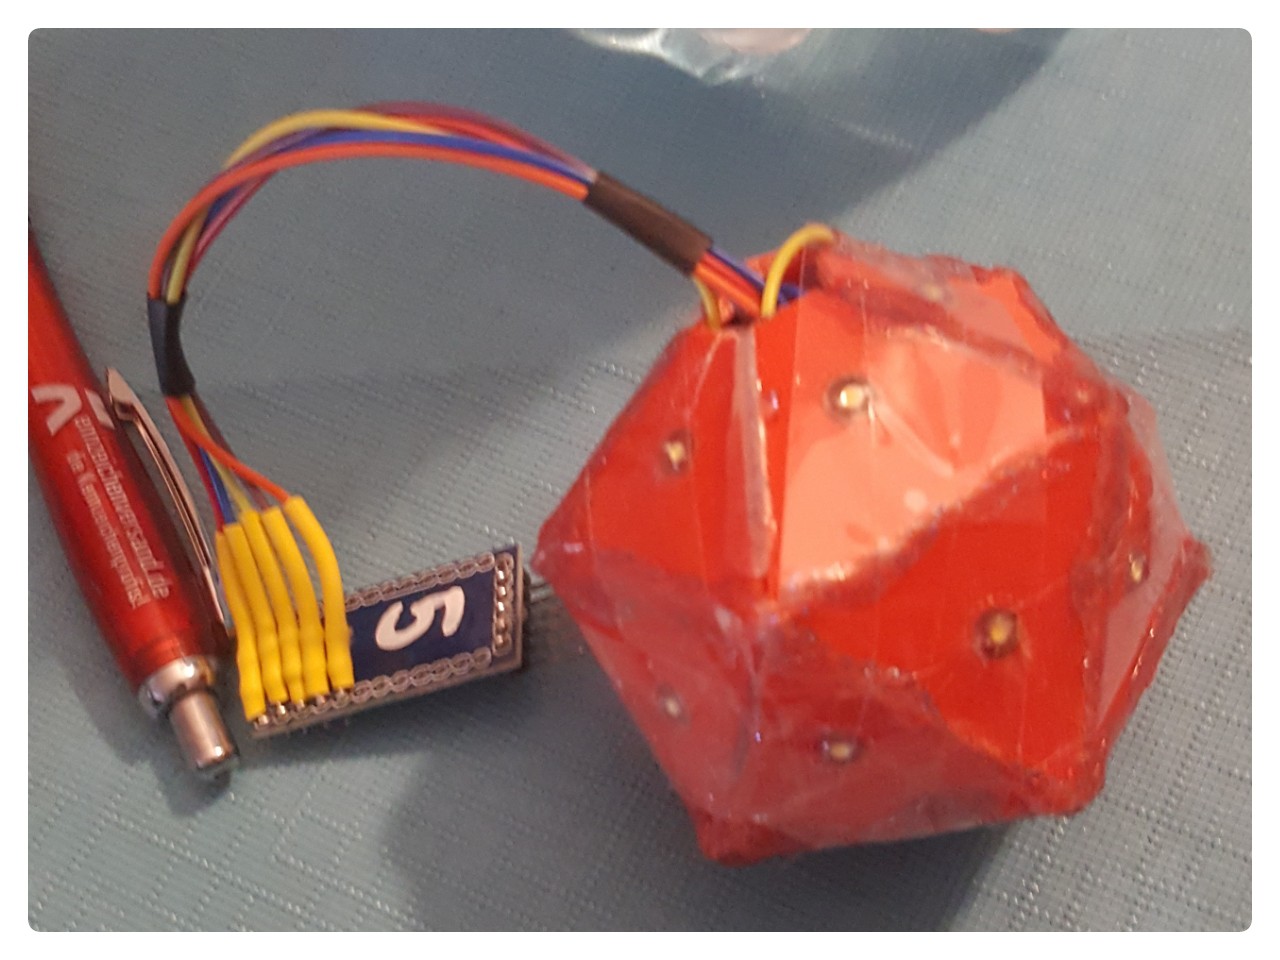
charlie-plexed icosahedron
09/17/2017 at 10:27 • 0 comments![]()
that's some tough stuff to get your head around, thanks to past dave I already had a cheat sheet :)
![]()
![]()
It get's worse from each iteration :D I was quite embarrassed when me and my mum pulled out the hotglue gun... looks a bit like Lukes Lightsaber training ball. I started a collection on thingiverse for inspiration of the next one https://www.thingiverse.com/deefdarko/collections/led-star
-
video recap of #mfh17
08/27/2017 at 14:45 • 0 commentsMaker Faire Hannover 2017 - fun times!
-
Ha! Fail...
07/21/2017 at 18:37 • 5 commentsSo I thought that my LiPo Chargers in form of 4056 modules are all weird, broken and not powerful enough, until I've noticed that my UNI-T UT61E multimeter isn't calibrated anymore(?)! Stupid me also calibrated other stuff like my Power Supply made from a buck down converter and a notebook PSU using that meter. I also thought my R8D8 power bank was off big time and the batteries were done, because I've continuously measured 3.8V on each cell with that multimeter... meh. Cheap multimeter now tells me I'm stupid. meh.
Anyone any tips for voltage references? Or how I can recalibrate voltage without another multimeter?
[update] I've seem to programmed all my attiny13 for #FLUX capacitor trinket with 13V instead of 12V, thanks to my multimeter... meh. but hey, they work.
-
Playing around with IS31FL7X
07/02/2017 at 17:37 • 0 comments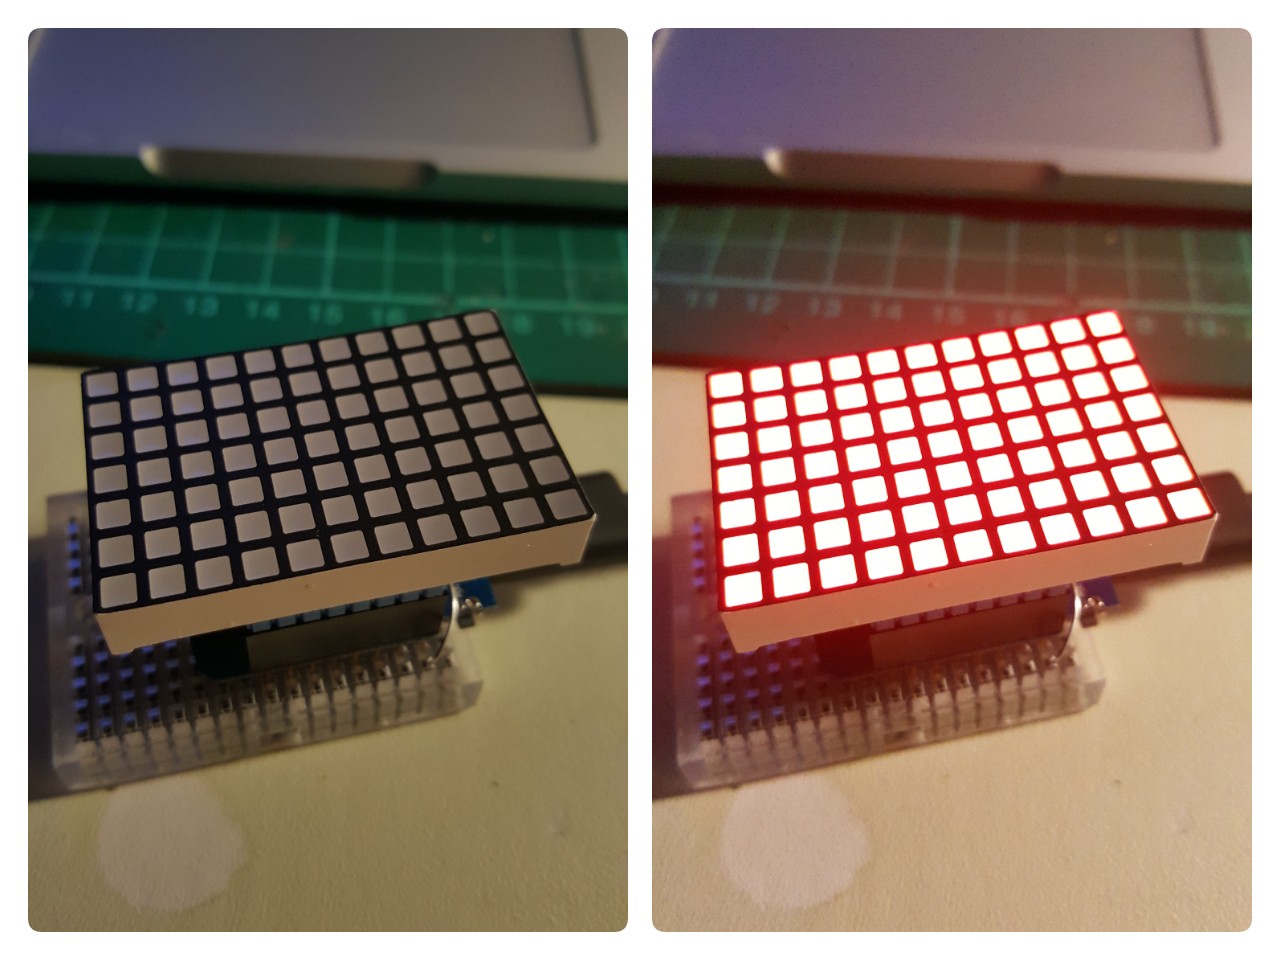
Trying to make [this] work with the Arduino IDE on a Wemos D1 Mini. The additional capacitor got loose, so that there were fluctuations in one row.
One row seems to be dead now, after I tried to resolder the QFN chip with my soldering iron. Instead of fiddeling around with that anymore, I finally got around to fix my hot air station. One of the 230V cables was crimped wrong, there was still some isolation where there should have been the blank cable, I wonder why it ever worked at first. There's a DIP Atmega8L inside - funky.
#include <Wire.h>
byte address = 0x50;
void setup() {
  Wire.begin();
  activate();
}
void loop() {
  ledPWM(255);
  delay(1000);
  ledPWM(0);
  delay(1000);
}
void ledPWM(byte b)
{
  // Wire.write(byte(0x00));
  for (byte i=0; i<98; i++)
  {
    writeEnable(byte(0x01));
    Wire.beginTransmission(address);
    Wire.write(i*2);
    Wire.write(b);
    Wire.endTransmission();
  }
}
void turnOnLeds()
{
  writeEnable(byte(0x00));
  Wire.beginTransmission(address);
  Wire.write(byte(0x00));
  for (byte i=0; i<12; i++)
  {
    Wire.write(byte(0x55));
    Wire.write(byte(0x15));
  }
  Wire.endTransmission();
}
void releaseRegister()
{
  Wire.beginTransmission(address);
  Wire.write(byte(0xfe));  // send command
  Wire.write(byte(0xc5));  // send page zero
  Wire.endTransmission();
}
void writeEnable(byte page)
{
  releaseRegister();
  Wire.beginTransmission(address);
  Wire.write(byte(0xfd));  // send command
  Wire.write(page);  // send page zero
  Wire.endTransmission();
}
void activate()
{
  writeEnable(byte(0x03));
  Wire.beginTransmission(address);
  Wire.write(byte(0x00));  // Configuration Register
  Wire.write(byte(0x01));  // Set SSD = 1
  Wire.endTransmission();
  writeEnable(byte(0x03));
  Wire.beginTransmission(address);
  Wire.write(byte(0x01));  // Global Current Control
  Wire.write(byte(0x30));  // set to 127
  Wire.endTransmission();
  turnOnLeds();
}
-
LCsoft Mini Board CY7C68013A in Sigrok on Mac
03/07/2017 at 11:00 • 0 commentsFour Euros for a 16 channel, 24MHz logic analyzer is a pretty good investment. At least that's what I thought when I read this article on hackaday.com in 2012. It talks about the LCSOFT mini board being a clone of a Saleae 8 Channel logic analyzer, but with the help of the open source software sigrok it can be much more. Sigrok itself is a command line interface only program, but together with pulseview I think you will have the same experience as with the Saleae devices + software.
You just have to make it work first, especially when you're on a Mac. I've written a nightly rant the other day, but here I'm trying to compress the essentials to make it work.
First you need to have homebrew [https://brew.sh/] installed. If you do, you need to follow the "unstable" install route - doesn't sound comforting, more on: https://sigrok.org/wiki/Mac_OS_X
$ brew tap rene-dev/sigrok
$ brew install python3
$ brew install --HEAD libserialport
$ brew install --HEAD --with-libserialport libsigrok
$ brew install --HEAD libsigrokdecode
$ brew install --HEAD --with-libserialport sigrok-cli
$ brew install --HEAD pulseview
Whenever pulseview(/sigrok) is opened, the firmware get's written onto the Cypress CY7C68013A (FX2LP) chip. For that you need to download the pre-built firmware files from here http://sigrok.org/download/binary/sigrok-firmware-fx2lafw/ and move them to the folder.
/usr/local/share/sigrok-firmware/The other stuff I ranted about in here is just me trying to make fxload work, a tool you (probably) don't need for that.
-
burn firmware CY7C68013A on a Mac [nightly brain dump]
03/06/2017 at 01:50 • 6 commentsWarning: Only read if you want to flash and use the CY7C68013A module with sigrok on a mac!
It all started six years ago with this article, written by @Mike Szczys: http://hackaday.com/2011/12/15/saleae-logic-analyzer-knockoff-hacking/
Once upon a time I bought a - CY7C68013A dev board [https://sigrok.org/wiki/Lcsoft_Mini_Board], because I read that one could use this shiny cheap thing with the fancy Saleae Software and it actually thinks it's one of their fancy equipment. I never really got it to work though (lack of experience, definitely). Skip forward 4 years and I thought to myself, this time I could make it work. Taking it with me on a vacation, I tried to make it work on a Raspberry PI, fooled around with the firmware, got frustrated, you guessed it, back in the drawer.
Now I'm fuzzing around with the Game Boy and thought that a logic analyzer would come in very handy, talked to guys in the #Hack Chat and gave it another try, this time with the open source program sigrok and their beautiful pulseview (you want that, not just the command line!) - side note: I'M ON A MAC.
If you want to have the beautiful GUI, you HAVE TO follow the build instructions called "UNSTABLE" - there is an instruction you can follow here: https://sigrok.org/wiki/Mac_OS_X - you need to have homebrew [https://brew.sh/] installed.
$ brew tap rene-dev/sigrok
$ brew install python3
$ brew install --HEAD libserialport
$ brew install --HEAD --with-libserialport libsigrok
$ brew install --HEAD libsigrokdecode
$ brew install --HEAD --with-libserialport sigrok-cli
$ brew install --HEAD pulseview
Do this and you should be fine with a non-tinkered or vacation-flashed EEPROM. Otherwise you're in trouble again, my friend. When I fired up my CYWHATEVER module with the jumper set, I got the module recognized as a Saelae 8 Channel device, but when I tried the 16-channel version, it failed on me. Hmm, bad. So I had to flash the EEPROM somehow with something. K.
https://sigrok.org/wiki/Lcsoft_Mini_Board/Info#Flashing_fx2lafw_to_the_EEPROM
You need a little program called fxload. I found a guy that ported cypress fx2 stuff to work with mac and another guy that wrote a "tutorial", but before the first guy moved the folder in the git. So here's how I "managed" to make it work.
git clone https://github.com/nall/nexys2-osx.git
cd nexys2-osx/fxload
xcodebuild
ln -s build/Release/fxload-osx /usr/local/bin/fxload
I'm not sure if the linking part is correct, I had to unlink and use a direct link from where I downloaded it into. The thing is, xcodebuild will probably fail on you, if you haven't installed the 2GB+ xcode. If you have that, open the downloaded files / main.m and wait for a "we need to fix stuff" - yellow warning thing that you can push, this will fix the issue with a missing path to osx10.5 library thing. After that you should be finally able to use the xcodebuild command (I'm not an xcode guy).So "luckily" the guys of sigrok offer a firmware file for everything and we're ready to go, right? Wrong. They're actually something else, you need a hex file for that, and as they say: "To flash the firmware, you will need a hex file containing the firmware, fx2lafw-cypress-fx2.ihx. Since the hex file is a byproduct of the build, you will need to build the firmware from sigrok-firmware-fx2lafw sources".
I tried to download the sigrok firmware part and compile it, so I can get the needed hexfile, that is not in the precompiled firmware folder. Bummer. But the './configure' script broke down on me, wanting a "sdcc-sdcclib", so I finally gave up and tried googling again, before firing up my rPI. Here is where I found my hexfile "fx2lafw-cypress-fx2.ihx":
fxload -v -t fx2 -D 04b4:8613 -I fx2lafw-cypress-fx2.ihxNow I'm just happy to tell, that Port B and Port D are reading and streaming! - Well. Seems like there's something else wrong and pulseview can't upload the...
Read more -
hey my fellow shermans... wanna buy stuff?
02/25/2017 at 17:15 • 1 commentI'm currently selling things on eBay, just throwing out what would collect dust otherwise. There's currently no international shipping planned, but if someone reaaaaally needs stuff from my oh so small list, tell me and we can find a solution. I hope it's not too bold to advertise something like this, but hey - it has to pay the hobby ;) Should I sell something else, while I'm on it? Any PCBs or Kits?
-
fail: I bought a fake teensy 2++
01/04/2017 at 16:40 • 11 commentsI have to rant a bit, because I bought stuff cheap and it byte back. So I'm mad, but it's my fault.
This is what I bought:
There's a total f'up with the wiring of the power lines, the fix can be found in the image "wI40iZV.jpg" of this thread, that I'm very happy to have found. I'm not embedding the pic because I haven't asked for permission and don't want to create an account there.
http://www.ps3hax.net/archive/index.php/t-97227.html
They also managed to deliver it with an AMS1117, where the center pin is Vout and the center pin on the board is ground! So this is what I ended up with:
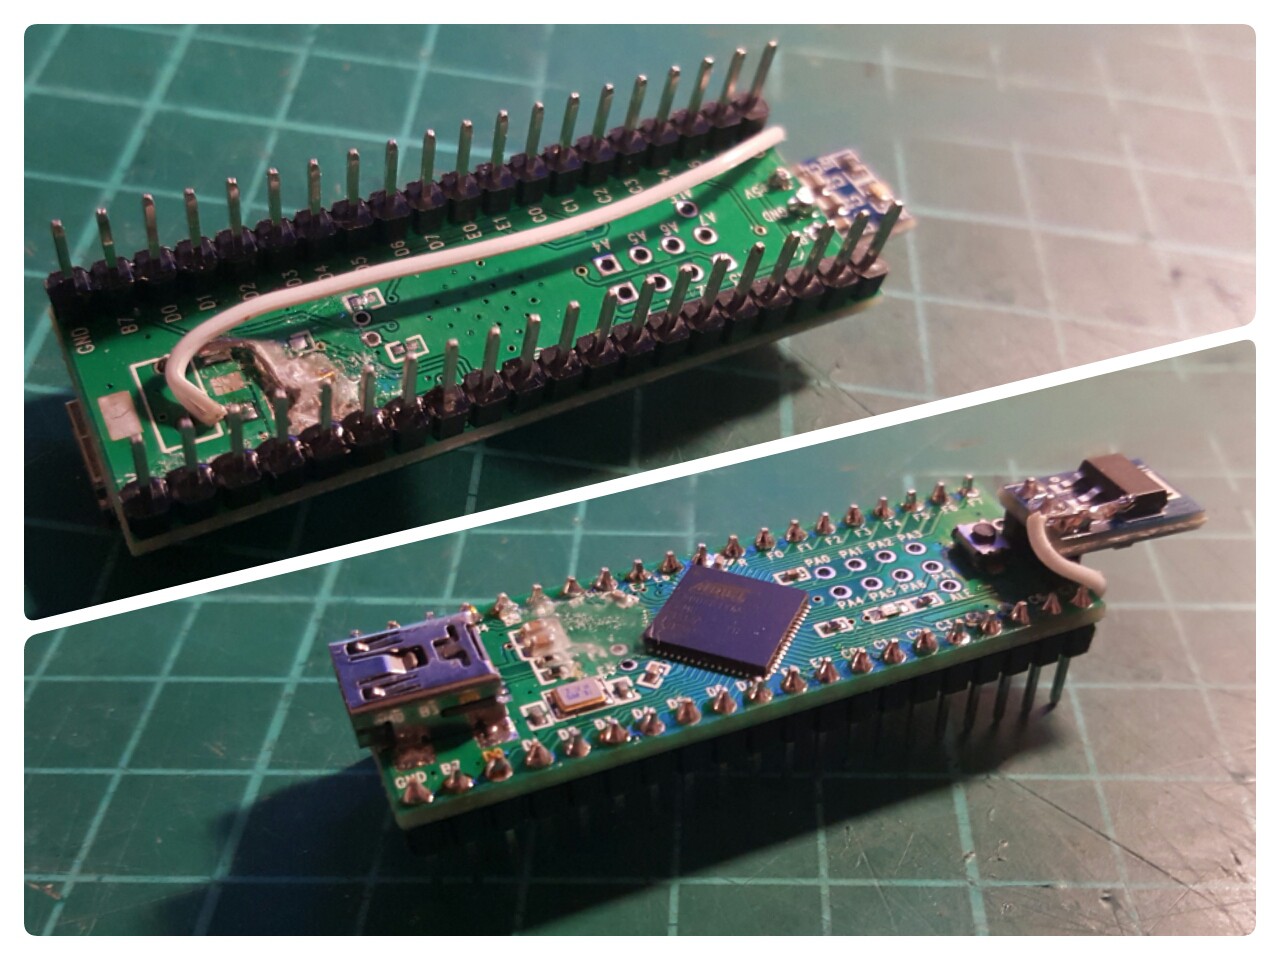
5 bugs saved vs. 5 hours dev time - damn. Lesson learned! Don't be too cheap! Respect the OP.
-
a totem of failure
12/31/2016 at 14:40 • 4 commentsSometimes you just want that special extra protection for your future projects (or dreams of them) or maybe you need a nice purpose for those old or faulty boards that are cluttering your drawers - if so - I might have a solution for you:
-
:3
12/22/2016 at 10:23 • 16 commentsSo I never said that this was in ONE envelope (actually two that arrived the same day) and it's what will haunt me for the next weeks to come ;)
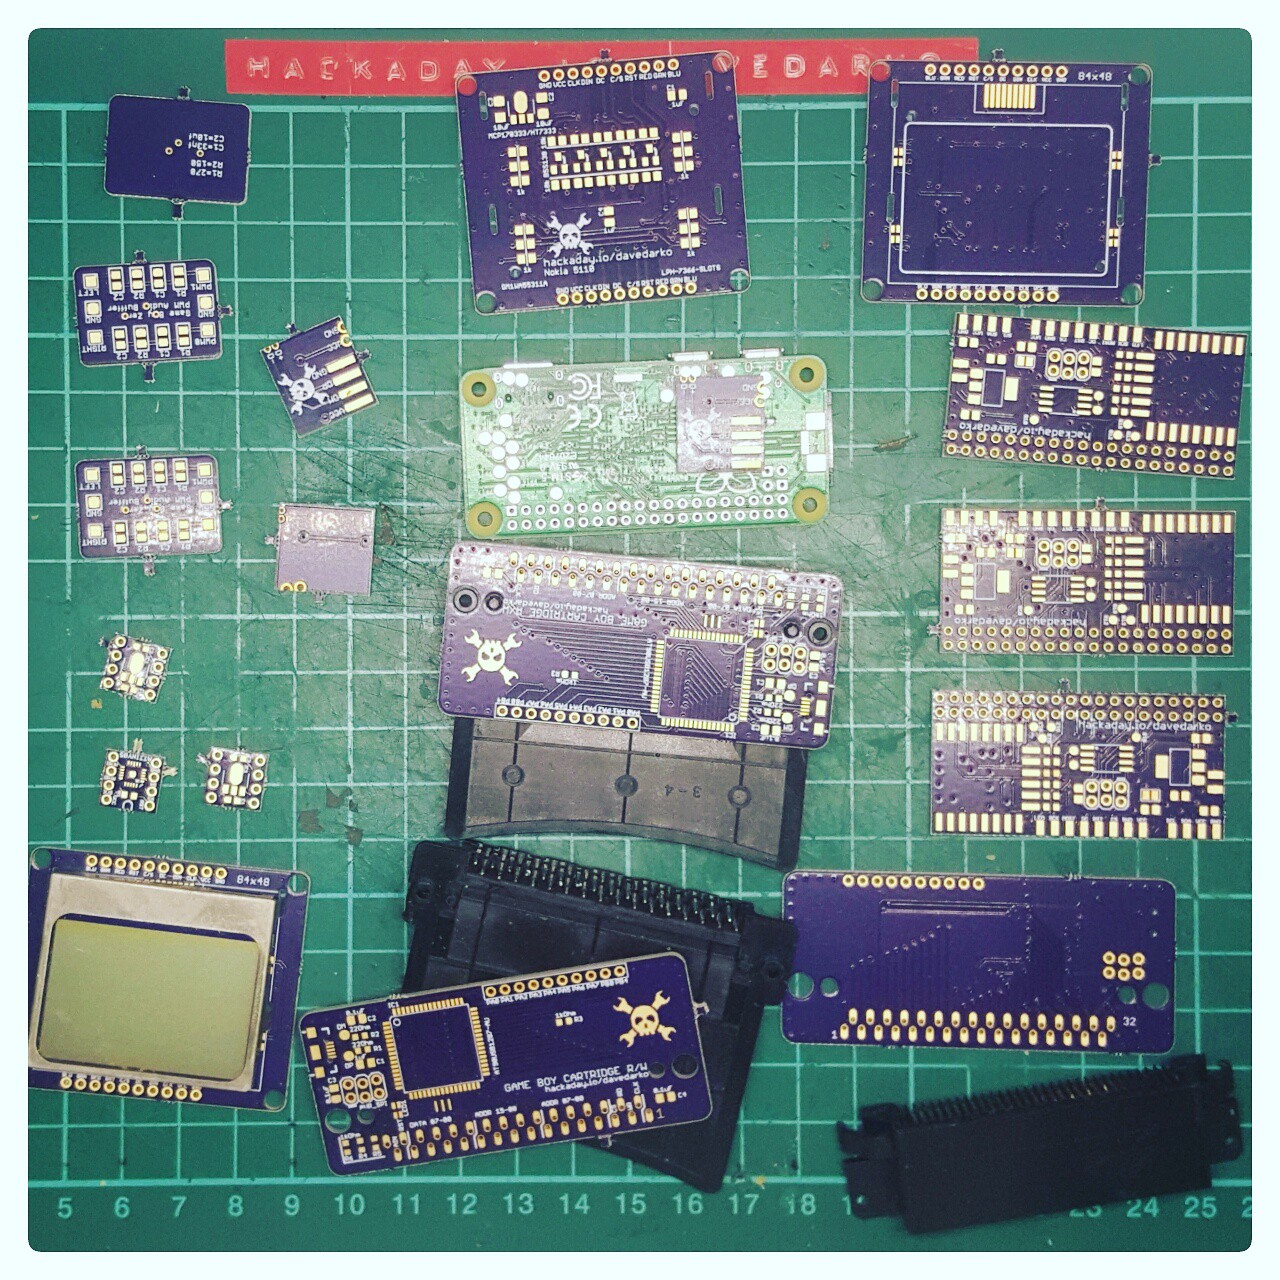
-
That's a first
12/13/2016 at 12:04 • 8 commentsFirst OTA step-down power converter :D
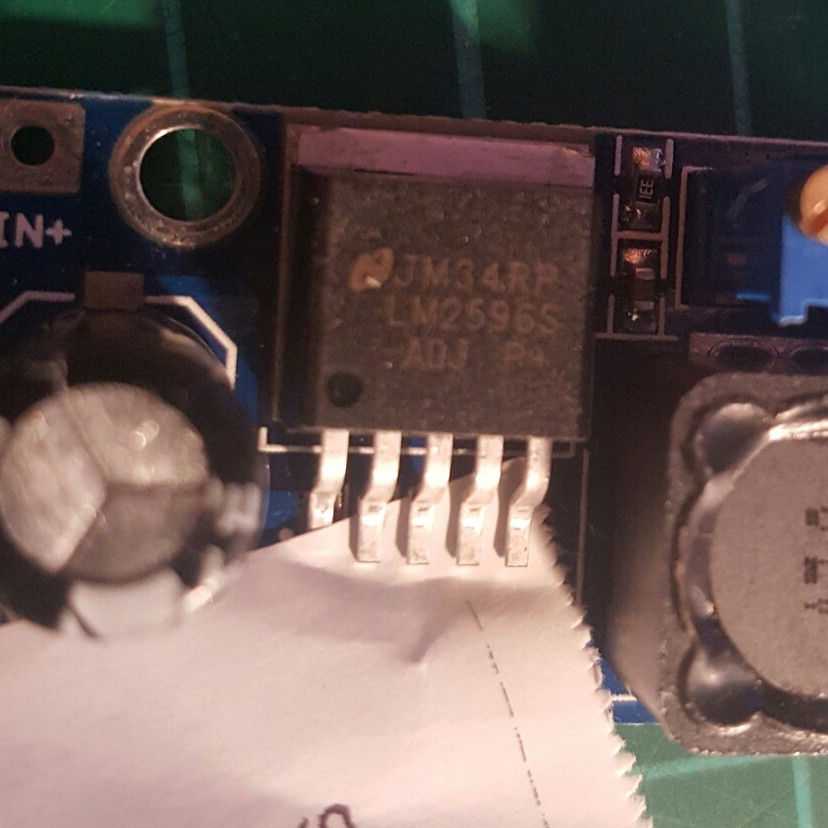
-
tools I really want to make / have
12/10/2016 at 10:20 • 4 commentsStarting this list to remind me that I want tools like this and that they should be fairly easy to make.
pressured air thing
to blow away dirt and dust
tiny vacuum chamber
for getting out the bubbles in 2K epoxy covered things
shaker
for shaking solvents like ABS + Acetone
vibration mini table
bubbles / shaking / etching you name it
-
I guess I just can't stop buying stuff
12/07/2016 at 10:32 • 0 commentsSo why did I buy this? It just reminds me of this websites logo, so why not turn it into a badge or combine it with an ESP8266 and write a little notifier for skulls (or likes) on projects. I still wan't to play around with the API of hackaday.io some more.
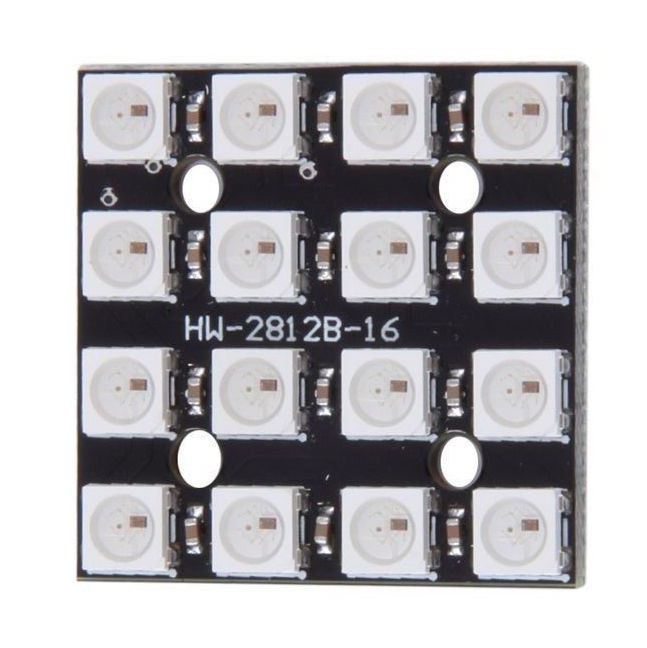
-
Schlachtplan ToDo
12/04/2016 at 13:02 • 2 commentsThere are already two or three lists I've put and ignore here, but I don't care. I just went through all my projects to see what I might have neglected for long enough now and sometimes I just forget what I was up to, merging ideas and project is also a good thing to not get too crazy about losing / forgetting / neglecting stuff, so here's my ToDo.
- make a prototype to earn some of those skulls
- maybe with the Nokia LCD thing
- change rgb colors when showing different stats
- finish the pcbs for dirtypcbs.com (sorry OSHpark)
- make a 3D case for the backside (finally), at least close the back side
- add buttons for setting the time
- make a case / laser cut template
- maybe order some more boards
- Projects:
- Light switch remote for MQTT stuff
#Locomatrix - 3D POV - a different approach
- make it work :D
#Heimdall - dumb remote home- add alexa support
- add neo pixel ring
- manage USB cable wiring
- gracefully shutdown PI zeros with PI3
- add camera (maybe with servo(s)?)
- add fan control
- wait for board and solder it
- make an image that works
- watch some more Doctor Who and finish a working thingy
#Johnny IV #R8-D8 - a distant relative of R2-D2 #NRF24L01 remote project
- make it work
- control R8 / Johnny IV with NRF24L01 remote project
- add base station
- <s>make another one because the micro USB plug broke off</s>
- maybe 1kB contest it / fit on attiny13A
- attinyfi it
- oh boy, have to finish that
- paint it
- make a clip for the battery
- fix the wiring of the LEDs
- write a better sound library
- solder the two boards with hot air station
- finish program on attiny85, then strip down to fit in 1kb
- write software to make it show next public transportation times etc.
Commodore 64 C64
- get the SID chip running making sweet sounds
-
added lights to my "youtube studio"
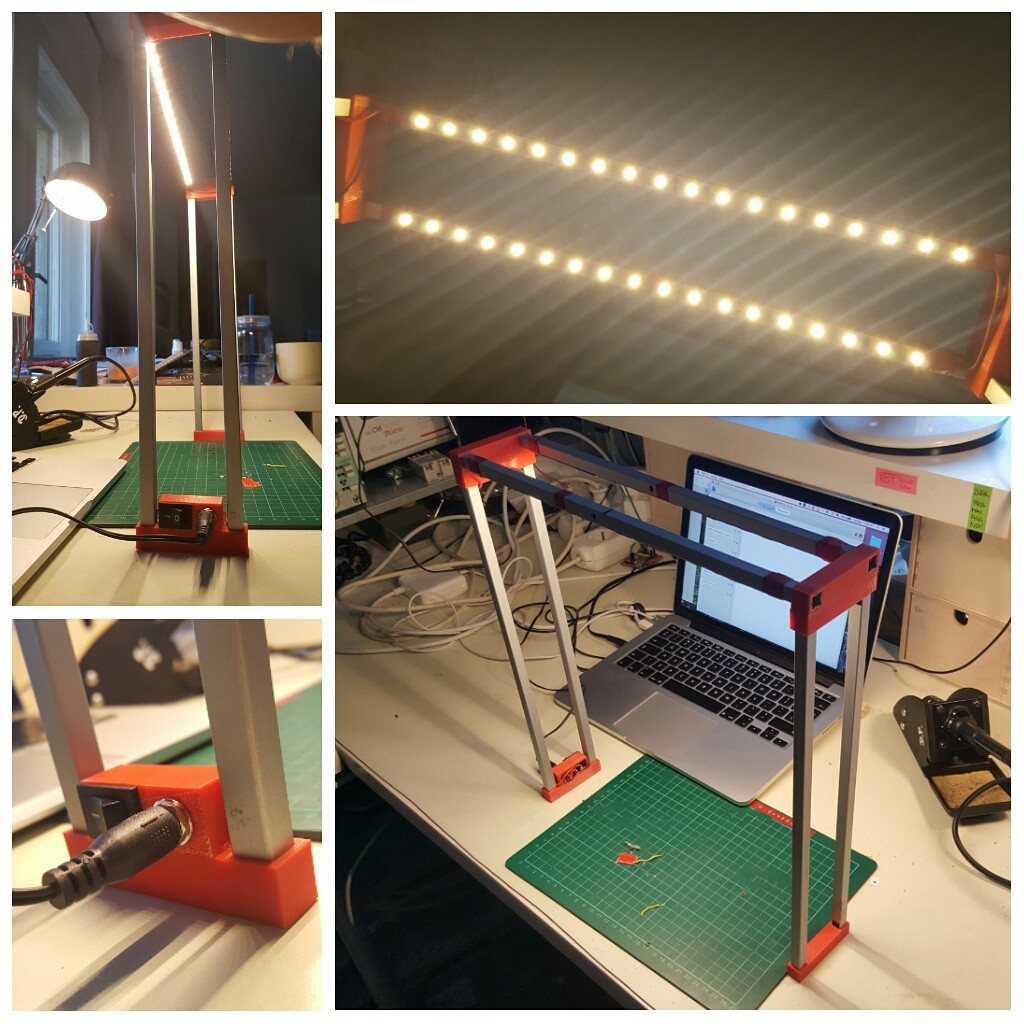
11/12/2016 at 14:20 • 0 commentsI went through the trouble of adding lights for my over head camera rig :) a little 3D print for the plug and switch was chemically welded with acetone to the existing foot. The metal beams are from a recycled IKEA lamp, to keep it hipster, the LED strip is a off of eBay for one Euro.
-
Hey Dusan
10/16/2016 at 09:30 • 1 commentplease check both links in your feed and tell me if both link to the page like I said it would not. @Dusan Petrovic
-
Maker Faire Berlin 2016
10/01/2016 at 17:01 • 1 commentIt's that time of the year again, the world maker faire is on in New York and Berlin is like "yeah, we can do this, too!" - what a lovely attitude.
Friday, 30. September - Berlin with @al1
We're showing off new boards, projects and webcam scripts before we hit the roads for some delicious Mexican food.
Read more
-
xbox chatpad
09/27/2016 at 19:28 • 0 commentsThis is my write up of how I made the cheap Chinese knockoff xbox chatpad to work for me.
After watching one of Ben Hecks classics - "Build a Retro Computer: BASIC 80's Pocket Computer"[link] I bought the cheapest on eBay I was able to find (as always), but quickly found out that they aren't the same and as easily reprogrammable. A bit frustrated I left this in a drawer for a while, until recently, where I was looking for a good portable keyboard for my #Portable Raspberry PI Zero project. So my solution was to add an Arduino Pro Micro with an Atmega32u4 on it, that has native USB and is also to find on a Teensy 2.0. I had to remove the IC blob on the Keyboard PCB first, to make sure it wouldn't be powered by the row scanning and crosstalk, then hooked up the Arduino to the test points. I also worked out some modifiers but got lazy with the green ones.
Read more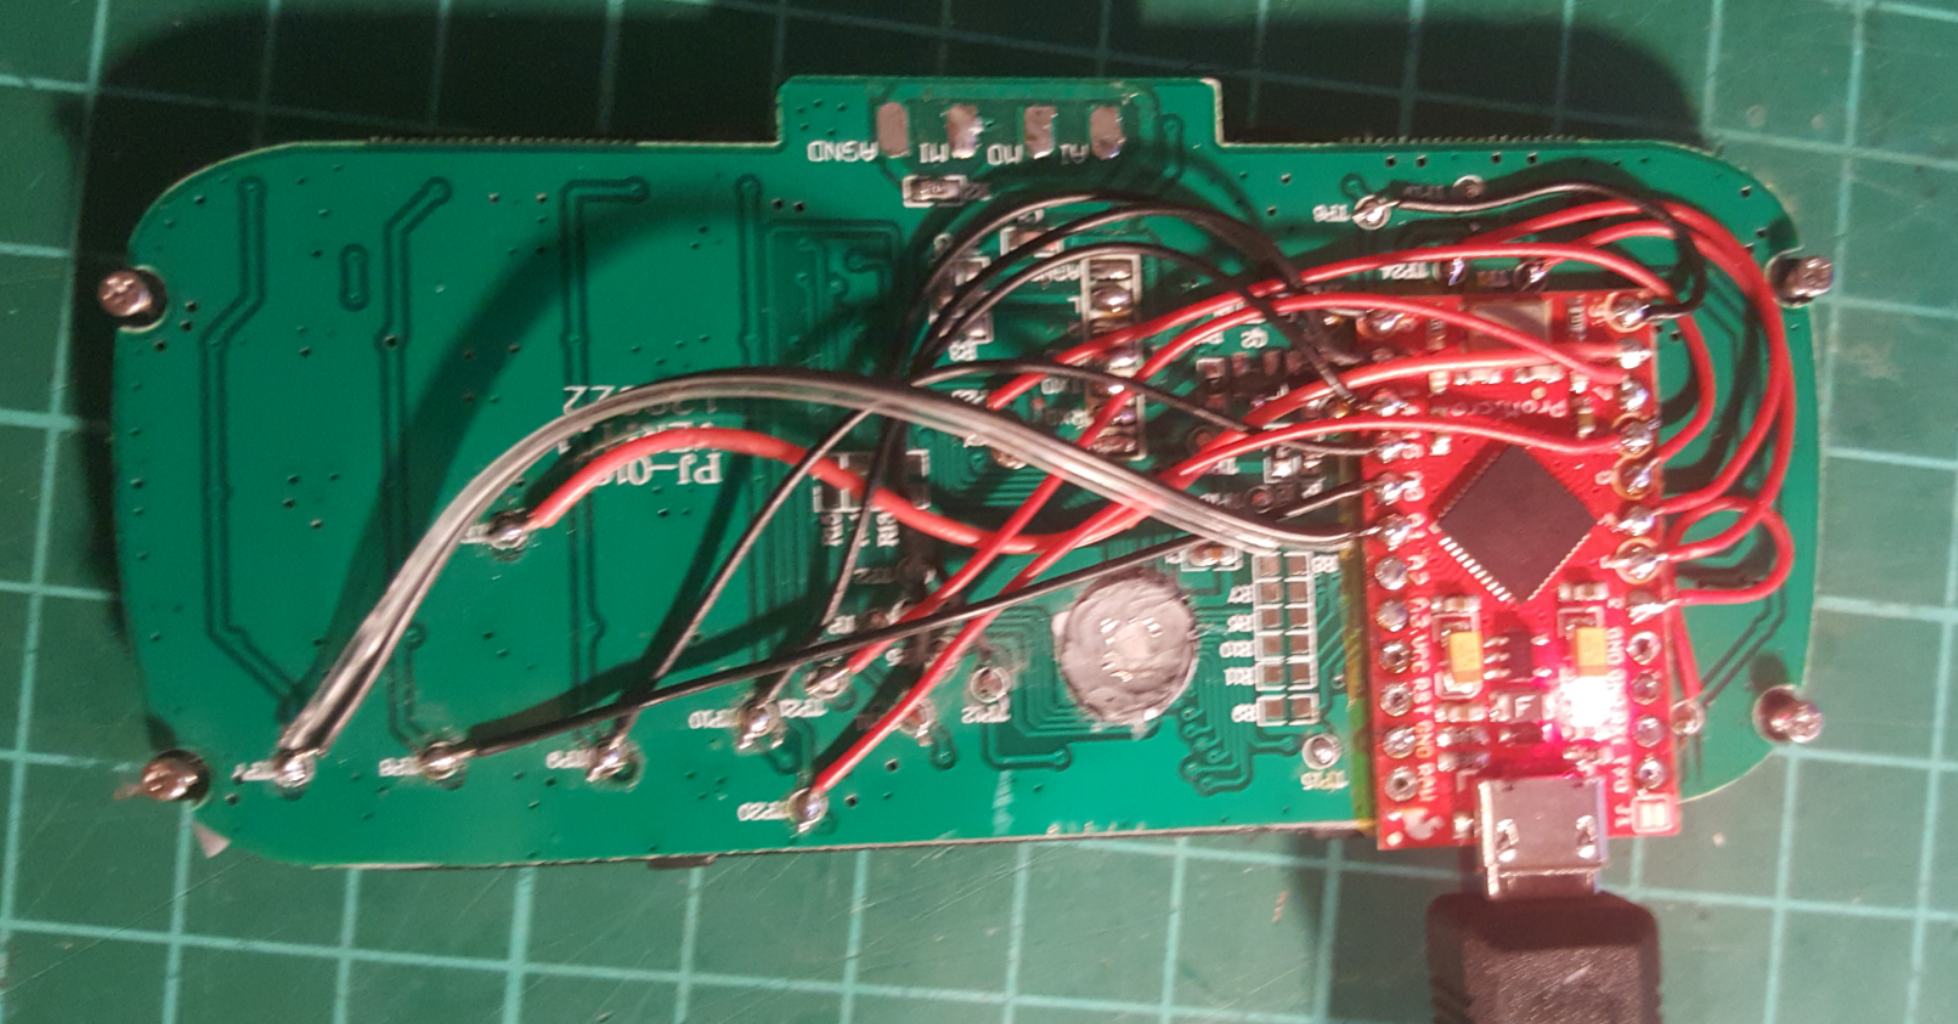
-
Keyboards please
09/27/2016 at 08:07 • 10 comments"Does anyone know of 6x6mm2 buttons that aren't a pain to push?" - Me
I'm currently 'researching' keyboard options for a portable raspberry pi device. So far I have an old cheap chinese bluetooth keyboard, some 4x4 keypads and an xbox controller and I'm not happy. Without screw holes -that were on the eBay listing pics- I can't mount those 4x4 boards anywhere and I don't like the pressure I have to apply to the switches. The BT board I might be able to hack in to, but after failing with the chatpad I feel slightly "meh" about it.
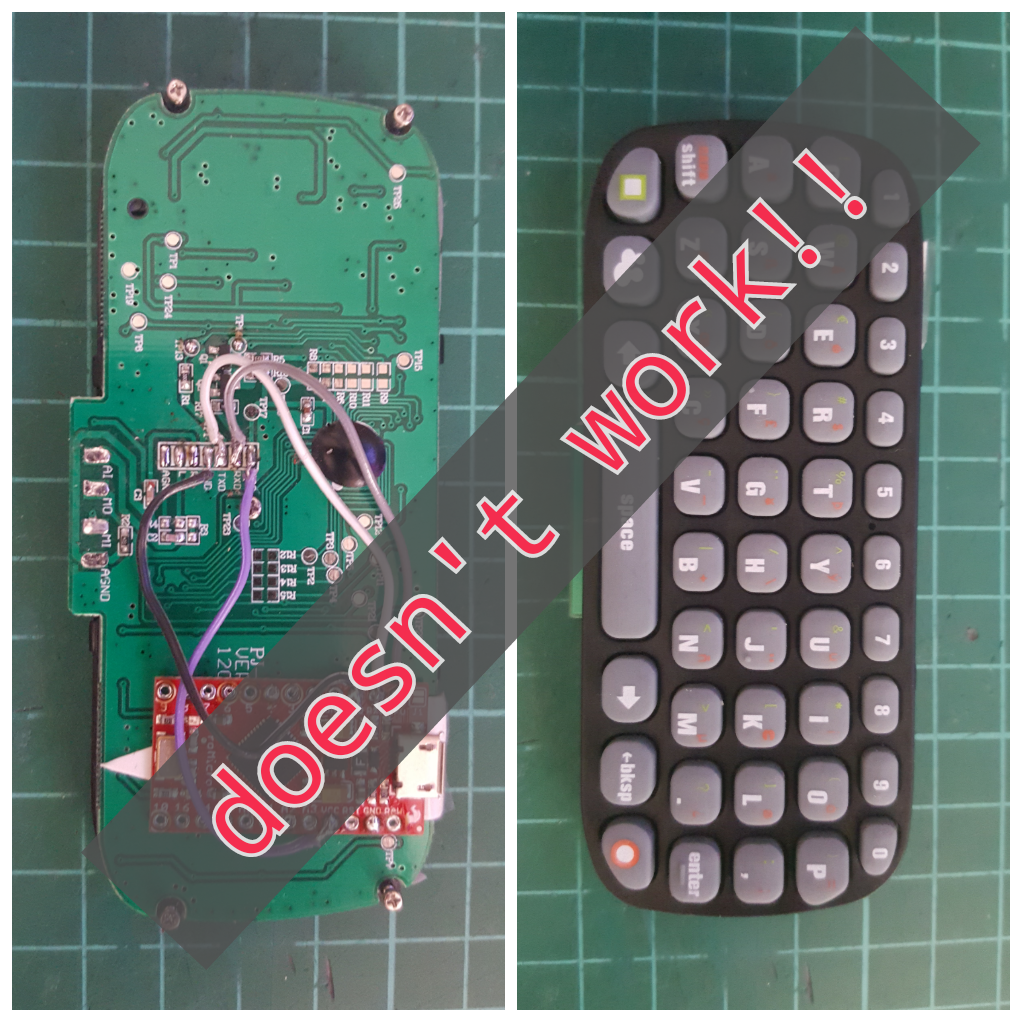
After a fatal waste of hours I gave up debugging a cheap Chinese xbox chatpad. It doesn't want to talk to me and it's not the PIC chip version one could reprogram, so my only option right now would be to remove the chip and throw on an atmega/arduino on there and scan it myself. Since they're cheap to get on eBay I still might do that at some point, but I came up with something else. Thanks to the very good google picture search result position that hackaday.io always gets, I felt compelled to add this massive text overlay. But I have to linkdrop this for all the guys who bought original quality M$ stuff - http://cliffle.com/project/chatpad/ - it might work for you guys.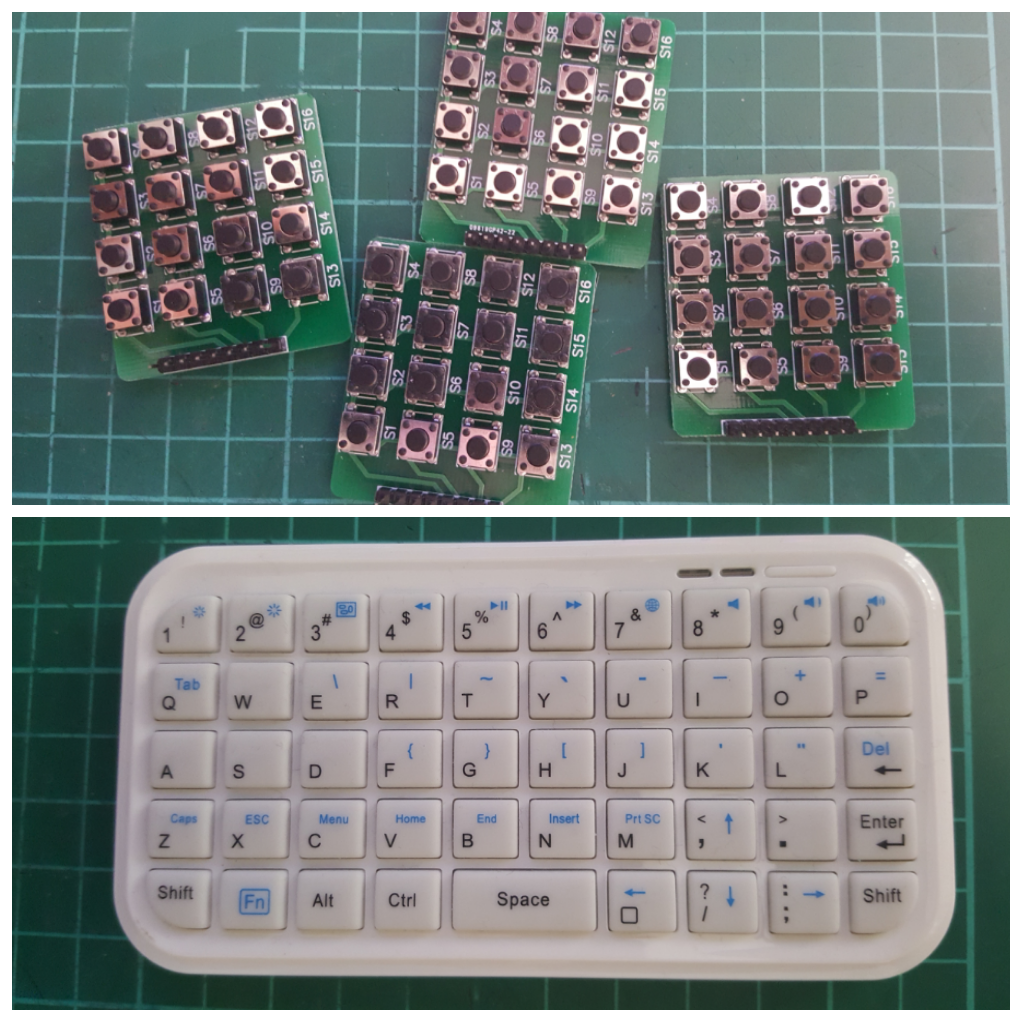
[UPDATE] mapped out TPs and Letters and stuff and wrote arduino sketch for pro micro
https://docs.google.com/spreadsheets/d/1aaoIAshYLMAF9ghrW0Vmfo8WK18rPOxnou2Njl7glPg/edit?usp=sharing
https://hackaday.io/page/2329-xbox-chatpad
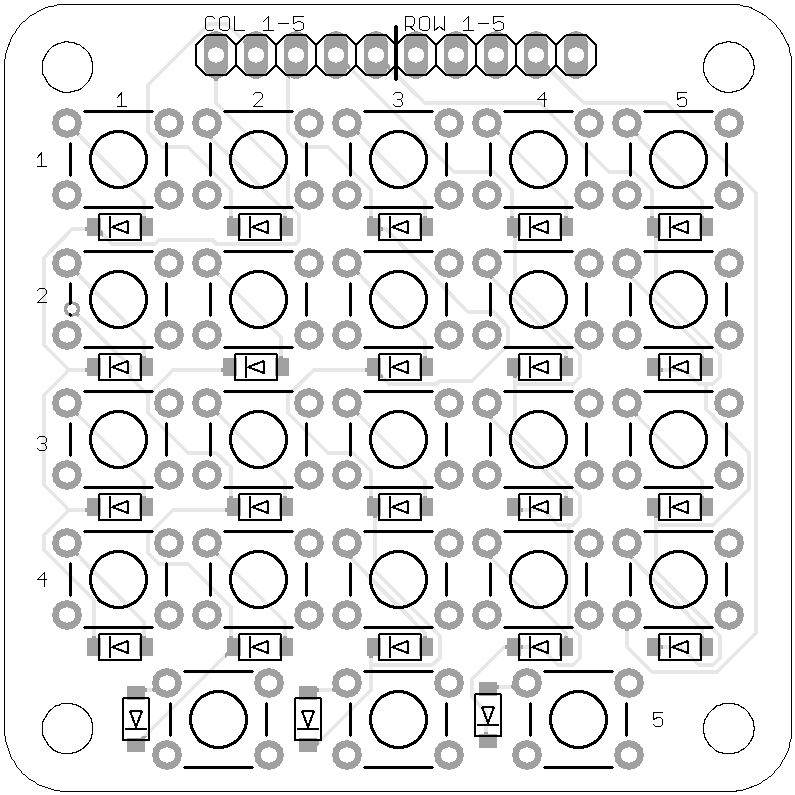
Instead I designed a little board that's inspired by the nokia 5510 - this cellphone has a "full" qwerty keyboard, 24 buttons on the left and 21 buttons on the right side of the display. So having two boards of this 4x5+3 keys equipped with the (way too heavy) buttons that I want to replace might be a good start. It also has diodes against ghosting - should have added a ghostbusters logo on there. Damn. Next rev.
I don't like indents in my finger from pushing a button - so does anyone have any other options? I'm running out of Ben Heck portables episodes.
-
planning winter projects and stuff
09/23/2016 at 20:06 • 2 commentsWhile working long hours wishing for some time to tinker again, I was shopping a lot of stuff the last two or three months. So once again I will compile a list of projects I might tackle in the future. This list is also for me because I forget things I have.
MQTT stuff
First up is the world clock with plenty of 1602 Displays I've ordered recently. Then there is this 5m red LED strip that I plan to control via a 'redAlert' command over MQTT. A wheather station would be nice too and some logging on the PI, although I'm still skeptical on logging stuff on the same SD card where the OS is. With the 4 relay module from eBay I want to see if I can hook it up to an ESP8266 despite the relais being 5V, probably yes.
Raspberry PI media recorder / alexa
4 USB microphones and 4 USB soundcards were supposed to help me get alexa running on a PI zero or record 4 input lines simultaneously with the help of JACK (I've done that before with linux)
Raspberry PI zero handheld
Most of the time when I think of what I would have wanted to do with my Game Boy, this Idea pops up, where I use it as a remote or surf the Internet - having a cartridge with embedded WIFI in it. This would mean programming something to program the Game Boy / running a client from a ROM that also pulls stuff from the internet etc. Way too complicated, so I will try to hack up a thing similar to Ben Hecks Raspberry PI Zero Portable Computer. Soon my third pi zero will arrive here, so it's time to throw one into something. Some empty Game Boy Advance shells for under 5 Euros found their way to my place, too. Still thinking about the im-me messenger so I have to throw in a radio module at least.
ST-Link stuff
10 of those cheap STM8 boards are already here and I'm waiting for the ST-Link adapter to finally try out @WooDWorkeR s tutorial on them [https://hackaday.io/page/2128-the-070-stm8-board]. Scrolling through my eBay purchases I also found the cheap STM32 boards.
Other stuff
A MAN2A / TIL305 watch comes to mind, a cheap click tracker converted to a frequency counter, a mobile color TV converted to a PI display, arduino VGA ported to ESP8266 (out of skills?), maybe some analog stuff again. Man my lightsaber needs some work too, like most of my projects.
Cons and Faires
MakerFaire Berlin and 33c3 are the next cons I'm planning to visit, sadly no Hackaday super conference this year for me.
Work related
I've designed my biggest board yet recently, basically an Arduino pro micro shield :D but with RJ45 connectors for RFid modules and a display. There are also optocouplers and an ENC28J60 is on there. It's 10x10 cm's, I've cheated with vias to get terminal screws outside of the 8x10cm eagle restriction and overall I'm pretty happy with it.
-
another trial in youtube video production
04/16/2016 at 15:52 • 0 commentsIt took me 23 takes to finally write down the text... but here is the result. Recorded, edited and dubbed with my Android phone.
-
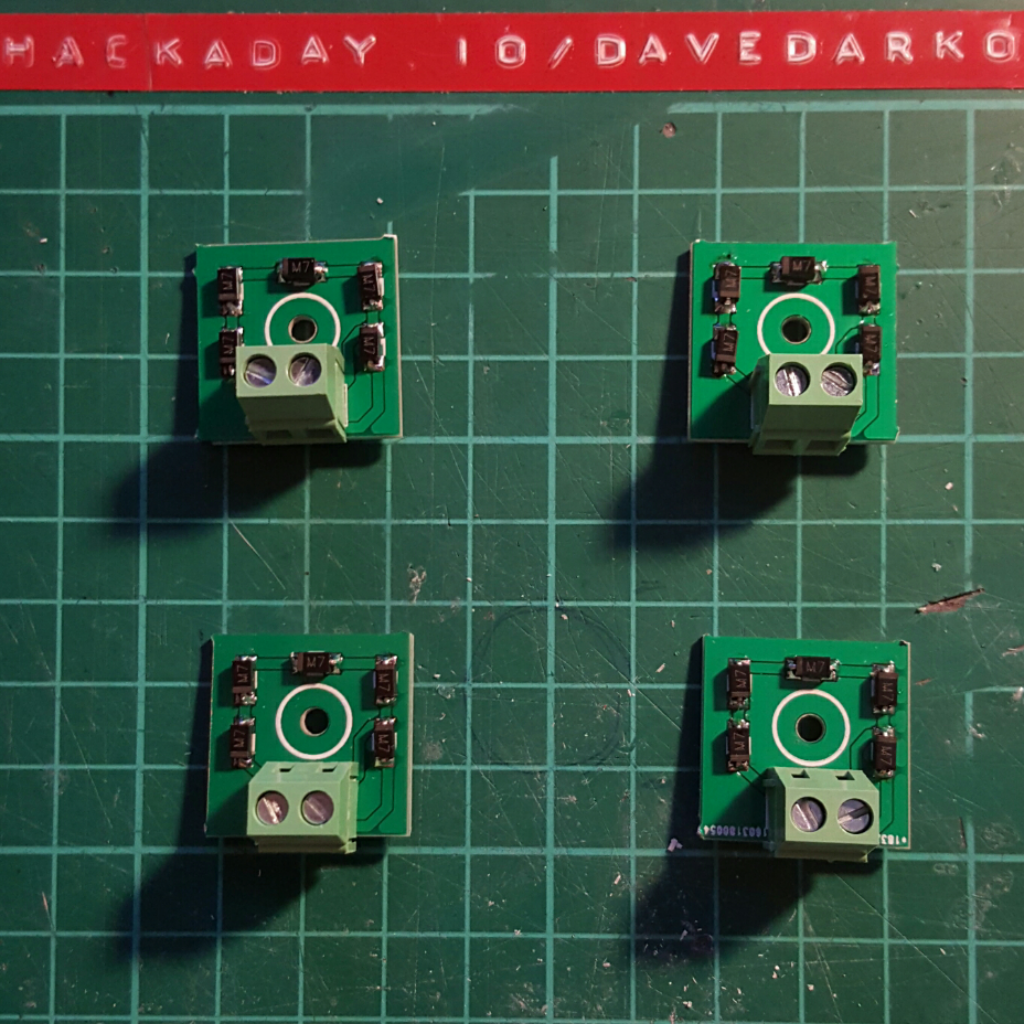
5 diode train brake
04/13/2016 at 16:24 • 0 commentsSo when my dad told me that the 5 diodes on a pcb were going for 15 to 18 Euros on eBay I thought to myself - why don't I try that too :D thanks to eBay and PCBs from dirtypcbs.com I'm at a material cost of 50ct or so. On sunday I'll test them.
-
(w)roomtour - a glimpse into a parallel world forming in my dad's laboratory
03/11/2016 at 23:59 • 0 commentsWhenever I visit my parents, something new almost always awaits me in my dad's "laboratory". I will share some pics and videos here, because I like what he builds and wan't to share it. Taking this whole youtube thing a notch further, here is an 'on phone' edited video, dubbed with an MacGyver inspired theme I played my self, to set the mood. My dad builds stuff since forever and I remember the long explanations I got as a kid, where I zoned out because I couldn't keep up, but didn't want him to know.
Read more -
upgrading soldering equipment
03/05/2016 at 11:09 • 9 commentsSo for the last few weeks I had to solder with a discounter soldering station that I've bought for 15 Euros. It's basically a screwdriver, heated by the power of mains, hidden in a big clunky green case.
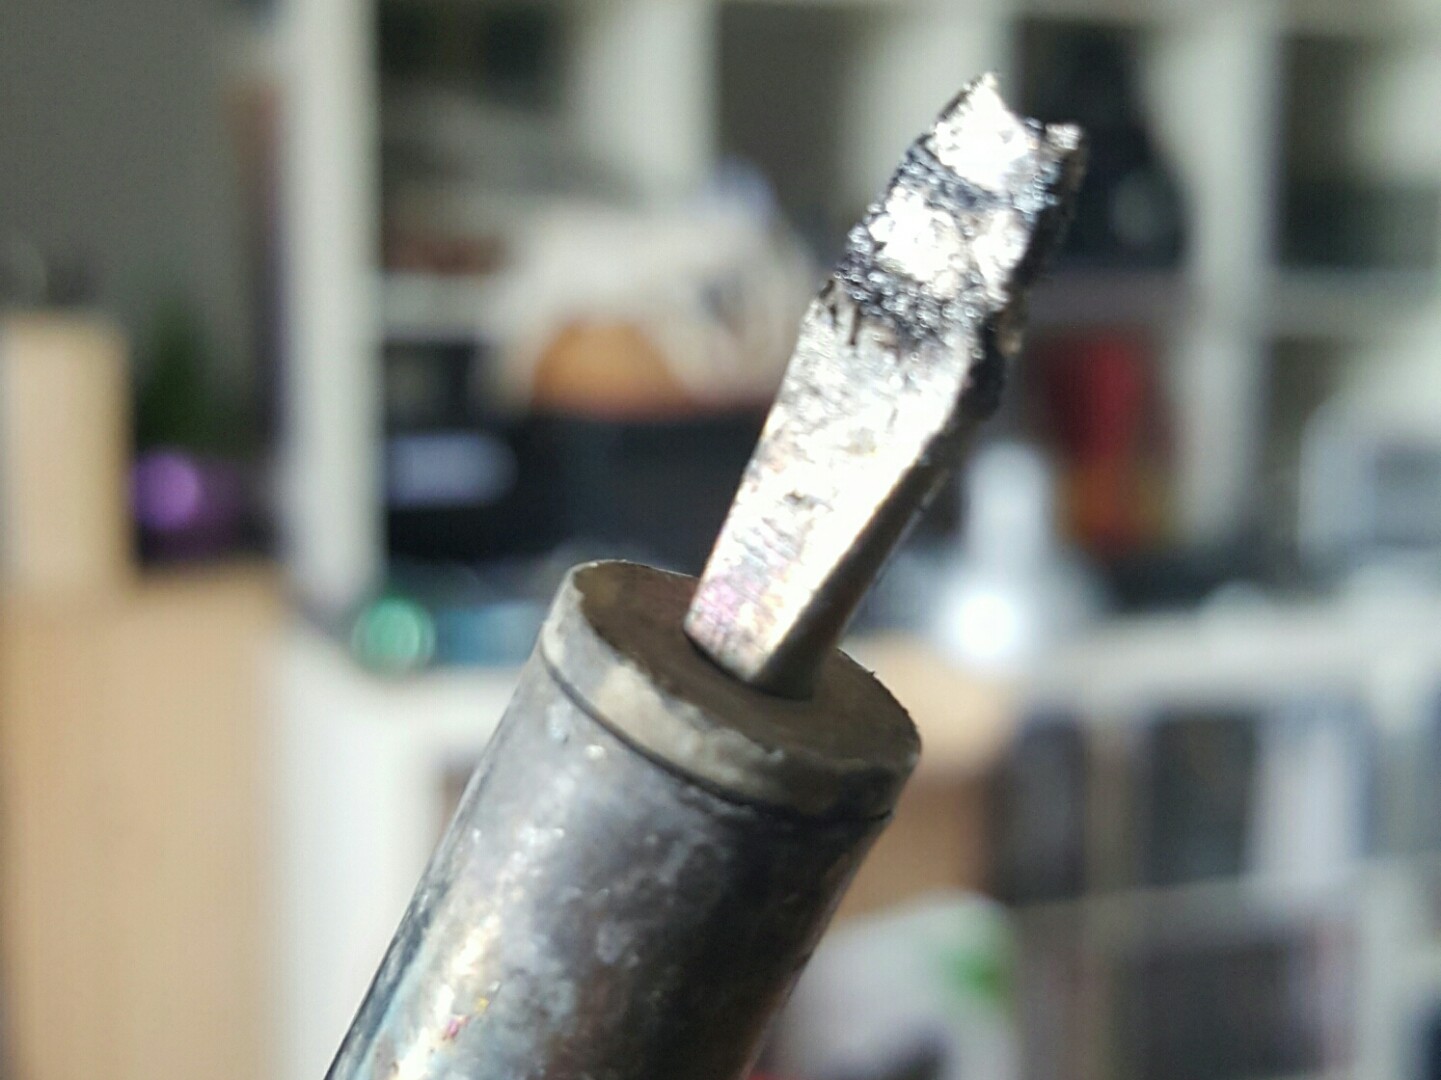
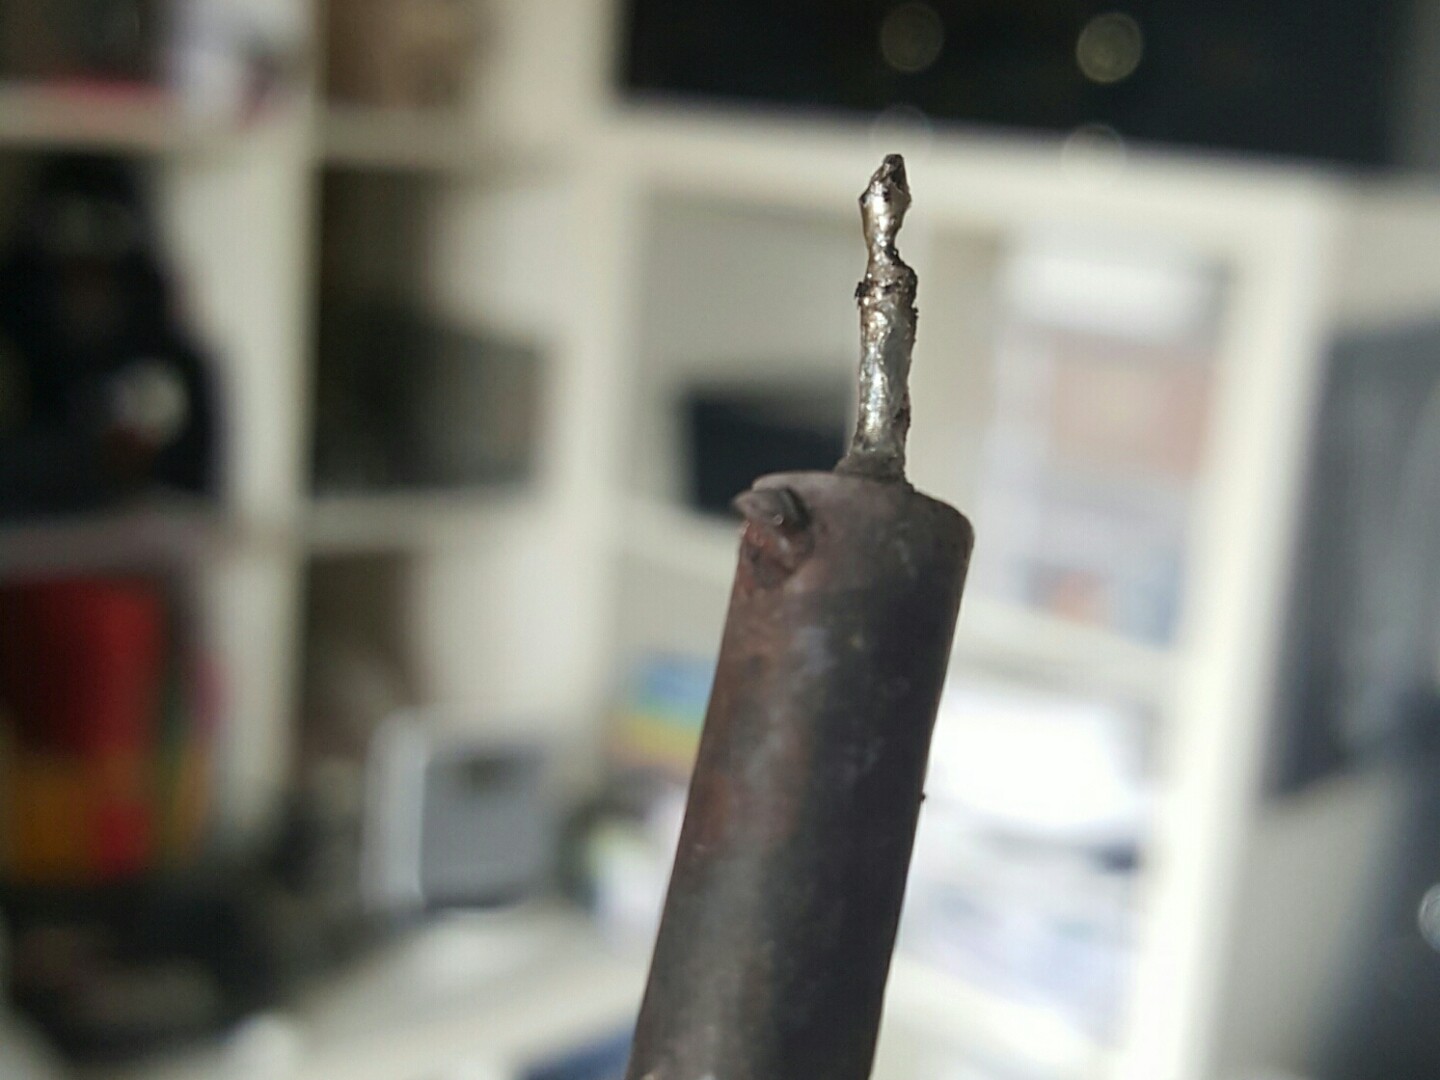
Before that I had a trusty Weller WM15L soldering iron with that I soldered all the SMD stuff and more, but especially with bigger thermal mass objects I ran into some problems. When I was noticing that the tip went from workable to bad and ugly, I tried to change the tip, but the heavily corroded screw just broke. I think I've paid 15-20 Euros for this soldering iron. In essence it also was a tiny screwdriver heated by mains, but a better one. It's also the same one that made me jump when I was soldering stuff in Marrakesh that might have been live. Scary throwback.
I was waiting to buy a hakko FX888 that was on sale on watterott for 130 Euros, but when the budget was there it was sold out - meh. So I ended up searching for hakko 936 clones instead and found one for 42 Euros. The important features for me were that the tip/iron were changeable and that I won't run out of spare parts, even though the hakko is not supported anymore, eBay is flooded with cheap stuff for it.
-
Hacking myself
02/28/2016 at 19:45 • 7 commentsI have a bad motivator and some broken energy cells to fix. I see a lot of repeated hacks, that I have never done myself and yet I feel tired looking at all of them and everything related with soldering. Maybe this is because of my work that takes a lot of time and energy at the moment, or that my soldering station for 10bugs is worth nothing and it's just no fun to solder! I'm also short breathed more than I'm willing to admit.. meh.
-
youtube stuff
01/29/2016 at 20:55 • 4 commentsSo I made a new youtube channel for my hacking / repairing / soldering / "german curse word tutorials" videos under https://www.youtube.com/davedarko . Thoughts and ideas are appreciated, I'm going to use this channel to showcase my projects in more detail and leave the other channel for private stuff like making music and vlogging and so on...
One of my recent favorite channels is https://www.youtube.com/user/rossmanngroup - a guy that posts videos from 20 to 120 minutes repairing mac mainboards - so entertaining! Favorite video so far:
-
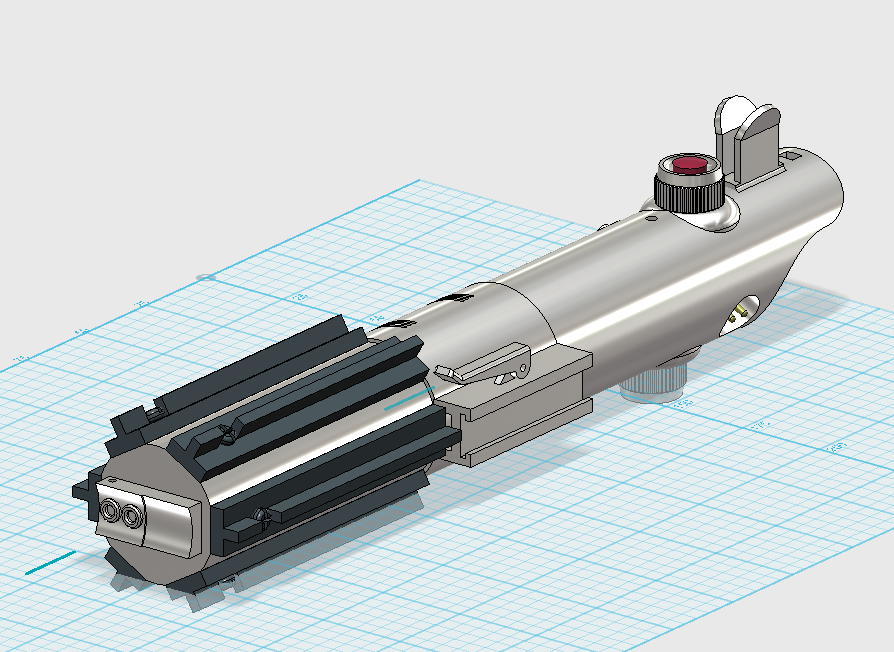
Star Wars Greebles
01/17/2016 at 19:41 • 0 commentsLook, what an awesome scene! But all I see is this fancy LED sequence thingy in the background and I want it!

So I'm going classic here, 555 timer and a 4017 with an ULN2003. The LEDs are definitely smaller, but it all fits on my protoboard.
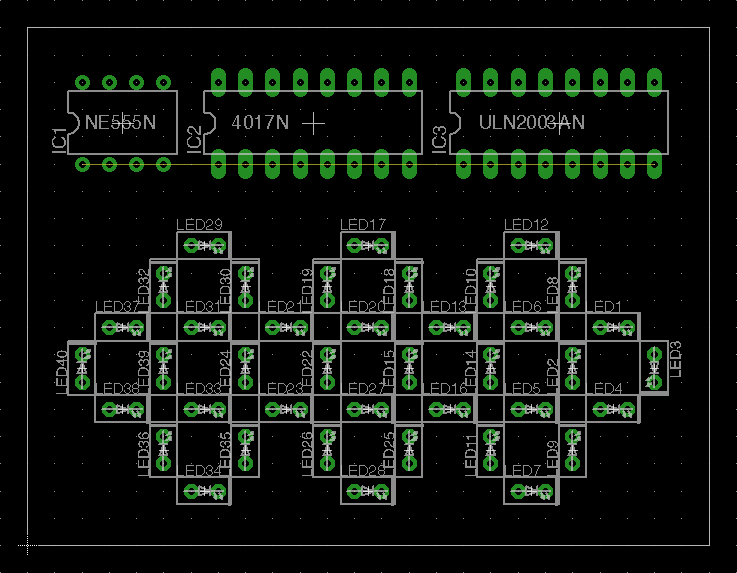
... it wouldn't be the first greeble from the millennium falcon that I tried to design.
http://www.thingiverse.com/thing:1262007
-
faboyism activated
12/23/2015 at 21:38 • 0 commentsJust in case someone was wondering why I got silent for a while, this is what I've been working on the past days - printing will start on 31st of december. In total 17 parts to print and one order at OSHpark! Once I have printed everything I'll probably geek out and do some LED stuff and gyro/acc sound generating experiments.
Happy holidays to every one and if you haven't seen Star Wars yet - I honestly don't know what to say to you :)
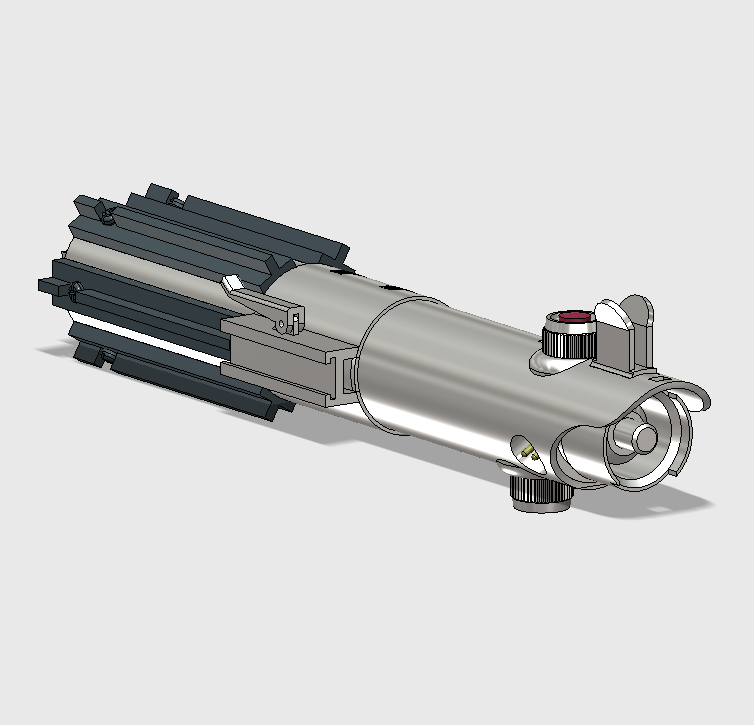


-
My 'paid' review on xrobots.co.uk
12/14/2015 at 16:55 • 0 commentsAs a patron on patreon.com for James Brutons channel I paid enough to get mentioned in a video :D Actually the amount you have to pay is very low and I pay it for more than a year now - and not because I wanted to be featured! I actually deleted my comment 5 minutes after posting, but he must have seen it and put me in anyway :) The following projects are featured:
-
0x03 NTTF - a PSU mod [another UPDATE]
10/21/2015 at 09:38 • 2 commentsI had to merge my "lab" with my living room to make space for a future flatmate. That means I pull all my projects from their dark, lost corners and places, see their flaws and want to revisit them. Like some of you told me, I was not really going to use it, since it was way too loud, big and other good reasons. Some weeks ago I got some old laptops with 19V PSUs and I thought that with the regulator I bought this would make a good PSU instead. With a ten-turn potentiometer and a 4euro voltage and ampere meter display it could get quite useful.
The wiring was a bit tricky, I will need to write it down or make a sketch for it. There's also a 3D printed case (almost) now!
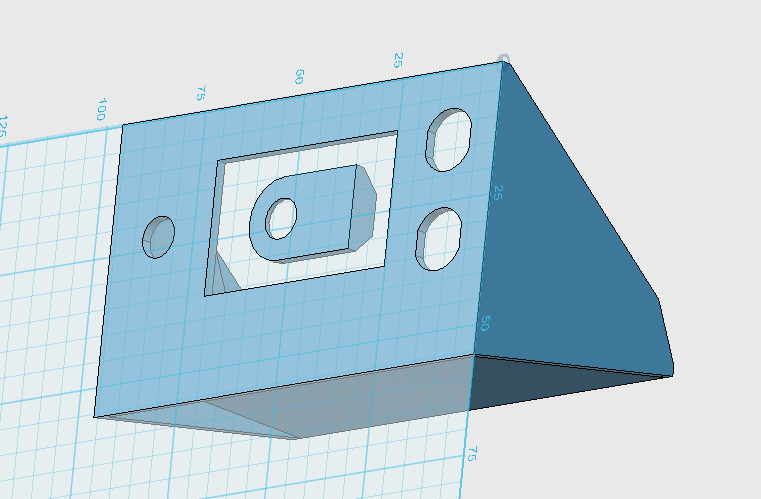
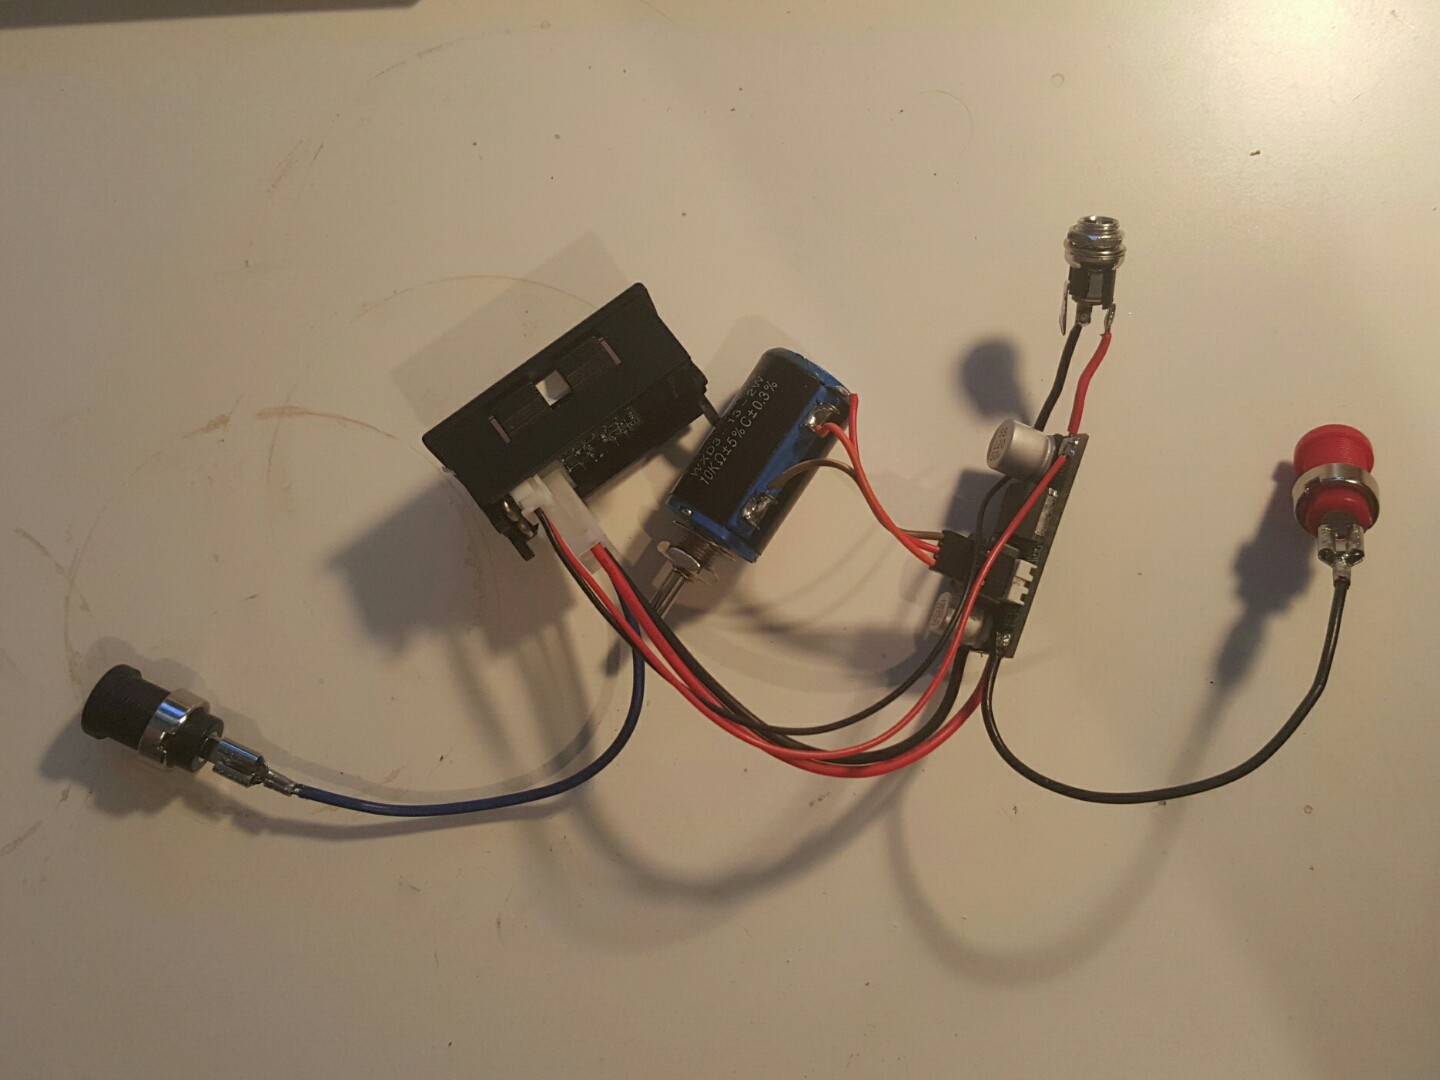
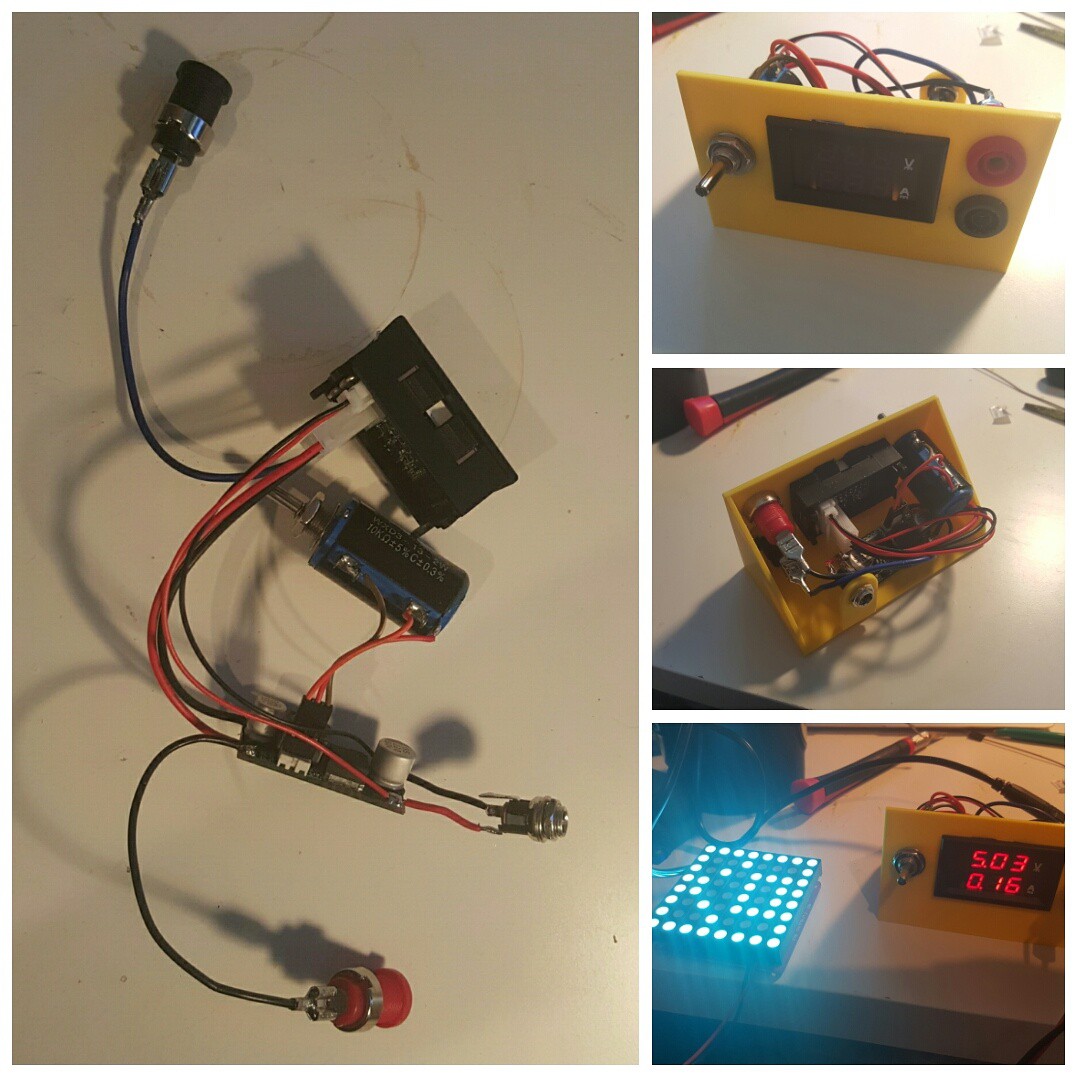
-
Maker Faire Berlin 2015
10/07/2015 at 22:42 • 13 comments[UPDATE] print is done :) Check the bottom of this page.
Still recovering from that weekend. My first maker faire, a "have to", because it was in Berlin, my hometown.
Friday night I was meeting with @WooDWorkeR, @Sophi Kravitz, @Elliot Williams and @al1 at the c-base. Shamefully I have to admit that this was my first trip to the space station based in Berlin, a meet-up place for computer friends, aliens, geeks and nerds and guys with no labels and categories. The tour offered some inspirations for new hacks and we've seen the #warpcore go crazy. Two notable projects that stuck in my head were the little speaker box, that made spherical noises when picking up magnetic fields (telephone amp by a company called micro-electric) and the 4 EL-Wire tube that looked like it was pulsing (no pictures were allowed to be taken, sry). We met other guys that wanted to check out the c-base before going to the maker faire and had a great time.
I think the speaker was based on something like this: http://www.jameco.com/jameco/workshop/diy/magnetic.html
Saturday I've met @al1 at the Ostbahnhof station near the Postbahnhof to go to the maker faire. Greeted by a fire throwing container robot we entered the first floor where some were still preparing their tables. I'm working through the flyers, they aren't in order.
MakerBeam
The first thing that got me interested was the MakerBeam starter kit. There was definitely a lot inside, different length of 1cm x 1cm extruded aluminum profiles with a threaded hole all the way through and multiple connectors to create presentable prototypes.
www.makerbeam.com - www.makerbeam.de
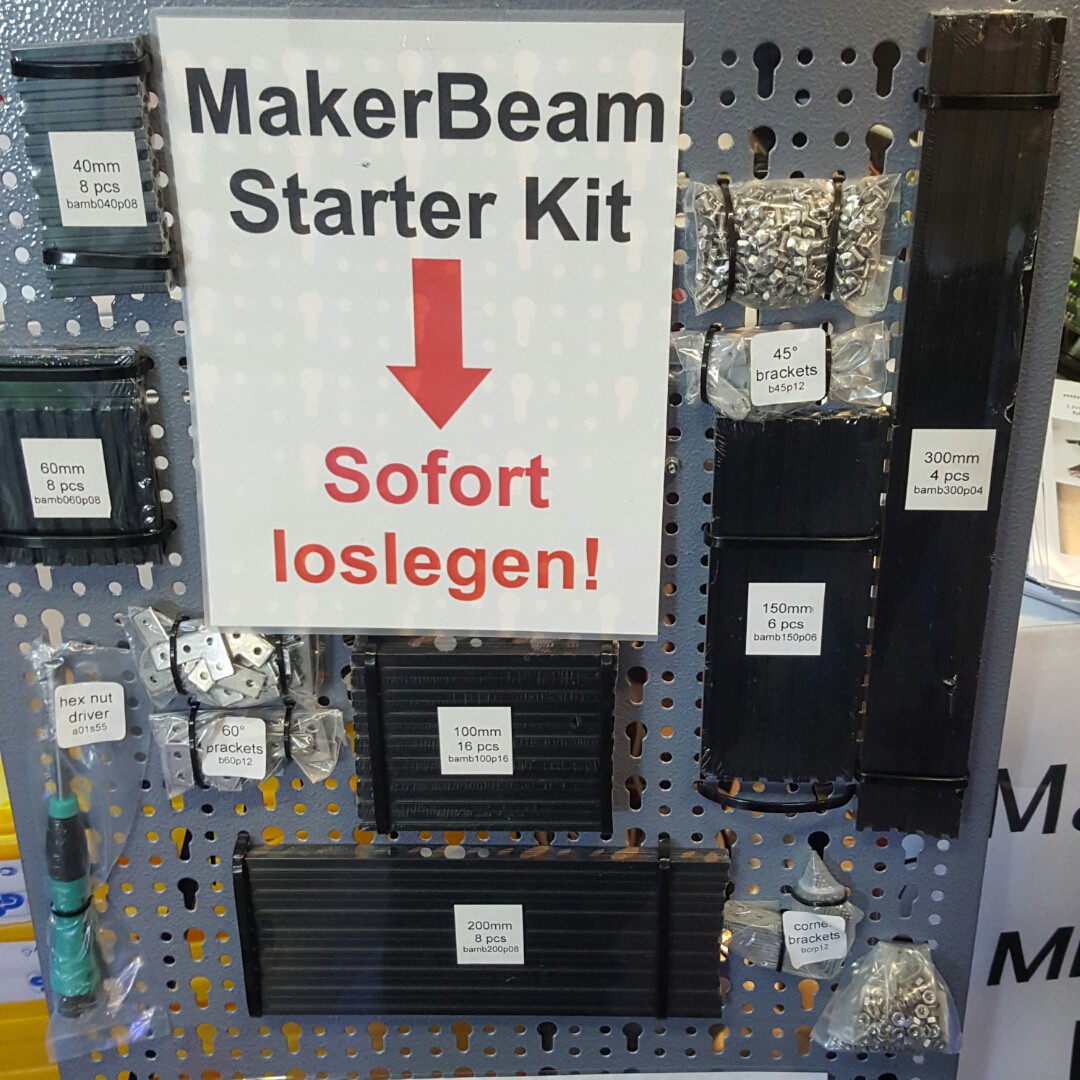
Seedstudio
they brought prototypes of their RePhone and Stickers and buttons and many staff.
https://www.kickstarter.com/projects/seeed/rephone-kit-worlds-first-open-source-and-modular-p
Hartmut Wendt
He brought a din rail case for the raspberry Pi, a mini arcade case and a lot of other little boards that we had a good chat about.
Inspirational projects
www.hacklace.info - a tiny orange 8x8 matrix driven by an atmega328, arduino compatible - everything in a necklace form factor. I was close to buying one but have so many displays in that size, that I would be angry with my self. Another interesting device was the word clock by www.kellys-finest.de that were designed with common ebay classics like a chead arduino clone, 2 8x8 matrices with max7219 controller and a DS1307 module. And there was this beauty:
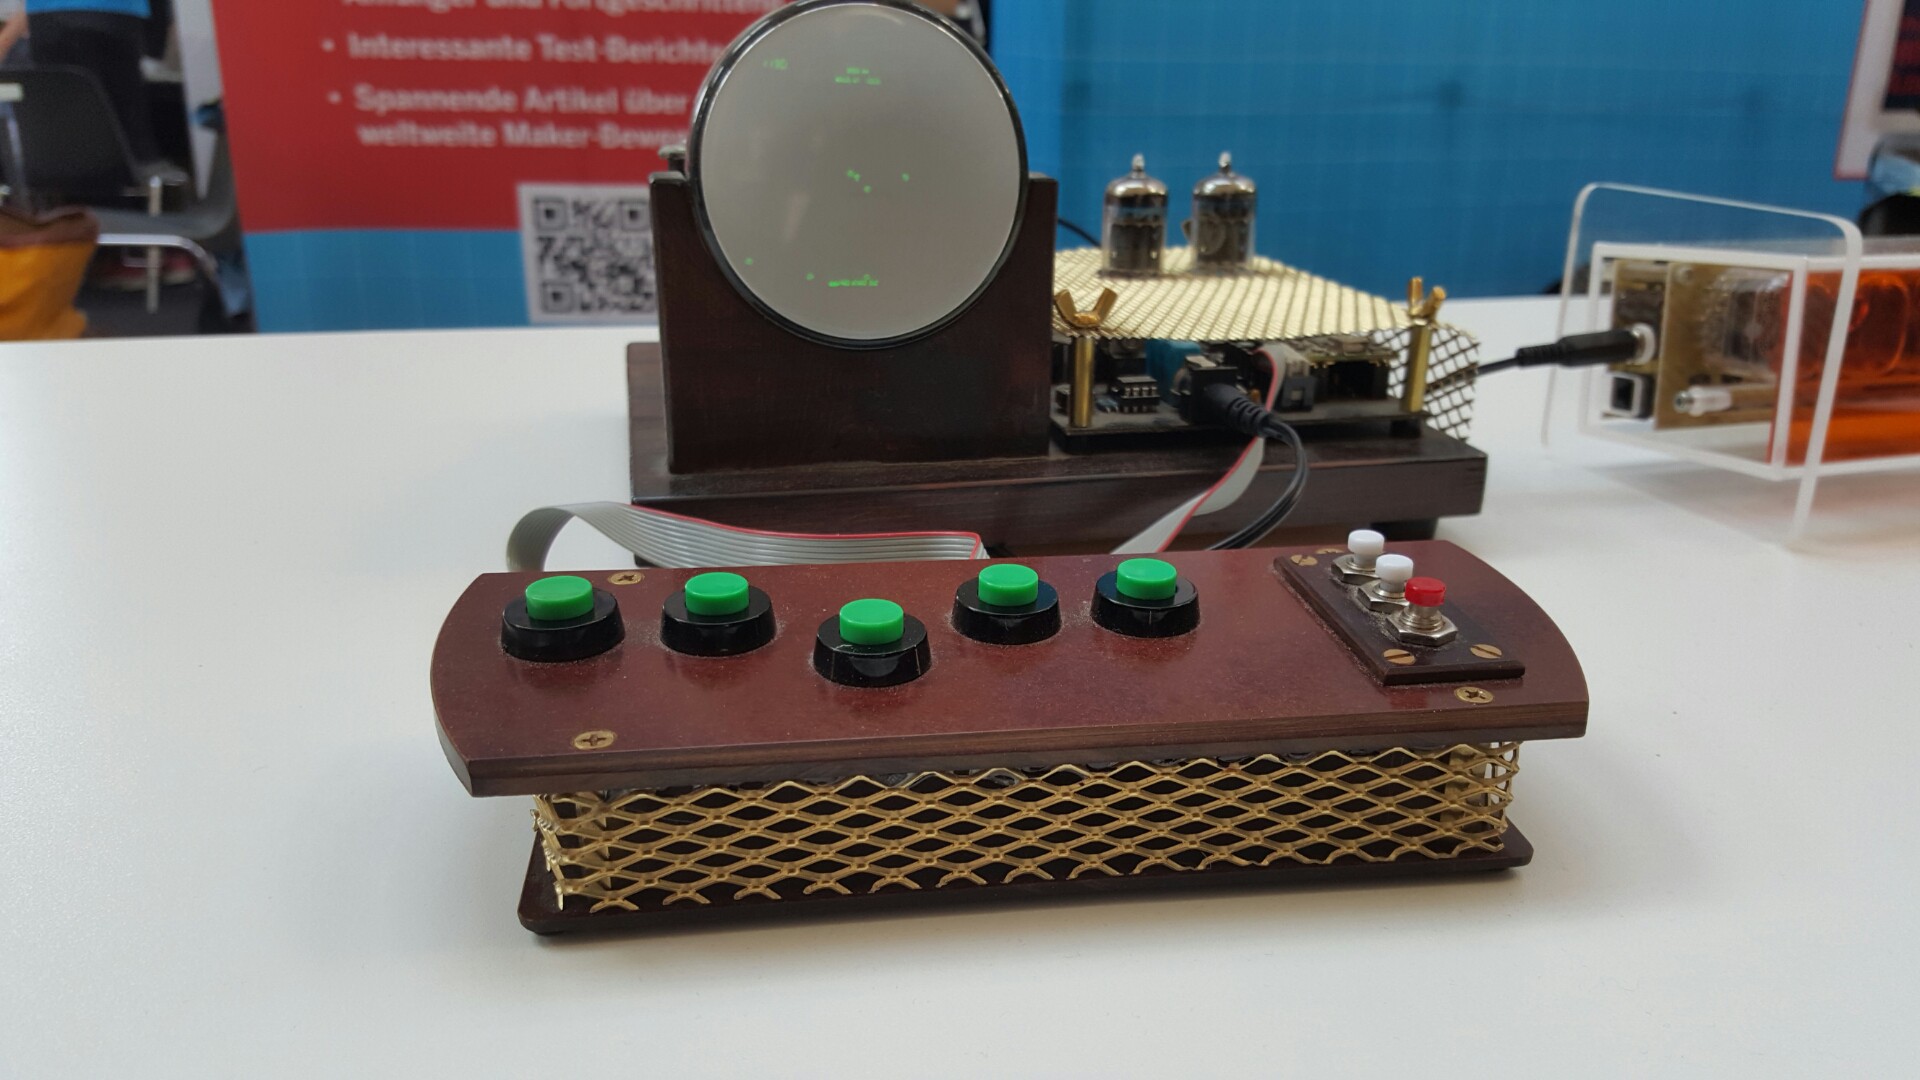
Pimoroni
they brought a lot of hats (shields, stacking stuff) for the raspberry PI and they might have thought that I was writing for hackaday.com - I had to wear a HaD shirt. There was a lot of RGB stuff going on!
Lasercutting and front plates
there were some service sellers that caught my eye. www.formulor.de and www.schaeffer-ag.de were there, and also http://pro.john-steel.com - beautiful interface and good pricing.
---------- more ----------
3D printing
http://i.materialise.com - first price test looks like prices of only 25% percent of shapeways for plastics. MeltWerk had some interesting prints as well, with prices around 75% of shapeways, tested with the same object. If you have a lot of LEGO parts, a browser and not so much time to wait for your 3D prints, you might want to take a look at www.brickify.it - there you can replace easy structures with LEGO parts to save time.
freie Maker
I'm printing myself right now - thanks to the guys from http://freie-maker.de - they brought a 3D scanner and scanned everyone who was interested - should have pulled in my belly :D After scanning a receipt with a link was printed and you have full control over the data. Awesome! We also met @Mario Lukas there and had a little chat.

After seeing the Siegessäule and the vintage computer festival, @al1 and I sank into the couches until the party started. We got our ESP8266 boards out, I brought my #zynthia - sequencer synthesizer and #USB cable tester - @al1 brought his #tiny7 displays. We had some great chats with a couple...
Read more -
Mailbag #001
09/18/2015 at 09:56 • 0 comments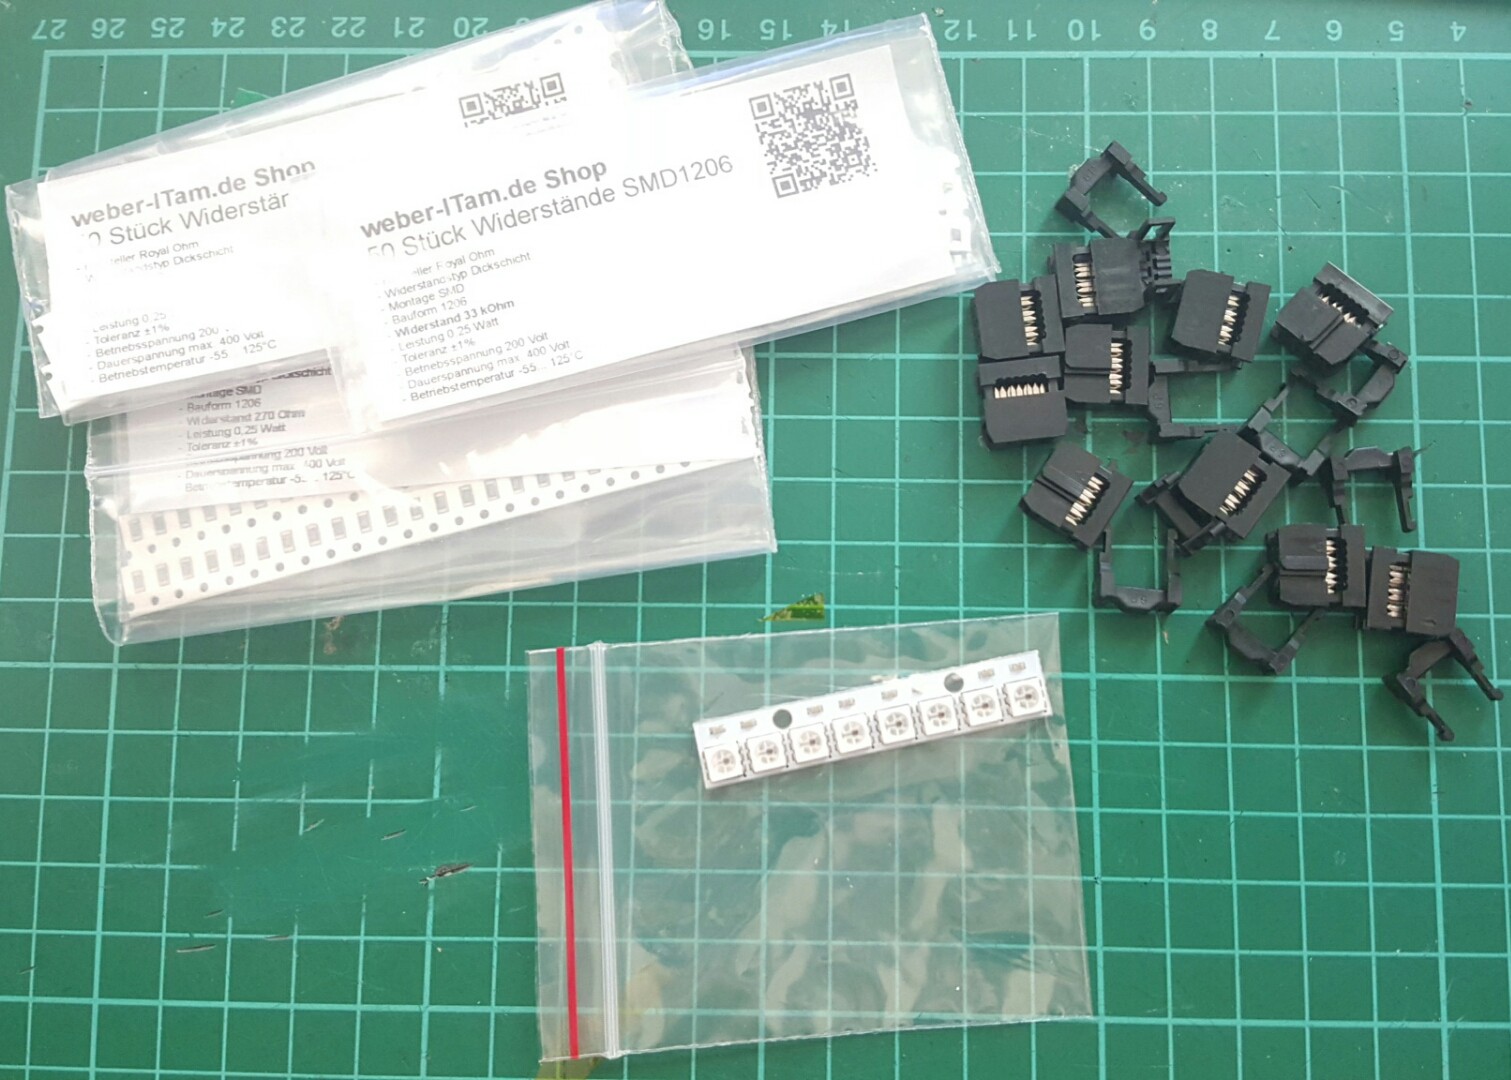
So I just checked my mail and this is what I got:
- some resistors for my #Lithium Coin Cell charger
- a bar of 8 ws2812b LEDs for my #Johnny IV
- some 2x3 clips for ISP cables, to connect with the #MMR-70 - cheap radio module where I'm waiting for 2x3 headers
I have to make a little phone mount for my cell phone to record some mailbag videos (it's just easier to open stuff with two hands).
-
Travelkit
08/03/2015 at 11:39 • 0 commentsChecklist for hacking vacations and work travels, will be updated randomly.
- swiss army knife
- usb power tool
- zip ties
- electrical tape
- gas soldering iron (ordered)
- flashlight
-
[contest follower update] my current hackaday.io feed cleaner
07/21/2015 at 13:16 • 1 comment// ==UserScript== // @name HaD beautifier // @namespace http://hackaday.io/hacker/3459 // @version 0.1 // @description This changes the appearance of all pages // @match *://hackaday.io // @match *://hackaday.io/* // @copyright 2014+, DaveDarko // ==/UserScript== setTimeout(function(){ $('[data-group="follow-contest-contest"]').hide(); $('.contributorsAdded').hide(); }, 3000);for tampermonkey..
I really don't like timeout functions, but since I don't know when the feeds are loaded and tampermonkey most probably only waits for document loaded, I had to do it this way.
-
future projects and ideas
06/22/2015 at 12:24 • 7 commentsA mini mixer for headphone-use of cellphone and notebook at the same time.
Now that I've seen Jurassic World, I want to have a robot velociraptor!
A little TFT screen combined with a SD card reading dev board showing images of the most common basic electronic rules I always forget (like LED "pinouts") - like a pokedex for electronics :D
Using an MCP41100 as a voltage divider input for an ADC + z-diode to protect it while scanning through resolutions. [FAIL - datasheet says no to voltages higher than VDD]
-
picture storage
06/05/2015 at 20:35 • 0 comments



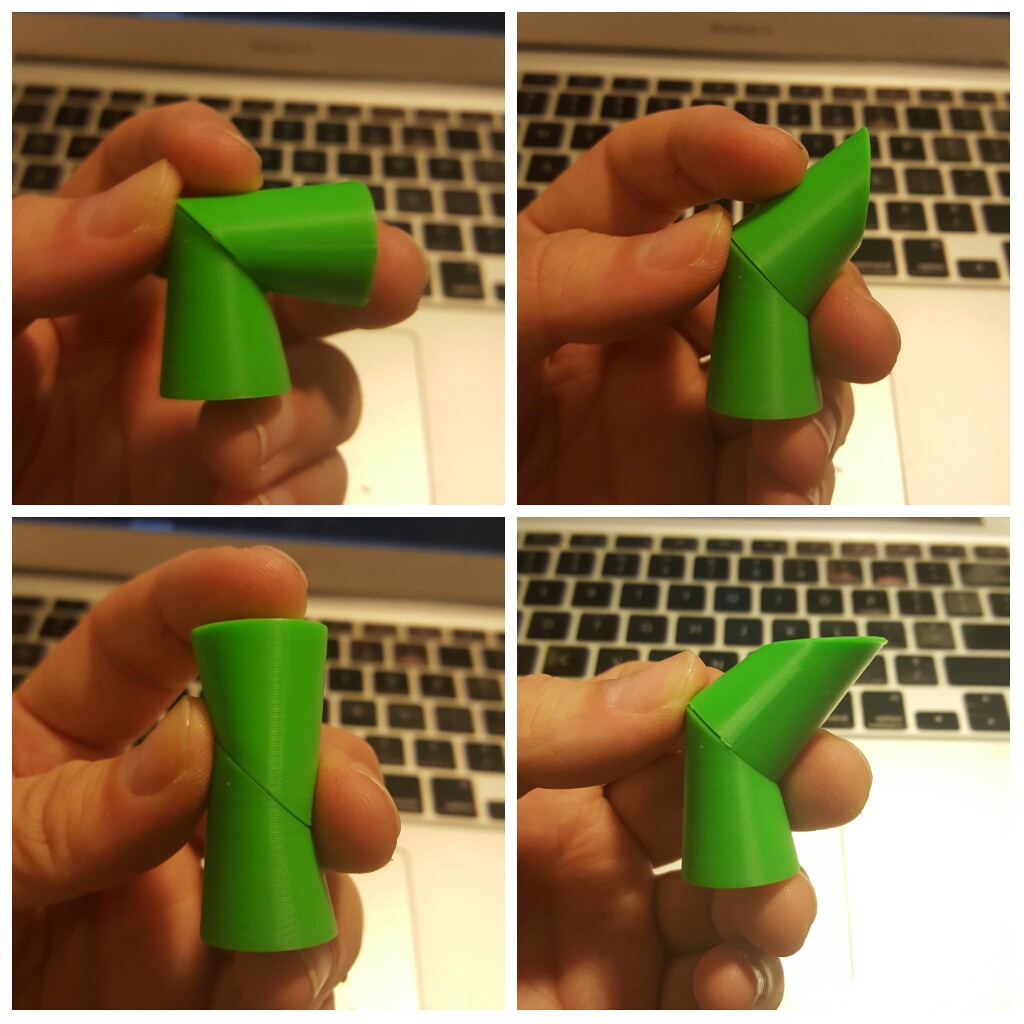
-
today my chair broke
04/28/2015 at 19:02 • 16 commentsSeems like I have to build a captain Kirk chair sooner or later. Although you know you bought it cheap, it's always disturbing to know that a chair just broke under your weight. I'm thinking of a chair using rollers you'd see on a shopping cart, a rotating base using skateboard wheels and a total comfy seat and arms that have control knobs that do stuff.
Read more -
0x06 NTTF - fake nixie tubes (more a gallery)
03/02/2015 at 16:01 • 2 commentsWhen I saw the #Nixie inspired display last week I once again fell in love with LEDs faking Nixie displays. The copper colored cage is awesome, the reflections on the inner walls and the wire mesh looks fantastic. Great job!
Read more -
0x05 NTTF - KW104AL displays
02/17/2015 at 14:11 • 15 commentsCHANGE LOG
2015-02-18 added pcb section
2015-02-17 first draft
INTRODUCTION
While I was looking on eBay for alphanumeric displays, I stumbled across 9 of those displays and had to buy them for about 10EURs all together. I didn't know anything about them but I was all in at that time, because I was thinking about doing a "back to the future" timer circuit at that time. I will use this page to collect all the data and informations I found on those and how I will use them and what for later on. There are 8 displays that are labeled with KW-104AL but number nine has "PINLITE 0-64 28564" on one side and "X-2393 8525" written on it.
Read more -
0x04 NTTF - a matrix controller
02/14/2015 at 22:31 • 2 commentsCHANGE LOG
2015-02-17 Joined with update page
2015-02-14 first version
INTRODUCTION
So I designed a circuit, without making a pcb and sending it to OSHPark today. First I want to make sure, if what I've done is correct or not and right now I'm too confused and tired to tell. And if so, I'm going to breadboard it and use some perfboard or design the pcb and try to etch it myself. I'm too spoiled. There is so much BS on the web, how you would have to connect an ULN2803 to LEDs and so on. Has anyone any complaints or hints for me? My plan is to loop through each column and set the shift registers. Latch off while switching the rows. This is supposed to be the prototype controller for the displays I made in:
- 0x01 notes for the future - can anyone have too many displays? - Introduction of pcbs
- 0x02 notes for the future [UPDATE] - soldering with a toaster oven
-
0x03 notes for the future - a PSU mod [UPDATE]
02/03/2015 at 23:18 • 8 commentsI guess I was a bit ÜBERmotivated. Excuse my german. So the plan was to get 4 ports with switchable voltages. But the connectors for banana plugs were that big, that I decided to use three wires on one.
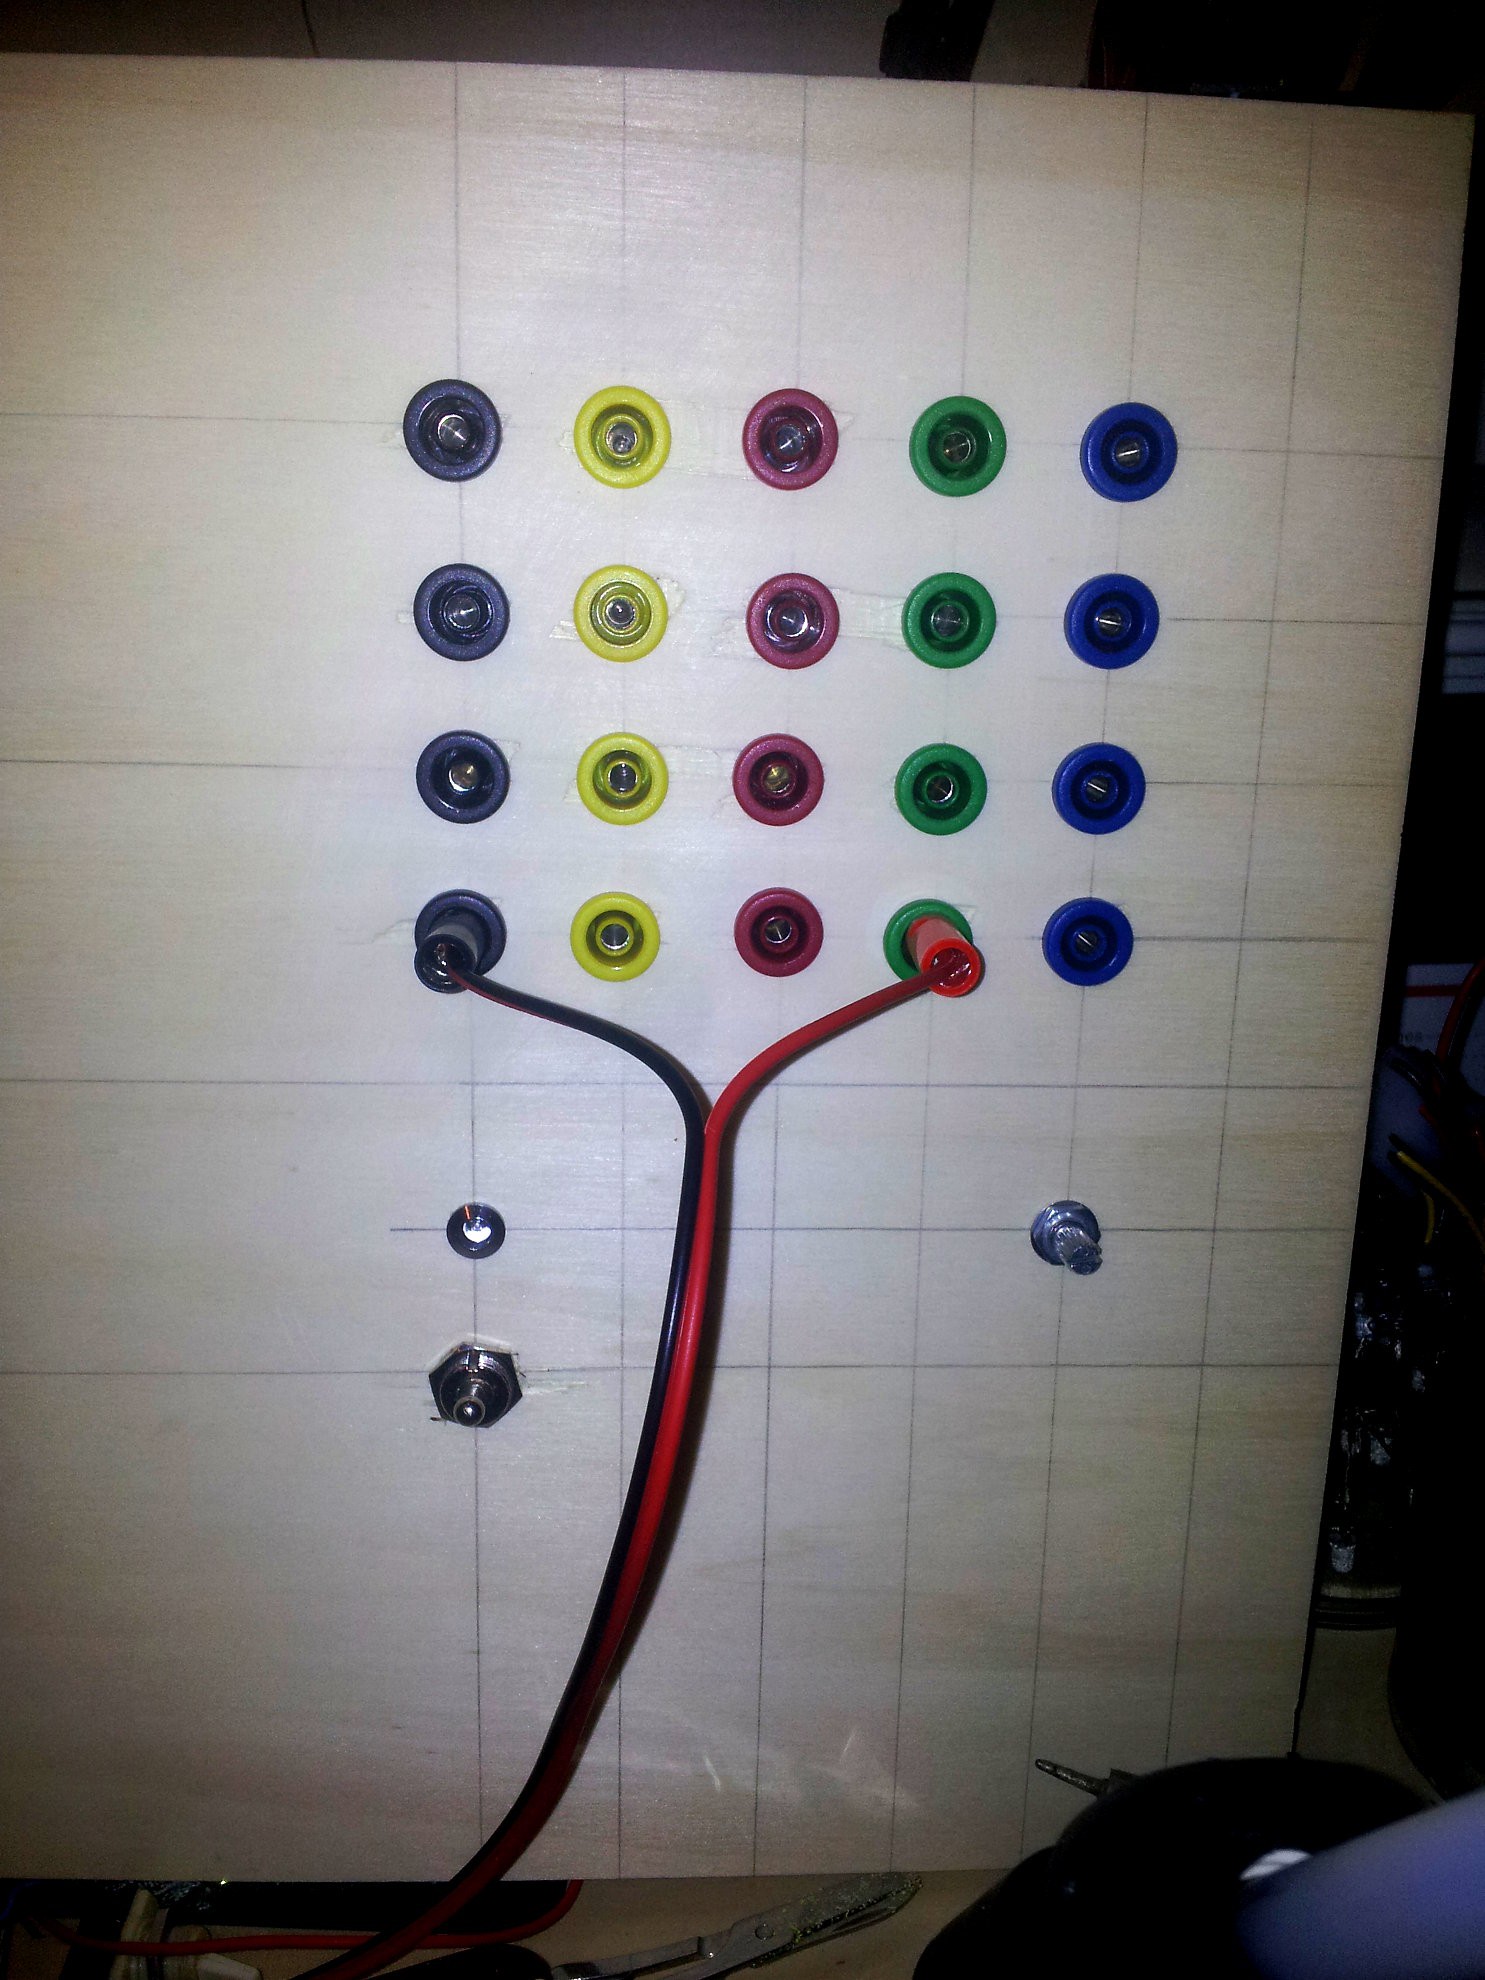
This is definitely a temporary design, I've already worked on the 2nd version of it (with not so many banana plug terminals and will hopefully be able to get it laser cut somewhere. Maybe I'll throw in a USB plug.
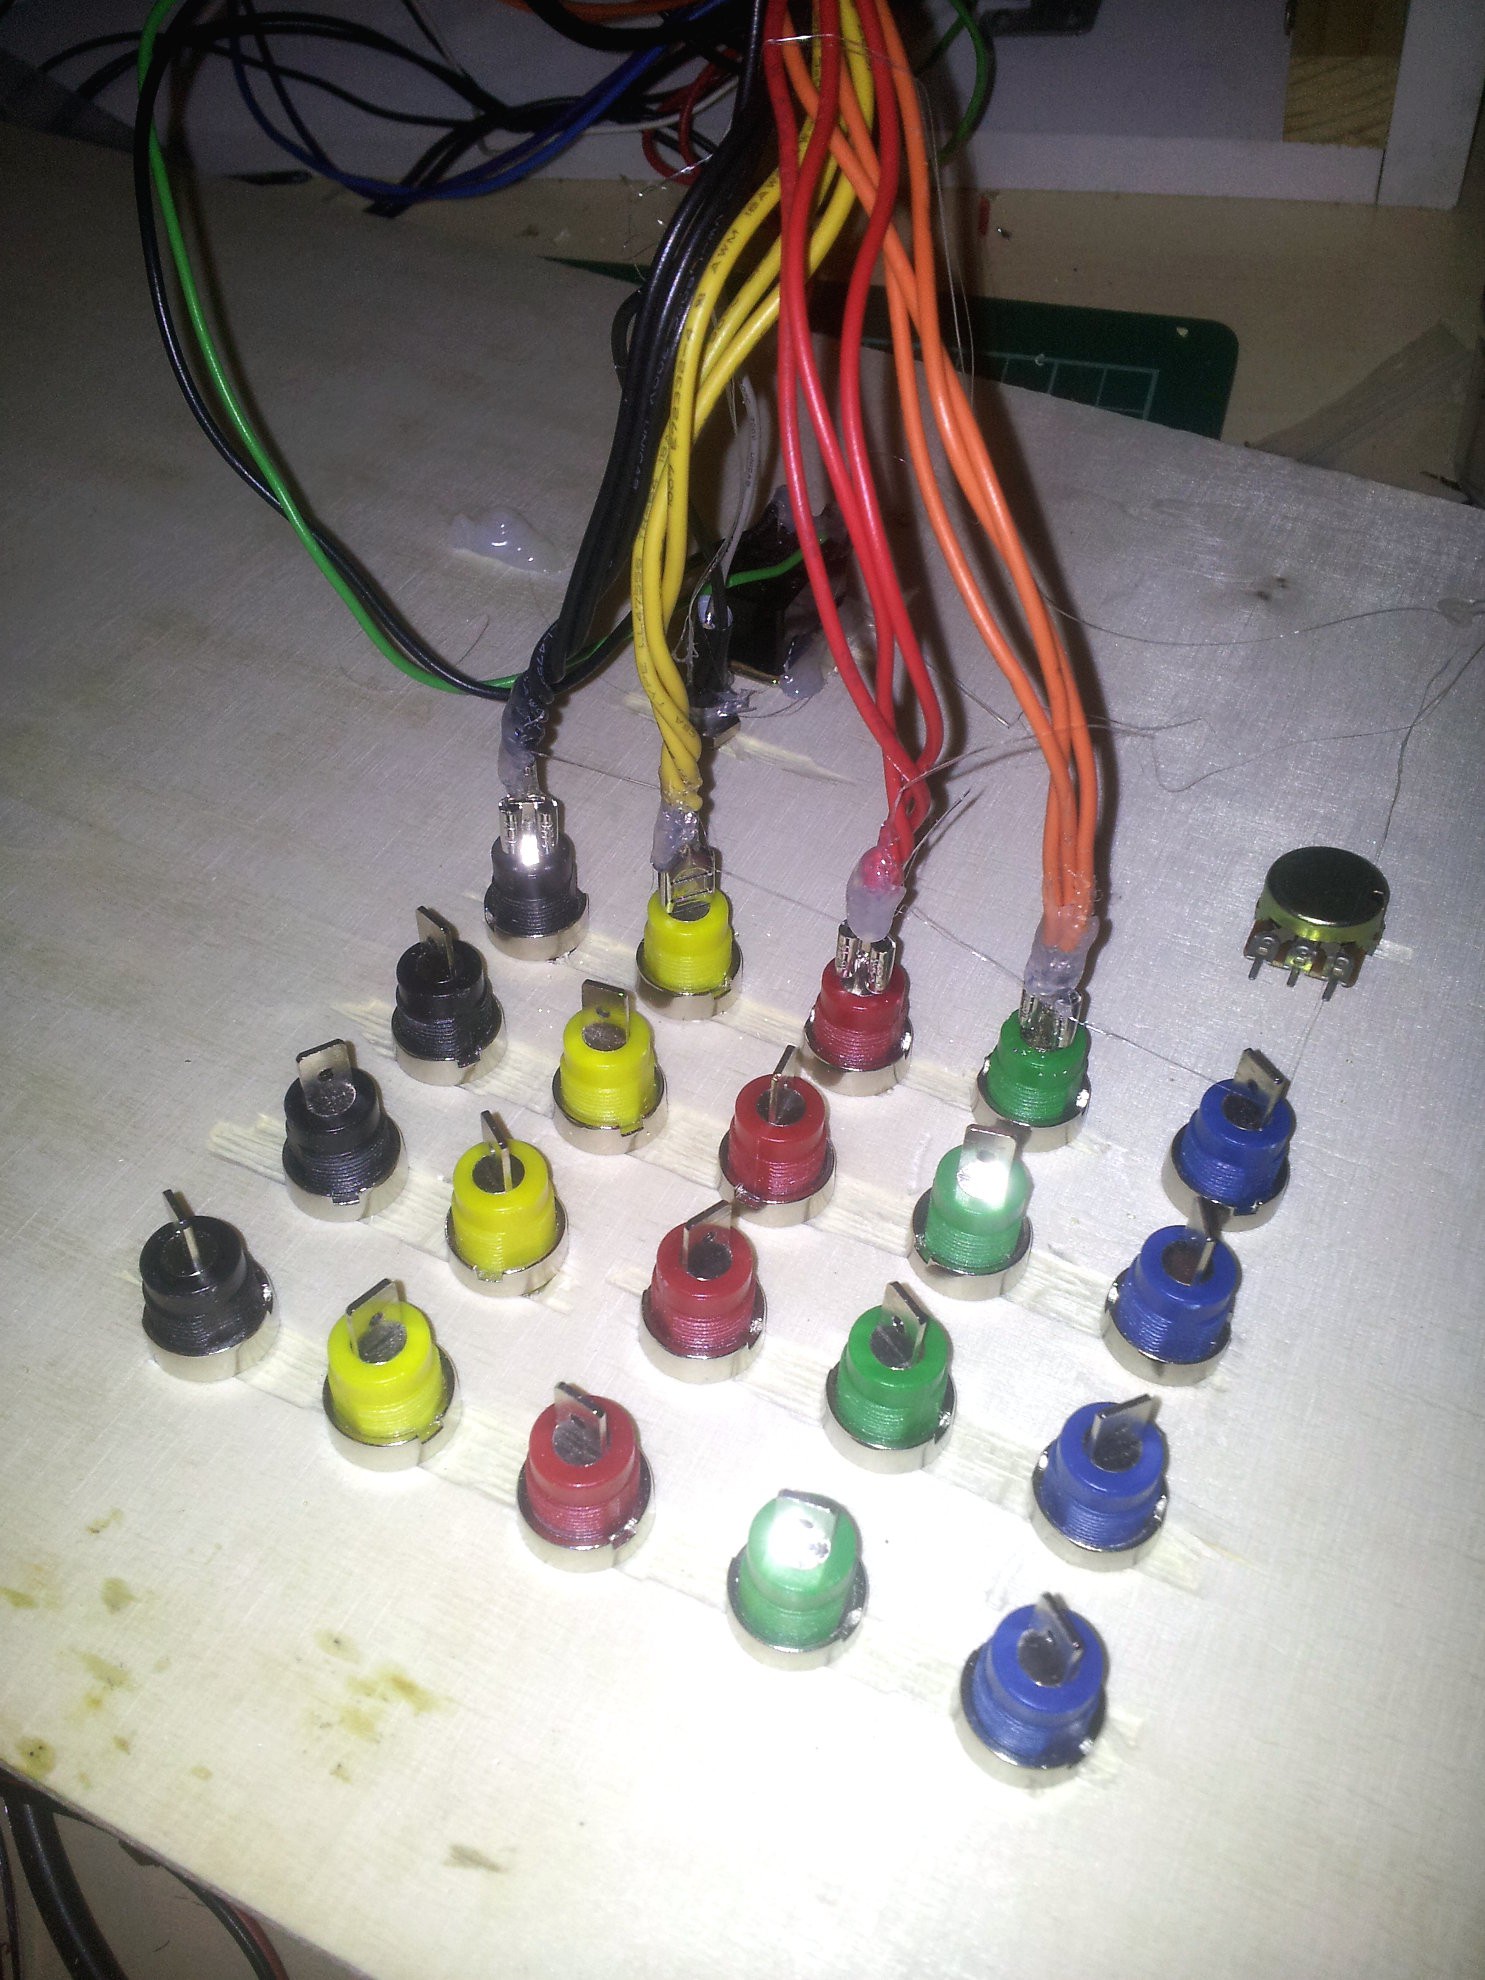
The result so far... well... I got one port with 3/4 channels or the other way around. And maaaaaan, this old supply is loud.
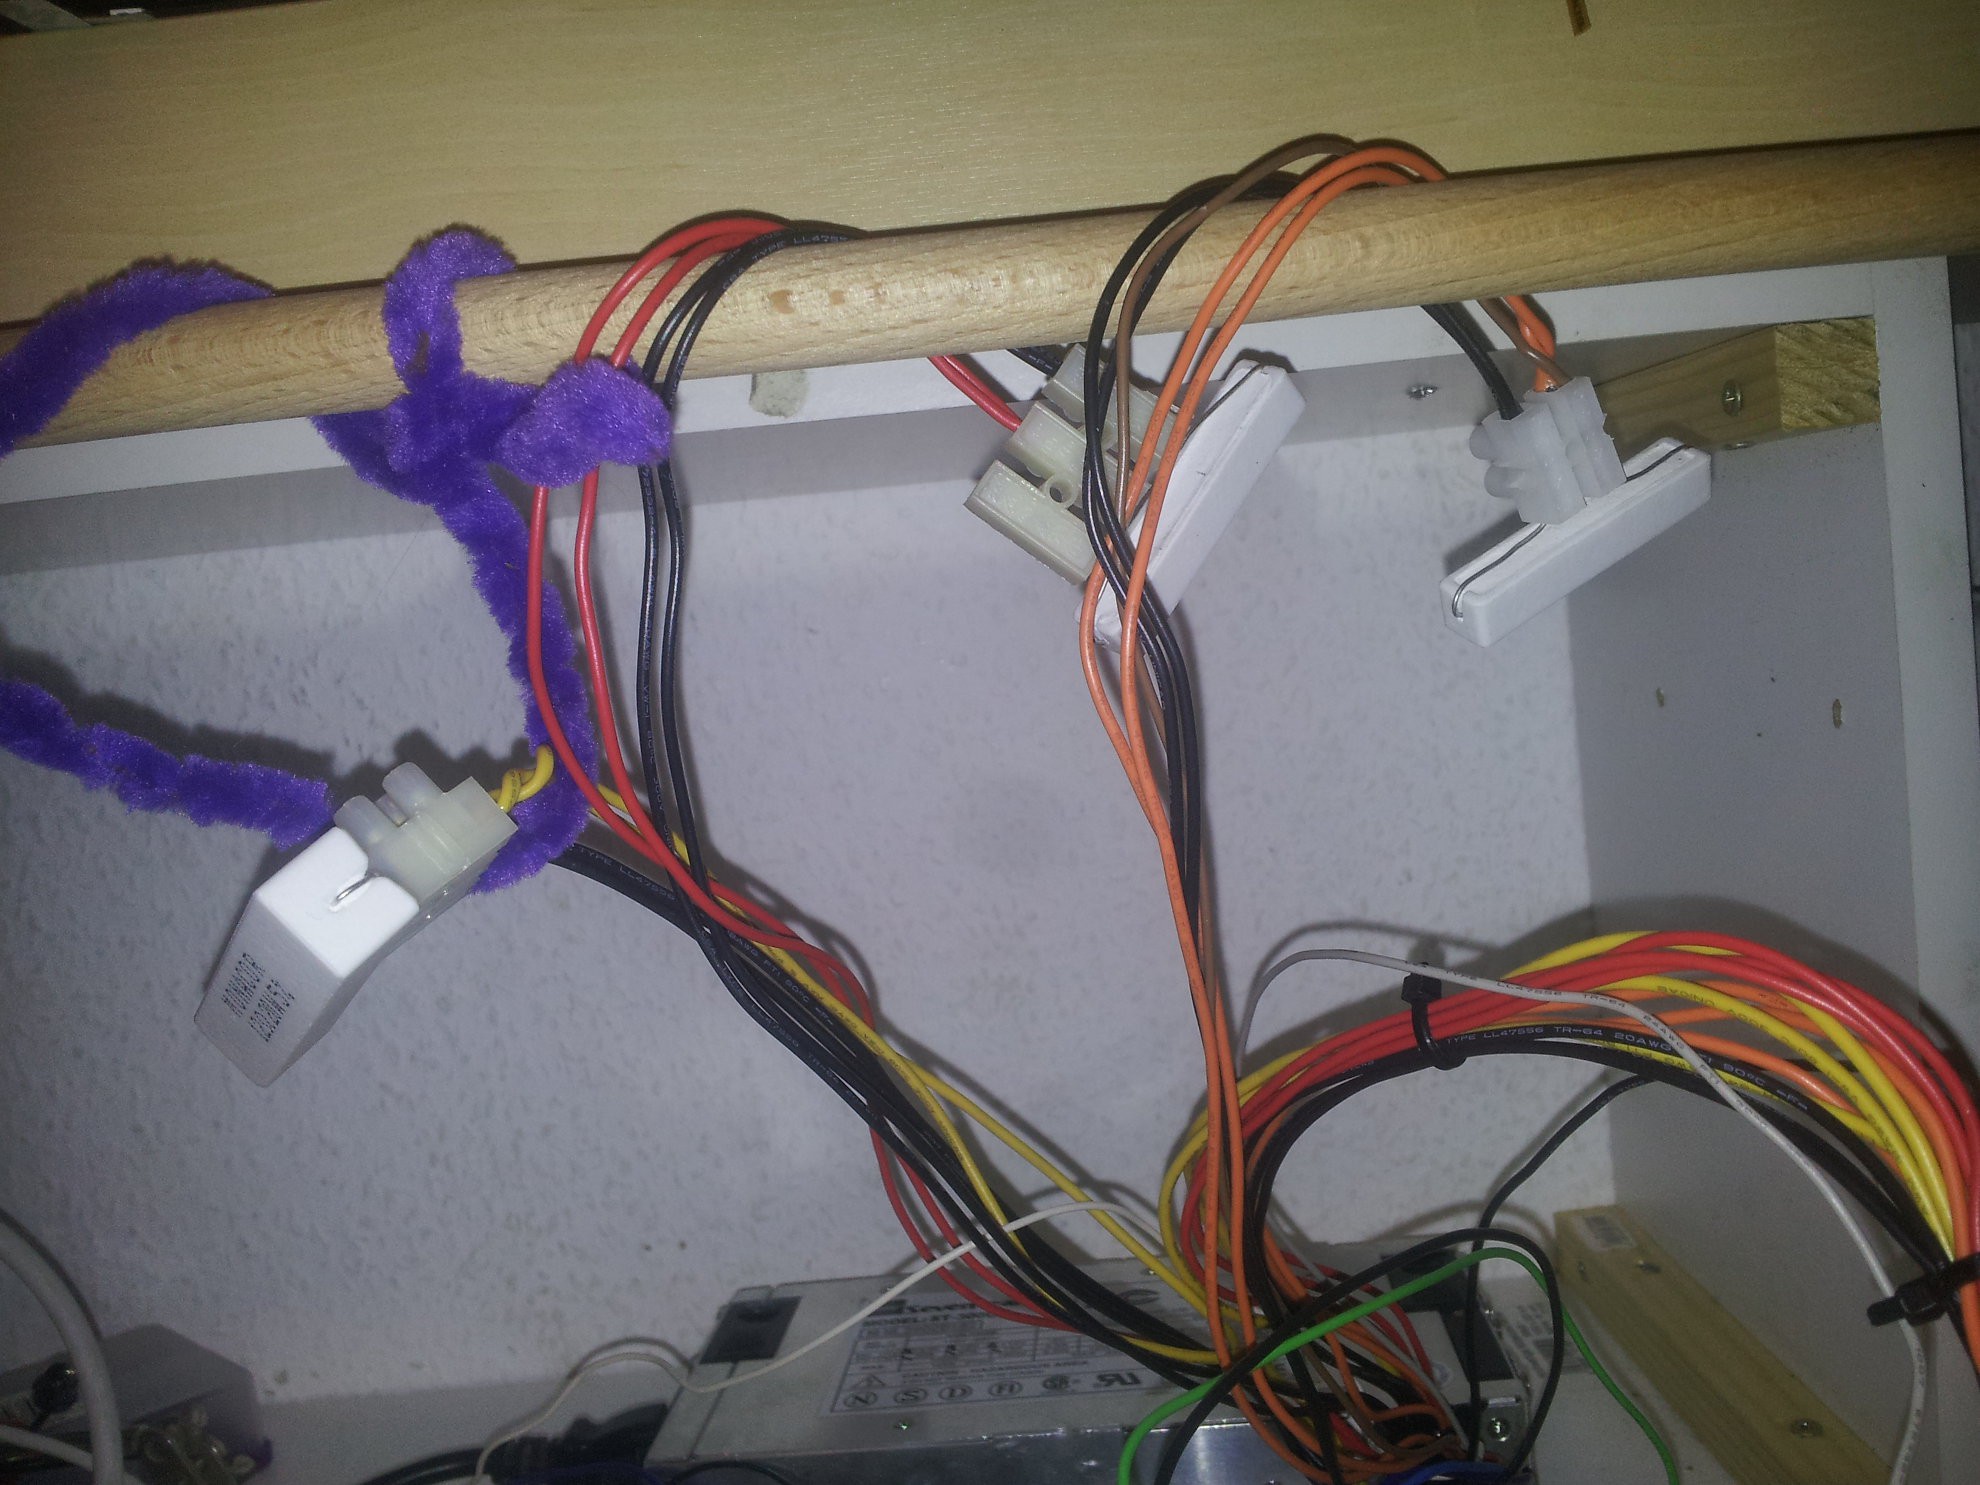
I'm not sure how hot the resistors are allowed to get, but I'm planning some heat absorption and involving a fan to keep those monsters cool(er(ish)). The gauge of the wires is set to accept around 1.5A but I used 2 wires for safety reasons.
-
0x03 NTTF - a PSU mod
01/25/2015 at 22:42 • 4 commentsMy usual way to power something with 5V? An old cell phone power supply. My usual way to power something with 3.3V? An old cell phone power supply, connected to a 3.3V arduino micro. That has to stop, so I asked my dad for an old power supply he surely had laying around and ordered some parts on the usual places. The plan is to use the 12V, 5V and 3.3V as seen before on so many places. Additionally, there will be a variable output controlled by a LM2595(ebay) with a LED display voltage meter (ebay). Now I just have to wait for the copper chicken head knob for the 10k resistor and the resistor itself, but nothing that should hold me from starting, though. *While writing thinking edit*: I need those min load capacitors. Sounds like some really tough math to get involved to.
No such things as 5 ohm I could find, so I'm looking for 4.7 ohms.
Yeah, I just wanted to play with the latex feature, I admit it :D Next on is the wattage.
I ended up buying LSR-120/20, LSR-33/10 and LSR-47/10, they are not the cheapest, but I could get them all from one seller and hope on some combined shipping costs, thanks ebay, for finally making this possible. I'll use some plywood to place the ports, the display, power good led and the potentiometer - and should not forget the switch.
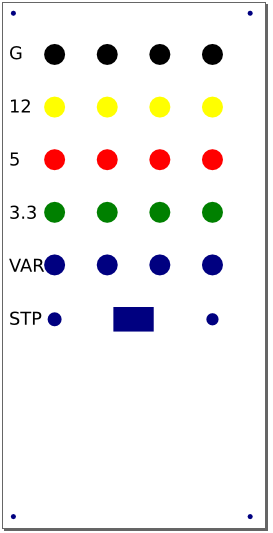
Well, so much for planning, not the best page I wrote, but it's supposed to be more a log this time - a note to the future me. That's why I gave it the title. Why do I explain something self-explaining? I'm tired.
#ATX Benchtop Power Supply - quite nice instructions, but don't cross the streams like he did!
#Bench Power Supply - ATX PSU Adapter - he can even reuse his PSU or change it for another!
#ATX power supply conversion for bench usage - the reason why I won't make a project out of it - the third great write up :)
-
0x02 NTTF - Stargate LED matrices [UPDATE]
01/11/2015 at 00:39 • 6 commentsFirst let me apologize for the pictures, I was too lazy to grab my DSLR so my "trusty" Samsung Galaxy S2 had to be enough.
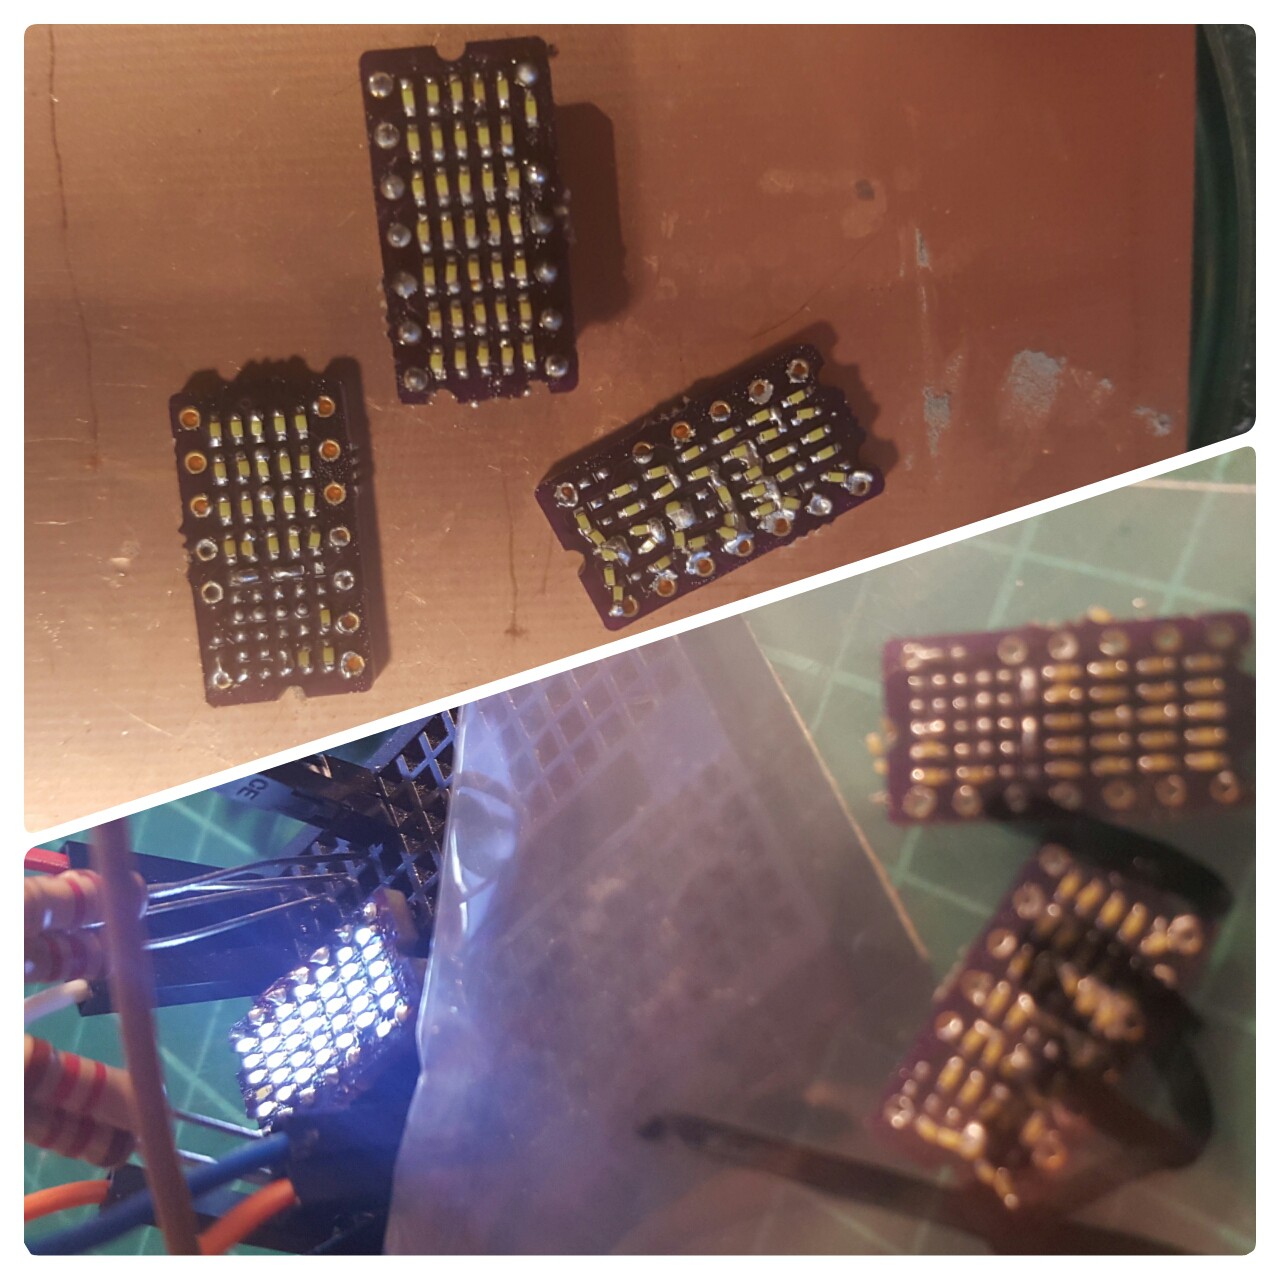
So let's dive into my adventure with SMD soldering with a toaster oven. I had all I would need to test this method myself. The boards were send by OSHPark, my cyan LEDs I've ordered years(!) ago and the solder paste. But my syringe wasn't actually a syringe you would expect but one with a 3mm opening - d'uh - let's not hit 1x2mm spots with that. So I got creative with a 3D printing nozzle - which made quite a mess but worked probably better than without.
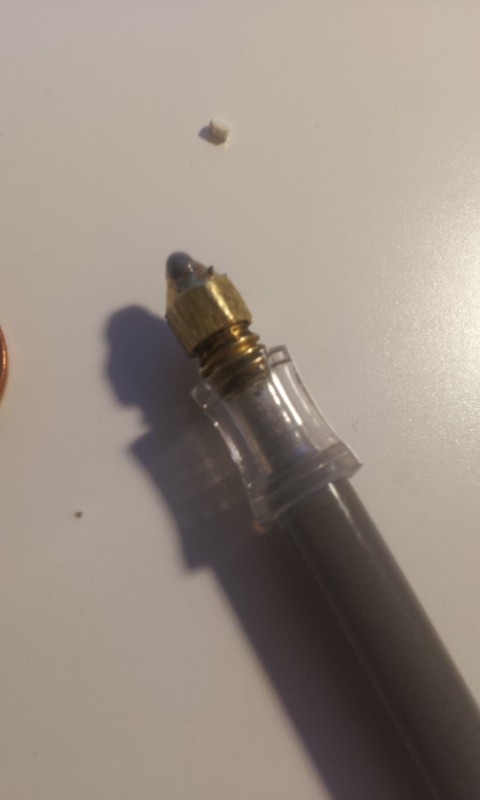
Then I went on putting solder paste on 180 spots with this crude device.What a boring task. But hey, all for science!
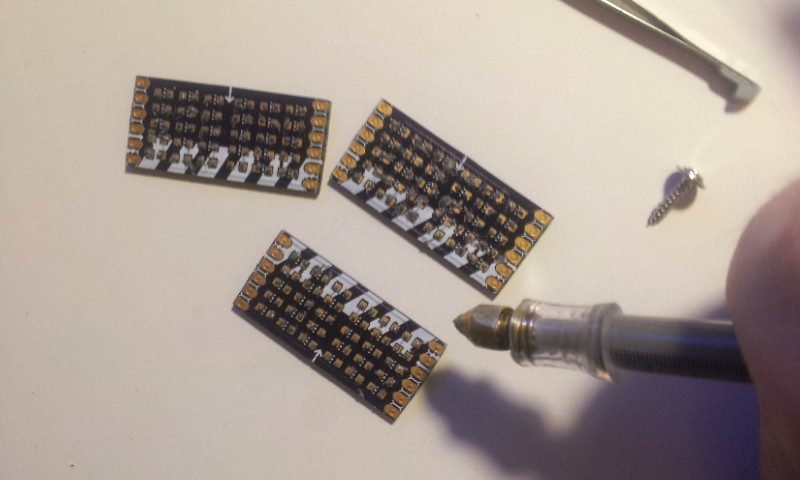
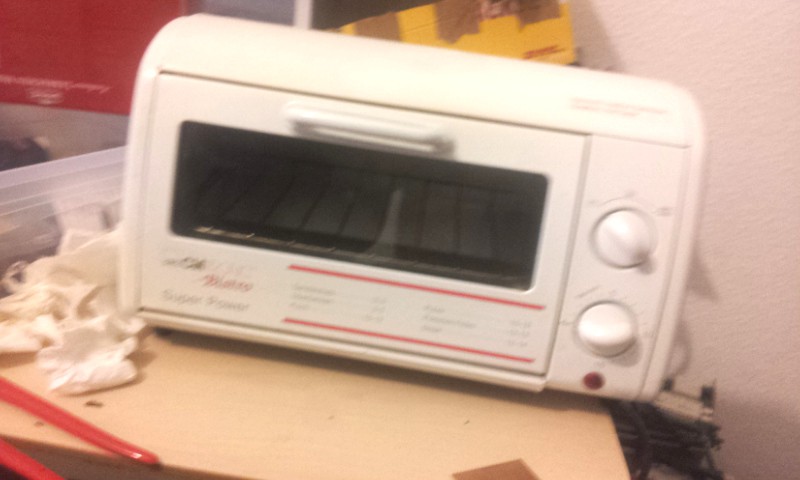
I had to get those LEDs out of the strip and figured out how they are oriented. But once I tried, they almost every time jumped out and I had to first find them and then check the polarity again. Hours later it was time for my trusty toaster oven. I have no special controller nor a temperature sensor - just a google search where I found this page http://www.openhardware.net/Misc_Stuff/ToasterSMD/ and figured I would have to turn the oven on for about 3 1/2 minutes. I'm sorry science.
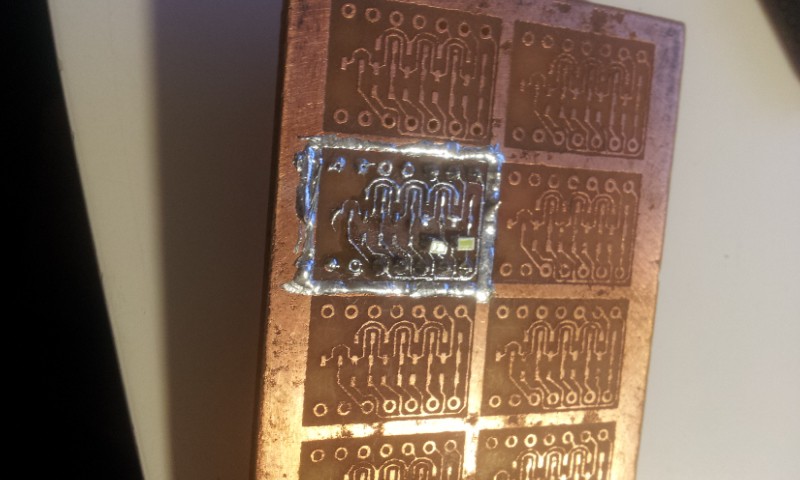
I'm kind of jumping to the end here, because I did them one by one and took no photos. They are not perfectly aligned through the process but far better then I could have soldering them by hand ;) That's actually from my DSLR because I switched while writing.
And this is my first attempt from years ago, which demotivated me for some time now. This board is self etched and pre tinned by hand - soldering those LEDs was nearly impossible.
Next up will be color coded pin headers for the cathode and anode rows, since I always forget what is what. Yes, lame, I know. But wait, that doesn't even matter with those little guys. Damn. Never mind, I mix up cathodes and anodes. So what.
-
0x02 NTTF - Stargate LED matrices
01/09/2015 at 15:30 • 0 comments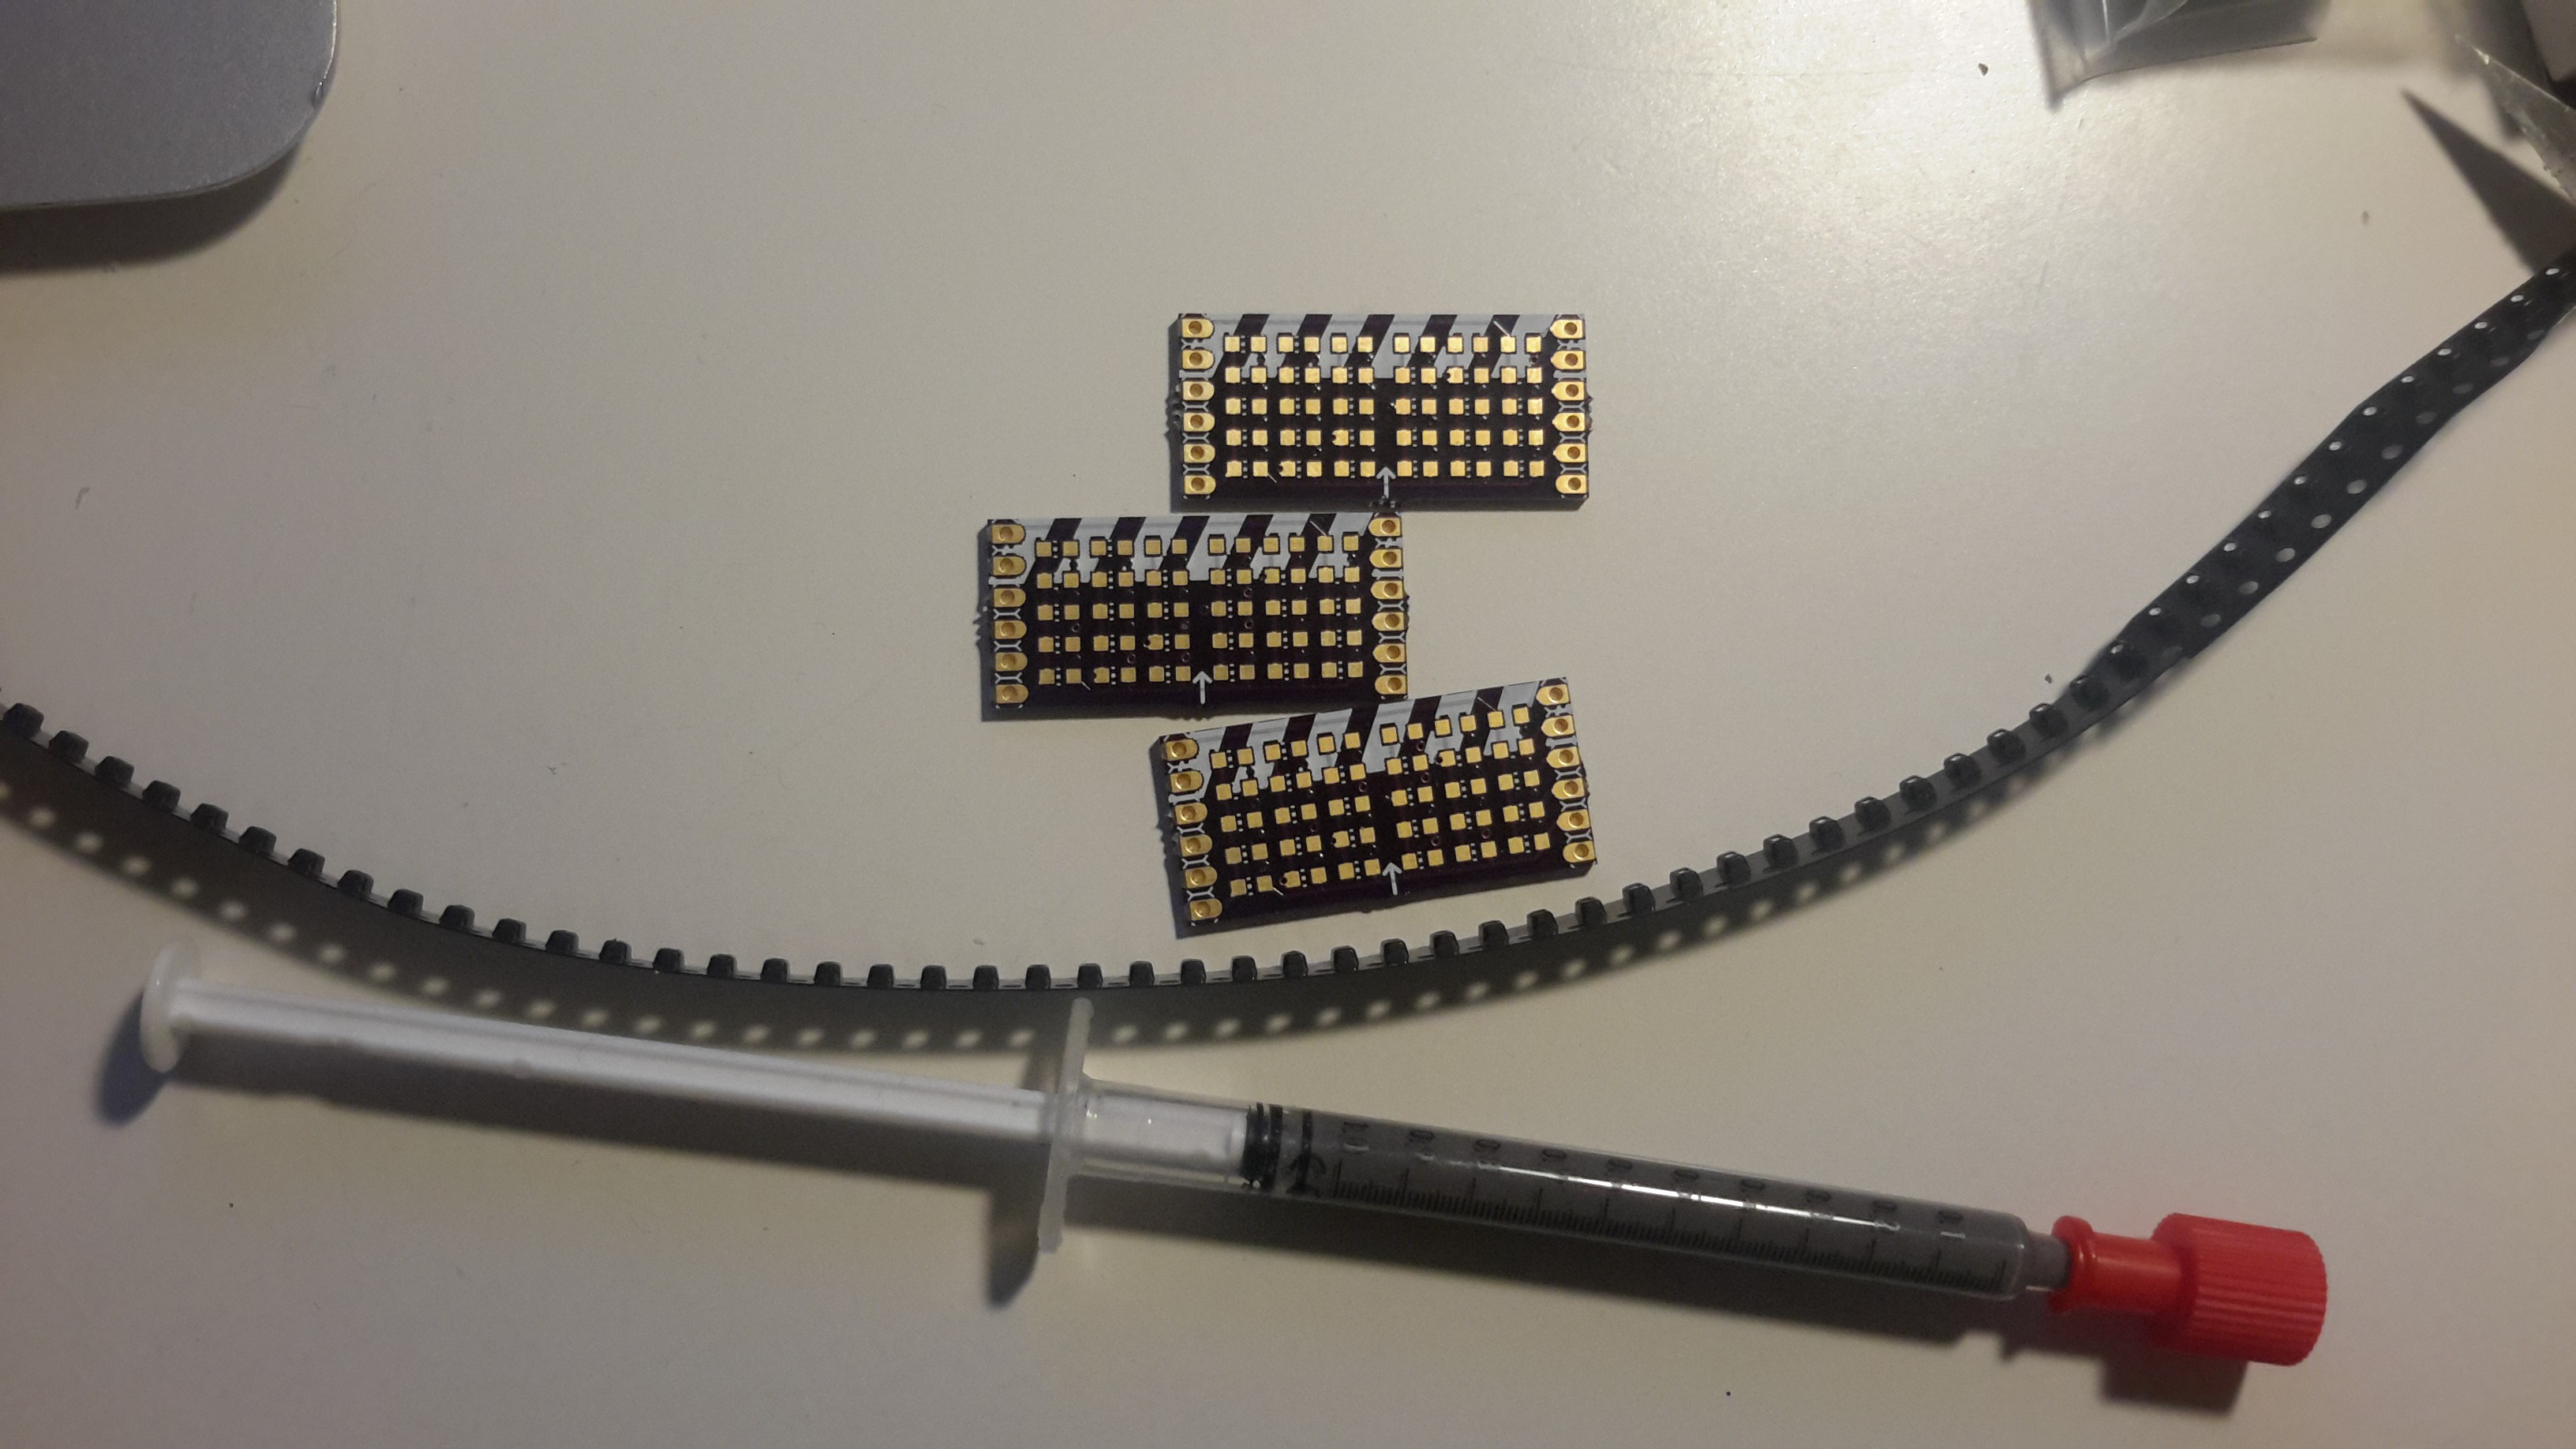
So today the boards arrived from OSHPark and I will put all the stuff together on sunday and throw it into my toaster oven, hoping for the best! As seen before those boards have quite obvious markings, since the LEDs do lack that - I hope for the best that they are facing the same direction in this strip and I can work with a predefined arrangement. I should pre test the LEDs once they are placed and connected by the paste. Maybe I should even test the toaster oven with some spare parts and protoboard first. Probably best.
So what should I do with the boards, once they are all perfectly fine (fingers crossing)? I though about a wrist watch, since I don't have a space ship that jumps out of stargate stargate range. I'm not even sure about how I would drive them, only that it would take me 18+5 or 15+6 Pins to control 90 LEDs. It's not that different from my #1886. fixietube clock setup.
I also ordered 4 MMR-70 and plan on programming them, but I don't have a 3.3v programmer, so I might move this to some point later. At least one 8-Bit Eduard Anatoljewitsch Chil should come out of this, using only the atmega32 onboard. Thanks to @Dr Salica and his wonderful project #3508. Portable Trollmaster 3000 for the inspiration!
My IKEA expedit 5x5 is currently a mess and I plan on getting some curtains for the lower 3 rows and make the upper ones a display area, showing all my nerdy creations, maybe with on and off switches in the front to turn the projects on and off. There is at least the K.I.T.T. scanner I build years ago, my stargate LEGO diorama needs some LEDs, then there is the doctor who "area" and a star wars section as well. Add some lights and all is set for a while.
With my flatmate moving out I now have a whole room I can use as my work space for soldering and hacking, 3D printing and crafting. So a workbench and a proper power supply setup up will be coming soon. 3 containers with little boxes for small parts arrived 2 weeks ago and I started to throw in all my electronic stuff I have - looking good. The boxes are transparent and I got a matrix of 15x8 out of it - so there is a hacking opportunity for organizing parts (or another watch project - meh). Combine that with voice recognition and finally my questions like "where are those damn arduinos again?" will be answered with a little blinking LED. Would be even better if the boxes were coded somehow, so I can throw them in where I want and it will always find them.
-
0x01 notes for the future - can anyone have too many displays?
12/21/2014 at 20:24 • 11 commentsAlmost three years ago I bought some 0805 cyan LEDs to make a tiny stargate inspired display. Since I haven't figured out any markings and wasn't able to hand solder them the project was on ice. Last week I've revisited the idea and designed some pcbs that are fool proof in terms of orientation making it easy to place LEDs in one direction without knowing anode or cathode. With some solder paste and my toaster oven I hope to achieve a good result ending with 3 boards - hours - minutes - seconds - that I will put on some perfboard arduino/74hc595 timer/watch thing.
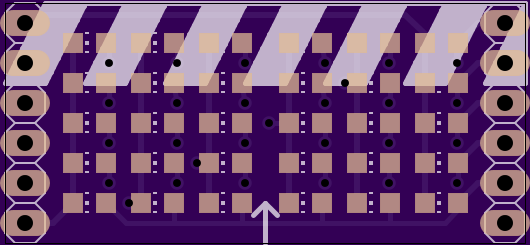
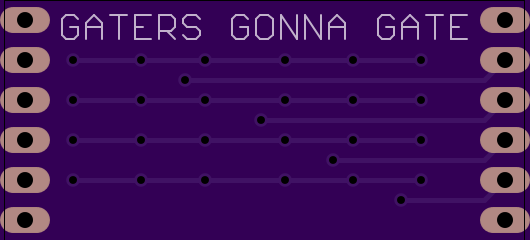
Raspberry Pi Stuff
Plans for an arduino based raspberry pi shield are forming, I definitely want some goodies on there like controlling ws2812b, 5V fan controller (yes a fan...), 433mHz module connector, SD card logger, current measurements, reset button, shutting down button. Kind of bummed out that my raspberry crashes when I make a picture with the camera module and ssh is poorly slow.
-
0x00 notes for the future - holidays without a notebook sucks
11/24/2014 at 19:26 • 4 commentsAttiny45 current logger
My raspberry pi setup was meant to somewhat satisfy my needs for a computer on my vaccation while my macbook battery would be replaced in the mean time. But somehow it always fried and frustrated the hell out of me. I think that is because of my insufficient power supply - 1A could be a bit to weak for a b512 with wifi and a hub. So I googled on my tablet pc how I could measure amps with an arduino and found this site http://www.vwlowen.co.uk/arduino/current/current.htm - ordered some 0.05ohm resistors and plan on using the integrated gain of the analog to digital converter to get a better resolution and store the data on a rolling array.
RGBW Flashringlight
For my 29th birthday and christmas I got myself a dslr - with generating youtube videos and project documentation in mind (some nice sonic screwdriver long exposure pics are on the way). I would love to see how a ws2812b rainbow ringlight would look like, but i think the adafruit rings are too expensive. Ebay had some interesting leds, though /pages.ebay.com/link/?nav=item.view&id=261645486643&alt=web
Cypress Logic analyzer
Someday in 2011 there was a blogpost on hackaday [http://hackaday.com/2011/12/15/saleae-logic-analyzer-knockoff-hacking/ ] about a clone of the saleae logic analyzer and I bought a cy7c68013a dev board for under 10euros but never plugged it in. So with my raspberry working in console mode I fired up fxload and sigrok-cli but the ported versions were not the newest and compiling didn't work either so I wasted a lot of time on this... have to revisit that.
Game boy camera polaroid instant camera
this could get interesting - taking a printer module and a camera and merging it with an arduino to get an instant camera thing in a nintendo style. Ben Heck style maybe.
-
I killed my camera
11/10/2014 at 23:27 • 6 commentsGood thing it was only a 7 Euro key-fob camera in 808 style, but I killed my time-lapse project with that. I wanted to wear this on the hackaday event taking pictures constantly with a harvested lipo from a macbook. I even shrunk it down from an arduino board plus perfboard and wire porn to a self-designed attiny85 board. While debugging one I must have killed the camera, because it won't take pictures or videos anymore - so I ordered a new one on ebay for 4 Euros. Btw., the boards were so tiny, that I didn't even get a sticker with them (I already have enough of them, nevermind). It is a bit messy to work with in eagle, but I like putting pads on the edge to solder the ISP connector sideways.
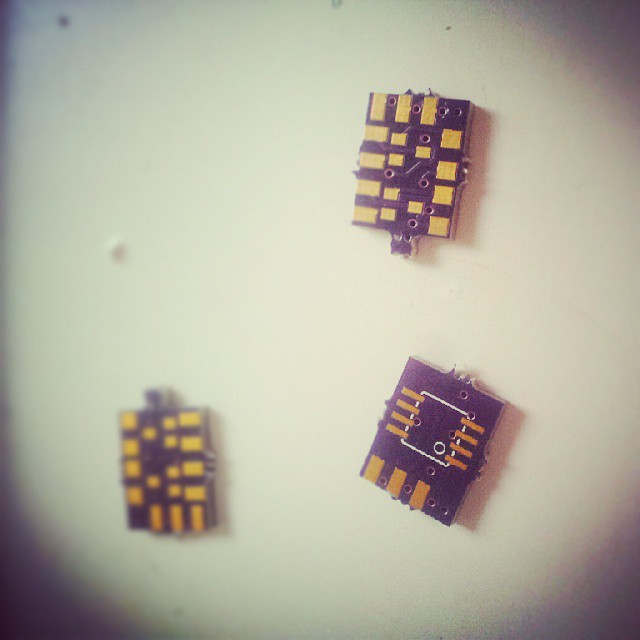
-
#wunderhack || a wunderbar hackathon
09/26/2014 at 11:17 • 3 commentsThe wunderbar
The wunderbar comes in a package of 6 BTLE sensors of different types (temp, light sound...) and an embedded device that connects over wifi to the Open Sensor Cloud Platform. It aims to be an easy “Internet of Things” starter kit, where you don’t have to worry about the security and hardware since it has all been taken care of the relayr.io-team.
The beginning
On half past ten on friday, september 26th around 40 engineers, designers and developers gathered at the betahouse in Berlin to be welcomed by the relayr.io team for their first 24 hours hackathon around their product - the wunderbar. A brief introduction was given of what the idea behind the wunderbar is, how the communications and the hardware is setup and that the hashtag for this event would be #wunderhack. Deciding factors would be “quality of code” and “use of third party devices”. We the contestants introduced our ourselves and our ideas for projects.
The teams
Sensor driven canvas - Christophe, my colleague from wakesys.com and I are webdevelopers and wanted to augment an html5 canvas with sensor data from the wunderbar, which could be used for bargraphing, painting and gaming [webAPI]
Wundersound - Julian, Jose and Khaled pitched to use the sensors and a kinect to create sound or manipulate sound [iOS SDK]
GrannyVision - a monitoring device that tracks the health of a beloved elderly was presented by Chris, Simon and Steven [iOS SDK]
Saunopportunist - an idea I worked before on the hackday with Tracey, but together with Marcus and Falko the HERE Team refined their design and redid the software from scratch to build a sauna monitoring device and email alerts and android push notifications [webAPI]
NoNameIdea - Jan and Julian arrived without a project and turned their wunderbar color sensor into a colour caller for blind people [webAPI]
Babybico - Nabhila and Miha joined the hackathon with their baby sleep monitor app, they want to turn into a product [Android SDK]
Keybox - the keydock.co Team brought their product to research a way to integrate the wunderbar into their product to make use of NFC tags on the keys of their customers customers [Android SDK]
gestureBeacons - think of a scenario where a shopping window interface would let you swipe a beacon to rotate a mannequin to see a combination from behind and control a PHILIPS hue to see it in different colors [webAPI]
Supermap/Wunderbahn - scan your color coded station and your destination to get a charlie-plexed LED station matrix lead you the way, this idea was from Tito and Ema, who were joined by John [webAPI]
The hacking
Two hours in the contest and we created the github repository, found our libraries and tested our canvas with additional mouse events, while still waiting for a wunderbar. Turned out that so many wunderbars were present, that the “onboarding” process for the sensors failed (all SSIDs and BTLE names were the same) so every wunderbar had to be onboarded in a separate location. After 30 minutes with the wunderbar their cluster server broke down, but it was lunchtime and I was trying to burn the firmware on the Grove/Bridge module over BTLE afterwards. With no luck we had to ask the Team to do it again, the first time was for the color sensor to deactivate the onboard white LED, which was so bright that the color readings were wrong. Until half past ten the server was down, leaving everybody not able to work with the wunderbar for 9 hours. Not a good start for a contest all about the wunderbar!
But with all the hassle we still got our project to a surprisingly stable and presentable state over the following 15 hours. Post-wunderhacking the judges came in to watch each project presentation with the other contestants.
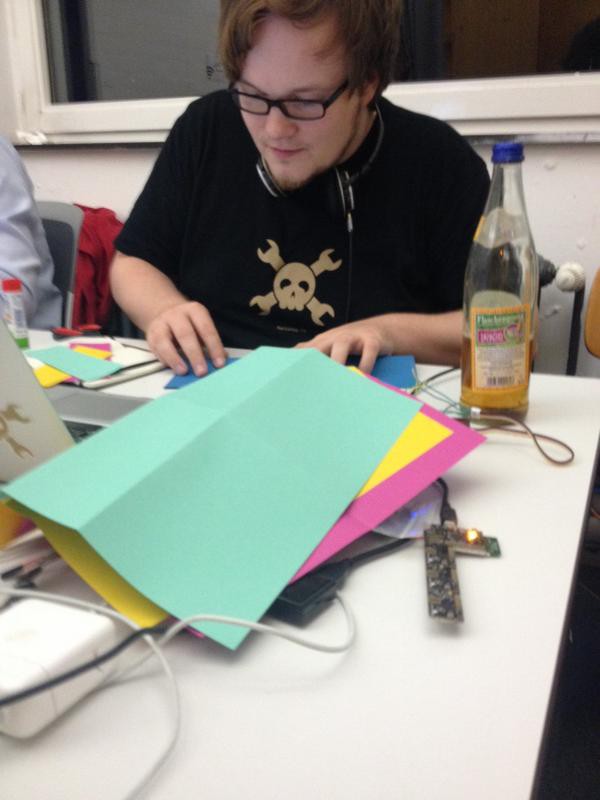
The results
Keybox realized early that the wunderbar was overkilling their product and used the time and atmosphere to brainstorm their product flow instead. Babybico actually managed to deliver an android app that also pushes data to a smart watch, when the accelerometer and microphone...
Read more -
Game Boy Printer vs. Arduino
09/23/2014 at 21:41 • 0 commentsI won the fubarino a while ago on hackaday.com because I worked a little easter egg into a Game Boy Printer library for the arduino. The printing from code was a work around since I never got the serial running. I ran into problems though, trying to print more than 2 arrays of 640bytes and thought that while my code reached a compiled size of 8kb+ that my cheap chinese arduinos where just faking the 32kb and the code would not fit. Like any other project it went into a box until sunday some one contacted me on github and I got motivated to get into it again.
I tried 2 arduinos and again bricked them and had to install the bootloader over ISP, to get them working. At one time I started noticing jitters on the serial line. So I googled for maximum array sizes on a arduino and I finally found the problem and the solution. The atmega328 has 2kb of SRAM and this is where the values are stored, so having 3 x 640 (1920) bytes is definitely overkill.
http://playground.arduino.cc/Main/CorruptArrayVariablesAndMemory#Array_example_and_comparison
Storing the picture in flash finally let me print up to ten rows of a picture, which was the maximum the printer could take before printing. But I wanted to be able to print endless pictures and after printing there was always a boarder of 3 rows and 1 row starting the next part. That was finally fixed when I found that the printing command contained the margin before and after the prints. With that fixed I was able to send multiple lines, but they were all just fired on the printer and only one row got out. Then I noticed, that Miles Burtons code wasn't waiting for the print to finish, so I copied the code from furrteks attiny code and bam, it worked with 17 lines of 640 bytes so far.
I also updated the code for generating the arduino lines on my webpage to give out progmem values and created a canvas based html5 page on http://davedarko.com/canvas/ - be warned that the pictures will also show on http://davedarko.com/gameboy.php
What an adventure! I'm not sure how I will proceed from here, I like the web based approach and don't want to make a processing app, working the algorithm again. So, internet of things stuff for a 16 year old printer anyone? Arduino and ENC26J80 maybe?
-
thoughts and links for game boy cartridge stuff
09/02/2014 at 09:42 • 9 commentsSeems like every month I stumble over an idea and can't get rid of it. This time of year I always get nostalgic and thought about using the fubarino as an cartridge reader and programmer for simple eeprom cartridges. I'm already developing a little board to start with the interface. I wonder if the fubarino could also act as an cartridge itself. Nice stuff to get started. I'm also interested in those memory bank controllers and how they work.
I had to make a part for the edge connector, great exercise! Although I'm not yet happy with it, because the pads aren't long enough. Wiring was a mesmerizing nightmare :D
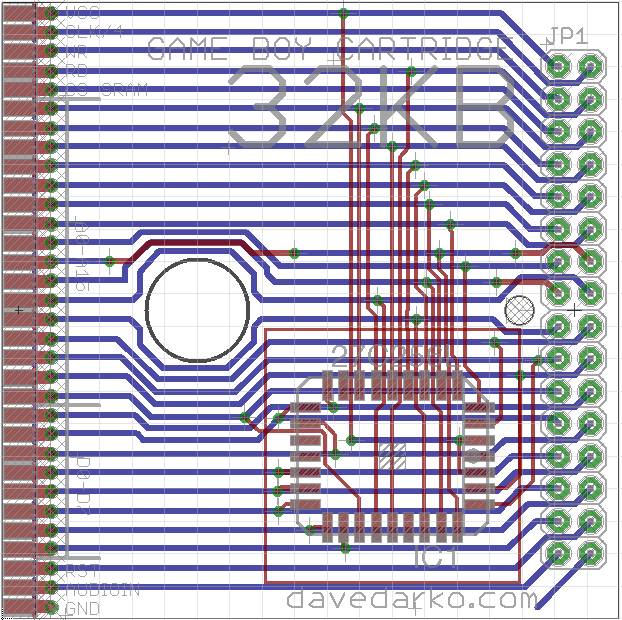
And here is a list that comes in handy to resource games I could clone on this simple device. I have no idea what I am doing, but that is always the most interesting part.
http://www.devrs.com/gb/files/gbmbcsiz.txt
Funny thing about the price, it would not matter if I order 3 eeproms and 3 oshpark boards vs. 10 eeproms and 10 dirtypcbs. Kind of strange, but there are more then 10 games out there with 32kb so worst case scenario would be having 10 games. But I also want to program stuff myself and hope to get some GPIOs working - get that wifi dongle http://hackaday.io/project/2879-ESP8266-WiFi-Module-Library to work :D - in theory you could get a controller pull your twitter feed, store it in ram and have a program read it out. Seems like a good amount of work and a long life project.
Another cool cartridge concept is to have an arduino library for it, and the gameboy would fetch data to display and safe the button states so the arduino knows what button is pressed. This way you could use it as a remote.Maybe it is possible to come up with an mbc-1 clone to adress more memory.
Some general informations:
http://www.reinerziegler.de/
http://meatfighter.com/gameboy/TheNintendoGameboy.pdf
Great help for opening the cartridges:
[german, but the pics give it away]
http://www.retro-universum.de/howtos-und-anleitungen/offnen-von-alten-game-boy-spielen/ -
upcycled my first atmega8 board
08/15/2014 at 11:01 • 0 commentsA friend told me once that her flatmate wanted to build a LED cube and I was like "pfff, I can do that..". I started to look for LEDs and stuff I would need, but had so much stuff laying around, that I said "use the stuff you already have" and harvested LEDs from a LED array of a flash light and used some big copper wires for the frame. My first Atmega8 was directly soldered in a messy way on perfboard - I corrected the dimensions and burned the atmega8 bootloader on it (including the auto reset "circuit" for the ftdi adapter).
That was 10months ago. Yesterday I finally joined the atmega8 board with the LEDs and programmed a crappy animation on it. Sometimes it feels good to not over engineer stuff and just go with it.
TIP: if you have clear glass LEDs like me, use some white acrylic paint to diffuse them.
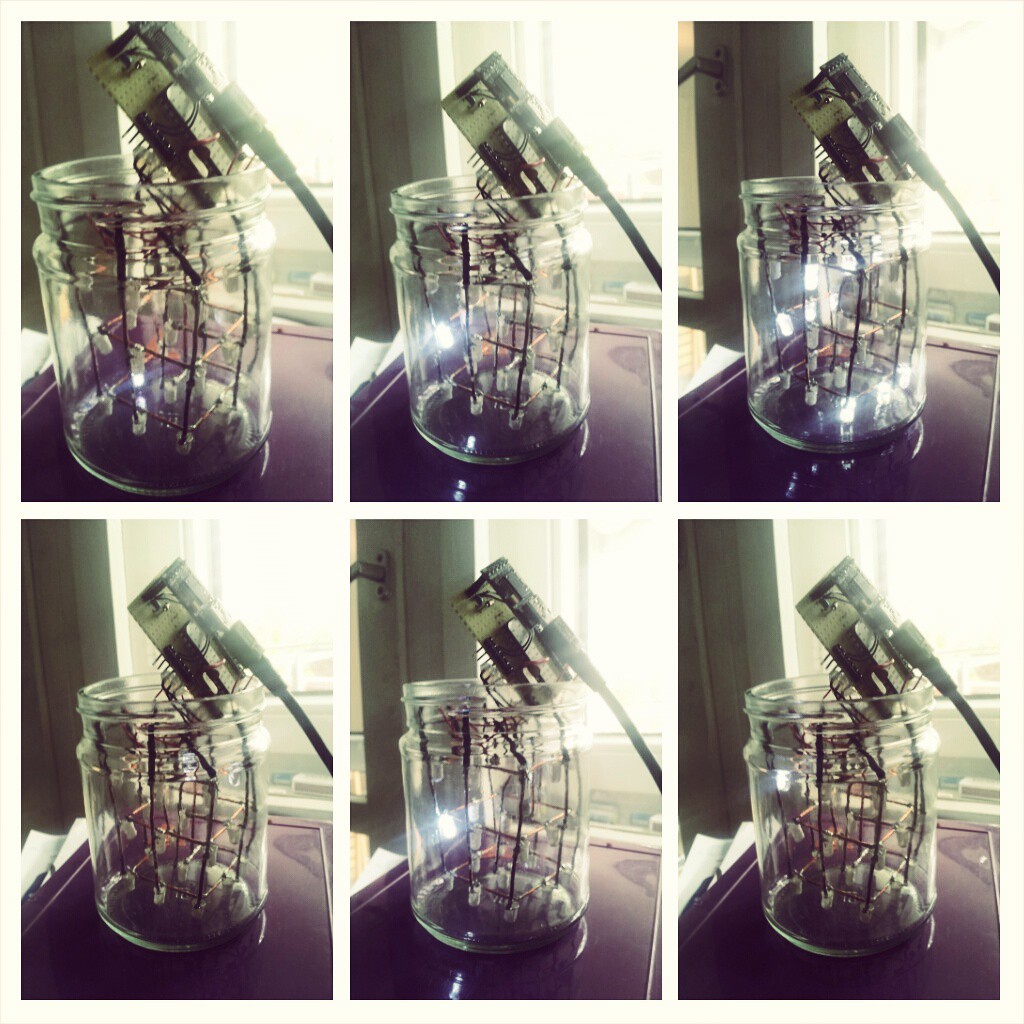
-
Charlie plexing/muxing/xing
07/25/2014 at 08:02 • 8 commentsYesterday I was chasing duo/bicolor LEDs on ebay.com because I read about blue/red ones on Reactron Integron for Automobile from Kenji Larsen. It never occurred to me that they weren't only red/green ones anymore. Inspired by this I made a 3x5 (15) LED matrix board with charlieplexed pinout in the hope I will be able to make a sometimes purple/red/blue display or colored temperature thingy. This will give me some coding experience since I have to come up with some array magic. I still haven't found out how I can tent the vias in eagle so OSHpark will add the solder stop mask over. The next iteration will probably have 1206 resistors on there and after that I'm going to order the 11*10 matrix I have already designed. This big matrix is perfect for a word clock project but I would need to check my software before. I'm also interested in a clock design as supposed to be seen here: http://hackaday.io/project/1480-Charlieplexed-LED-Clock this would need 9*8 (72) pins (60 for minutes and 12 for the hours) and a good positioning/addressing system.
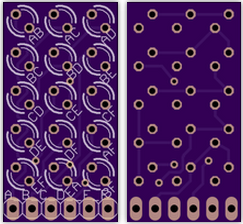
Awesome links
https://dl.dropboxusercontent.com/u/4345112/www/mrule/charlymuxing/charliemux.html
http://tomscircuits.blogspot.de/2010/10/charlie-cube.html
[UPDATE] Final results
I had to solder two jumper wires to make the connections to fix the somewhat buggy display, but now it's all worked out :) I bought red-blue and red-green BI/Duo LEDs.
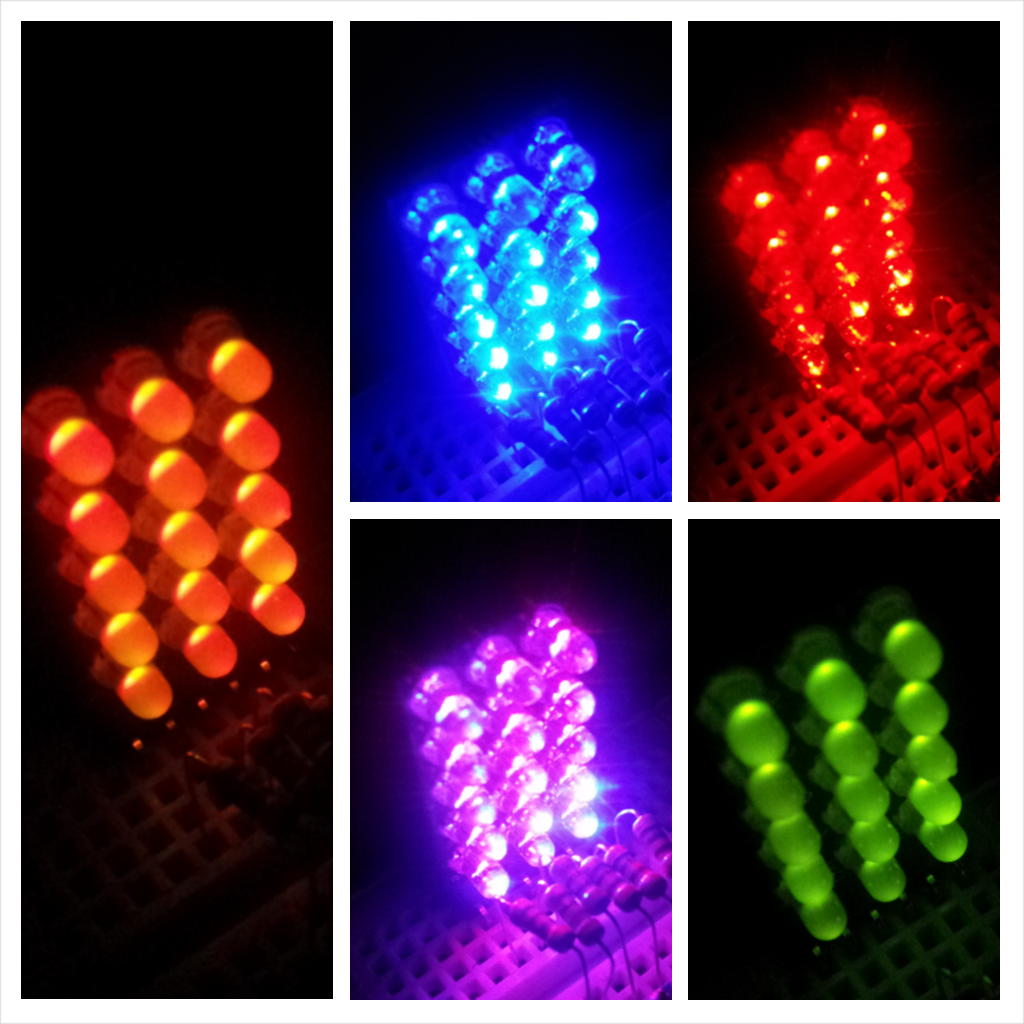
-
Brainstorming an Open Bicycle Computer
07/07/2014 at 12:59 • 18 commentsSo I took my bicycle out to my parents, about an hour ride and I noticed that it's quite embarrassing as a tinkerer not having my own arduino based bycicle computer. I've looked around the web and could not find something satisfying to start with, only a youtube video
The software seems to be a good starting point, but it's not complete and the hardware lacks at least a case and a pcb. So right now i'm collecting things one could do with an arduino based bycicle computer. Which information is relevant for me, what should it at least do, what could be nice to have etc.
- front lights integrated
- bell / ring / signal / horn to scare old ladies walking on bicycle lanes
- OLED display for good visibility
- a decent connector between bike and computer
- power source for lights
- chargeable through dynamo
- speed / travel time / distance
- breaking lights would be cool
- pedal movement tracking ("I drove 20 miles today, down hill, food free, calories burned: zero")
- temperature (40degrees celsius - sheesh)
- backlights blinking when a car gets closer
-
Oh how I love props
06/19/2014 at 21:18 • 0 commentsI recently got distracted from everything when I saw a quantum device from the canadian show "continuum" on thingiverse.com and had to make my own version of it, because I wasn't happy with the file someone uploaded. So I made this; 8 different parts, holes for magnets for the snapping effect, researched wobble positions.
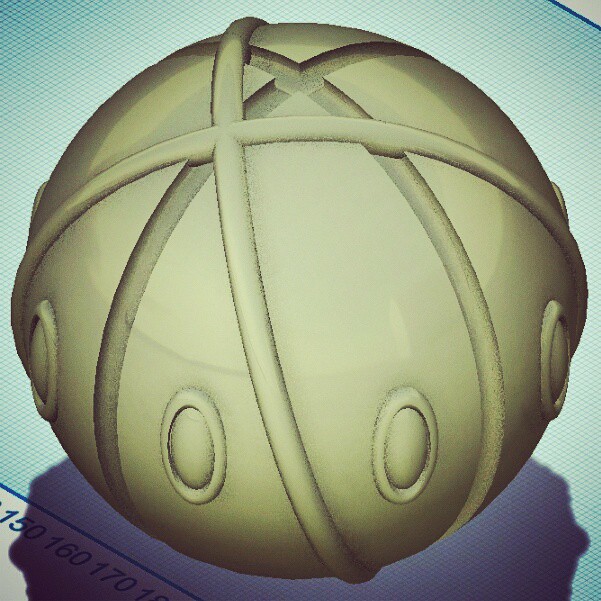
http://www.thingiverse.com/thing:365370
I have printed 6 1/2 parts right now. My printrbot simple intends to shift sometimes on the x axis so I had to stop the print and rip of the layers printed wrong. By printing the top half of the part and hot-glueing them together I'm going to save about 4 meters of plastic I would have to throw away. By extruding PLA manually I can easily fix holes and gaps in the parts and it worked before. It would be cool to have a beacon activated when all the parts are put together.
-
project ideas for fubarino anyone?
06/09/2014 at 18:25 • 0 commentsSo i won a fubarino on hackaday a while ago and still haven't figured out what I should or could do with that thing. It's calling for something awesome but my head is full of blinking leds right now... I never really reached the constraints of an arduino with an atmega328, so I'm asking for ideas.
-
future projects
05/22/2014 at 15:54 • 0 commentsFlying keyfob
I still have a keyfob camera laying around and always wanted to make it fly. I frankensteined it to make time lapse pictures like a "drop and shoot for hours or days or years" device. would be cool to see it fly from my 18-floor house I live in, using some cellphone wideangle lenses I have to dig out.
Bicycle PC
kind of embarrassing with all that tinkering I never made an arduino based bicycle pc. would be great to store your tracks and times on an SD card and it's just measuring the time between "clicks" from the reed switch. I may have an easy way to interface it with the web without hurdling around with apps, bluetooth and stuff but still be connected to your mobile one direction. All in all a bicycle pc nowadays should not stop there. It should be integrated with it's own power supply, be loaded by you through pedals, control the lights using light sensors and delayed off switching when waiting on a traffic light. It should be working without your cell phone, but even better with it.
Scorcher 6x6
Found my rc car from the 90ies on ebay without any remote. I've already ordered a big motor bridge for the 2 500mA motors and a new battery and probably throw in an arduino with a bluetooth module and recreate the larsson scanner like seen here. There are some parts broken that I have to print in 3D, like a front wheel.
emiglio / emilio
I found it once on ebay and got it for around 10bugs. It's huge! I stripped the electronics from the head to replace it and the 2 shells of the head are fitting my head like a helmet (that's not easy - biiiig head). The gears are broken and I have to make a copy, probably make a silicone mold and cast it in resin, but thats two things i've never done before. I hope to throw in a raspberry pi in there or use my prize from the contest I won on hackaday once (a fubarino). I also found 4 PIR sensors in the garbage, still working (they were black and the house owner wanted white ones I guess) - saved me 20bugs.
solar turtle bot
I want to work with solar cells and 2-3 servos creating a little walking bot that seeks light and stays there and if the light is out it will retract its limbs and head.
tree climbing bot
I'm not sure whether it will jump from branch to branch or use some grappling hooks and other cool stuff... like pretending to be a spider.
R2D2
I'm ashamed to say that until this year I had almost nothing related to star wars laying around. Since may the 4th there is now a $0 lightsaber built and my project from the ewok movies.
LED matrix stuff
I ordered so many led matrices I wanted to use for clock projects or just liked their form factor so much... I got them in 8x8 and 5x7 in different colors and sizes. This is a stargate atlantis hommage.
-
Solarlamp Project Idea
05/03/2014 at 17:30 • 0 commentsI just figured, that it would be cool to have some solar lamps that would get red if the soil moisture is too low.
Some links for later:
http://www.cheapvegetablegardener.com/how-to-make-cheap-soil-moisture-sensor/

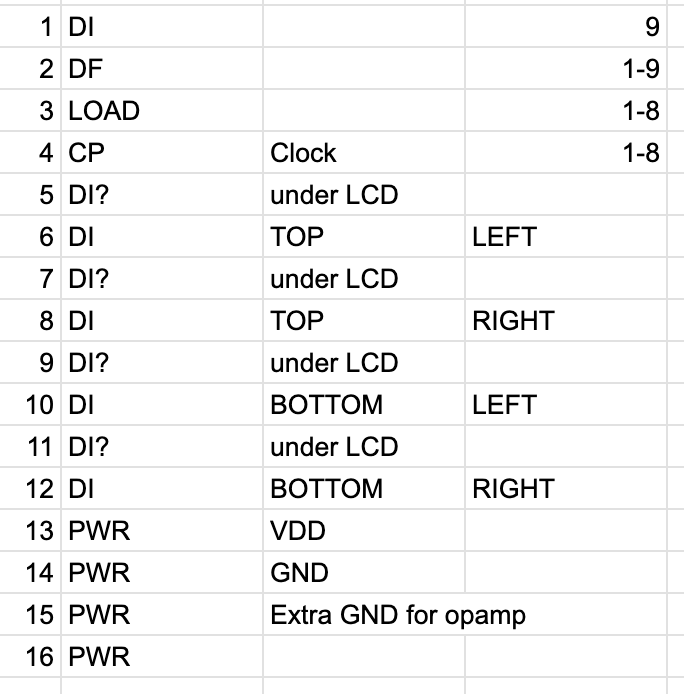
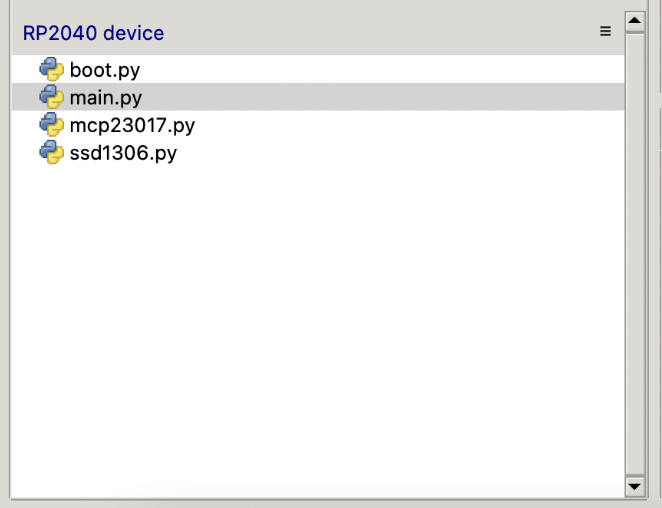
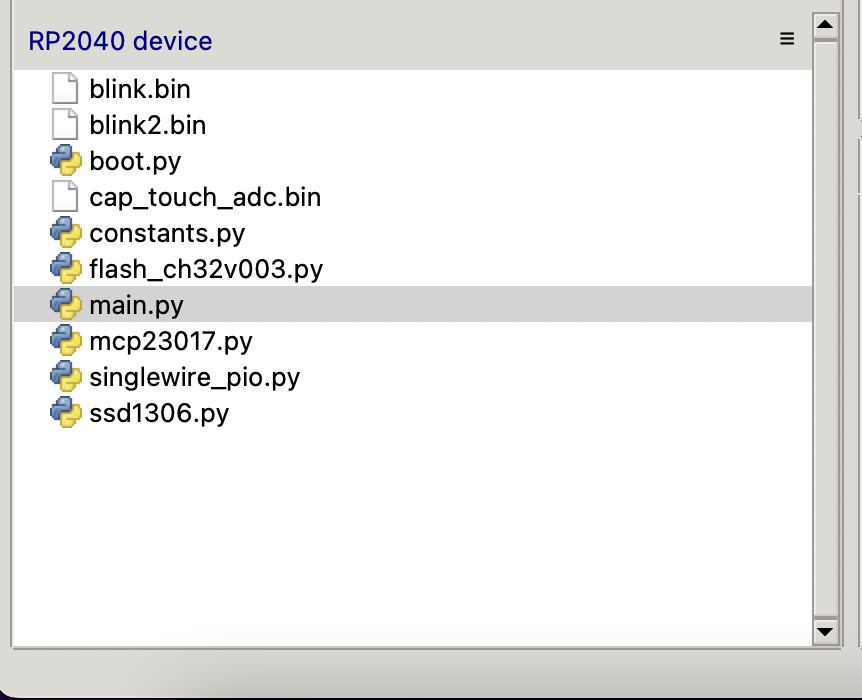
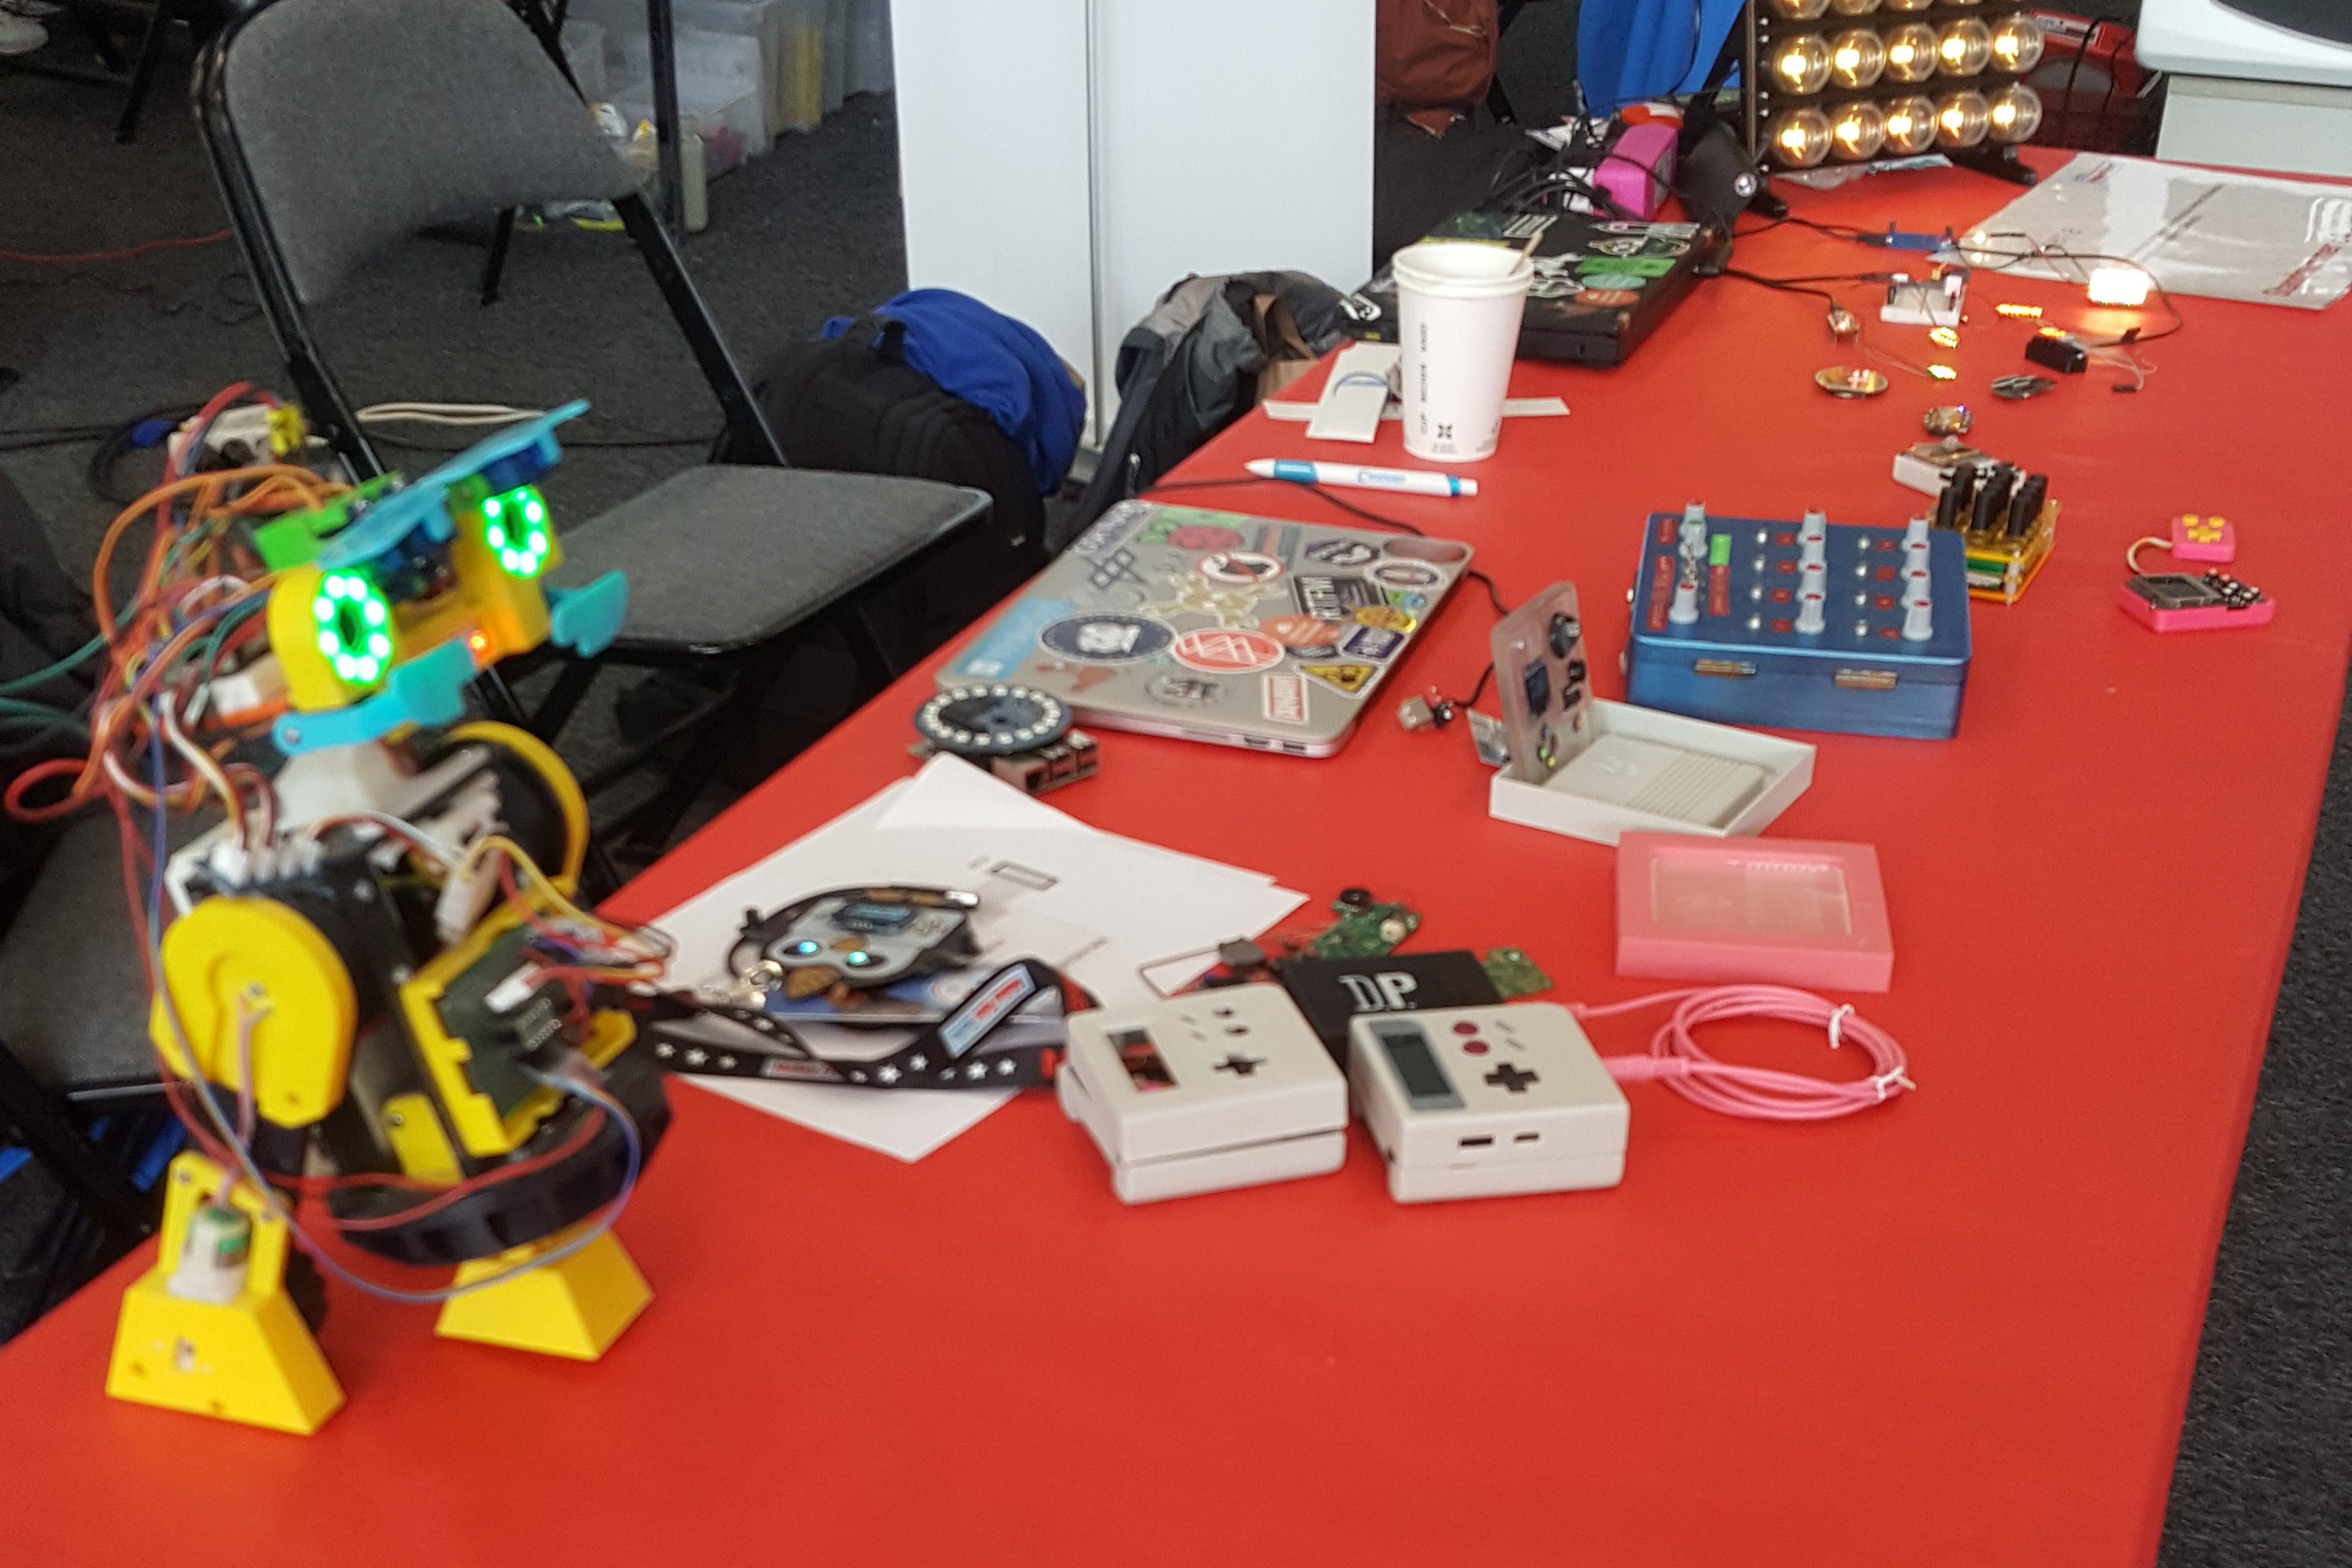
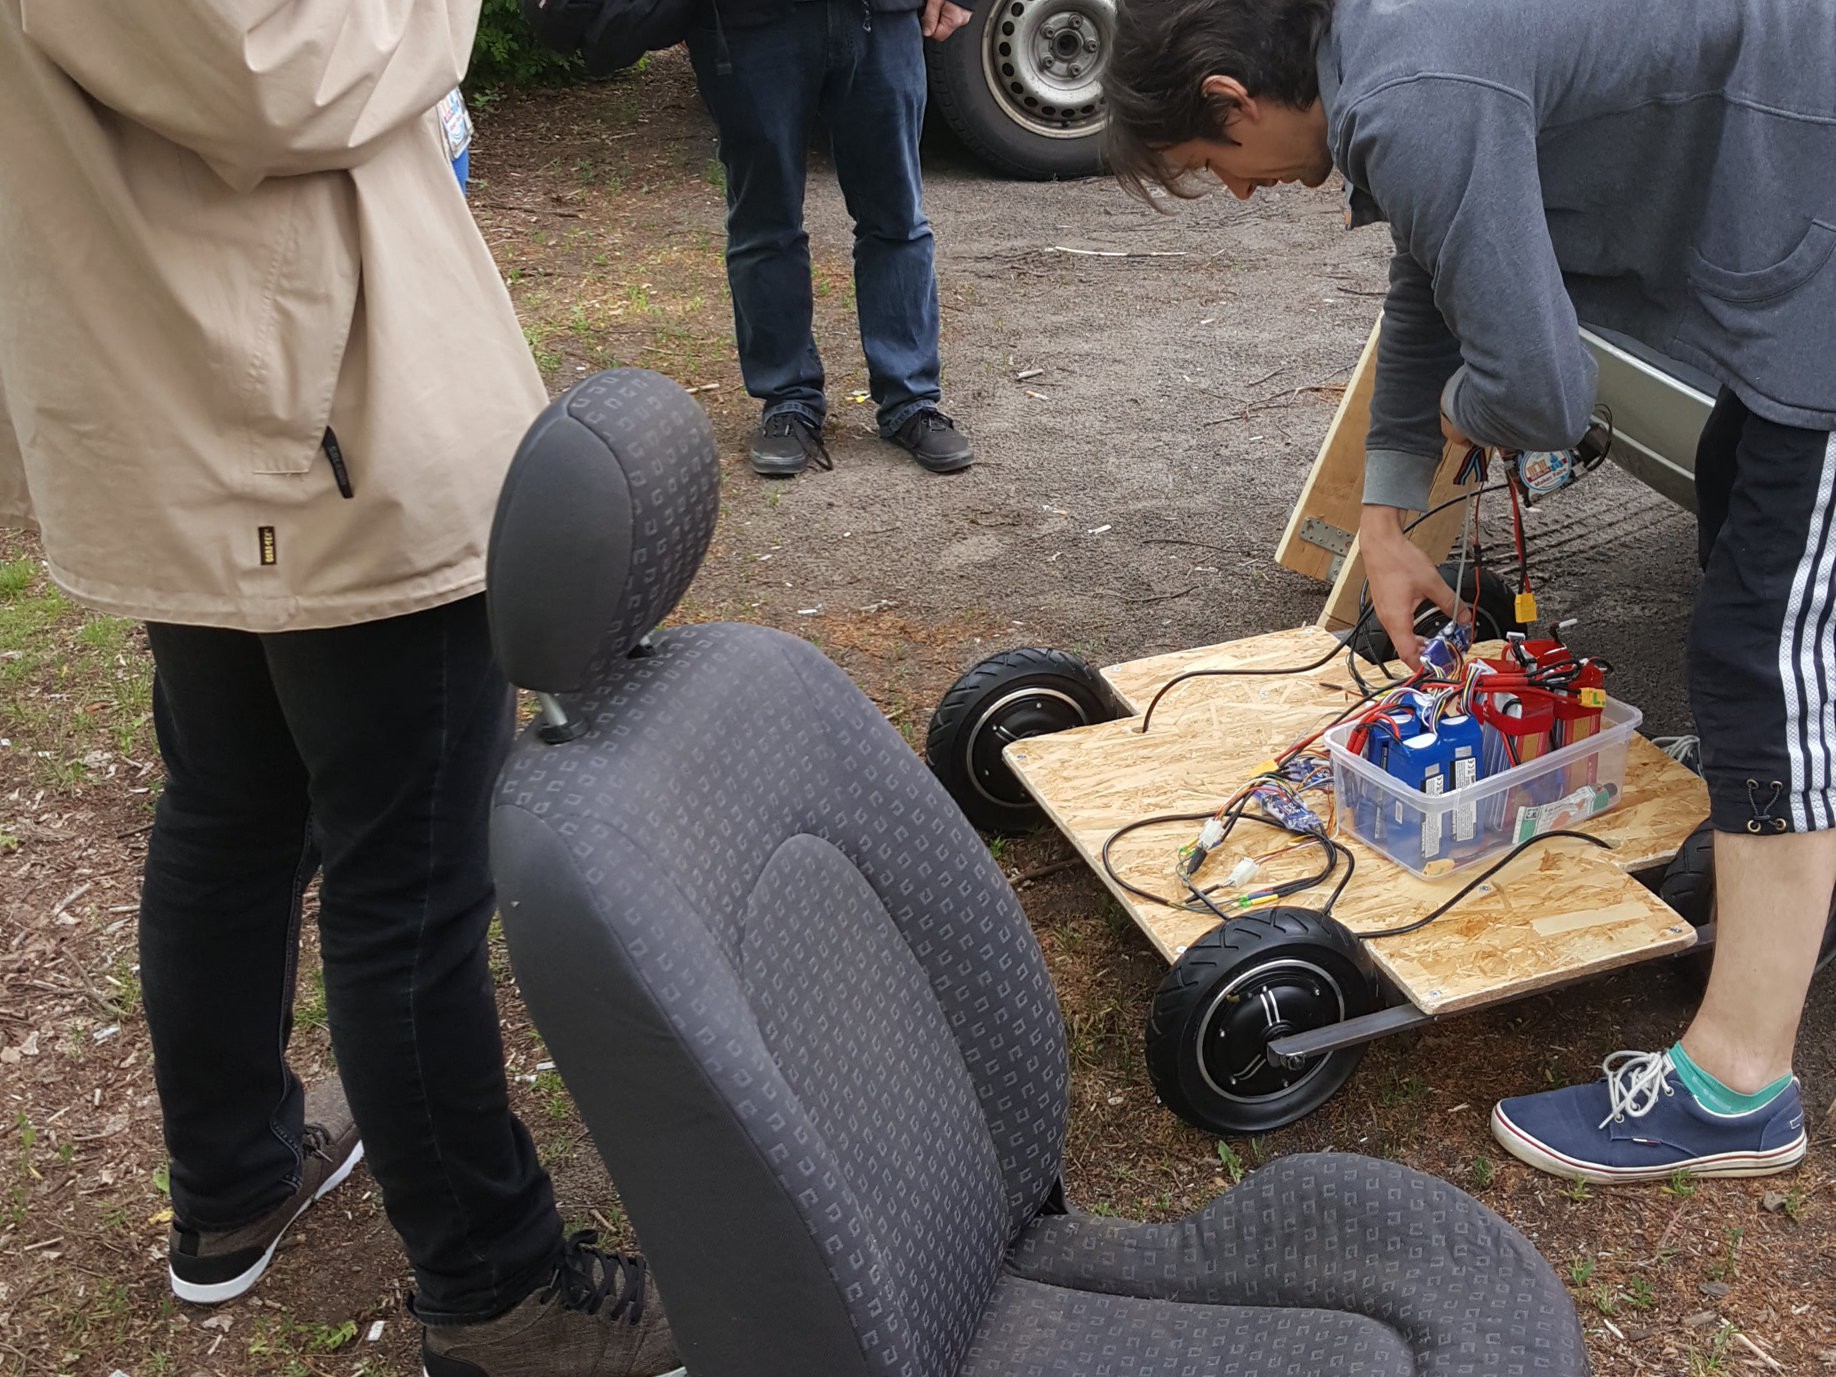
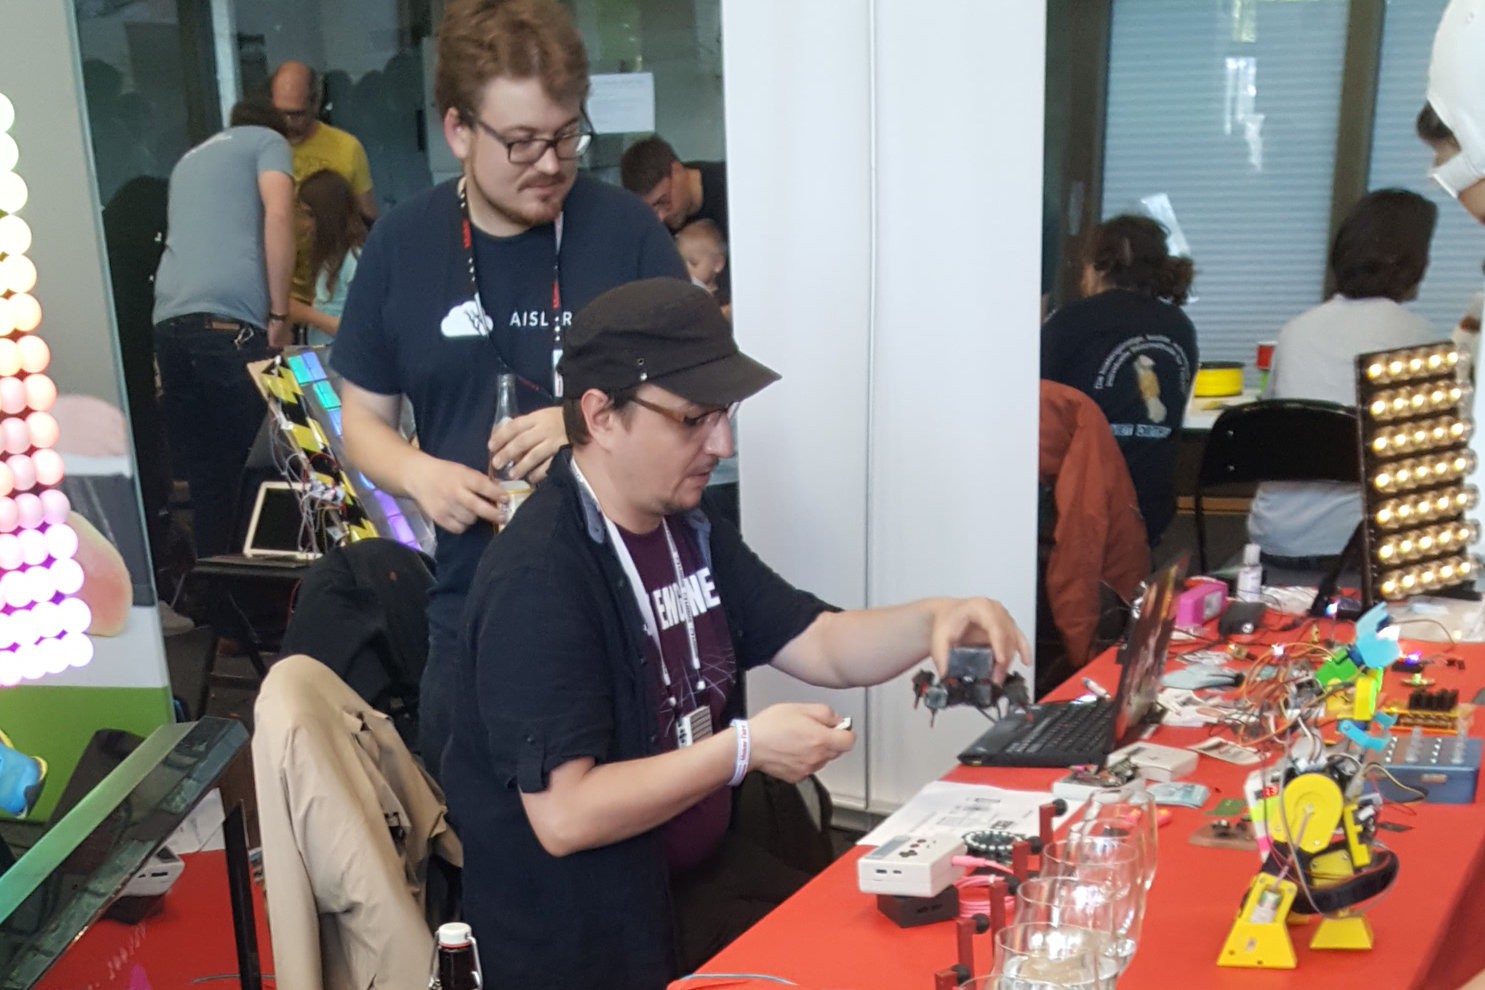
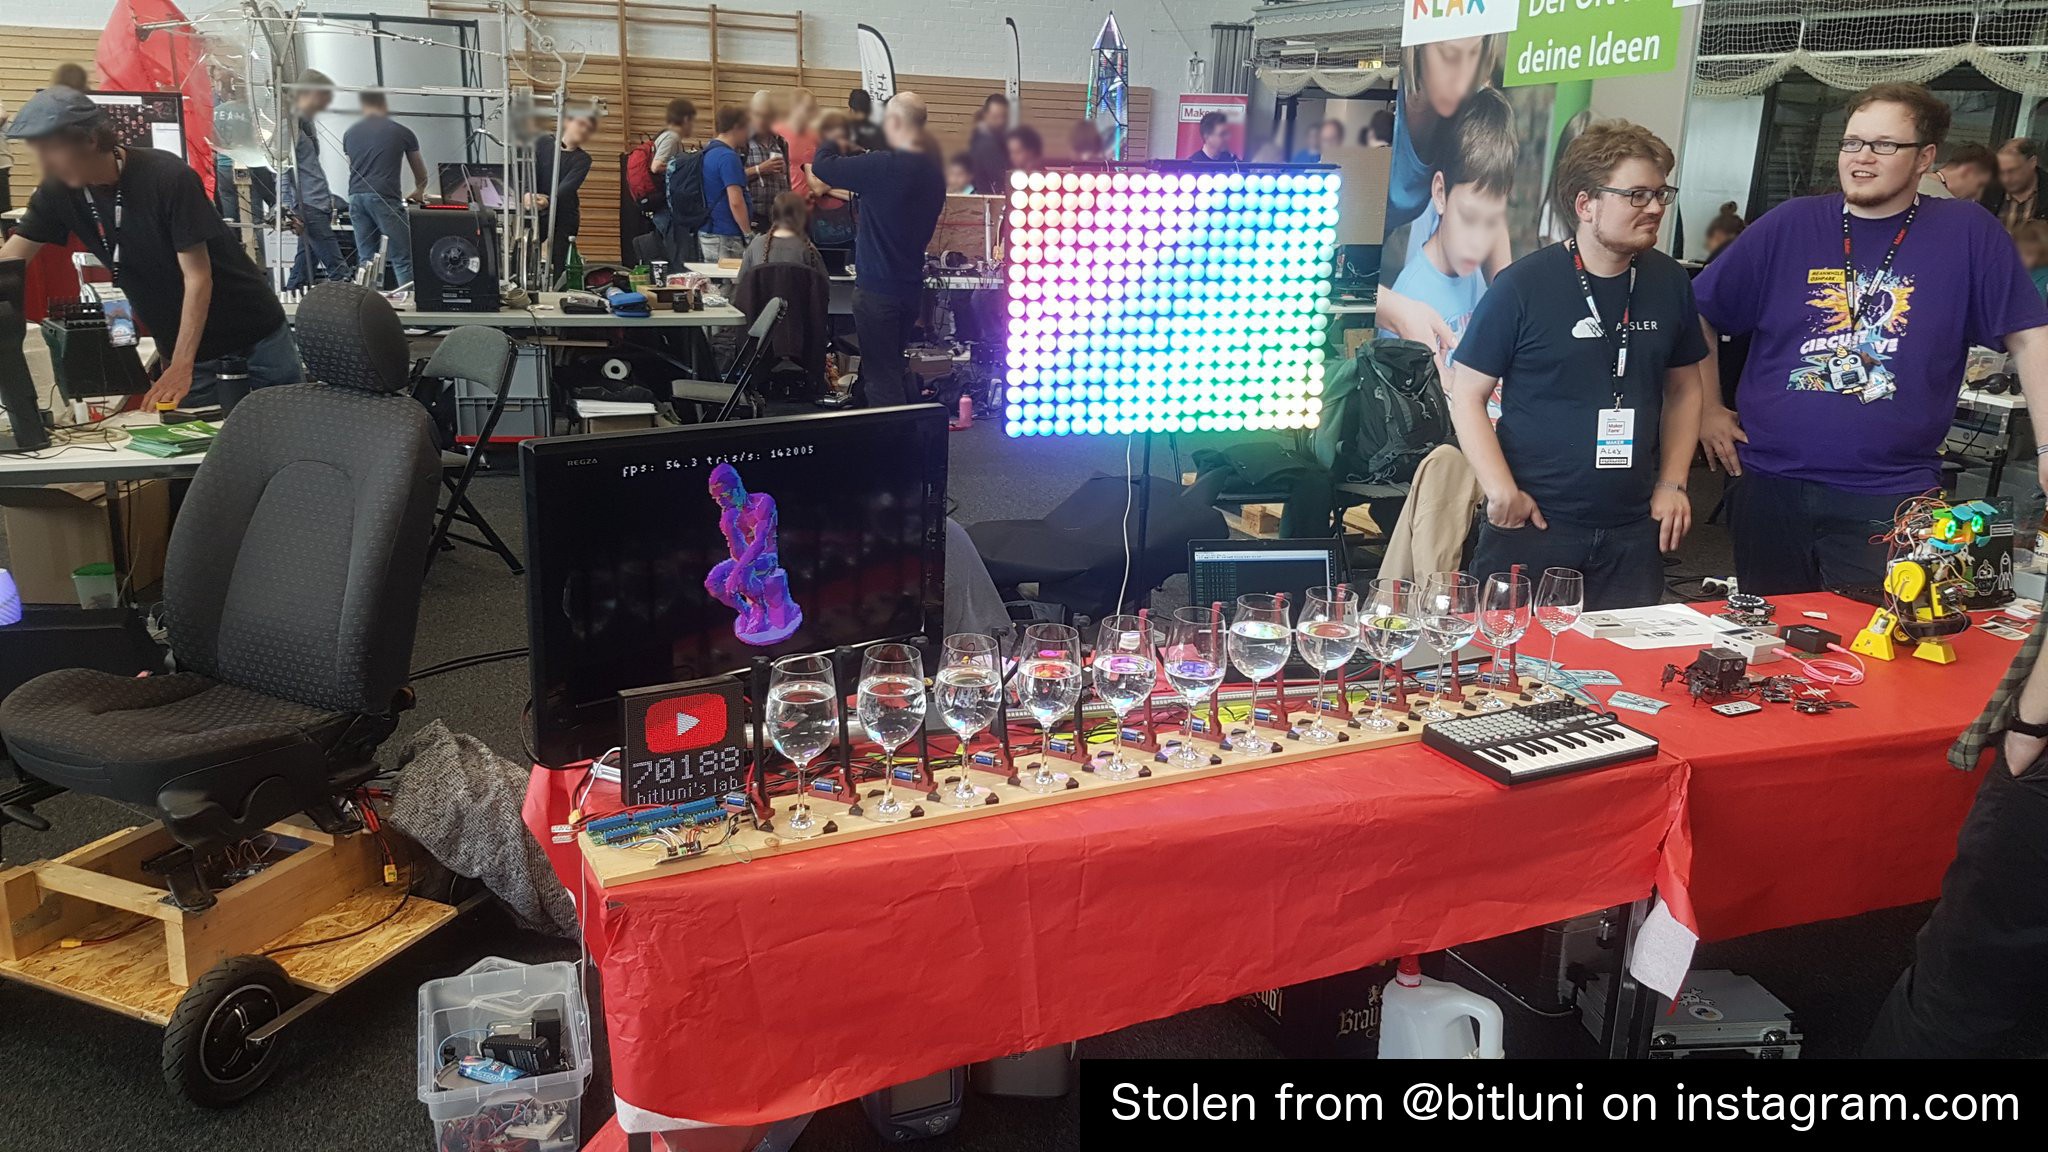


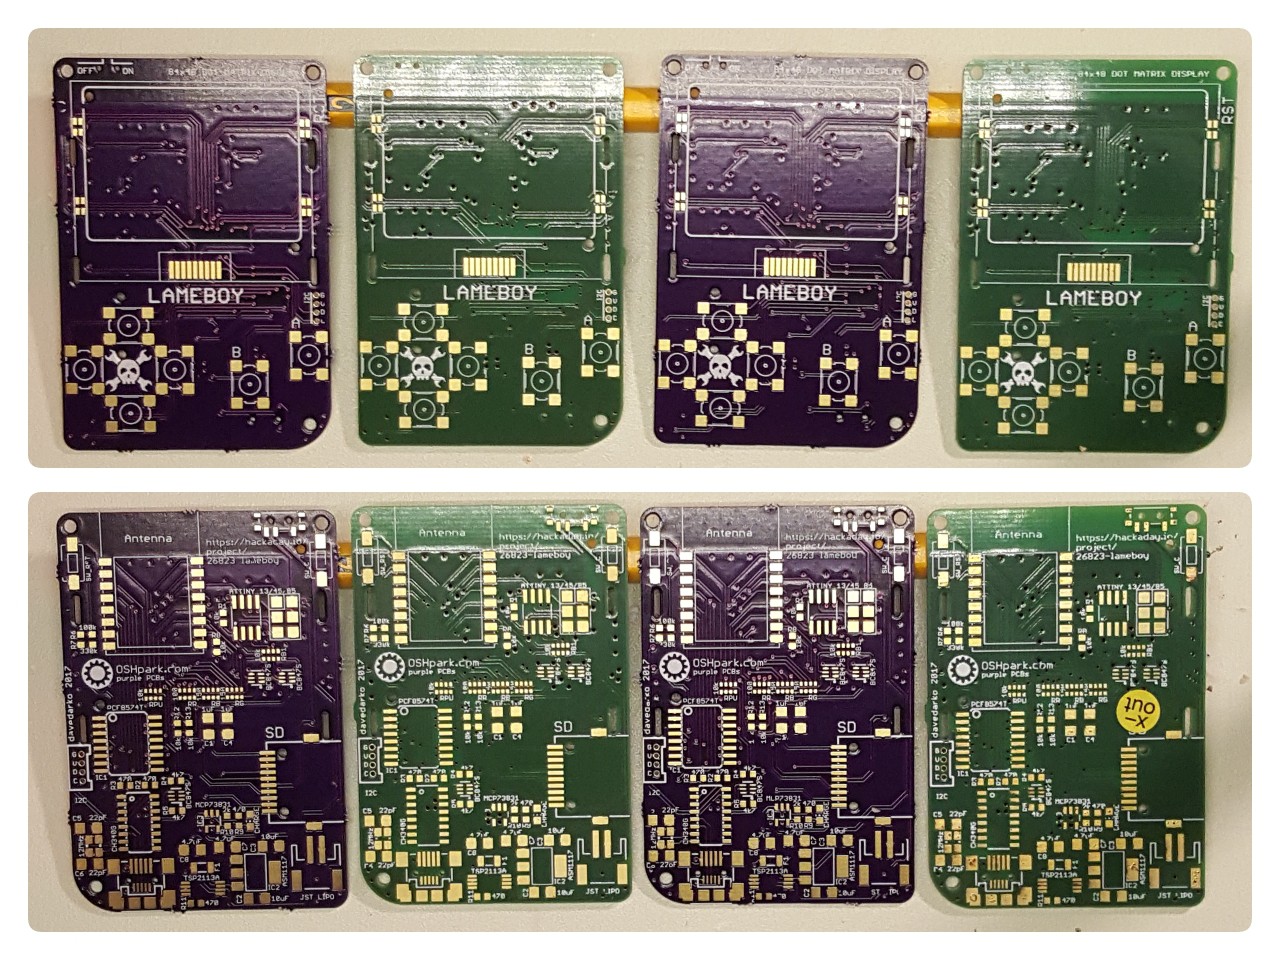 As you can see here the
