richardginus
-
More WiFi power
12/10/2014 at 21:05 • 1 commentLast weekend i dragged the whole setup to the flying field. After 10 meters the control became intermittent. How is this possible after the successful earlier tests? On the flying field there is no power available so i could not use the ground station i built. So i used the WiFi adapter from the FTU with a laptop and a "Micro" USB WiFi adapter. That didn't work.
Today the WiFi adapter i ordered came in the mail and i have been testing it.
Using wavemon i found the adapter was performing around the same as the built in adapter in my laptop. The transmit power reported was 100mW.
The reason i bought this specific adapter in china was because it had the following features:
- Small and light
- RP-SMA connector
- 1000mW tx power
So where are my 900mW?
So the maximum allowed transmit frequency is not the same in every country. This is controlled by the driver of your network card. To change this in most linux distributions use the following instructions.
First find the name of your card with ifcofig. Usually this is wlan0. Replace NAMEOFYOURCARD in the following commands with with the name of your card and run the following commands:sudo ifconfig NAMEOFYOURCARD down sudo iw reg set BO sudo ifconfig NAMEOFYOURCARD upThis example sets the locale of your network cards to Bolivia.When checking in wavemon again the tx power was 500mW. Much better. Power saving was still enabled and i think disabling that will let the full 1000mW out of the box. I wasn't willing to try this yet without first having a good power supply.
Bye!
-
Pre flight checks
12/04/2014 at 18:16 • 0 commentsI am getting there! When the weather clears up the system will be tested at the flying field. The system as seen in the video is powered by the onboard lipo and is airworthy. I ordered another WiFi adapter and when that arrives i expect the system to be actually flyable!
-
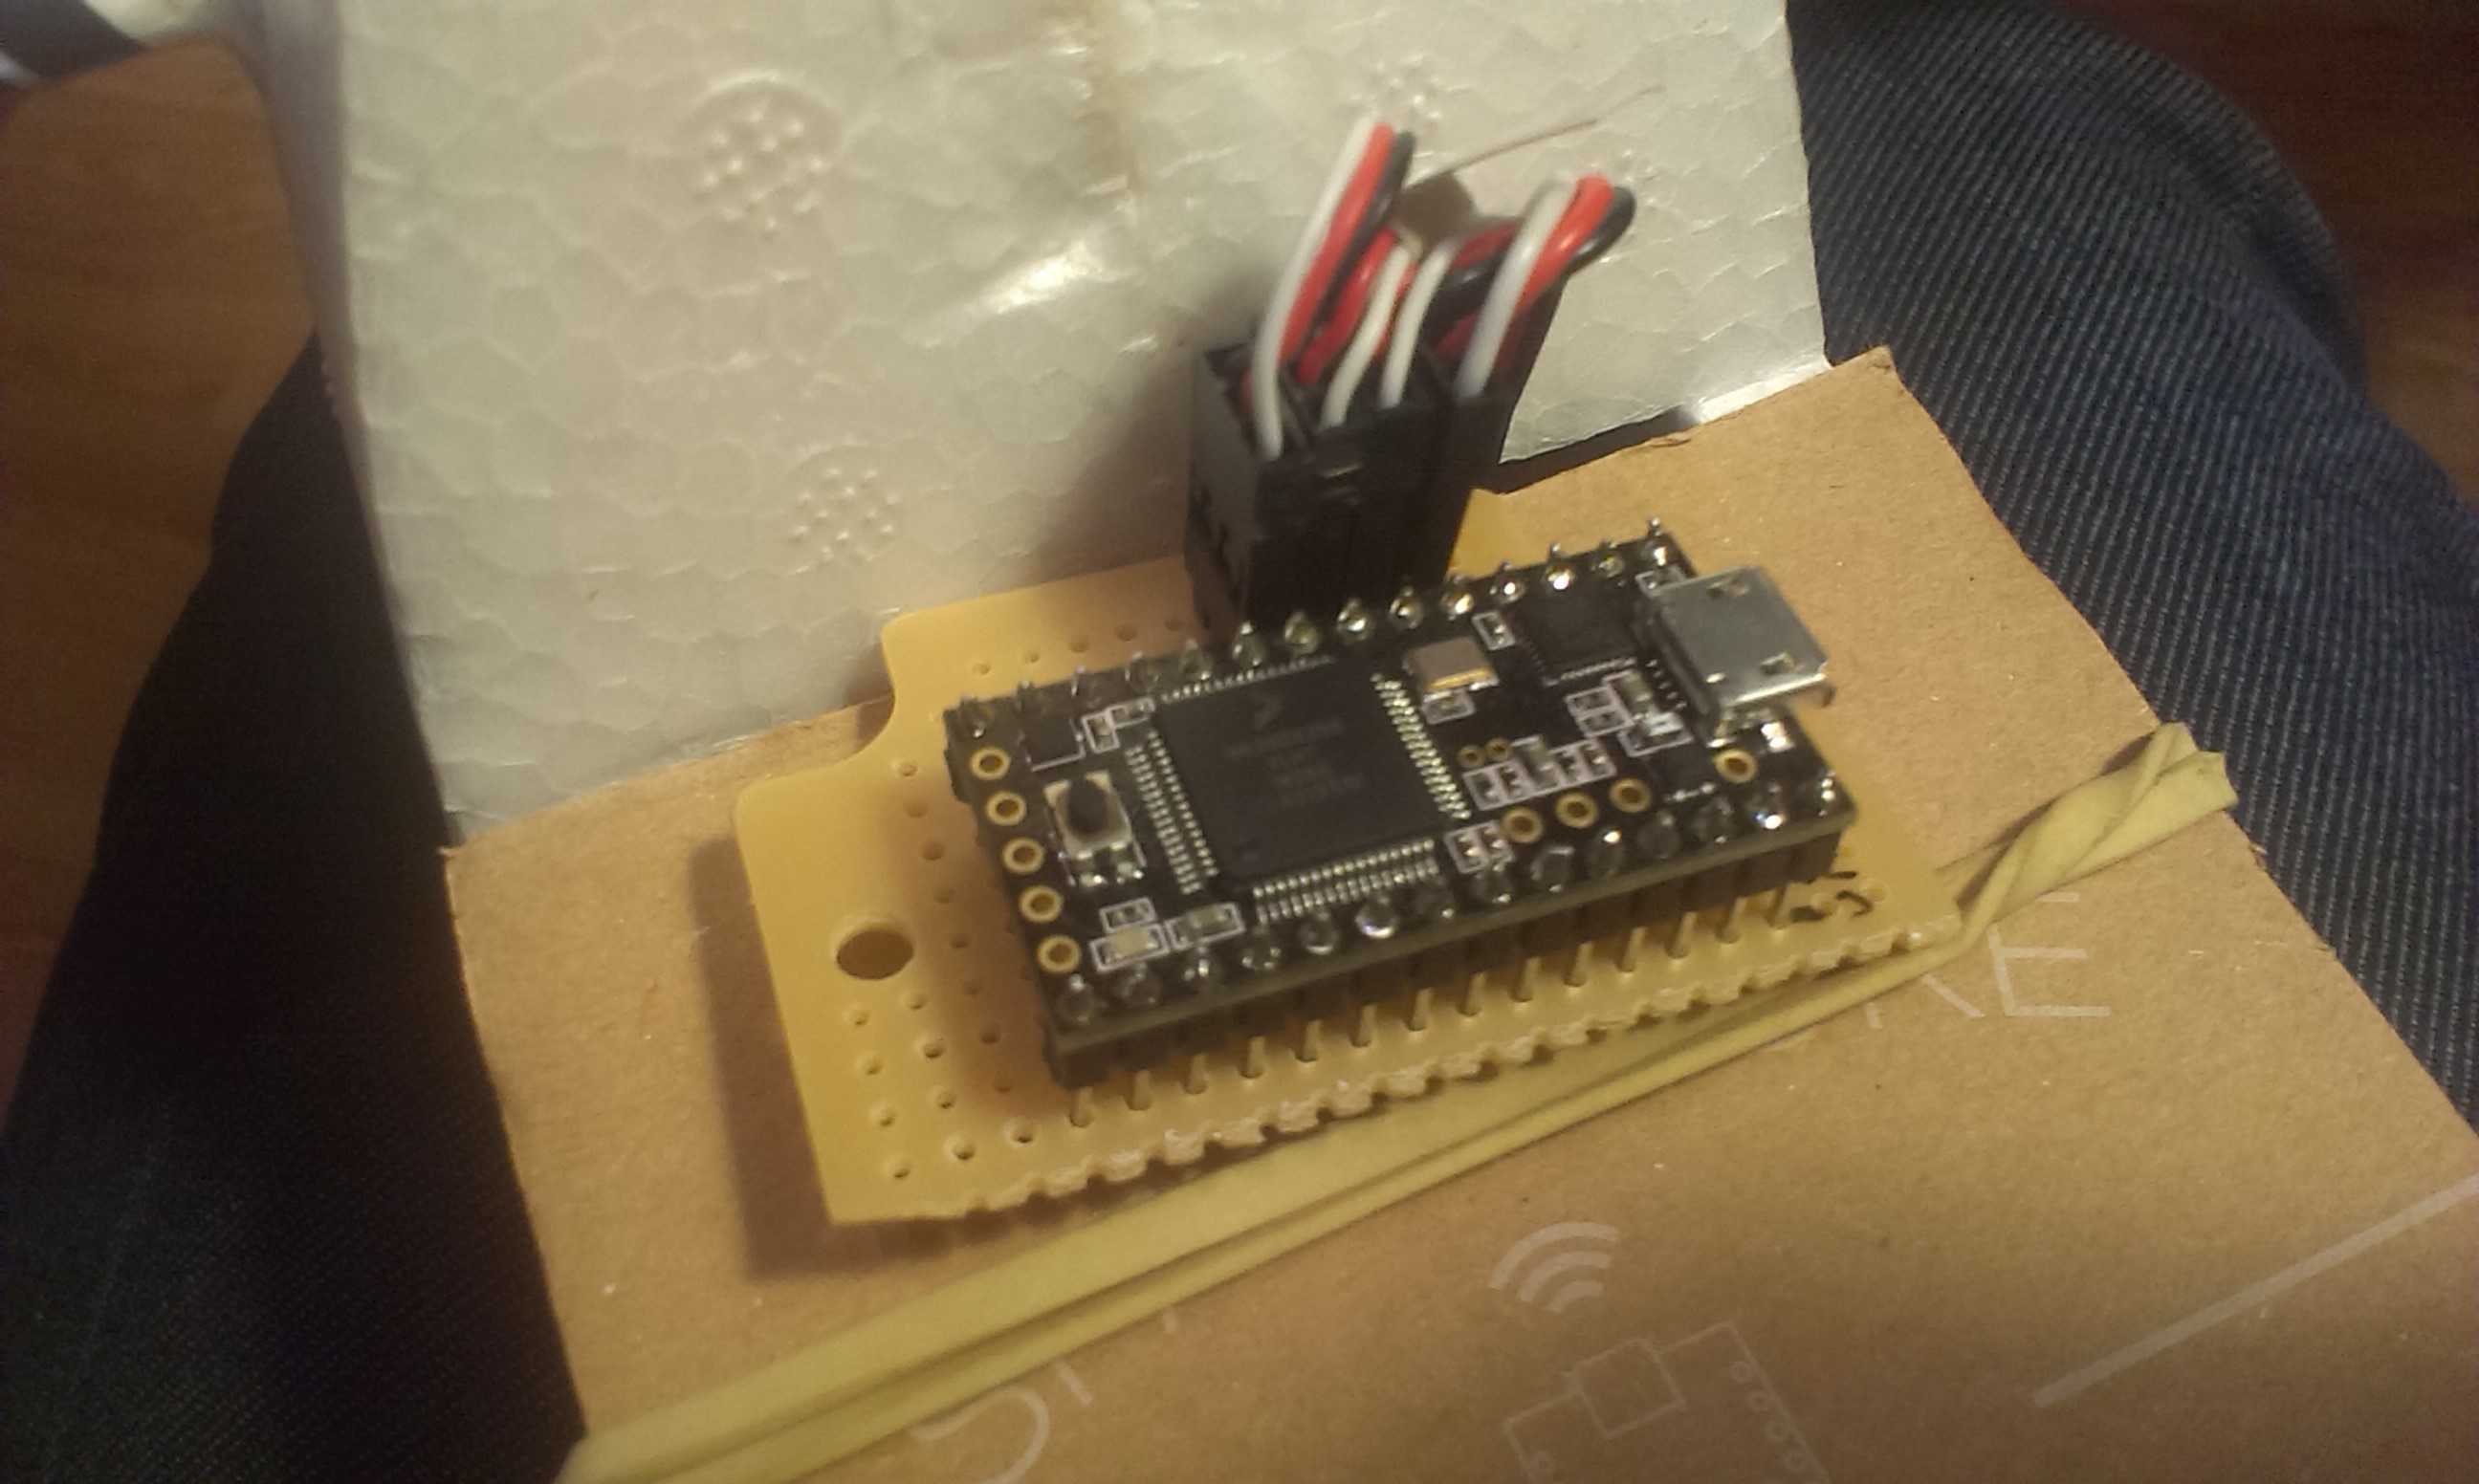
RC over IP hardware ready to be tested.
12/02/2014 at 17:26 • 0 commentsToday i finished all the hardware for the RC over IP. I used a Teensy 3.1 as a 'receiver' It communicates over USB with the Pi. There are still a few software tweaks to be done like servo rates. I would also like to change the way the servos are controlled. Currently they are scaled down from 1000 to 180 and in the servo library back up to 1856 so tuning the maximum deflection and stick scaling would solve that. There is also a issue with throttle not being zero on startup. (dangerous!)
![]()
Things work reasonably well on my bixler.
Bye!
-
Cash strapped developments
11/26/2014 at 17:55 • 0 commentsUpdate: Added a second channel. The bandwith used is 3.85 KiB/s
Looking for UHF/LRS (long range) RC systems i realized i could not at the moment pay for them. Since my interference troubles keep me from aerial testing i went with the only solution left: building WiFi based RC control.
Think of it as reverse telemetry ;-) First test went okay. I can update the servo 30 times per second and get a natural feel to it. The bandwidth is 3.85 KiB/s for two channels. The software will land in the github repo when it is capable of 4 channels, expo and trim.
Bye!
-
Field testing results
11/17/2014 at 14:34 • 4 commentsToday i tested the system in the field with the new groundstation and FTU. I reached 150 meters with a reasonable video feed. This made me confident and want to jump ahead at setting up an aerial test. I tested using my RC gear right next to the streaming equipment. The transmitter induced a 10 - 20 second delay in the video feed. The RC connection did not seem to be influenced by the streaming equipment.
Te most interesting is that the RC equipment induced a delay, but image quality remained consistent. Increasing the distance of the video feed produced a more intermitted image, but almost no extra delay.
The influence of the RC equipment on the FPV equipment was expected and should be solved in one of the following ways:
- Switch the FPV system to 5Ghz WiFi
- Switch to UHF/LRS RC control
- Control the plane over WiFi
The last one is the most risky but the cheapest
I will investigate the performance of the orangeRx openLRS system and buy it if it is good enough.
Bye! -
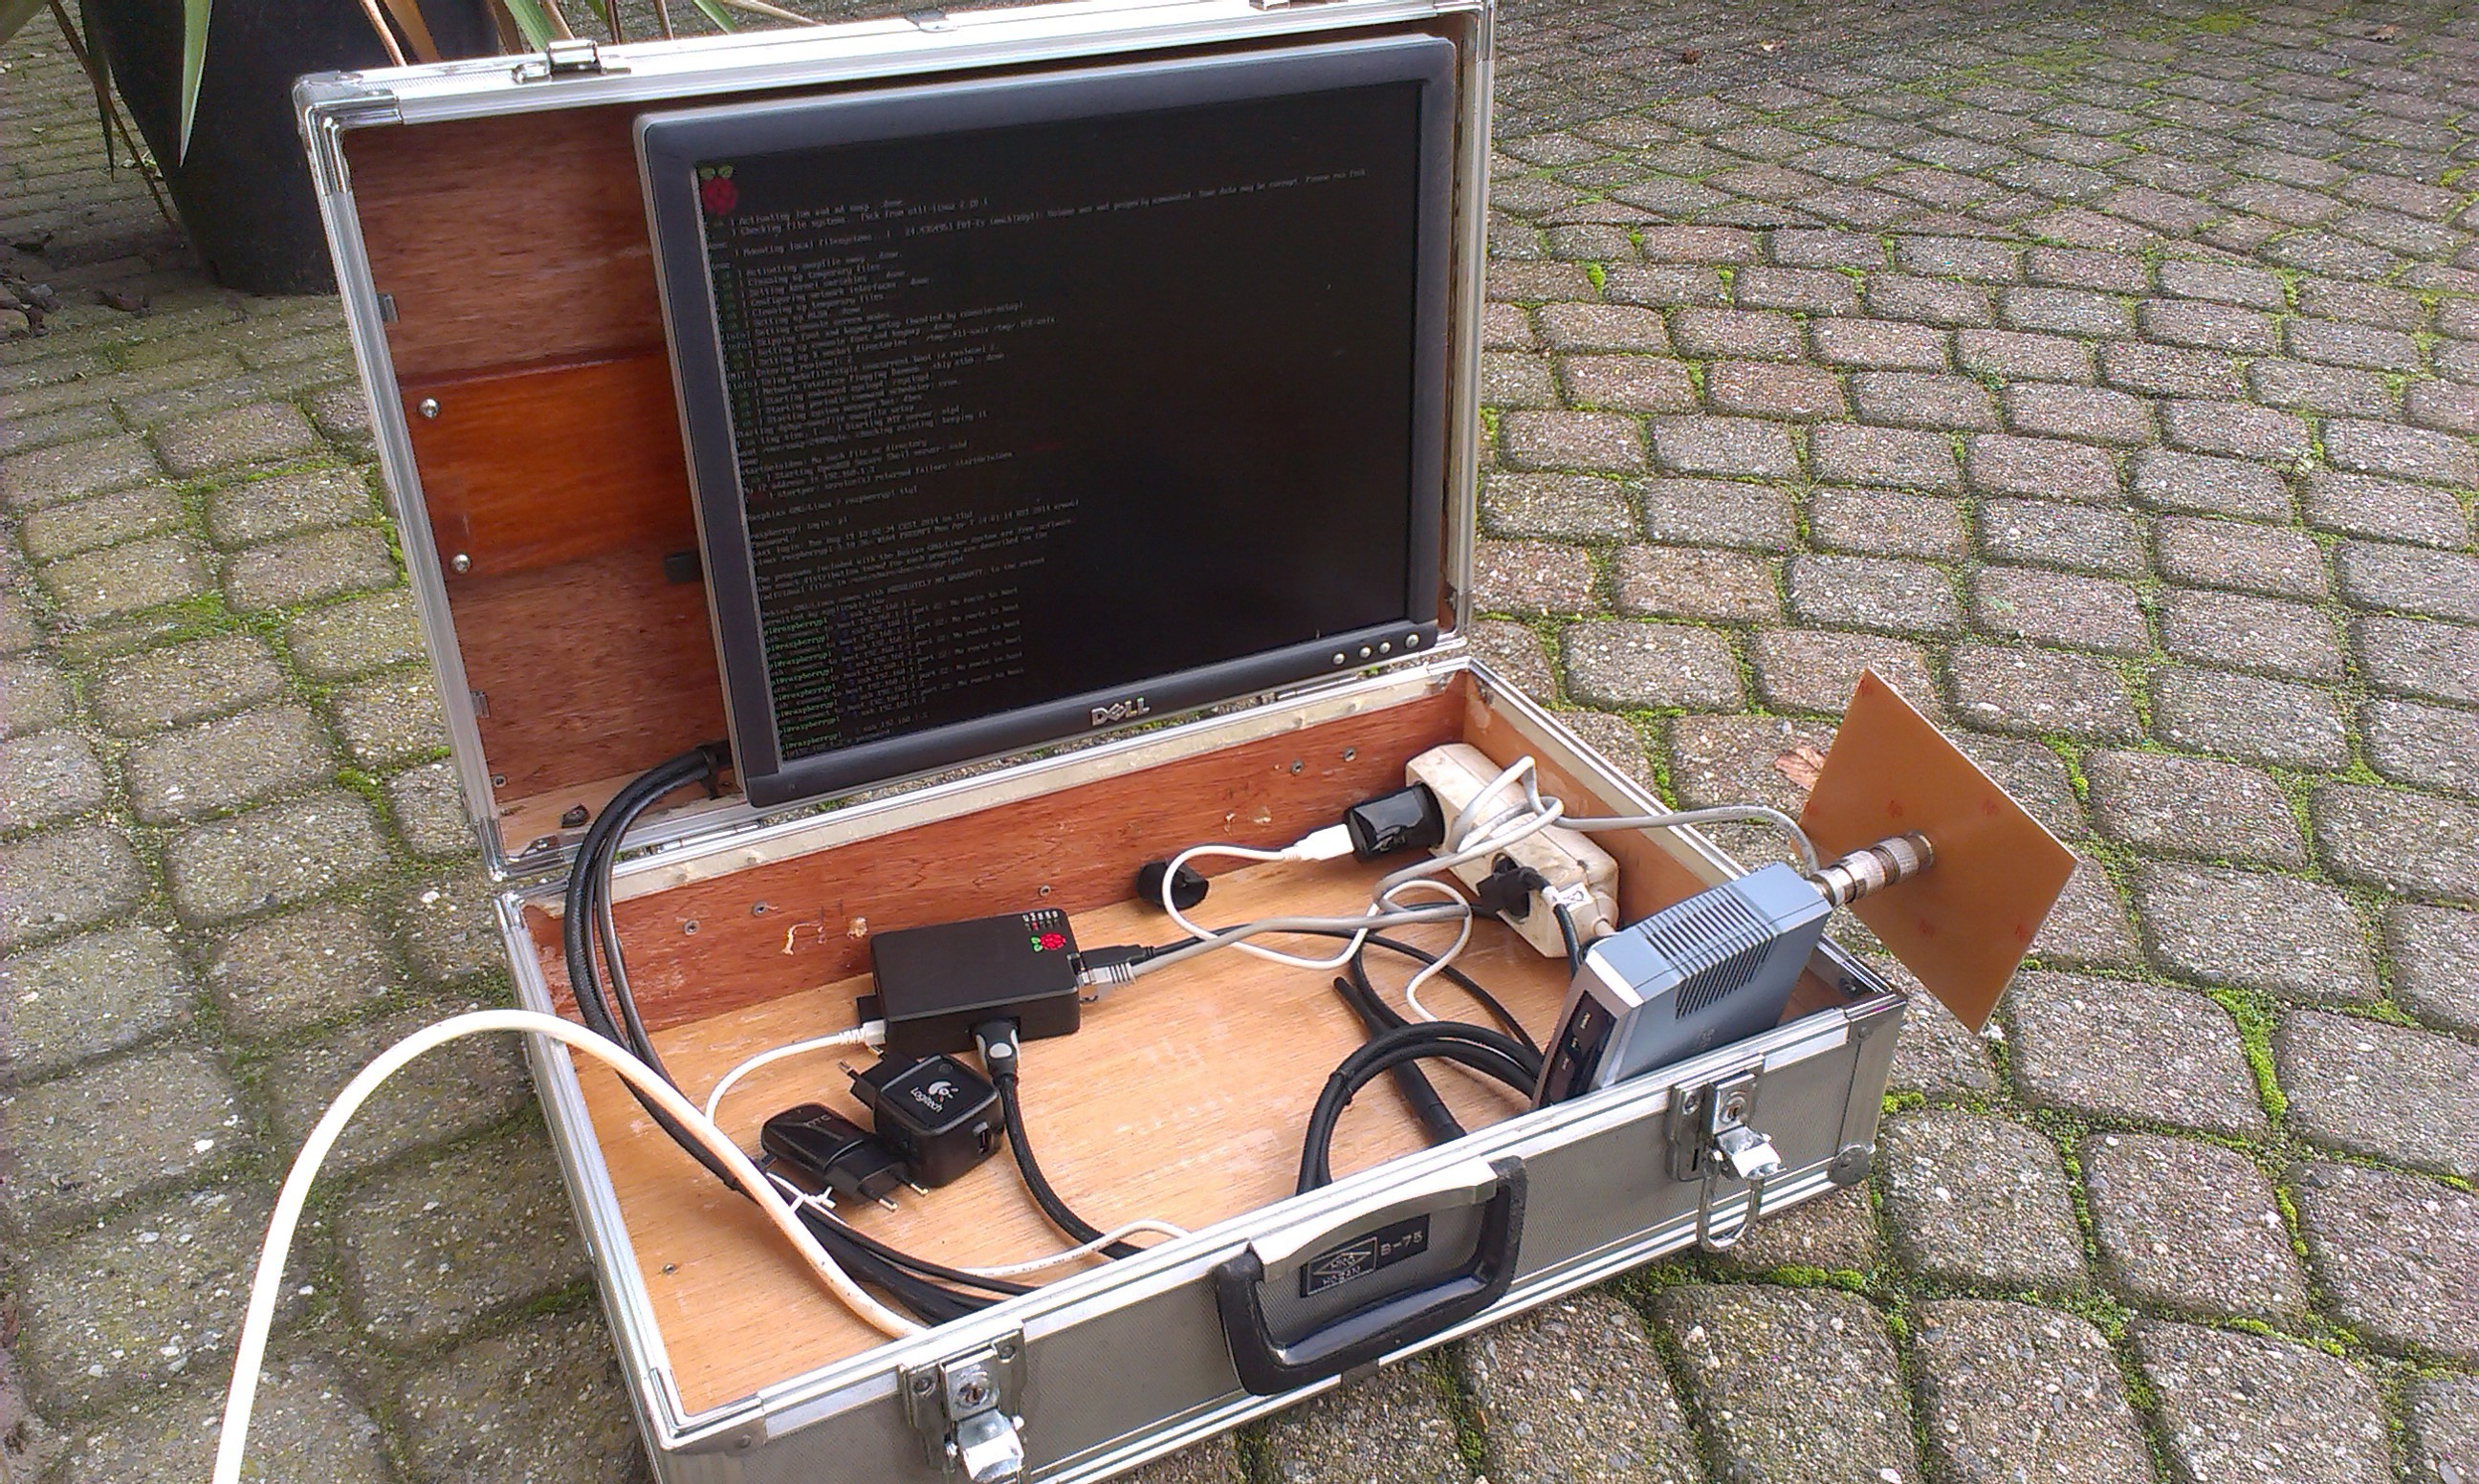
New groundstation and field testing unit.
11/13/2014 at 15:47 • 0 comments![]()
So i built a groundstation to test the project in the field. the plan is to feed it from a 12 volt to 230 volt inverter in the back of a car and drive to an open field to test performance at one meter. When a usable feed is achieved at 500 meter (~1600 feet) i am satisfied and will start aerial tests.
The only worry i have is interference with the RC control which also works at 2.4GHz.
I could use a long range rc link on another frequency or somehow minimize the interference. Enough challenge ahead!
![]()
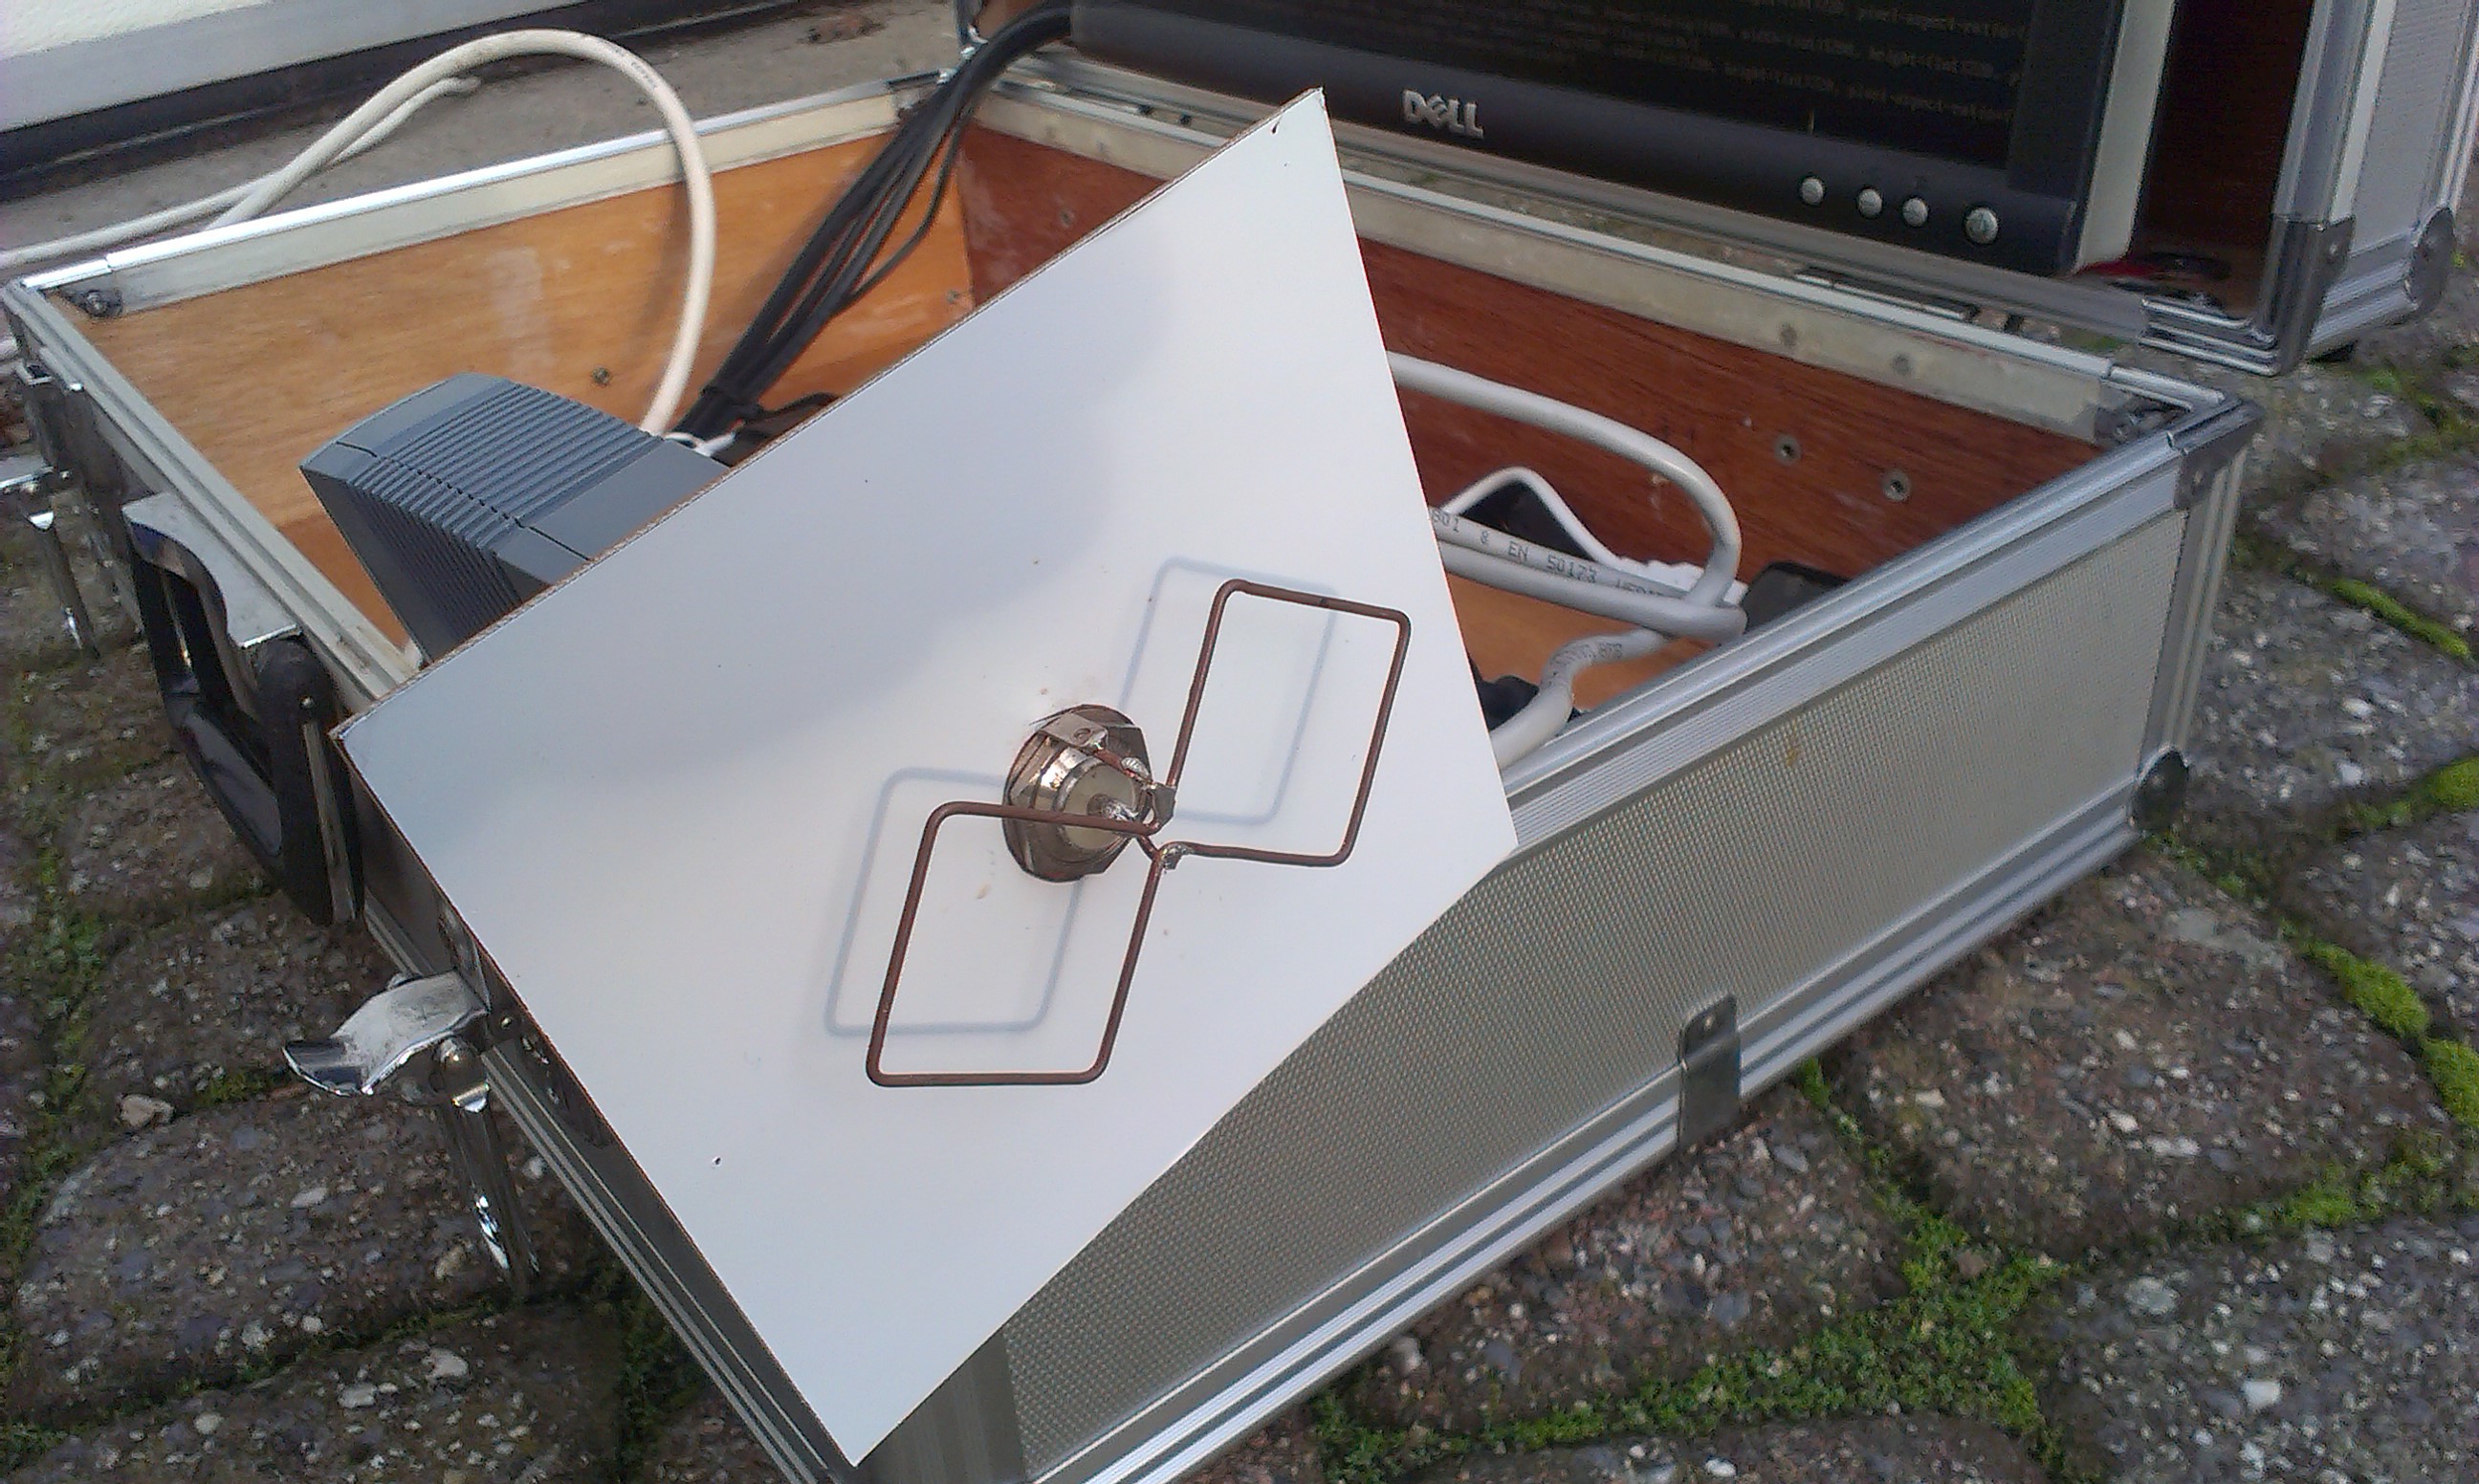
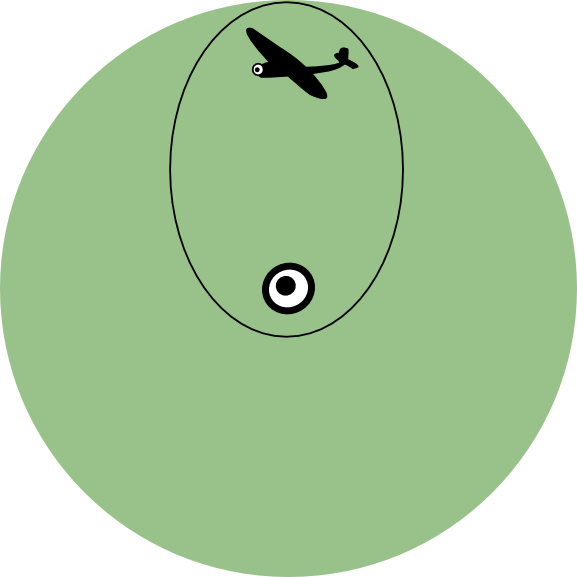
This is the new antenna. This is a biquad antenna which should have a radiation pattern that looks like this:
![]()
![]()
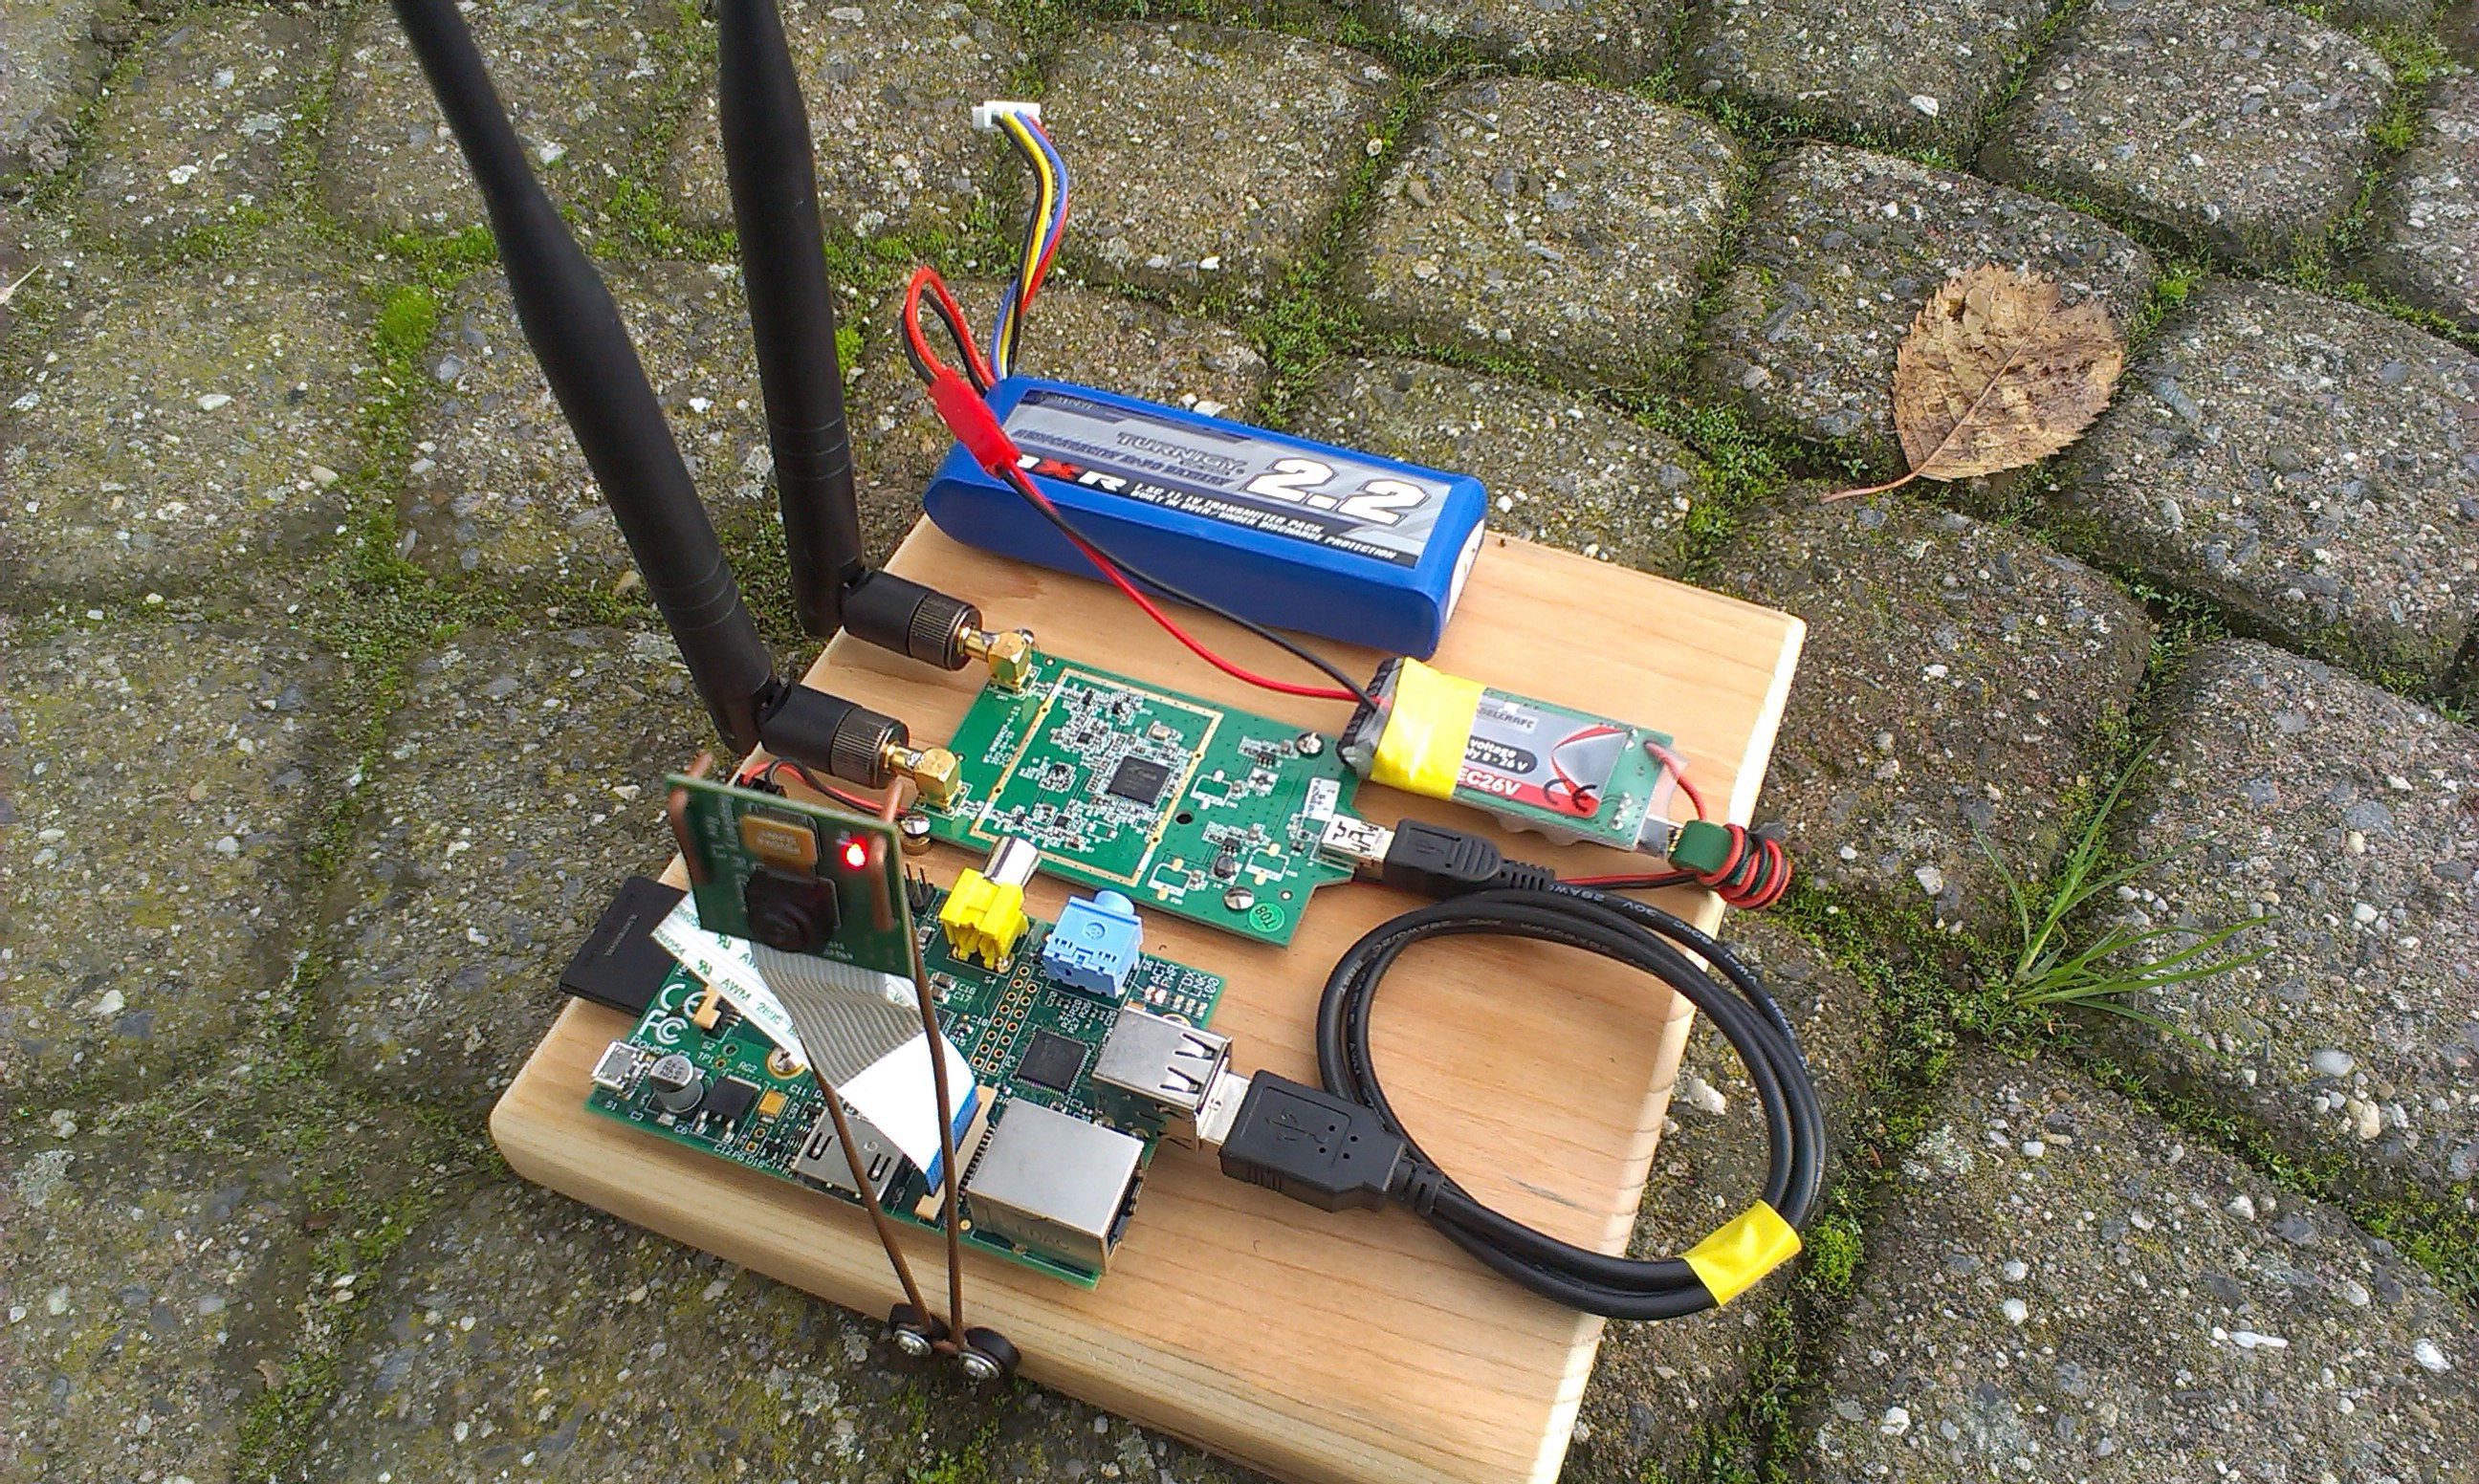
This is the smaller and more handsome field testing unit (FTU). It is also more rugged and does not feature tape to hold the boards together. The change from lead acid to LiPo made it significantly lighter. The unit can be lifted by a multicopter. The component weight without battery approaches the weight of regular FPV gear.
Also watch the video:
Until next time!
-
The Field Testing Unit
08/13/2014 at 10:14 • 3 comments![]()
This is the field testing unit. It has currently reached a range of 170 meters (560 feet) with 50% signal left. Latency jumps between 100 and 200 milliseconds. Resolution is 720P There is lots to do to improve this setup!
-
I entered the hackaday prize + bonus sneak preview
08/05/2014 at 16:17 • 0 commentsI finally had the guts to enter this project into the hackaday prize. I didn't do it before because i cant work on the project until the 18th of August. We'll see if i make the first cut!
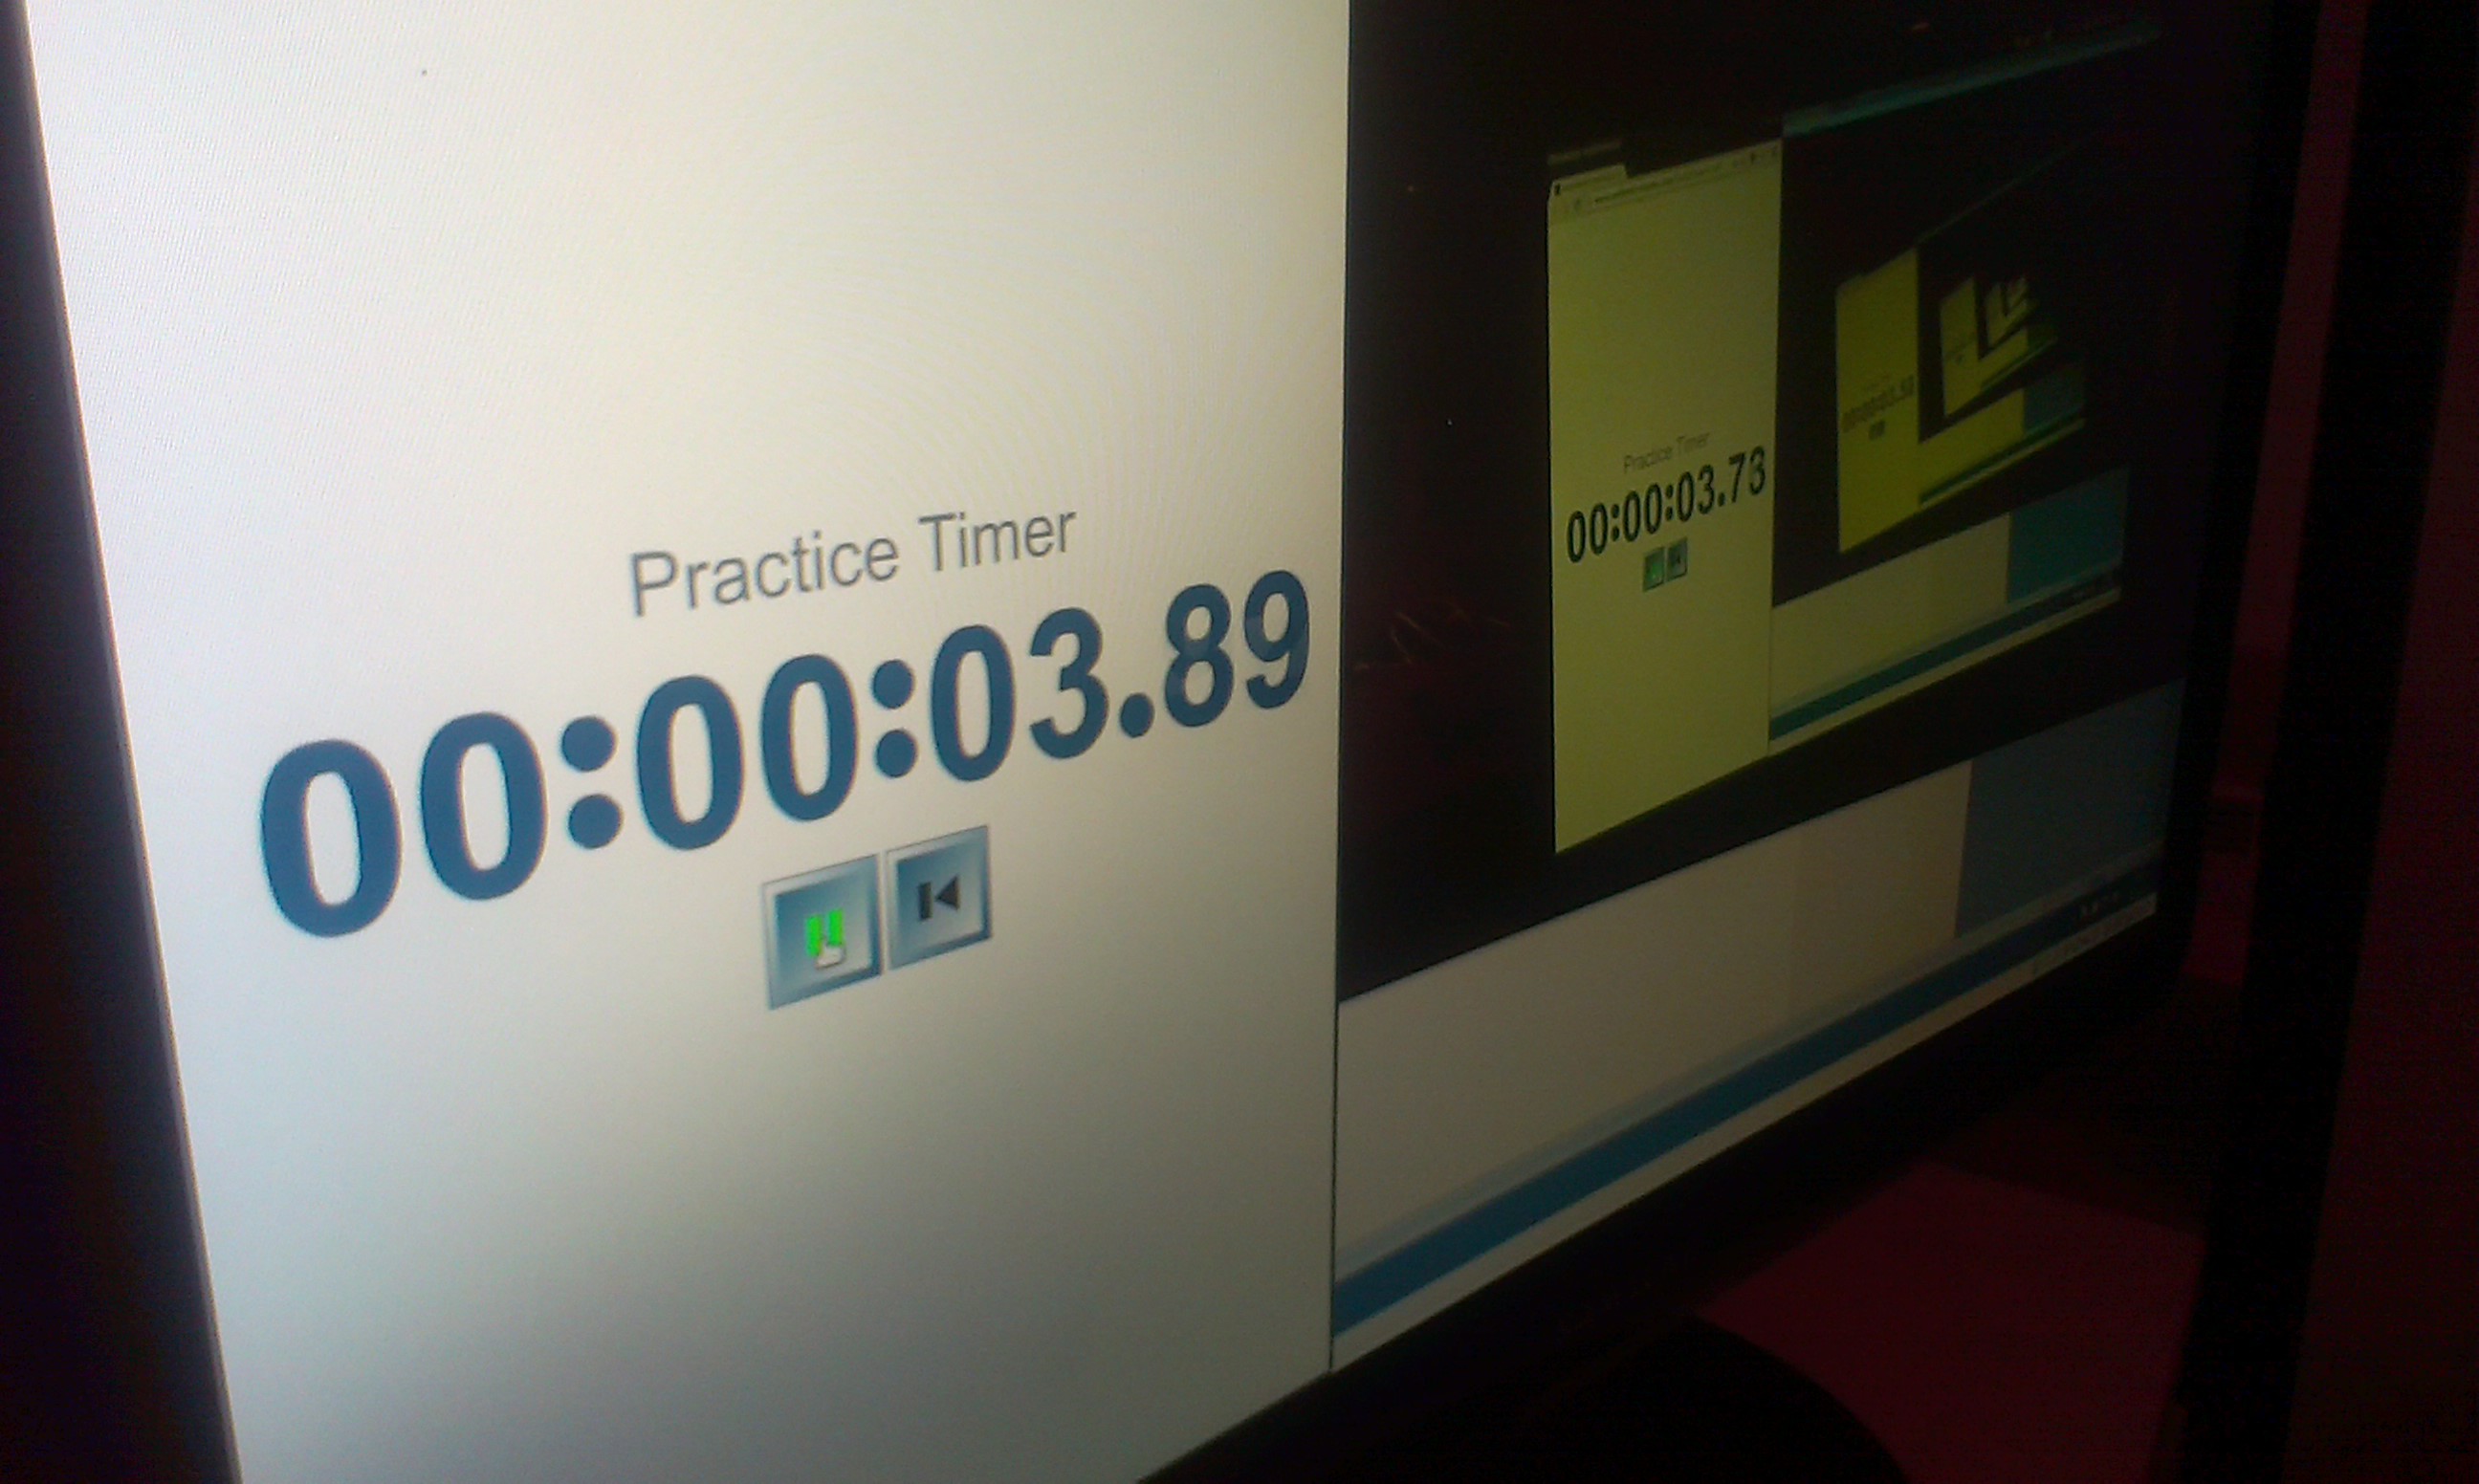
Here is a preview of my current results:
![]()
It is an image of the camera filming the screen of the viewer. The end to end latency is calculated by subtracting the right number from the left number.
3.89 - 3.73 is 0.16 seconds. That is only 160 milliseconds!
This test was conducted at point blank WiFi range. The raspberry and the laptop are both connected via wifi to the same access point. The resolution is 1280x720 and the framerate is 30 frames per second. The bitrate was limited to 2 Megabits per second.
-
The specification
07/12/2014 at 08:01 • 0 commentsThe hardware specification will be as follows:
- Raspberry Pi camera module
- Raspberry Pi (either model A or A will work)
- High power USB WiFi dongle
- Another USB WiFi dongle
- Laptop
USB WiFi dongle
This will need to have some special features and/or mods.
To prevent interference and to allow more bandwidth the dongle should support the 5Ghz range. Normal RC control systems use the 2.4Ghz range and thus would interfere with the WiFi signal, or worse, the other way around.
Range will be our biggest problem with WiFi. To get better range, better antenna's are a must. The dongle should be able to accept a better antenna or should be modified to accept one.
The output power is another factor in range. Although twice the power doesn't mean twice the range it does help to a certain point. For WiFi it wont make sense to go above 1000 milliwatts.
Laptop
The laptop will be running linux for now to get good support for the gstreamer libraries. We wont be using the internal WiFi radio for reasons stated above.
The software specification will be as follows:
- H264 video @ 1280x720 30 frames per second
- encoded using raspivid
- RTSP stream over UDP with gstreamer1.0
- Viewed with gstreamer1.0
To be continued...
-
Waiting game
05/12/2014 at 17:50 • 0 commentsI'm sorry this is taking so long. My camera board is in another project right now, so we will have to wait before i can start building. :-/