-
Finally: Plants Are Growing!
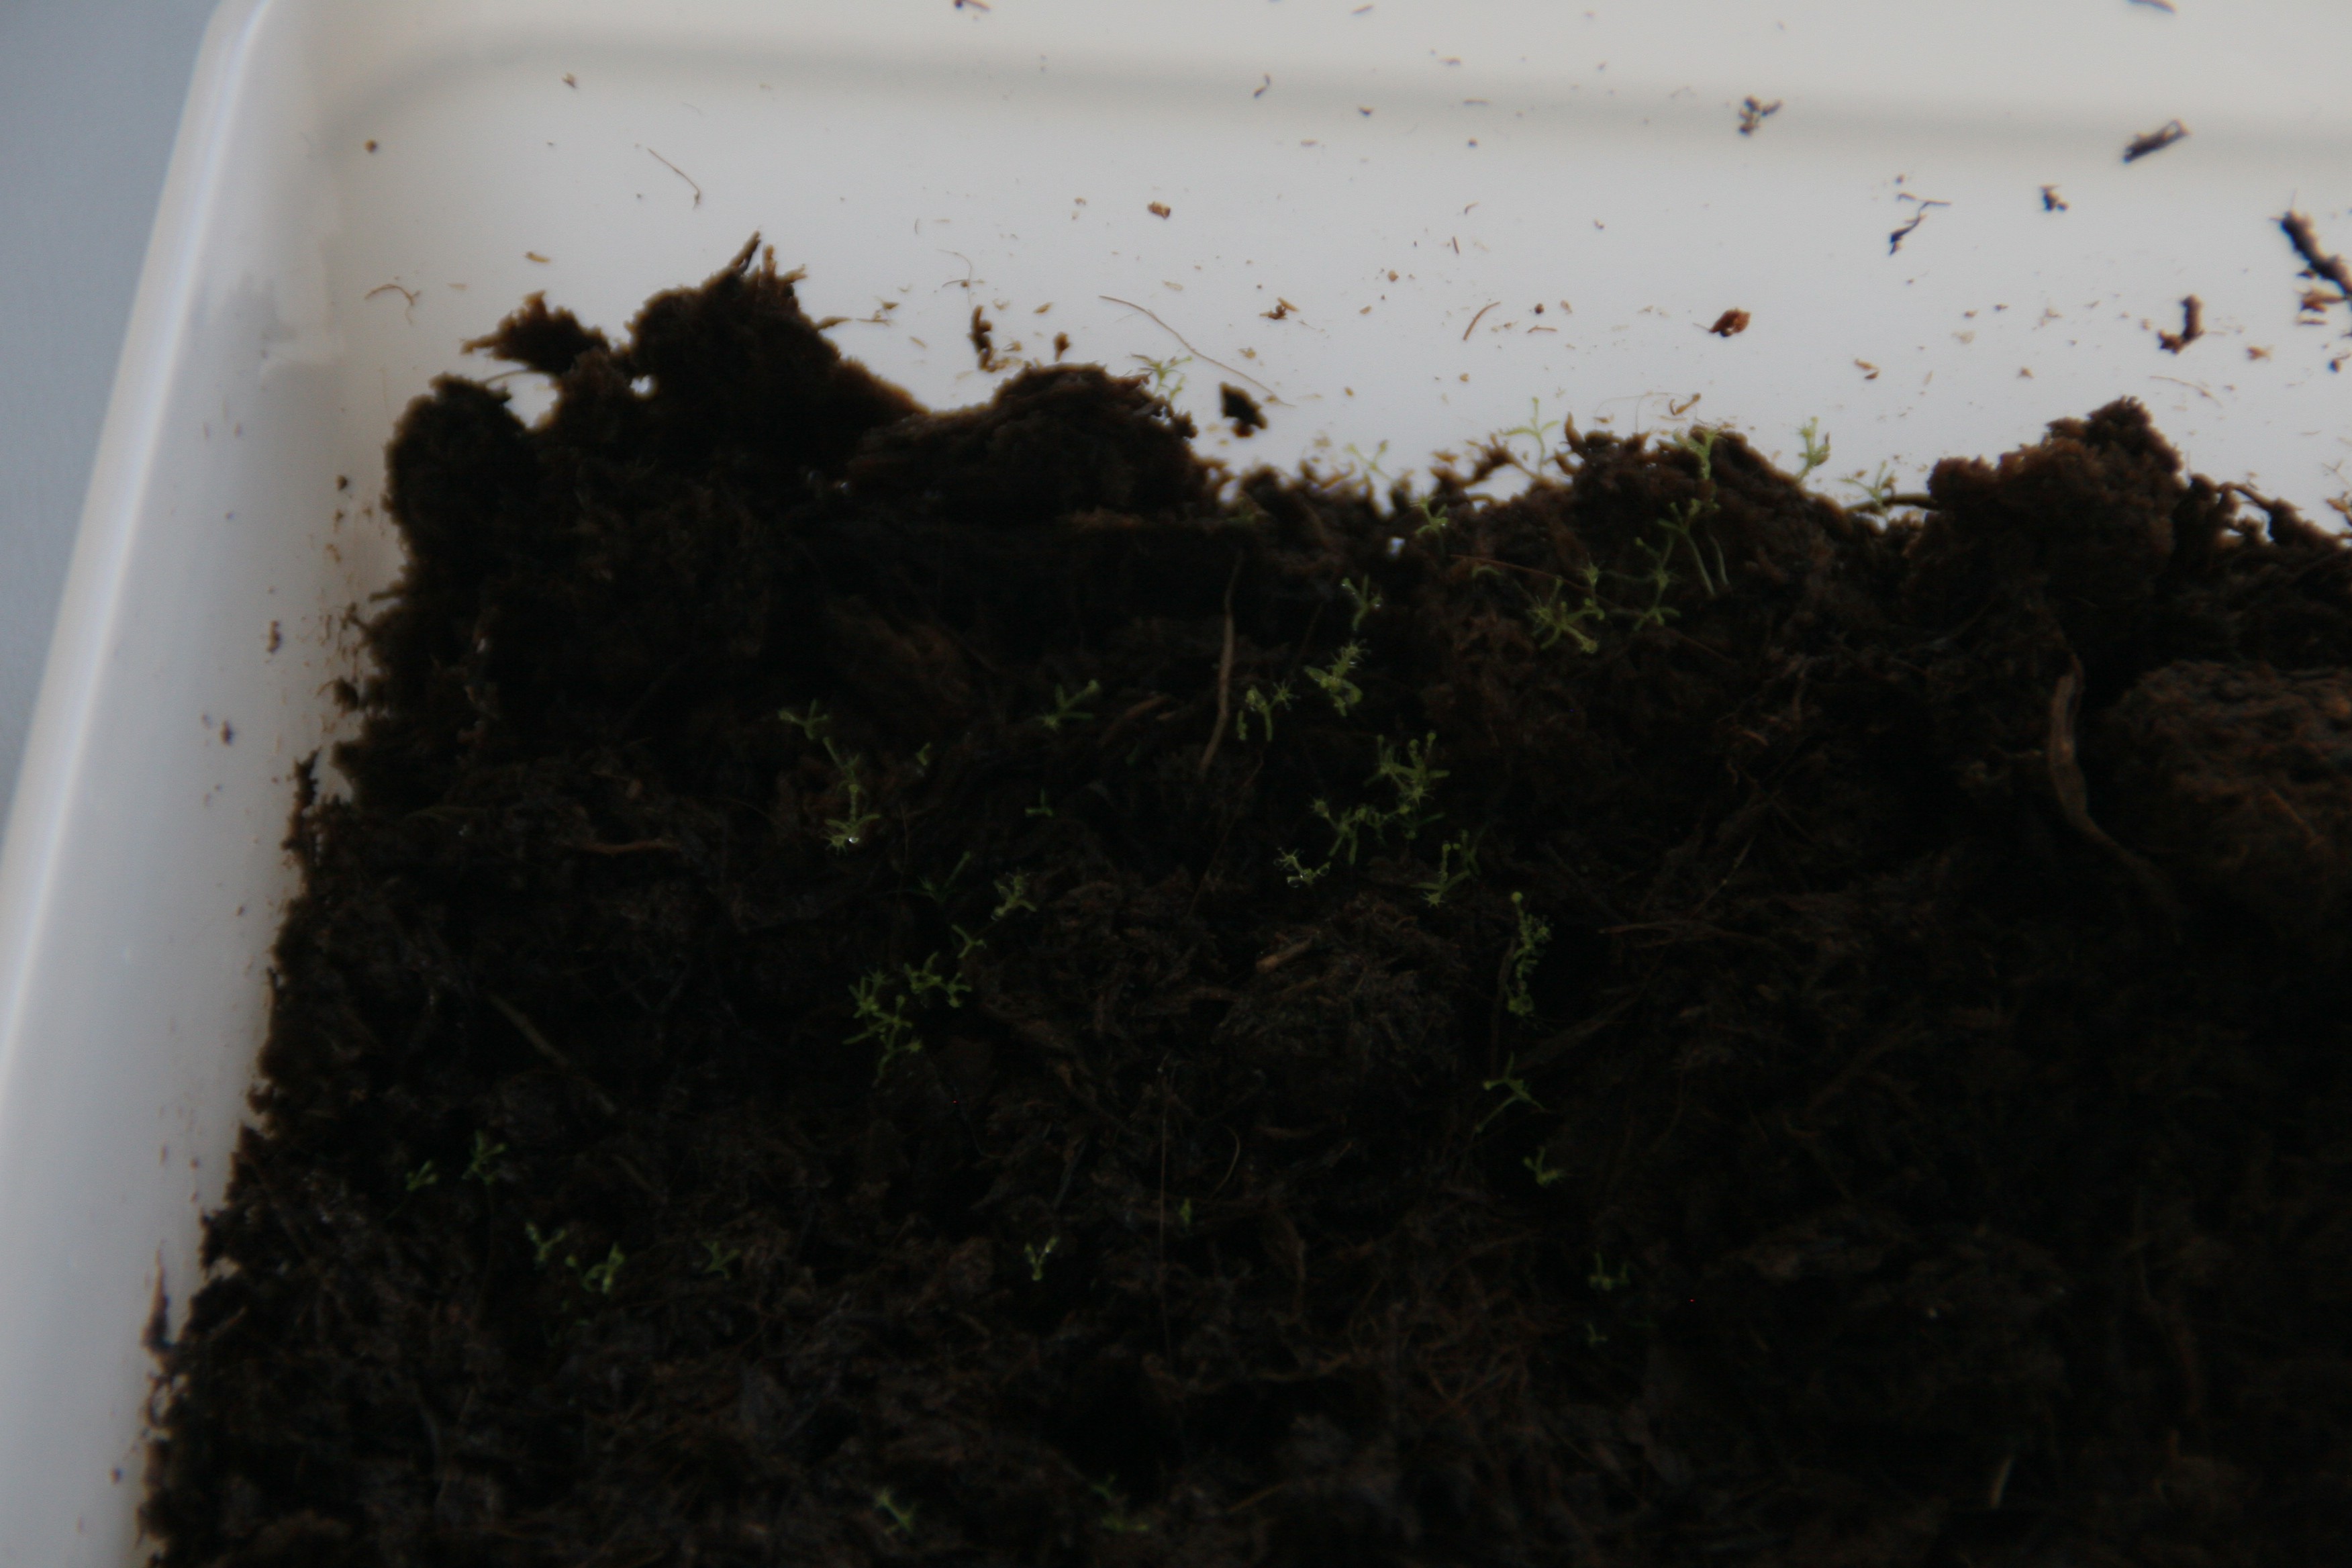
03/04/2017 at 10:33 • 0 commentsIt's been a long time since my last update on the VegeTerrium project, I've been delaying the actual planting because I was unsure about which plants and substrate are suitable for the enviroment I created. Something that I discovered quickly after starting to search for plants, is that most of them require a hibernation period; If I were to ignore it, the plants would die. The alternative was to search for tropical species, some of which can tolerate growing conditions year round. I discovered that most carnivorous plants are tolerant to this enviroment and decided to start with the sundew, a.k.a Drosera Capensis.
![]()
As a substrate, I am using peat moss, even though I was strongly against it (peat moss is a very unsustainable substrate). At the gardening store I was persuaded to use peat instead of coconut fibers, because the fibers would apparently not provide a good substrate (though I still have my doubts). These plants have been growing for a few weeks now, but there was an accidental dry period temporarily stunting their growth. Already, small mold spores can be seen because of the high humidity. In another few weeks/ a month I will adding earth to the vegeterrium and moving the healthiest plants over. My next task is getting some new plants, and some protein for the carnivores!
-
Parts Mounted
08/02/2016 at 08:40 • 0 commentsAfter working out some last bugs and testing the software, I decided to finalize the hardware and mount it inside my enclosure. I wanted all of the growing area to be isolated, so I carefully and painstakingly drilled and cut every single screw hole to the perfect depth. Except one, the second to last screw had to go through the acryllic sheet! I also figured that the power supply was going to be too loud and annoy the heck out of everyone in the vincinity, so I mounted it on a vibration dampening foam sheet. Or you might know it as dirt cheap crafting foam... As I was almost finished, I managed to burn out my LED without a replacement. It gets even better, because the original seller also stopped offering them on Amazon! After some intense searching I came up with some LED's which look the same, but if it comes from China that means as good as nothing...
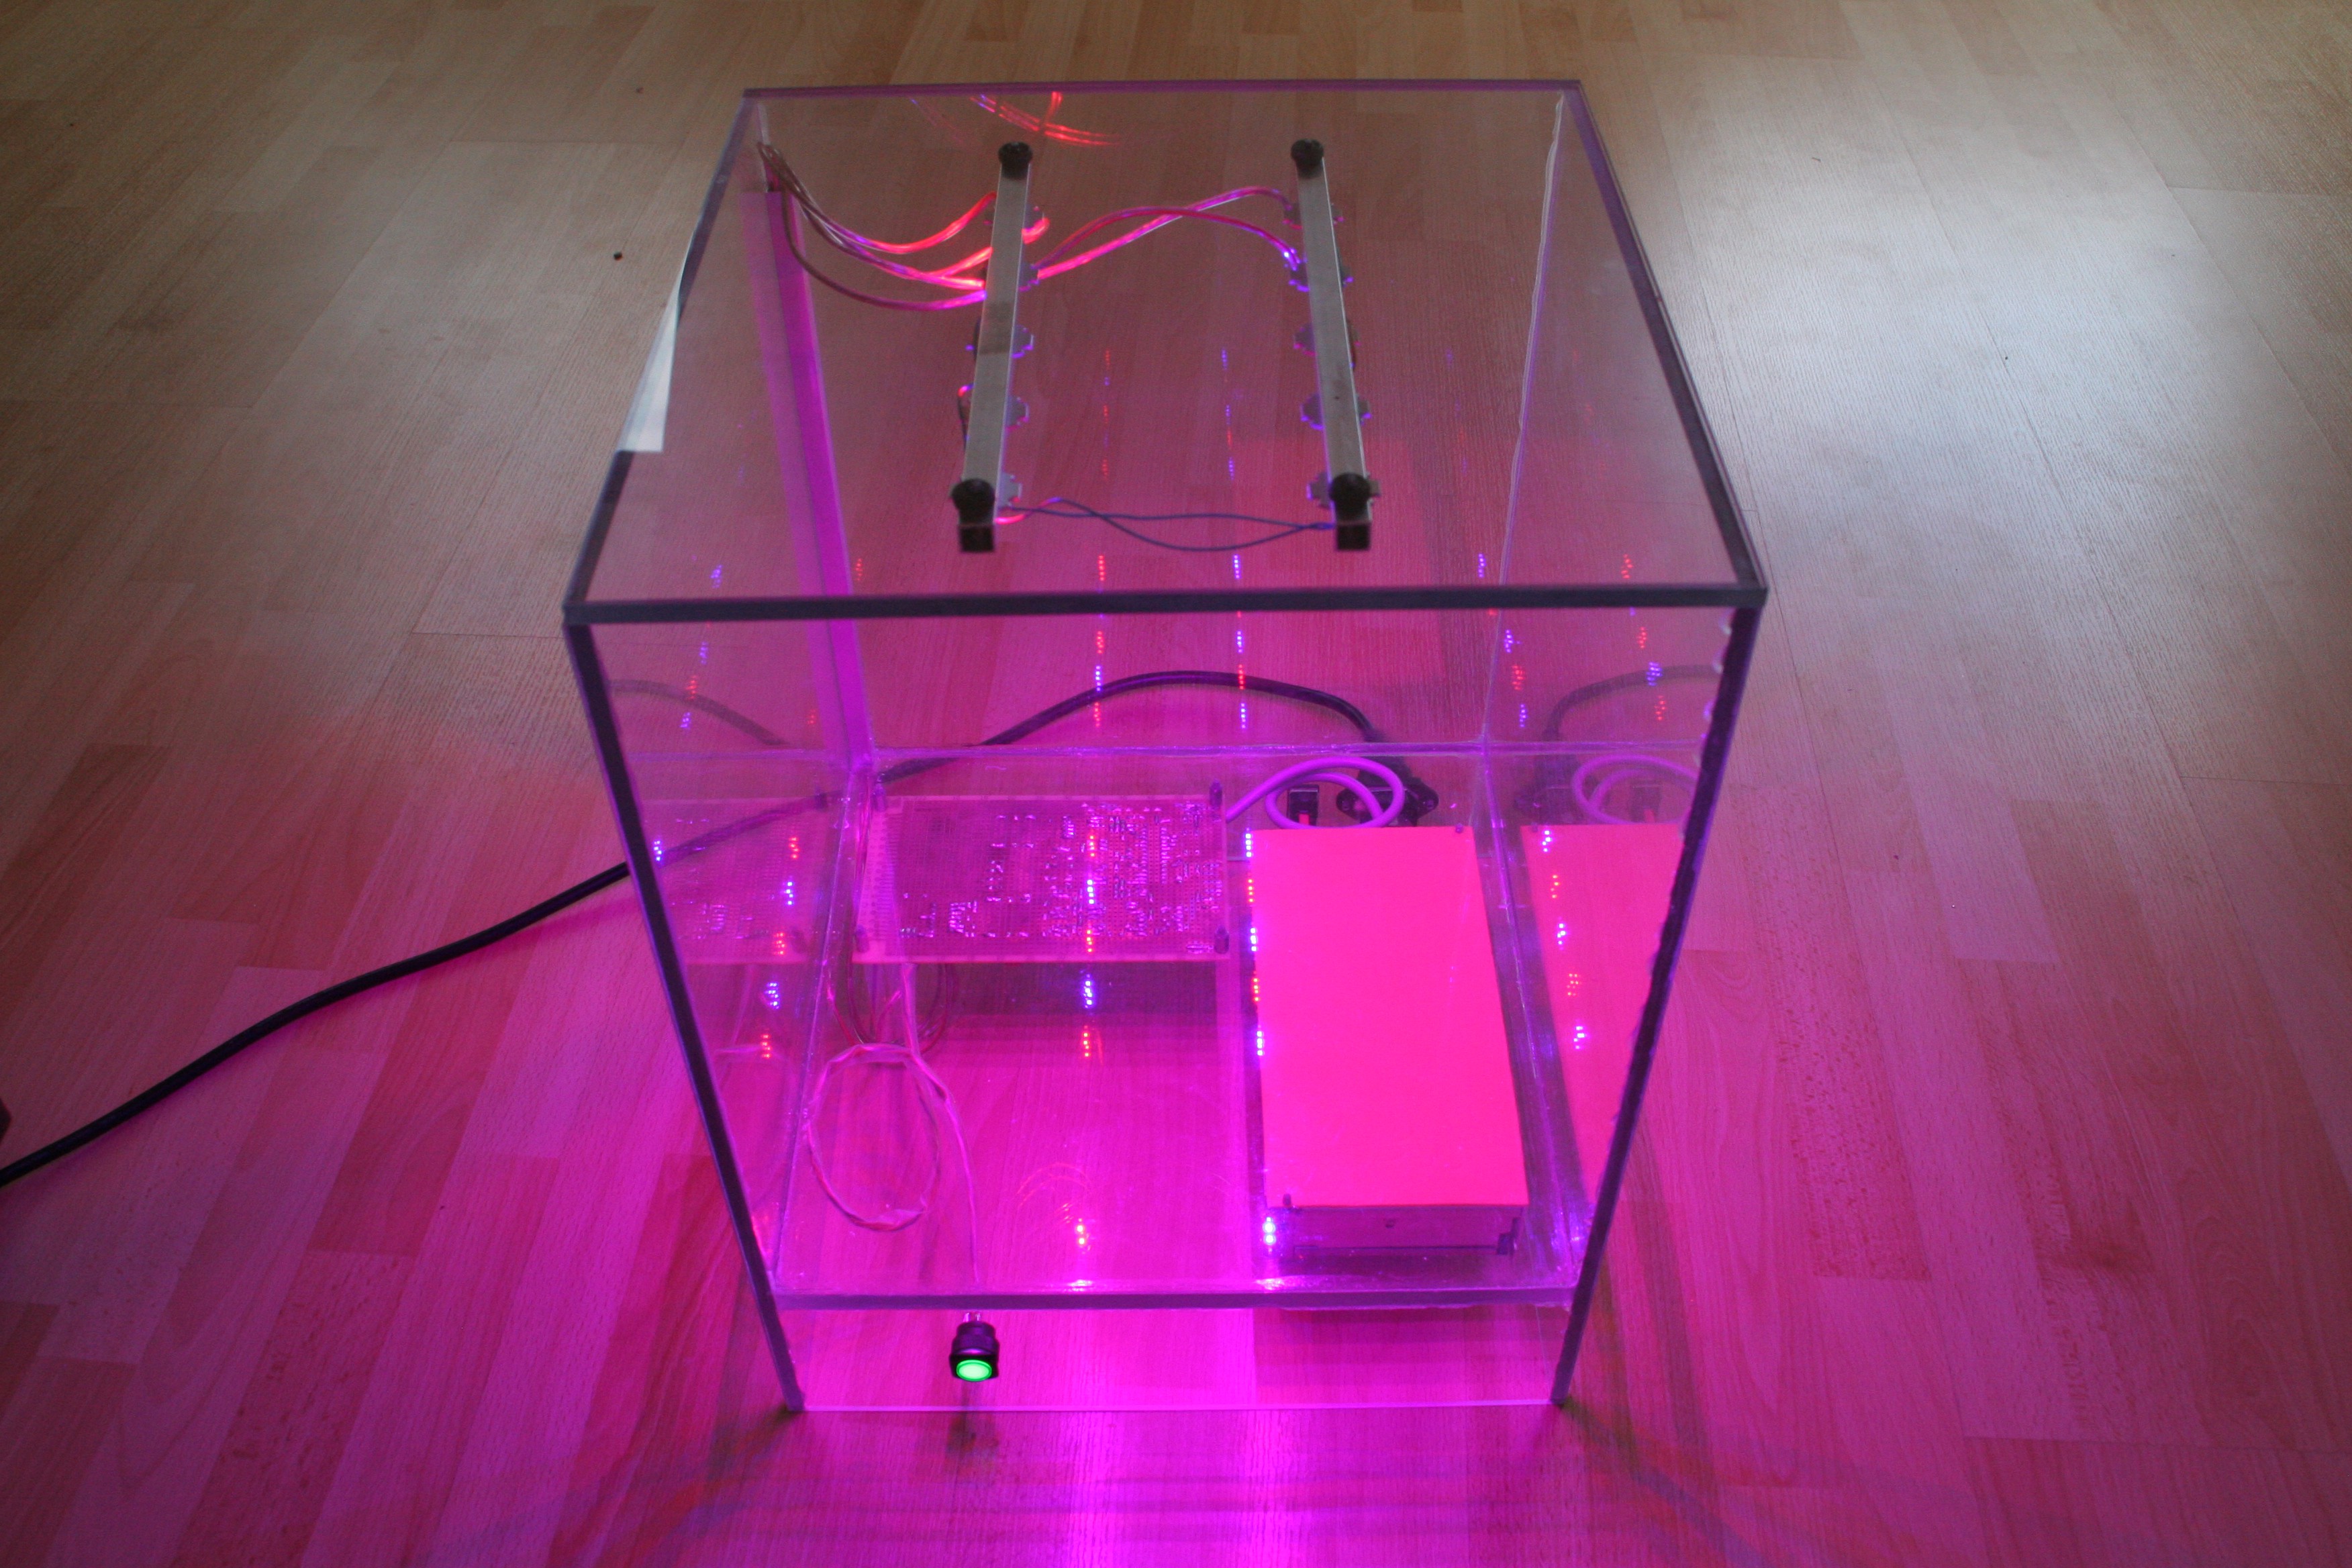
![]() This is my enclosure with all electronics mounted and LED's on full power
This is my enclosure with all electronics mounted and LED's on full power![]() These are all of the hardware components that were mounted (and used to mount)
These are all of the hardware components that were mounted (and used to mount) -
RTC, Power and Bug Fixes
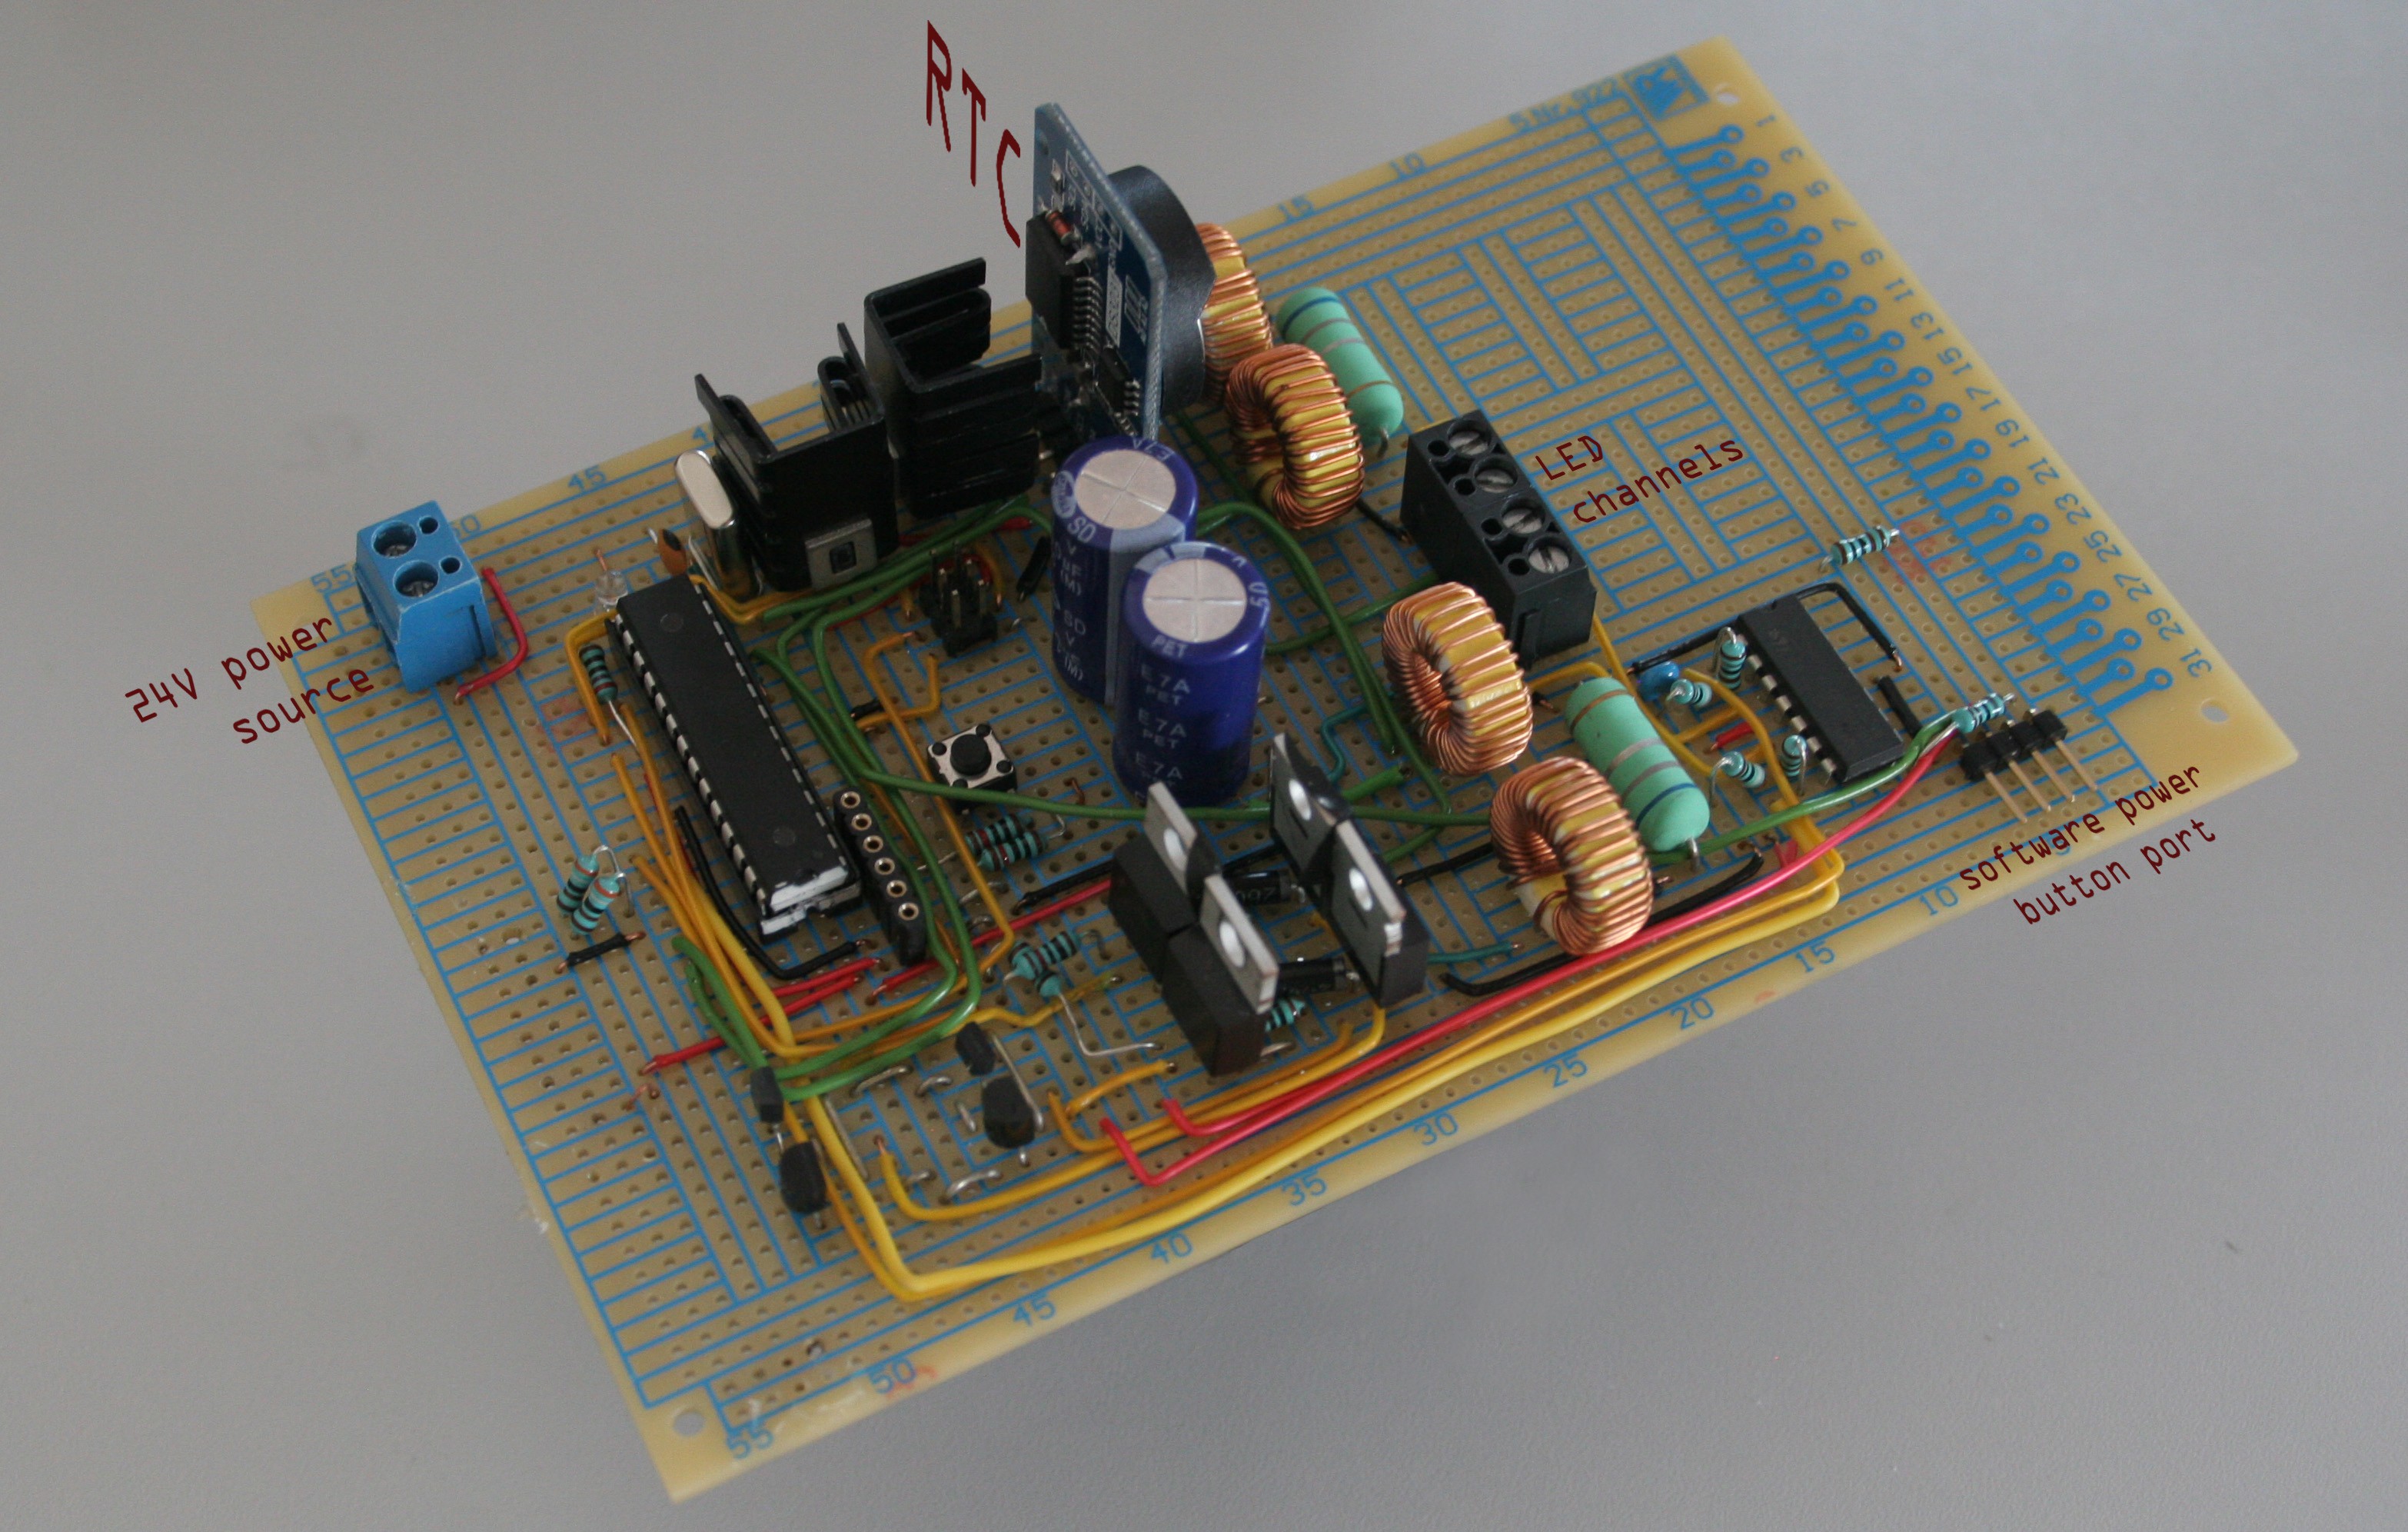
07/27/2016 at 14:18 • 0 commentsAfter a few month long battle with randomly crashing Arduino, the bug turned out to be something quite simple, as usual... It turns out that the Arduino was not turning off because of a brownout, software issues or noise on the reset pin, but rather overcurrent protection. The reaction of the Arduino is pretty much indistinguishable from a normal reset, and was solved by simply adding resistors between the Arduino and MOSFET's to limit surge currents because of gate capacitance. Now if you looked carefully at the schematic, you would also see that I've added an RTC (the DS3231) and a button of sorts along with the resistor. The final change that was made, is switching to an external power supply for safety and efficiency reasons, freeing alot of space on my breadboard!
![]()
The last thing I'm going to mention is the electrical tape between the MOSFET's, I added it after thinking it was the root cause for the problem, and while it was a necassary modification it still wasn't what solved my crash.
Now, the basic hardware is done and it's time to start coding!
-
Schematics
07/26/2016 at 13:56 • 0 commentsI finally got around to creating some detailed schematics for my control board, as of the 26.07.2016 it's up to date for the version based on the external power supply. Hopefully I will be able to use Eagle to create a PCB in the future, but for now it only serves as reference. You can get My Control Board PDF, or even The Schematic to download.
My orginal plan was actually to use the schematic for bug fixing, but I managed to solve the problem right before I completed it, so now it's just a "nice to have". If I end up making a PCB I will also release the .brd file.
-
Damn bugs!
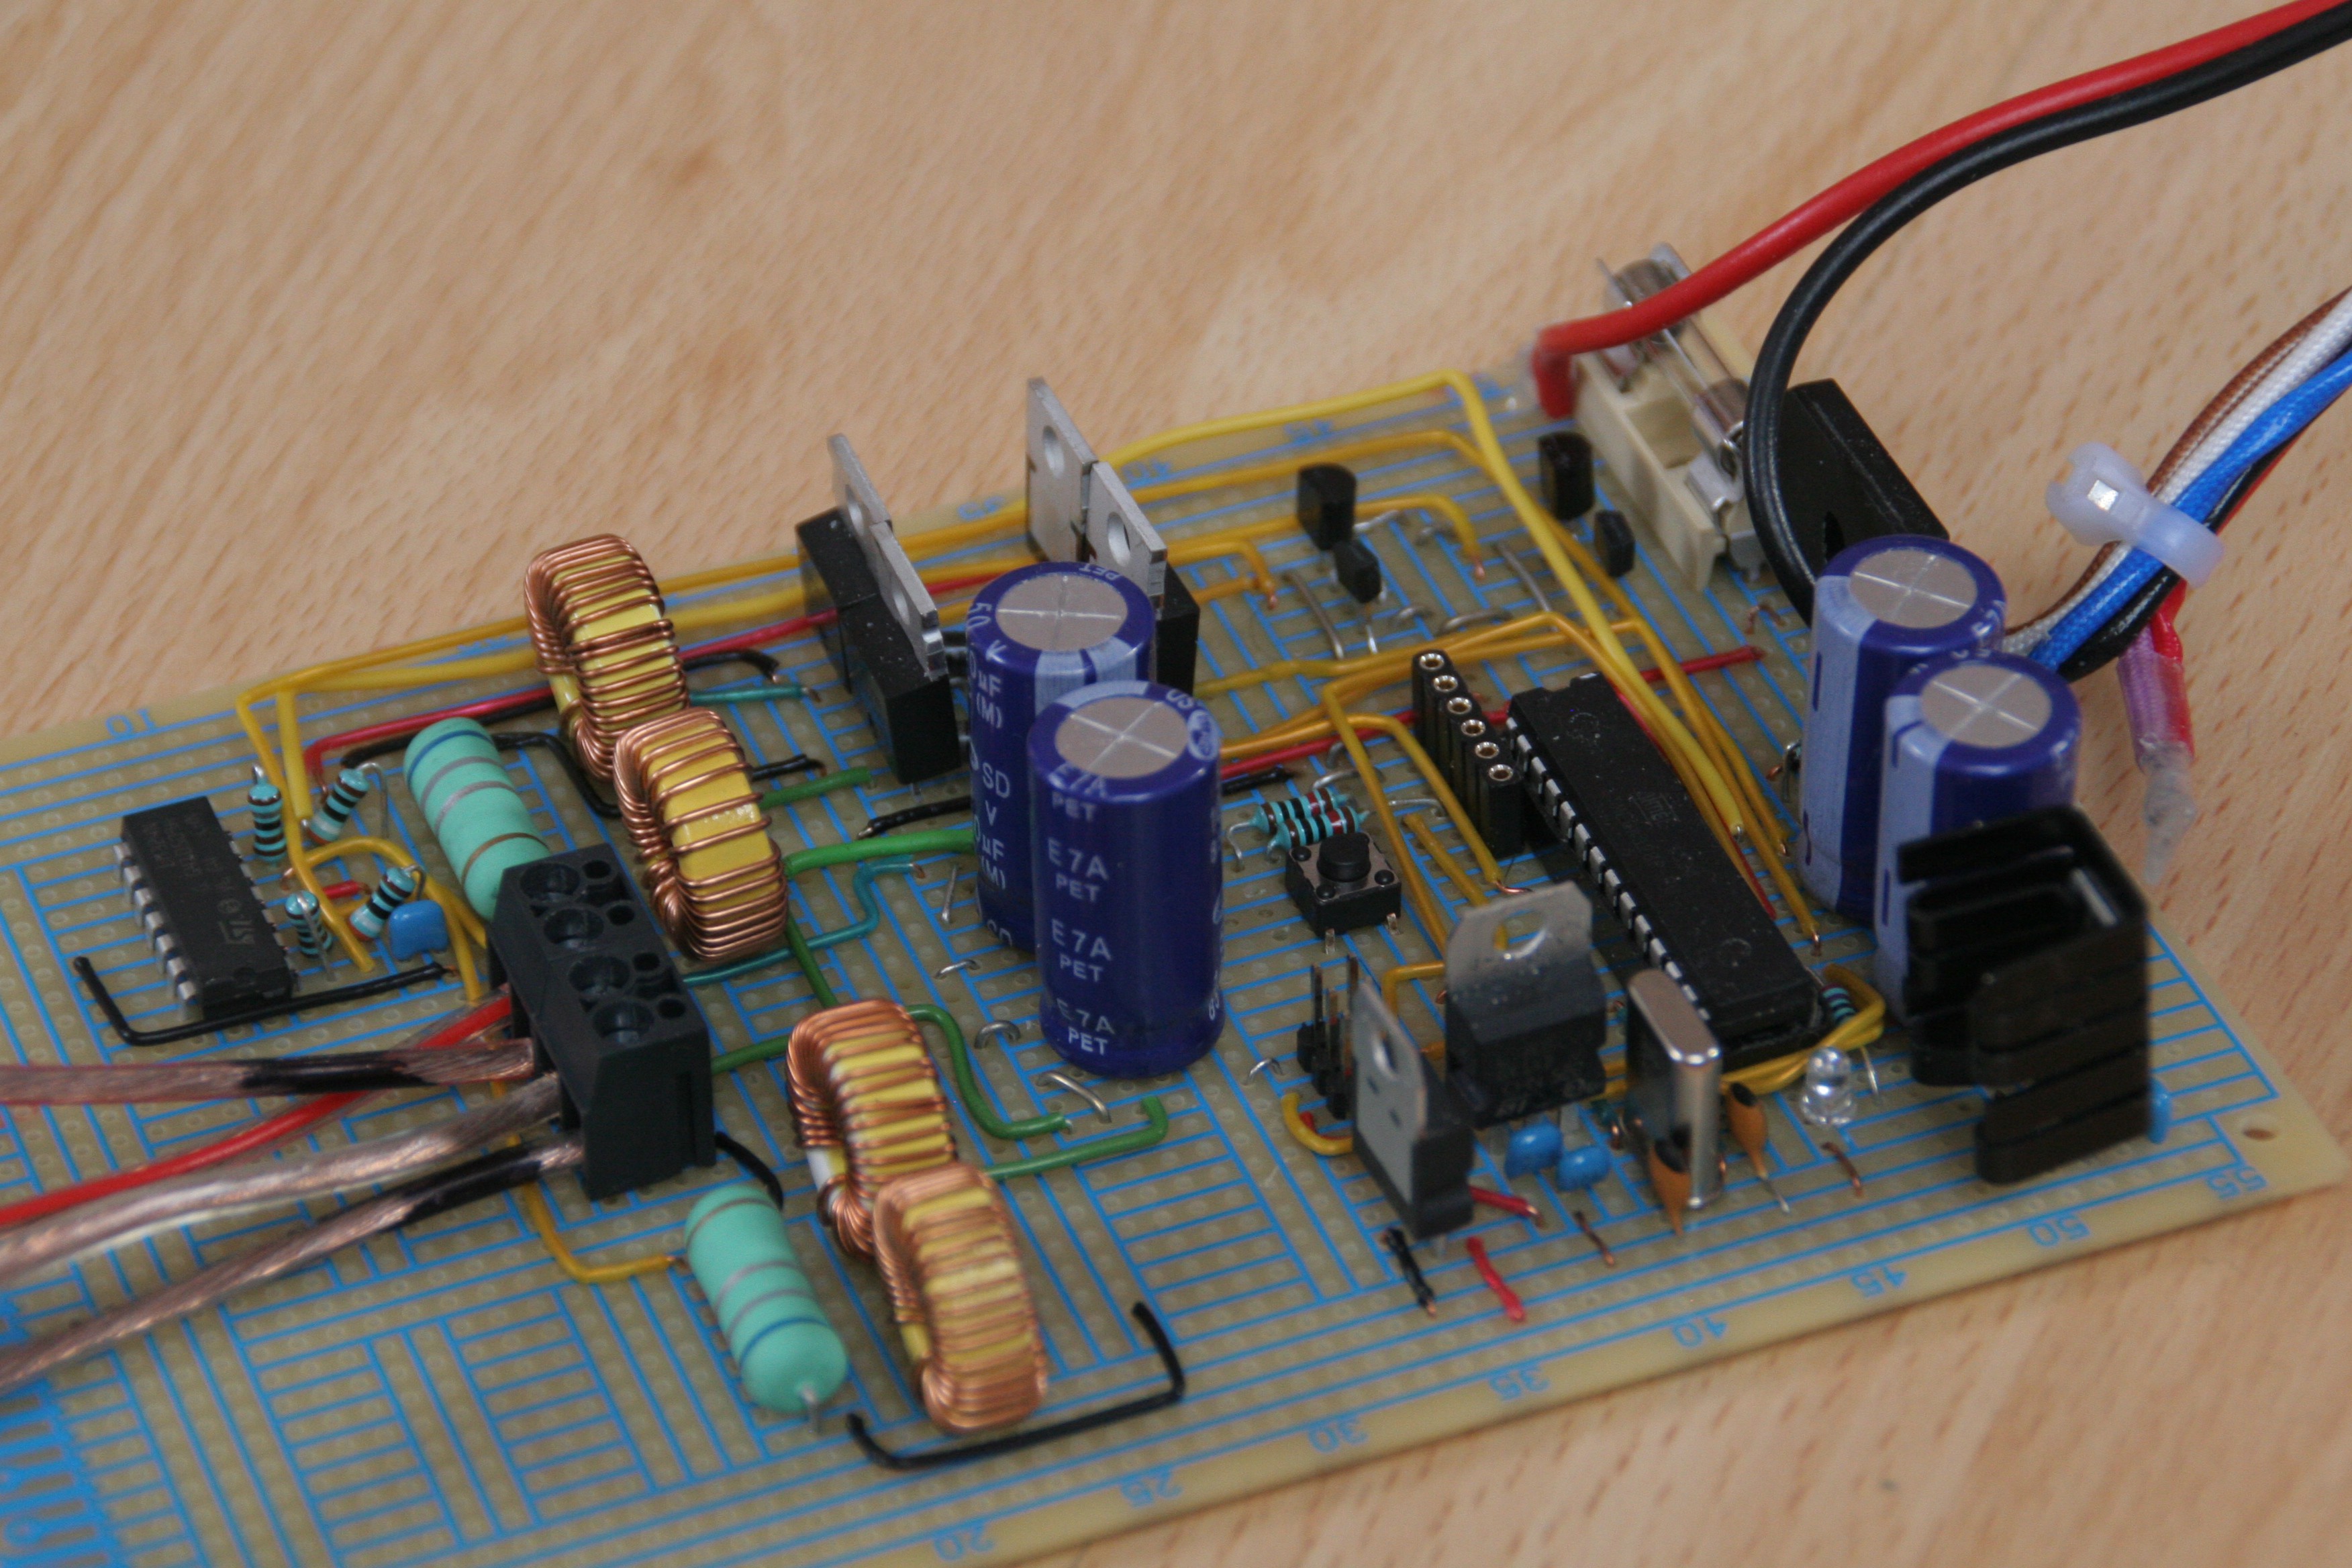
06/21/2016 at 14:37 • 0 commentsI have finally (almost) finished my switching LED driver, and boy was it journey! It started with my first time working with the mains voltage here in Germany, and hopefully also the last time. After going through the trouble of rectification, getting the right voltage out of my transformer, filtering and regulating the output voltage, I am sure to use a finished SMPS in future! Afterwards I also made my first switching power supply, while also using inductors for the first time, at this point I was starting to regret my decision. Soon after I completed the Arduino on a breadboard (you guessed it, first time) and managed to bring all of it together. This is what my final product looks like after a few months of work between long school days:
![]()
I might release a schematic if this project makes it further (it's a lot of work to make one).
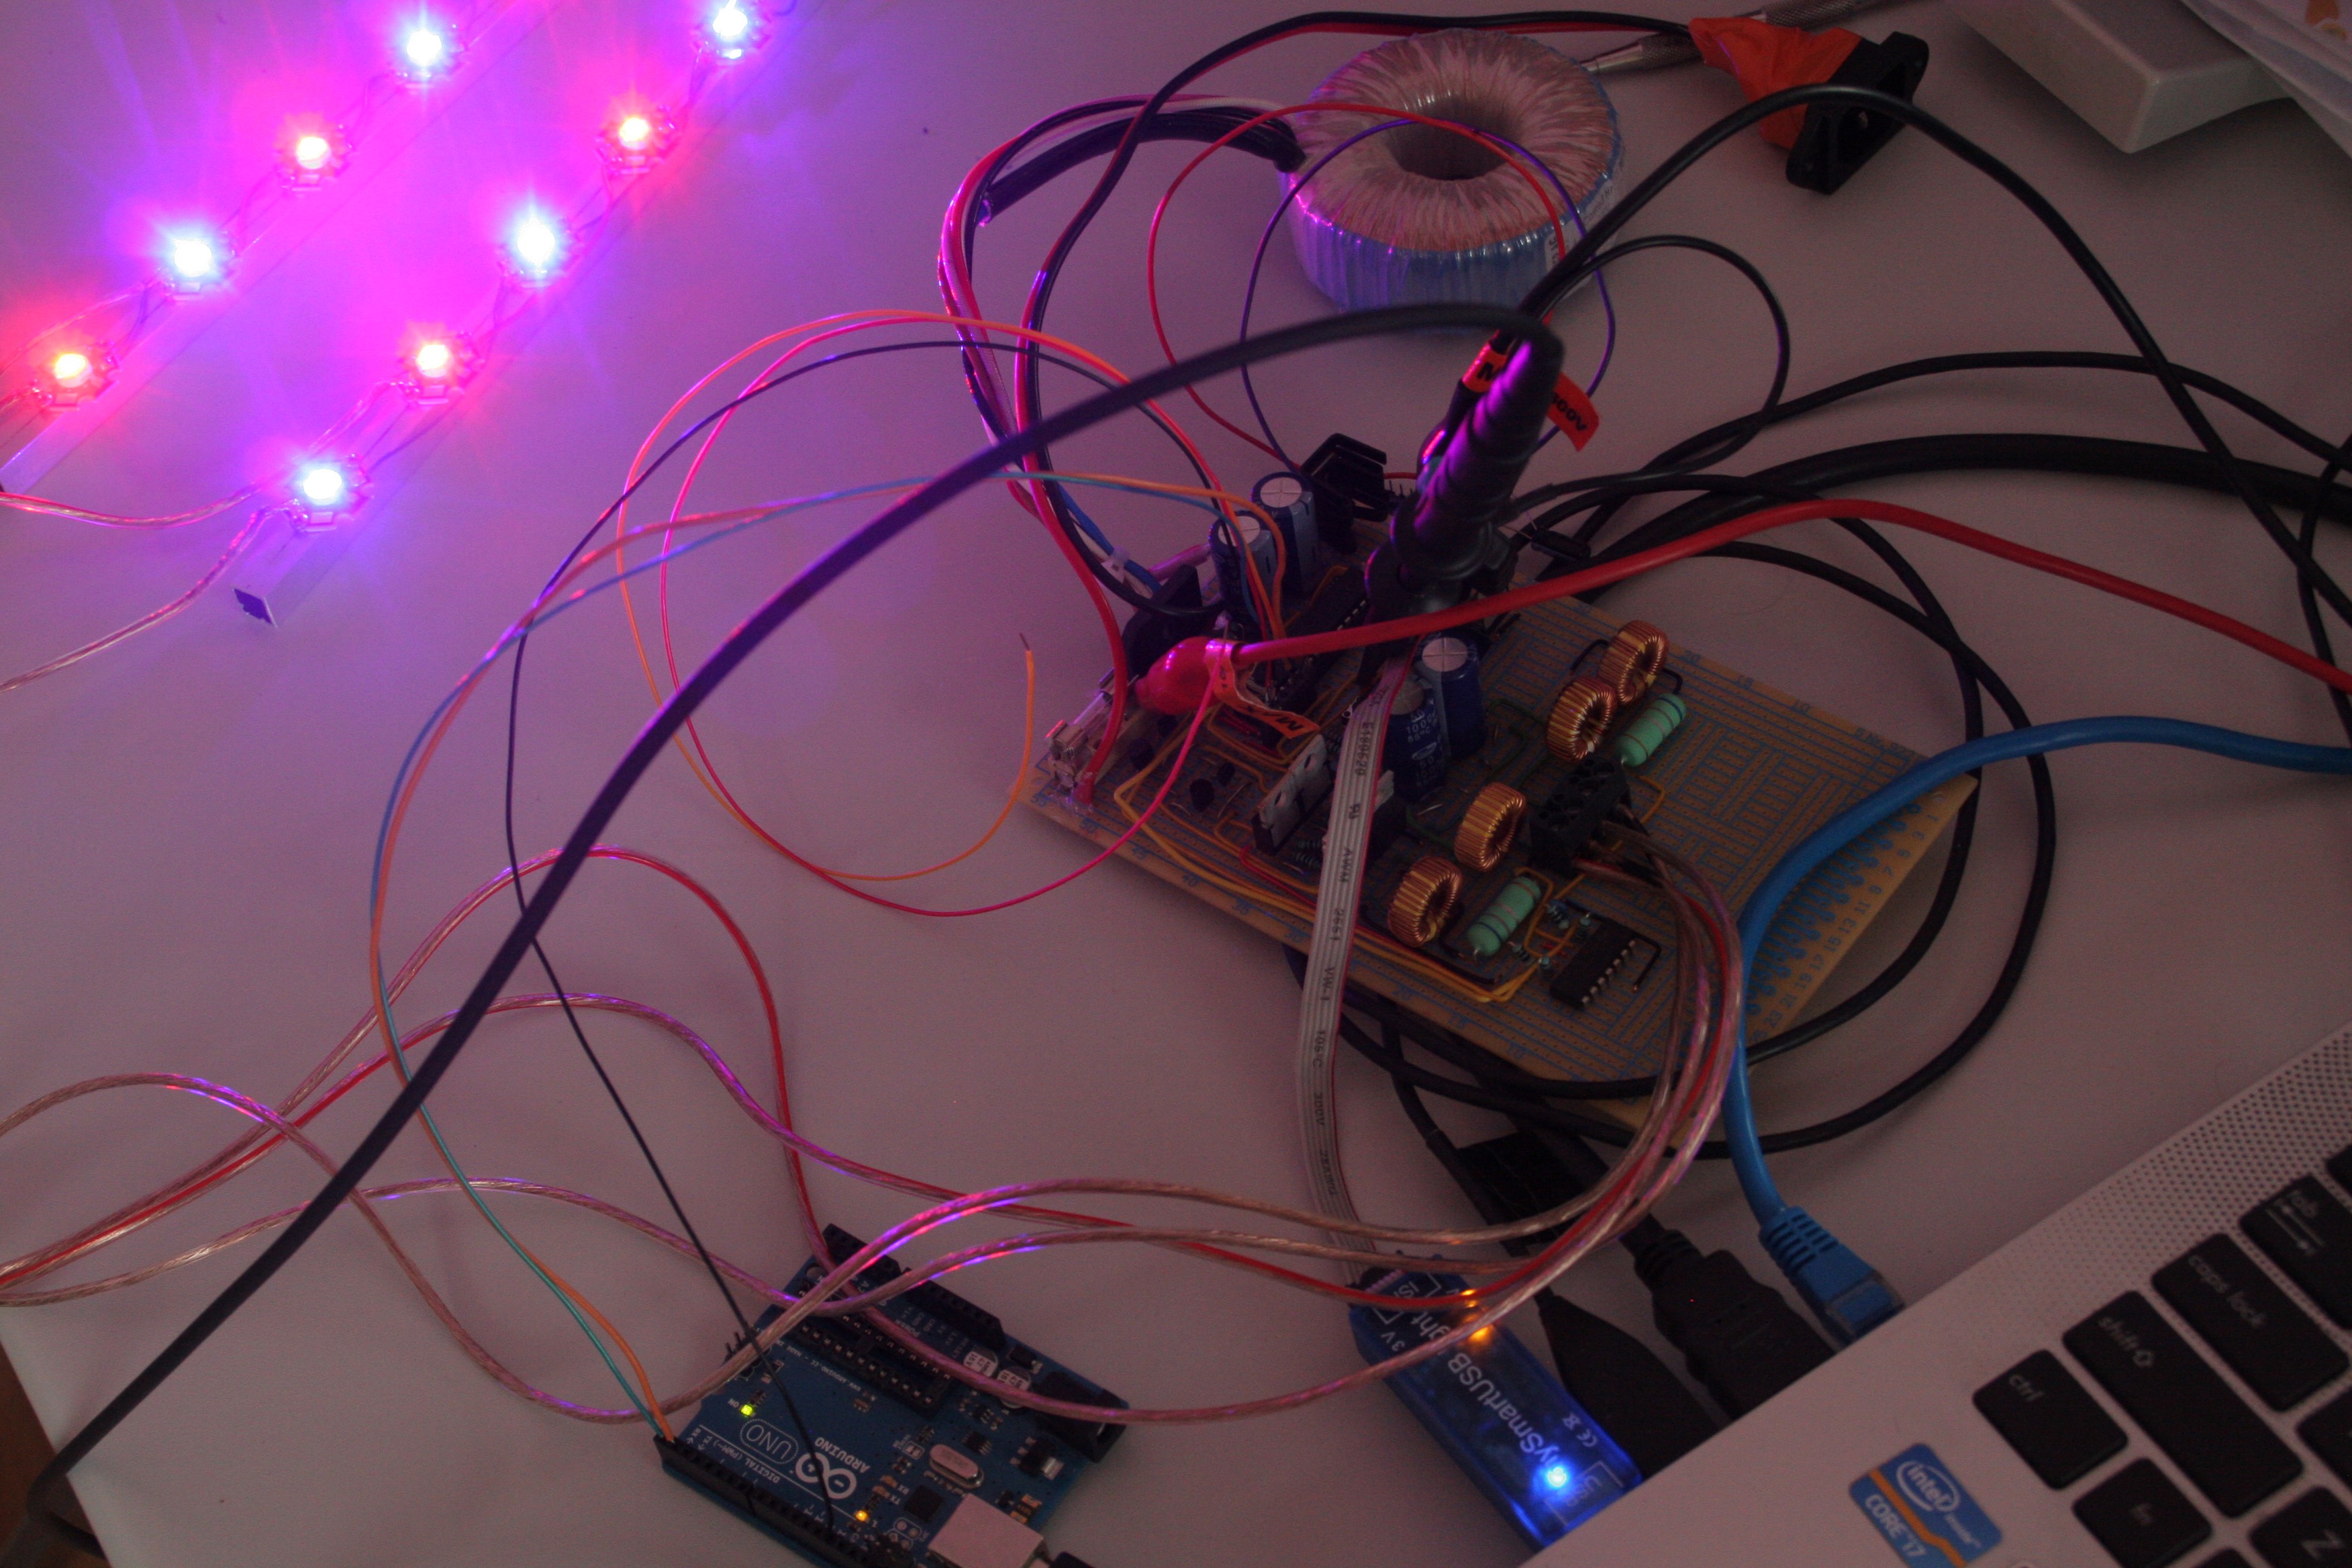
With the board ready it took merely an hour or two to refine the fast PWM and current control and upload the code. Sadly my program was attacked by a bug, and this is what my board looks like now:
![]()
My Uno is managing the serial IO, the Oscilliscope is monitoring the PWM and power source, the programmer is pushing new code constantly and my lab bench power supply is providing a clean power source, but I still can't for the life of me figure out why my Arduino is randomly crashing! So I guess it will be a little while until I can mount my electronics ;(
If you wan't to see the issue, I posted a question on stack exchange: http://arduino.stackexchange.com/questions/25414/arduino-crashing-and-rebooting
 This is my enclosure with all electronics mounted and LED's on full power
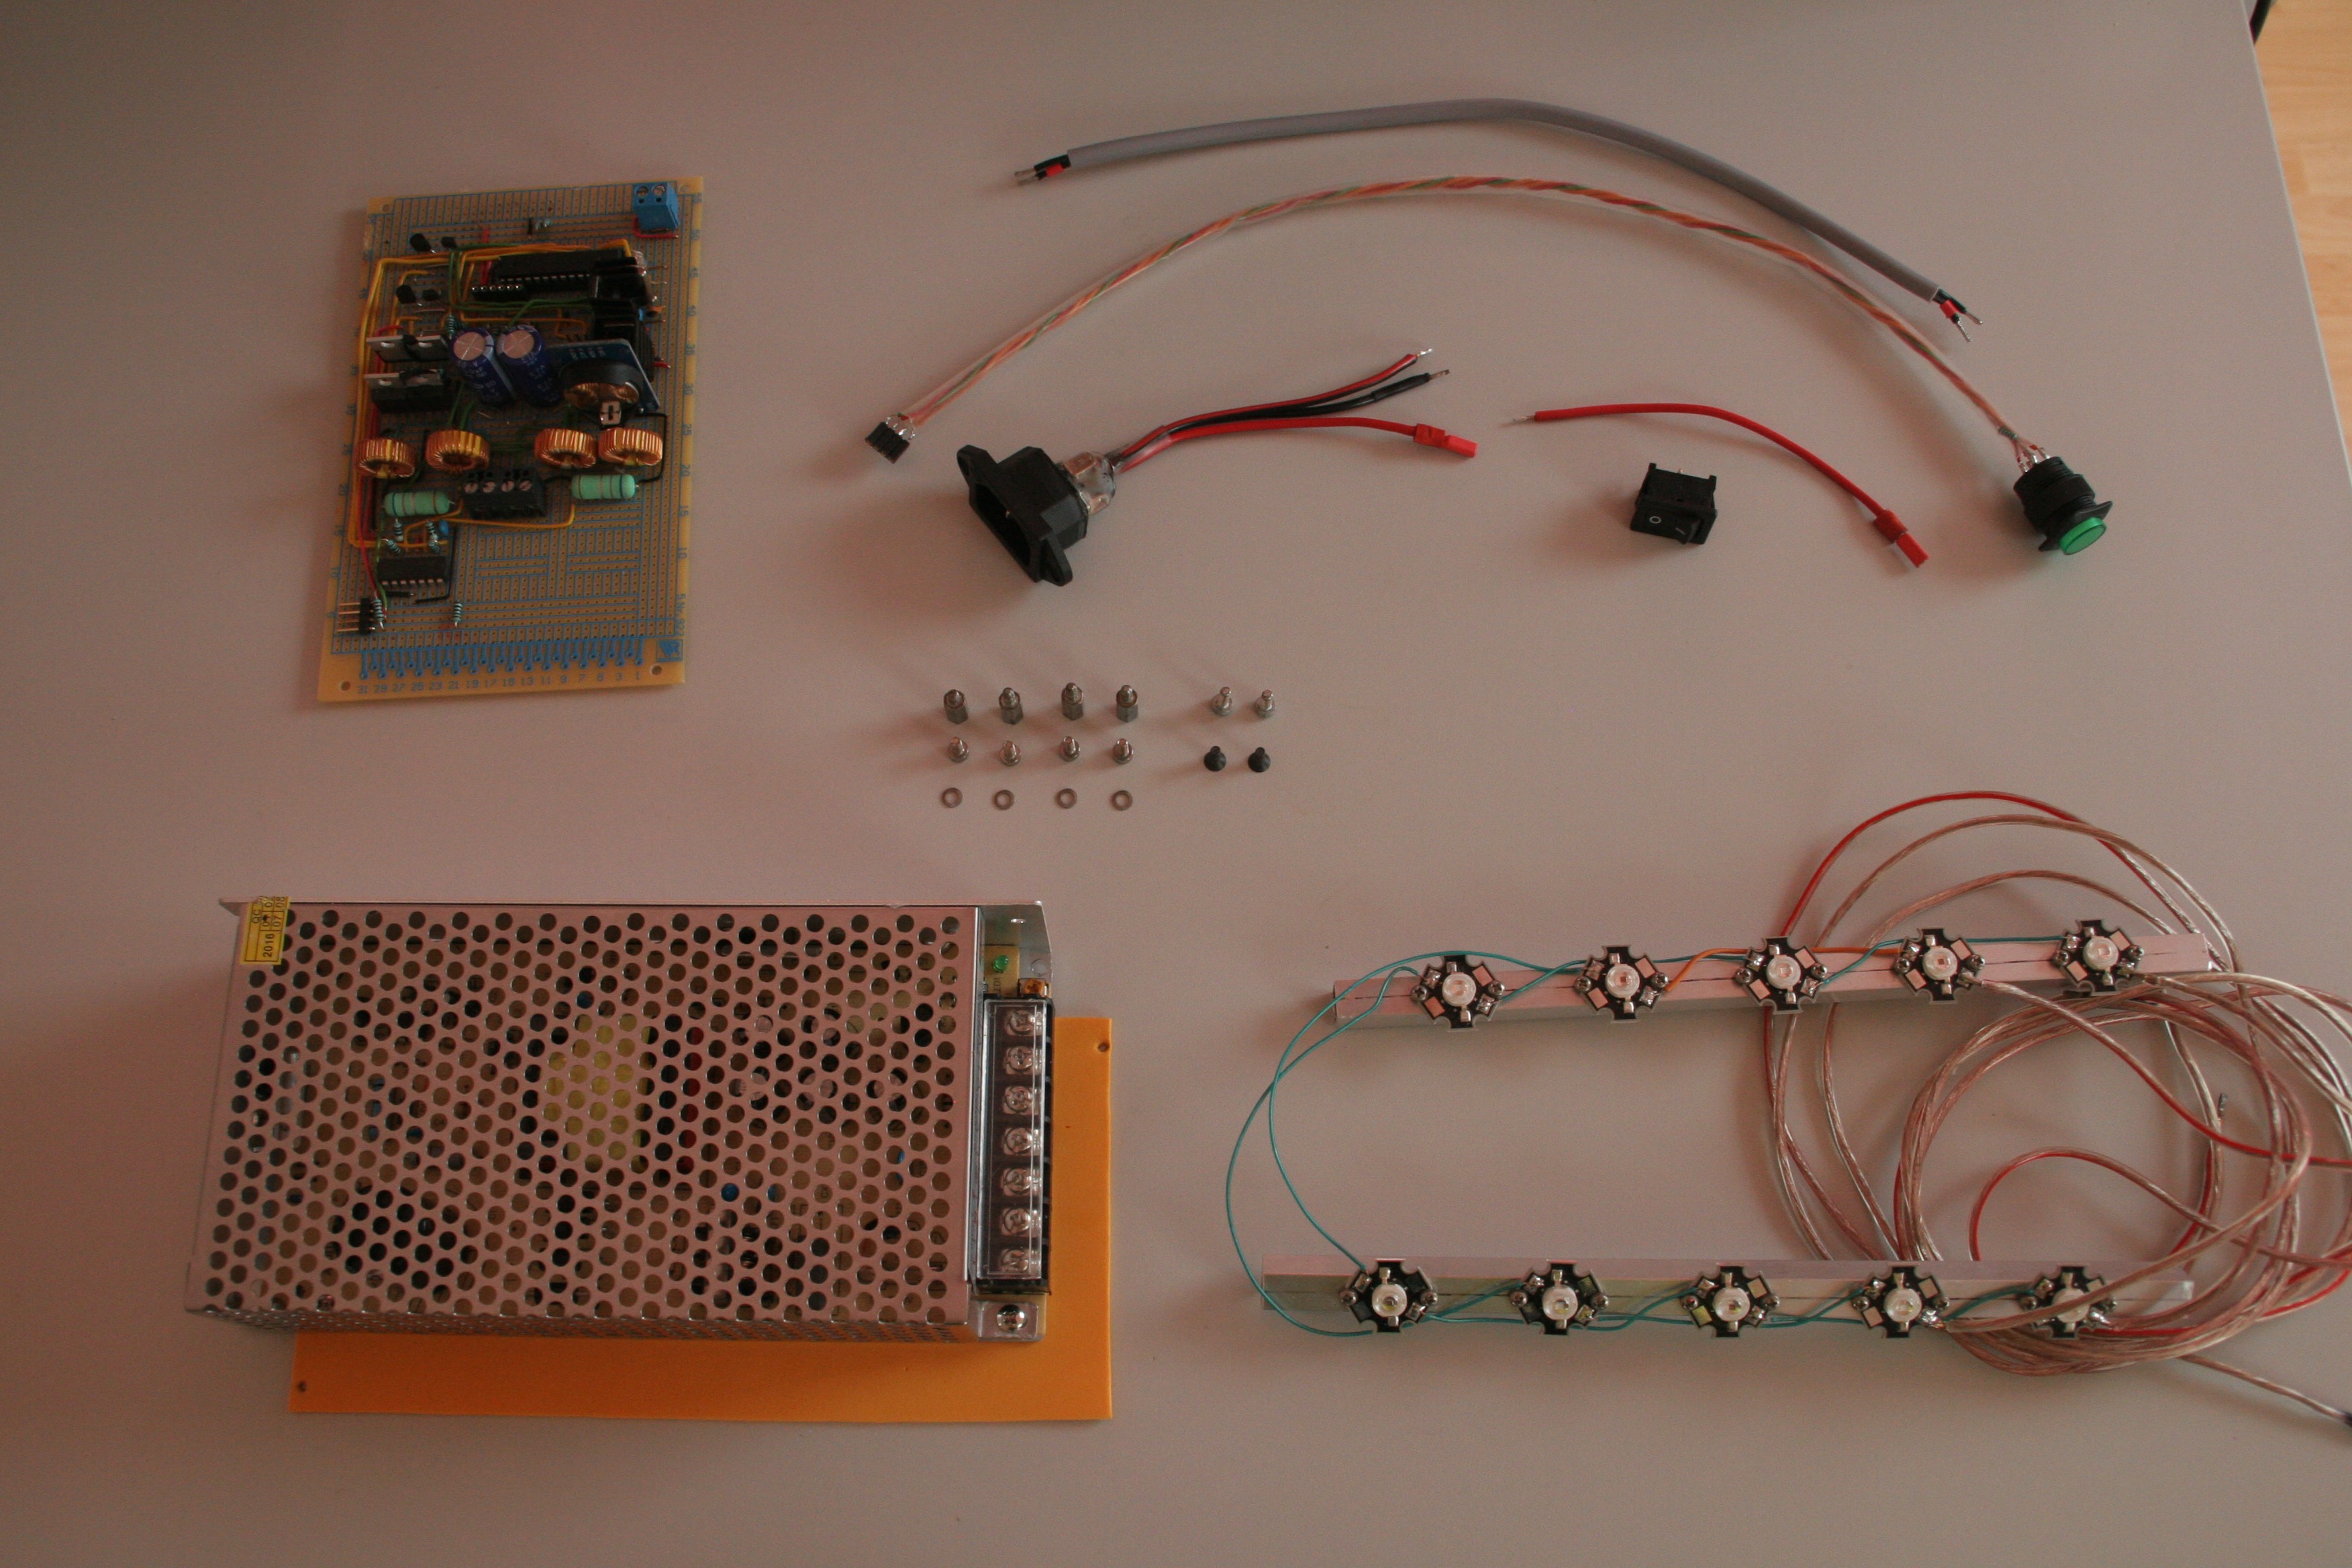 These are all of the hardware components that were mounted (and used to mount)