Close
0%
0%

ToslinkCNC

CNC machine control modules with Toslink optical cables.
http://goodenoughcnc.eu/

Similar projects worth following
ToslinkCNC, CNC machine control modules with Toslink optical cables, was developed for our GoodEnoughCNC range as an answer to grounding and interference issues commonly experienced with DIY and low-cost CNC machines More:
http://goodenoughcnc.eu/
https://github.com/IRNAS/ToslinkCNC

CNC machine is usually controlled via parallel bus, containing six signals. For each of the three axes there are two signals: STEP and DIR. At each positive edge of the STEP signal, the corresponding stepper motor moves into direction set by DIR signal. In addition to these six signals, there can also be other general purpose control signals.

Parallel bus on longer distances and in noisy environment can be susceptible to electromagnetic interferences. Because of this we decided to design an interface to transport these parallel signals via an optical link. For successful transfer via optical fiber the first thing that must be done is to convert parallel data to serial bit stream. Moreover, because of the inherent design of optical transmitters and receivers, serial data must also be Manchester encoded.
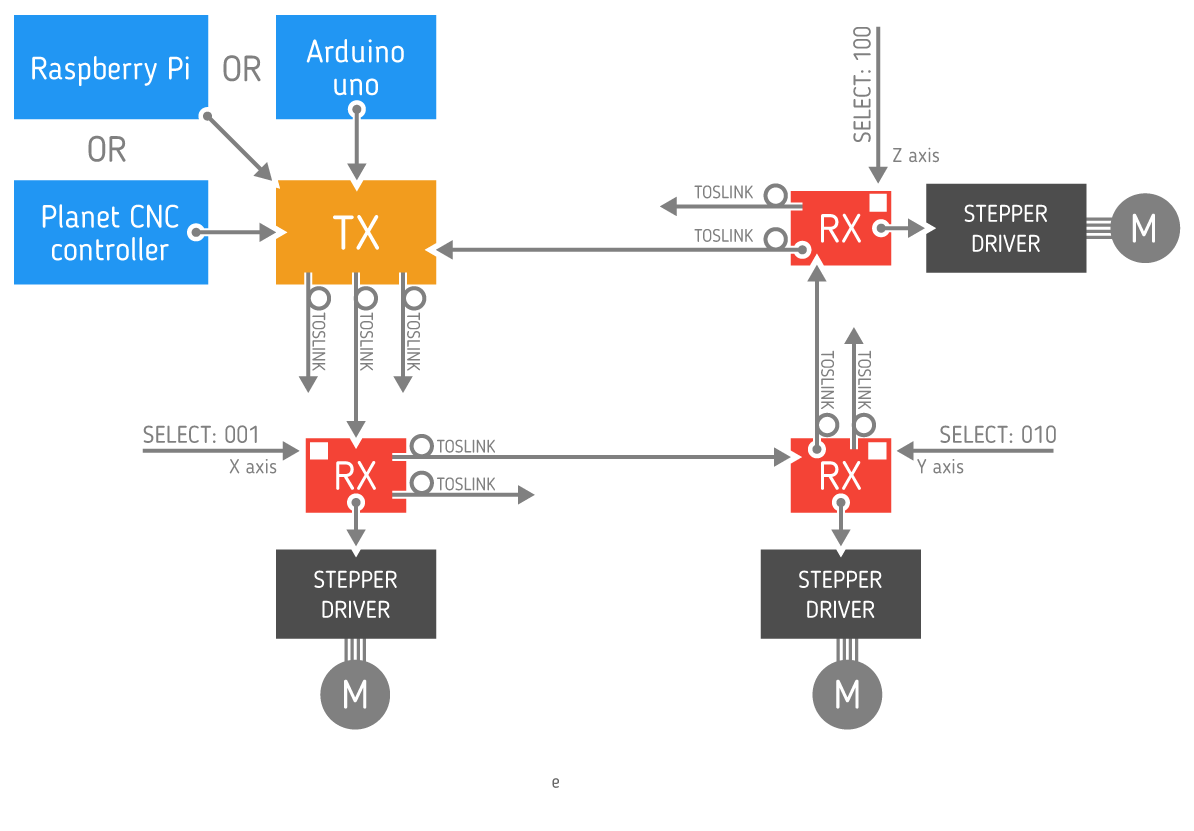
Our design is based on Serializer / Deserializer for Audio Fiber Optic project published on Open Cores.

Use cases

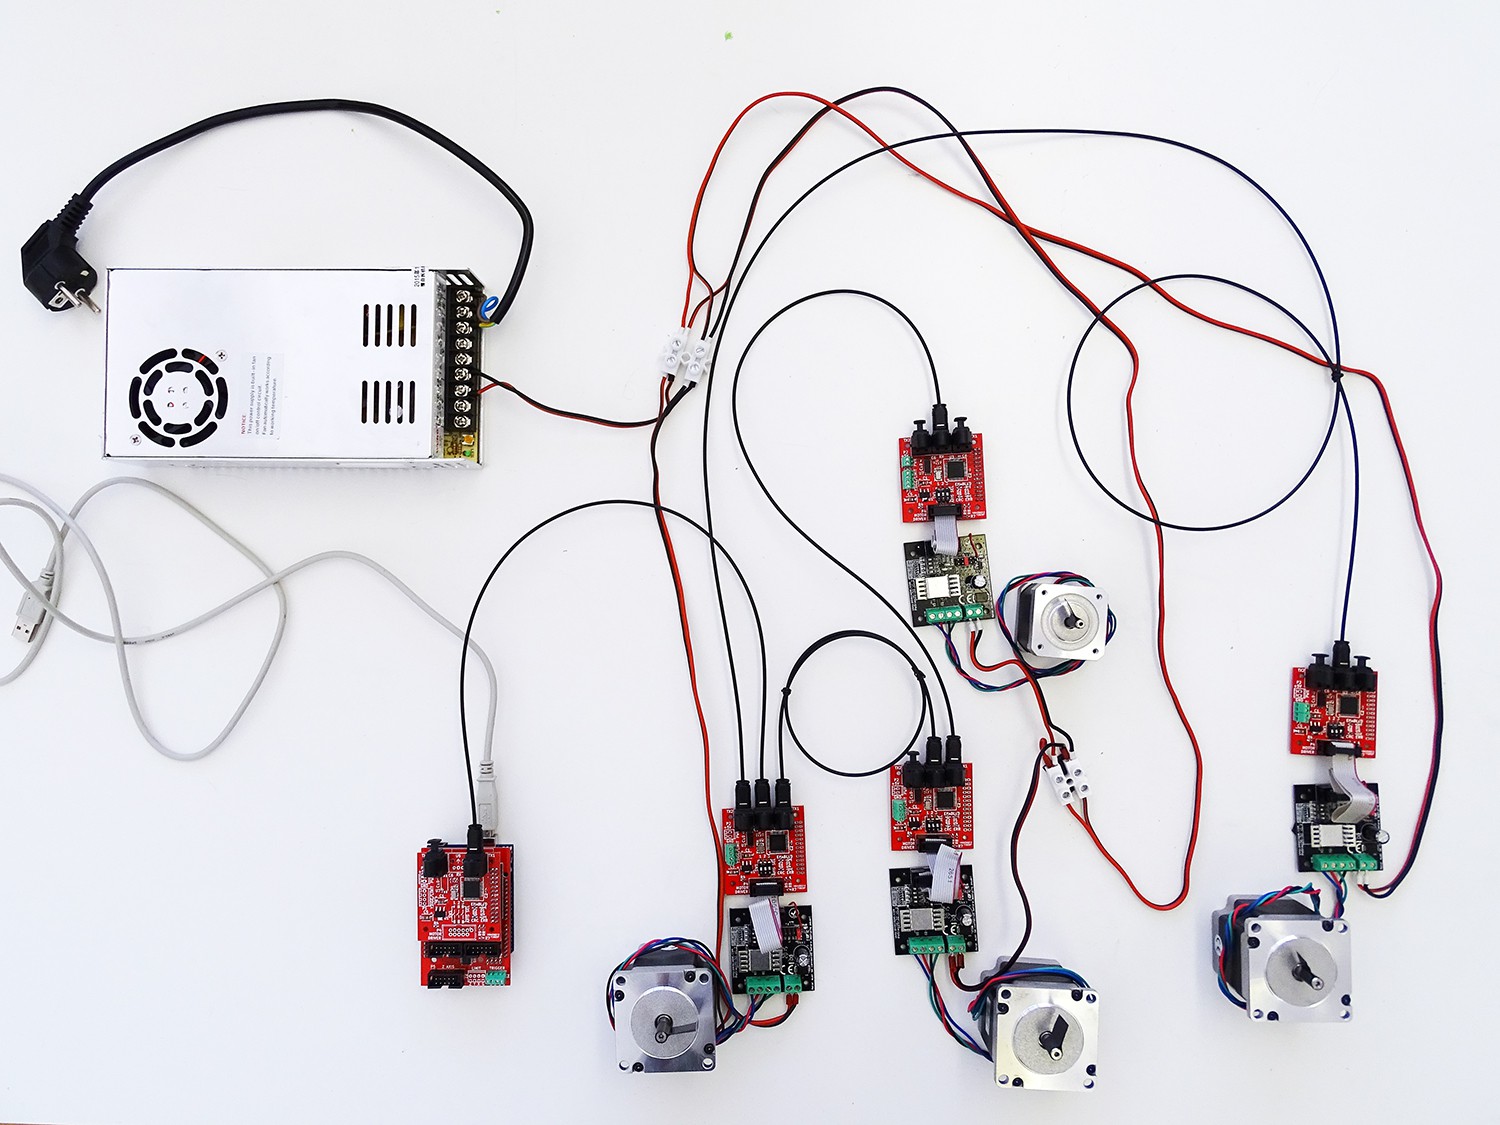
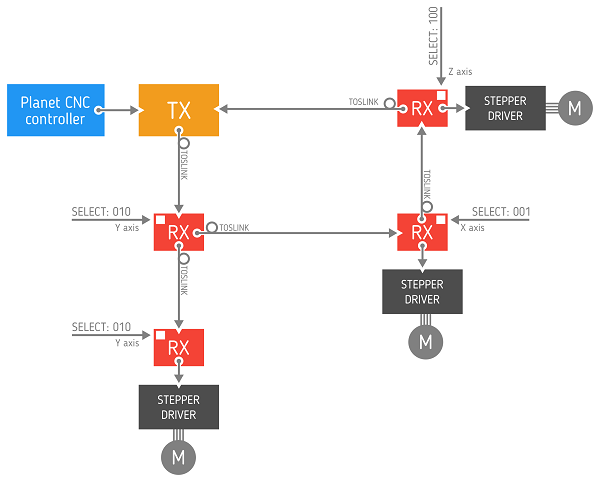
ToslinkCNC has been developed for use with GoodenoughCNC Plasma cutter as our answer to continuous problems with electrical noise and interference. The following configuration is used in the system.
Toslink Receiver-transceiver

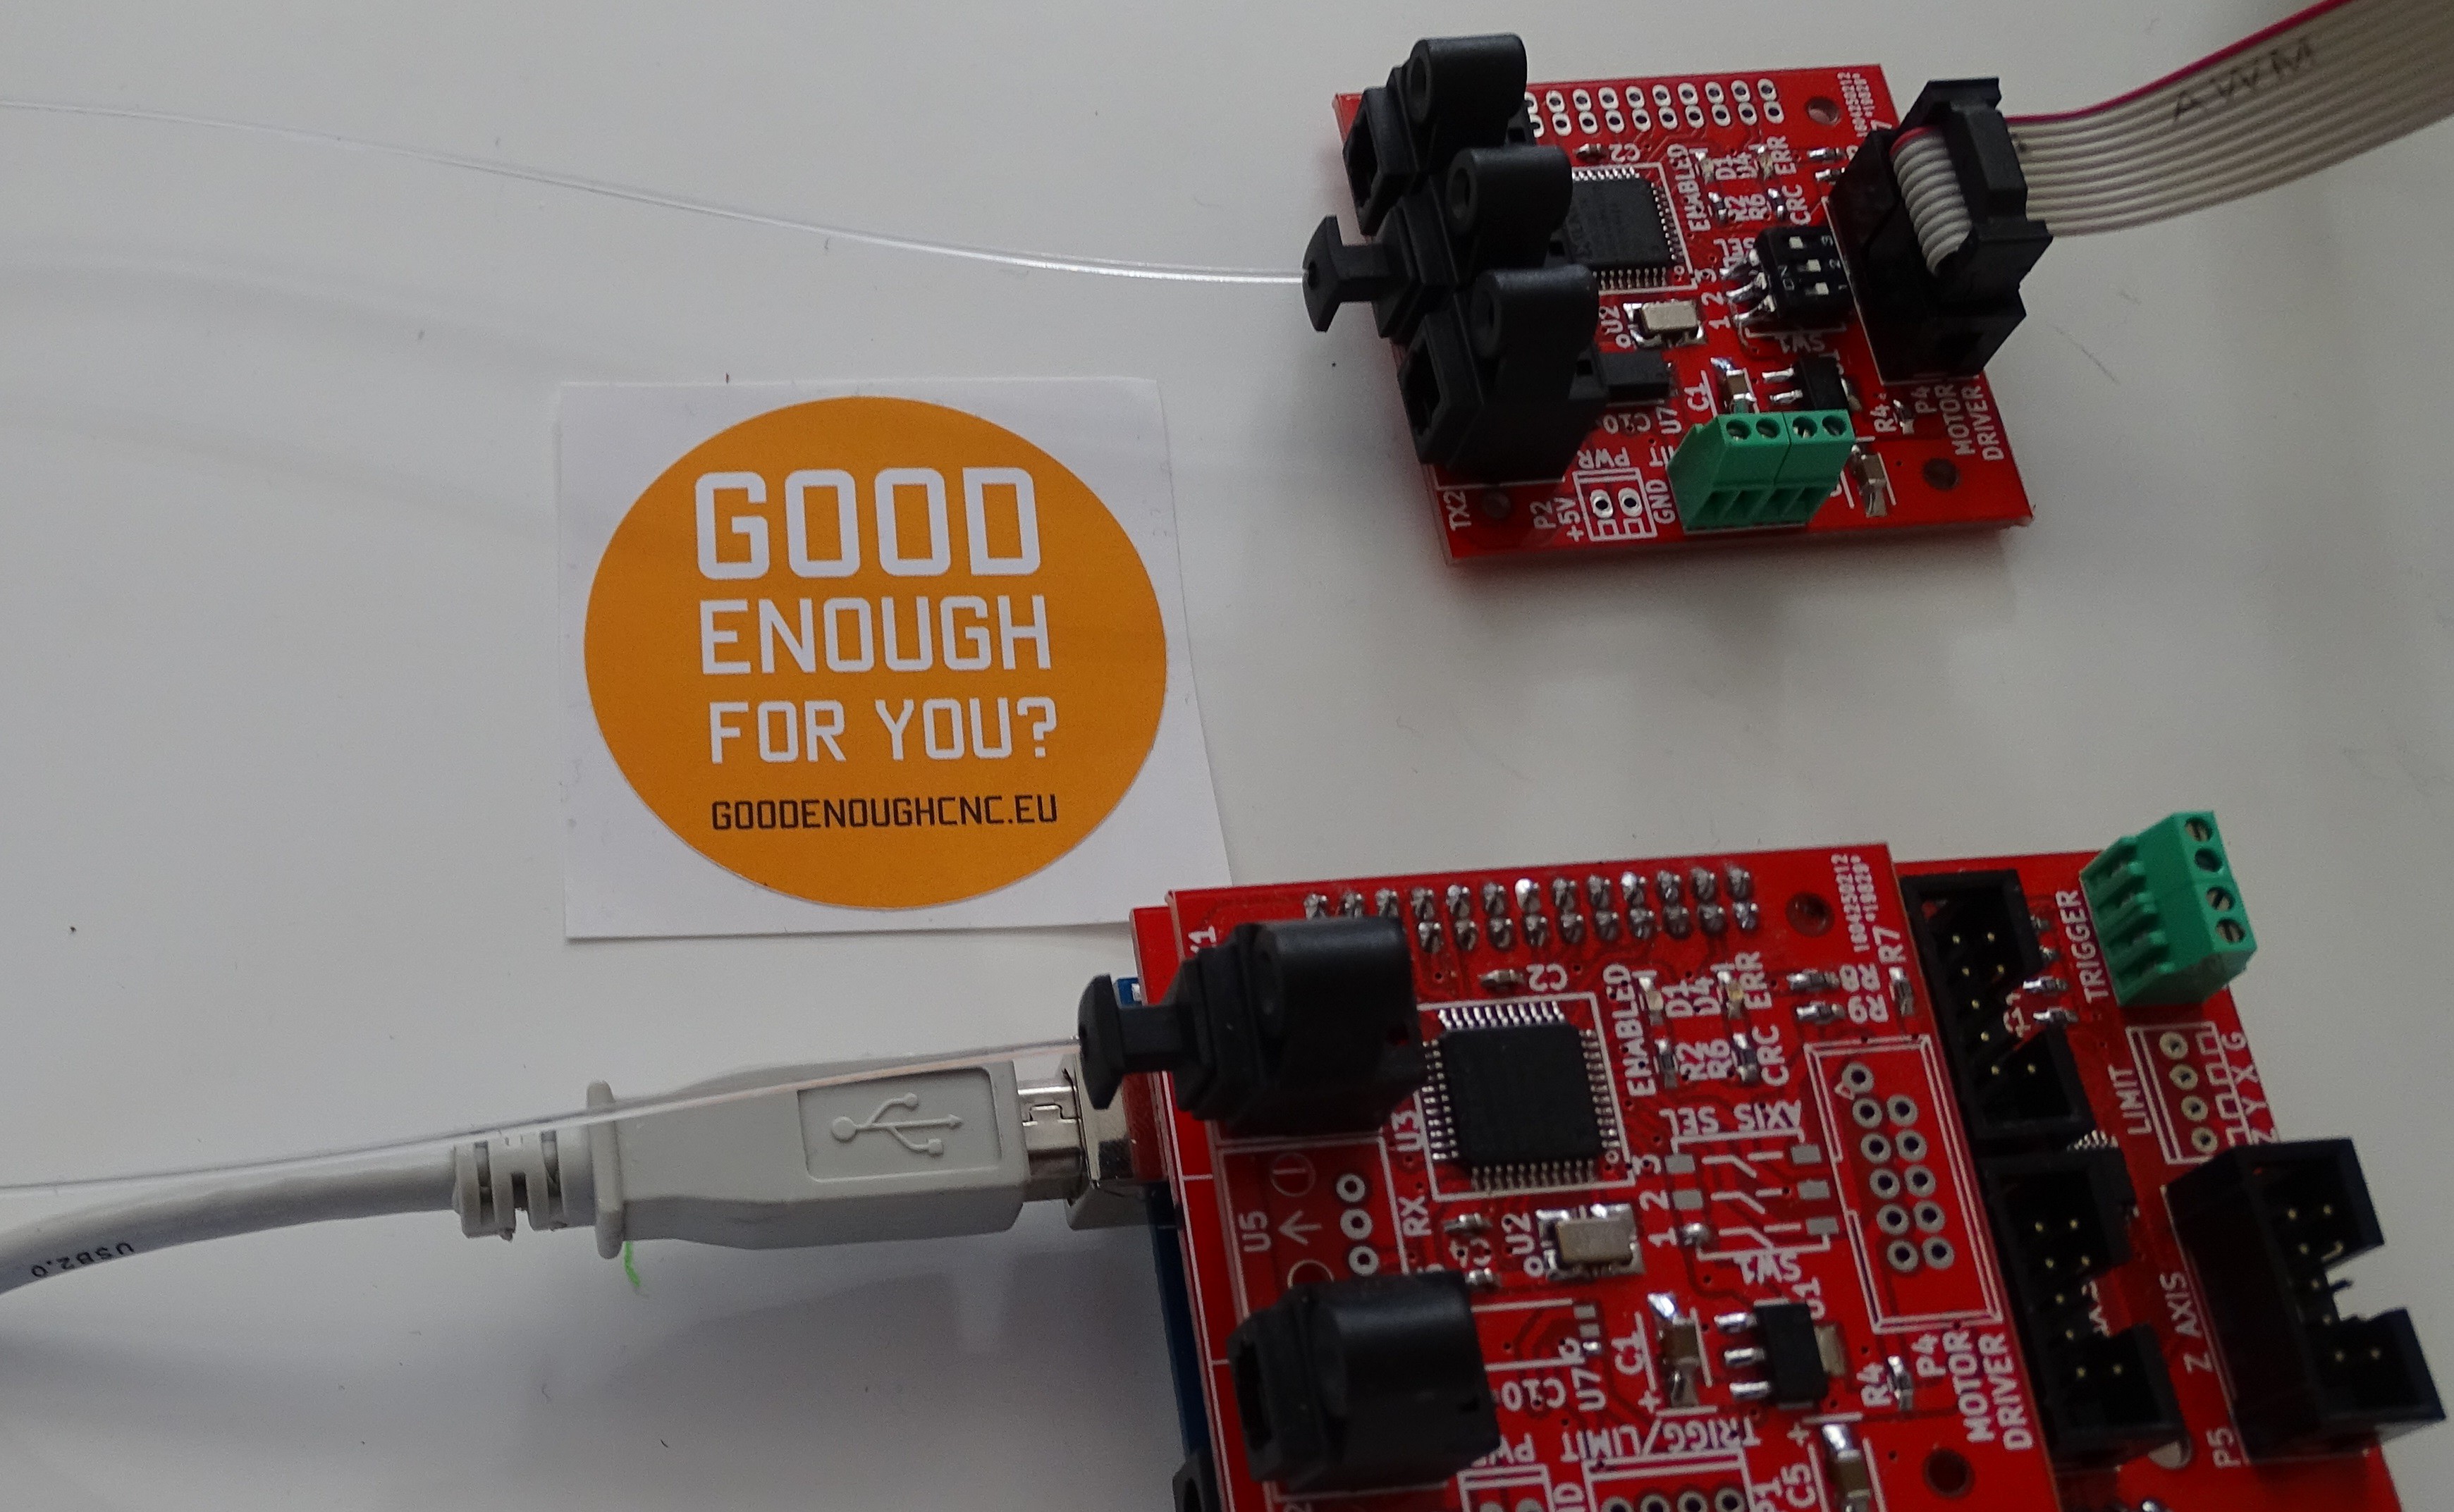
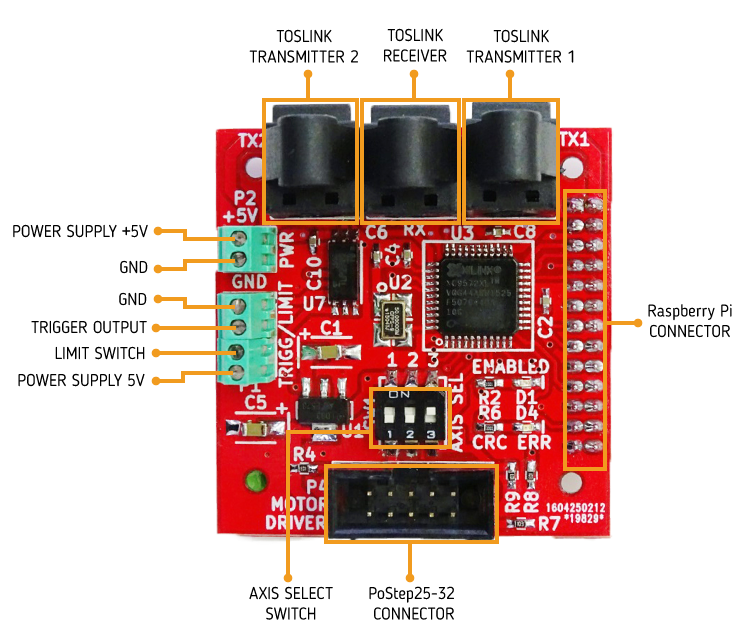
For each motor on the CNC machine there is one PCB, containing Toslink receiver. Receiver PCB, together with motor driver, can be mounted on the motor. Receiver is being used with PoLabs' PoStep25-32 stepper motor driver. PCB is being powered through motor driver connector using +5V. To enable this the +5V supply from motor driver should be connected to unused 9th pin on the driver's IDC connector usign a piece of insulated wire. PCB consists of one CPLD, two optical transmitters, one optical receiver, one DIP switch for selecting the axis and one limit switch / trigger connector. Limit switch is insulated through an optocoupler and trigger output is open drain type. Toslink transmitter DLT1111 and Toslink receiver DLR1111 were used, which enable data transfer speed up to 16 Mbps. We used Xilinx XC9572XL CPLD to implement the necessary logic for protocol conversion. Receivers can also be connected in daisy chain.

Using IDC-10 connector:
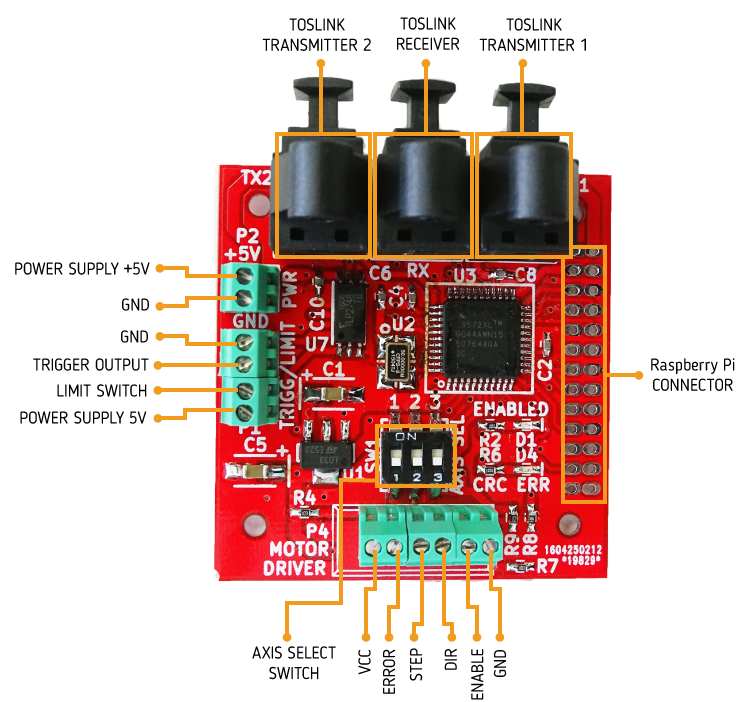
Using terminal blocks:

Toslink Transmitter

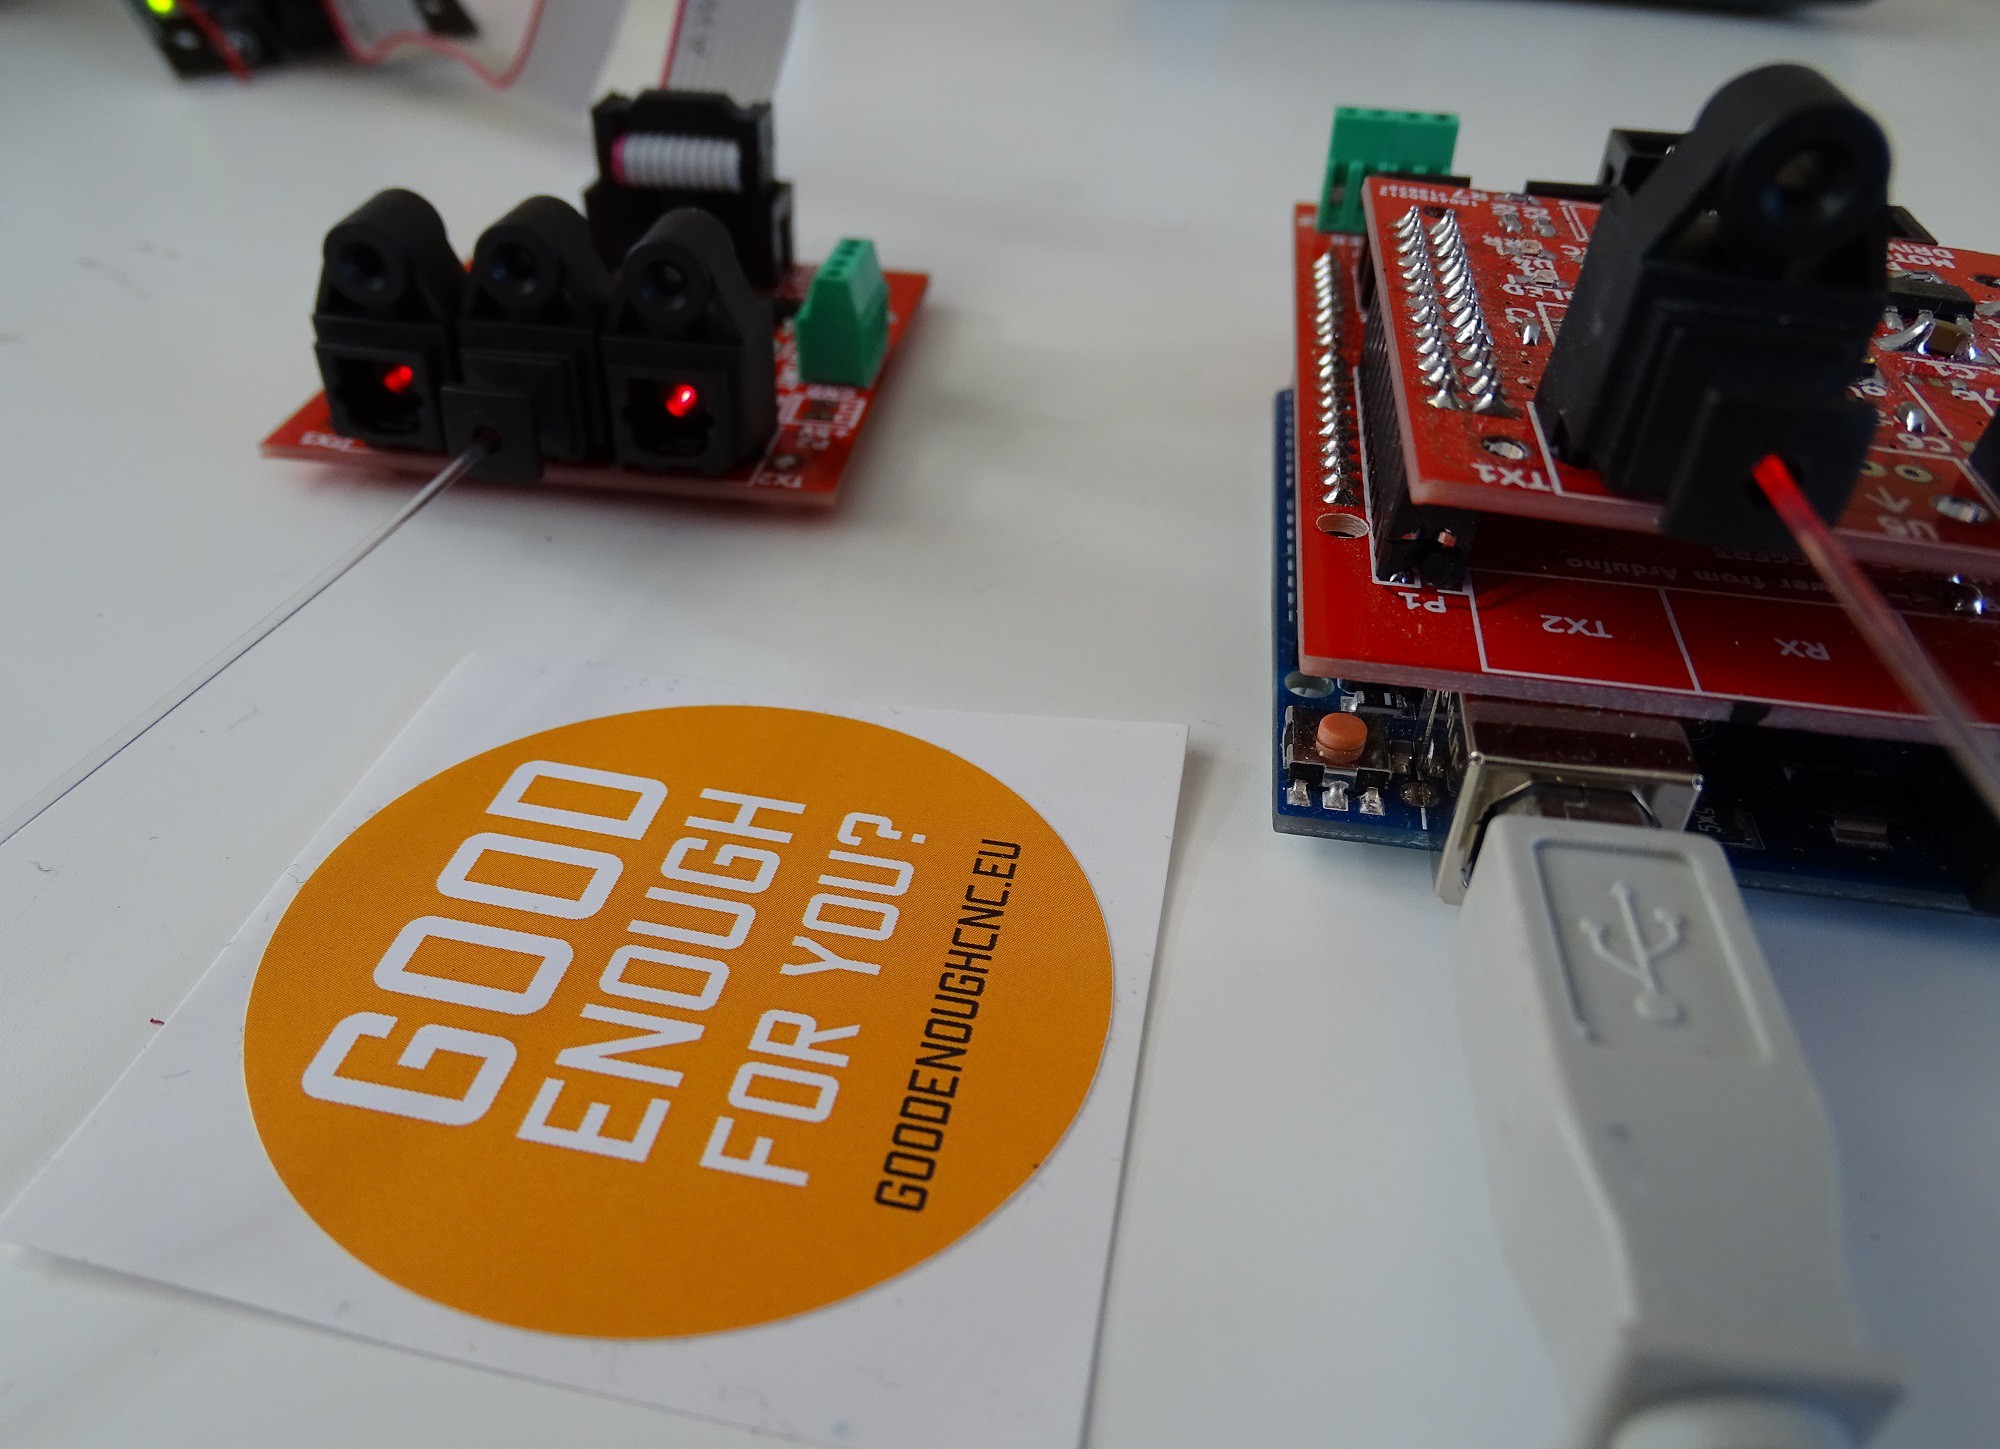
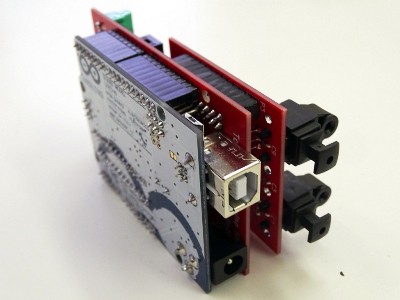
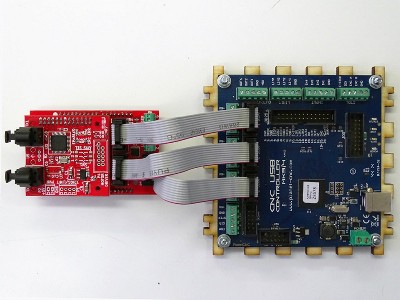
Transmitter consists of two PCBs, an Arduino sield and a Toslink transciever. Both PCBs are stacked together. Toslink transciever PCB is identical to one used for receiver. Arduino shield consists of headers for Arduino and connectors for CNC USB Controller Mk3/4 from Planet CNC and PoStep25-32 driver. There is also a terminal block for connecting limit switches and trigger signals. Circuit can be powered either through terminal block (+5V), through Arduino Uno if attached as a shield, or from Planet CNC Controller.
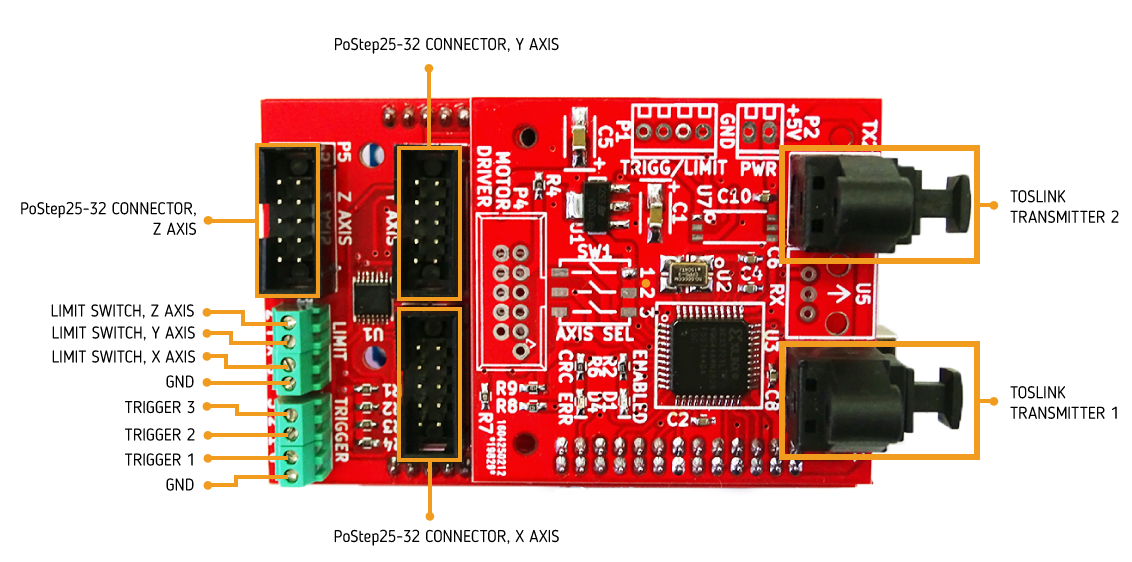
Toslink Transmitter - Arduino Shield

Toslink Transmitter - Planet CNC

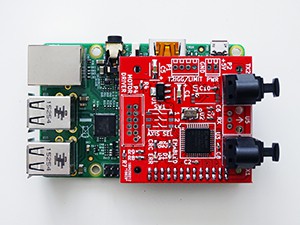
Toslink Transmitter - Raspberry Pi Shield

Firmware Description

All data is being transmitted in frames of fixed length. Frames are transmitted without gaps between them. Each frame contains 3 direction values, 3 step values, vaule of enable signal, 3 values of limit/end switch signals (these fields are being shared with 3 trigger values), parity bits and frame delimiter. To detect parity bit corruption, both even and odd parity bits are being transmitted. Transmitter places direction, step, enable and trigger values in new frame, adds calculated parity bits and sends the frame to the first receiver in daisy chain. Receiver reads the enable value and direction, step and trigger values ( based on axis selection). Receiver replaces the correspondig trigger value with limit switch value, calculates new parity bits and sends this new frame to the next receiver in dasy chain. Output of the last receiver in dasy chain is connected to transmitter input. Transmitter reads all three limit switch values from received frame.

Data in optical fiber is manchester encoded. For logic '0', logic '1' and frame delimiter three different patterns are being used. They were selected so that all of them have the same length and are completely different from each other. Decoding...

Read more »

toslink receiver BOM.ods

spreadsheet - 14.13 kB - 05/30/2016 at 11:48

Download

toslink receiver schematic.pdf

Adobe Portable Document Format - 97.43 kB - 05/30/2016 at 08:55

Preview

shield schematic.pdf

Transmitter shield schematic

Adobe Portable Document Format - 69.07 kB - 05/30/2016 at 08:52

Preview

shield BOM.ods

Transmitter schield BOM

spreadsheet - 10.22 kB - 05/30/2016 at 08:52

Download

  • Poor man's Toslink cable - no connectors needed

    Musti05/30/2016 at 17:09 0 comments

    Toslink cables are commonly available online and in stores, however when running them between components or on GoodenoughCNC machines, the frustration persists that a pre-made cable with connectors is never the right length. But fear not, we found that you can simply make the cable yourself and the system works just as well as with purchased cables.

    A pre-made cable of 1m length can be obtained for around 2$ with connectors, 1mm PMMA fiber with no shielding for about 0.09$/m, so we can have a significant cost saving using it.

    Now reliable connections are the first thing that comes to mind, however that are much simpler to achieve then expected because:

    • Cutting PMMA cable with scalpel produces a nice flat cut
    • Toslink receivers and transmitters come with dust caps
    • Dust caps are easy to drill with 1mm drill bit

    Thus to make our own cables, we can simply cut the fiber in length, drill a hole in the dust cap, push the fiber in all the way and ad a drop of glue such that it can not slide out of the dust cap.

    A simple hack like this, makes our wiring much simpler. Because the fiber is transparent, you can see a nice red glow on it. ToslinkCNC connection can be simply tested with your custom cable by observing the error light on the receiver board.

    Another neat thing about clear PMMA fibers is that you can run them almost unnoticed everywhere.

  • Improved version of ToslinkCNC

    Musti05/30/2016 at 14:44 0 comments

    The version 2 of the system ToslinkCNC is improved with a number of new features. You can check out the blog on previous version here.

    Using the previous version for about 5 machines we’ve learnt a lot, a number of changes now make it much better. Hardware footprint has been reduced and unified, such that the CPLD based optical board can now be a transmitter or receiver, only with a firmware change. The optical control system can now be seamlessly integrated with Raspberry Pi, Arduino, Planet-CNC controller or any other CNC control system operating with step and direction signals. This makes it perfectly suitable for new machines being built as well as a retrofit of older systems.

    ToslinkCNC main board is designed as a single axis device, featuring one receiver and two transmitter optical interfaces and a number of electrical connections through two versions of interfaces. RaspberryPi connector contains signals for 3 separate axis and enable signals, such that the board can be a transmitter for the complete system or extended with a shield to connect to other controllers. On board there are connections for 5V power input, one input and one output as well as a screw terminal or IDC port for step, direction and enable signals to connect to a stepper driver. The RaspberryPi connector also contains pins for JTAG programming of the main board. Currently there is only one shield available that doubles as the interface for the transmitter connected to Arduino or PlanetCNC controller. When the main board is in function of the receiver, stepper drivers can be connected to it, our default choice being PoStep25-32.

    The version 2 is not yet perfect, however we are successfully using it with GoodEnoughCNC Hybrid machines also in challenging conditions, for example with plasma cutters. Future work is required to add proper support for end-switches by significantly optimizing the CPLD code and adding a few more features.

  • GoodEnoughCNC using ToslinkCNC

    Musti05/30/2016 at 13:27 0 comments

    Check the video to see how ToslinkCNC operates on GoodEnoughCNC Hybrid machine. In this case it is used on the cnc machine with a mill head, but it was already successfully used with plasma cutter as well.

  • ToslinkCNC Walkthrough

    Musti05/30/2016 at 13:17 0 comments

    We prepared this video to walk you through the ToslinkCNC setup.


View all 4 project logs

Enjoy this project?

Share

Discussions

MonicaLindgren wrote 08/08/2020 at 12:17 point

I have to say that ToslinkCNC is successfully solving all of interfence and grounding issues. Read essayshark review to know about their service. From my point of view, their most highlighting feature is that they are offering very high quality services in a very reasonable price range.

  Are you sure? yes | no

klima.igor wrote 02/07/2020 at 20:28 point

hallo

Kde je možné kúpiť montáž elektroniky toslink cnc elektroniky?

  Are you sure? yes | no

Similar Projects

Does this project spark your interest?

Become a member to follow this project and never miss any updates