-
1Step 1
Flash ESP8266
- You need to set the ESP8266 into Program mode by setting up the jumper correctly between IO_0 and GND.
- Connect TX,RX and GND to your serial converter (or Arduino board without the microcontroller)
- Start the flashing tool first
python2 esptool.py --port /dev/ttyUSB0 write_flash 0x00000 nodemcu_firmware.binFor Windows, you can use NodeMCU flasher
4. Start the HomeAutomation board.
In case of problems, you might need to switch TX and RX connectors. Make sure you connect GND as well.
-
2Step 2
Load scripts to ESP8266
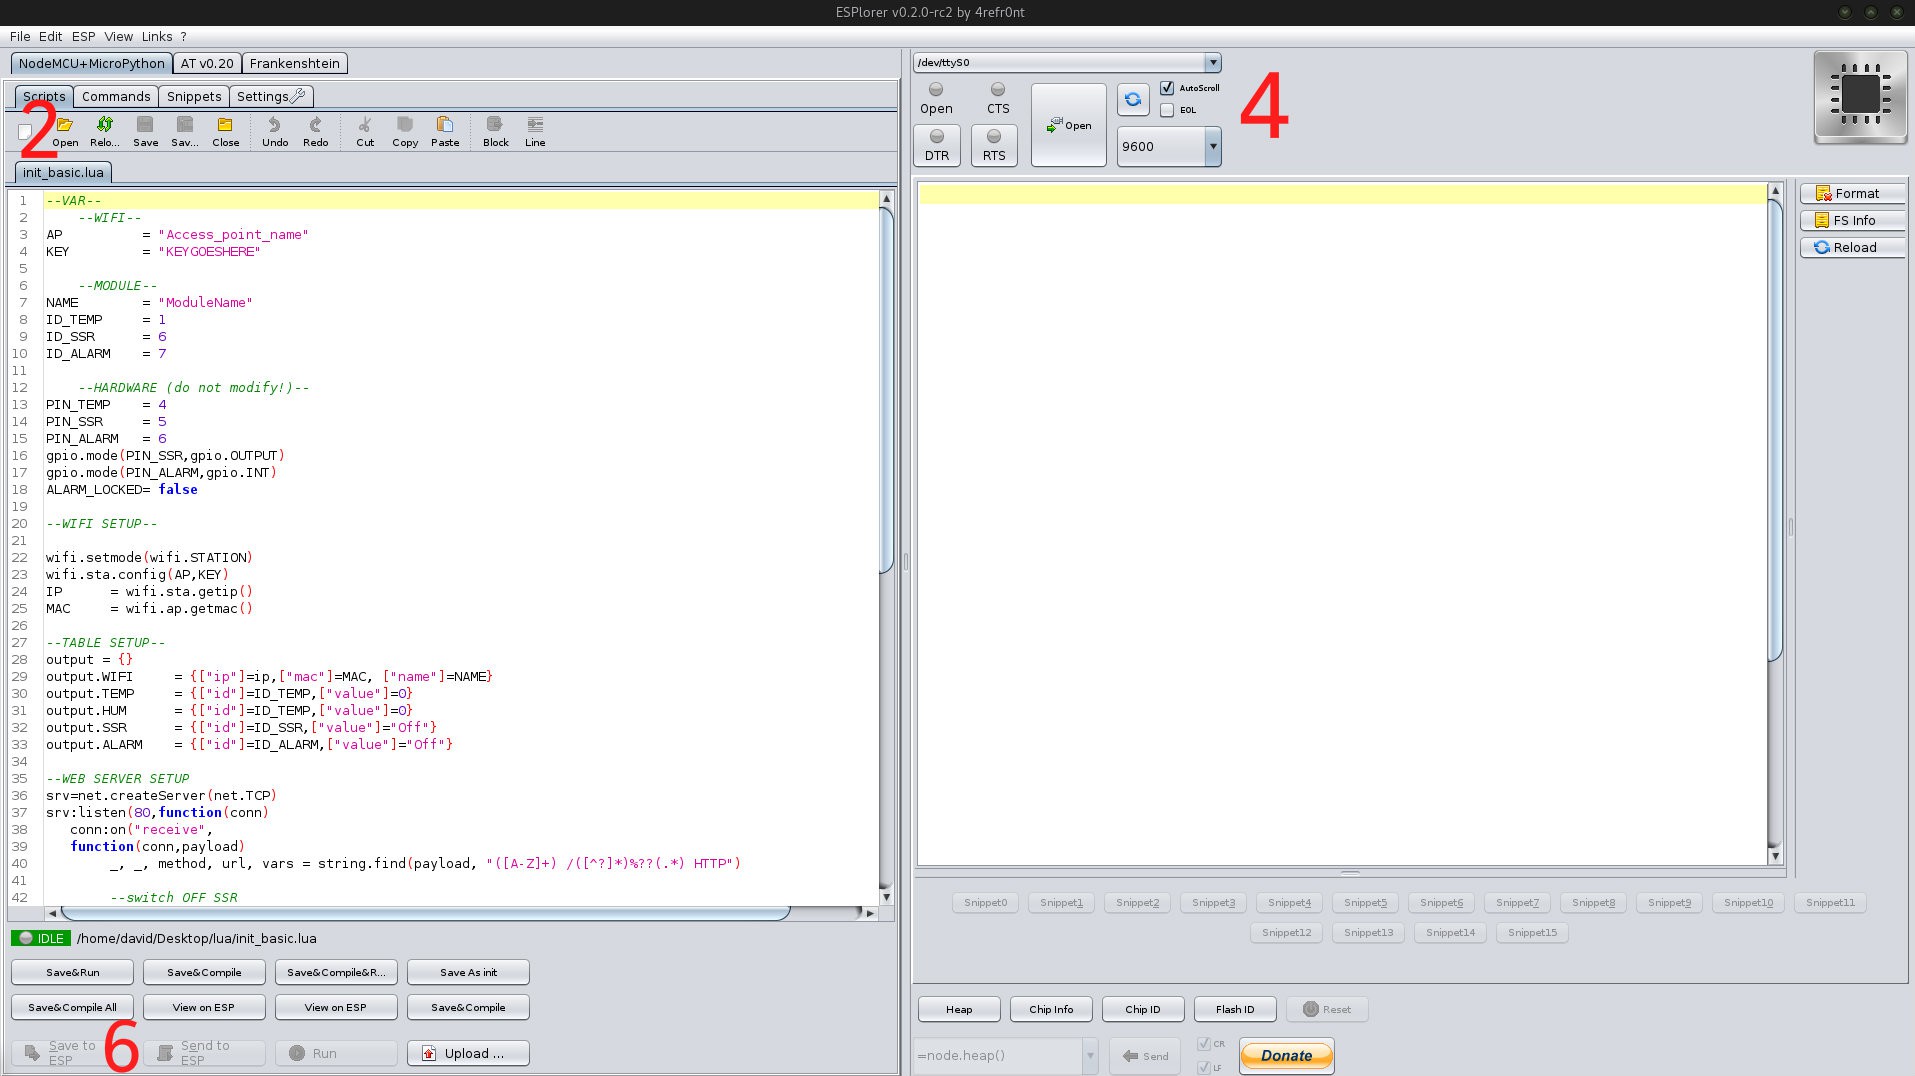
- Download ESPlorer ( works with both Linux and Windows ).
- Open your file. You can try the file init_basic.lua available in the project page. (the file should be named : init.lua )
- Remove the jumper between IO_0 and GND. The program mode is only required to flash the ESP8266.
- Select the correct device and baud rate ( 9600 ) , click Open in the right panel, at the top.
- Start the HomeAutomation board .
- Click "Save to ESP" in the bottom left corner.
- The board might require a reset for the new code to be effective.
If it doesn't work, make sure you have connected TX, RX and GND correctly. Check that the baud rate and the port are correct. Always open the port first and then start the board, it will not work if you start the board first.
Home Automation Power Socket
A simple power socket that contains a relay, a temperature/humidity sensor, a motion sensor and that is manageable over WiFi
 David Davenne
Discussions
Become a Hackaday.io Member
Create an account to leave a comment. Already have an account? Log In.