-
1Step 1
OVERVIEW:
Here are some preliminary instructions on how to get your Mechaduino up and running.
-
2Step 2
ASSEMBLY:
You will need to mount the magnet to the back of the motor shaft. Note: the magnet must be diametrically magnetized, as opposed to axially magnetized. The magnet may naturally stick to the shaft, but we recommend a dab of epoxy or super glue to hold it in place. The magnet should be fairly centered, but the calibration routine will correct for minor misalignment.
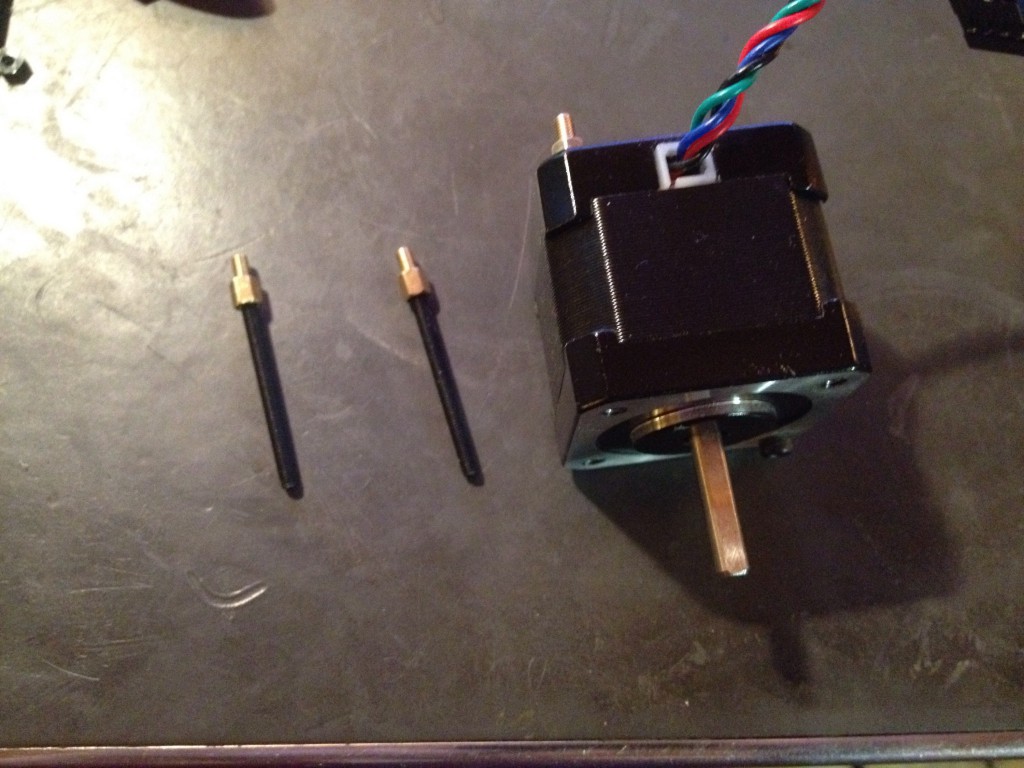
The Mechaduino PCB must be mounted so that the magnet is directly under the encoder chip (Very close but not touching. See the AS5047 datasheet for details). We replaced the standard motor hardware with M3 threaded rods and short standoffs to mount on our Mechaduinos, but there are other ways this could be done.
When wiring your motor up to the Mechaduino board, please make sure that one phase is connected to ouputs 1&2, and the other phase is connected to phases 3&4.
![]()
-
3Step 3
BOOTLOADER:
You will need to make sure your Mechaduino has the latest Arduino Zero bootloader. If you are getting a Mechaduino as a reward from our Kickstarter, it will already have this! Otherwise you will need an Atmel-ICE or similar SWD programmer...
-
4Step 4
FIRMWARE:
Next you need to install the firmware:
The Mechaduino firmware can be compiled/edited/uploaded using the popular Arduino IDE: https://www.arduino.cc/en/Main/Software
Once you have Arduino installed, you will need to add Arduino Zero support. Open the Arduino IDE, navigate to Tools>Board:...>Board Manager and install the latest "Arduino SAMD (32-bits ARM Cortex-M0+)" .
At this point you you can connect your Mechaduino via USB. It will appear as an Arduino Zero. (If it does not appear, please make sure any drivers have finished installing, then try hitting the reset button or disconnecting/reconnecting the hardware...see note below)
Download the latest Mechaduino_01 multi-file firmware, open it in the Arduino IDE, compile it, and upload to your Mechaduino.
*NOTE:
Apparently the arduino zero drivers do not always automatically install. Please take a look at these instructions:
https://www.arduino.cc/en/Guide/ArduinoZero
I have had issues where it will show up in the device manager, but not as a COM port (as an unidentified device). If this is the case, the bootloader is present, but the drivers have not installed properly. -
5Step 5
CALIBRATION ROUTINE:
The first thing you will need to do is run the encoder calibration routine.
With the Mechaduino connected to your computer, open a serial monitor (115200 baud) in the Arduino IDE. You will need to provide V+ to the Mechaduino to power the motor drivers (needed to calibrate). Type "s" and press enter a couple times to verify that everything is working. The Mechaduino should step like a stepper. It is currently in open loop mode. press "d" and the stepping direction will change.
Now, make sure nothing will touch the Mechaduino shaft during calibration. Type "w" to start the calibration routine (... may change the letter soon). The Mechaduino will now step through all full steps to calibrate the encoder. When the routine is done, a very long lookup table (16,384 entries) will be printed to the serial terminal. These are the calibrated angles at each encoder count. You will need to copy these into the Parameters.cpp file here:
Note: you can easily select the whole lookup table from the serial monitor by clicking on the next line and dragging the cursor up.
Save, compile, and re-upload the firmware to your Mechaduino. you are all calibrated.
-
6Step 6
BASIC COMMANDS:
As long as you have "serialCheck();" in your main loop, you can use the following built in commands to control the mechaduino from a serial monitor:
s - step
d - dir toggle
w - encoder cal routine
y - enable controller interrupts
n - disable controller interrupts
r - enter new setpoint
x - position mode
v - velocity mode
t - torque mode
q - parameter query (prints current parameters)
e - reads encoder diagnostic register
p - print [step count] , [assumed angle] , [encoder reading] **this needs to be updated to include calibrated values
...see serialCheck() in Utils for more details
-
7Step 7
TUNE CONTROL LOOP:
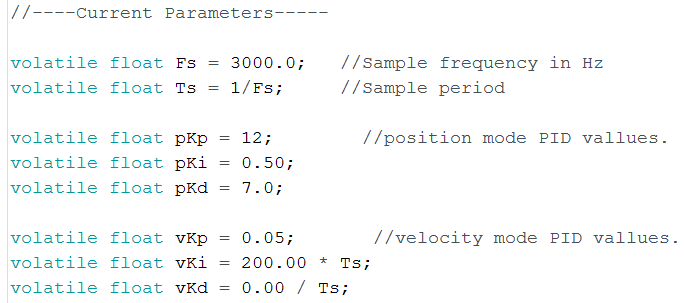
At this point you may need to tune the controller gains. By default, the position and velocity loops have PID controllers with parameters that can be edited in Parameters.cpp:
PID values will vary a lot depending on the motor you use and the load you have connected to your motor. There are lots of resources online that discuss PID tuning, but here are some simple pointers:
-Start with a low proportional gain and no integral or derivative action. If the motor seems to buzz or behave erratically, then your Kp is probably too high. Try setting kp low enough that the motor behaves like a fairly compliant spring about the setpoint.
-Slowly increase kp to improve the stiffness of the control. Adding integral action can remove steady state errors. Derivative action can also be added in to improve performance.
Mechaduino
Mechaduino is an affordable, open-source, industrial servo motor. Position, torque, velocity, and custom modes. Arduino compatible.
 jcchurch
 You will need to mount the magnet


Discussions
Become a Hackaday.io Member
Create an account to leave a comment. Already have an account? Log In.
it can run any stepper which runs under 2A (8V to 24V) since the driver permits only 2A.....
Are you sure? yes | no
yes the official firmware does have step and dir pin both at 5v and if wanted you can assign other 3.3v pin to enable in the firmware.......
Are you sure? yes | no
I need to control a paper drive shaft back and forth as it delivers pages into and out of an inverter. The Mechaduino will replace an unreliable electromechanical gearbox. Two 5v lines operate the gearbox, one for each direction. I have a basic understanding of simple Arduino programming but the Mechaduino code is beyond me. Can you help?
Are you sure? yes | no
How do you use this as a "drop-in replacement" for a 3D printer? -- Is there a way to control it digitially? -- Like using the I/O pins instead of serial (one pin for DIR, and another for step? with 3600 steps?)
Are you sure? yes | no
Any instruction on the power supply ? What is the requires voltage ?
Are you sure? yes | no
I think they stated elsewhere it can be powered with between 8v and 25v.
Are you sure? yes | no