-
ROS Integration: Location
10/23/2017 at 10:51 • 0 commentsHello! This is another dejavu post. We have already presented a system that used a camera system to located the robots. Since then I have gone to a large robotics conference (for an unrelated project), I took the micro robots with me and they were a minor hit amongst the people that I had impromptu demo with. The lesson learned from this trip was that any demo of the project should be portable and quick to set up. Therefore a carefully calibrated system with controlled lighting and a mount for the camera is a nono!
In the future I hope to integrate the following onto a single board computer of some kind, minimising the amount of trailing wires and inconvenience. Any way without further ado, what have I built/
Firstly with a free moving camera there is no simple way to use it as a reference as with our old implementation. Therefore we need to put a reference in the environment. In our case a small QR code. This QR code now can represent (0,0,0) for the robots. Luckily ROS has a very capable package for this task ar_track_alvar . This package provides the transform between the camera and all QR codes that are visible in the scene. Easy as pi eh?
Next we need to find the robots in the camera image. The easy way would be to put QR codes onto the robots, however they are too small. Also this would make each robot unique, which is awkward when you want to make 100s of them. Therefore we are going to have to do it using good ol'fashioned computer vision. For this I used the OpenCV library. The library is packaged with ROS also, using some helper packages, things work smoothly.
The actual algorithm for finding the robots is not too complicated. We threshold the incoming image to find the LED and the front connector that has been painted red with nail polish. These thresholded images are then used as an input to a blob detector. The outcome is we should have a number of candidates for LEDs and front connectors.
Next we need to pair them up. To do this I project all of the points from camera space to the XY plane defined by the QR code. This gives us the 'true' 3D position of these features, as I make sure that the real QR code is at the same level as the robots top surface.
Now for each potential LED we have found we search all potential front connectors, if the distance between the features is the same as they are in real life (13.7mm) then we can say this is very likely a robot.
Next we do a check to ensure our naming of the robots is consistent with what they were in the previous iteration. This is simply associating the potential robot with the actual robot that is closest to it (based on where it was last time and the accumulated instructions sent to the robot).
Finally we convert the positions of the LED and front connector to a coordinate system that is centred on the centre of the wheel base. This is then published to the ROS system.
The outcome is that ROS has a consistent transform available for each of the robots in the system, as a bonus we also have the position of the camera in the same coordinate system. This means we could make the robots face the user, or have their controls always be aligned with the user position. (RC control is very hard when the vehicle is coming towards you, this could be a good remedy.)
A long wordy post is not much without a video, so hear you go:
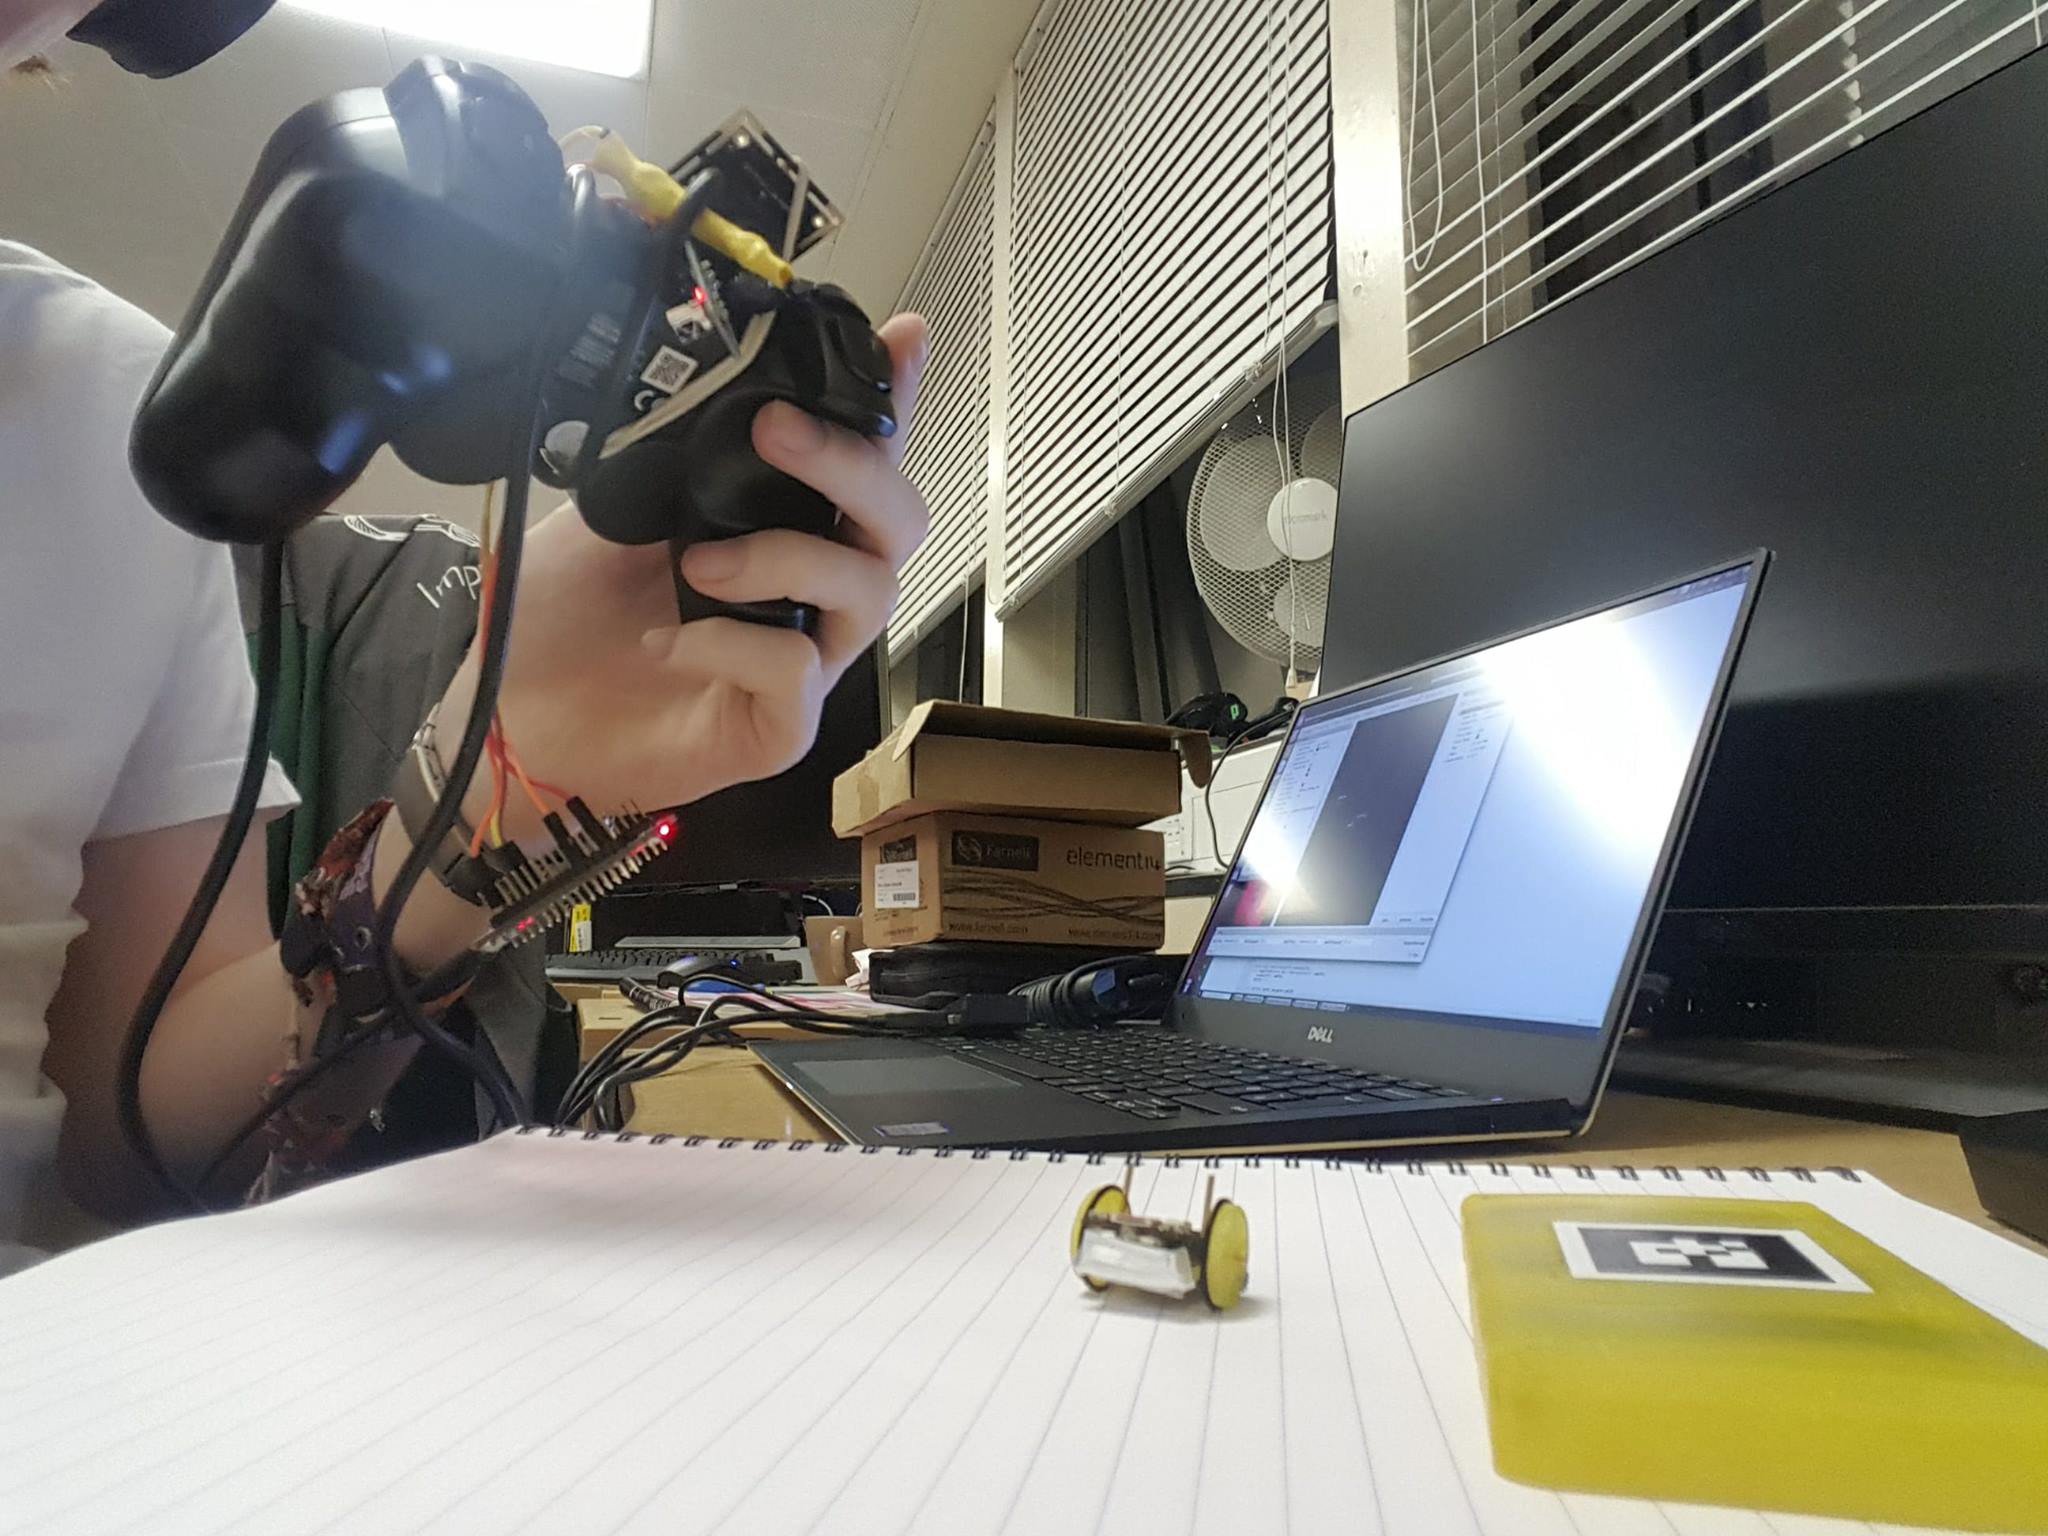
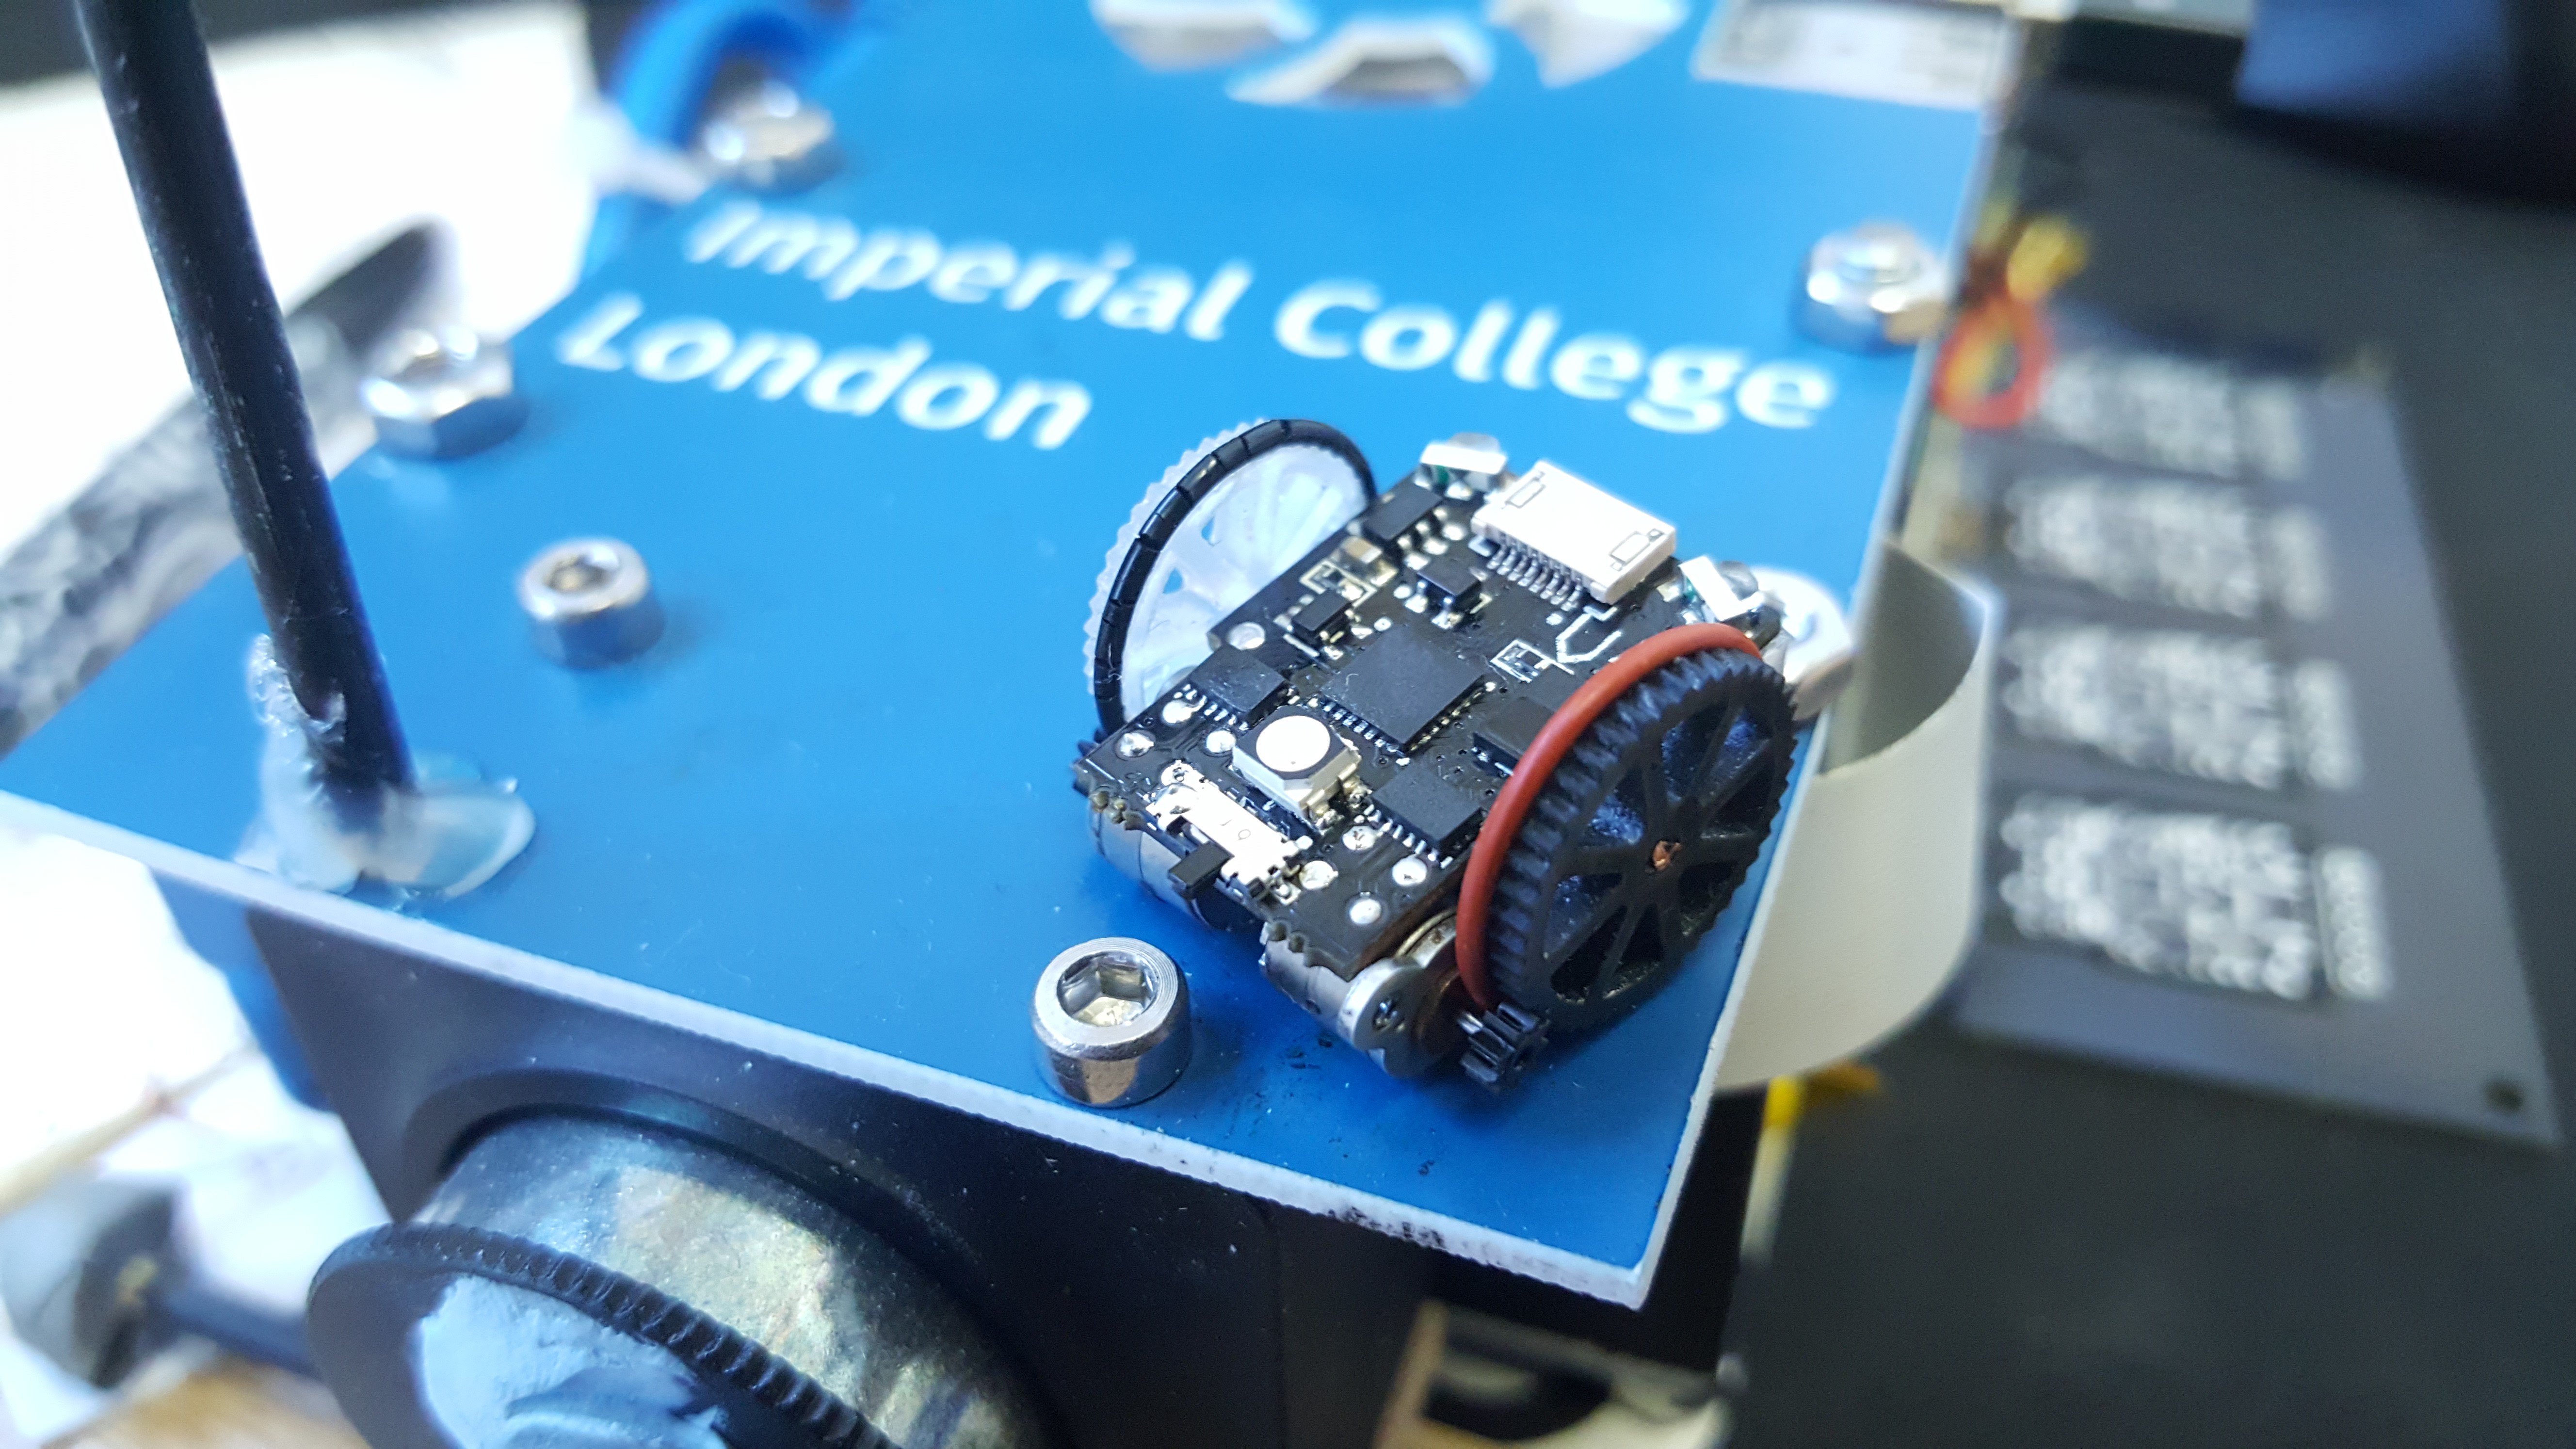
Here is a picture of the very awkward setup as it stands:
![]()
-
TOF Laser Scanner Assembled.
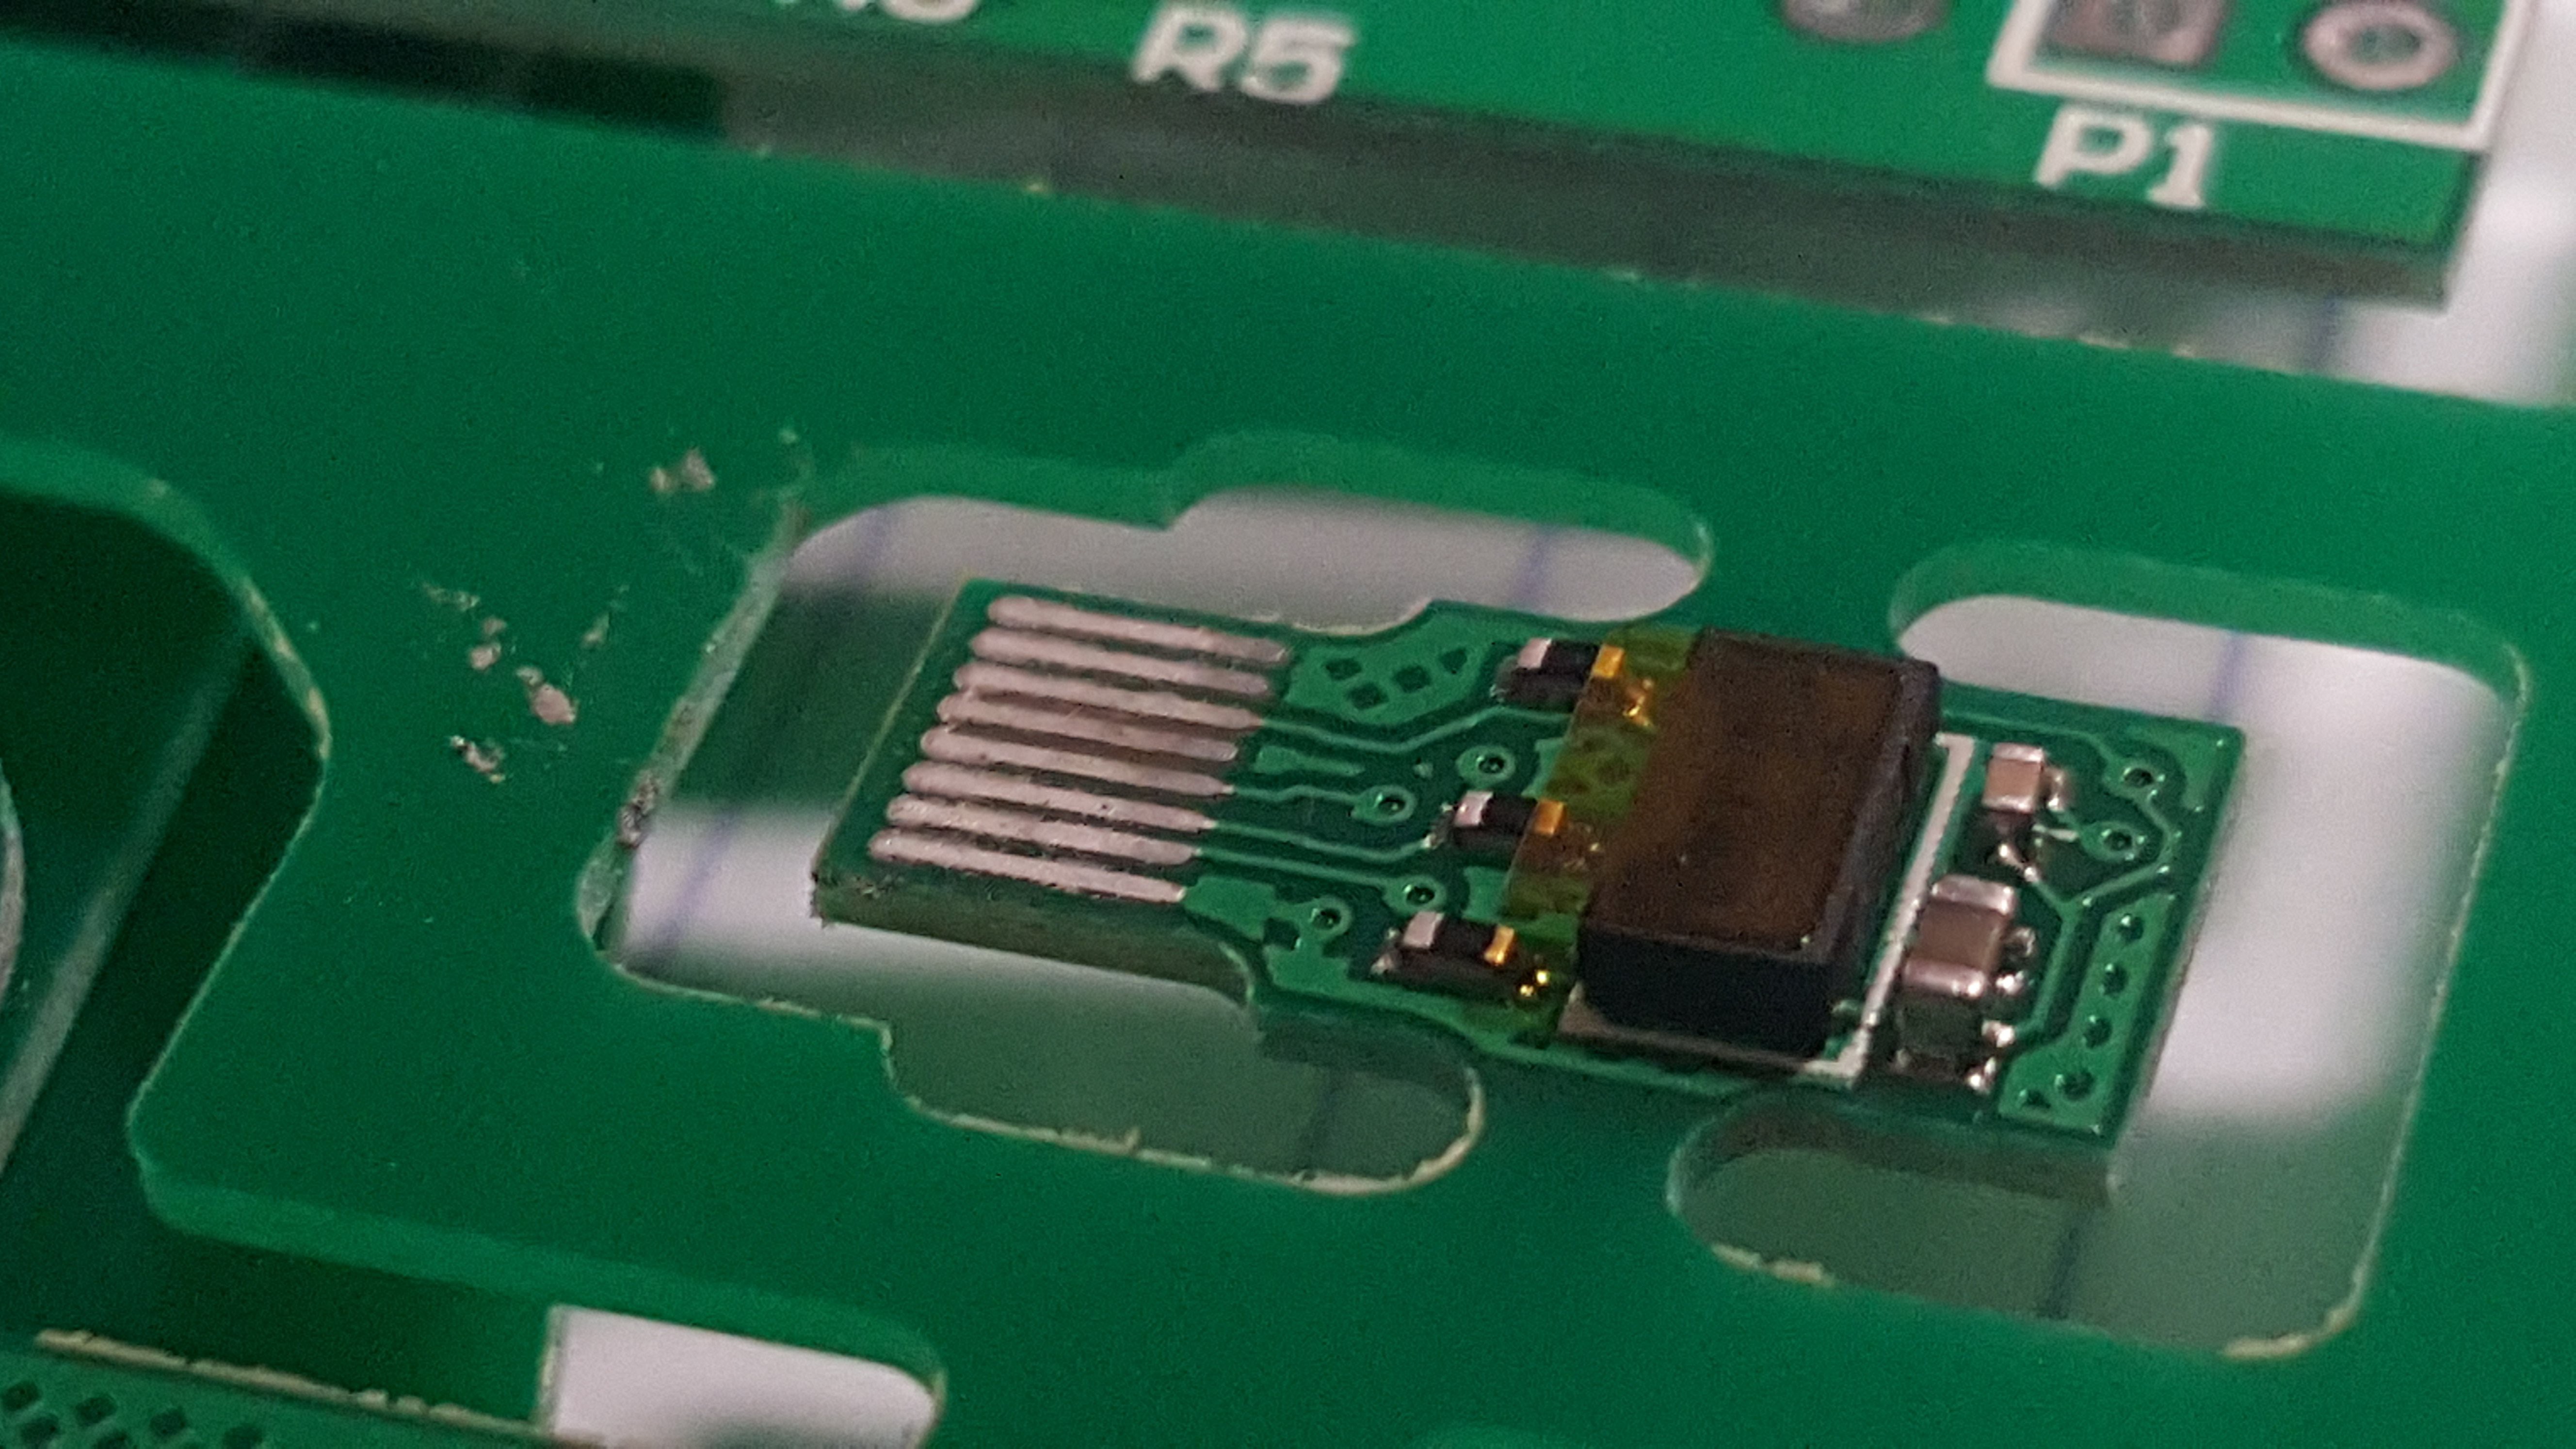
10/17/2017 at 10:57 • 1 commentAn update on the progress of the robot 'hat'. This is a TOF laser sensor that can be plugged into the programming port of the robots. With a range of ~2m, this can scan a circle of ~4m with just a quick spin of the robot. Will be made on flex PCB to integrate a 90 degree bend. Probably the smallest PCB I have ever made. Bring up on this board is not a priority, as there are core features that are still needed for the robot project, also debugging could be a pain, as these use up the debugging port. When you get used to the STM break point debugging, flashy LED debugging seems dreadfully inefficient.
![]()
-
ROS Integration take 2.
10/04/2017 at 11:38 • 2 commentsHello again.
ROS: Did I do this before?
ROS: Robotic Operating System is a key part of modern robotic research. The glue that lets academics and industrial system designers package their work in a way that is easy to share and stick to other modules. If you are interested in modern robotics and don't know about ROS then get to work on the tutorials! There are alternatives to ROS, though ROS has 'won', for now.
I am keen to have these robots fully linked up with ROS, such that I can be lazy when wanting them to do fancy things. When a robot is connected to ROS and has the relevant sensors and actuators, it can leverage pre-made cutting edge research code with just a little XML jiggery-pokery and perhaps a few simple c++/python nodes to do conversions. Pretty awesome.
I made a post quite a while ago that claimed ROS integration was working on the robots, and I wasn't lying. The problem however was that the implementation was for version 3.0 of the robots, AKA arduino on wheels. Now we are in version 5.0 (and 6.0 is ready to send to manufacture) which uses a different micro controller. In redesigning the code to run on the new hardware we decided to make the communication layer far more versatile. The old version was just spoofing NEC commands over IR, and each robot would have their own set of commands to allow them to move around. This is OK, though there is lots of redundancy in the NEC protocol, and the commands are sent at a very low rate. This meant that if you had more than a couple of robots you would be starved for data to each. Also there was no provision for up link to the master system.
The new implementation makes use of UART as the base for the communication scheme, and this is one of the key differences between V4 and V5, the IR receiver is connected to the UART Rx pin. All you need to do is modulate your UART at 38kHz and you are good to go. In both the robots and the master this is achieved by letting the LED straddle the Tx pin and a PWM pin, when the PWM is strutting it's stuff a high voltage on the Tx pin will light the LED only when the PWM pin is low. Now we can just use the UART hardware as usual and the LED will be modulated for free.
Where art thou packets?
Now that we have bidirectional UART (half duplex) we can start doing some more sophisticated communication. Because the IR channel can be very unreliable, a sensible packet needs to be proposed. luckily I happen to be writing a blog post about just that issue! The packet follows, each [] is one byte:
[header][header][robots][255-robots][type][robot0 ins][robot1 ins][.....][checksum]
Above is the current packet implementation, which is likely to change to include better validation for many-to-one communication packets (like asking all robots for their battery voltage).
[header] is just a special byte to find the start of the packet, in my case 0xAC, as it has a fun alternation of bits. We do this twice, to lower the chance of collision with data, though that would not be a big deal if it did happen.
[robots] is just the number of robots in the system, and [255-robots] is just some redundancy to double check this number, the sum of these should always be 255, getting this wrong could put the robot into a long loop waiting for the wrong number of robot commands.
[type] is the command type, for example 'move', 'report battery voltage' or 'enter line following behaviour'.
[robot0 ins][robot1 ins][.....] is then the array of instruction bytes to each of the robots. Each robot is likely going to ignore all of these apart from it's own instruction. Though you could imagine that the information given to other robots could help the robot plan locally in some cases. All robots know how long the array will be due to receiving the robots value previously.
[checksum] is a checksum, such that we can perform a sum then check the sum matches the checksum. How many sums could a checksum check if a checksum could check sums? I think I am getting carried away, so I will move on.
Finding a Unique Identity.
Well defined packet complete! It is not perfect, later I will move the checksum earlier, such that it can be evaluated early on frames that require the robots to respond in their 'slot', though for down link purposes this is fine for now. The problem is all of the robots think they are the same. We need them to find their own way in the world. Well what I mean really is: they need to know which of the bytes in the instruction array they should listen to. We could hard program this into each, #define MYID 666, though this is a messy solution if you need unique source code for 100s of robots. I would like them each to be programmed with identical code, then at run time negotiate who is who.
To achieve this we need two things, a source of entropy, and a game to play. The first is easy, STM32 parts all (I think all) come with a unique ID number burned into the hardware. This is super useful, it is actually better than a random number, it is guaranteed to never be the same between robots. We can use this to seed a pseudo-random number generator.
Next we need a game that they can play using random numbers that will let the robots compete for dominance, who will win the right to be the blessed "robot 0"? The game that they will be playing is kind of like a version of "Snap". Each robot can pick a time between 0ms and 250ms. Then they wait till that time arrives they will then modulate their IR led iff there has been no other robot modulating their IR LED to this point. They win the round and claim the next ID number. Basically the first to 'raise their hand' wins. It is likely that at some point two robots will pick a time so similar that they both think that they won, hence we actually repeat the round 3 times with different random times (though you only play if you think you won the last round), this makes misunderstandings rare enough we can ignore them.
Eventually there will be a round where nobody claims a win by flashing the LED, as all robots have their ID number an no longer need to play. When a round goes un-played then we know the task is complete, then king Robot0 will announce the result in a serial message over IR using the UART, this is then received by the ROS-IR interface, and the ROS system is informed of the number of robots.
As a demo I have the robots being controlled by a joypad over the ROS system. When turned on all robots think they are 'Robot 0'. After fighting it out with flashing LEDs they have unique IDs which can be controlled by the different parts of the joypad. Video below. (ignore the fact one robot behaves strangely, his motor is broken : ( )
sources: robot firmware, ROS packages, ROS-IR bridge (to be gitted)
-
Version 5.0 and Hats.
08/18/2017 at 20:36 • 0 commentsHello,
Whilst it seemed a good idea at the time to make a new project on Hackaday IO to cover the developments of the robots as a more or less mature project. It turns out I disagree with my past self significantly enough to go back on my decision. So updates will be placed here to keep the continuity with all the cool stuff we got up to over the last couple of years.
The robots are now in version 5.0. What upgrades did this bring? To be honest, nothing spectacular. We moved to having 2 upright pins for charging, this was to remove the faff of constructing the ground connection on the bottom of the robots. This was a very manual process and would not be able to be scaled. The upright pins also double as the shafts for the wheels, therefore they can charge on the shaft protrusions! What an enviable talent!
![]()
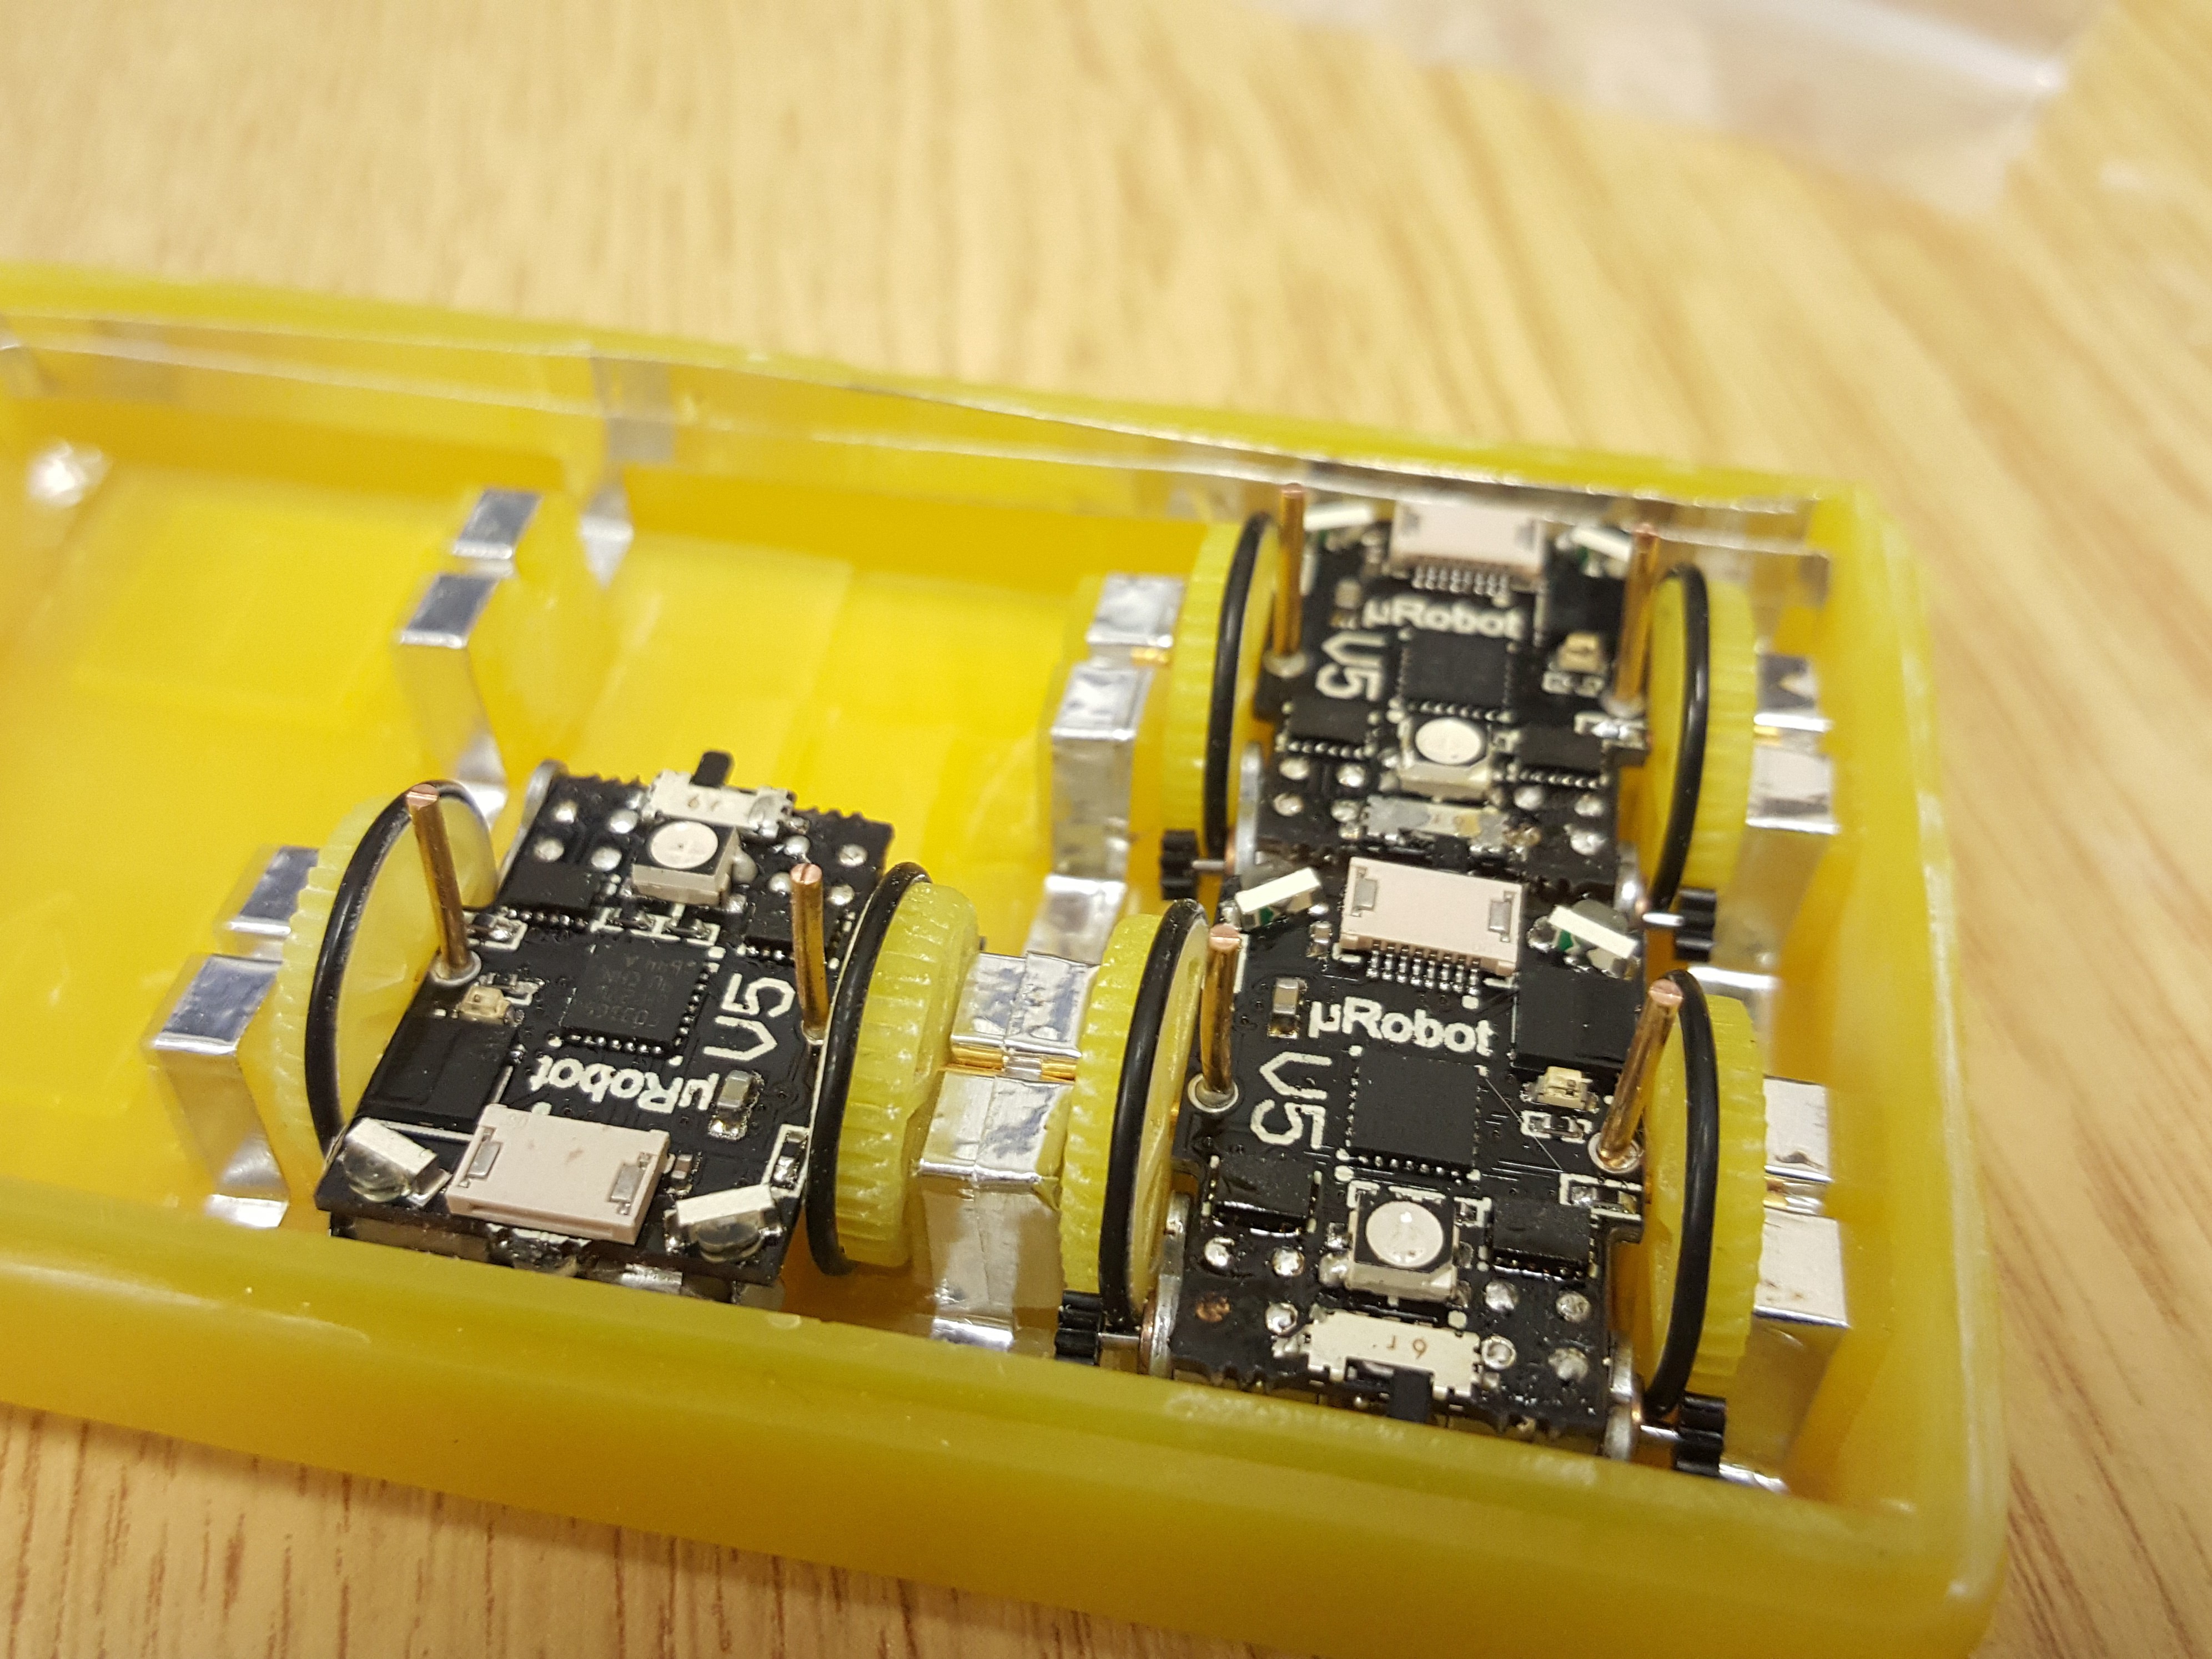
I made a little box that leverages this feature such that they can all be charged whilst in storage. Even little robots need a comfortable home. The other changes were just in the pins chosen for particular peripherals to connect to, as there was a mistake that one of the light sensors was not connected to a analogue capable pin, DOH!
Having surveyed some of the competing robots, it seems popular to offer an expansion system. Usually this is a row of headers with useful interfaces broken out. Luckily we thought of this ahead of time and broke the I2C pins out on the 8 pin programming header. So you can plug in the additional thing you need in there and you are done.Wait, the end of that last paragraph was not convincing?! OK, I would admit there are not a huge selection of sensors that you can get off the shelf that will fit in that particular position, pinout etc. But we are on HaD, so why not design something.
I thought that the idea of having a laser scanner on the robot would be pretty cool for all of those micro SLAM projects that you are working on. Luckily Texas Instruments make a very nifty, and very small ToF distance sensor. It is called the VL53L0X. So sensor picked. Next we need to plug it in. On a bigger robot you could just use one of the many board to board connectors, or use a flex cable to a similar header on the daughter board. Unfortunately there is not space for such luxuries, so we need to find a more compact solution.
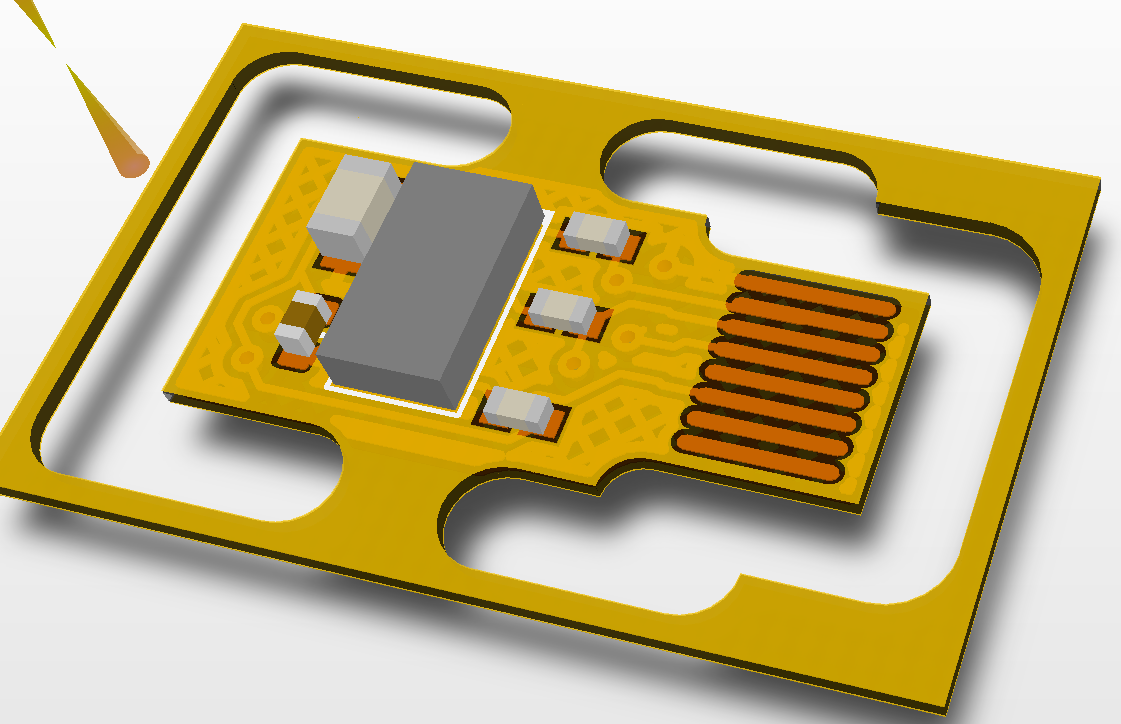
Luckily for my Thermal Watch project I need a flex PCB, so why not solve loads of problems with it all at once. Below you can see my design for a tiny folding front ToF distance sensor 'Hat'.
The surrounding parts of the PCB are just where it will panelise for manufacture, The centre piece will be cut free. The part will be plugged into the programming header and bend at 90 degrees such that the sensor faces forwards. Obviously this is not perfect as the sensor will have to be removed for reprogramming, though this is the price we need to pay to be able to fit upto 5 of these robots in our mouths at once. If you want to see a robot where you could perhaps fit 10 units in your mouth then check out my even smaller design here. << warning robot too small.
Version 6.0 is already drawn up and ready to send away. It has a super stealthy feature that I look forward to showing you all.
-
V4.0 It lives!
03/16/2017 at 15:46 • 1 commentHello everybody. V4 is alive and well. Below are a few upgrades we have implemented.
- Upgraded to STM32F0 processor. 48Mhz lots of nice peripherals 32k program memory and 4k SRAM, not to shabby.
- Front facing sensors are now a type that actually face forwards, therefore we no longer need optics to redirect the light into them.
- The single upright pin from the previous design is now a 2 upright pins. These are used for on-the-fly charging. Bump into 5v and charge away. They are reverse polarity protected. So don't live your life in fear.
- The programming header can now be plugged in backwards. It won't function the wrong way around, but it won't explode either.
- The 'hips' of the robot have been shifted inwards to account for the face plate of the motors. This allows the wheels to run much closer to the robot's main board and make the footprint even smaller.
- The upgraded processor has enough PWM pins (which are correctly connected) to implement phase control of the motors, as per 'micro-stepping'. This allow the robot to turn the motors slowly without introducing large vibrations that cause the robot (V3) to lose traction.
- The wheels have been improved (Not strictly an upgrade to the PCB design, though I care about wheels too much to leave them out).
So this version is significantly better. Though every design needs an appropriate erata! Things that are wrong:
- The IR reciever IC is connected to a poor pin on the uController. This means we cannot use the hardware UART to recieve serial. Also the particular timer on that pin is not sophisticated enough to implement the best version of the library that recieves remote controller commands. So in general communication to the robot is now awkward.
- One of the front IR sensors is not connected to an ADC pin. Rendering it basically useless, unless your light levels are such that the digital threshold happens to be correct.
- Whilst not breaking the design, due to the keep out area allowing the axle to pass through, there are too many components near to the battery terminal. This makes soldering in the battery a dicey business. You are only ever 8mil or so away from shorting the LiPo battery out and causing a fire. This will be solved by splitting the axle in two. Using an 'L' shaped piece of wire one limb will be the shaft and the other will be the upright pin for charging purposes. This also means that charging pins coming from the centre of the wheels on the side is also an option. (Makes me think of the chariots from "Gladiator")
Below are some videos and pictures of the newest version for your viewing pleasure.
![]()
![]()
-
Where have we been? Wheels of course.
02/01/2017 at 15:00 • 2 commentsHello,
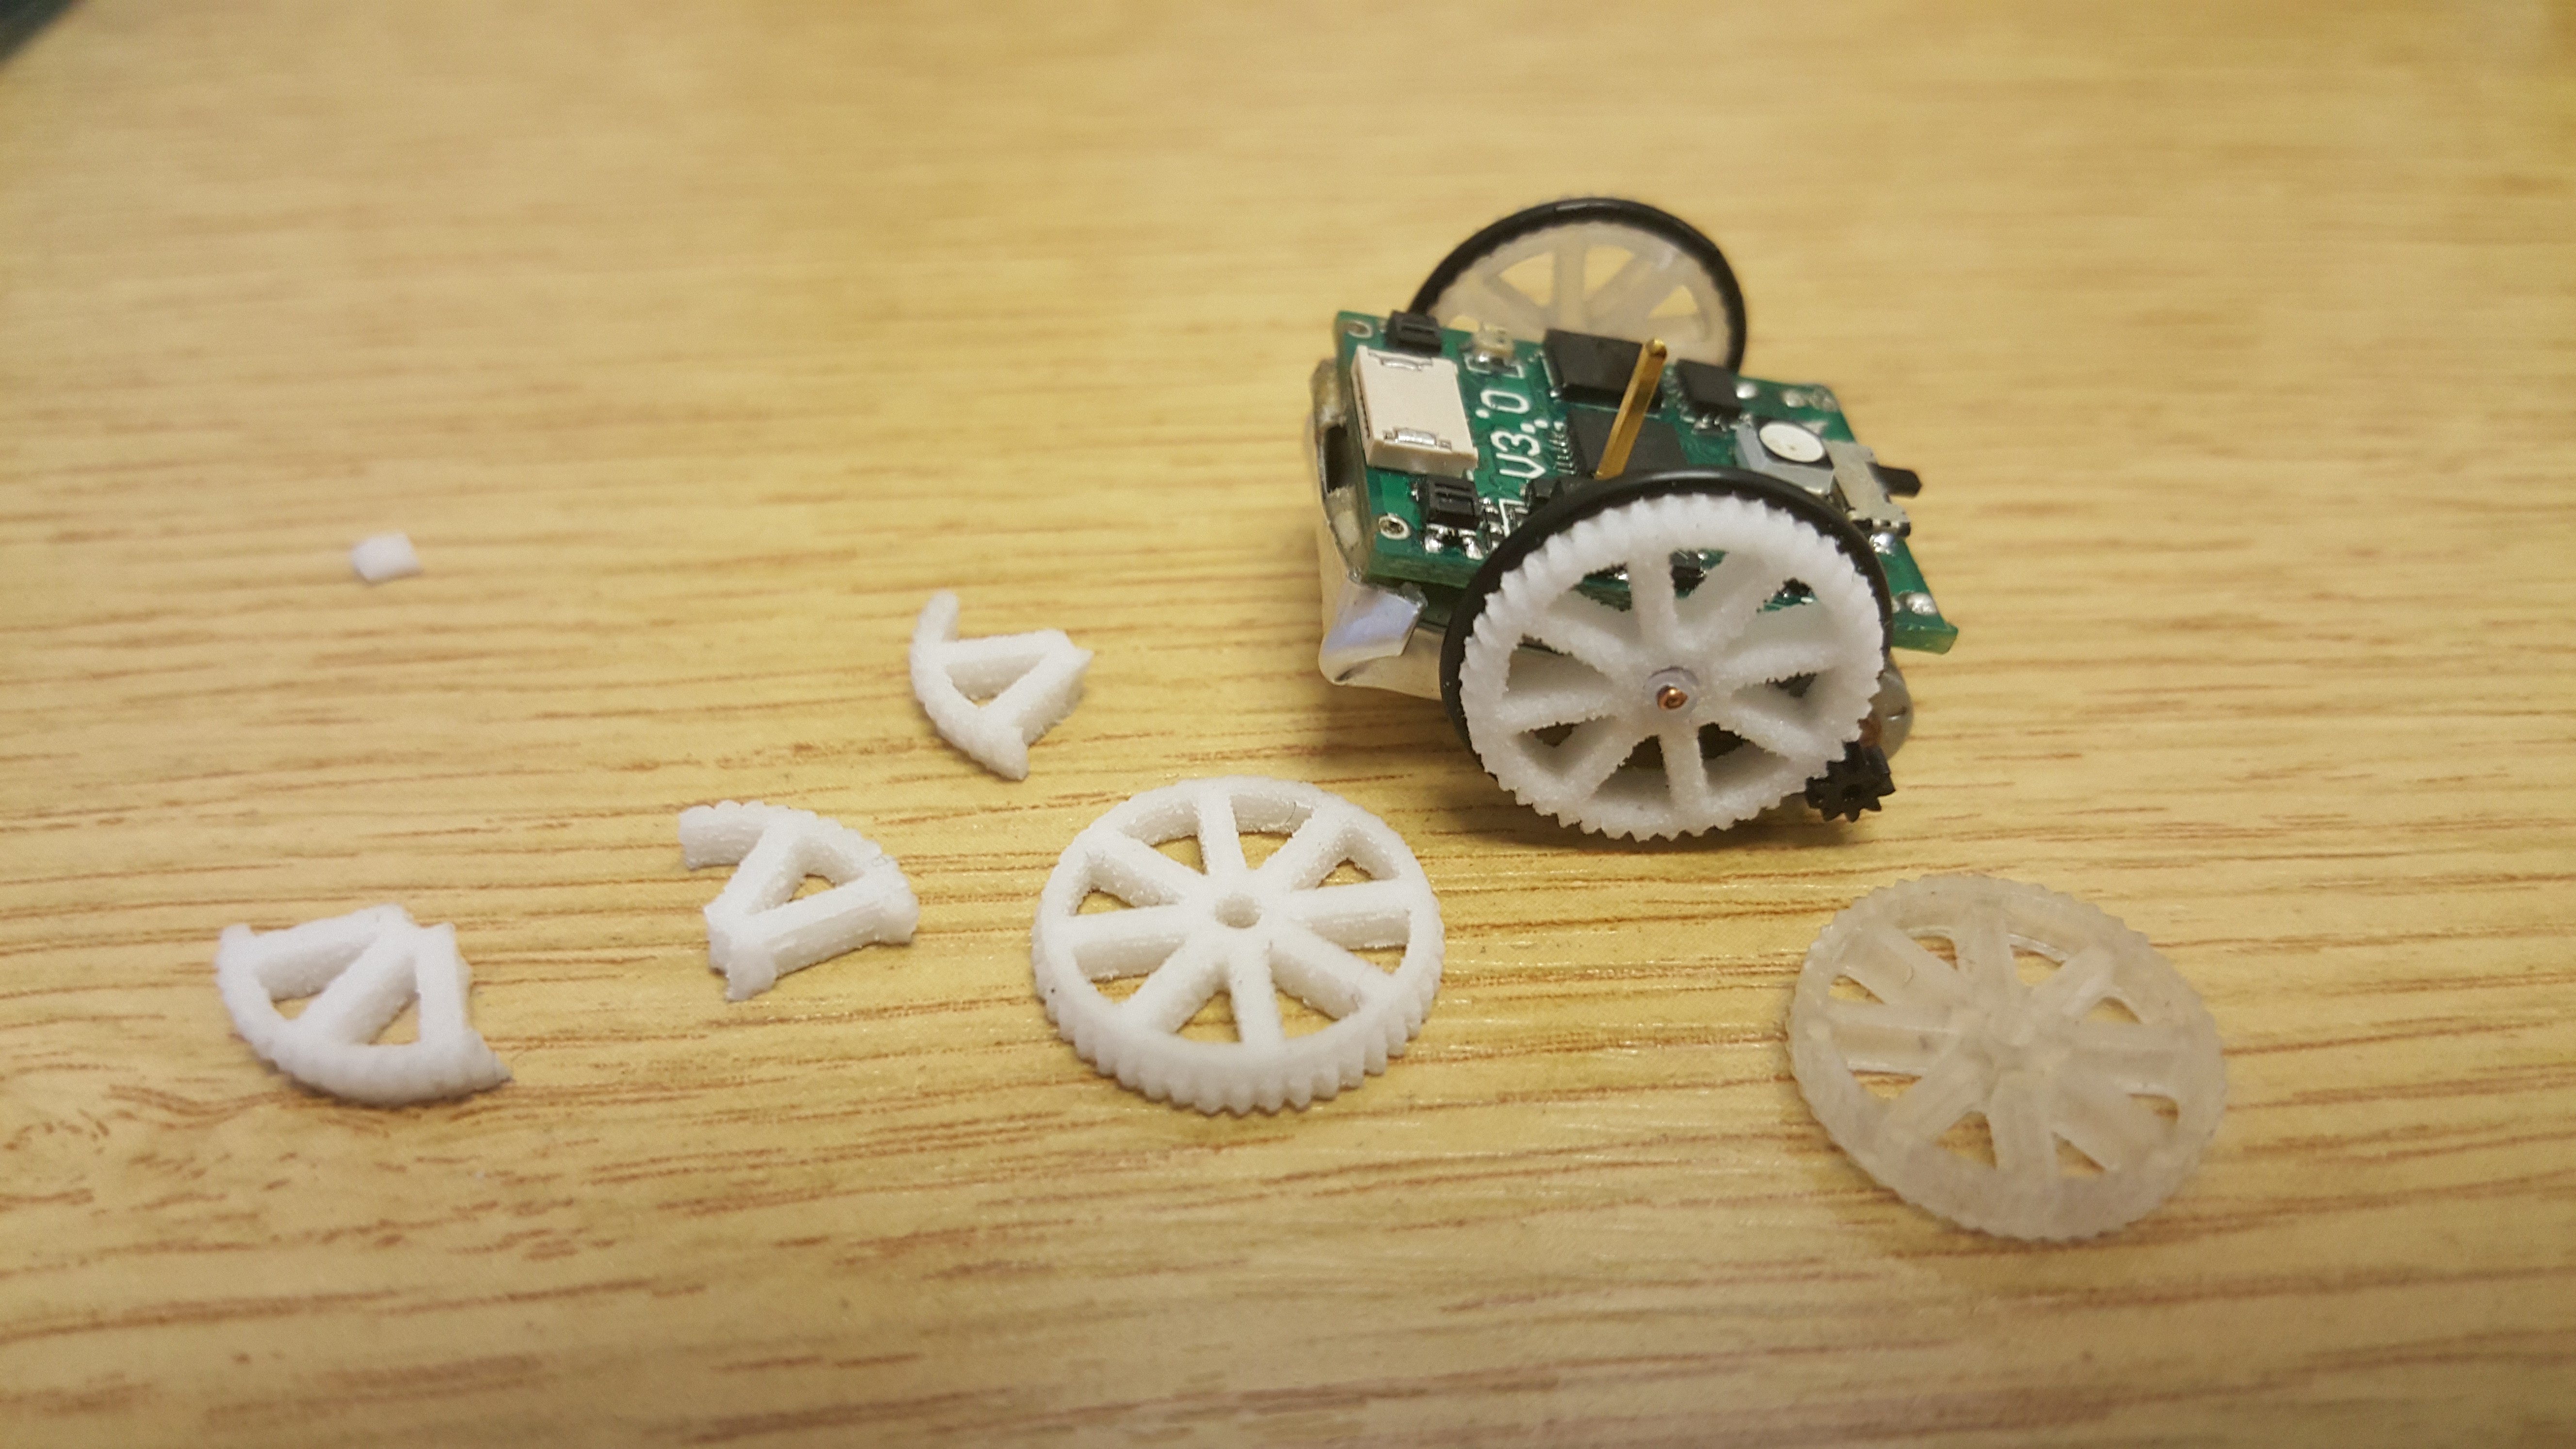
If any of you have been following this project you may have noticed that the main problem we need to overcome is making the wheels for the robot. If you scan through previous logs there are something like 4 full posts on the subject (I have lost count). Today may be the last, one can only hope.
The wheels in question need to be very small, and they have a very fine module gear teeth running around the perimeter to engage with the motor pinion. I have tried to date: Model wheels (friction driven), stamped out rubber disks (friction driven), printed on Roland DLP printer, cast from a negative printed on the Roland, printed on a zcorp (glue dust together) printer, and finally - building my own printer for the express purpose of producing these wheels.
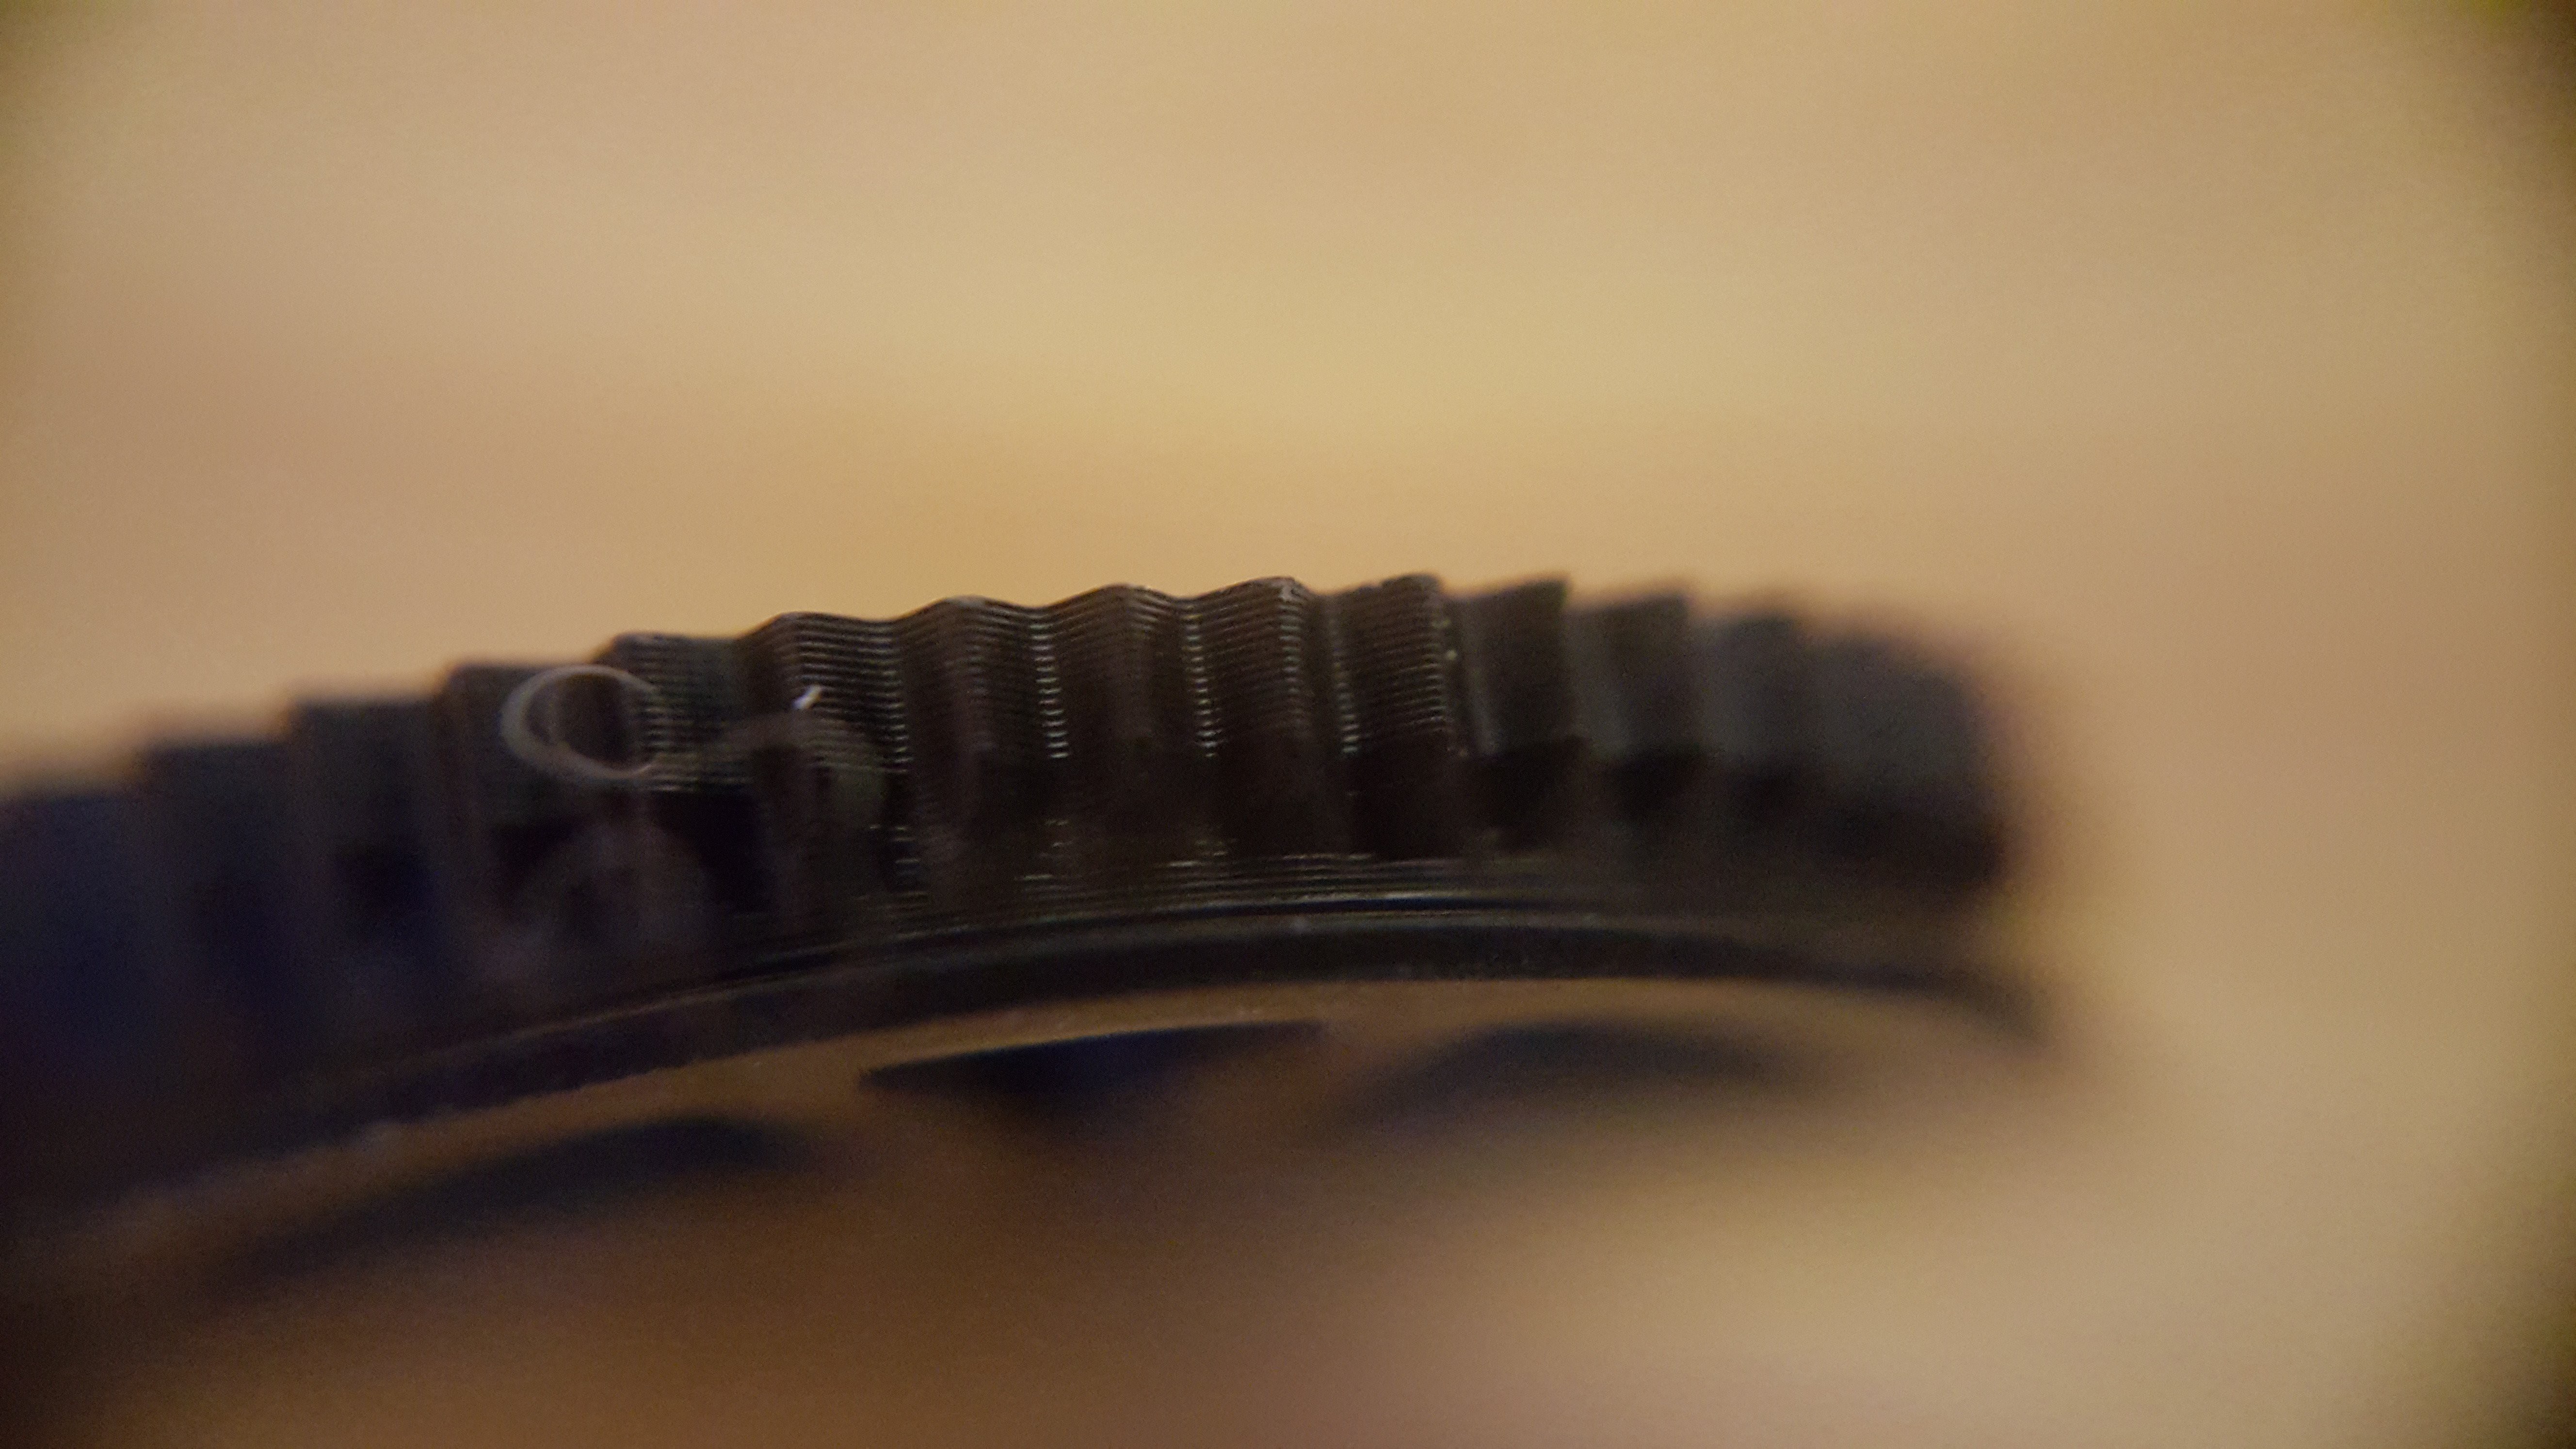
Quite the journey, the result: look for yourself!
![]()
You can see that the teeth on the wheel is as well defined as the teeth on the pinion. The pinion gear comes with the motors and are presumably injection moulded in a big fancy factory. These were printed with FunToDo Deep black (settings: 20u layers, ~70u pixel size, 27s exposure per layer). The detail is pretty crazy, though at ~35s per layer they are not quick to print, so I will work on optimising the print parameters such that they take a more sensible time. Check out the printer on my other project page CLICK HERE FOR PRINTER DETAILS , though I warn you the project is likely to be rather more sparse than this one for details, though all the info you would need to build it is on the page, it is really just one linear slide in a box, so I am sure you clever people can fill in the gaps!
The primary use for the printer till it gets decommissioned is to produce wheels, though maybe it will also produce some useful jigs for small scale manufacture.
![]()
![]()
These layers are 70u, and they are stretching how thick is possible for this resin. This is because it is so black all the UV is absorbed before being able to cure more deeply than this. With some optimisation it might be possible to get to 100u at around 30 second cure time (I found the projector was on Eco before, doh!). Also seeing as I wish these wheels to be printed directly on the bed I may modify the model to account for the wider-than-designed first layer.
-
Panelisation: Robot Arrays Ahoy!
12/23/2016 at 14:03 • 6 commentsHello all,
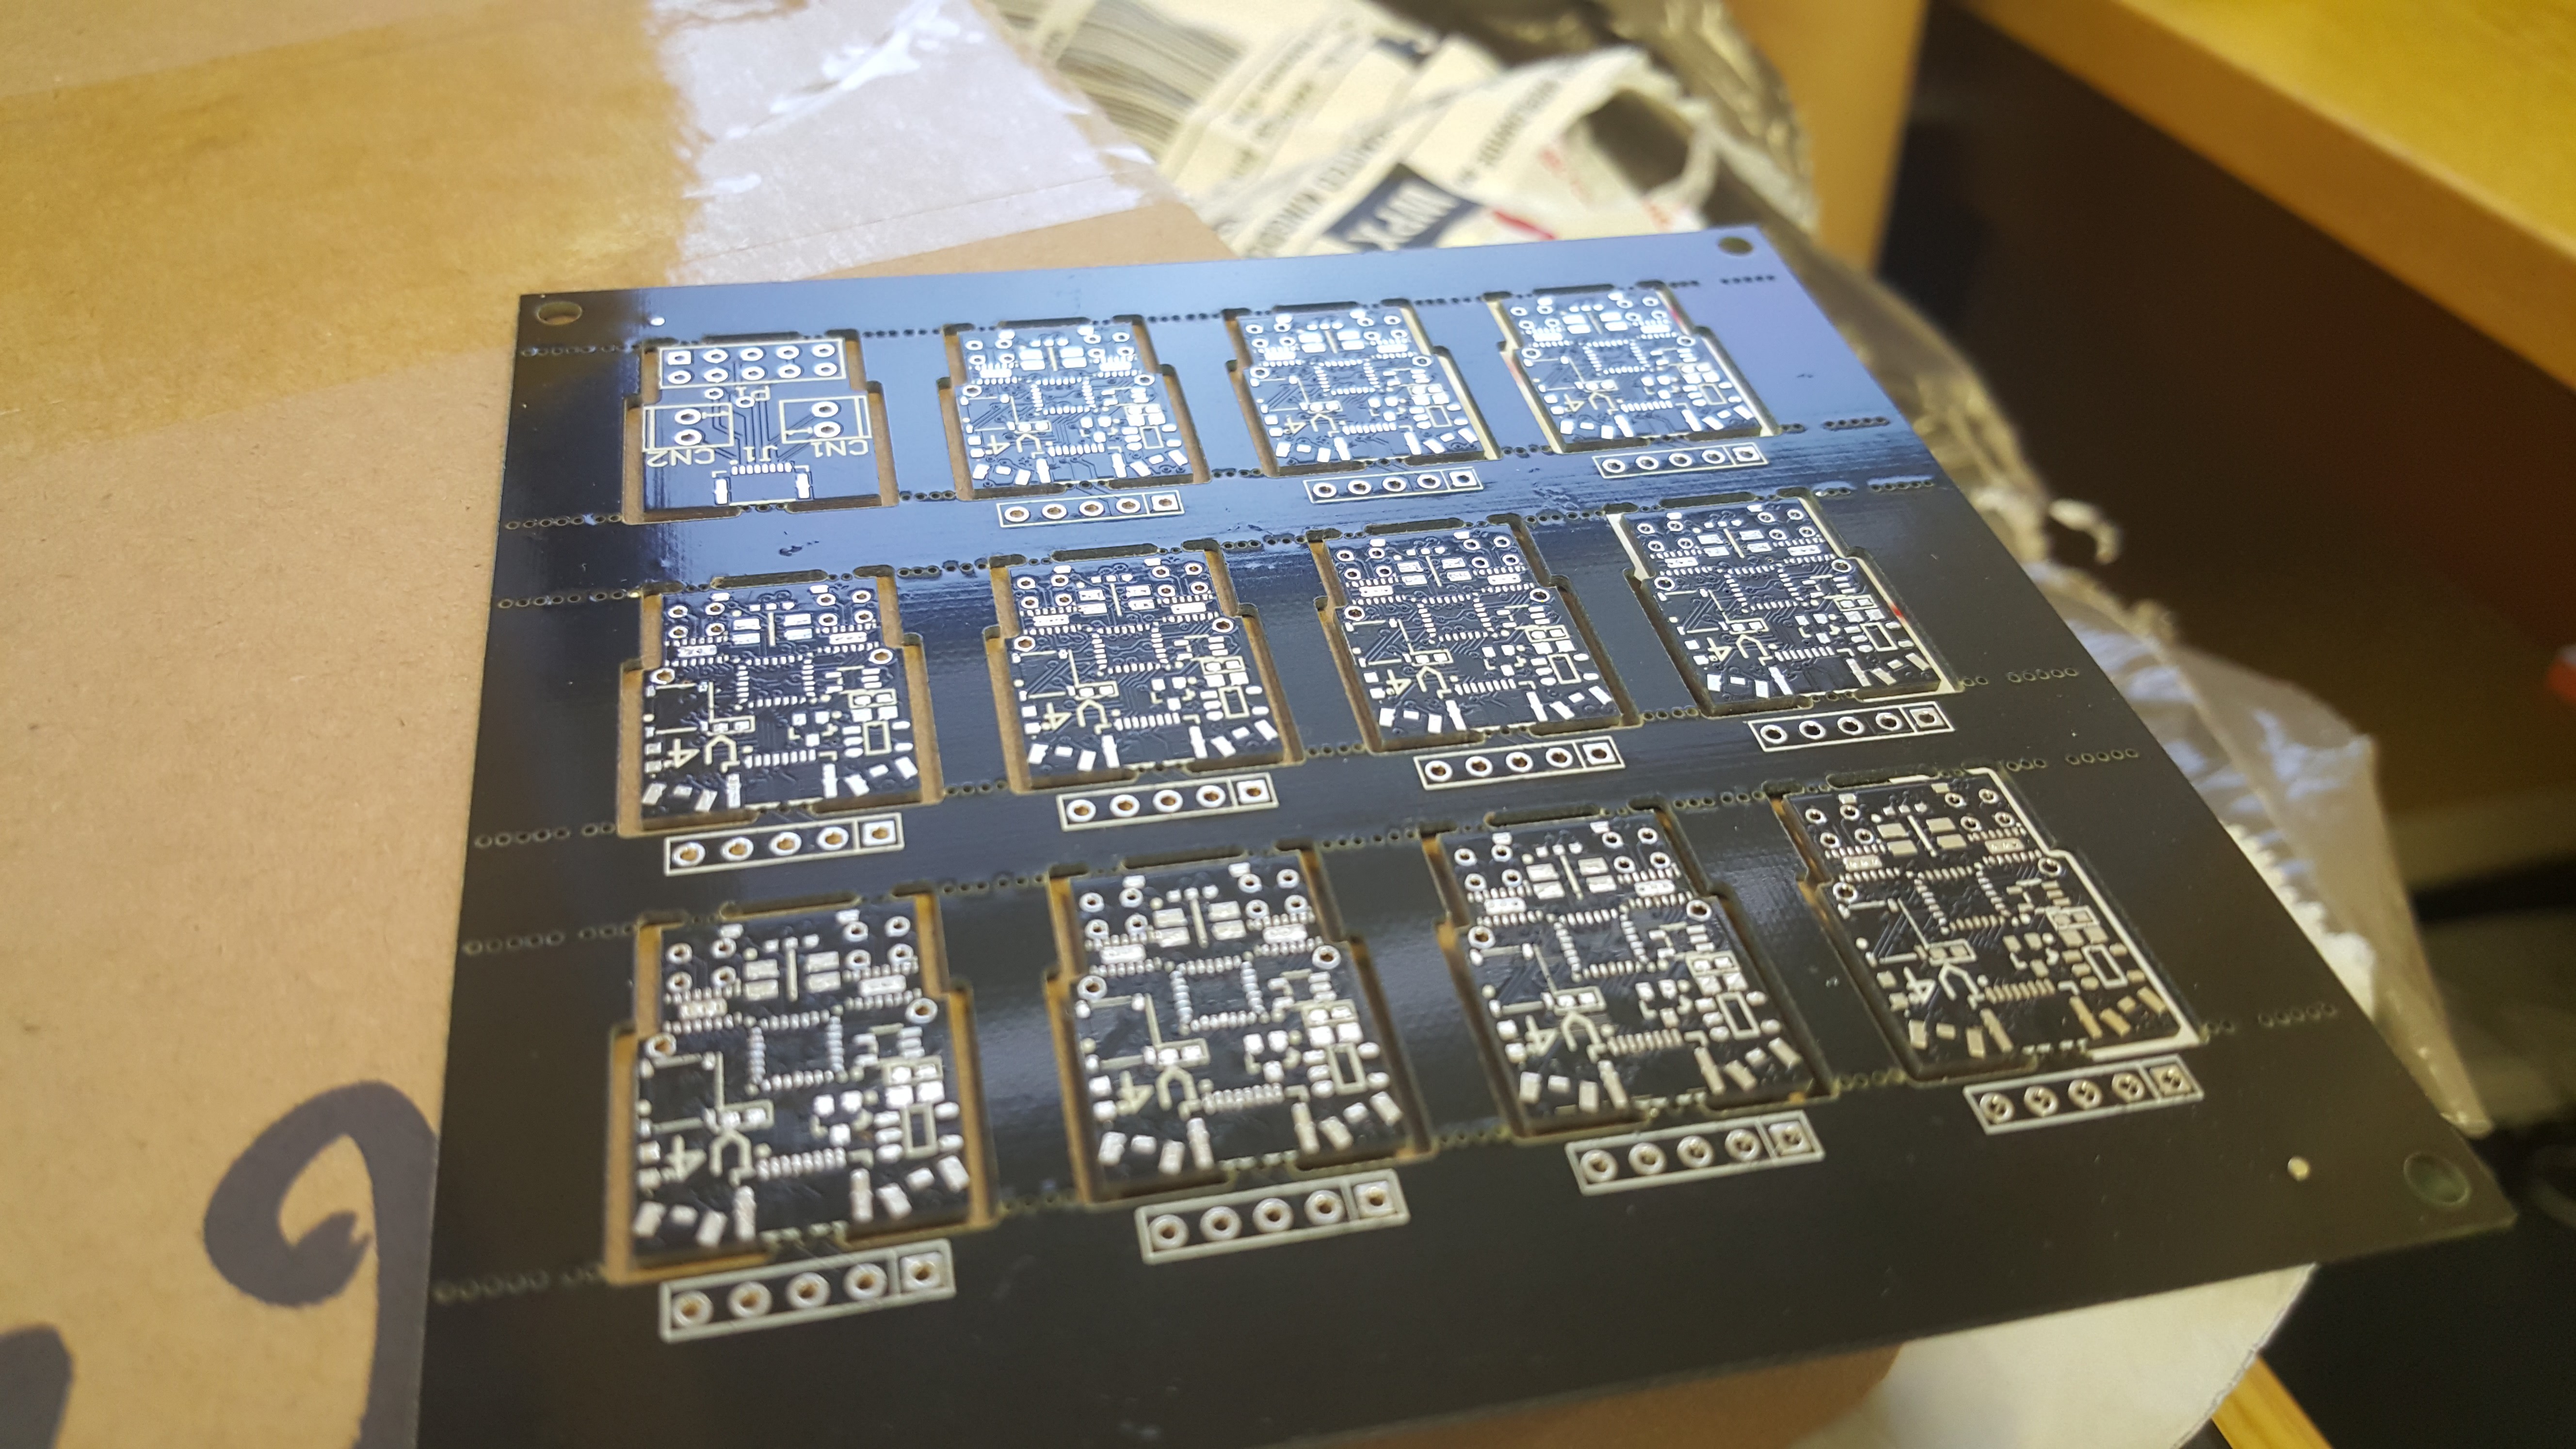
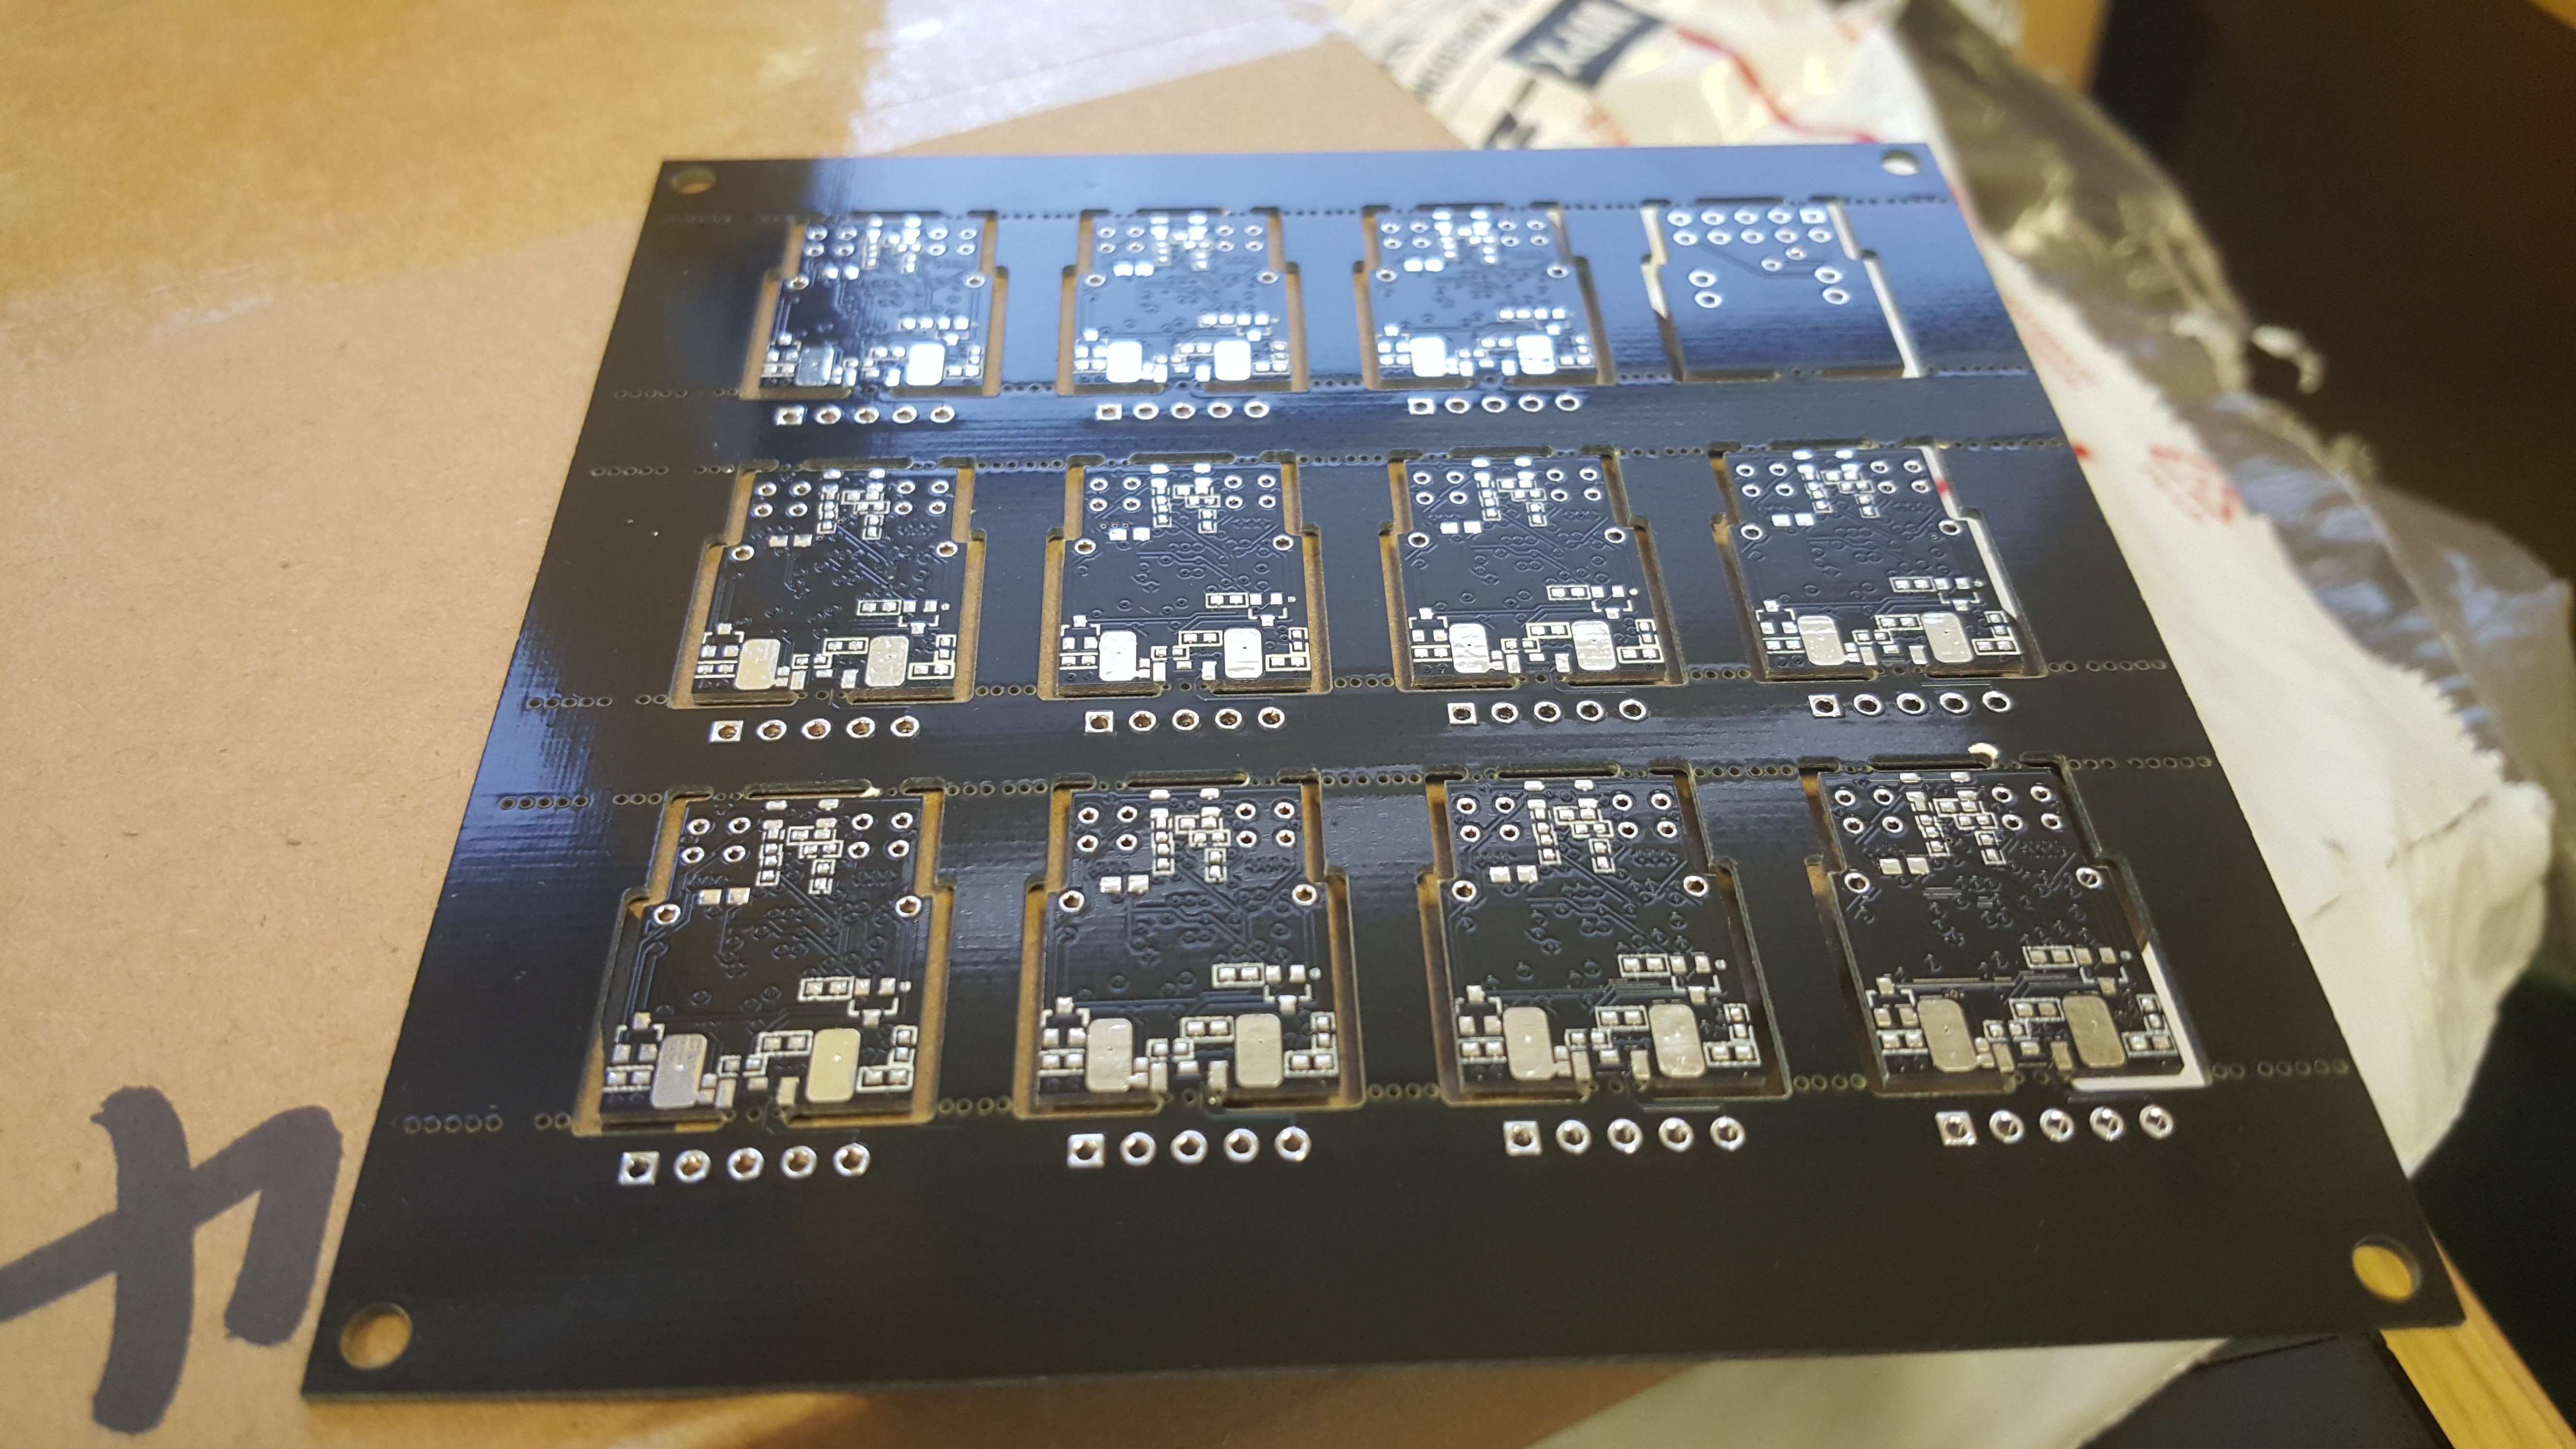
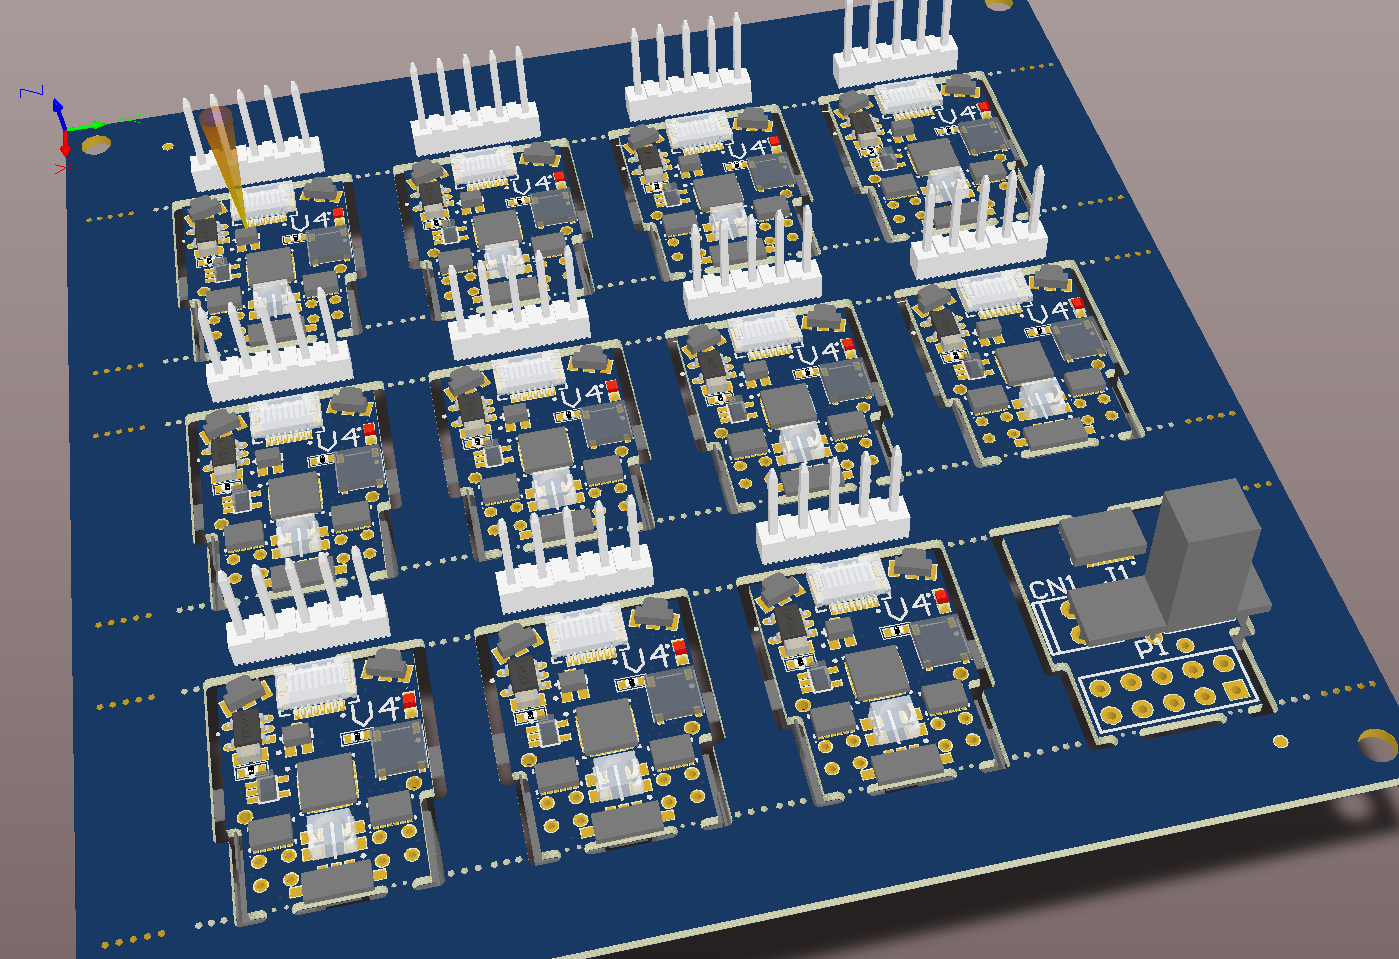
Christmas is nearly upon us, and just in time Elecrow delivered a present for us! The next stage in development is finding a way of producing a number of these robots on a small scale. The solution in industry is to create large panels of the boards in question and use pick and place machines to populate them. We wish to do the same thing on a smaller scale, enter mini-panels!
![]()
![]()
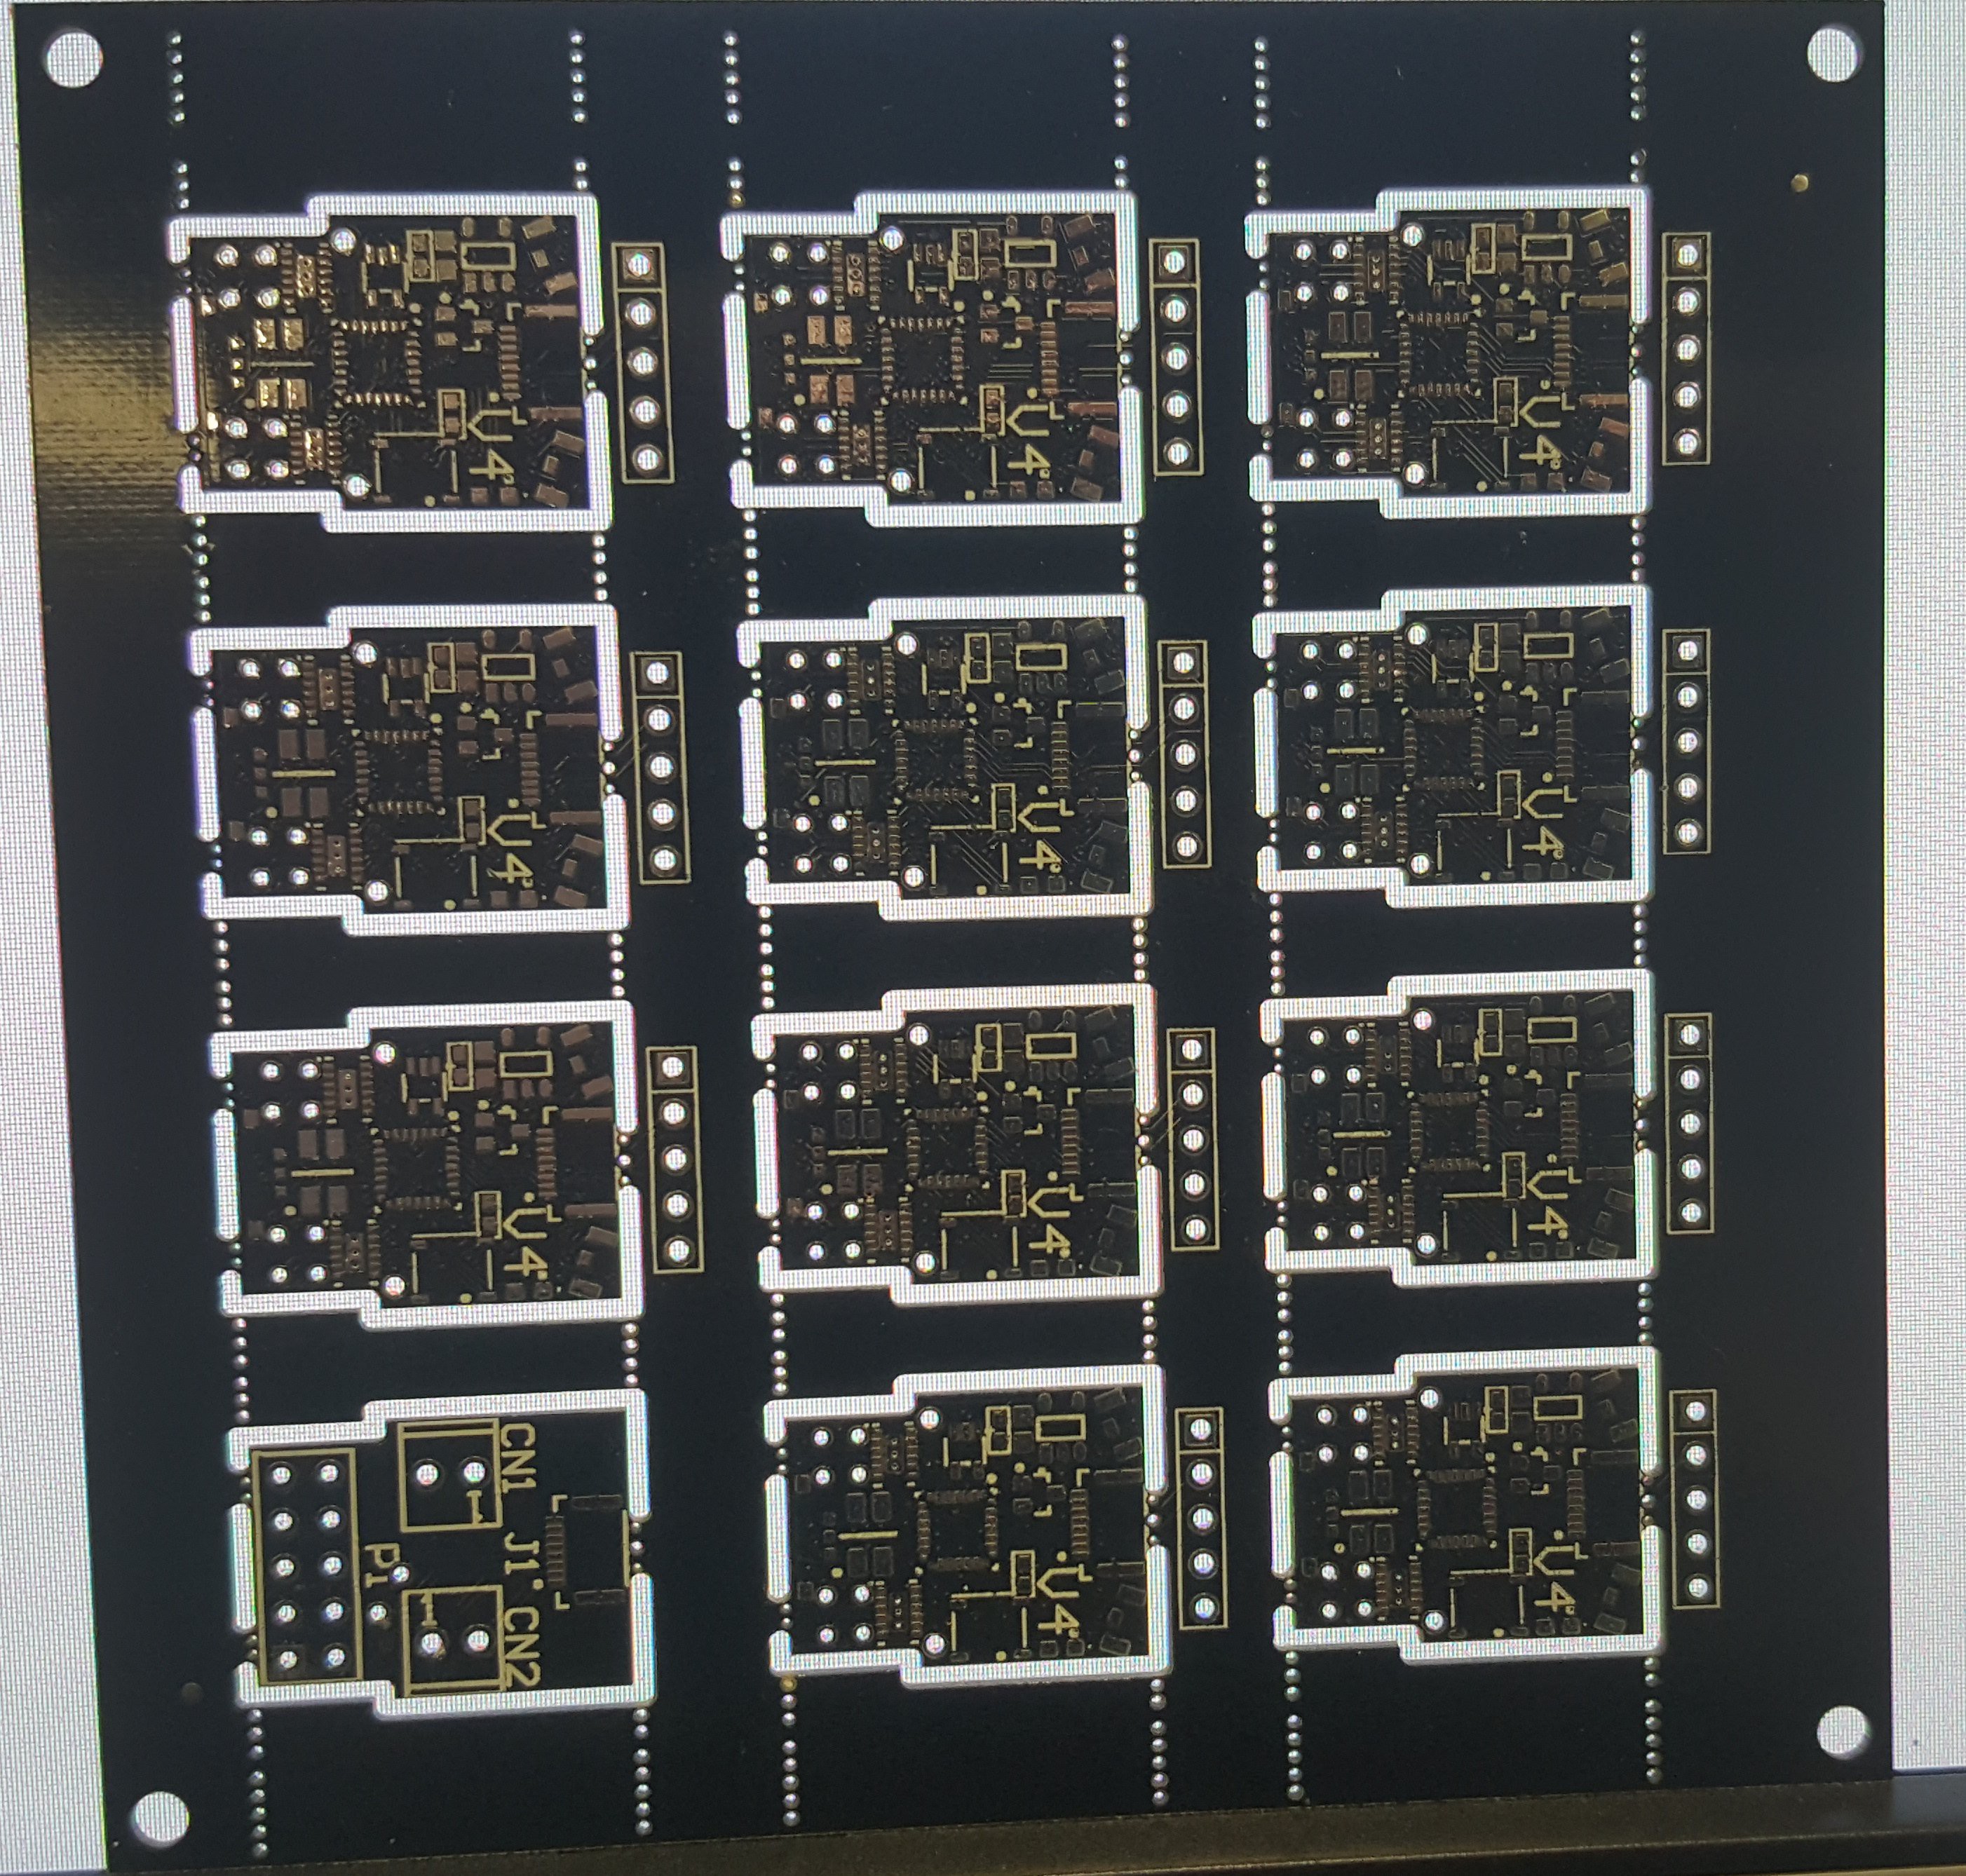
We can get these pick and placed on site without needing to make 100s+ at a time. A batch of 11 robots and a programmer is roughly the size of one 'kit' of robots in our estimation. Below is an image highlighting the techniques we used for panelisation. The programming pins are broken out to the 0.1 inch headers for slightly easier programming in batches. Ideally we would have thought about things a little more to get them to be programmable from one port, but alas we are lazy.
![]()
To be honest I was expecting the manufacturer to complain about the panelisation, as you usually pay more for it, though we tried our luck and boom, no extra charge ;).
You can see that this is V4.0, rather than V3.0 which starred in the other posts. V4.0 has some nice new features including:
- Reduced width at back allowing for a much reduced over all width. (wheels can now be tight to the robot)
- We are using a stm32 processor, this has more pwm hardware, higher clock speeds and crystal-less operation.
- The collision sensors at the front are now a separate LED and 2 phototransistors. This is so they properly 'look' forward.
- The upright charging pin is now 2 upright charging pins, one 5v the other GND. These have reverse polarity protection. Having a sliding GND contact on the bottom was not feasible due to fiddlyness to build.
- Due to more careful thought and more PWM hardware available we should be able to efficiently have microstepped motors, allowing for less vibration when they are turning slowly.
- These will be the first version to benefit from an unhealthy obsession with getting the perfect wheel (As will all new versions so long as I have an unobtainable standard for wheels I suppose). You can check out my DLP printer build here . I will be optimising this printer for the production of these tiny wheels.
For now Christmas is here, though in the New Year a new robot army will be upon us!
-
Experiment in Wheels: Part 4.
12/16/2016 at 16:10 • 0 commentsHello,
So it seems the core issue in this project is how to reliably make the wheels. The resin 3D printer I used before made some ok wheels, though the tolerances where not reliable, also as the optical path became foggy the quality of the teeth degraded.
This time I am experimenting with the SLA process. Conclusion: they are not as smooth as the resin wheels, though they are more consistent. This makes them more usable for this application where a single dodgy tooth renders the wheel useless.
The main problem cited with SLA printers such as the ZCorp machine I am using is brittleness of the parts. This is indeed true, the wheels can be easily be broken by hand. Though the robots weigh only 5g and application of forces in this magnitude will break almost everything on the robot, so the wheels are not a weak link. They are also white enough to star in a tooth paste advert, which I like very much ;)
![]()
-
An update: What has been done in the last 6 months?
12/13/2016 at 15:30 • 0 commentsUnfortunately not too much! Life gets in the way at times, as does my crippling laziness. We have made some modifications to the design and they are sent to the board house. We hope to have a few demo robots up and running in the new year. I am continuing my experimentation with tiny wheels, on that topic an update will come soon!
The new board release contains 11 robots and an st-link adapter, this is for ease of small scale pick and place. It is unlikely we will be making millions of these things any time soon, but the ability to bash out 11 new minions when needed on the local pick and place machine should be a boon for distributing robots to interested parties.
The new design includes proper forward facing proximity sensors, dual upright charging pins with polarity protection and an updated processor with more of everything! And we hope to implement some proper motor control with the help of our house motor control expert ;) Also have the robots run a simple operating system to aid in the modularity of adding new features.
Fingers crossed that the next update is sooner than 6 months time!
![]()
-
Hackathon!
06/20/2016 at 13:24 • 1 commentHello again,
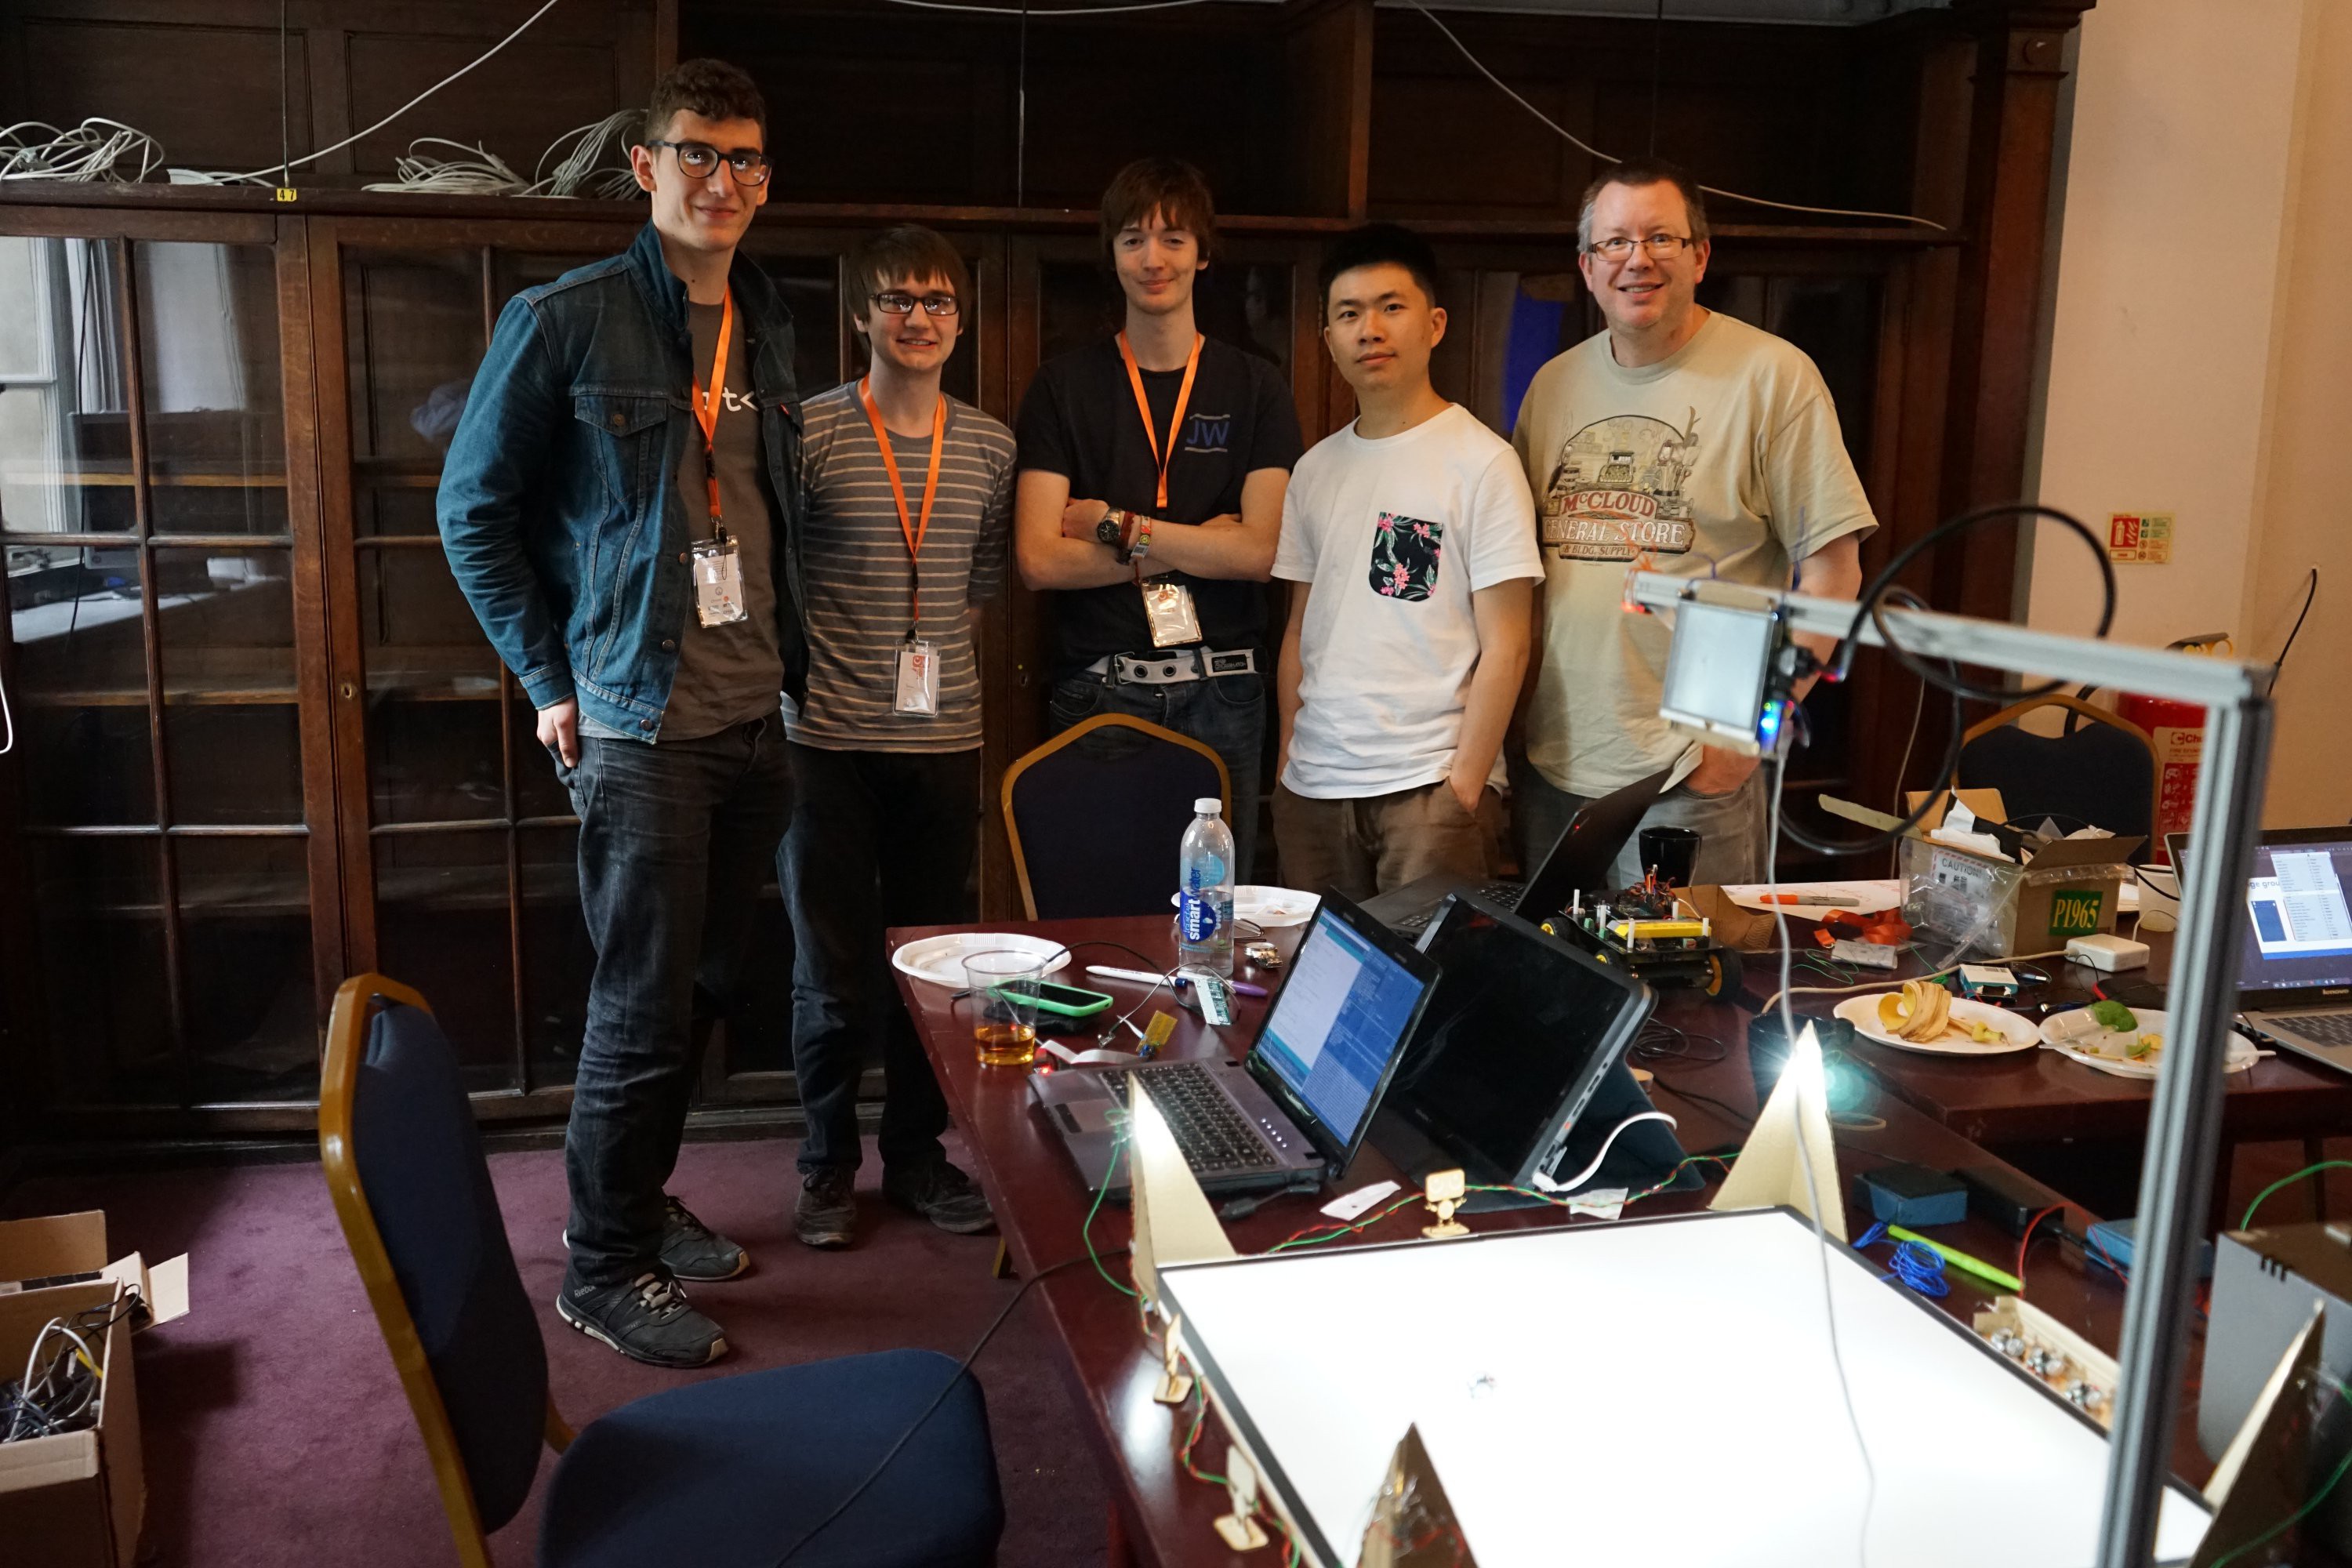
This weekend we took part in the delightful Hackathon focused on 'Robotics in Education' organised by the Imperial College Advanced Hackspace. We met more than our fair share of interesting people, and even got some work done on the project on the side ;) As part of the Hackathon we were introduced to some new team mates to help us for the 2 week period, and especially the final hack frenzy that happened this weekend. So say hello to Christian, (Tom and Myself), Kenny and Nick! Depending on their schedules we hope that we can continue to work together.
![]()
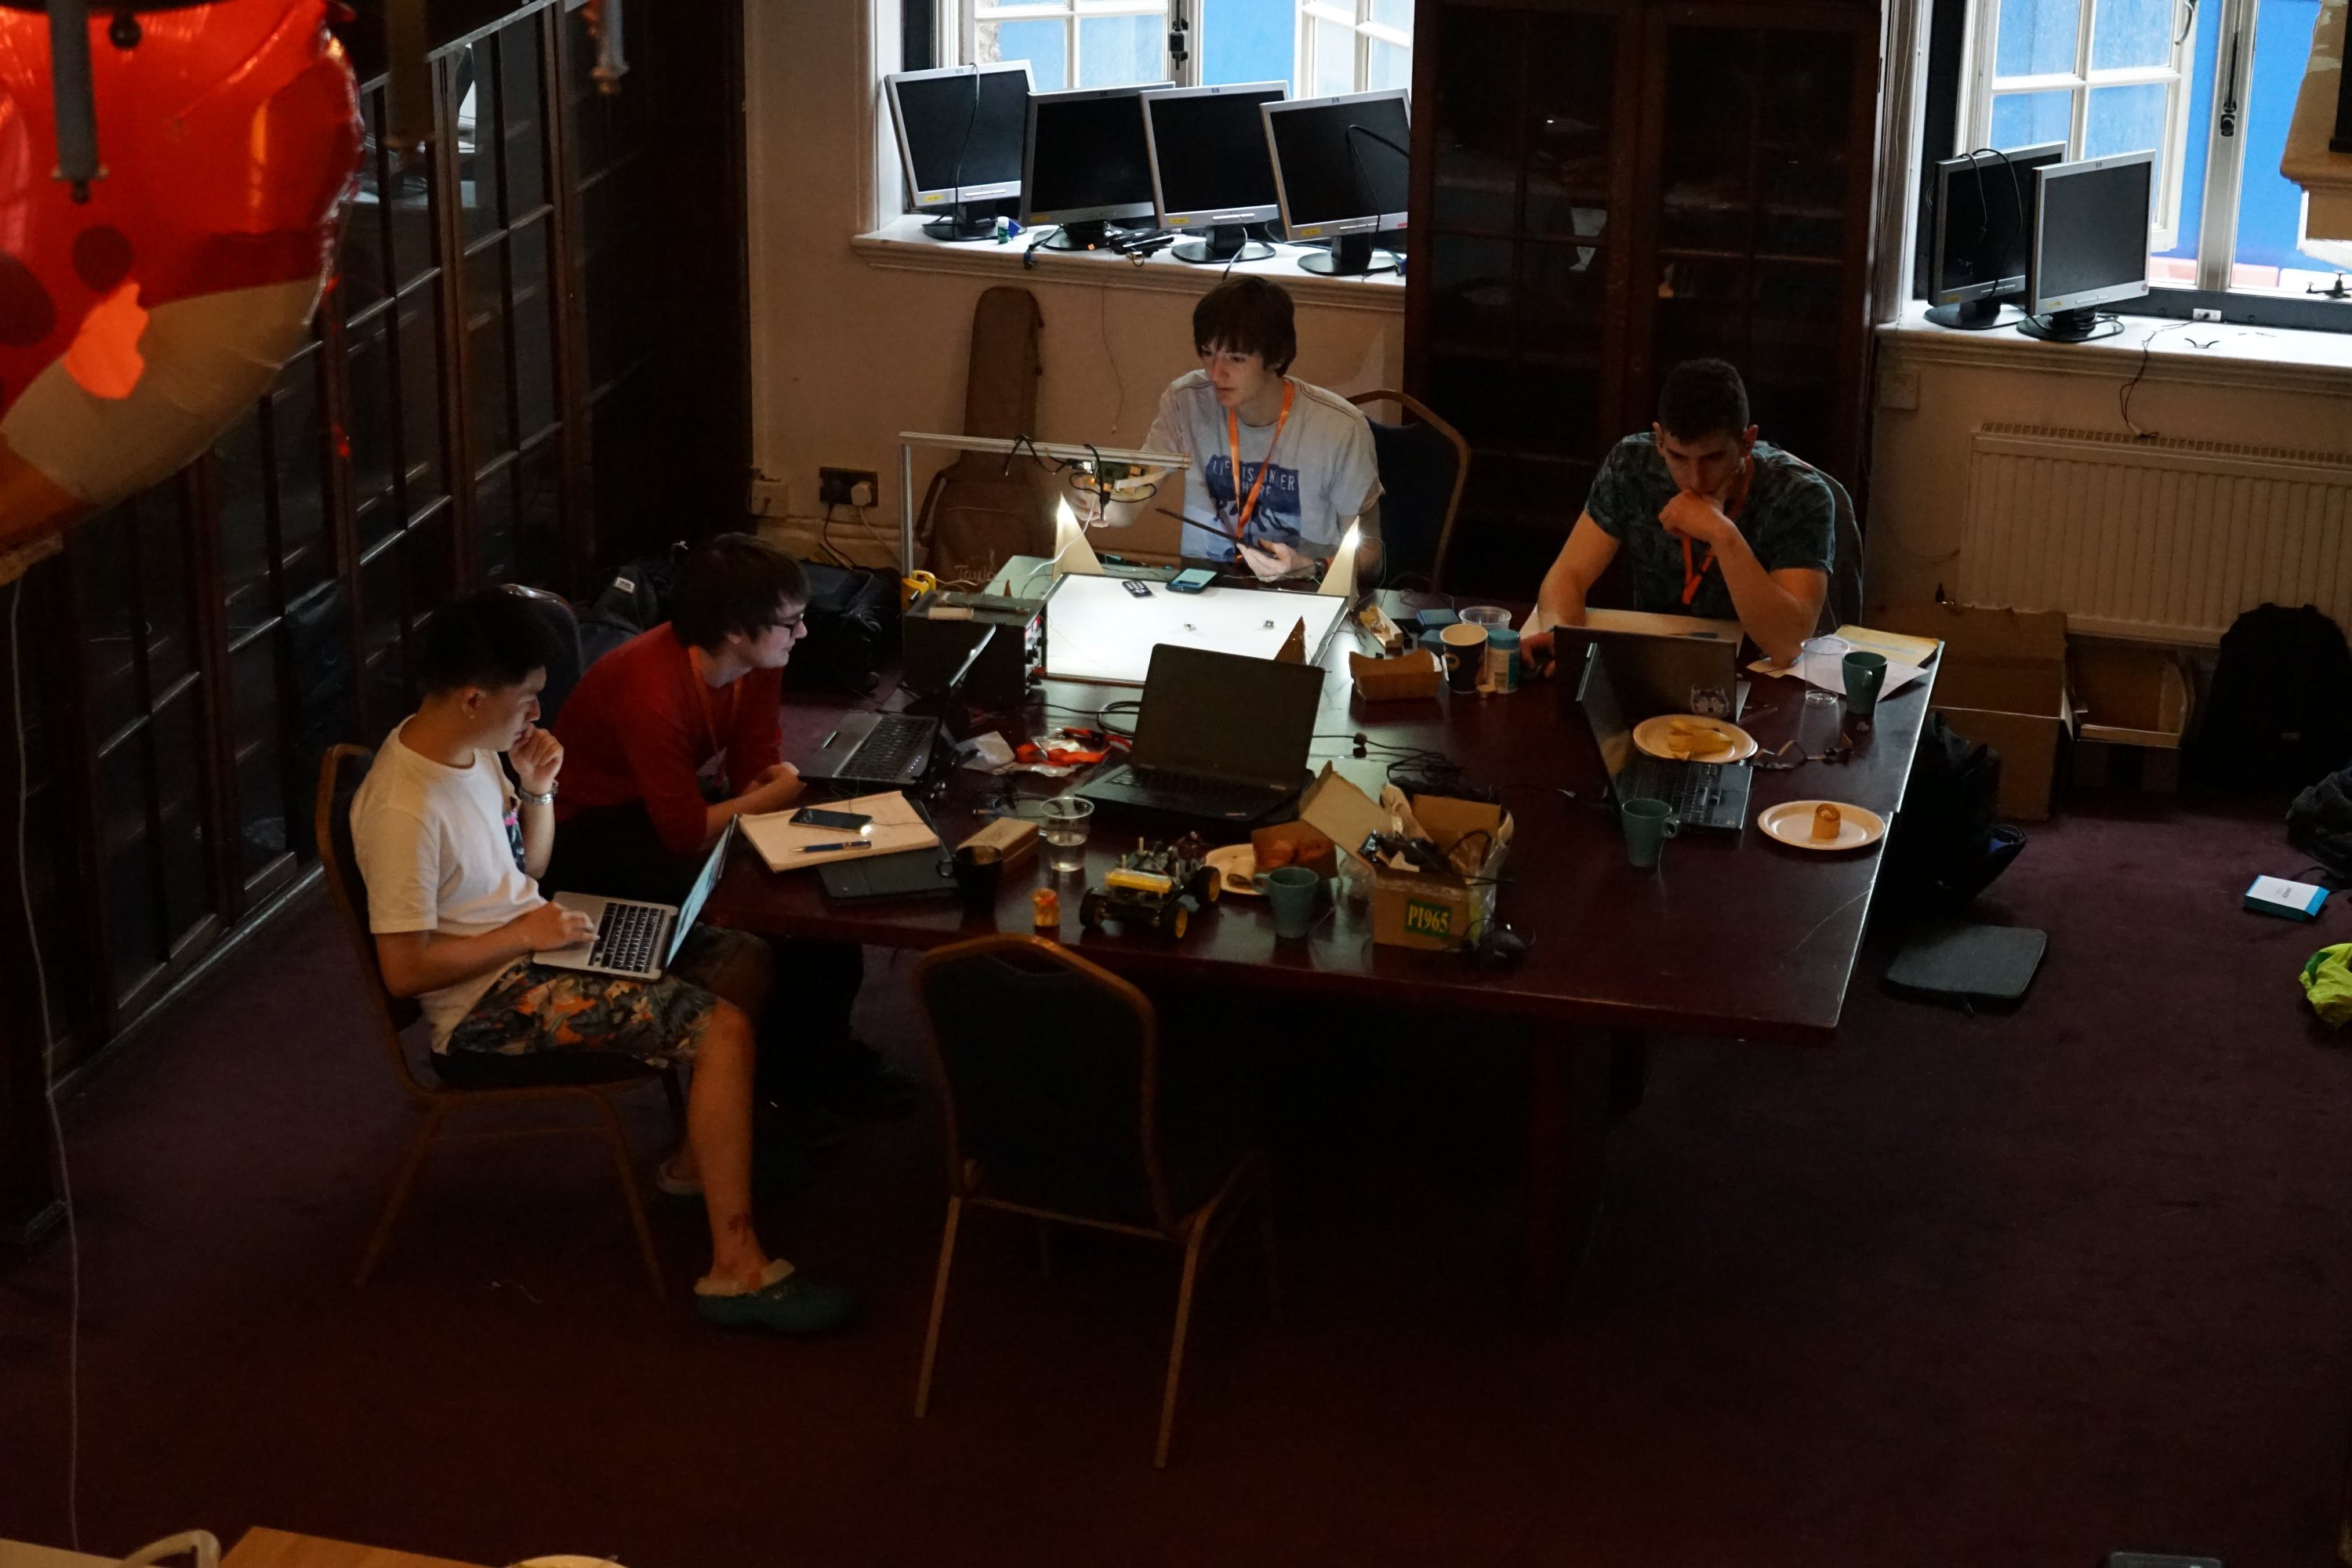
Christian enthusiastically oversaw the team effort to focus ideas and help us appeal to teachers, kids and technicians alike. So thanks to him we have more streamlined ideas, nice graphics and a fantastic presentation to use in future. Kenny worked on a number of things including investigating a block programming interface, and a web connected interface, he also happens to be a ROS connoisseur. Nick provided us some grounding in what children would be interested in and what is tenable from a teachers stand point, he works as a Software engineer and an after school STEM ambassador, which is a pretty useful set of skills for this project. Nick also helped us prototype a sanitised Python interface for the 'activity' part of the software, such that we are more able to fit in with the UK curriculum in this area. Tom and I continued on the ROS integration and robot firmware. A shot of us being studious; free food and coffee, and an amazing venue!
Some modifications to the firmware unleashed the beastly speed of the litte robots, now we can proudly say that power sliding is a potential issue we will have to deal with. Here is a video, the spinning is in real time, the movement forward is in slo-mo.![]()
There is a small update for anyone who is still listening. A fully integrated demo comming soon I hope.
Micro Robots for Education
We aim to make multi-robot systems a viable way to introduce students to the delight that is robotics.
 Joshua Elsdon