Tintype Develop-o-tron
Automated tintype (and film?) developing machine
Automated tintype (and film?) developing machine
To make the experience fit your profile, pick a username and tell us what interests you.
We found and based on your interests.
If, as I suspect, the air leaks are from the solenoid valves; then the only recourse is to replace them with valves that don't leak. Simple enough to deduce. Expensive to effect.
There was a time when you would go looking for a product in your distributor-of-choice's catalog; find a half dozen things that were vaguely right; and consult with them over which was the part for your task. I once called up engineers at a company about one single IC, priced in the just-under-$100 range, and easily got them to ship me a sample - after they spent some 20 minutes explaining all the ways in which it would and would not work out well for what I was attempting. With no misdirection on my part: "I'm trying to build a one-off thing for such-and-so, with no commercial value ever, and I wonder if your gizmo will work for that." "Probably! What's your address? We'll ship you one UPS overnight."
If such a thing is still possible today, I'm afraid it's not at the scale that I'm building. The information that's available about what's out there is sparse, and distributed. If you can find the right seller for the kind of general thing you're looking for, you might be able to peruse a wide selection of gizmos. I guess it's probably still possible to talk with such resellers about which thing might be best within certain tolerances. I suppose I just don't have that context.
But there is a new phenomenon. Go find a part; find other similar-looking parts; and then you can find the common supplier in China.
These guys are, in my limited experience, *always* willing to talk to you about their product. And how they can sell you six billion of them. Minimum. For cheap. So all you have to do is drum up another 4 billion people that also want the thing; place the ridiculously large order; watch and hope while it clears customs; and then spend half your life repackaging them one at a time and mailing them to all the people that ponied up money to make it possible.
But I digress.
My thinking in this case went like so: "I need a valve that won't leak; that can be opened easily from a motor; that is not going to react badly to photographic fixer. I know, from plumbing, of ball valves that have the right properties but are made of copper. I wonder if I can find one that's made of stainless steel?"
Answer: yes.
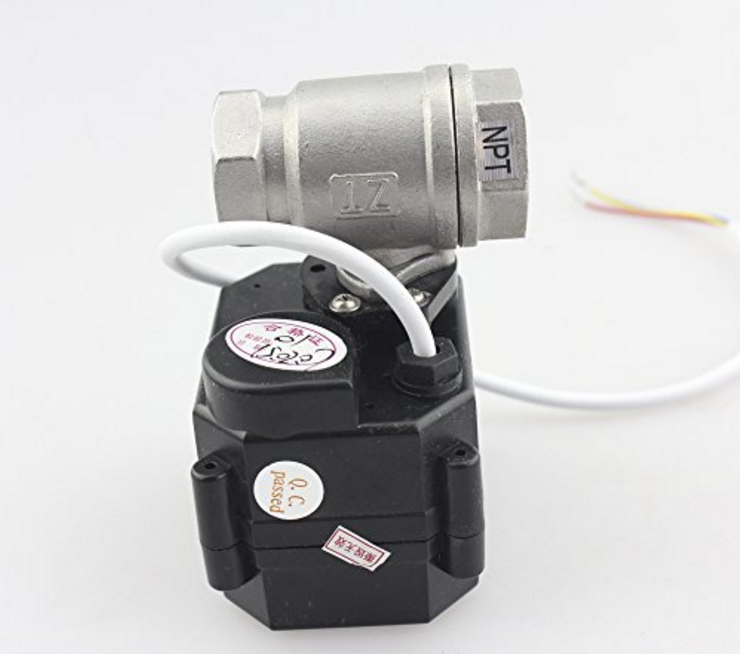
This thing is a 1/2" NPT-threaded ball valve with a 12v DC motor attached. The motor has three leads: a common, an open, and a close. It's available under lots of names, from lots of resellers. Here are a couple of them over at amazon:
https://www.amazon.com/dp/B00VPRR42Y?psc=1
https://www.amazon.com/dp/B00OUTP6D8?psc=1
... which looks an awful lot like this:
Hmmmmmmm. If I only needed a billion of them, I might start tracking that down.
Fortunately, I only need four. I figure the solenoids for the pumps are probably sufficient (I'm not convinced I wouldn't leak air through the pumps themselves, so why make the valves leak-proof?) which means covering the waste line and the three supply tanks.
A couple orders from three different suppliers on Amazon - since every one of them seemed to only have one in stock when I bought mine - and I wound up with four identical-to-the-color-of-the-wires ball valves. Nice.
Since I built this around a relay board that has 3-position relay contacts (common, normally open, and normally closed) it's trivial to wire these guys in. Once I figure out the wiring. Yellow (which may very well be yellow-green for all I can tell) is common. Red opens the valve. Blue closes it. It takes about 3 seconds to fully actuate.
Which means I have to rewrite the program, injecting a new "waiting" kind of state while the valves are in the process of opening or closing.
I used this as an opportunity to refactor the code quite a bit, cleaning up some of the messiness from the original prototype. I also had to refactor the hardware...
Read more »And here's the first run! Just water, no tintypes.There were some leaks. I applied more truck bed liner. More testing: more small leaks. I bought a half dozen 3/8" hose clamps. More leaks, really? Okay, a dozen more 3/8" clamps. Leaks Be Gone!
The programming, to this point, was fairly minimal. I wrote some simple driver code that let me send commands over RF; some Perl scripts on my laptop, via a moteino on USB, told the moteino in the D-o-T to turn on or off various solenoids and pumps. It worked well enough for intiial testing. My goal was to not take the laptop with me to the photo shoot, though. Which meant making the smarts in the D-o-T end smarter, and building a remote that would let me trigger this thing. Or maybe I'd just add a button on the D-o-T itself for now that let me start it. And I'd probably want one to stop it. And that's starting to sound complicated.
Thinking a little about what I wanted to control: there are 6 steps in developing. Developer-to-tank; tank-to-developer; fix-to-tank; tank-to-fix; wash-to-tank; tank-to-wash. There's one clean-up step (dumping from the tank to the waste line). And there's an intermediate "bubble air through the tank to agitate" that has to happen every so often.
So if I had a remote, it would need 8 buttons.
It would need an on/off switch.
And if I put in a second switch, it would let me use those 8 buttons for a second set of functions.
I'd want some way to see what was happening. And I've got a few different LCD displays hanging around. I wonder if I can put these all together somehow. What would it look like? Well, with this here proto board I can throw some parts at it and...
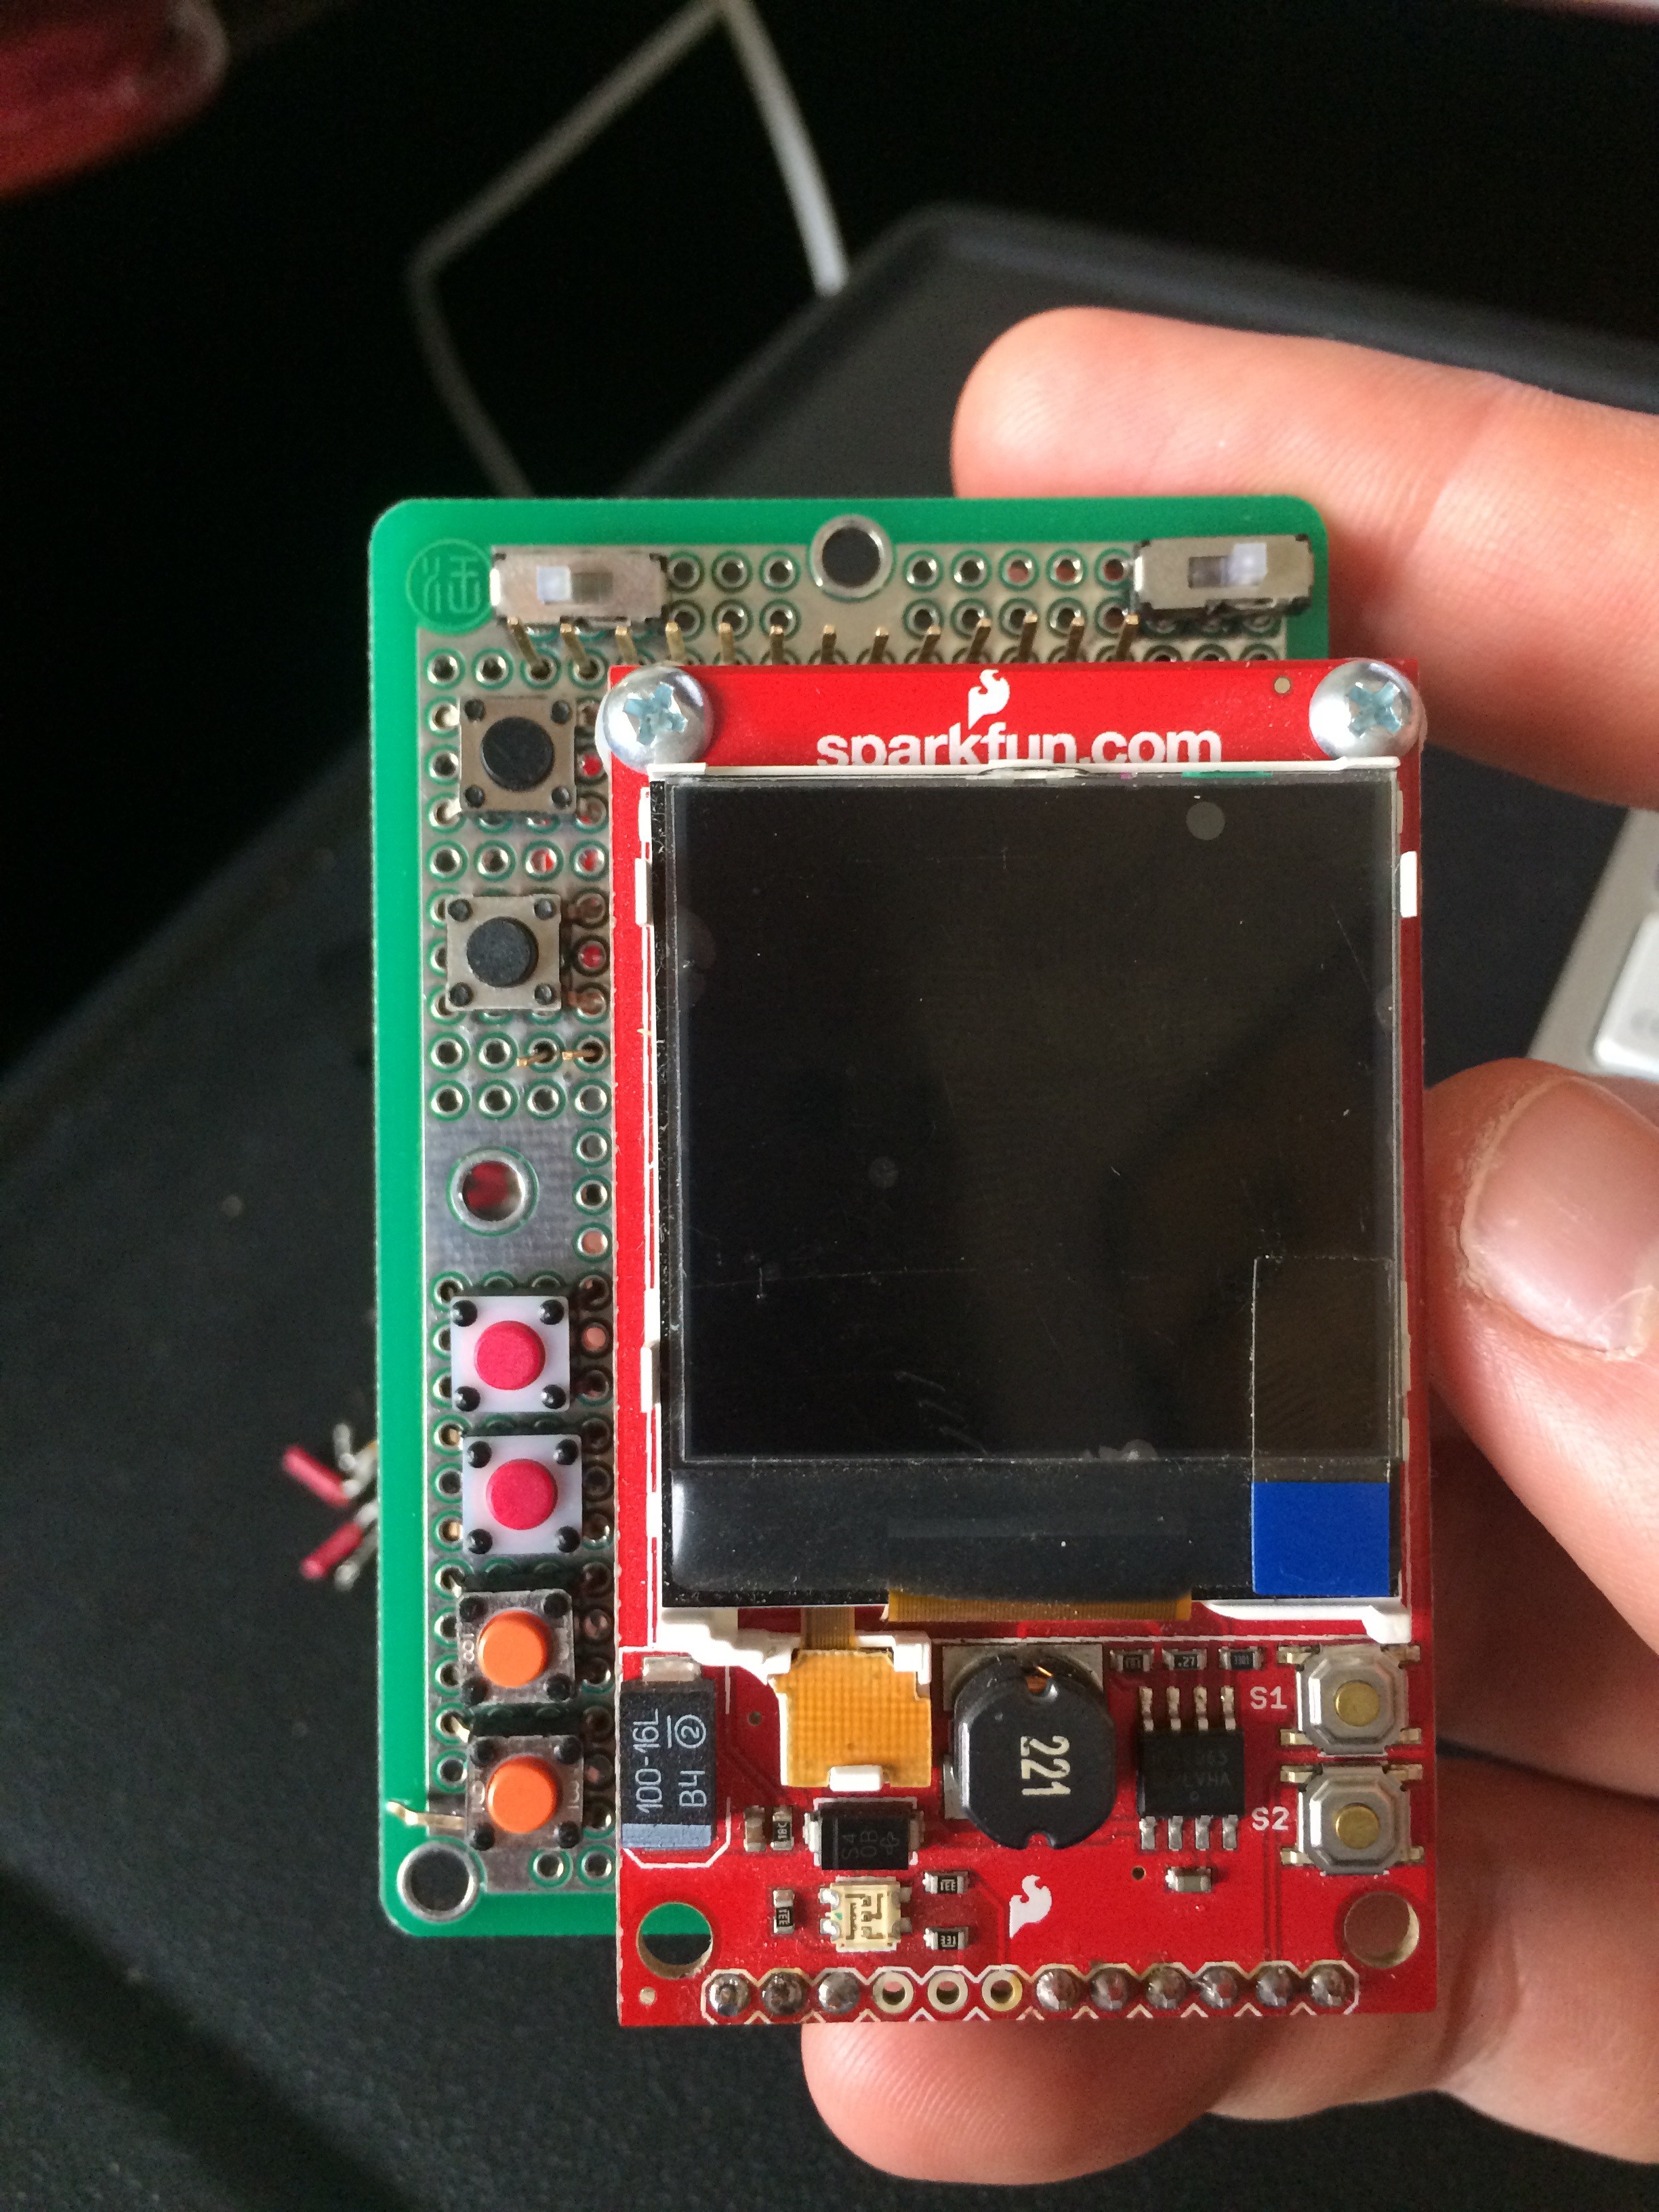
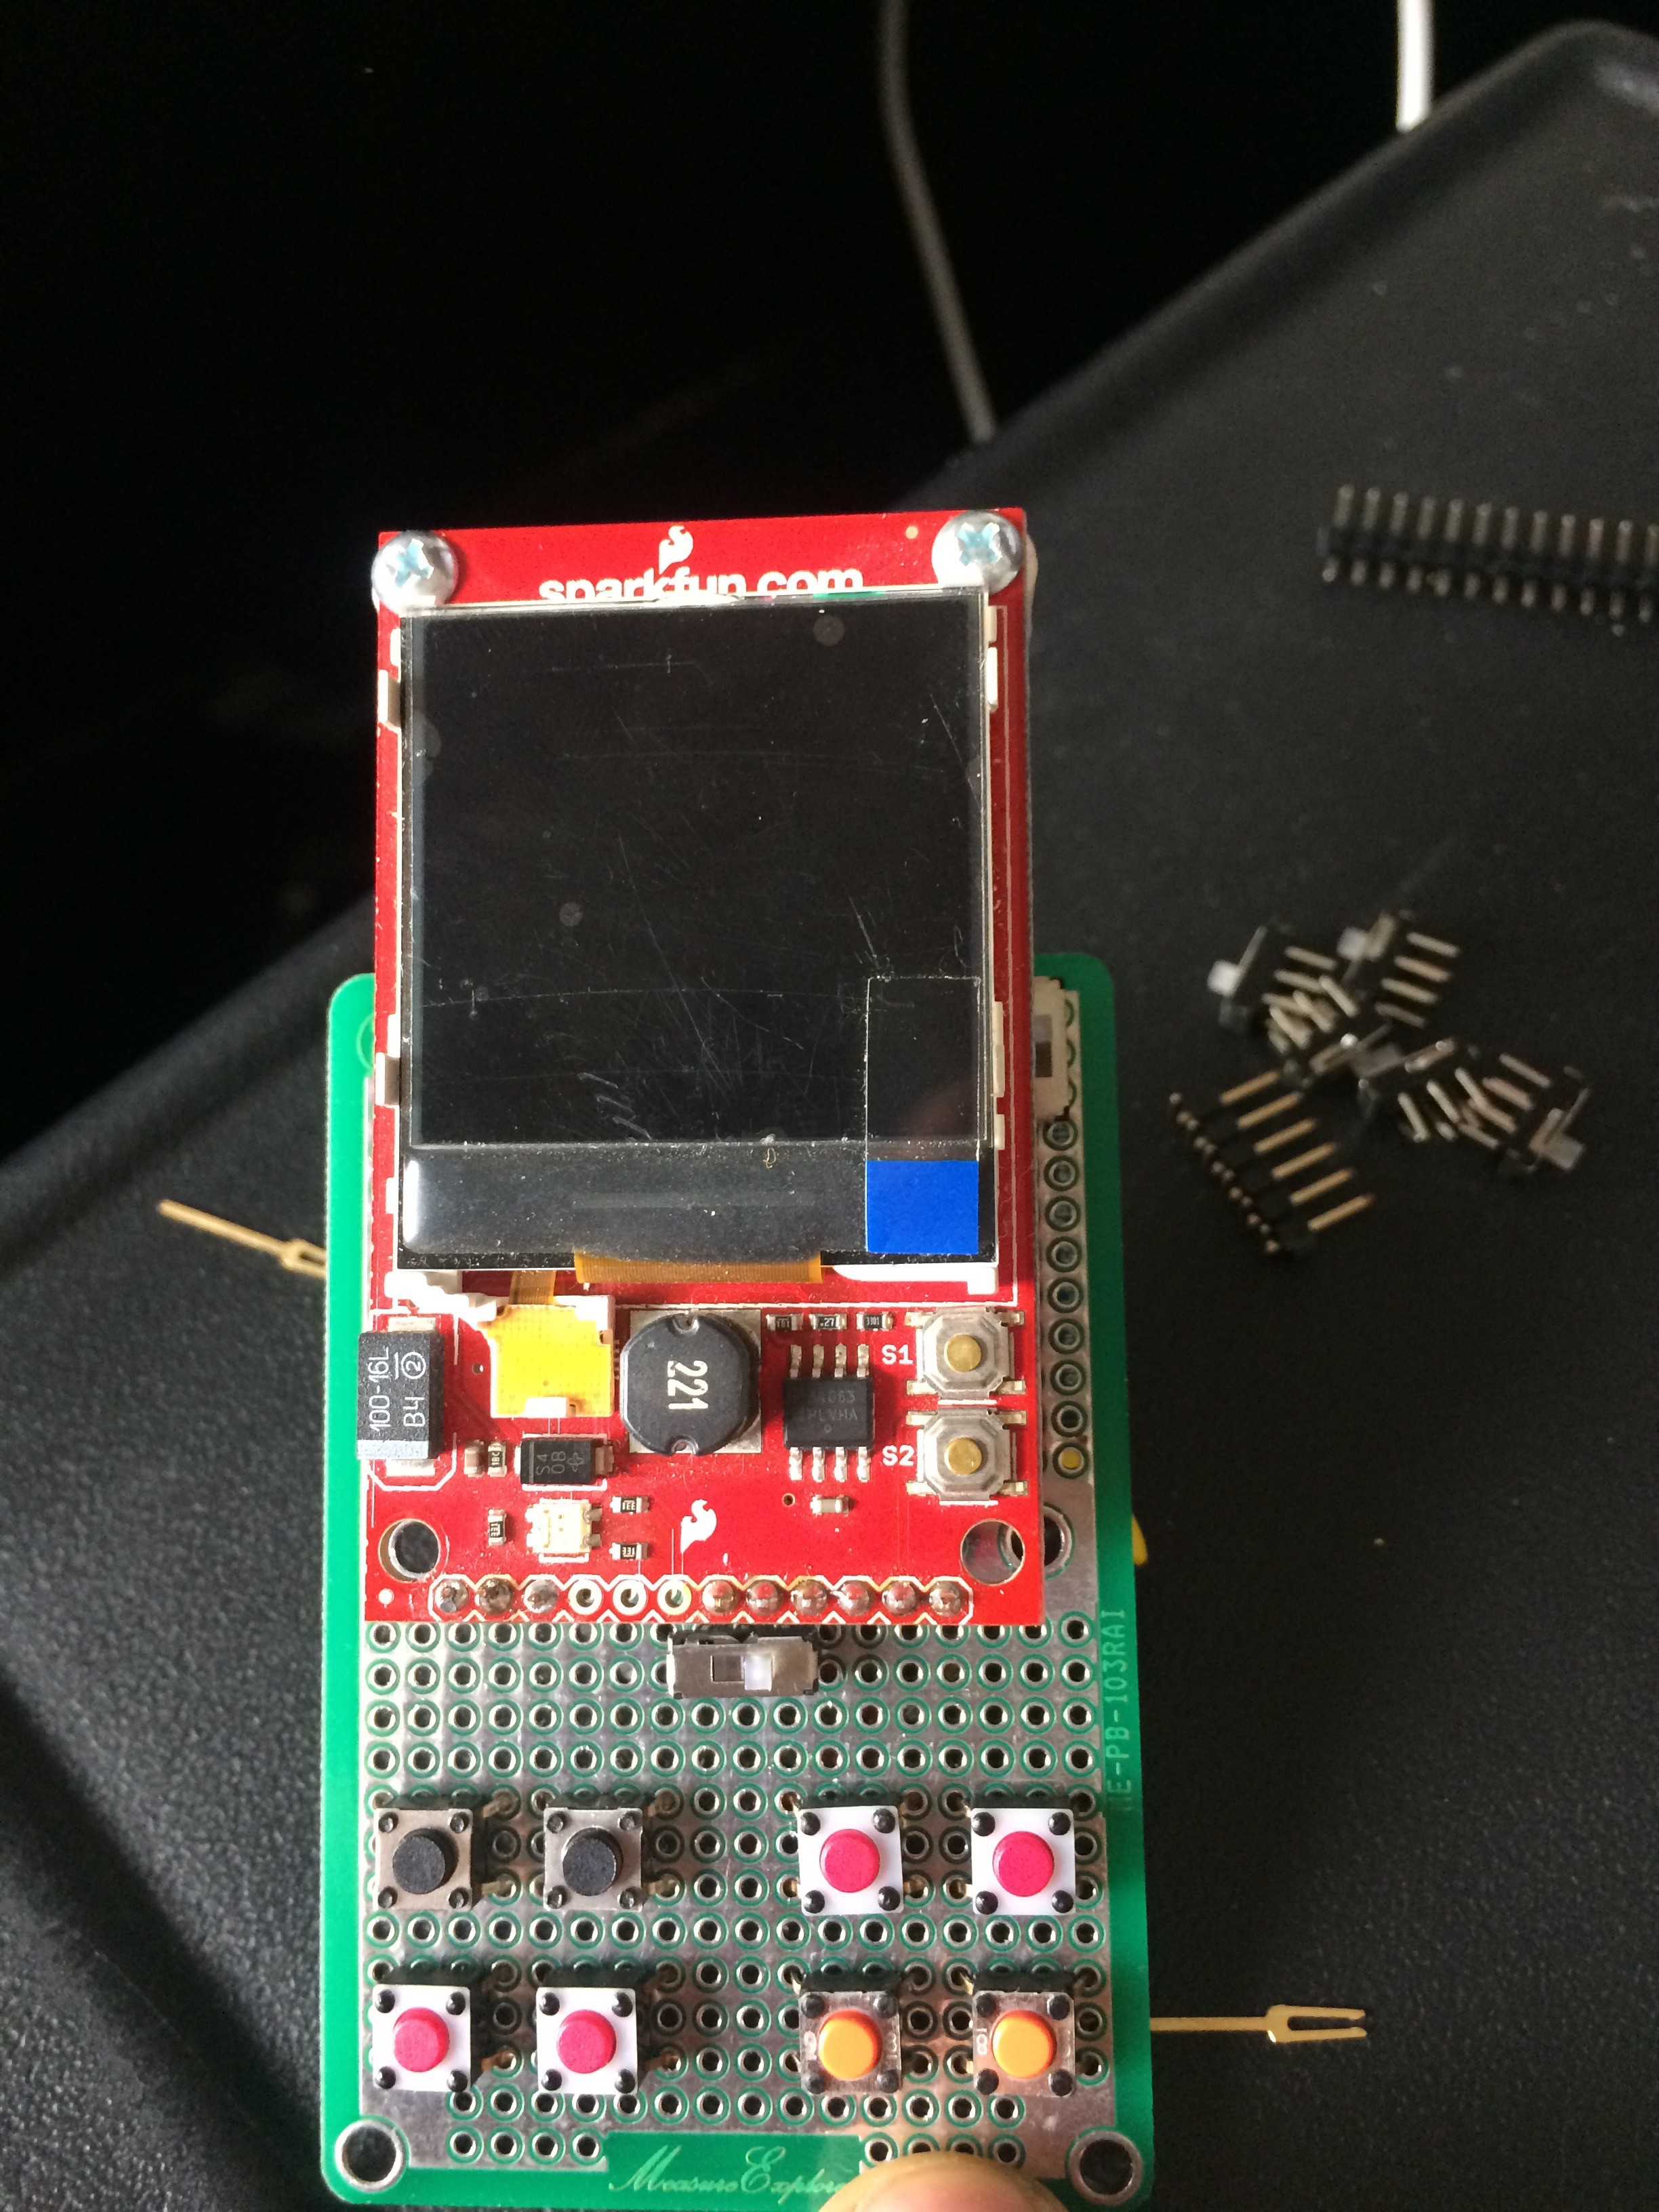
Some soldering, minor programming, and it's got feedback from the remote end! Oooooooo. Me likey. This means I can spend DOZENS OF HOURS fiddling with the code for NO GOOD REASON. Perfect. :)
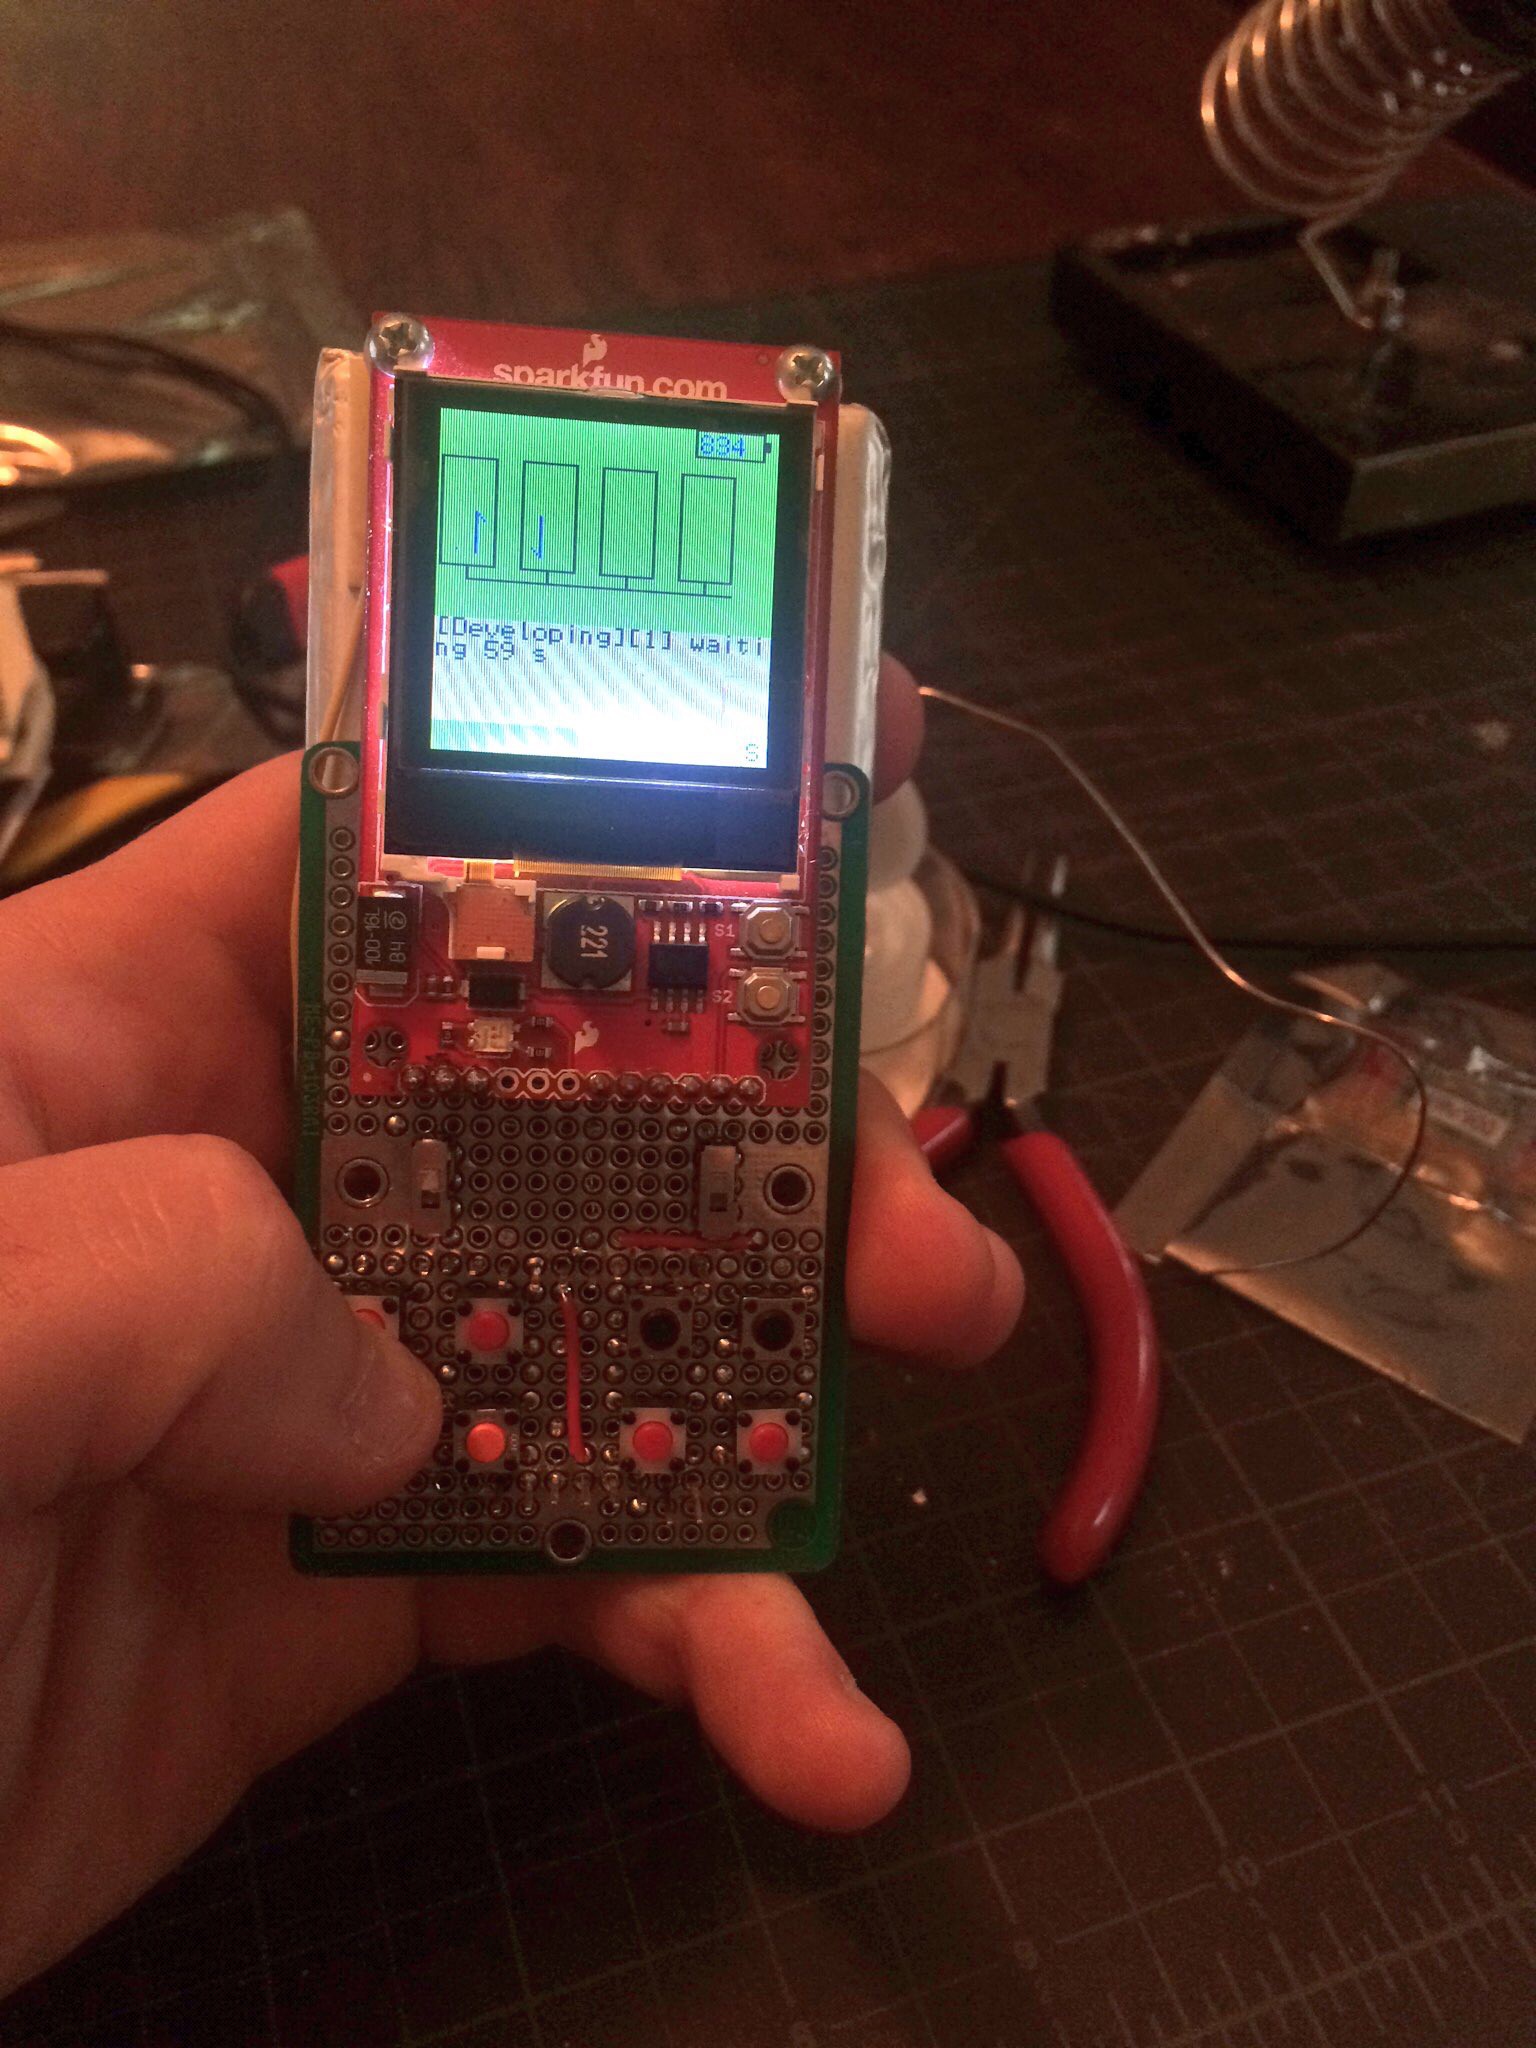
The display is a Nokia 6100 display from Sparkfun. Which you won't be able to buy; it's a discontinued product. I've had it sitting around for a couple of years. It briefly saw life as part of a gizmo I'd made for my son (the "timey wimey" - yes, we're all Doctor Who fans), which had an RFID reader, display, a couple of analog gauges, some LEDs scavenged from Dell server front panels, and quite a lot of Instamorph. Later I hacked a thermal printer on to it, and the whole thing played a part in a "treasure hunt" day where I thought up a dozen puzzles for Jake and his friends to solve: a series of riddles that lead them to find clues behind mirrors, remote controls taped under a table, a channel 4 transmitter and receiver that were broadcasting from a totally dark room that was lit by the remote controls, letting them see the next clue; and somewhere near the end, an RFID card that my son immediately said "I know what this is for!" and took it to the timey-wimey. Which, when it saw the right RFID card, printed out the final combination to a lock they needed to unlock. Fun was had, and my son learned what an answering machine is. Or was. Why I still have the answering machine is a great question that I'll skip answering for another day, at least.
Back to *this* story, though: from here, the rest of the build is academic! Code to actuate relays to turn on motors and solenoids. Timing the flow rate to figure out how long it takes to pump things around. Realizing that it takes longer to pump *in* to...
Read more »Wake up! It's Saturday. No time to sleep in. Lots to do. Drag yourself downstairs. Put on the kettle. Dig through the scrap wood pile and find something vaguely the right size. Oversteep the tea because you're not paying any attention to it; it's too early in the morning. Find the parts. Lay them out.
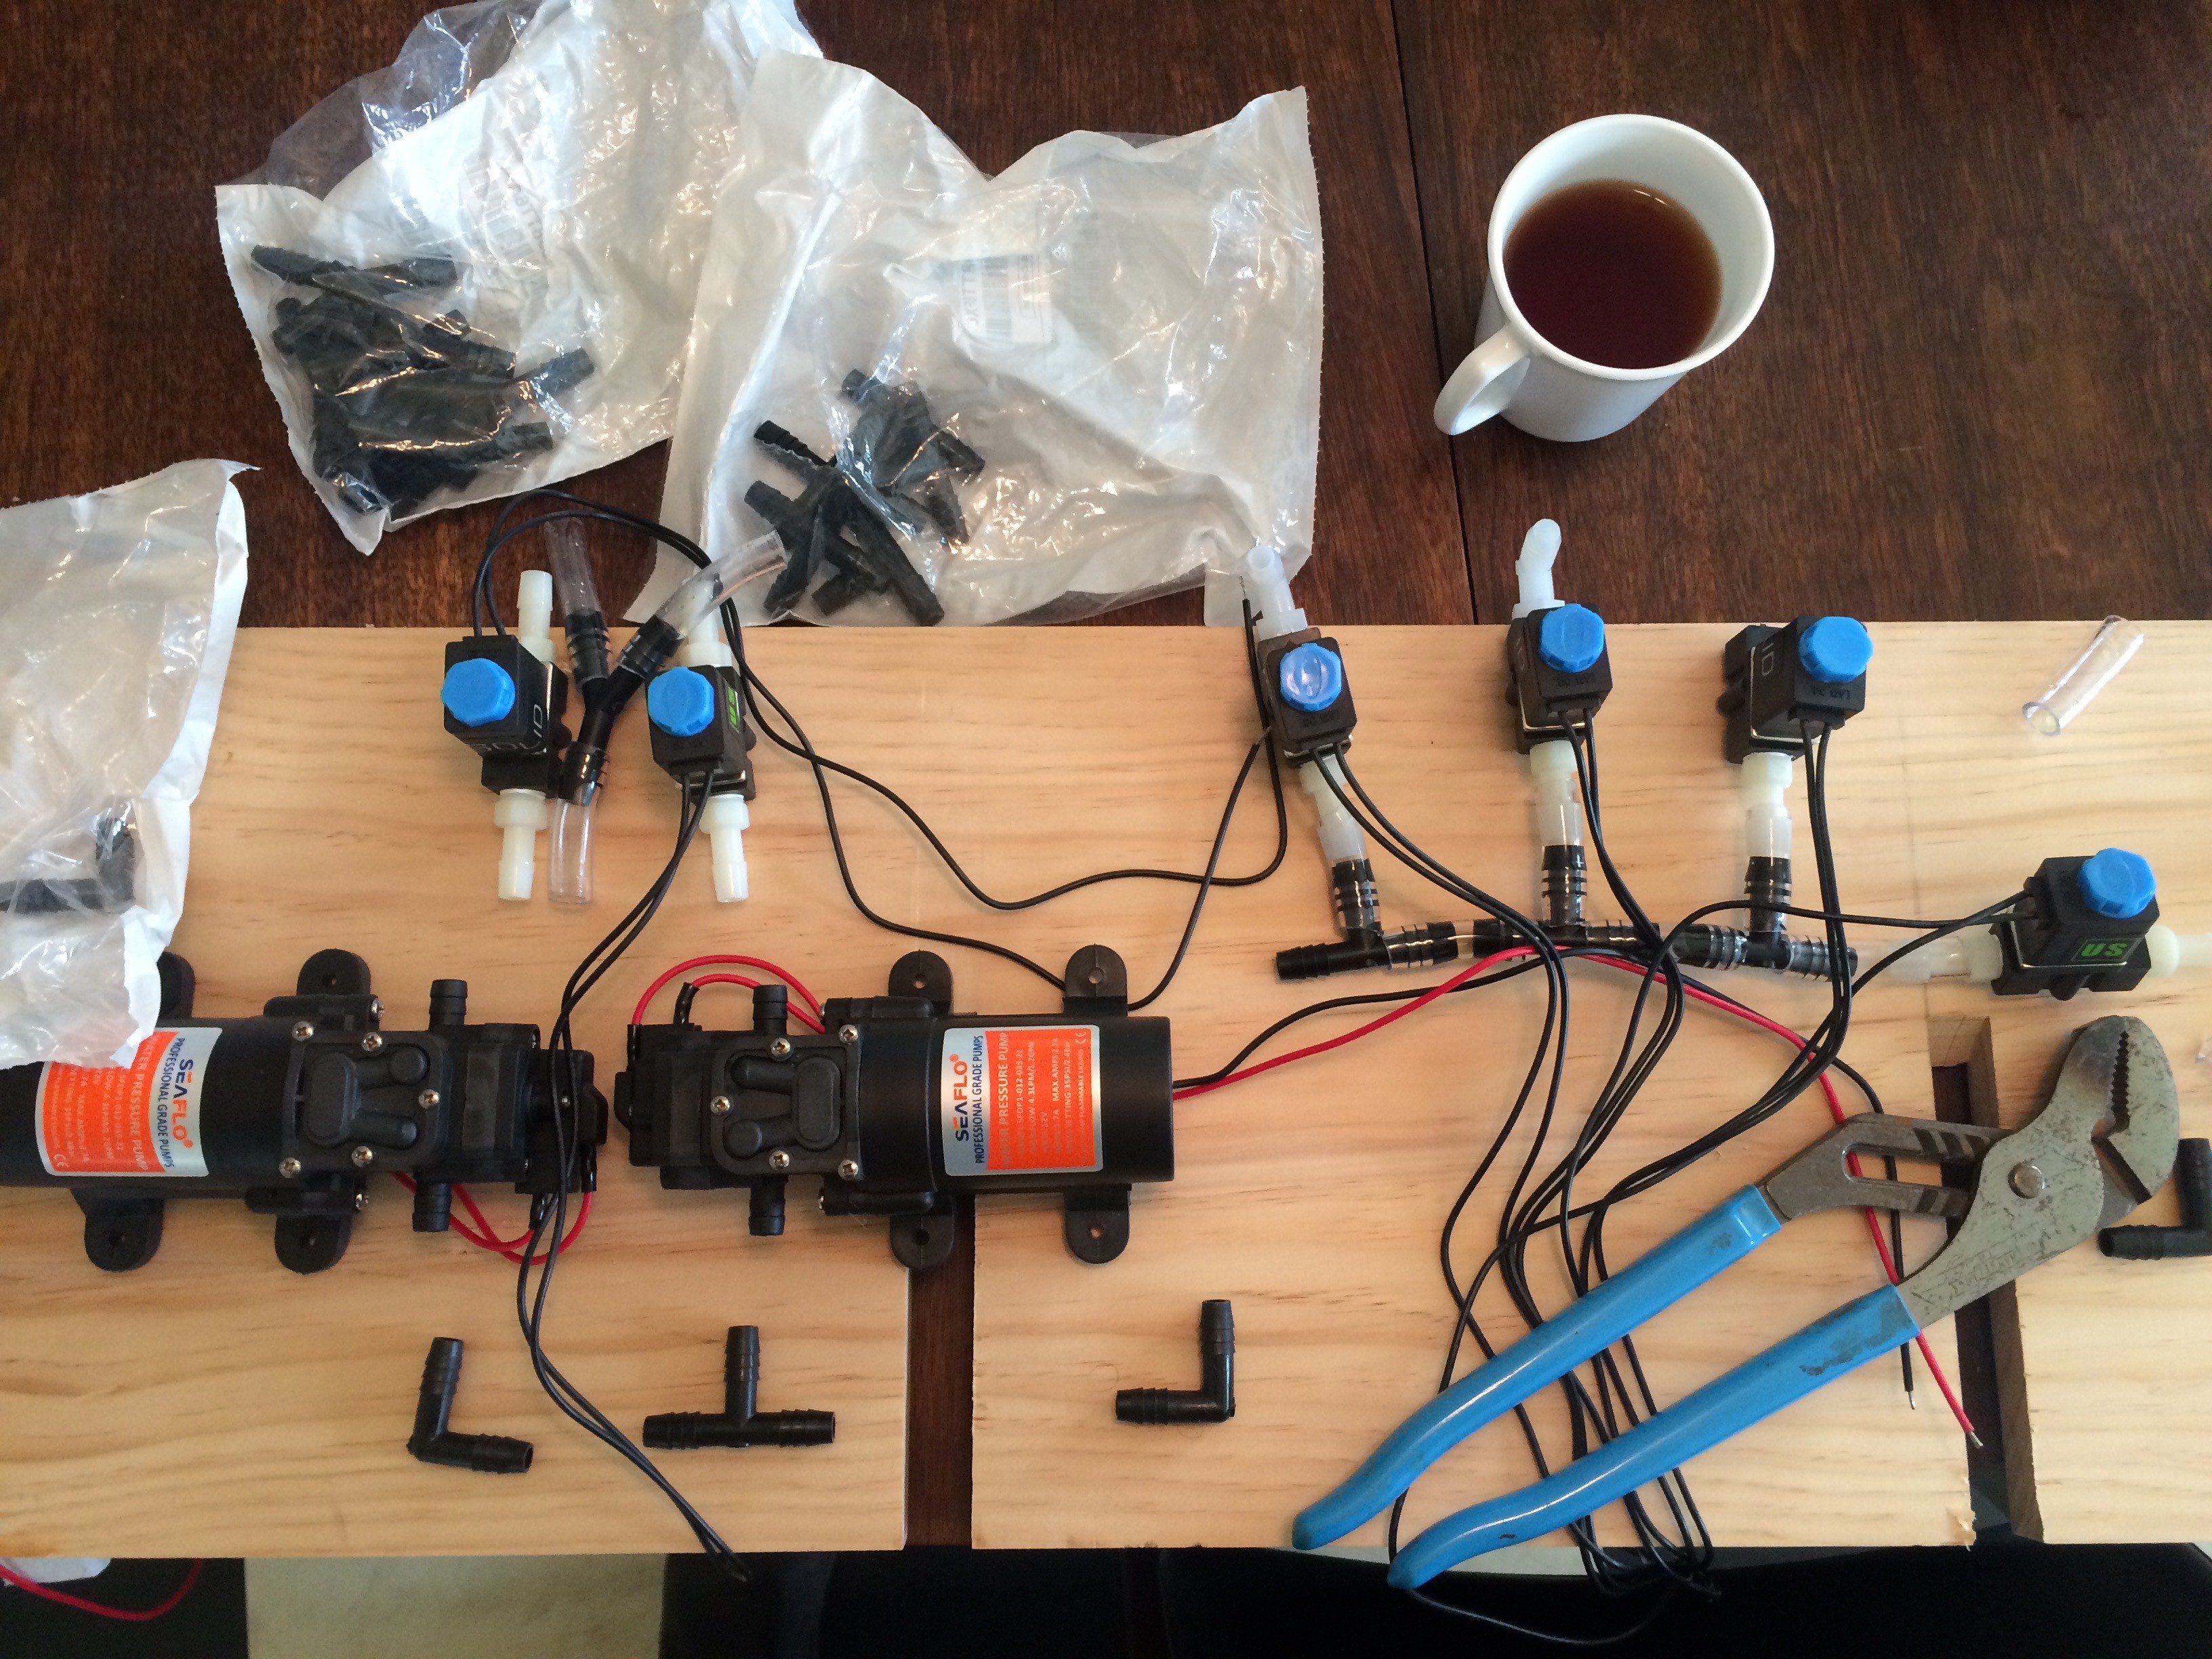
This looks vaguely right. Three bottles on the upper right for developer, fixer, and clearing baths. One outlet on the right for waste. Two pumps on the left that head up to the one developing tank. And builders' tea to give me that necessary construction boost.
I think maybe it should look something like this...
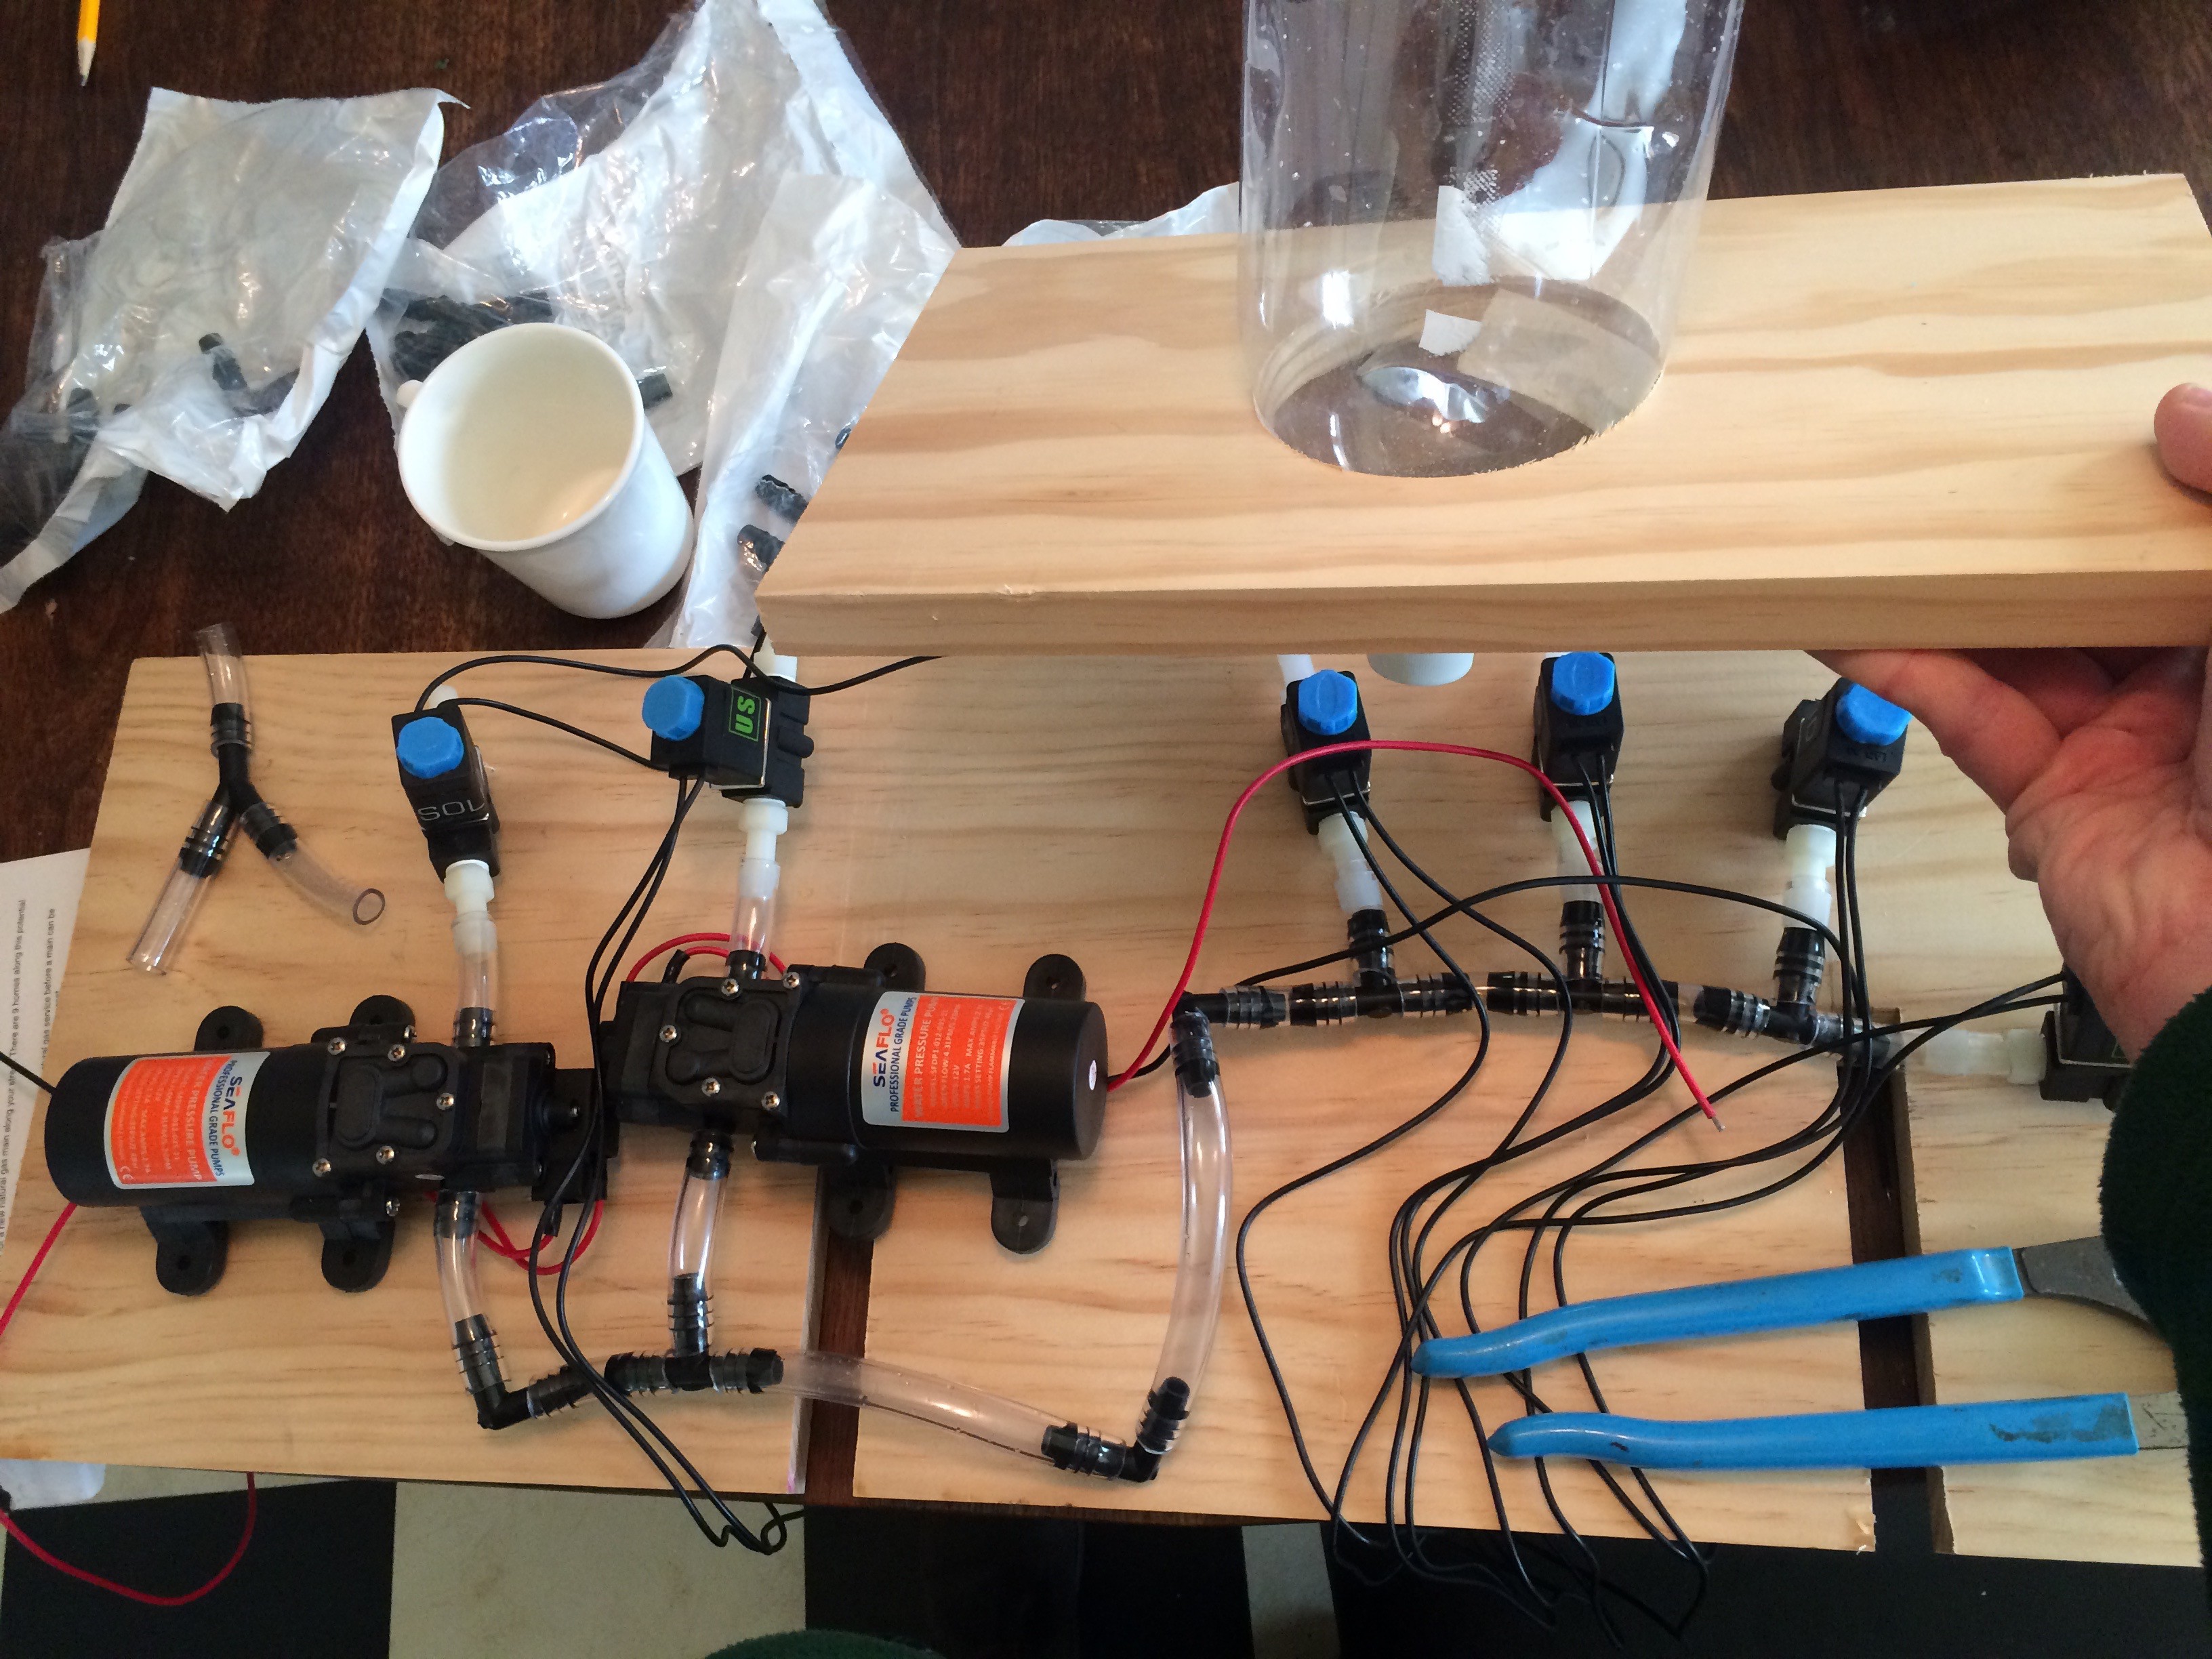
yeah, that. But with three bottles. This could work. The caffeine's starting to do its job and I'm thinking it might not be too early in the morning to fire up the table saw and lop off part of that plank. Maybe I'll have breakfast first though.
Breakfast passes; the plank is sawn; and now what do I want to do about the developing tank? I've had in mind that I could drill a hole in the bottom of a Patterson tank, add some sort of leakproof valve attachment, and probably not compromise the dark of the tank. Not too much, at least. We'll see.
The hole is easy to drill: pilot hole, check. Spade bit easily does its job without fracturing the tank. Phew. Attachment fits, and after some initial testing, I realize it needs adjustment. I went with the pair of
I've built many contraptions over my forty-some years. And I'm a bit surprised that, to date, none of them have really involved pumps. Okay, there was that one "hey, we have some high power sump pumps from the flood, and a kids' pool, and some steel pipe, and - look at this! - a KID, so let's turn this in to a fountain and see if we can spray water higher than the house." Which is related to the "pump all the water out of the basement for a week" project. Which is related to the "what do you mean the pump overheated?" project. But none of those involved any real logic; they were just pipe - turn on - enjoy. Or, hope to enjoy.
So when I started this project I knew just about bupkis about pumps and solenoid valves. Sure, I know what they do. I know about diaphragm pumps, piston pumps, peristaltic pumps. I know how these things work. I've just never had to specify that pump "A" was the right pump for job "B". And I've sure as hell never had to pick a solenoid valve. Or six.
But I know a lot about the chemicals I want to pump around this thing. I know that photographic fixer will happily eat away silver - as it's intended. And also copper and steel, amongst other metals. Plastic, then, is the name of the game.
I figure that I need to move about 1L of chemistry in under a minute; 30 seconds being my target. Based on those two specs alone, I picked a pump. Well, two pumps: one for each direction.
... or so it says. This thing is designed to put positive pressure out the front end, with an automatic cutoff, so that you can use it to pressurize a faucet in an RV. The pump pumps up the pressure and turns off; you later open the tap; water starts to flow out because of the pressure in the line; then the pump kicks back in to keep the water flowing. Seems pretty good to me! Should have my liter of soup moved in seconds, easily.
It turns out that these pumps are pretty good for my task (I got lucky). They're not quite as fast as I'd like, but this (as you'll soon see) are due to engineering difficulties rather than the pumps themselves.
Next up are the solenoids. I drew up a quick flow diagram to figure out how I'd make this all work, and quickly realized I'd need 6: one for each motor direction; one for each of the three supply tanks; and one for a waste line. I picked something that looked like it might do the job, based on nothing other than the 12v supply.
To run all of this, I figured I would throw in a Moteino with an RFM69. This would let me put most of the electronics onboard in some waterproof and safe way, and take the controls off to some safe remote...
Read more »Okay. I've got about a bajillion projects in the works. At all times. I've come to realize that the #1 reason that I don't post anything here is because I have so many things in progress that I never get back to posting the things that are done (or close enough). So I'm trying to break myself of that, and post the fun tidbits of my "I haz engineering" skills here.
Which brings me to this little bit.
I shoot some photography. I really enjoy the "old stuff" - not just film: I'm talking about 1850s printing. Building cameras out of cardboard and cheap glass. Making your own tintypes. Working with chemicals that can stand in for the "hey, we're having a fourth of July party and don't have any fireworks - can you make something explode?" (Answer: hoo boy, yes.)
So recently, when I was asked if I'd shoot tintypes for the 180th anniversary of a local historic cemetery, I of course said yes. For way too little money, I'll add. But while I may be stupid enough to not figure out what I should charge for things, I'm not so dumb that I don't realize that shooting tintypes outdoors, live, without hiring a second in order to keep the cost down *also* means that I have to *develop* the things. Which means time spent not talking with the interesting people. Not telling them about the cool stuff that happened over a hundred years ago. Not sparking their - and even better, their kids' - interest in the history of technology (chemical, photographic, mechanical... any of the above!).
So: in the middle of building all the other stuff that's still marked as incomplete here, I undertook a "quick" build of a film developing apparatus.
I wanted to be able to dump in the soup (what old-school photogs call the developer, fixer, what have you); load a tank; and walk away while the tedium was carried out by something resembling a computer.
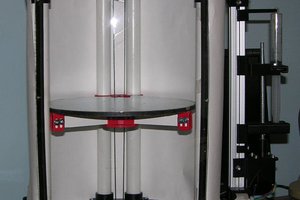
And the current lead photo here is the first version of that! Three two-liter soda bottles, connected via 3/8" hose, garden hose adapters, a good deal of truck bed liner as waterproofing, 6 solenoid valves, two pumps, one Patterson-style developing tank, and some bits of electronics to drive it all.
Create an account to leave a comment. Already have an account? Log In.
I've got it sitting in my basement waiting for me to get back to it! :)
Film and printing started taking up too much of my time, so I refocused a bit. I'll get back to this guy, though; I replaced the solenoids - which did stop the air leaks - and have to spend time rebuilding the timing in the firmware because of how slow these open and close.
Kind of wondering how well my cardboard computer would work at controlling something like that...It can control a single servo at the moment :-)
Become a member to follow this project and never miss any updates
 neohackerjd
 Douglas Miller
 Razvan Caldararu
Wish I did something like this when I had a darkroom back in the 70's. I worked with b/w and color by hand and even exposed/developed on glass and ceramic plates. Any updates after two years ? :-)