Steven Roch
-
Nothing near finished (do not rebuild yet)
05/18/2016 at 10:07 • 0 comments-- UPDATE FOUR--
So guys,
today my wires finally arrived but in the meantime I read about the Pi's 3.3V rail and their maximum current draw.
So I came across this problem that the maximum current the Pi can handle on its 3.3V rail is 51mA (correct me if I'm wrong), which is reached after 3 LEDs lighting up. Take e.g. 19:49 and you will have 15 LEDs burning each drawing 15mAs.
Since this is my only Pi and I can't afford another one I will rebuild the circuit a little bit but I am not yet sure whether I want to use transistors or go over the 5V rail which can handle 750mA to my knowledge.
Anyway, Yann Guidon / YGDES who is a follower of this project answered my questions on how to optimize the circuit and we will team up in a second project which will have an optimized version both of the circuit and the code to be more compact.
I will now upload the source code how it came to my mind when I first thought of the project. Be careful not to re-build my circuit yet because it could potentially damage your Pi!
When I was testing if everything works my Pi2B did not have any problems or instability problems but I never had more than 7-9 LEDs glowing at the same time and to be honest I do not want to risk executing the code at 19:49!
I hope you had fun following the project (this is not the end) and I will soon post a link to our (Yann and I) new project. Stay tuned and feel free to follow me for more easy but practical stuff done with the Raspberry Pi.
-
Resistance is futile!
05/15/2016 at 19:04 • 0 comments-- UPDATE THREE--
Guys, I couldn't help it. I had to continue working and now the clock is near to its final state.
I'm lacking 5 m-f-jumper wires but I already ordered some and they are expected to ship on Thursday.
While waiting I completely assembled the rest of the clock's circuitry and added the lines to get row 3 to work.
Here's an image of the clock:
![]()
When everything is finished on Thursday I'll post the complete source code as well. I am always open for suggestions on code-improvement and other stuff.
See you then!
-
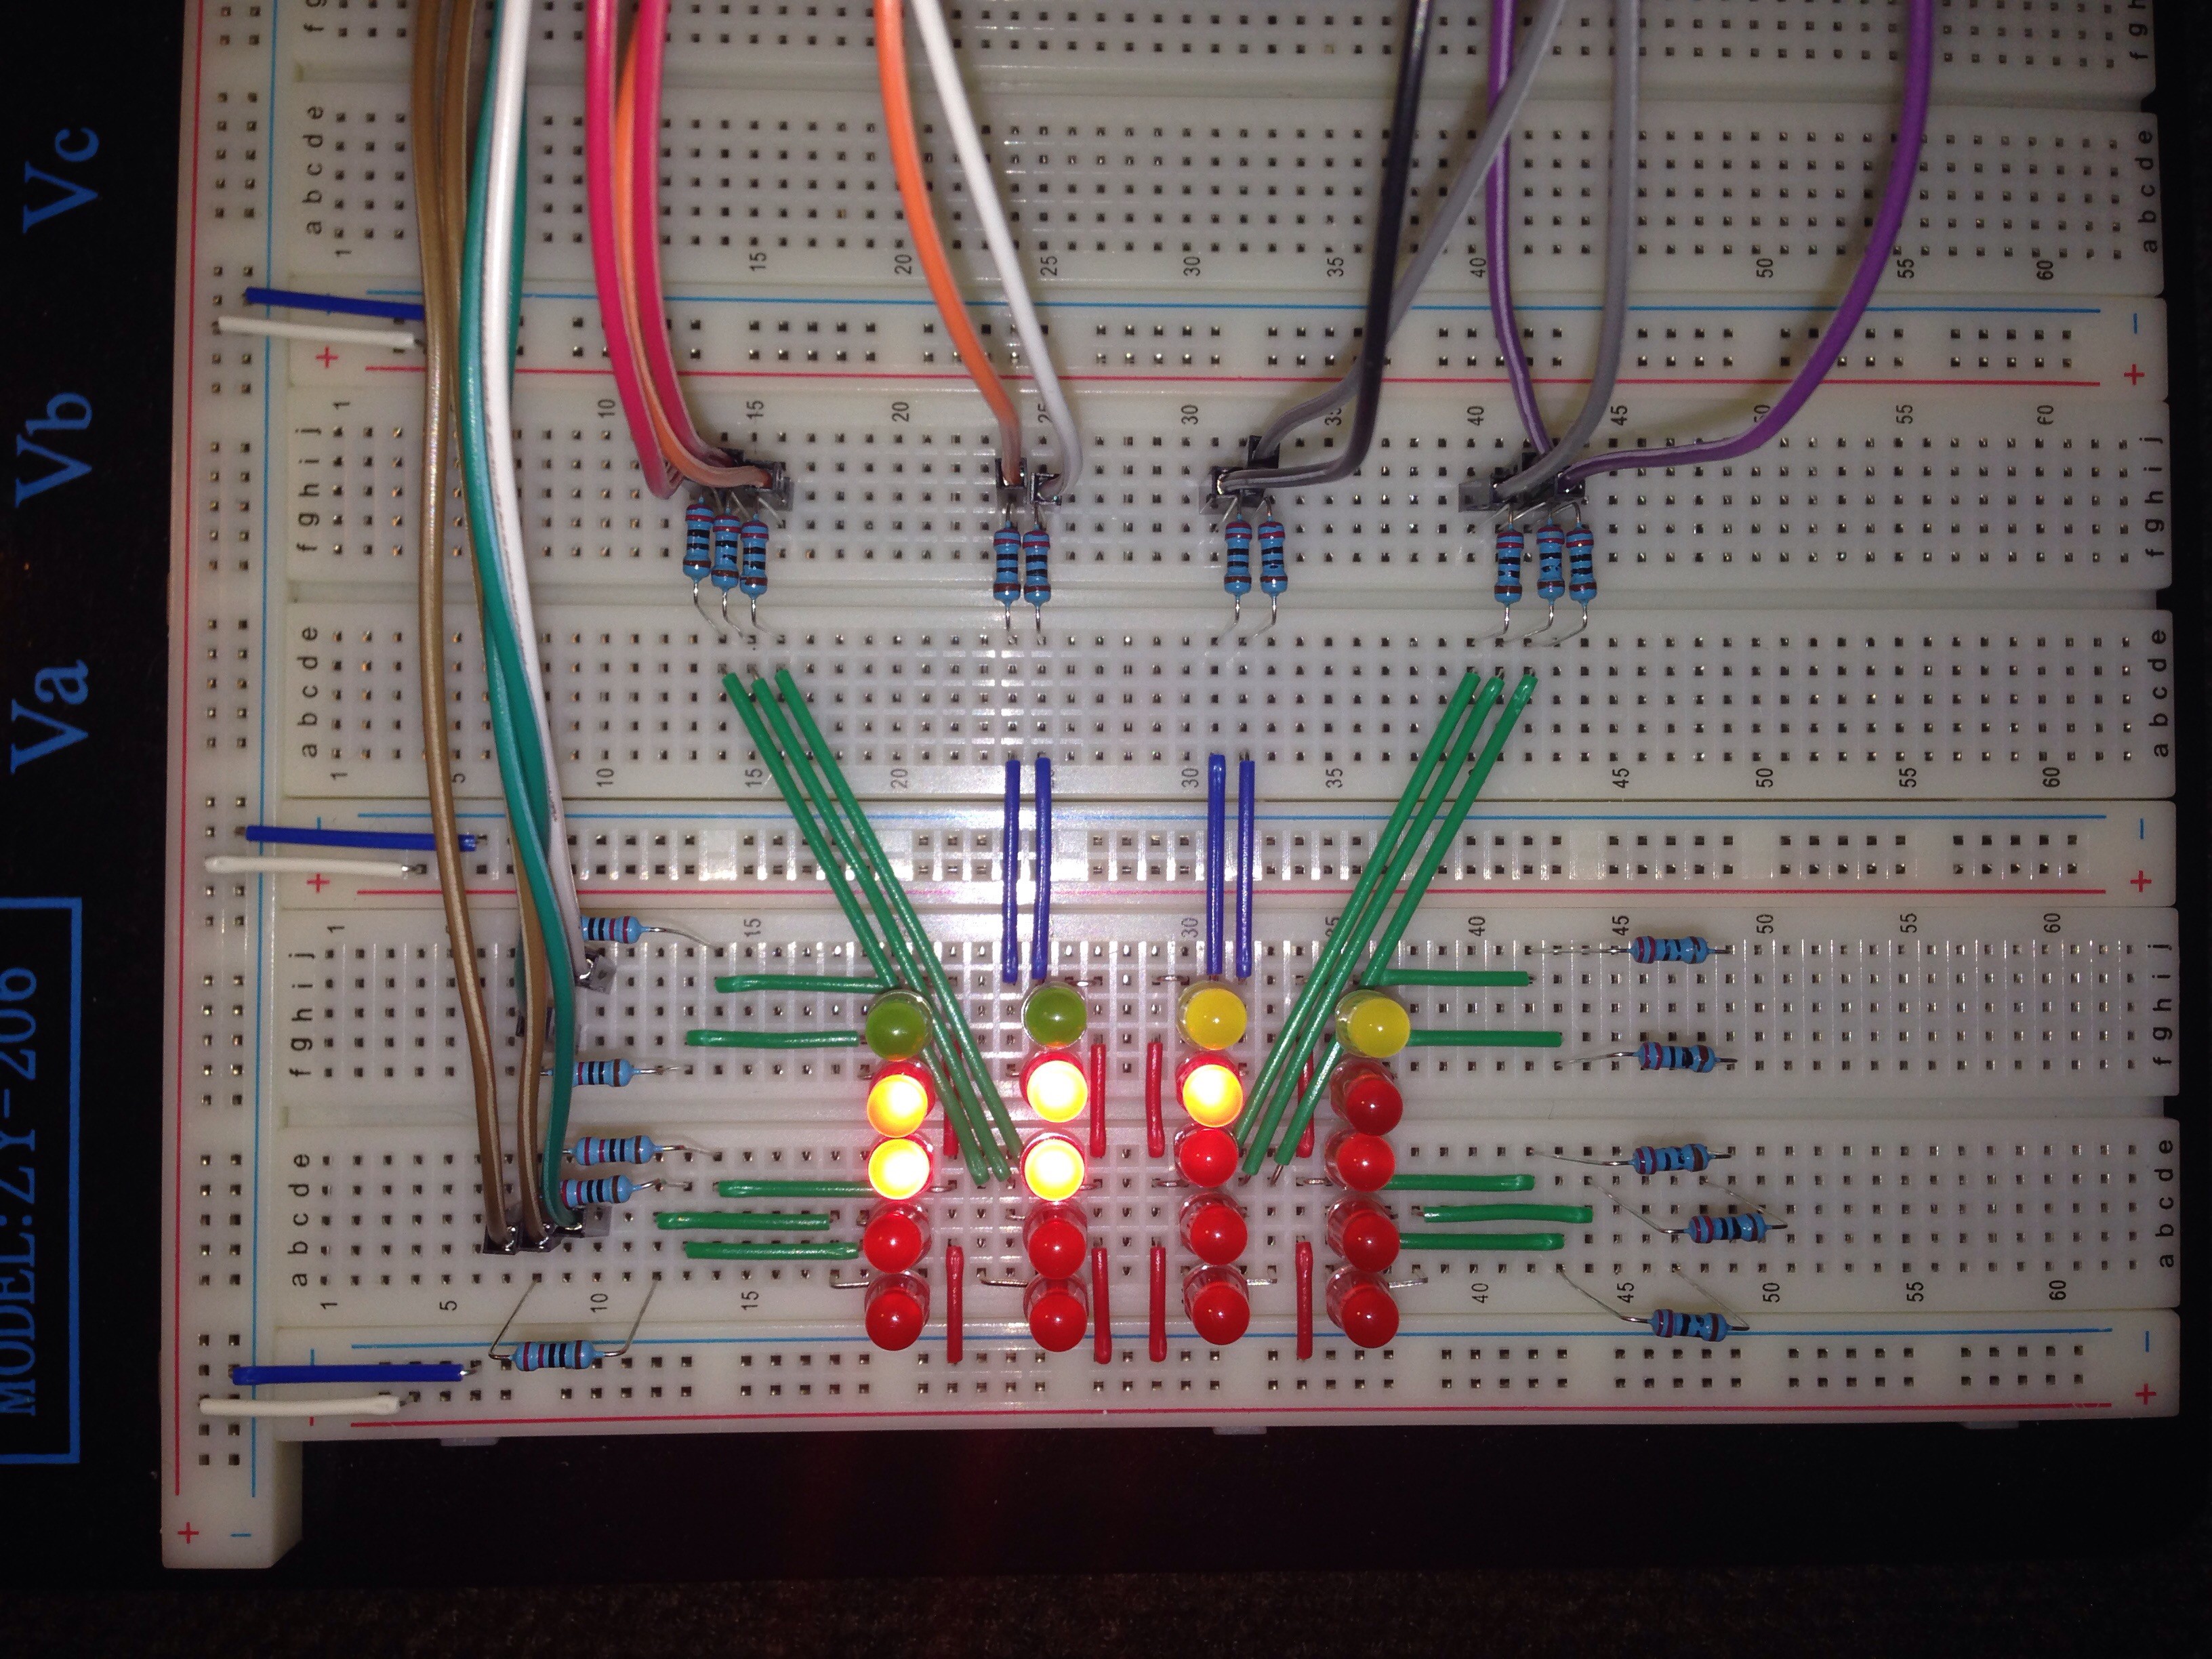
Getting messy
05/14/2016 at 14:21 • 1 comment--UPDATE TWO--
Now I've come up with a way to reduce the amount of code drastically.
I will use 10 functions to turn the LEDs on and off depending on the current time. This is 'eight' for example:
def displayEight(led_1, led_2, led_3, led_4, led_5):
    GPIO.output(led_1, True)
    GPIO.output(led_2, True)
    GPIO.output(led_3, True)
    GPIO.output(led_4, True)
    GPIO.output(led_5, False)
In addition I installed another row of LEDs today but now I don't have any more LEDs and need to order some which is why I won't be posting any updates for a few days.
Here's how my breadboard is looking right now (don't mind the knife, I needed to open a pack of resistors):
![]()
-
Display the minutes, please!
05/13/2016 at 22:09 • 1 comment--FIRST UPDATE--
So after a bit of experimentation I finally came up with an unoptimized code to display the factors of 10 of the minutes.
Like I said, this is just for me to be sure everything will work like I imagined.
I took a picture of the testing-setup while it was displaying 23:3xh.
Today I will continue to get the second part of the minutes section to work.
![]()
Her you have my unoptimized code. Let's see what I can do to make it a bit shorter in the final product:
#!/usr/bin/python
# -*- coding: utf-8 -*-


# modules
import RPi.GPIO as GPIO
from time import strftime, sleep


# setup GPIO
GPIO.setmode(GPIO.BCM)
GPIO.setup(5, GPIO.OUT)
GPIO.setup(6, GPIO.OUT)
GPIO.setup(13, GPIO.OUT)
GPIO.setup(19, GPIO.OUT)
GPIO.setup(26, GPIO.OUT)


# functions
def displayTime():
  minutes = strftime("%M")
  row_3 = int(minutes)/10
  row_4 = int(minutes)%10
  if row_3 == 5:
    GPIO.output(5, True)
    GPIO.output(6, False)
    GPIO.output(13, False)
    GPIO.output(19, False)
    GPIO.output(26, False)
  elif row_3 == 4:
    GPIO.output(5, False)
    GPIO.output(6, True)
    GPIO.output(13, True)
    GPIO.output(19, True)
    GPIO.output(26, True)
  elif row_3 == 3:
    GPIO.output(5, False)
    GPIO.output(6, True)
    GPIO.output(13, True)
    GPIO.output(19, True)
    GPIO.output(26, False)
  elif row_3 == 2:
    GPIO.output(5, False)
    GPIO.output(6, True)
    GPIO.output(13, True)
    GPIO.output(19, False)
    GPIO.output(26, False)
  elif row_3 == 1:
    GPIO.output(5, False)
    GPIO.output(6, True)
    GPIO.output(13, False)
    GPIO.output(19, False)
    GPIO.output(26, False)
  else:
    GPIO.output(5, False)
    GPIO.output(6, False)
    GPIO.output(13, False)
    GPIO.output(19, False)
    GPIO.output(26, False)


# main program
def main():
  try:
    while True:
      sleep(0.1)
      displayTime()
  except KeyboardInterrupt:
    GPIO.cleanup()

if __name__ == "__main__":
  main()
I hope you have fun following the project! See you soon.
-
Project Start
05/10/2016 at 21:25 • 0 commentsTue, May 10th 2016, 23:25 CEST
Project started.
Abacus Clock
A clock that uses Abacus logic to display the current time.