-
Laser Cutting and Assembly
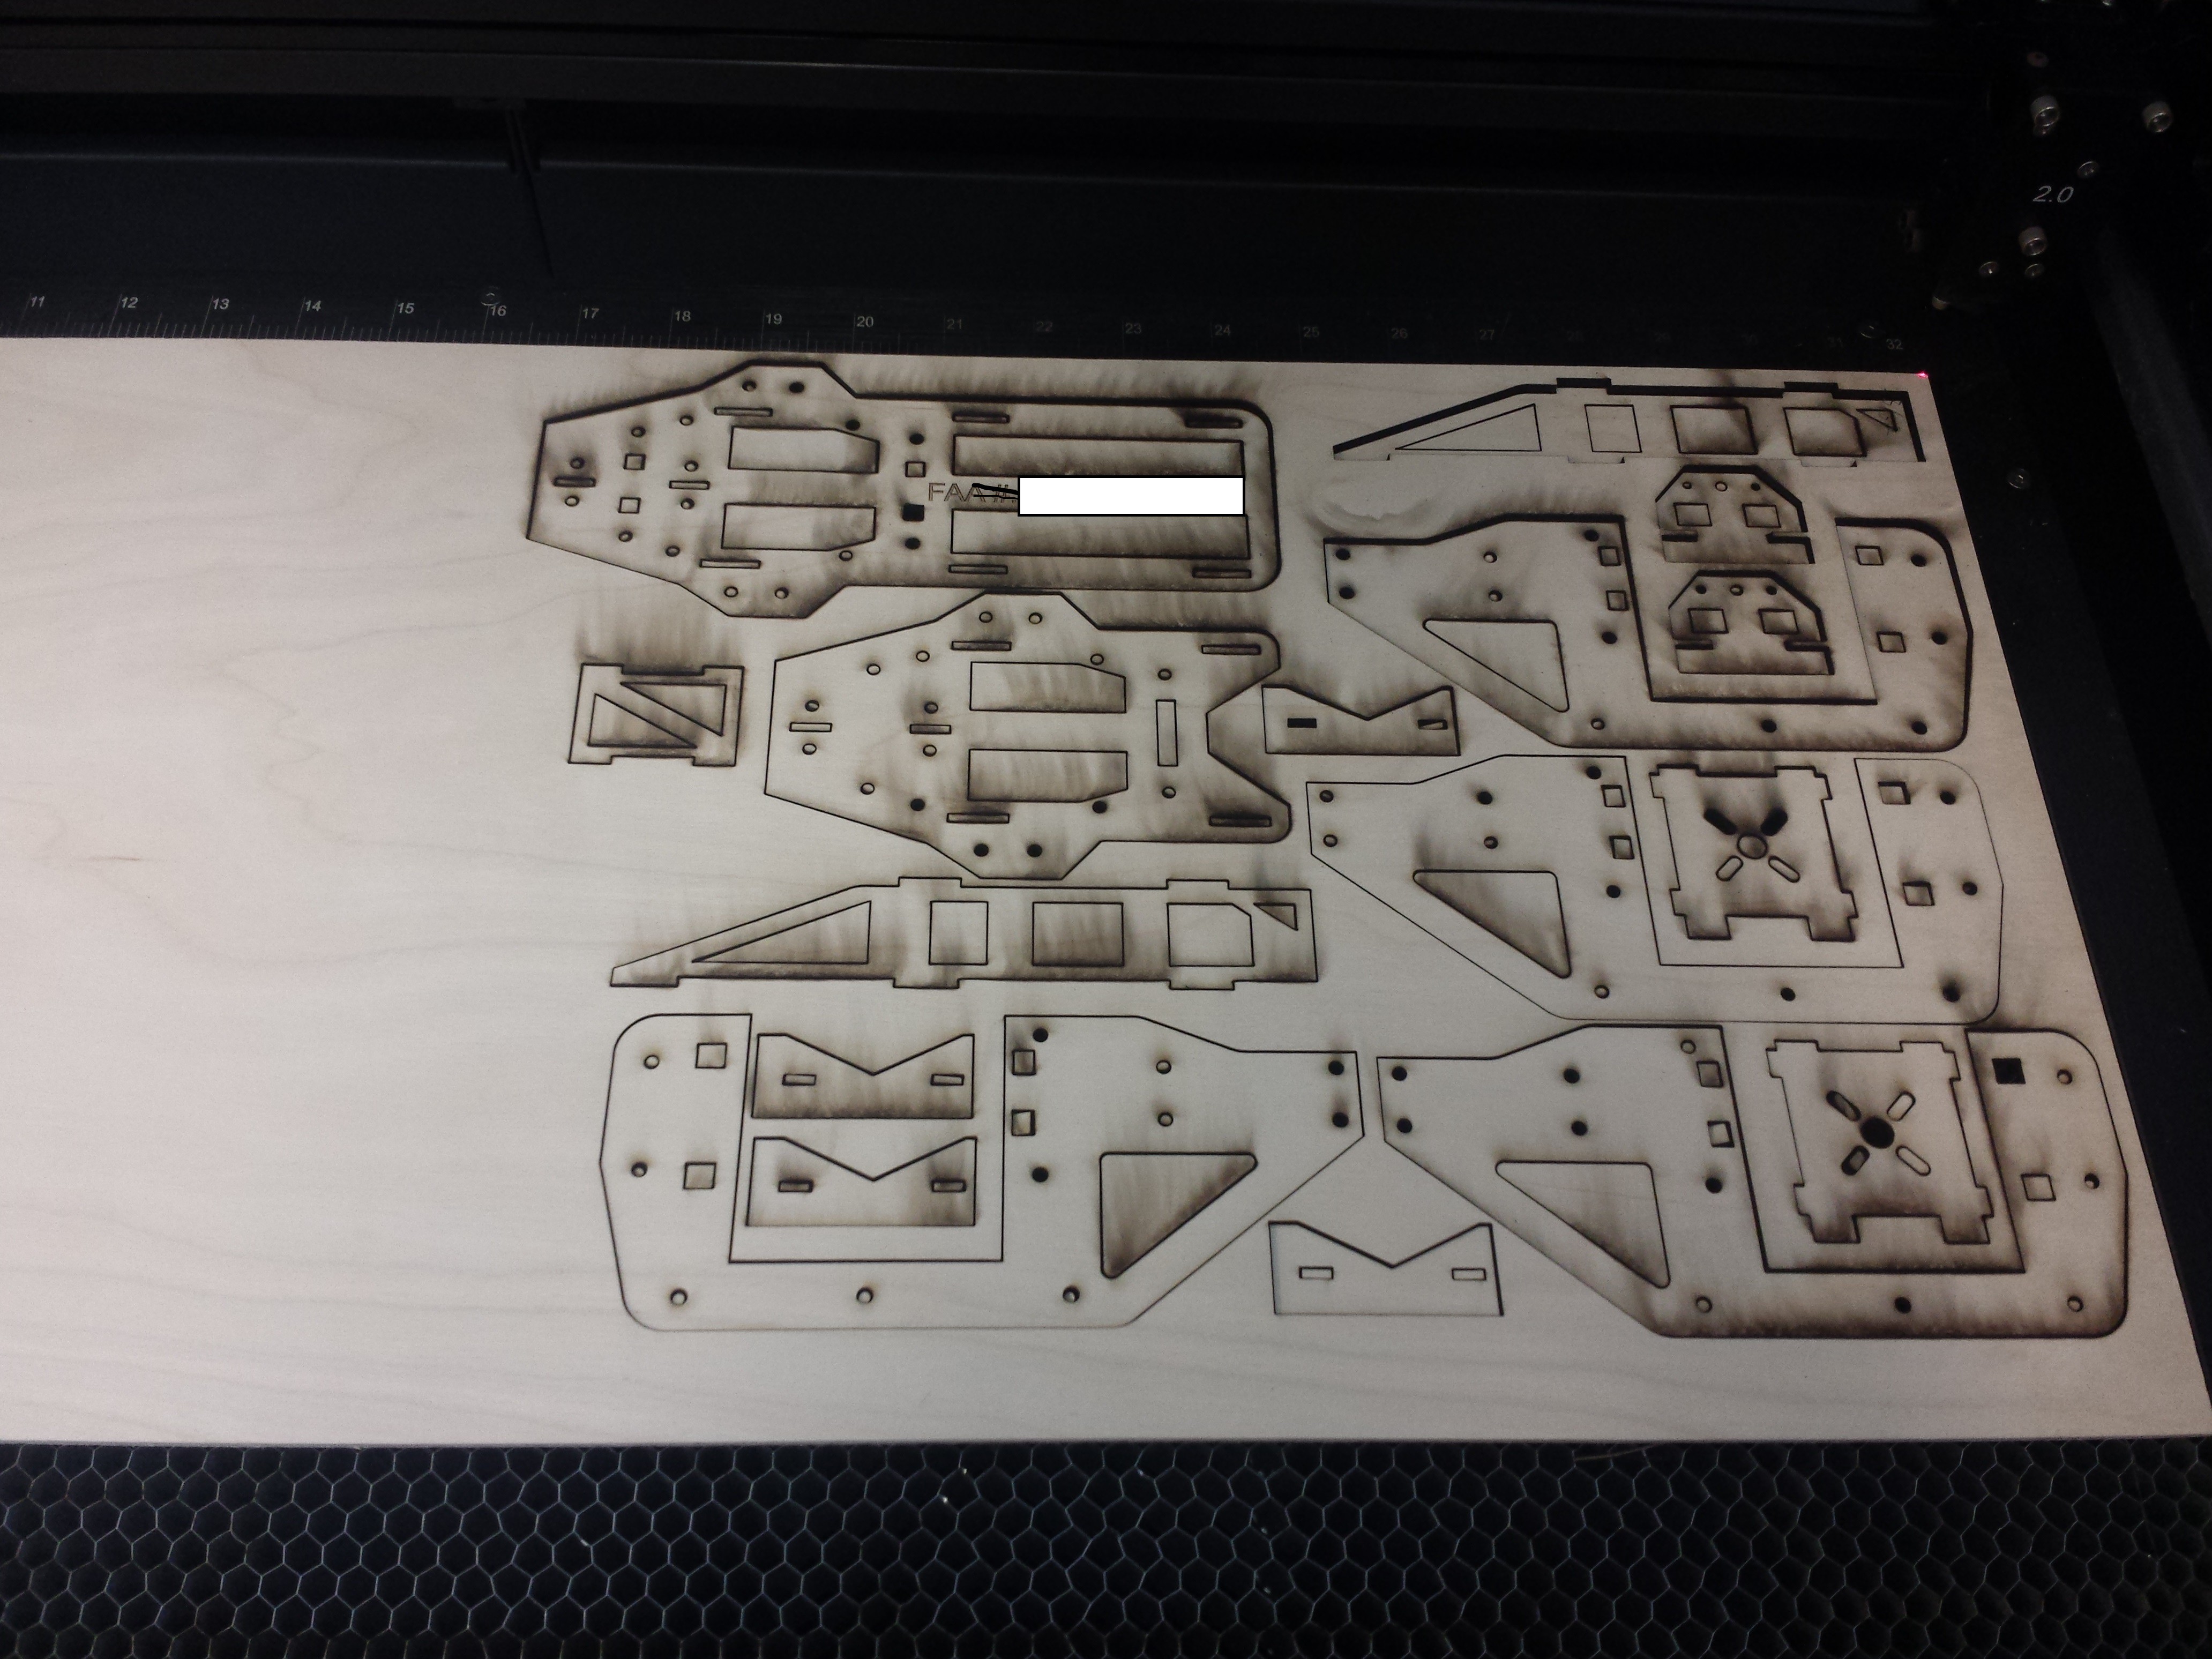
11/18/2016 at 22:01 • 0 commentsI made the design to be laser cut and after finally getting the chance to use the laser cutter at my university it came out perfect! A big thank you to the staff member that let me make use of it.
![]()
![]()
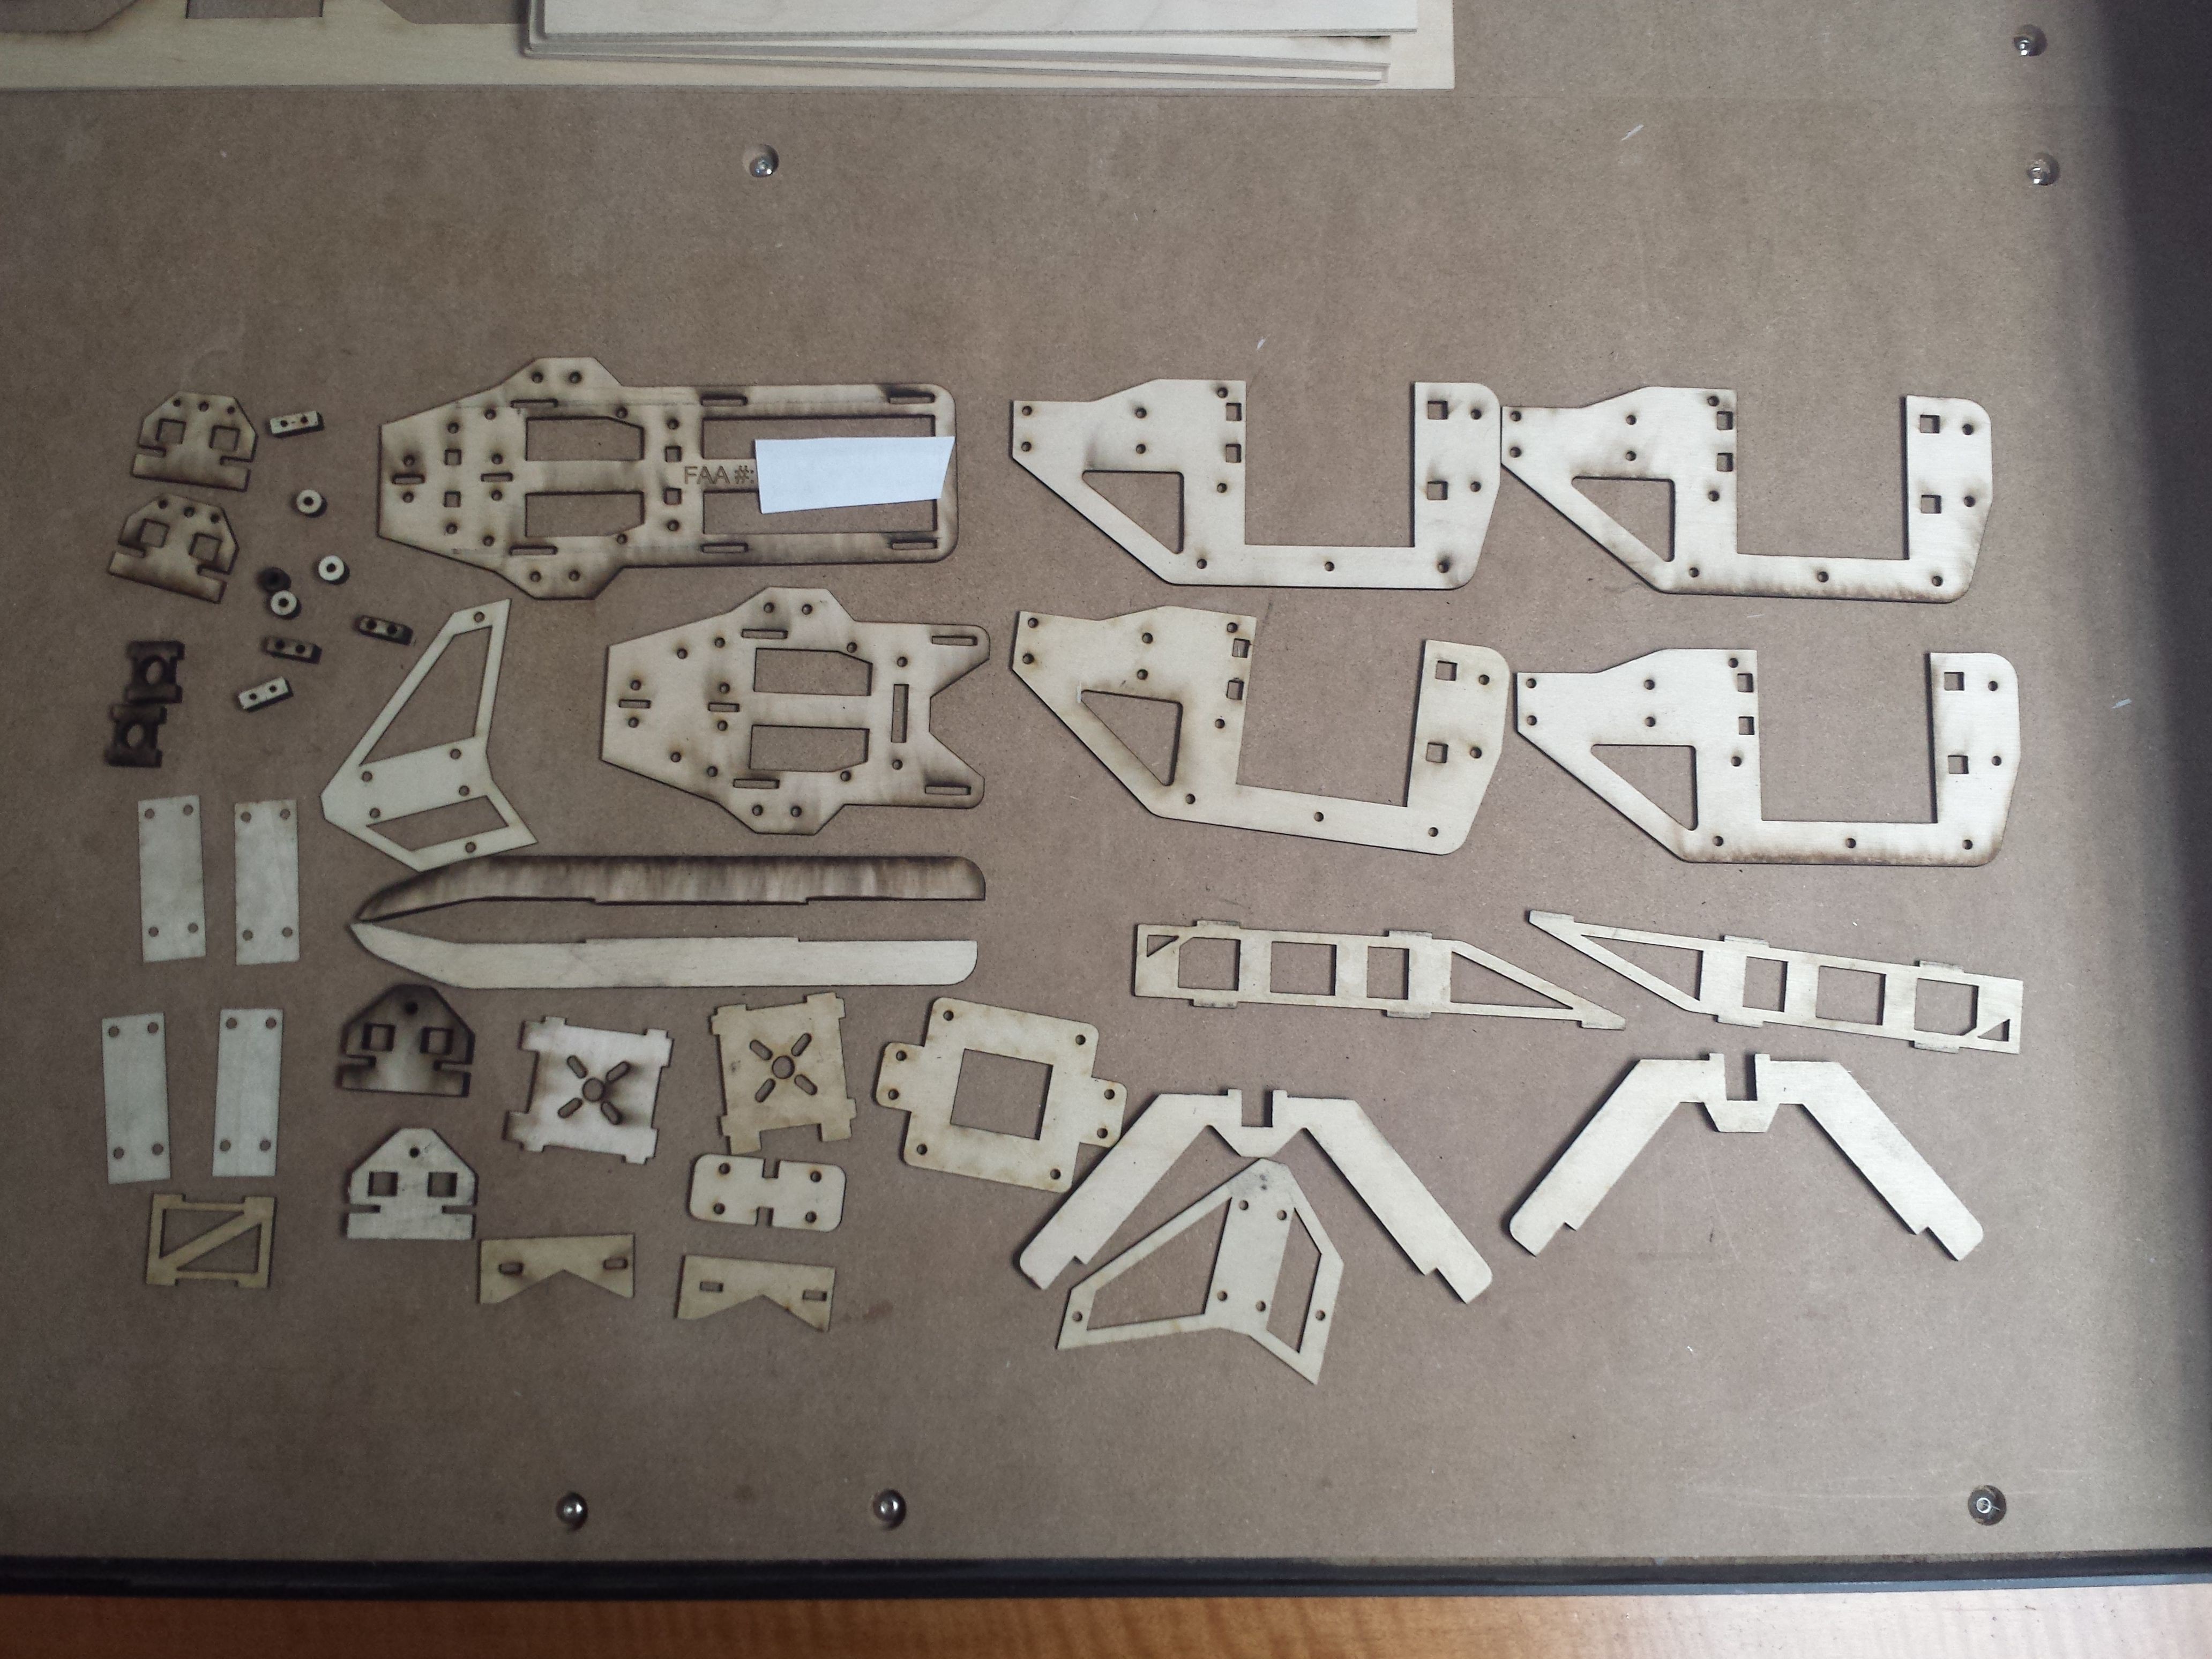
As you can see there are a lot of parts. The parts did take a while to cut but it would have been hell to do this many small parts on my cnc. I'm really happy with how it turned out. They fit together perfectly and the frame feels strong. I started building it but I'm short one servo. I had three servo's but turns out only one of them is in great condition. Ones okay and the other totally busted even after a gear change.
![]()
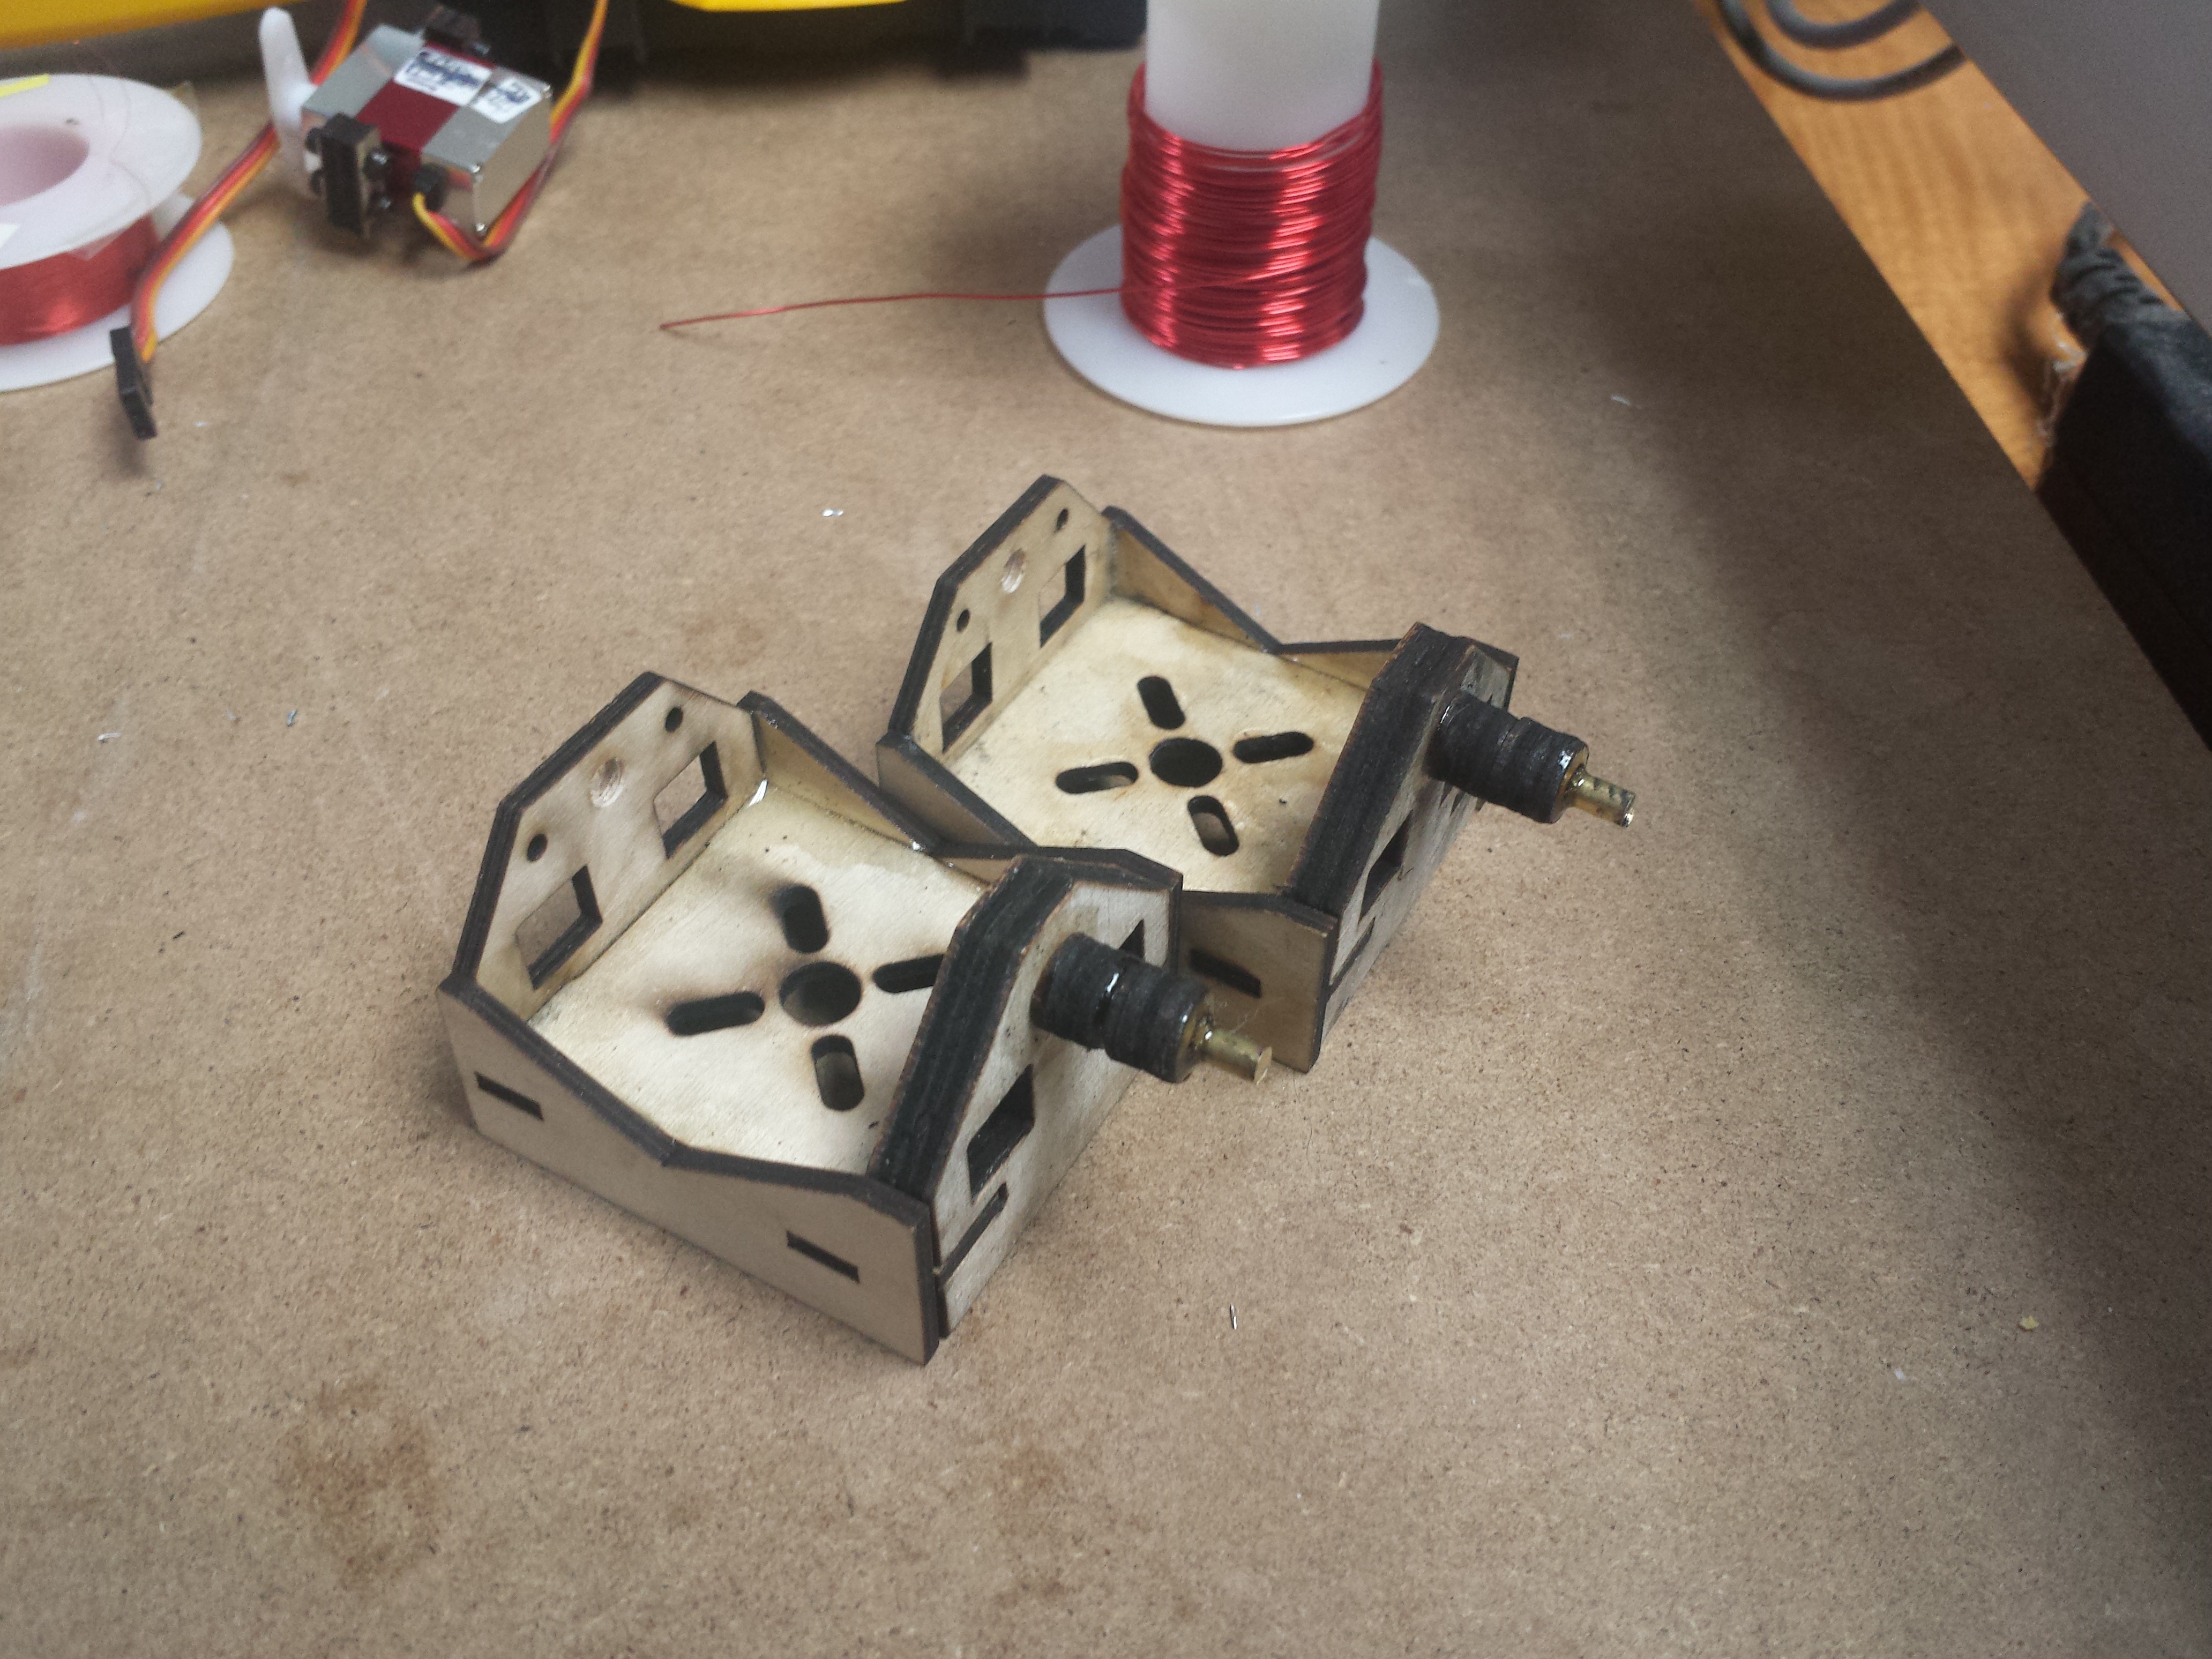
Designing the motor buckets was a challenge but I think it turned out very well. The left side bolts to a servo horn with 2mm bolts. The right side is the free spinning side. I used a 1/4 inch side plate and 2 0.25 inch spacers also cut from the same sheet. I ran a 1/8 inch brass rod down the center and glued it all together. I trimmed the rod off after the epoxy cured. There is a bit of wobble in the joint. There might be better ways but this should be good enough.
![]()
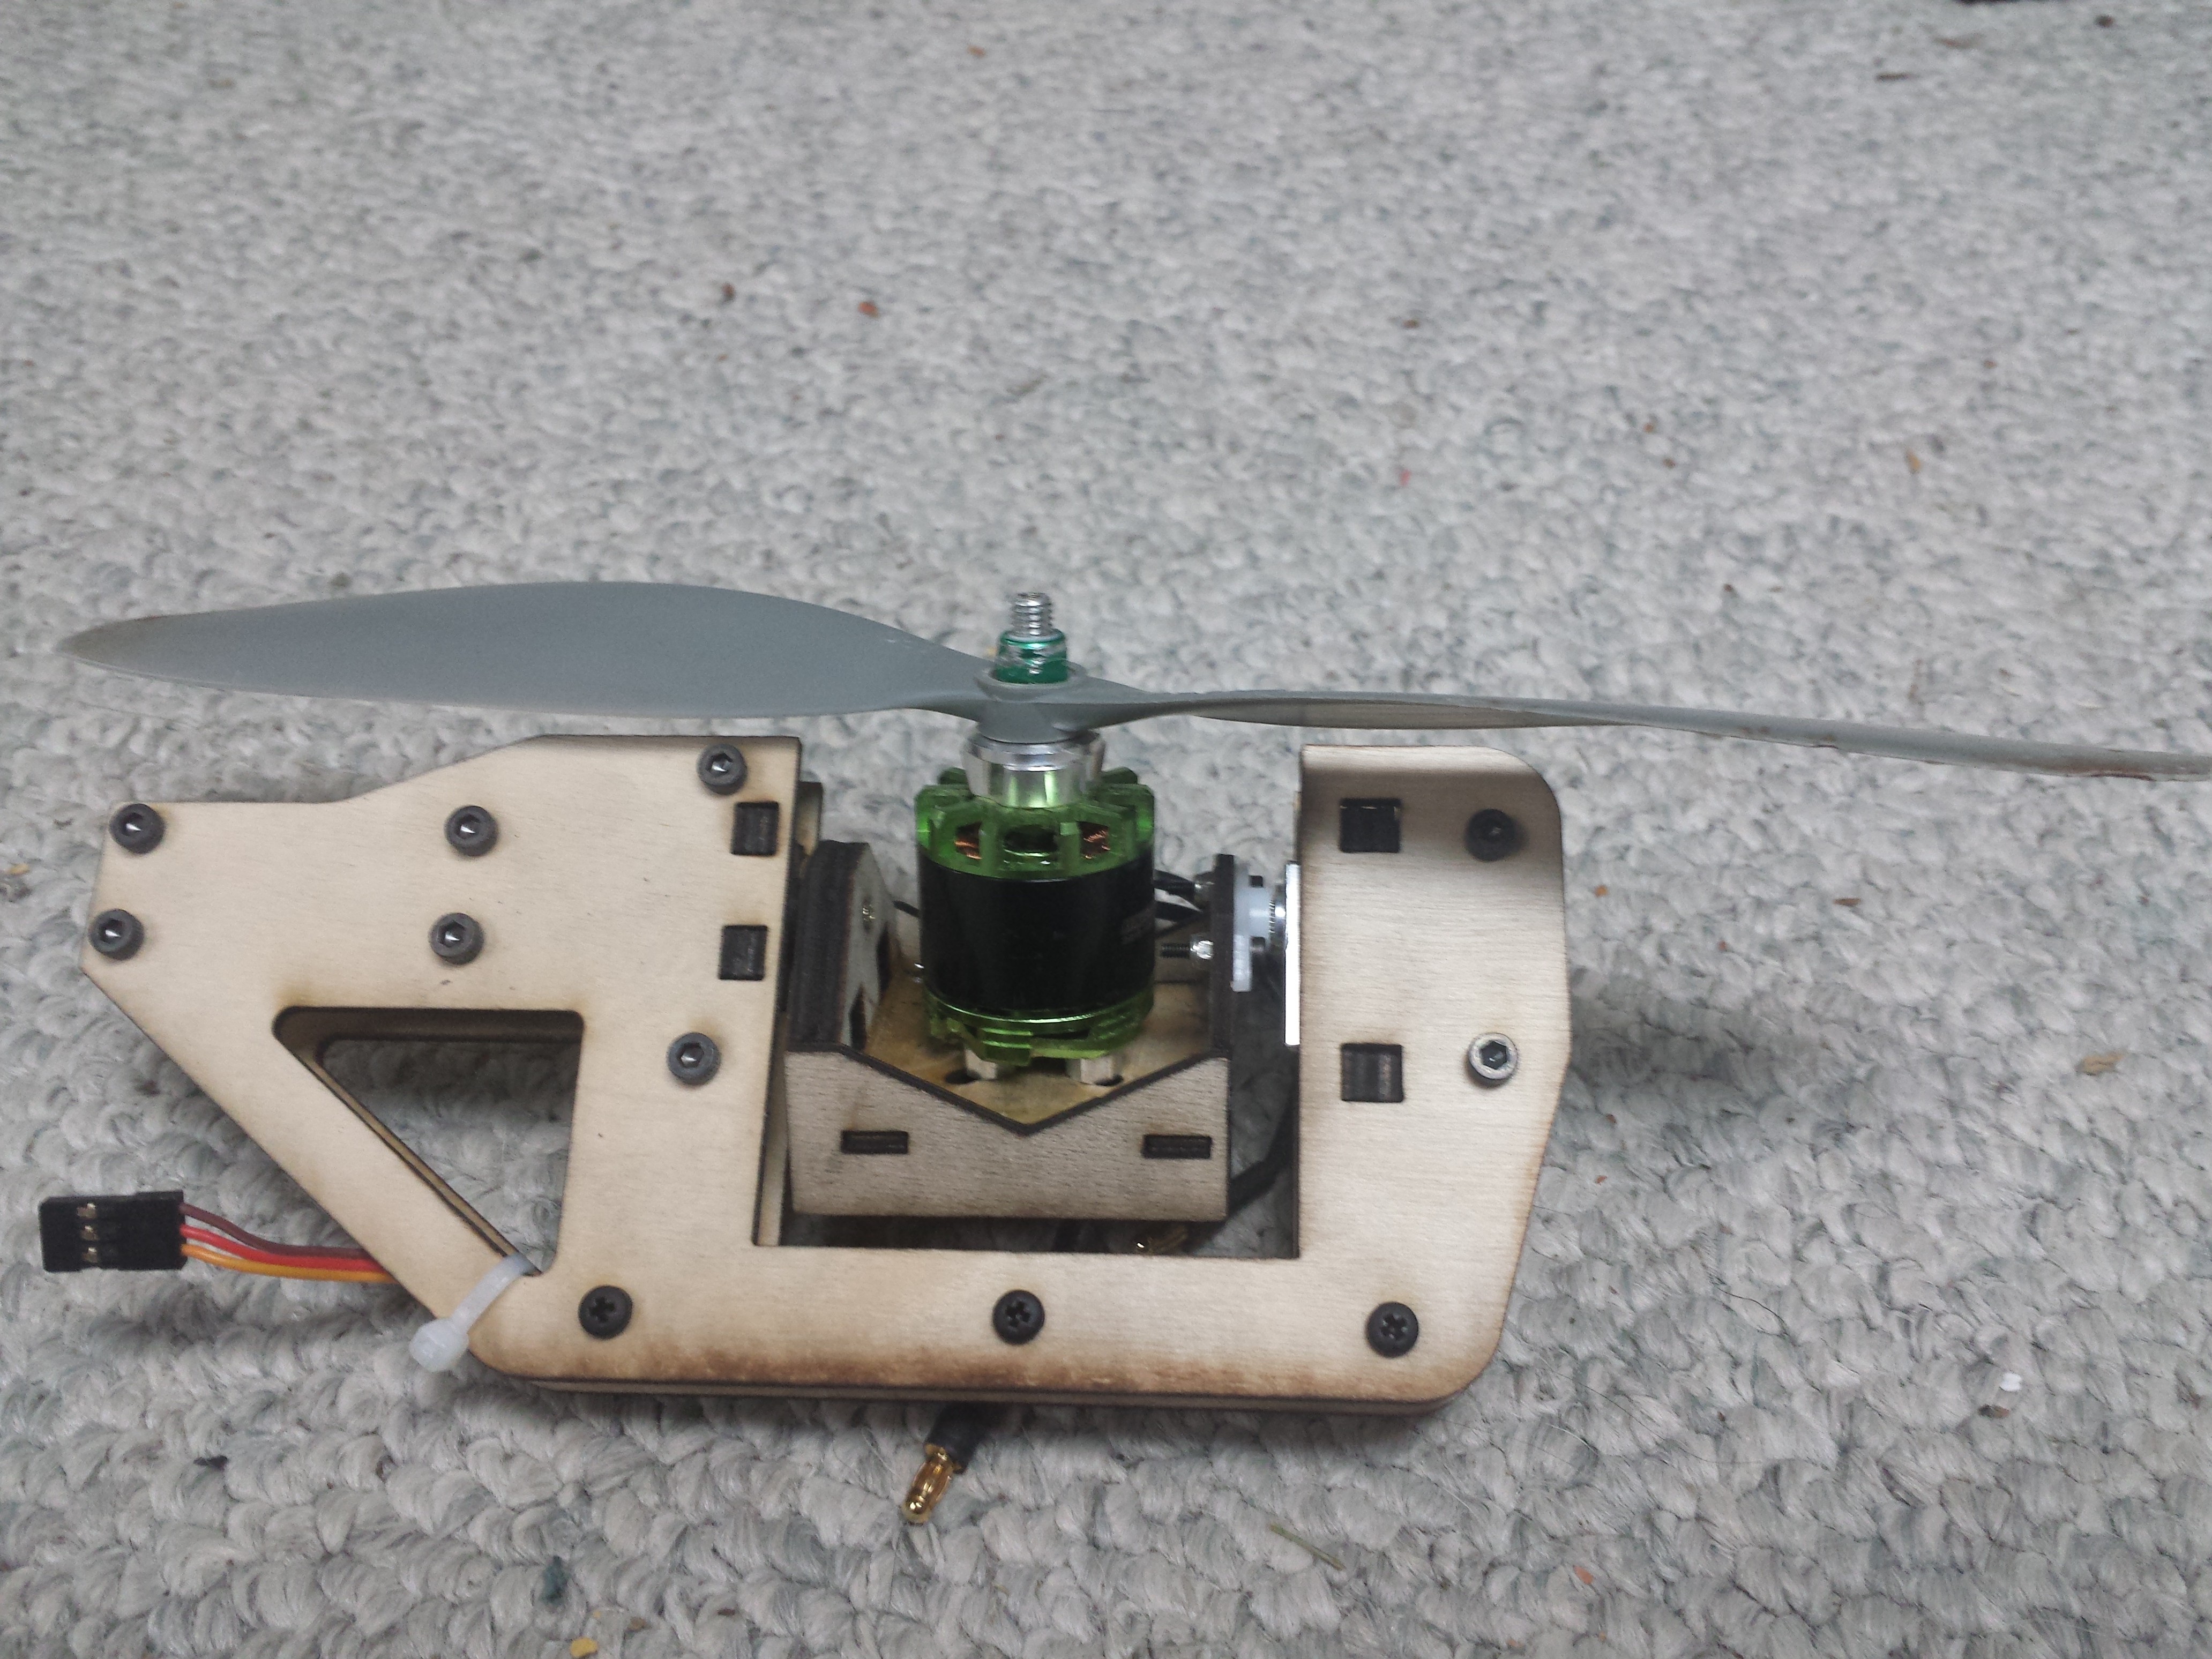
The final motor mount came out quite well. The pivot action is smooth even with a little bit of wobble on the free joint. I put the motor on top of 4mm spacers to get the center of gravity just right. I want the COG to be right at the pivot point. My previous design had the pivot well bellow the COG and the off center torque was bad enough to snap the gears in mid flight. The whole assembly clamps onto a 10mm carbon fiber spare that insets into the left side.
![]()
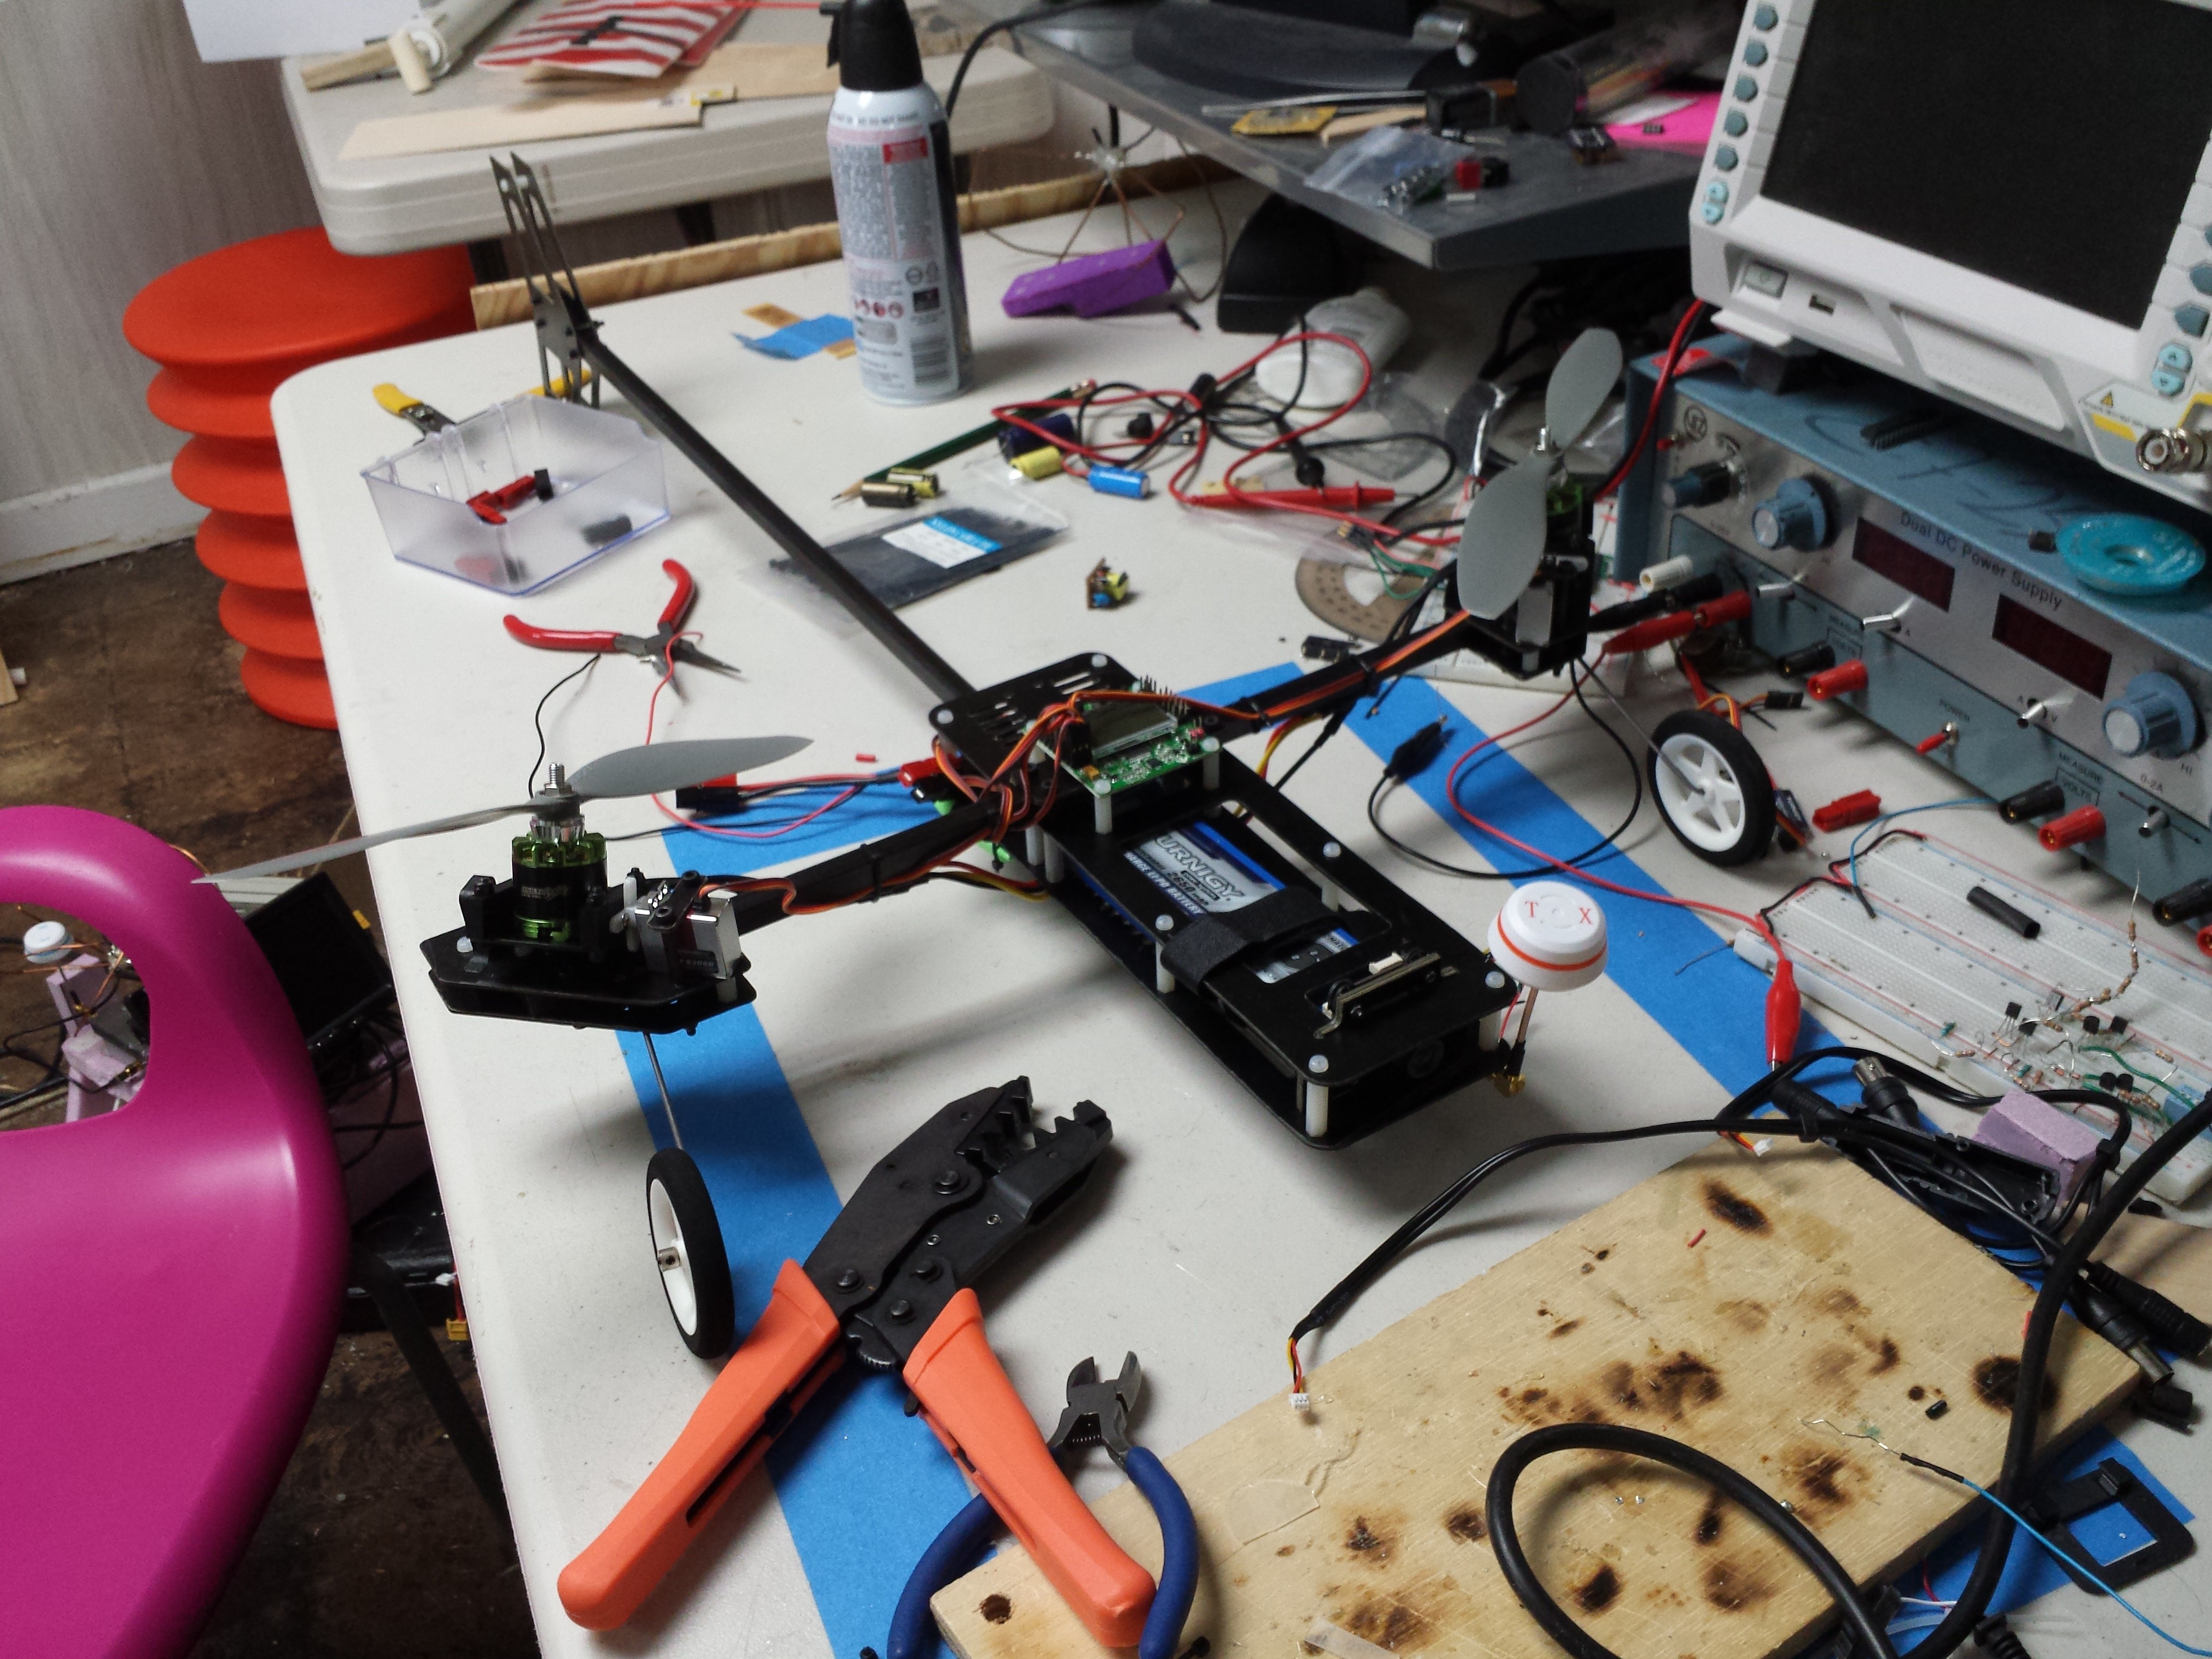
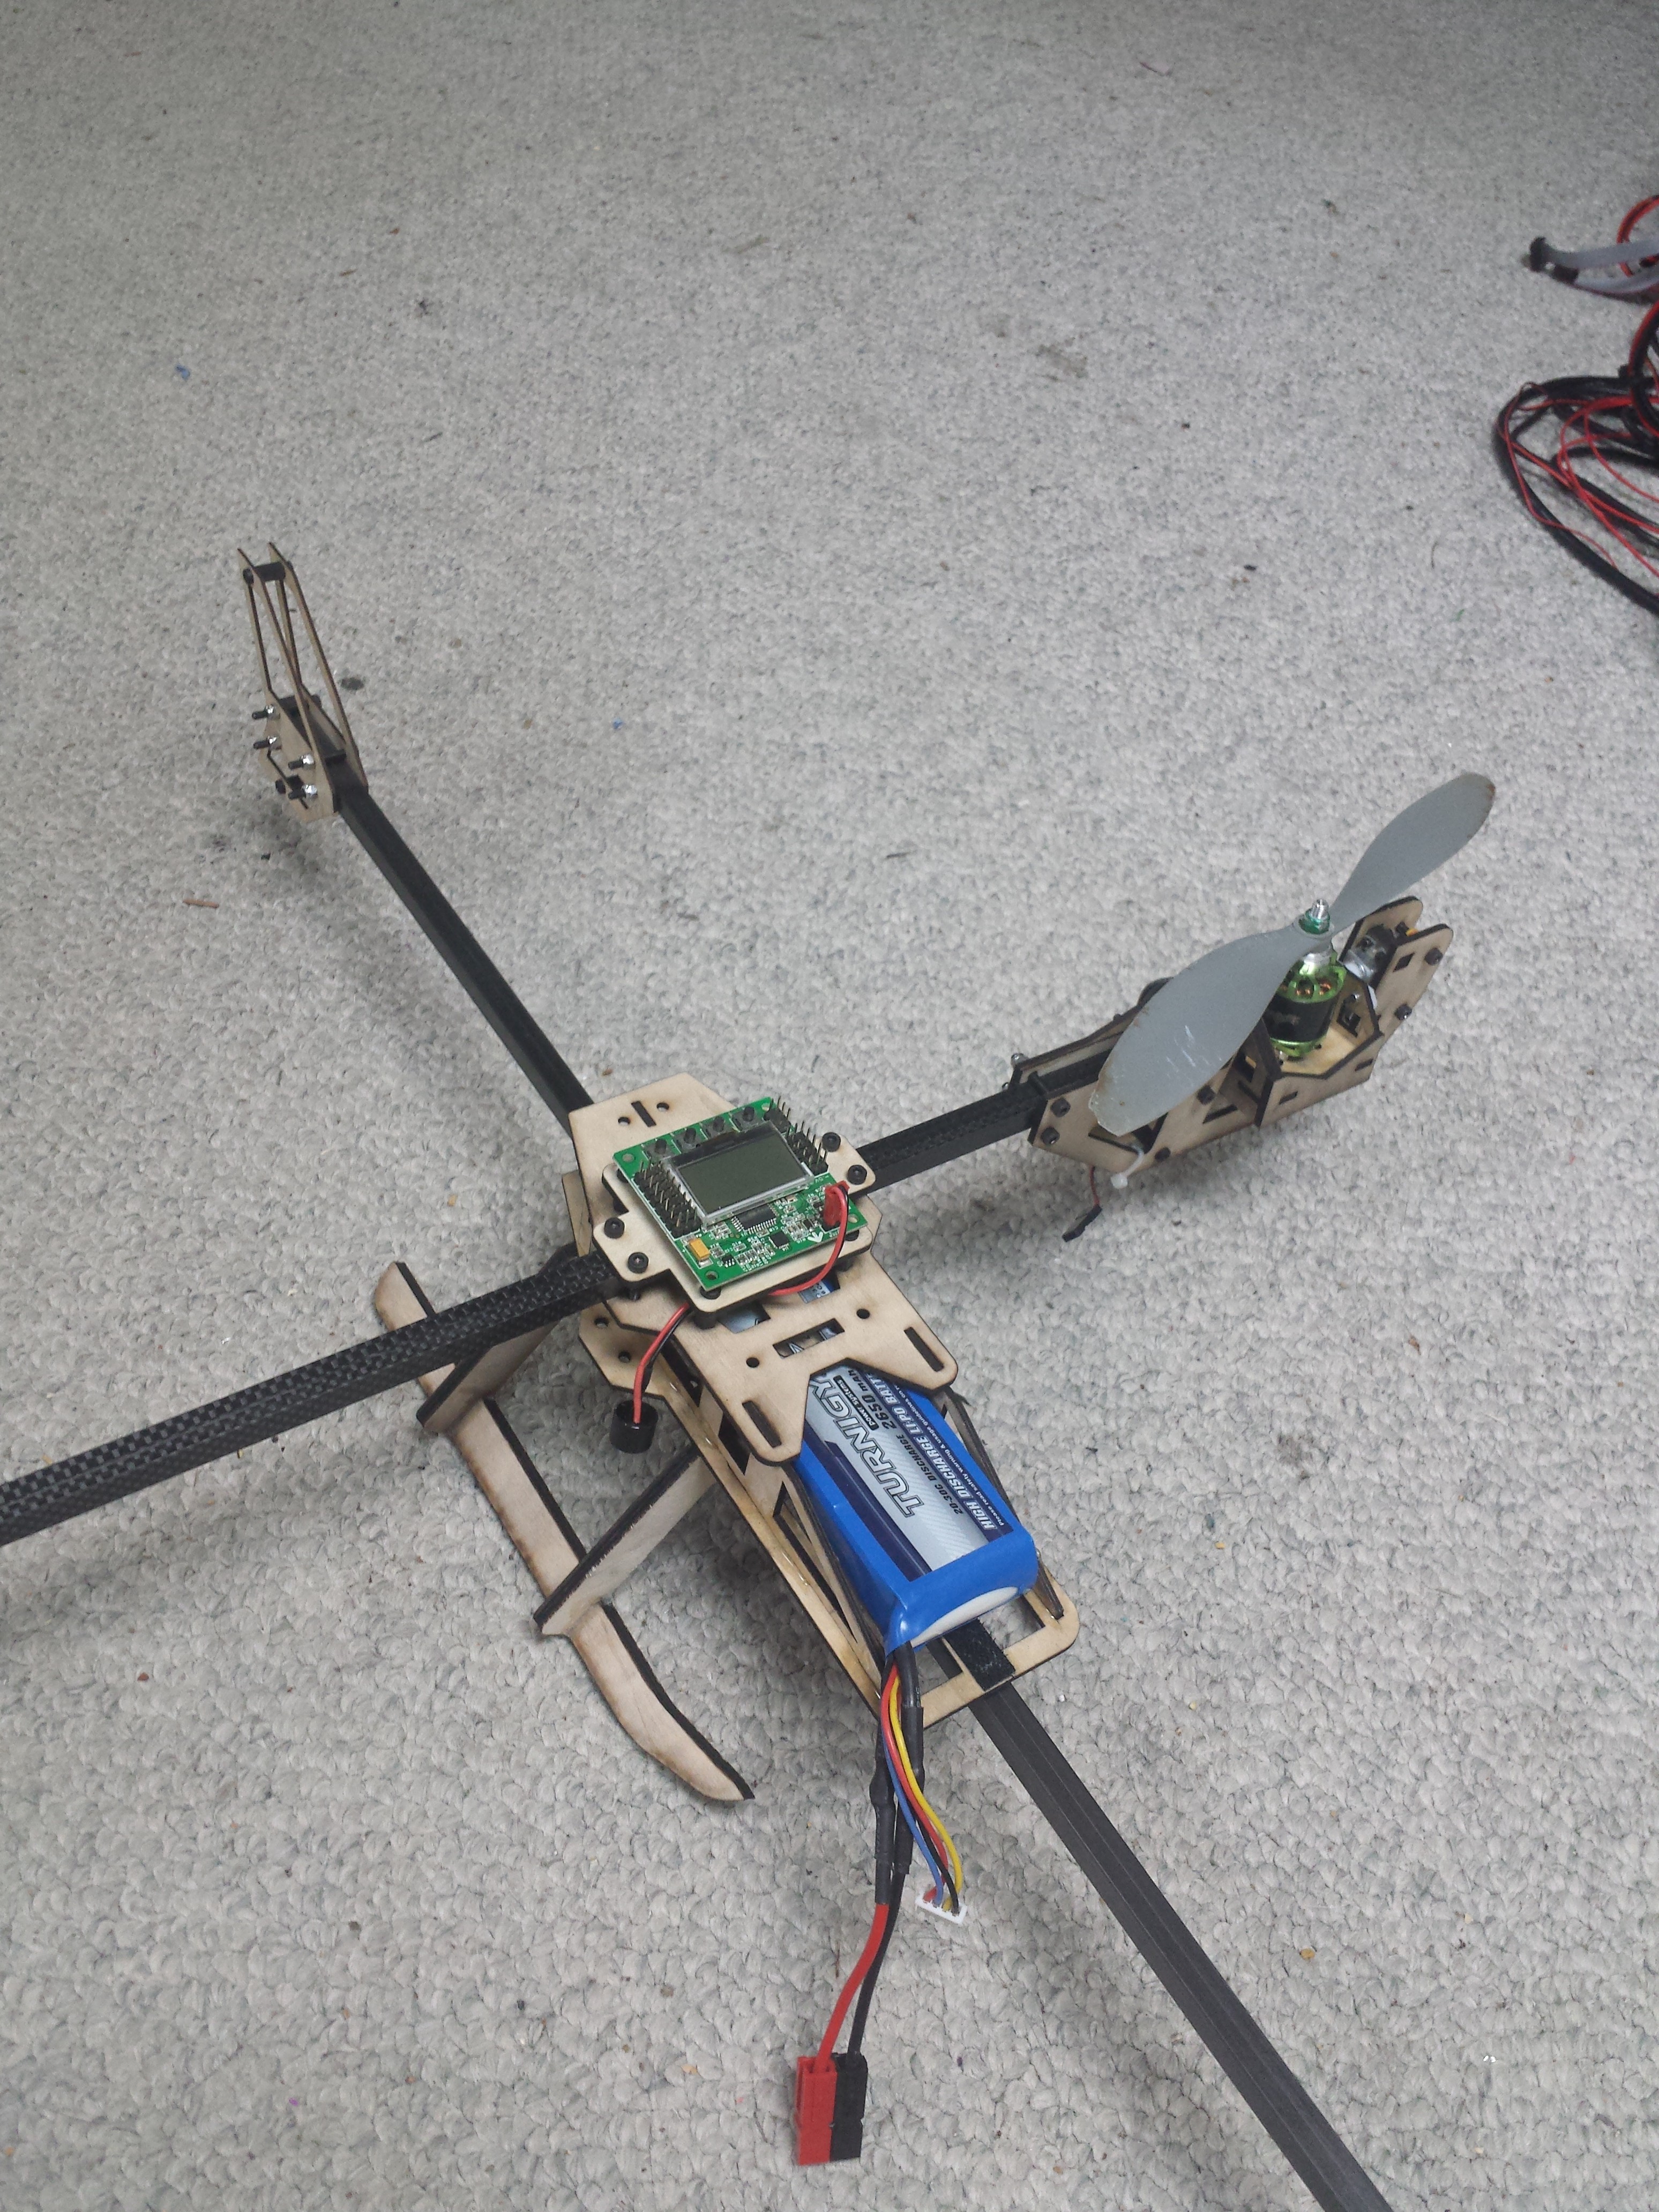
As you can see the frame is mostly complete. I'm just waiting for a servo then I can finish it. I really like the current look but I do regret not painting it. Maybe I'll still do it but I really don't want to have to take EVERY thing apart. Hopefully my next update will be of it flying.
I'm thinking of uploading the files under Non-Profit Open Software License 3.0 (NPOSL-3.0).
-
V2 Design finished
07/13/2016 at 00:10 • 0 commentsAfter much hard cad work V2 is finished! Well it was finished a few weeks ago. I'm a bit late with the progress update. It ended up being slightly harder than expected but fusion was far easier to use than creo parametric. I'm gladt I made the switch to fusion 360.
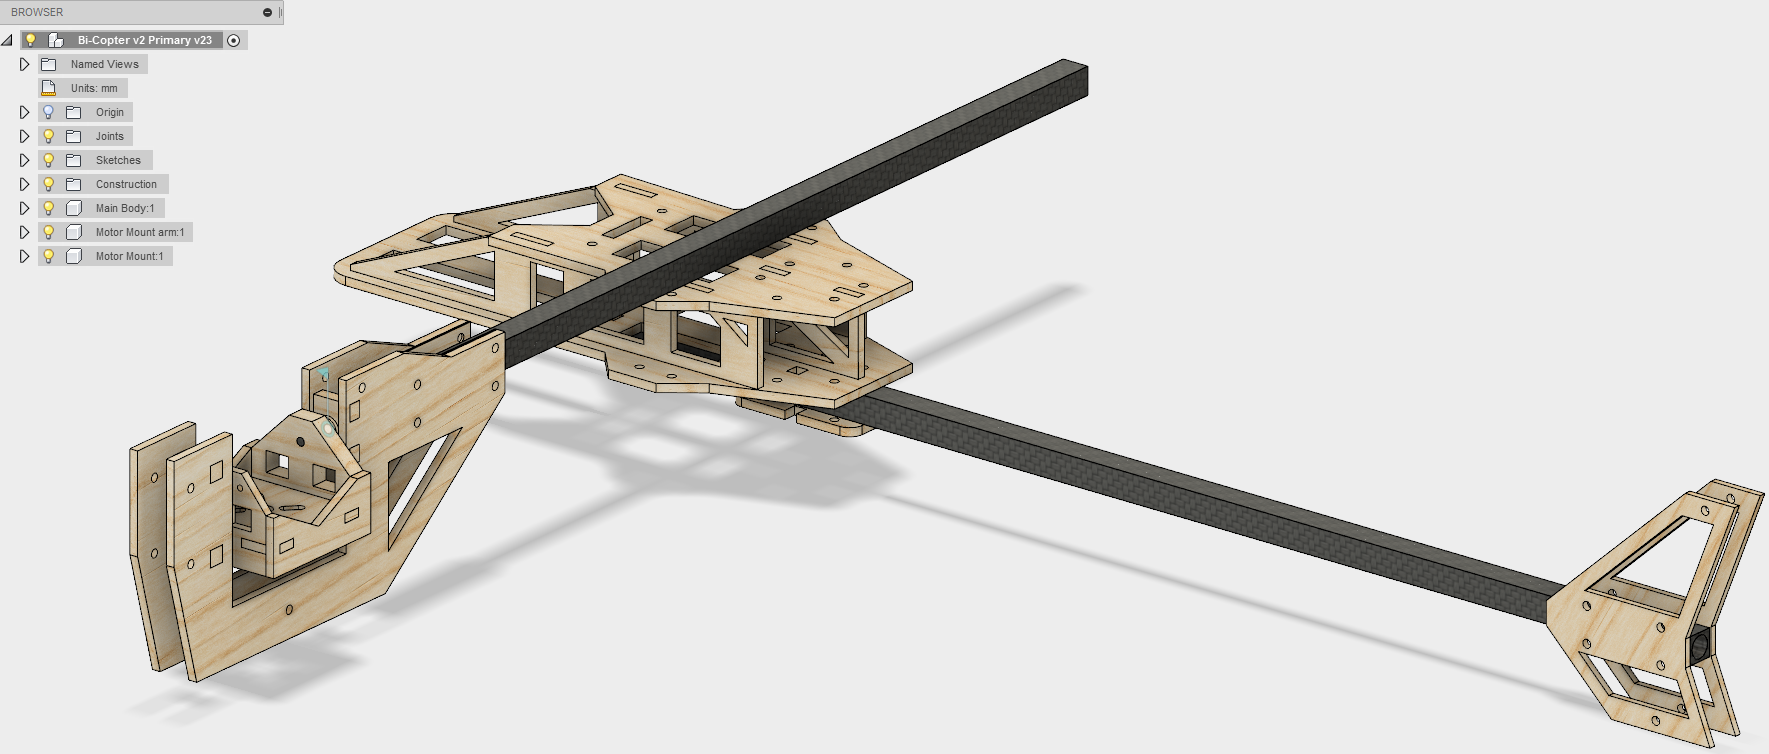
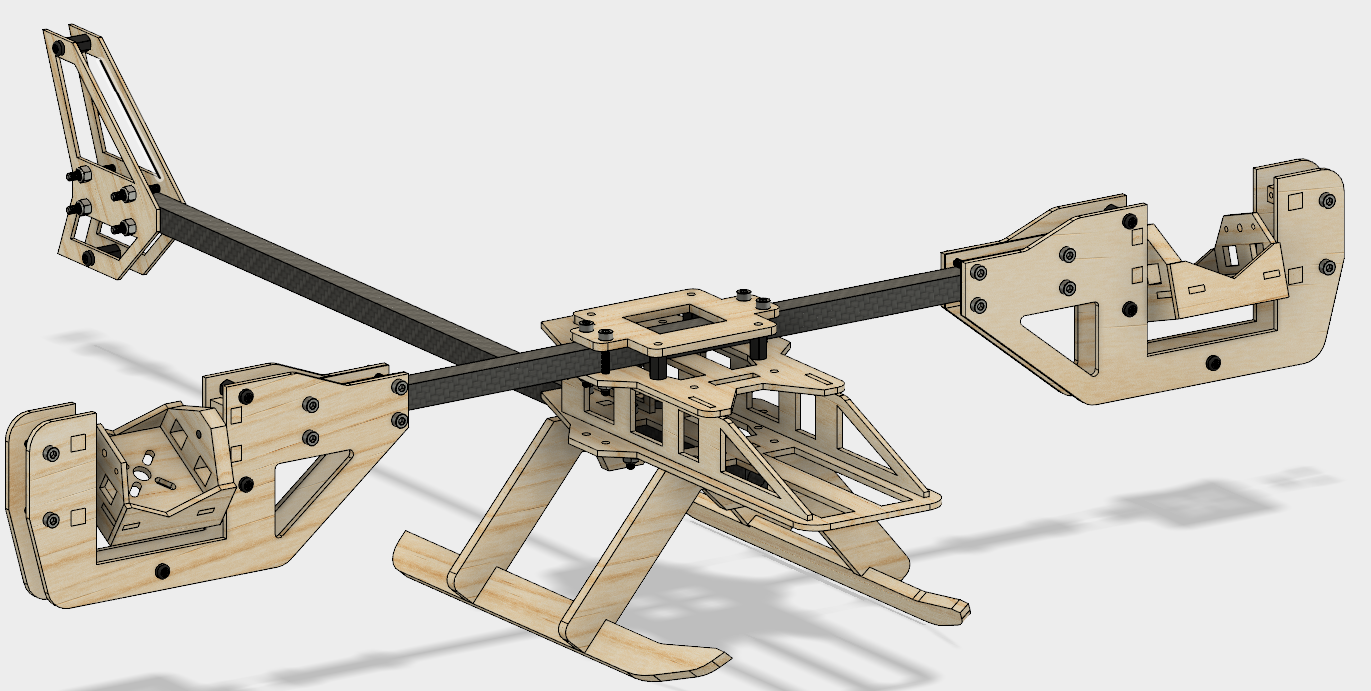
So here he is, V2 in all it's glory.
![]() The nice thing about fusion is I can input material density and get a weight estimate. This frame comes in at around 285 grams. Not bad, I could probably do better with carbon fiber or fiberglass but that stuff is a royal pain to work with. The plan is to laser cut the plywood then bolt/glue the frame together. I tried to keep the glue to a minimum. The less glue the simpler to repair and Bi-copters crash A LOT. There not too practical but still fun. The black spars are 10mm carbon fiber spars from Hobbyking. Cheap and light while being strong enough. 10mm is likely over kill for a craft of this size anyways.
The nice thing about fusion is I can input material density and get a weight estimate. This frame comes in at around 285 grams. Not bad, I could probably do better with carbon fiber or fiberglass but that stuff is a royal pain to work with. The plan is to laser cut the plywood then bolt/glue the frame together. I tried to keep the glue to a minimum. The less glue the simpler to repair and Bi-copters crash A LOT. There not too practical but still fun. The black spars are 10mm carbon fiber spars from Hobbyking. Cheap and light while being strong enough. 10mm is likely over kill for a craft of this size anyways. I submitted this design for the design for auto desk challenge and won 250$ for my troubles. Very generous of autodesk. I submitted a second design as well but I have yet to receive any info on it's status. Now I just need to export the parts to the laser cutter and cut the thing.
Here is the link to the Fusion 360 gallery for the project. I'll also place the model into the downloads on this project page to if any one wants it.
-
Lesson's learned from V1 and initial design
05/18/2016 at 05:02 • 0 commentsBi-copter V1 was okay... But had severe issues. This is V1 is all his glory.
![]()
Some of the problems were easy to fix. For example the wire landing gear produced far to much vibrations so they were replaced by foam blocks. However some problems are not so easy to fix. believeit or not it kept snapping metal gear servo shafts in mid flight.
Now this was likely related to the weird angle the motors are at in this picture. I read online that having them tile at 45 degrees relative to each other can help with stability. This made the design of the mounts quite a bit harder. Due to this the center of gravity of the motors do not line up with the pivot point. In fact the COG is about 10mm higher than the pivot point. This means the servos have to work much harder and potentially explain the snapped gears. However the mounts also had a limit freedom of movement. If the tilted to far either way they would crash against the mount. This could also have been the reason for the breakage or it could even be due to both. So the new design will not feature angled motor mounts.
The new design will also be laser cut. This is due to two reasons. First is that the laser cuter is far easier to use. Second is that due to internal political BS at my college the CNC mill is effectively out of service. However the laser cuter is available instead so it's not all bad.
For V1 I had the pleasure of using Creo parametric. Lets just say I'm not a fan and I don't miss it. For V2 I'm using a student
version of Fusion 360 and it's been working very well. A side affect if that I can enter it in design for auto desk and win a cash prize. Sweet.Here is my current progress on V2, most of the hard work is already done.
![]()
Bi-Copter V2
The objective of this project is to design a frame for an RC Bi-Copter in CAD with laser cutting in mind
 Spencer
 The nice thing about fusion is I can input material density and get a weight estimate. This frame comes in at around 285 grams. Not bad, I could probably do better with carbon fiber or fiberglass but that stuff is a royal pain to work with. The plan is to laser cut the plywood then bolt/glue the frame together. I tried to keep the glue to a minimum. The less glue the simpler to repair and Bi-copters crash A LOT. There not too practical but still fun. The black spars are 10mm carbon fiber spars from Hobbyking. Cheap and light while being strong enough. 10mm is likely over kill for a craft of this size anyways.