-
1Step 1
Installation
Download and burn the free image of the Raspbian Operating System to a micro-SD card. Insert the card into the Raspberry Pi, connect an ethernet cable from your router to the Pi, then power it up. Log in to your router and view the DHCP table of connected devices to determine what the IP address of the Pi is (the hostname will be "raspberrypi"). Use an ssh client to connect to the IP address of your Pi, using the user name "pi" and the password "raspberry".
Once Raspbian is running and you've successfully logged in, you're ready to install Mycodo. Go to https://github.com/kizniche/Mycodo to get the latest instructions of how to Install and log into Mycodo.
-
2Step 2
Sensors
Out of the box, Mycodo can begin logging the temperature of the Raspberry Pi's CPU with its internal sensor, as well as the CPU processing load. These can be added from the Sensor tab.
If you have supported sensors, connect them to the appropriate communication pins (UART, I2C, GPIO, etc.). The most current list of supported sensors and setup documentation can be found at https://github.com/kizniche/Mycodo#supported-devices-and-sensors
-
3Step 3
Relays
Connect one or more relays to the GPIO pins of the Raspberry Pi, then add and configure them from the Relay tab.
The required current and voltage capacity of your relay will be best determined by the device you desire to control. For instance, if using a device that plugs into a standard US 120-volt alternating current (AC) wall socket, you will want a relay that can handle switching 120-volts AC and has a current capacity that can safely operate the device you intend to connect. Ensure the relay can also accept a switching signal of 3.3 volts and does not exceed the Raspberry Pi's maximum GPIO current draw of 16 mA. Below are two different schematics to illustrate sensor and relay wiring.
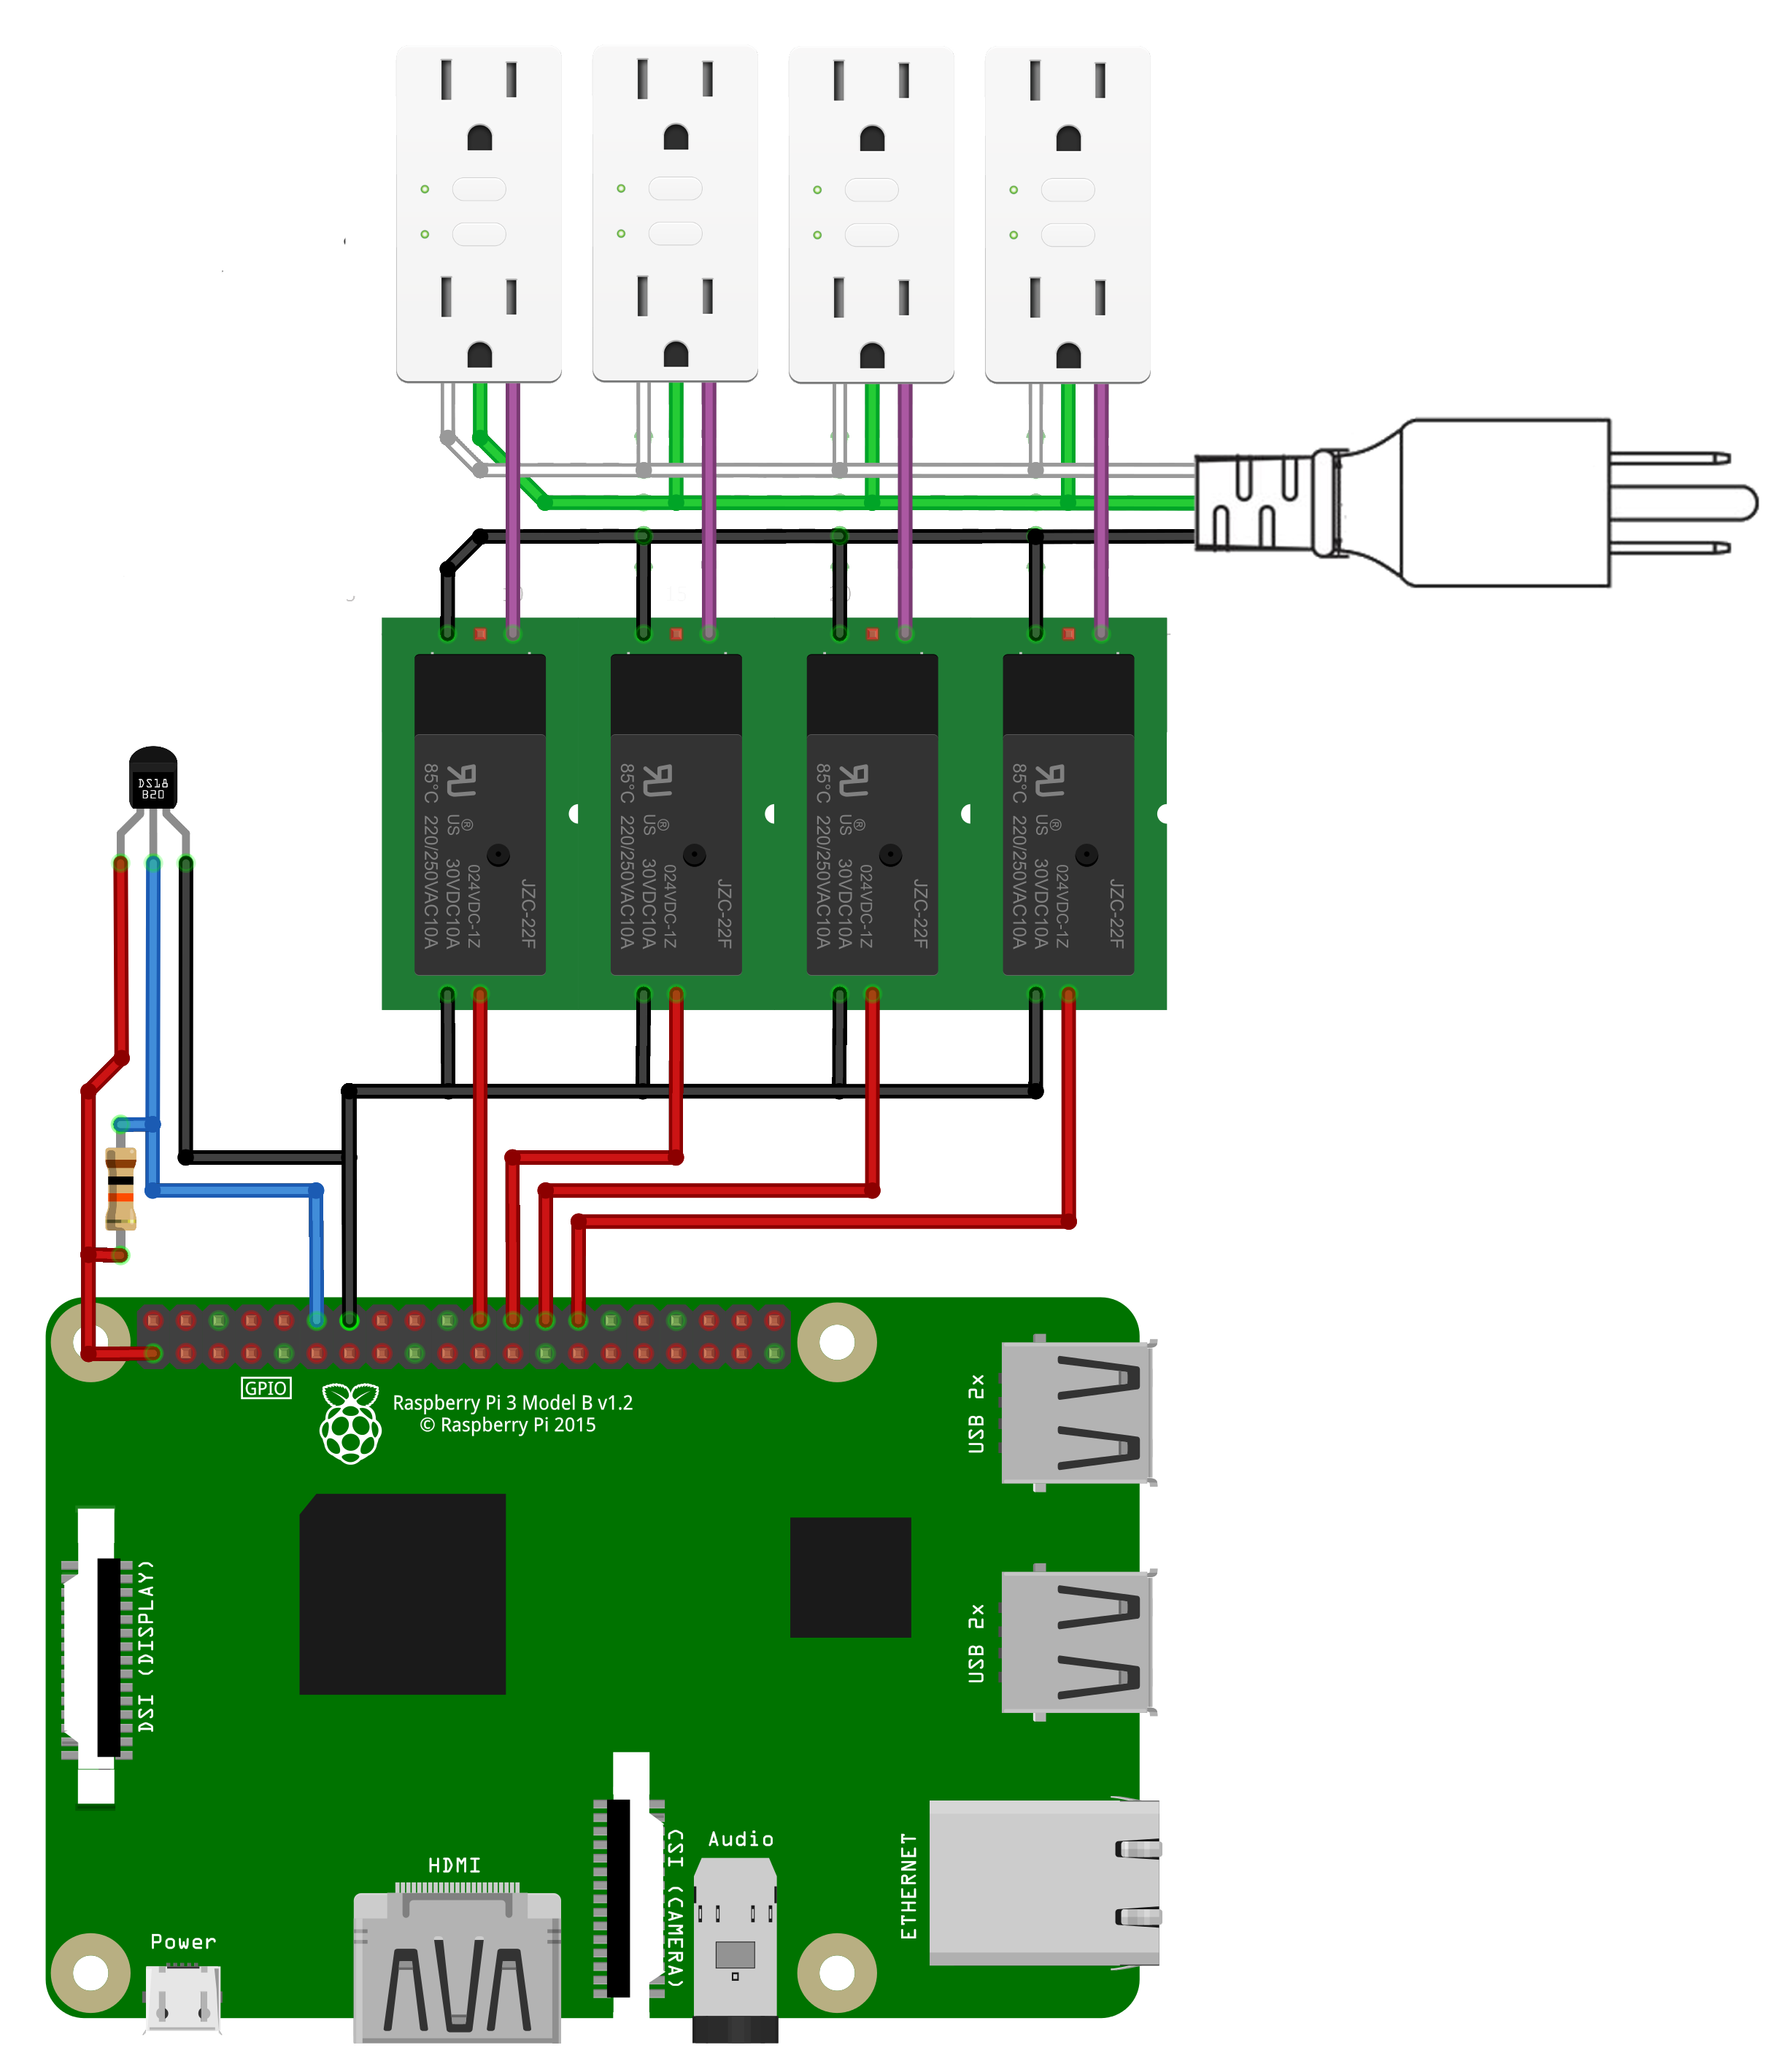
The first image is a wiring diagram with a Raspberry Pi connected to one DS18B20 1-wire temperature sensor and 4 relays connected to AC outlets. Note that although there are 8 outlets, this diagram only has 4 relays, which means each set of 2 outlets have a shared connection with each relay. To energize each outlet individually of a set, typically a conductor (a piece of metal) needs to be broken that links the live plugs of each outlet together, then wire each live plug to the normally-open contacts of each relay. The ground link does not need to be broken.
![]()
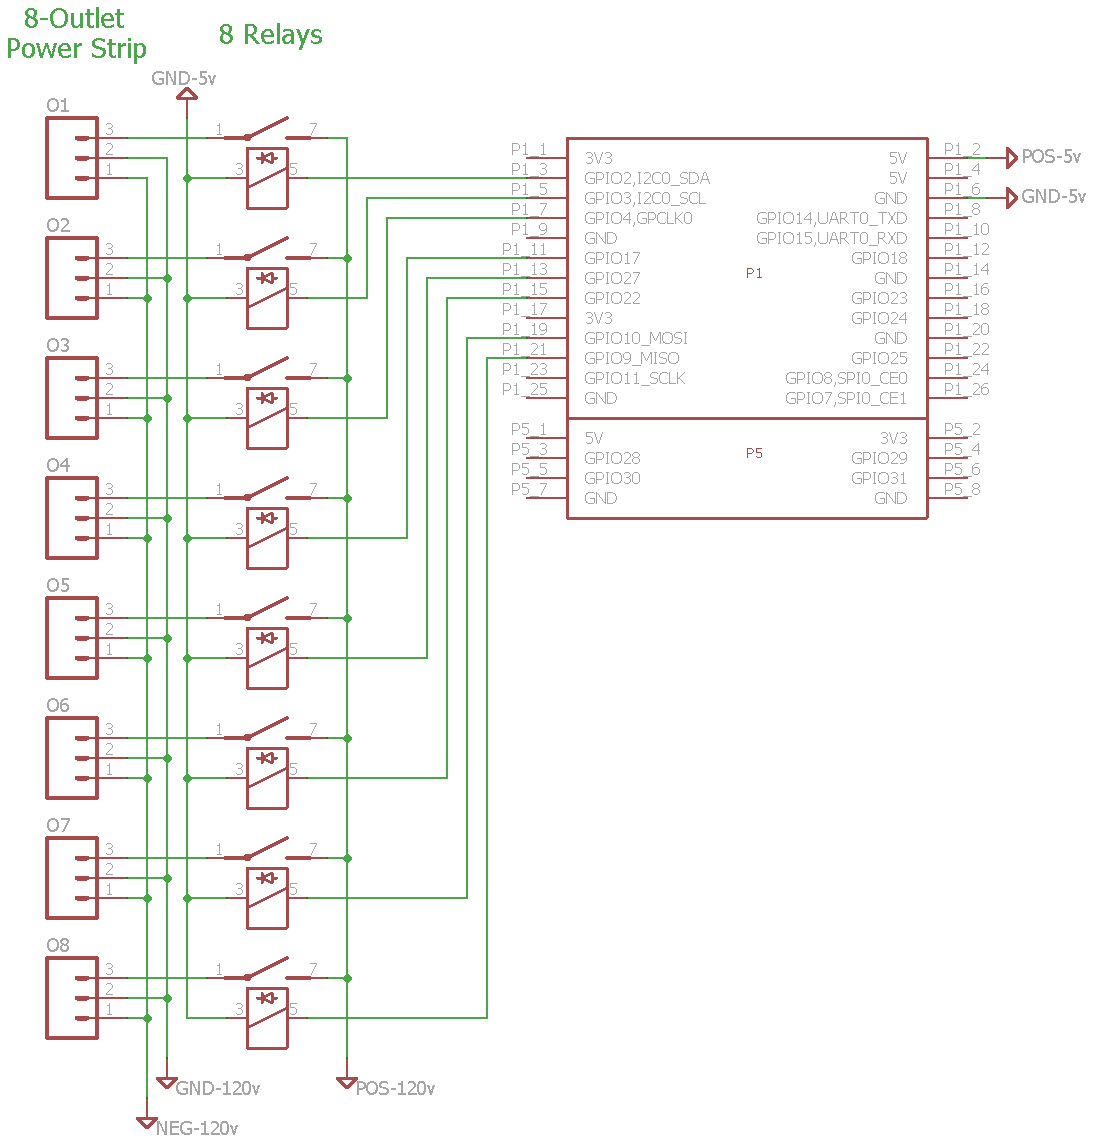
The second image is a wiring schematic with a Raspberry Pi connected to 8 relays that are energizing each outlet of an 8-outlet AC power strip. Each outlet is connected to the normally-open contacts of each relay. This is done as a safety precaution to prevent an outlet from becoming energized in the event of a lost signal to the relay, switching the outlet to the default state of an open circuit.
![]()
There are numerous different combinations of relays and outlets that can be used. This illustrates the basic principle of how each outlet is able to be controlled. When wiring AC lines, always switch the hot wire with the relay. This ensures the wire that's always connected to the outlet is ground (so if you accidentally come into contact with that wire it's safe) and a live connection only travels to the outlet when the relay is activated.
-
4Step 4
Regulation
After setting up the hardware and logging into Mycodo to configure both the connected sensor and relay, activate the sensor from the Sensor tab to begin logging measurements. Once the sensor is activated and data is being recorded, a PID controller may be set up from the PID tab. This associates the sensor with the relay, and the environmental condition measured by the sensor may now be regulated with a device connected to the relay.
Keep in mind the device you are using to modulate the environment must be able to affect the condition you are measuring for proper feedback to occur. For instance, if you are using a temperature sensor and desire to raise the temperature to a desired setpoint, a heating device is one appropriate device to accomplish this.
Mycodo - Environmental Regulation System
Bringing industrial automation and regulation to everyone.
 Kyle Gabriel

Discussions
Become a Hackaday.io Member
Create an account to leave a comment. Already have an account? Log In.