-
The next steps
07/11/2016 at 05:41 • 0 commentsThe next steps of the project are...
1) set up a coordinate system in Matlab so by inputing the change in degrees of the servos, I can know the change in position on the screen.
2) Using Matlab, create figures that relate the neural activity to the position and direction of the laser beam.
3) Test with dragonfly using entire set-up (new laser light show, Spikerbox pro double events recorder, etc)
-
Manipulating the code for the laser set-up
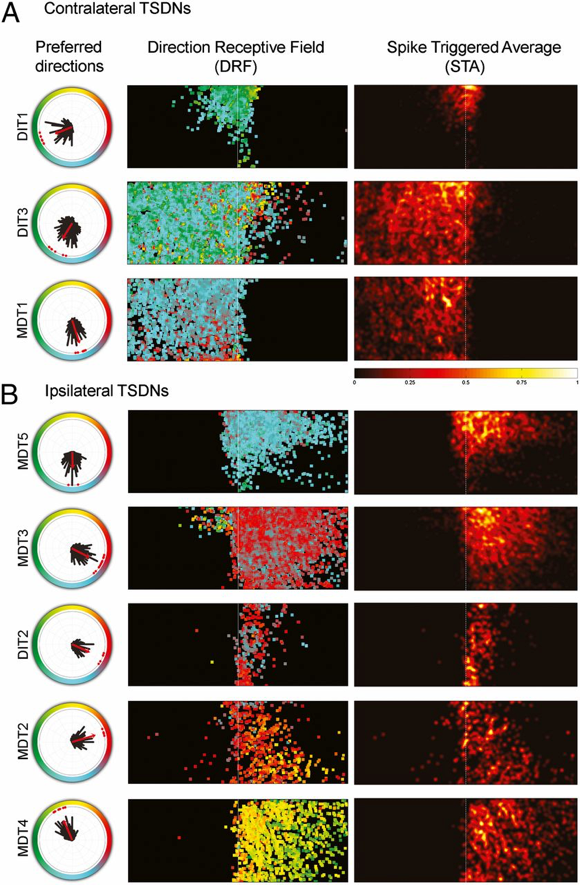
07/11/2016 at 05:34 • 0 commentsIn order to replicate Paloma Gonzalez-Bellido's experiment, I need to be able to manipulate the direction and position of the laser beam. In Paloma Gonzalez- Bellido's 2012 paper she publish these results:
![]()
Gonzalez-Bellido, P. T., H. Peng, J. Yang, A. P. Georgopoulos, and R. M. Olberg. "Cozzarelli Prize Winner: Eight Pairs of Descending Visual Neurons in the Dragonfly Give Wing Motor Centers Accurate Population Vector of Prey Direction." Proceedings of the National Academy of Sciences 110.2 (2012): 696-701. Web.
The diagrams on the left column plot the preferred direction of a certain neuron (labeled DIT.., MD... etc). Imagine that in the centers of the circles are the dragonflies, and that each color represents a position the target could be moving in. The red arrow points to the position that is preferred. The next column represents the flattened out screen. Each colored dot represents a pixel that the target has either started or passed through, and each color represents the direction. By looking at the left column, we can determine the direction the target was moving. The last column represents the firing rate- yellow being the greatest and black being the weakest.
I wrote a first draft of code, using Arduino, to mimic the experiment. Using the data collected about the preferred direction and the preferred starting location of the target, I designed code that would move the laser beam from each of the preferred starting locations for each of the neurons and travel in each of the neurons preferred directions.
For example, I wrote code for the neuron MDT3:
#include <Servo.h>

  const int servo = 10;       // The servo motor pin
  const int servo2 = 11;
  int laserPin = 12;
  Servo myservo;  // create servo object to control a servo
  Servo myservo2;
  int servoAngle= 0;

  void setup() {

    // Servo
  pinMode(laserPin, OUTPUT); // set up the laser pin

    myservo.attach(servo);  // X servo
    myservo2.attach(servo2); // Y servo


  }


  void loop(){

    for (int i = 0; i < 11; i ++)
    {

    for (int j =0; j < 5; j ++)
    {

    digitalWrite(laserPin, LOW);

      myservo.write(30); // X servo starting point
      myservo2.write(60 - i*(2.5)); // Y starting point - moves with i
      delay(100); // 100 millisecond delay
      digitalWrite(laserPin, HIGH); // turns the laser on
      for(servoAngle = 30; servoAngle < 55 ; servoAngle ++)
    {
      myservo.write(servoAngle); // X servo moves

       delay(50);

    }
    }

    delay(1000);
    }


  }
The result is:Here is the first draft of the code for the final testing:
#include <Servo.h> const int servo = 10; // The servo motor pin const int servo2 = 11; int laserPin = 12; Servo myservo; // create servo object to control a servo Servo myservo2; int servoAngle=0; void setup() { // Servo pinMode(laserPin, OUTPUT); // set up the laser pin myservo.attach(servo); // attaches the servo to the servo pin myservo2.attach(servo2); // Inizialize Serial } void loop(){ //DIT1 for (int i = 8; i < 11; i ++) { for (int j = 0; j < 5; j ++) { myservo.write(55); myservo2.write(60 - i*(2.5)); delay(100); digitalWrite(laserPin, HIGH); // turns the laser on for(servoAngle = 30; servoAngle >10 ; servoAngle --) { myservo.write(servoAngle); delay(50); } digitalWrite(laserPin, LOW); delay(2000); } delay(10000); } //DIT3 for (int i = 0; i < 11; i ++) { for (int j =0; j <5; j ++) { myservo.write(55); myservo2.write(60 - i*(2.5)); delay(100); digitalWrite(laserPin, HIGH); // turns the laser on for(servoAngle = 45; servoAngle >20 ; servoAngle --) { myservo.write(servoAngle); delay(50); } digitalWrite(laserPin, LOW); delay(2000); } delay(10000); } //MDT1 for (int i = 0; i < 11; i ++) { for (int j =0; j <5; j ++) { myservo.write(55); myservo2.write(60 - i*(2.5)); delay(100); digitalWrite(laserPin, HIGH); // turns the laser on for(servoAngle = 55; servoAngle >20 ; servoAngle --) { myservo.write(servoAngle); delay(50); } digitalWrite(laserPin, LOW); delay(2000); } delay(10000); } //MDT5 for (int i = 0; i < 11; i ++) { for (int j =0; j <5; j ++) { myservo.write(20); myservo2.write(60 - i*(2.5)); delay(100); digitalWrite(laserPin, HIGH); // turns the laser on for(servoAngle = 20; servoAngle < 55 ; servoAngle ++) { myservo.write(servoAngle); delay(50); } digitalWrite(laserPin, LOW); delay(2000); } delay(10000); } //MDT3 for (int i = 0; i < 11; i ++) { for (int j =0; j <5; j ++) { myservo.write(30); myservo2.write(60 - i*(2.5)); delay(100); digitalWrite(laserPin, HIGH); // turns the laser on for(servoAngle = 30; servoAngle < 55 ; servoAngle ++) { myservo.write(servoAngle); delay(50); } digitalWrite(laserPin, LOW); delay(2000); } delay(10000); } //DIT2 for (int i = 0; i < 11; i ++) { for (int j =0; j <5; j ++) { myservo.write(30); myservo2.write(60 - i*(2.5)); delay(100); digitalWrite(laserPin, HIGH); // turns the laser on for(servoAngle = 30; servoAngle < 55 ; servoAngle ++) { myservo.write(servoAngle); delay(50); } digitalWrite(laserPin, LOW); delay(2000); } delay(10000); } //MDT2 for (int i = 0; i < 11; i ++) { for (int j =0; j <5; j ++) { myservo.write(30); myservo2.write(60 - i*(2.5)); delay(100); digitalWrite(laserPin, HIGH); // turns the laser on for(servoAngle = 30; servoAngle < 45 ; servoAngle ++) { myservo.write(servoAngle); delay(50); } digitalWrite(laserPin, LOW); delay(2000); } delay(10000); } //MDT4 for (int i = 0; i < 11; i ++) { for (int j =0; j <5; j ++) { myservo.write(50); myservo2.write(60 - i*(2.5)); delay(100); digitalWrite(laserPin, HIGH); // turns the laser on for(servoAngle = 50; servoAngle > 20 ; servoAngle --) { myservo.write(servoAngle); delay(50); } digitalWrite(laserPin, LOW); delay(2000); } delay(10000); } } -
Laser set-up: version 3
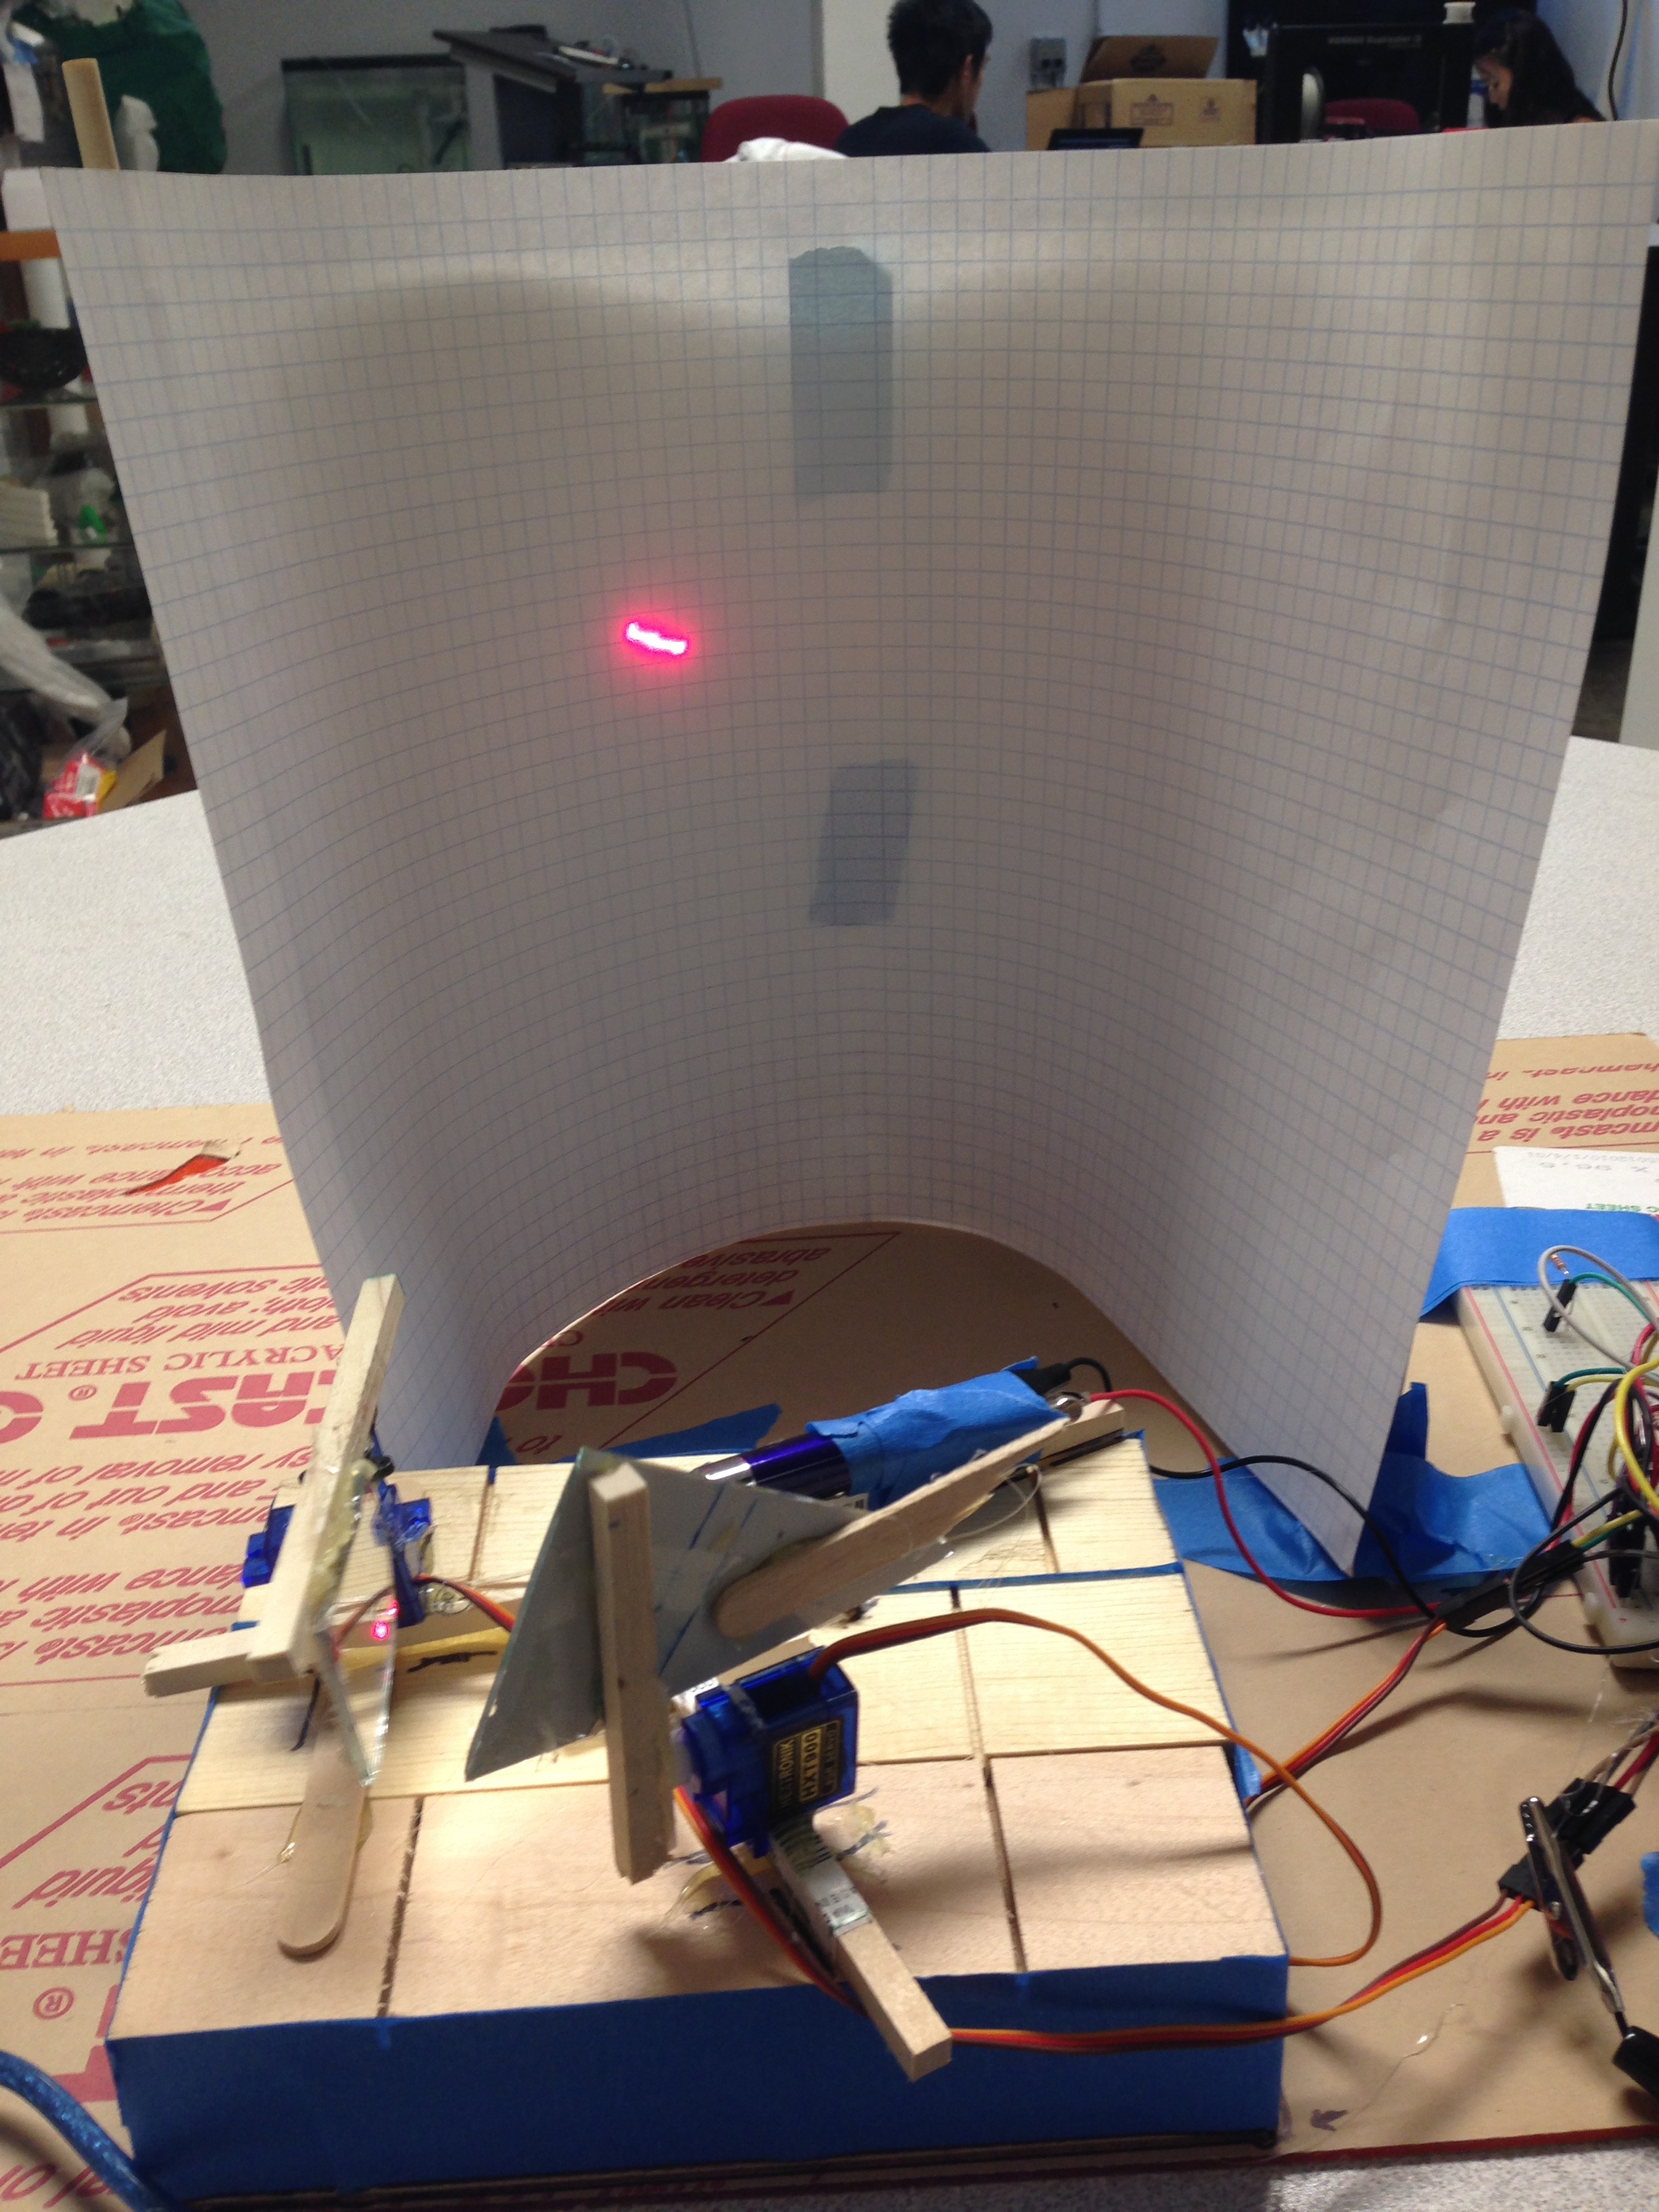
07/11/2016 at 03:21 • 0 commentsGiven the previous problems, I then started on a new set-up hopeing to 1) solve the curvature of the beam problem 2) make a more stable, cleaner set-up.
The final result:
What I did:
I cut wood to use for a stand, and used an acrylic sheet for a base. I made the Y servo mirror much longer horizontally so that the Y servo would reflect a wider range of movement fro the X servo. I met one of my goals, to create a more stable, cleaner set-up. However, I still found that there was some curvature of the laser beam. I am afraid that that might be unavoidable, but also could be easy to work around using code.
-
Building a servo laser set-up: prototype 2
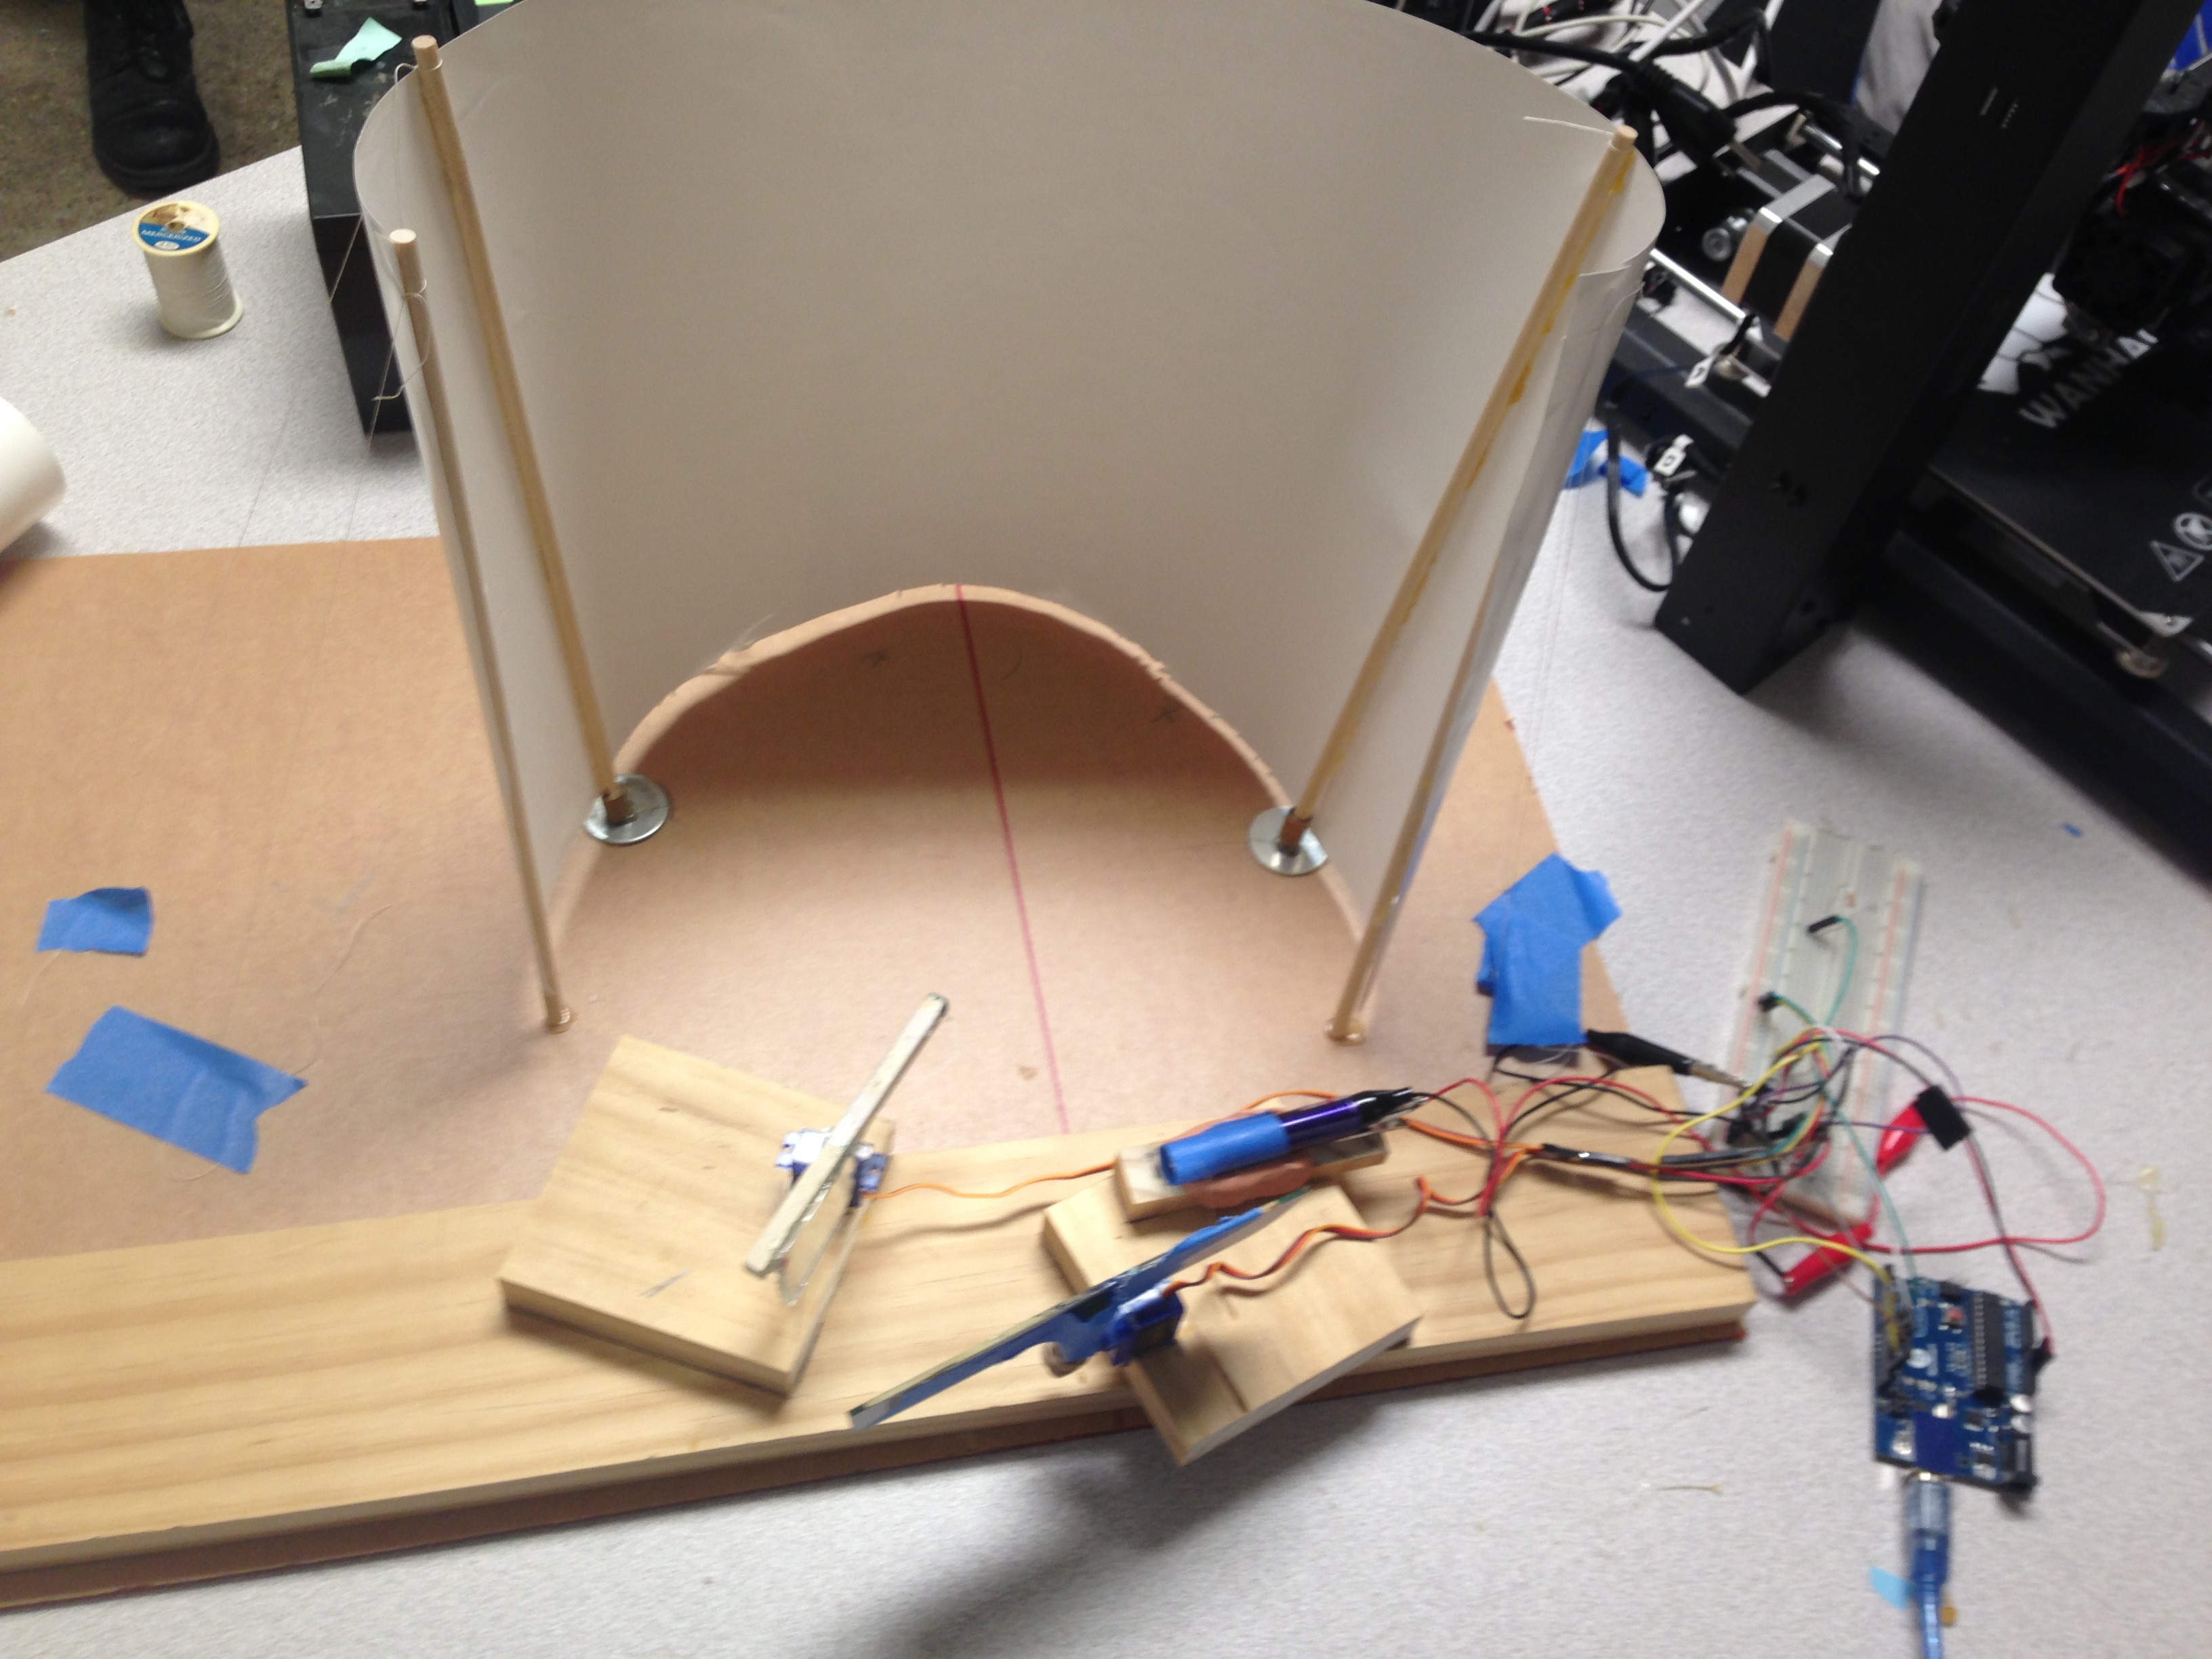
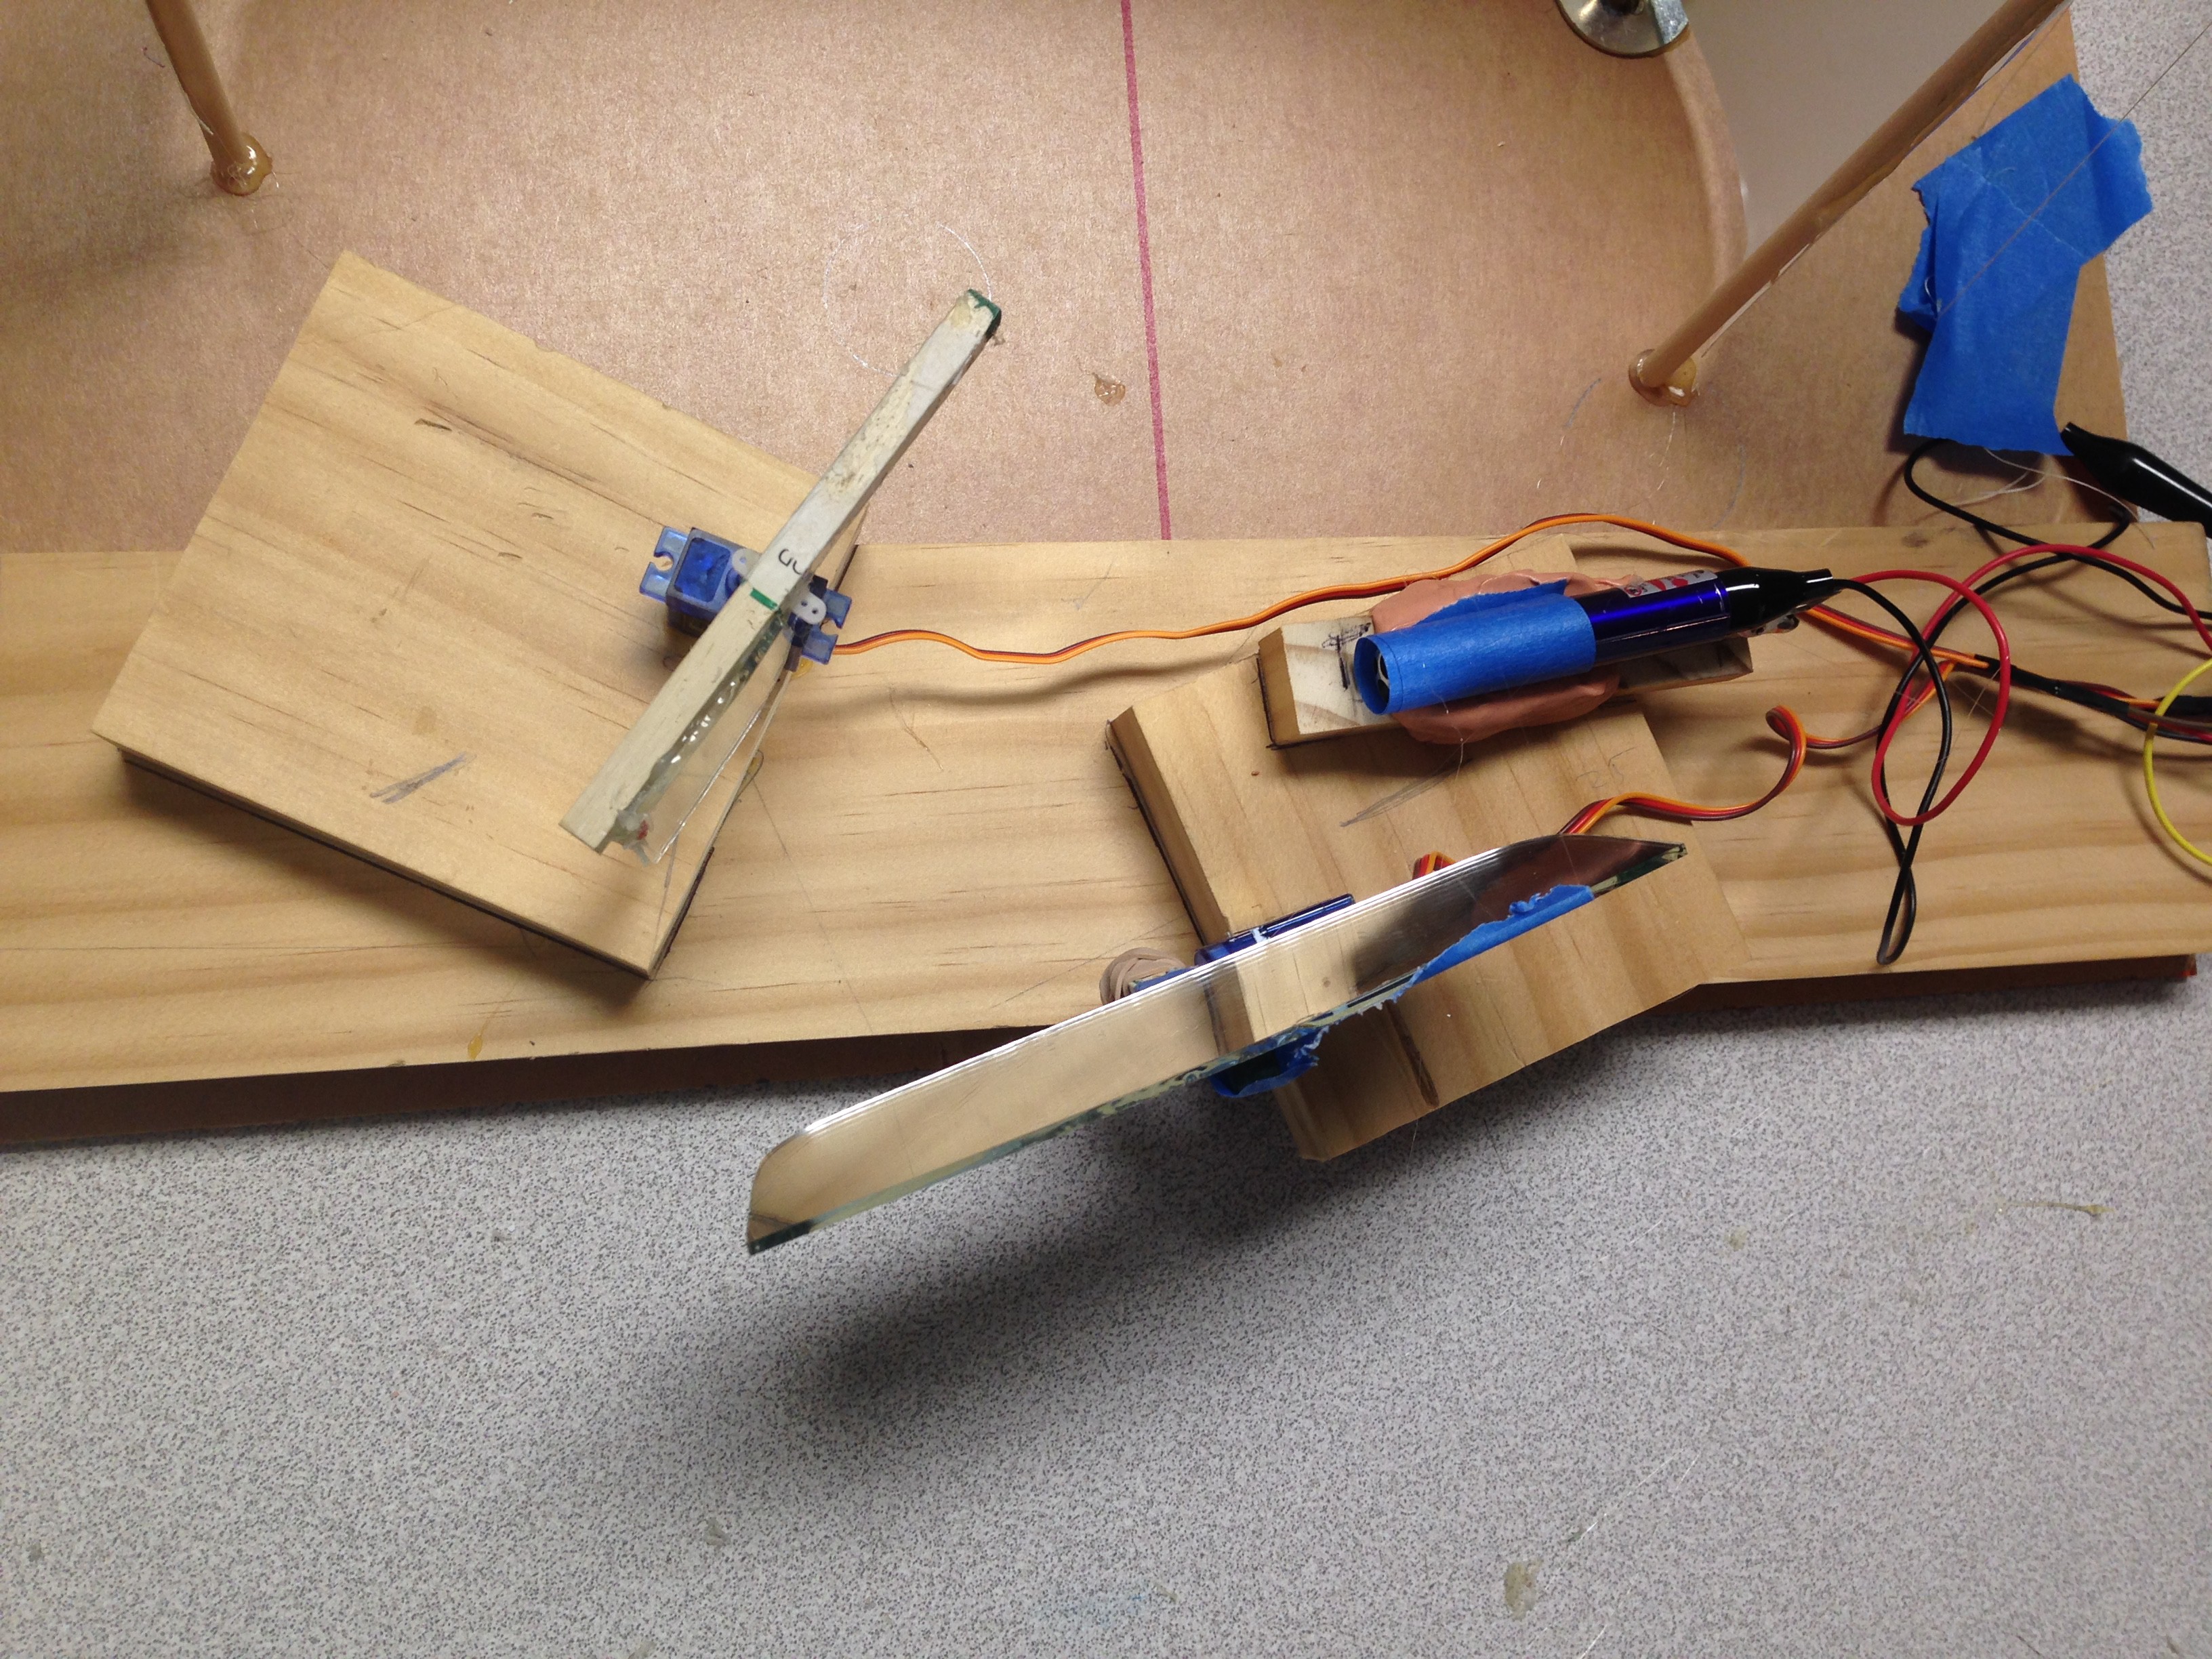
07/11/2016 at 01:21 • 0 commentsI built a servo laser set-up (prototype 2) that allows me to control the movement of the laser beam across a curved screen using an X direction servo and a Y direction servo.
Below is the final result of prototype 2:
The problems:
The hot glue on the mirrors makes the mirrors tilt at an angle, and not line up exactly with the wooden sticks.
![]()
This curves the laser beam, and does not make it perfectly straight. Furthermore, my set-up was altered many times to get the laser, the mirrors and the screen to line up. Thus, the set-up is overall very messy and filled with scraps of old glue, tape, and wood.
-
Connecting the laser to the Spikerbox
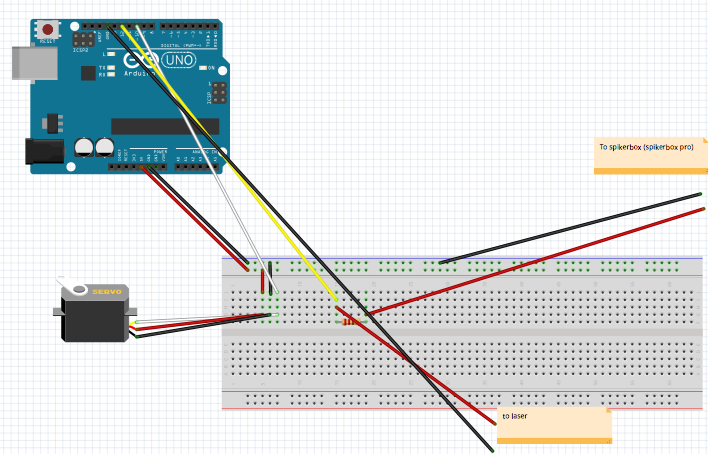
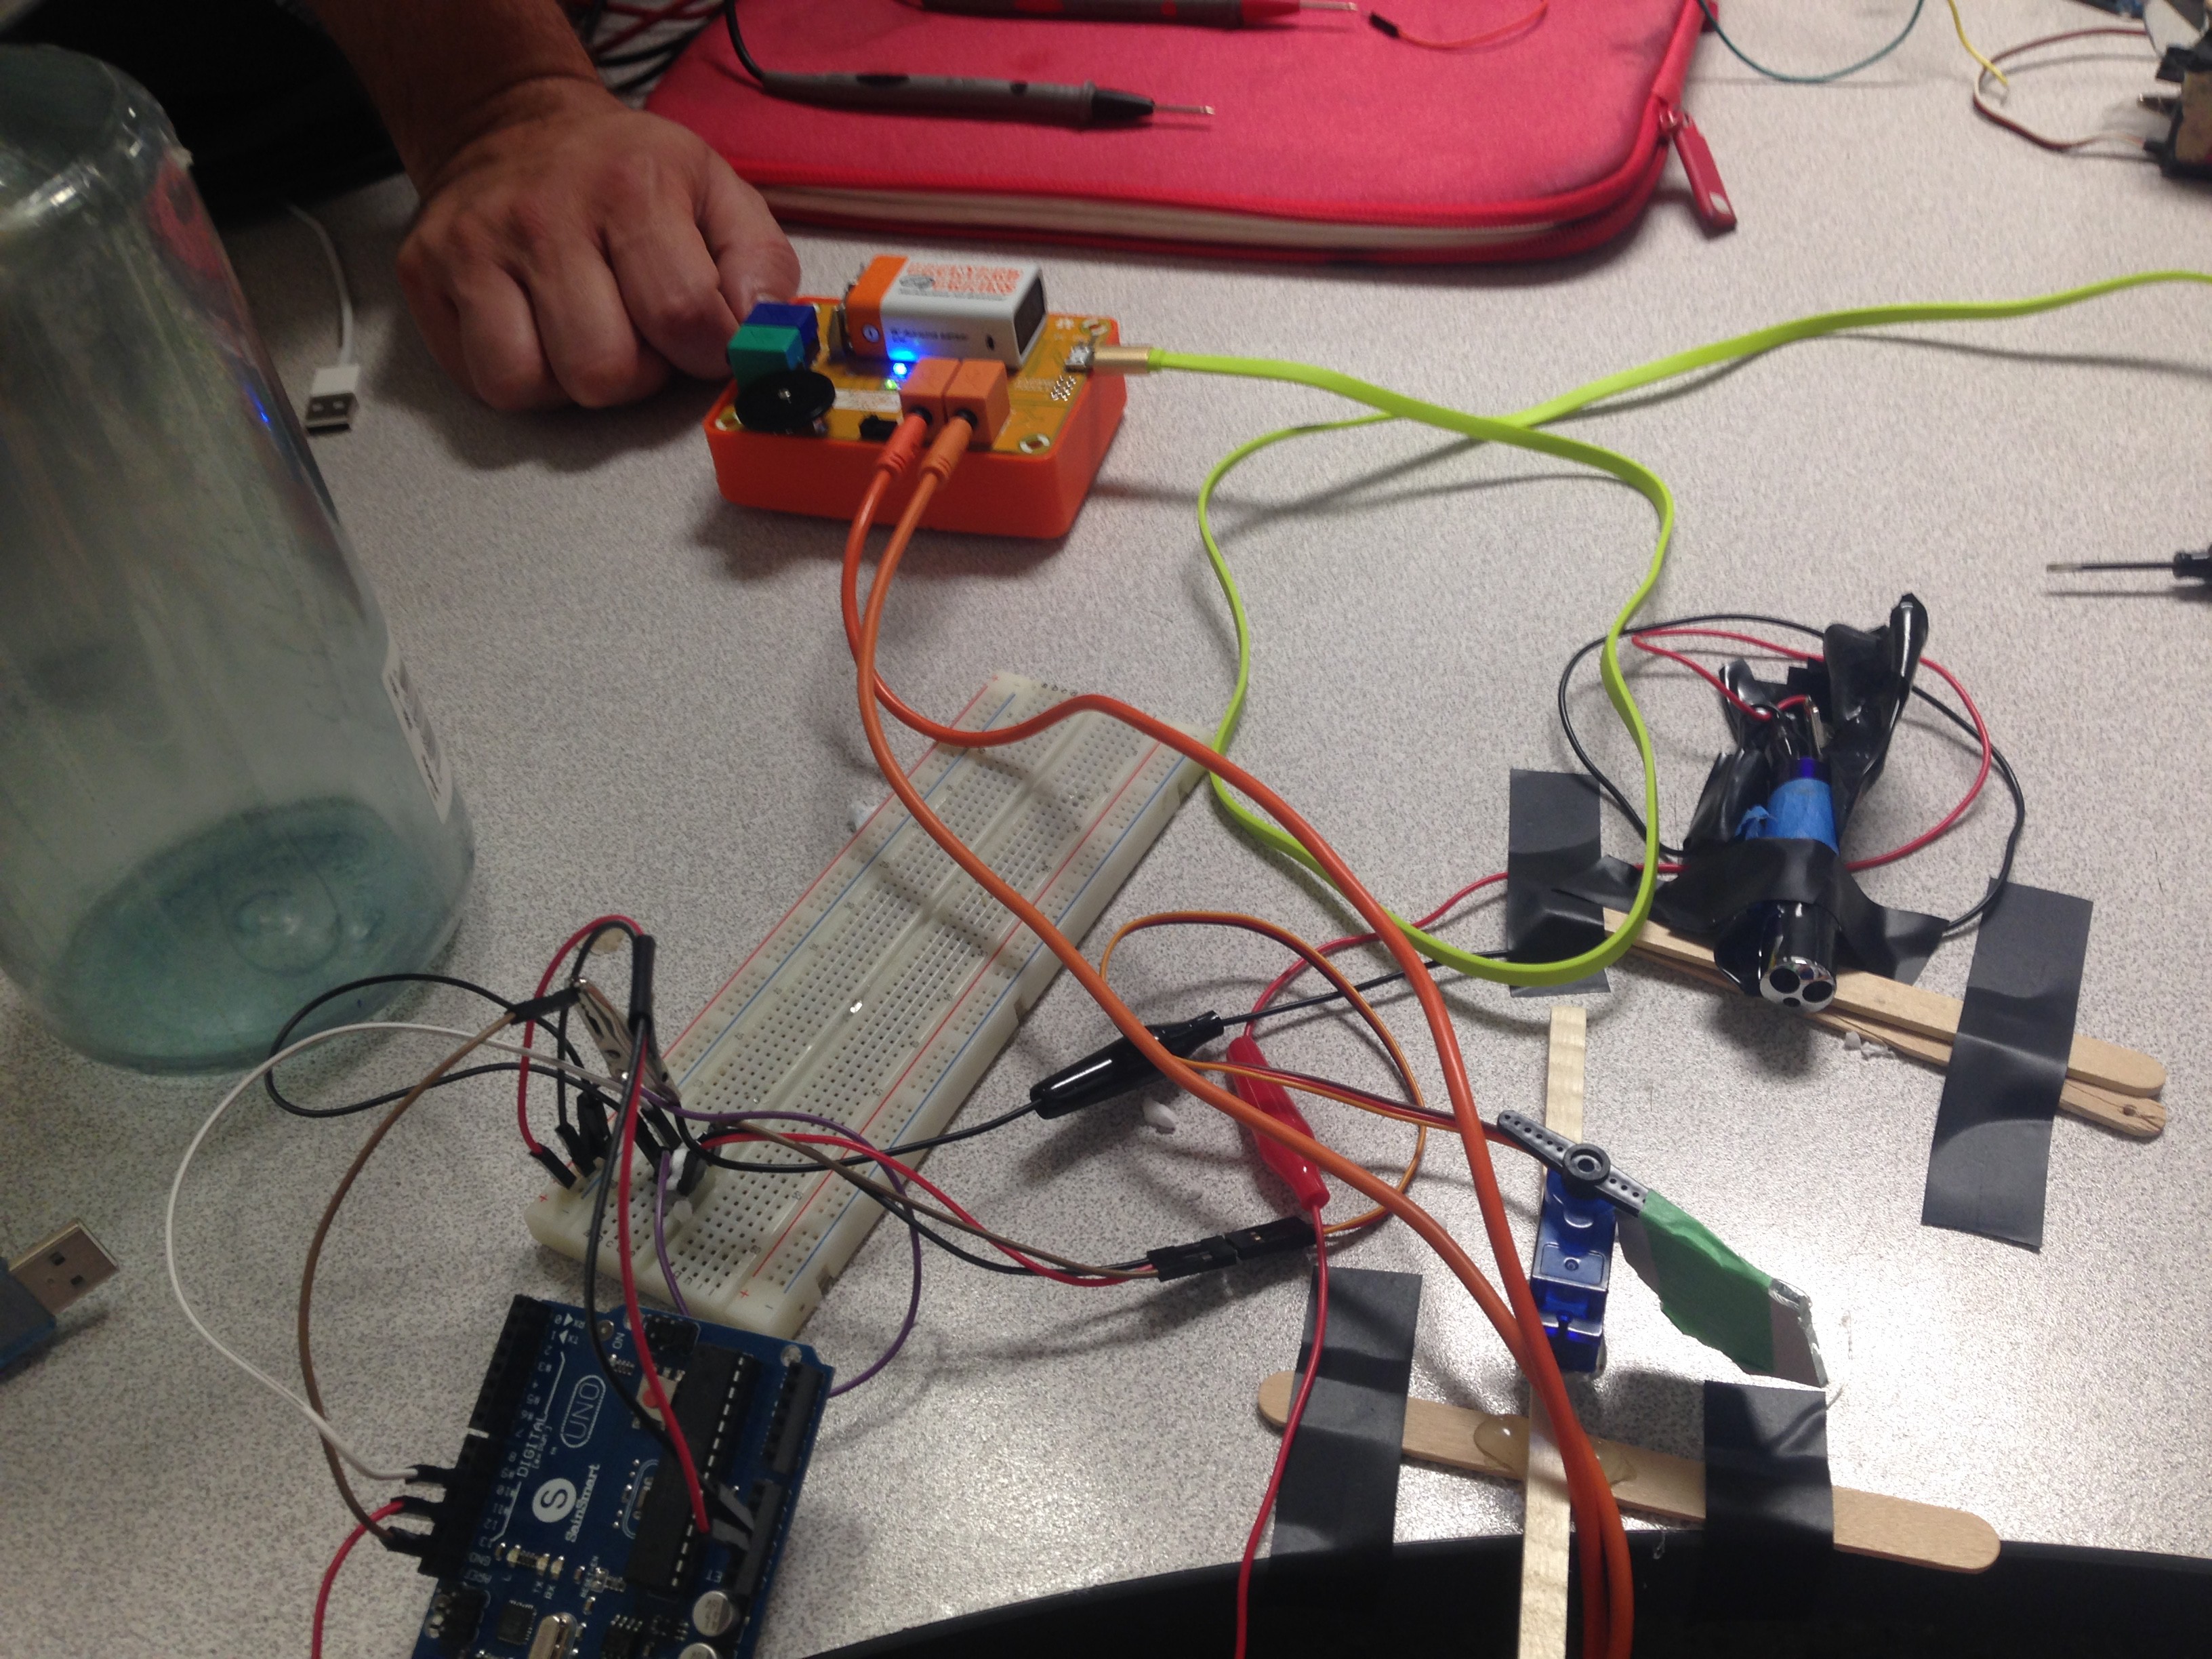
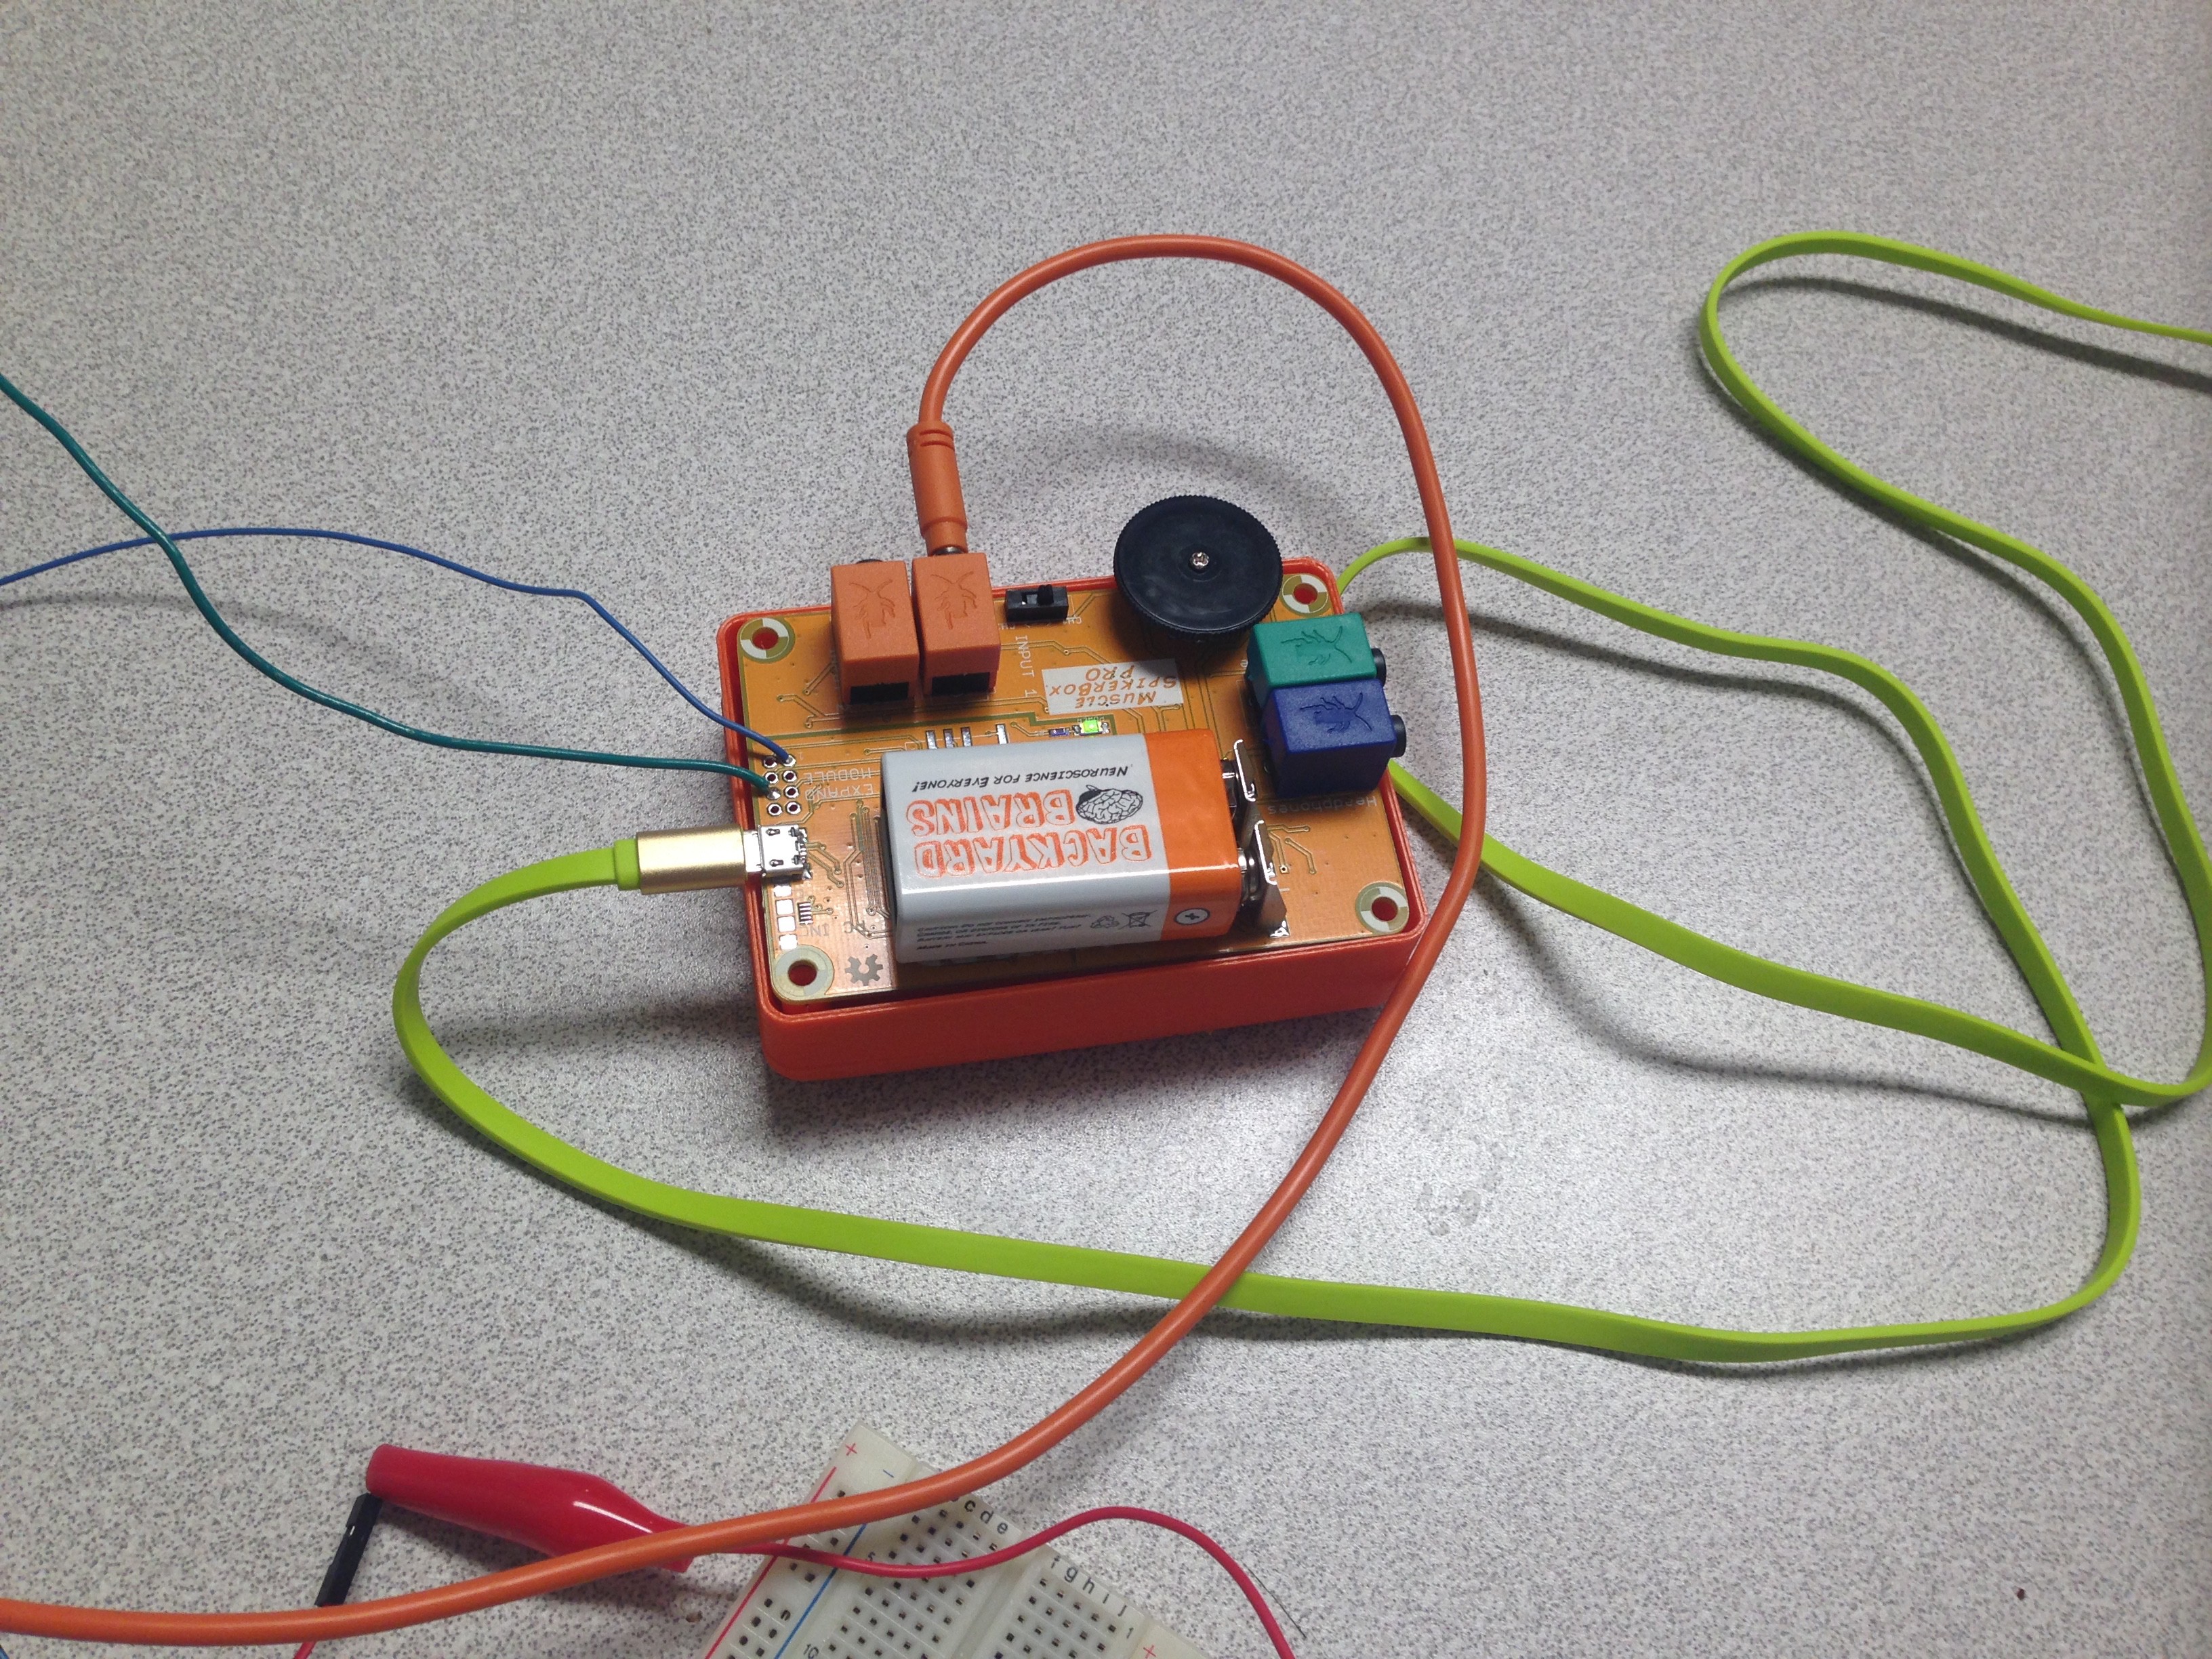
06/29/2016 at 03:32 • 0 commentsFrom previous neural recordings, I have data of the spikes of the TSDNs. However, I had yet to find a way to record the onset of the stimulus (turning on the laser) so that I could correlate it to the spikes. In order to both simultaneously record the event of the laser turning on and the neural recording of the daringly TSDN, I exchanged my neuron Spikerbox for a Muscle Spikerbox Pro, which allows me two channels (later I would find that I didn't even need the second).
Basic schematic for how this will be accomplished:
![]()
This allows me to simultaneously record whether the laser is on and record from the neuron of the dragonfly.
Here are some more pictures of how I accomplished this:
Below is a video of the final result:
The red lines on the laptop screen represent the laser turning on. I do not yet have an event marking the laser turning off-- maybe that's the next step! Also, the white recording on the laptop screen is the recording from the electrodes (which will be recording from the dragonfly neuron.)
-
Laser show: the first prototype
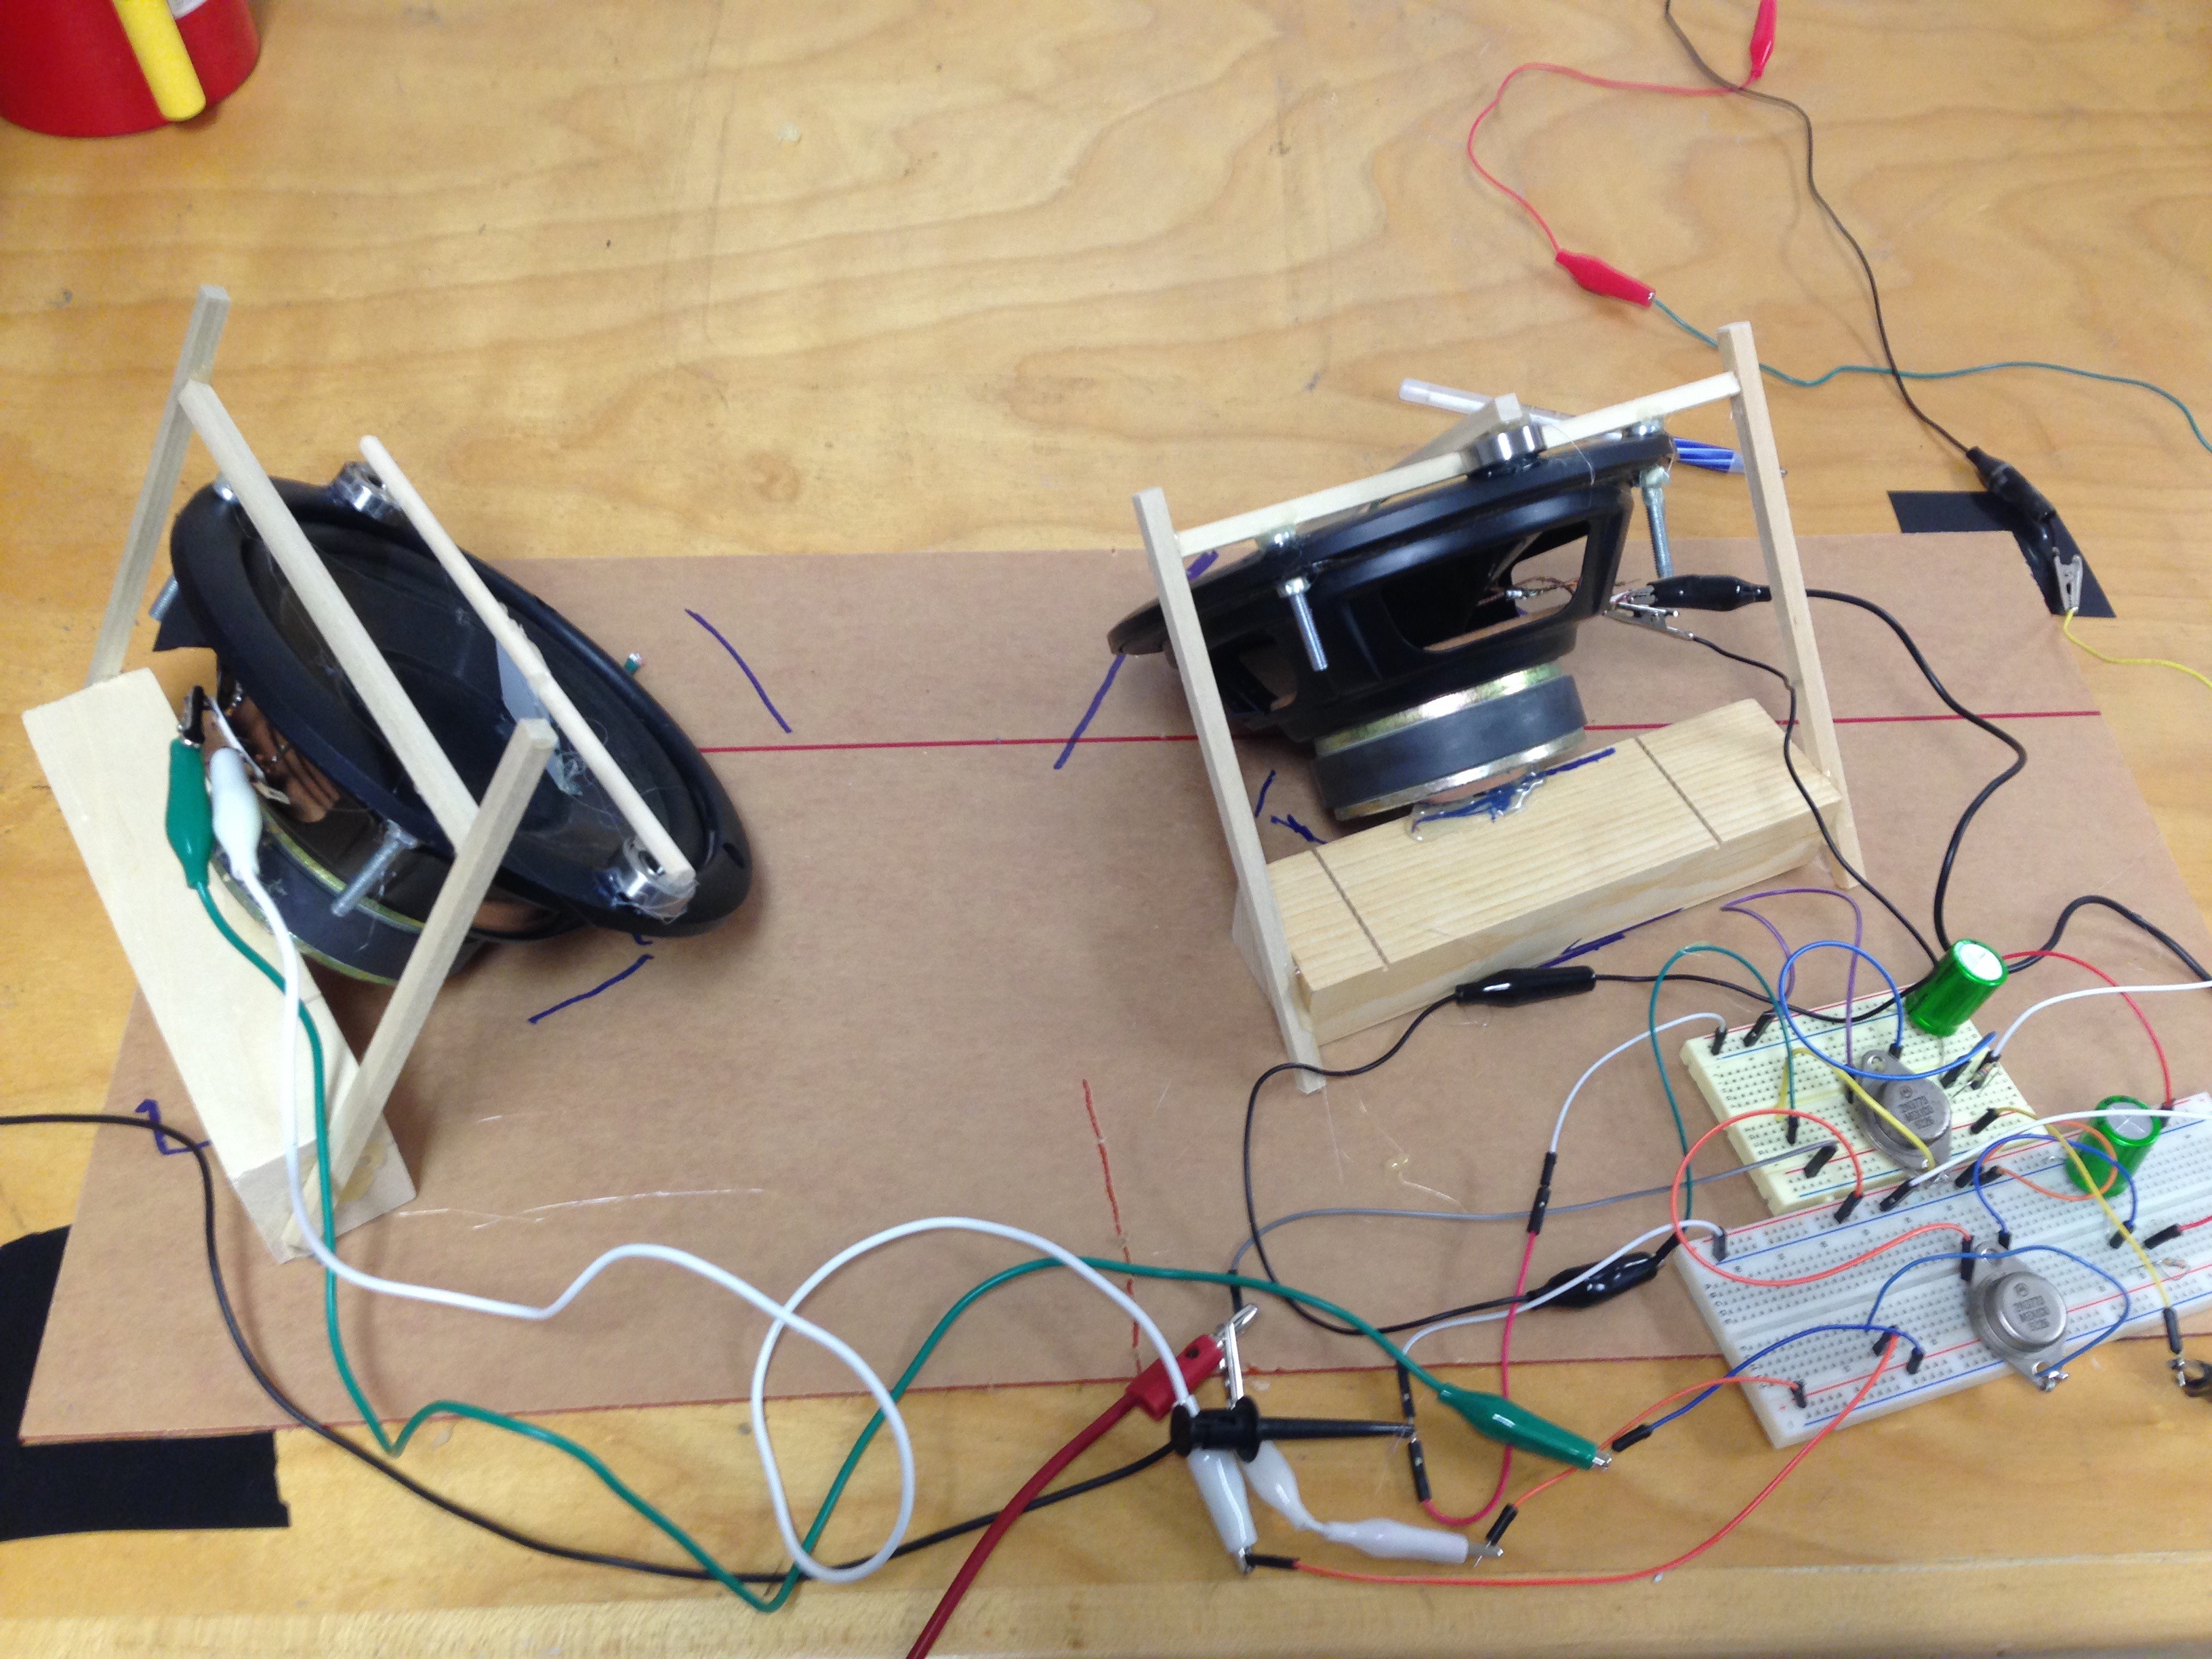
06/29/2016 at 03:22 • 0 commentsToday I started working on the first prototype for the laser set-up. Previously, I had tried to make a laser show out of bass speakers. However, I found that the bass speakers that I had did not allow me the range of motion that I wanted.
A picture of the bass speaker set up that I chose not to use:
![]()
So, I instead decided to rig up a laser show out of servos. Starting simple, I only used one servo, meaning only one degree of freedom.
My laser set up:
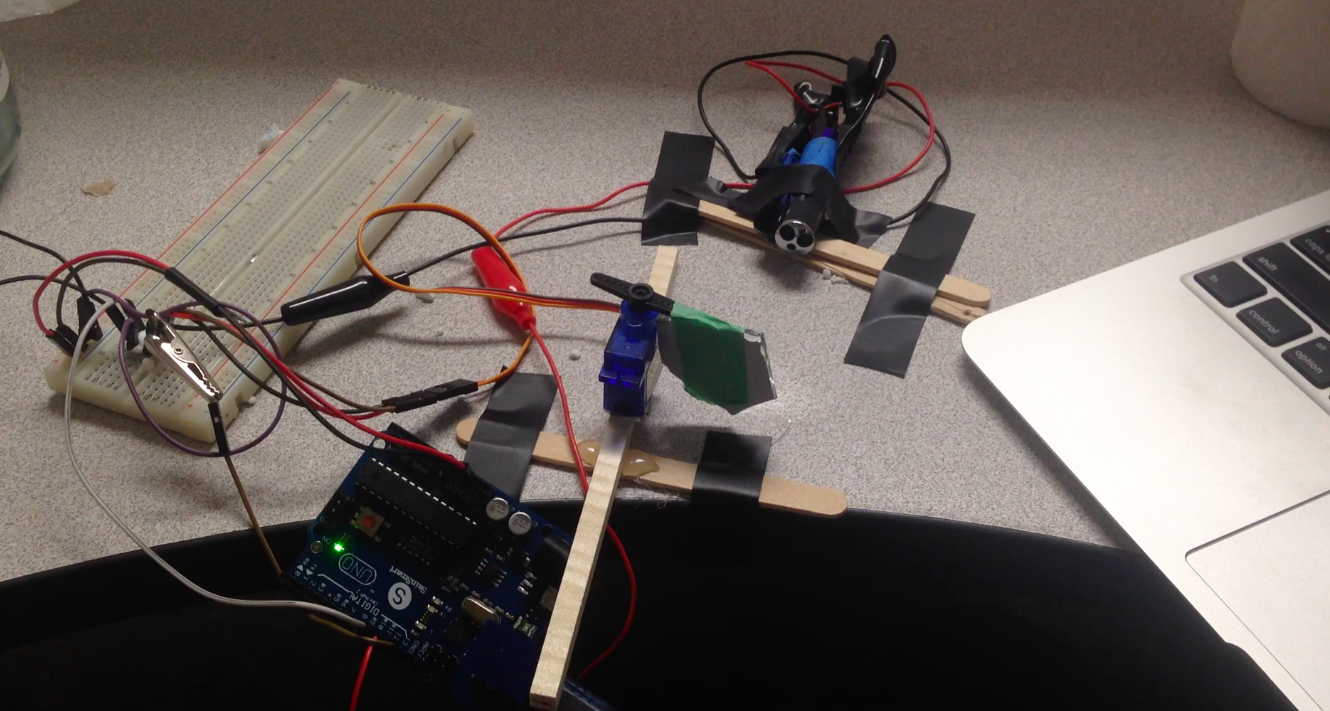
Using a servo motor (I started with the continuous rotation, then moved on to the stepper) and an Arduino Uno, I connected the two so that the servo moved in an angle of about 40 degrees, paused for a second, then returned. I found that the stepper motor was best for this (not the continuous rotation) because it allowed me to plug the desired angle right into the code. By connecting a mirror onto the servo, I could shine a laser onto the servo, reflect it onto a screen, and move the laser beam by controlling the movement of the servo. Additionally, through the Arduino, I could turn on and off the laser easily.
Below is a picture of the set up:
![]()
The servo and the laser are both connected to the breadboard, and then to the Arduino.
Here is the code I used to power the laser and servo:
  #include <Servo.h>

  const int servo = 10;       // The servo motor pin
  int laserPin = 12;
  Servo myservo;  // create servo object to control a servo
  int servoAngle = 0;   // servo position in degrees


  void setup() {

    // Servo
  pinMode(laserPin, OUTPUT); // set up the laser pin

    myservo.attach(servo);  // attaches the servo to the servo pin

    // Inizialize Serial
    Serial.begin(9600);
    myservo.write(servoAngle);
    delay(1000);

  }


  void loop(){


      digitalWrite(laserPin, HIGH); // turns the laser on
      for(servoAngle = 0; servoAngle < 40; servoAngle++)  //move the micro servo from 0 degrees to 40 degrees
    {
      myservo.write(servoAngle);
      delay(50);

    }

    digitalWrite(laserPin, LOW); // turn the laser off
    myservo.write(0); // return to zero degrees

    delay(1000); // pause for one second

}
This moves the servo in a 40 degree wedge and turns off the laser once the servo has hit the 40 degree mark and has moved back to 0. I connected the laser by removing the batteries, connecting an alligator clip to the spring in the center of the laser (ground) and connecting another alligator clip to the metal surrounding it. Connect the ground to ground on the Arduino and the other to the 12 pin.
After I got the servo and laser working, it looked like this:
The problems with this set up are that the servo is a little unstable, meaning the laser beam is quite jerky when it moves. Maybe this does not matter to the dragonfly TSDNs. I will see. The next step, trying to find some way to record on the computer when the laser turns on and when it turns off!
-
Dragonfly neural recordings
06/23/2016 at 11:14 • 0 commentsNeural recordings:
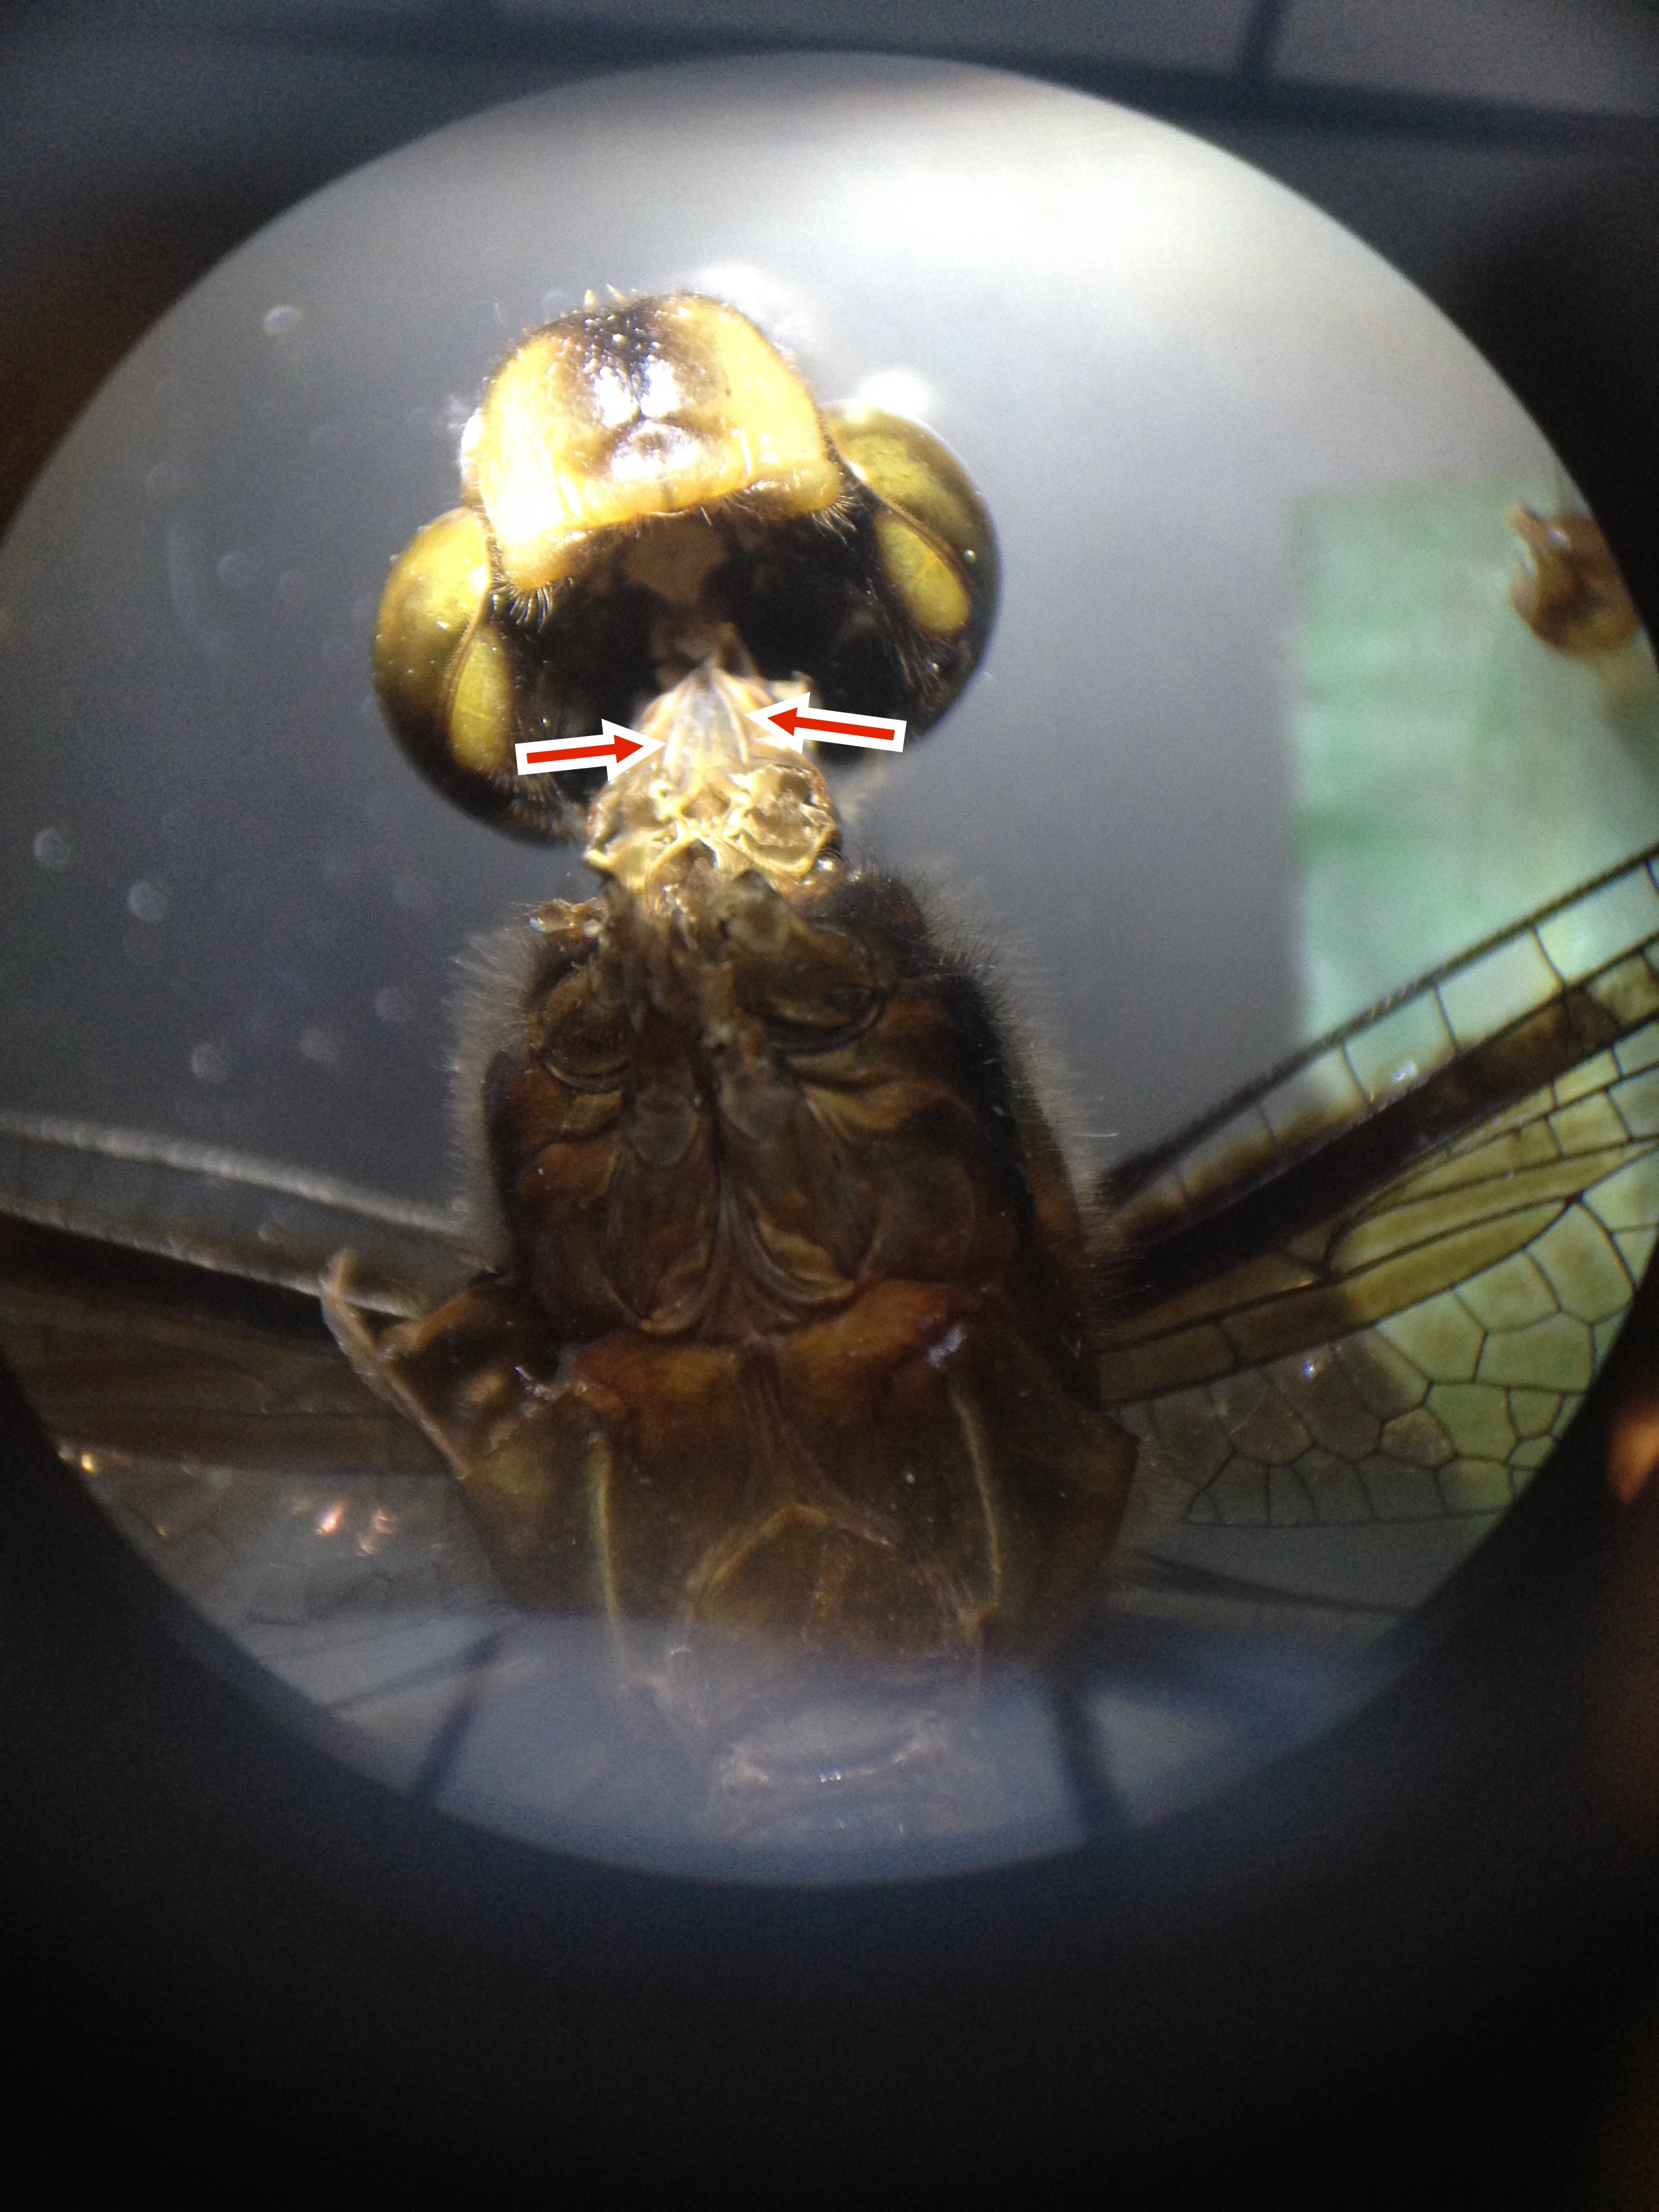
Yesterday, I recorded from the neuron of the dragonfly without the lasers, just to ensure the materials are working and that I can find the TSDNs. For the neural recordings of the dragonfly, I aimed to place the electrode in the TSDN. These neurons run down the dragonfly's neck, on the right and left side, just above the thoracic ganglia. (Pictured below)
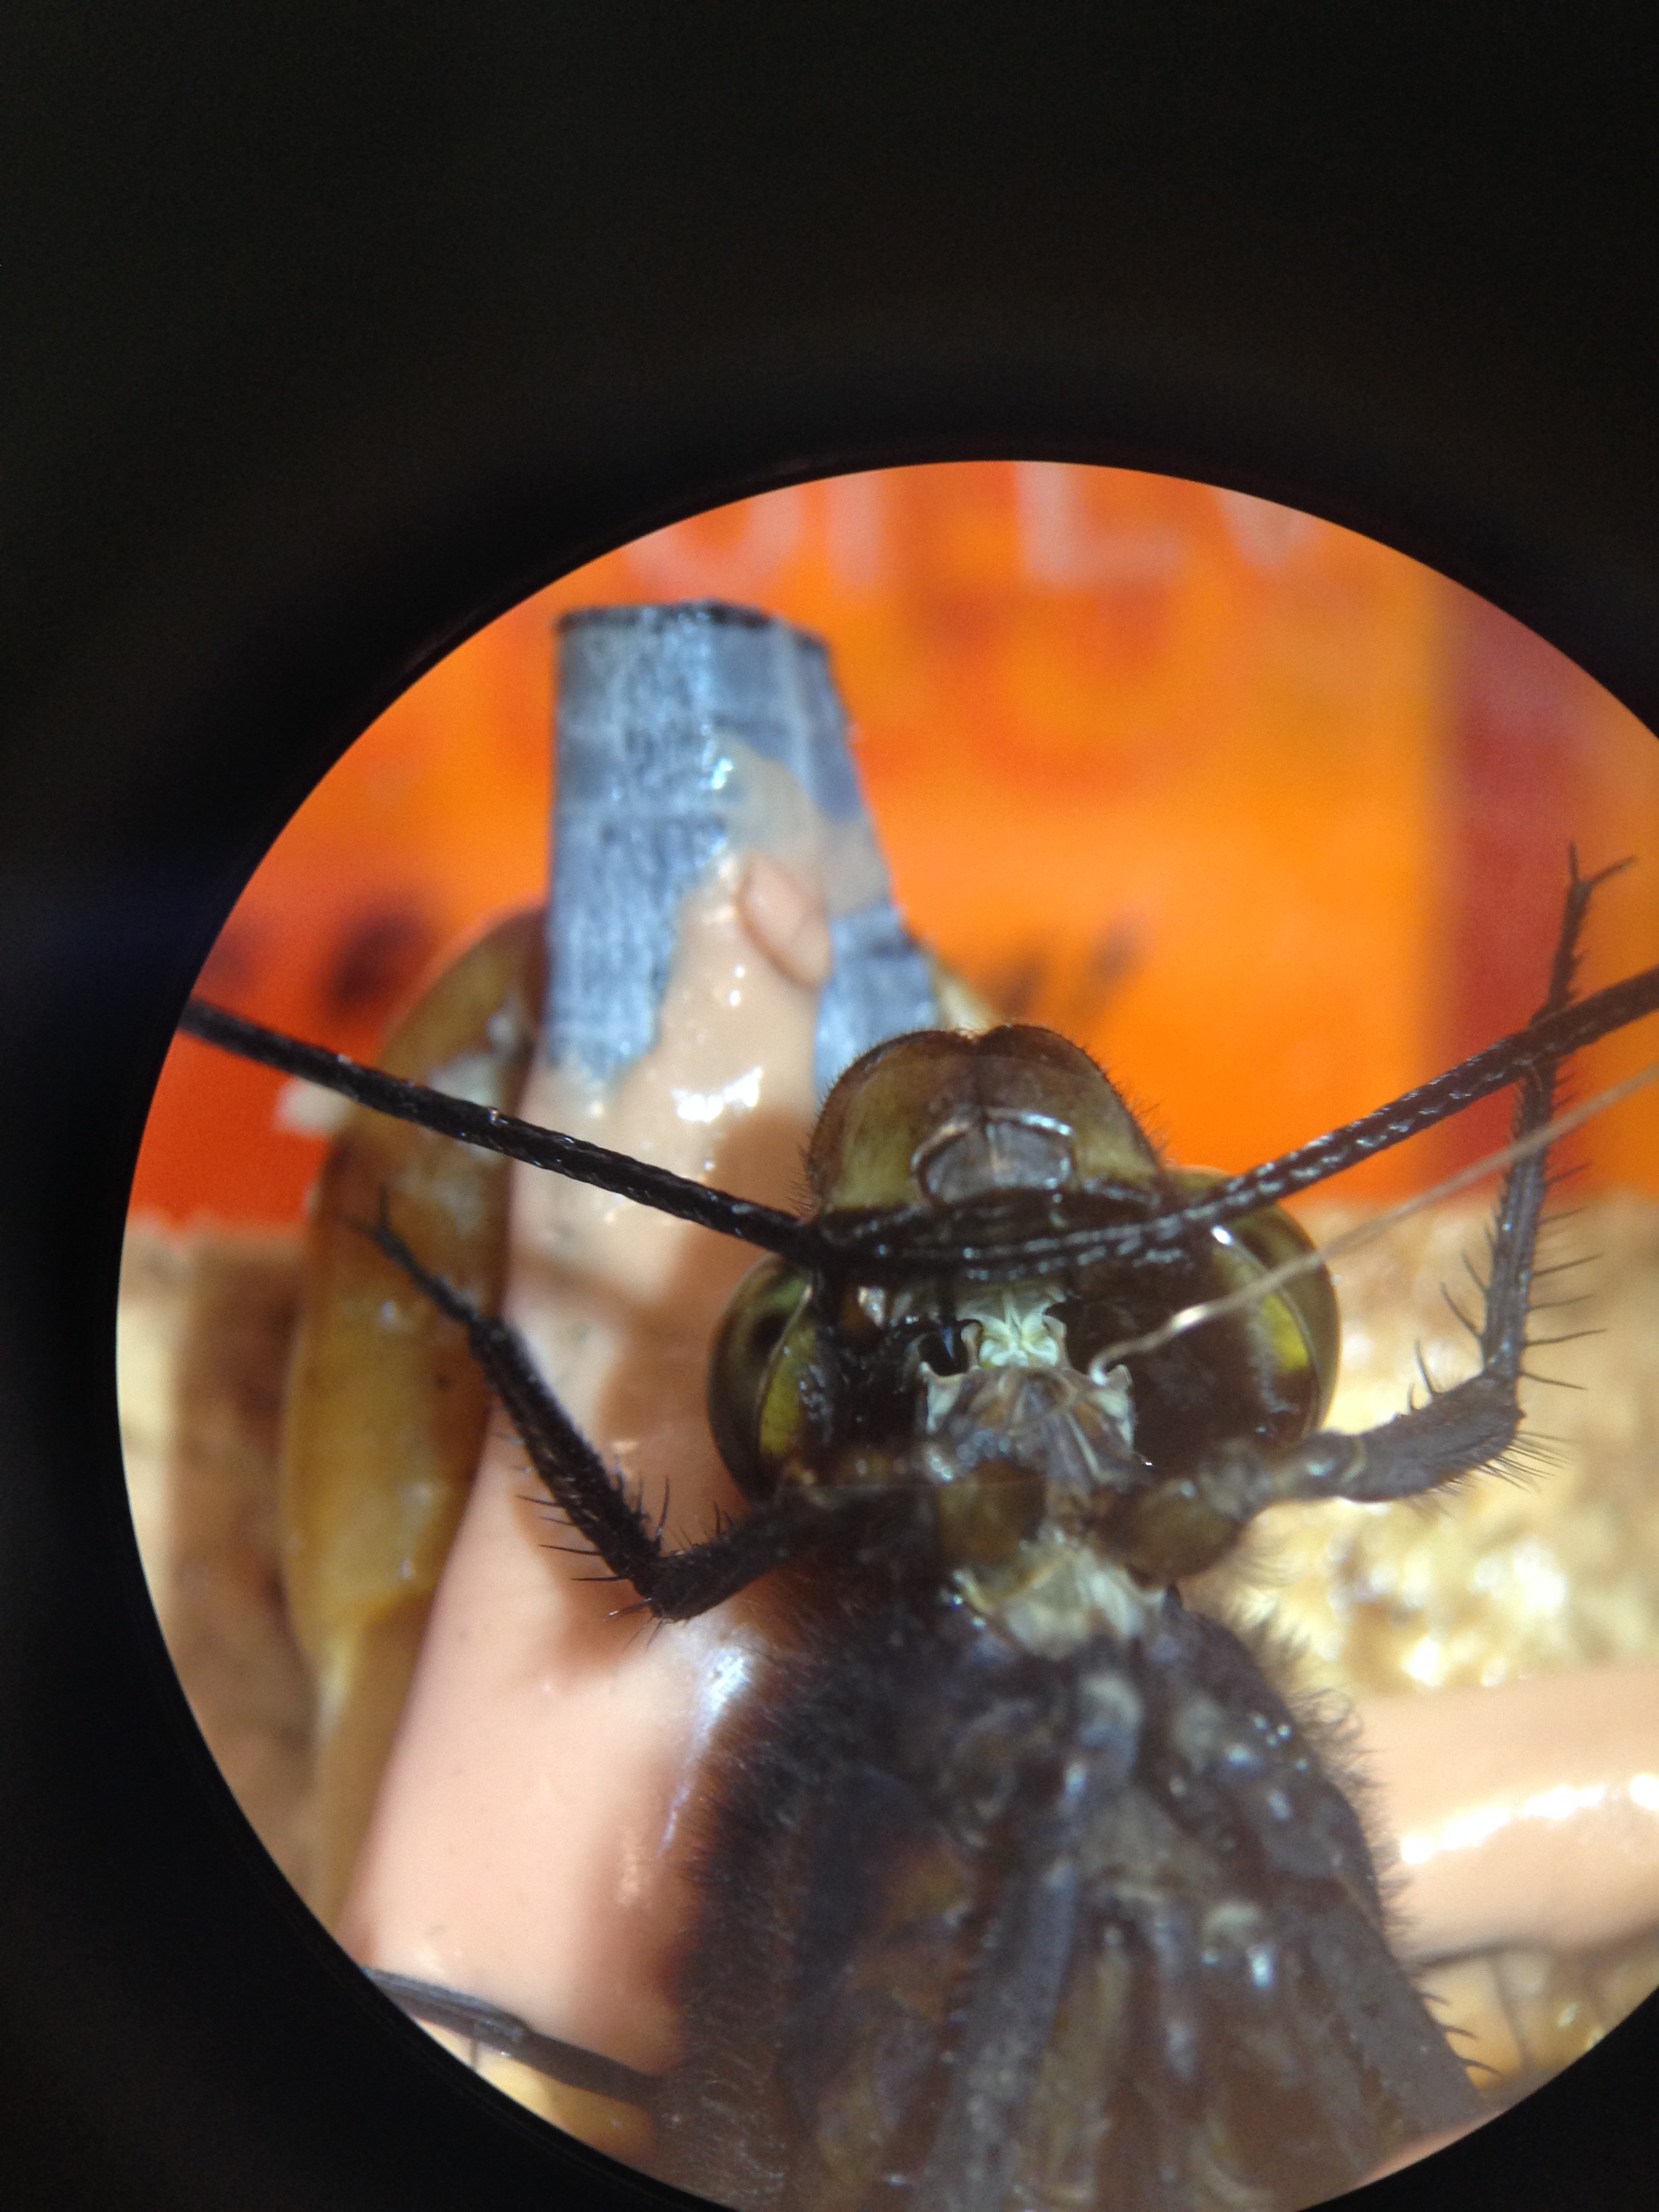
The TSDNs are the thin white lines running on both sides of the dragonfly's neck, as shown by the red arrows. I placed the electrode on the right one. As seen below, I placed a thin wire in the right TSDN.
But before I placed the electrode in I anesthetized my dragonfly (about 2 hours in a refrigerator).
Materials needed of the neural recordings:
- Spikerbox (from Backyard Brains)
- a speaker (optional) and audio cable
- one dragonfly
- insect wax (or tape)
- popsicle stick
- silly putty (or tape)
- clips, stand or clamp
- string
- electrodes
- micromanipulator (optional, you can just use free delicate wires if you have a steady hand)
- laptop, iPad, or iPhone
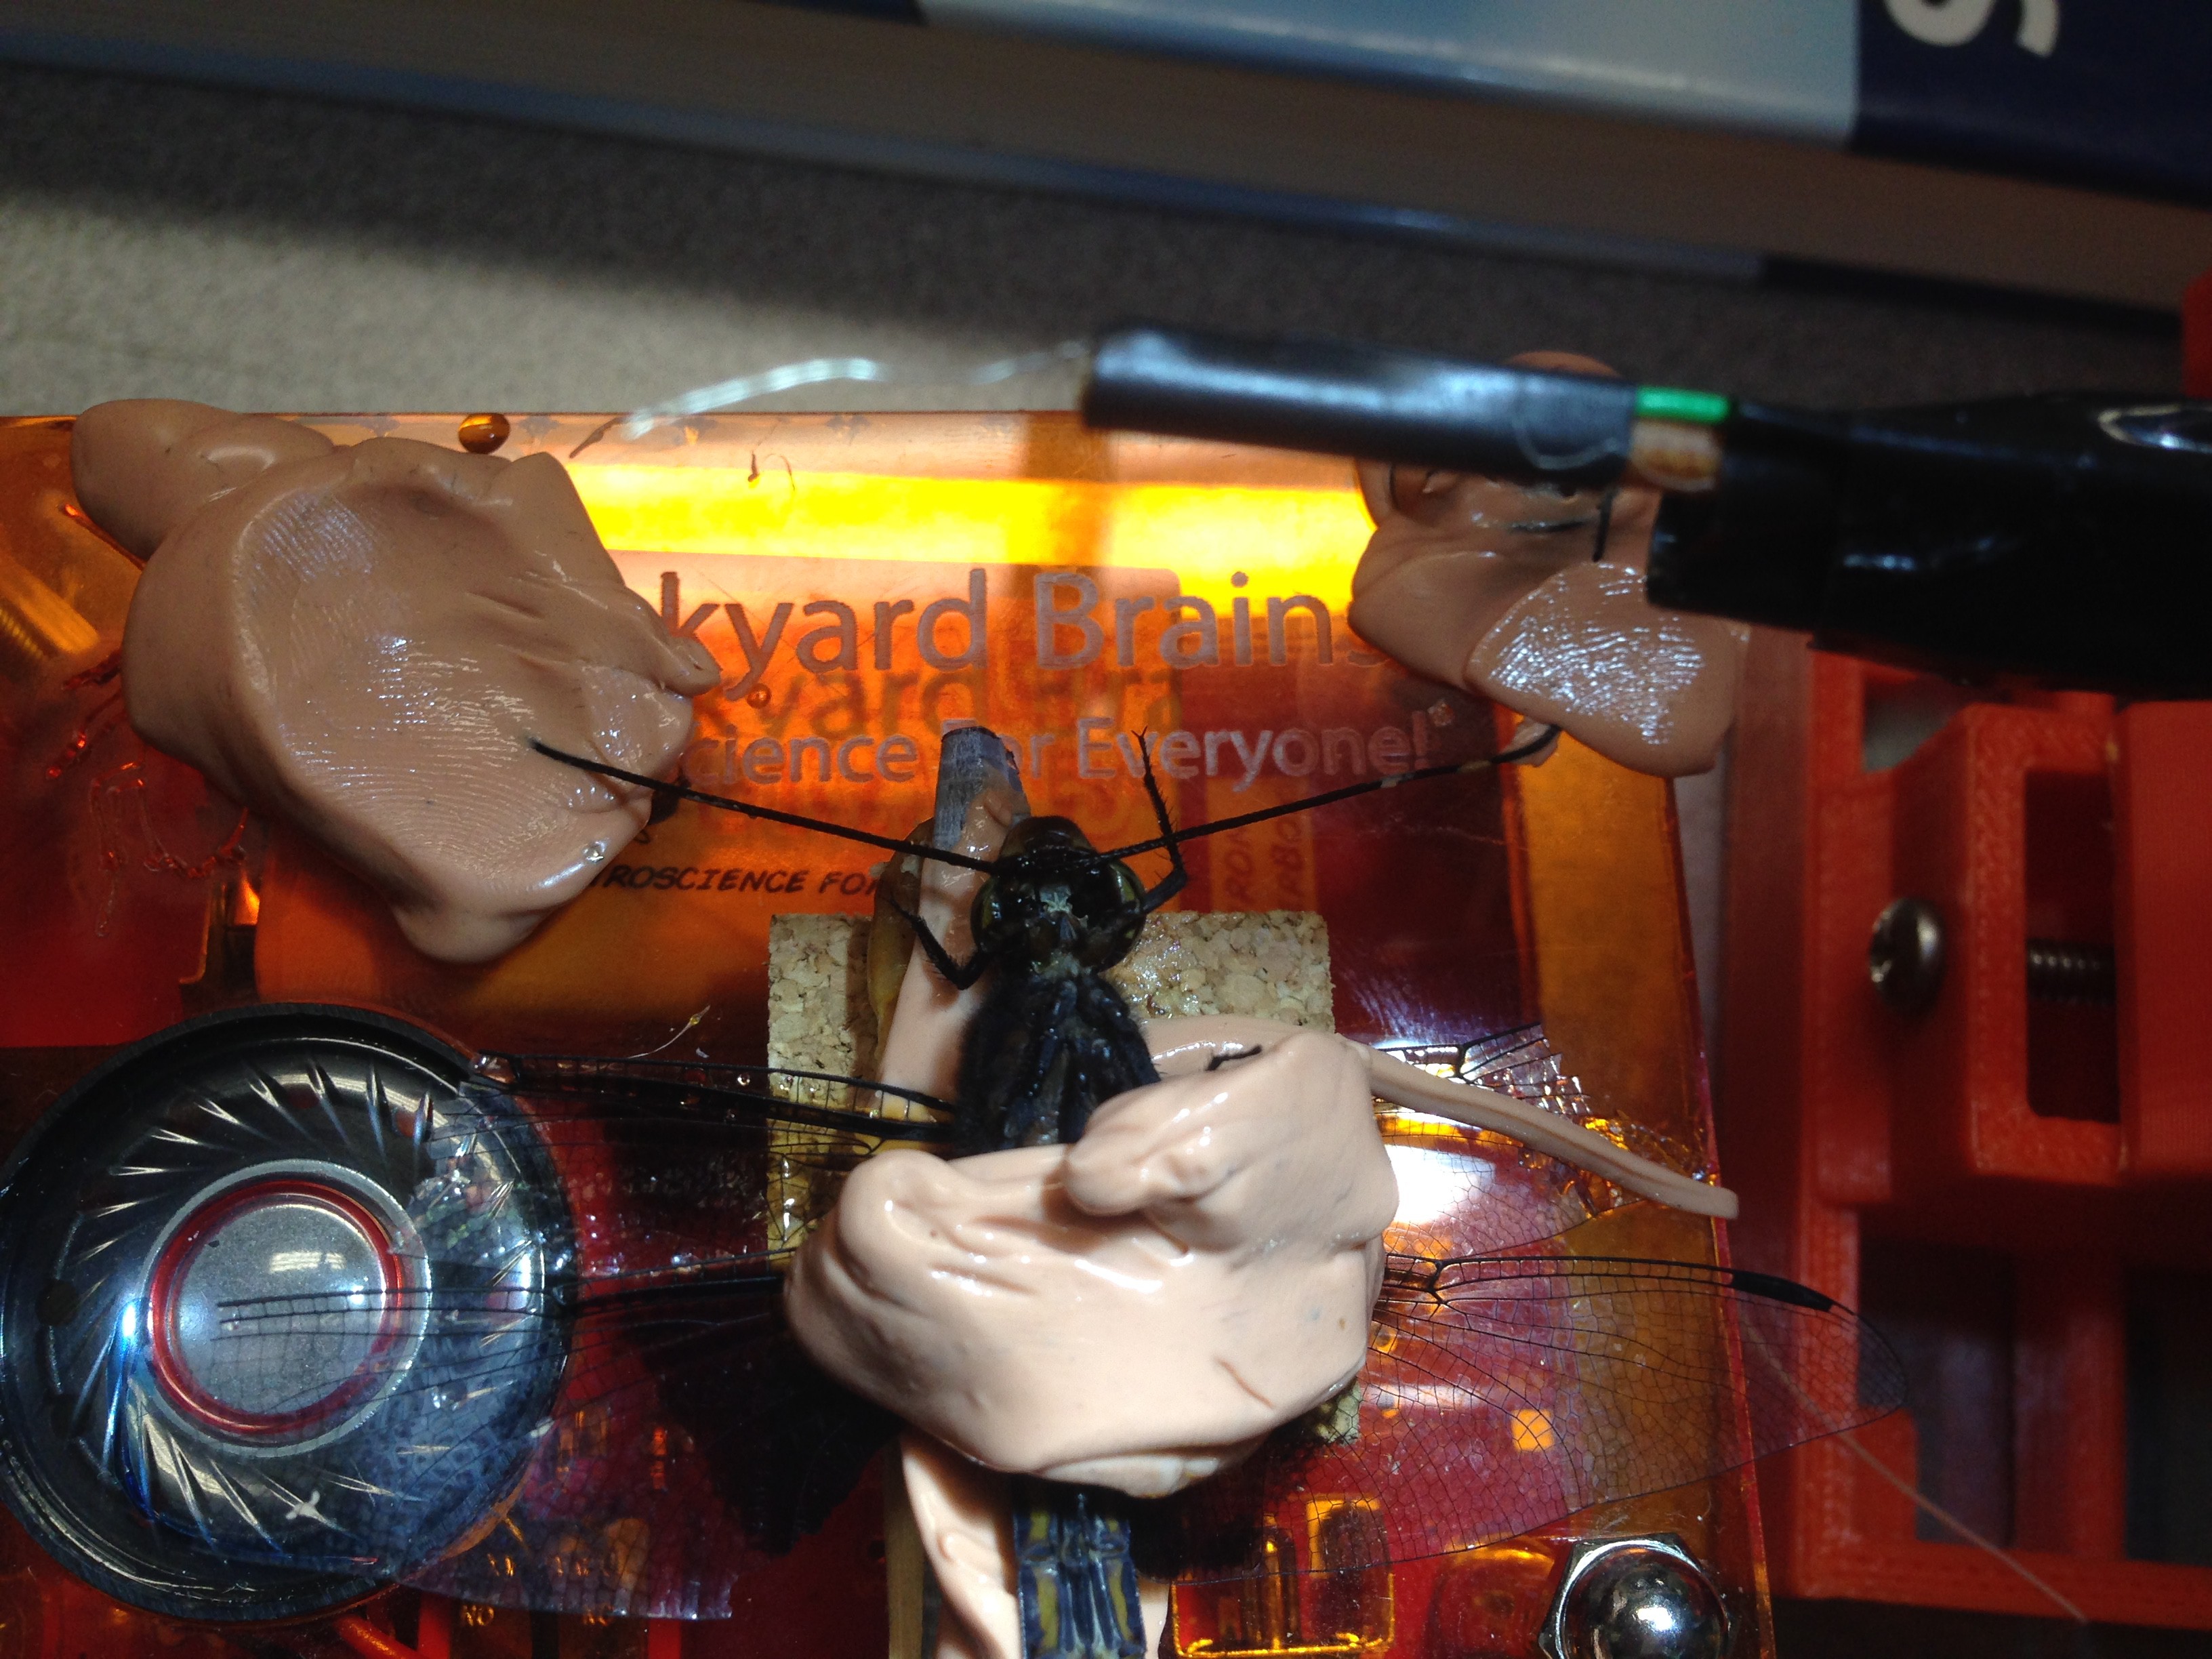
The finalized set up should look like this:
Make sure to set as much as you can up before you take the dragonfly out of the refrigerator, to make sure that the dragonfly does not wake up before you have the electrodes in. Once the dragonfly is anesthetized, secure the dragonfly ventral side up on a popsicle stick with insect wax and silly putty. Make sure not to touch the wings with either substance, the wings are extremely fragile! After securing the body, I used string to keep the neck exposed. While I was securing the dragonfly, it woke up so I put it in ice water (leaving the lower abdomen exposed to that it could breathe). After 15 minutes, I took it out.
After the dragonfly is secured onto the popsicle stick with his back waxed onto the stick with insect wax and his legs secured with silly putty, place the electrode in the right TSDN (as shown in above pictures) and place the ground electrode in the side of the lower abdomen. (This ground is cut off by the picture but I placed in the "tail" on the right side. I placed the electrode so that it was almost parallel to the dragonfly, not perpendicular, to cause as little damage as possible.
I placed the dragonfly on the Spikerbox (a device for measuring action potentials), and plugged in the speakers. I heard a rattling sound- the sound of action potentials firing. I waved a wooden stick around the front of the dragonfly and heard the action potentials greatly increase in frequency. The increase in frequency corresponded to the movement of the stick.
Alternatively, you can wave a piece of paper with a black dot on it. Actually, basically any movement (including laser beams) cause firing. I also placed a paper towel 'screen' around the set up to shine the laser beam (as seen in the project pictures).
-
Catching Dragonflies
06/22/2016 at 15:35 • 0 commentsCatching the dragonflies:
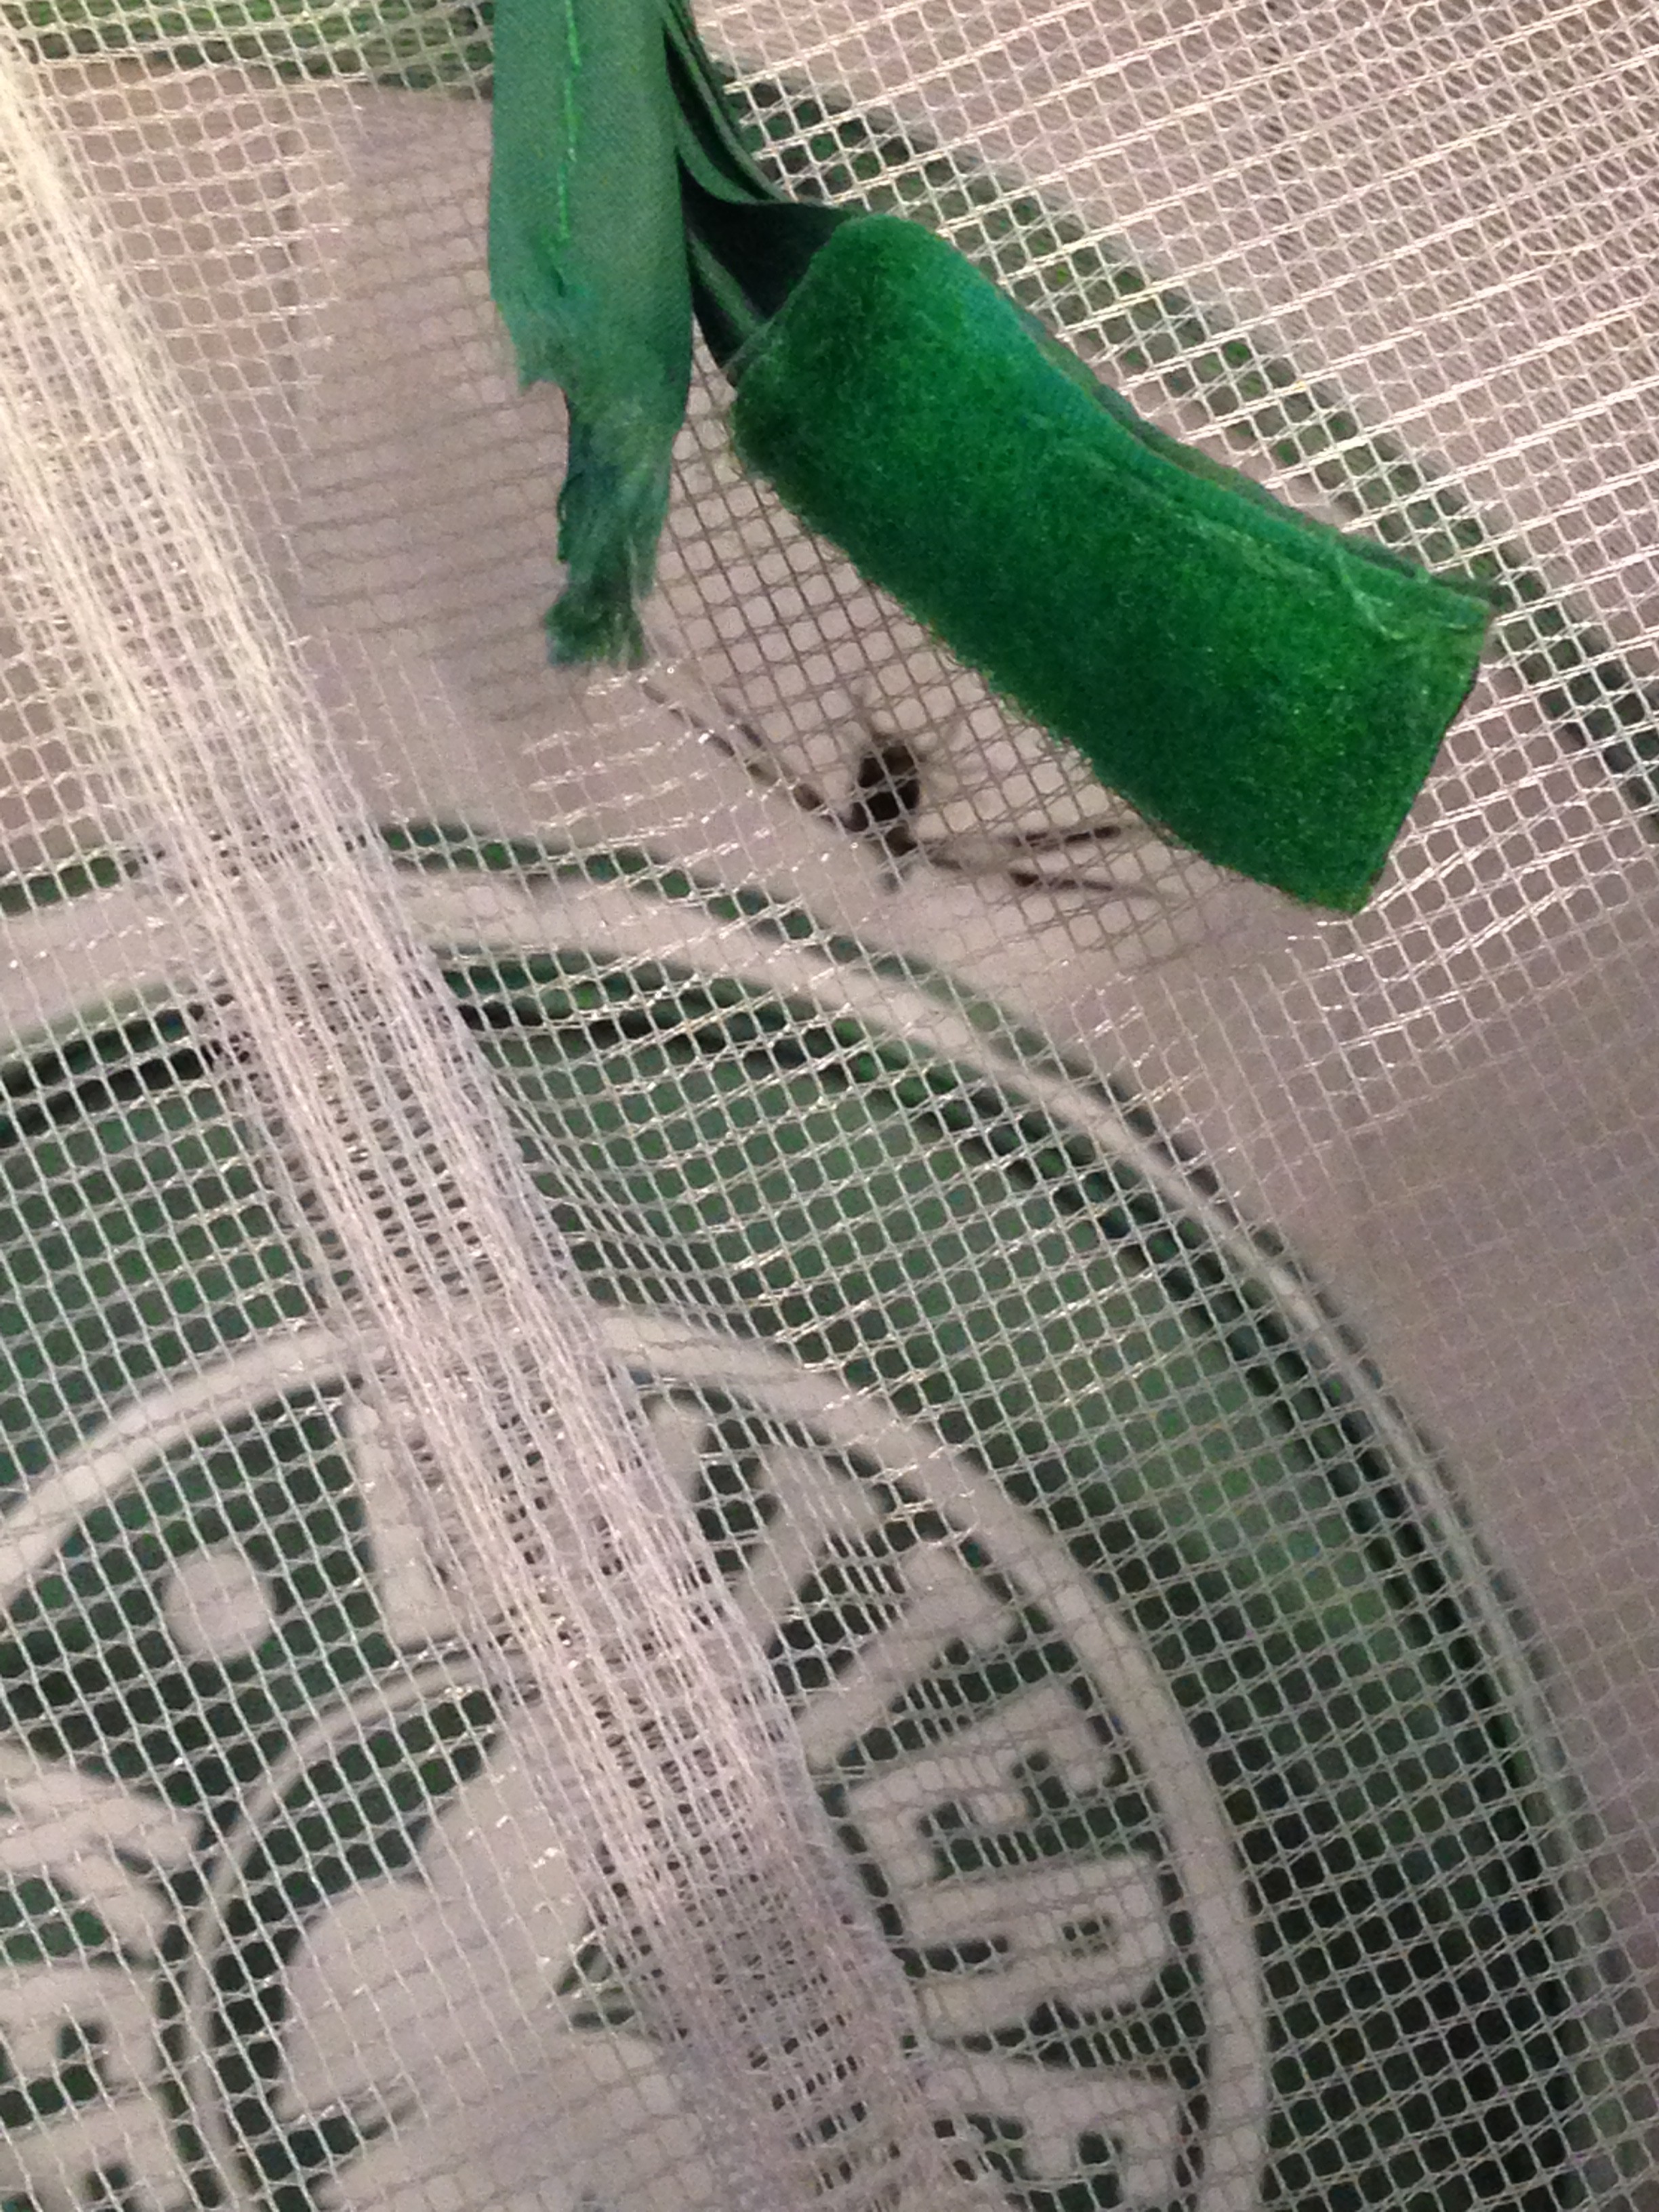
The first step of my project is to collect the dragonflies. Dragonflies love vegetation near waterways (rivers, streams, ponds, lakes etc.) All you need to catch them is a butterfly net and a mesh cage. Once I caught enough, I put the dragonflies in individual cups and place them in the refrigerator (this will anesthetize them).
Above is a dragonfly perched in my mesh cage
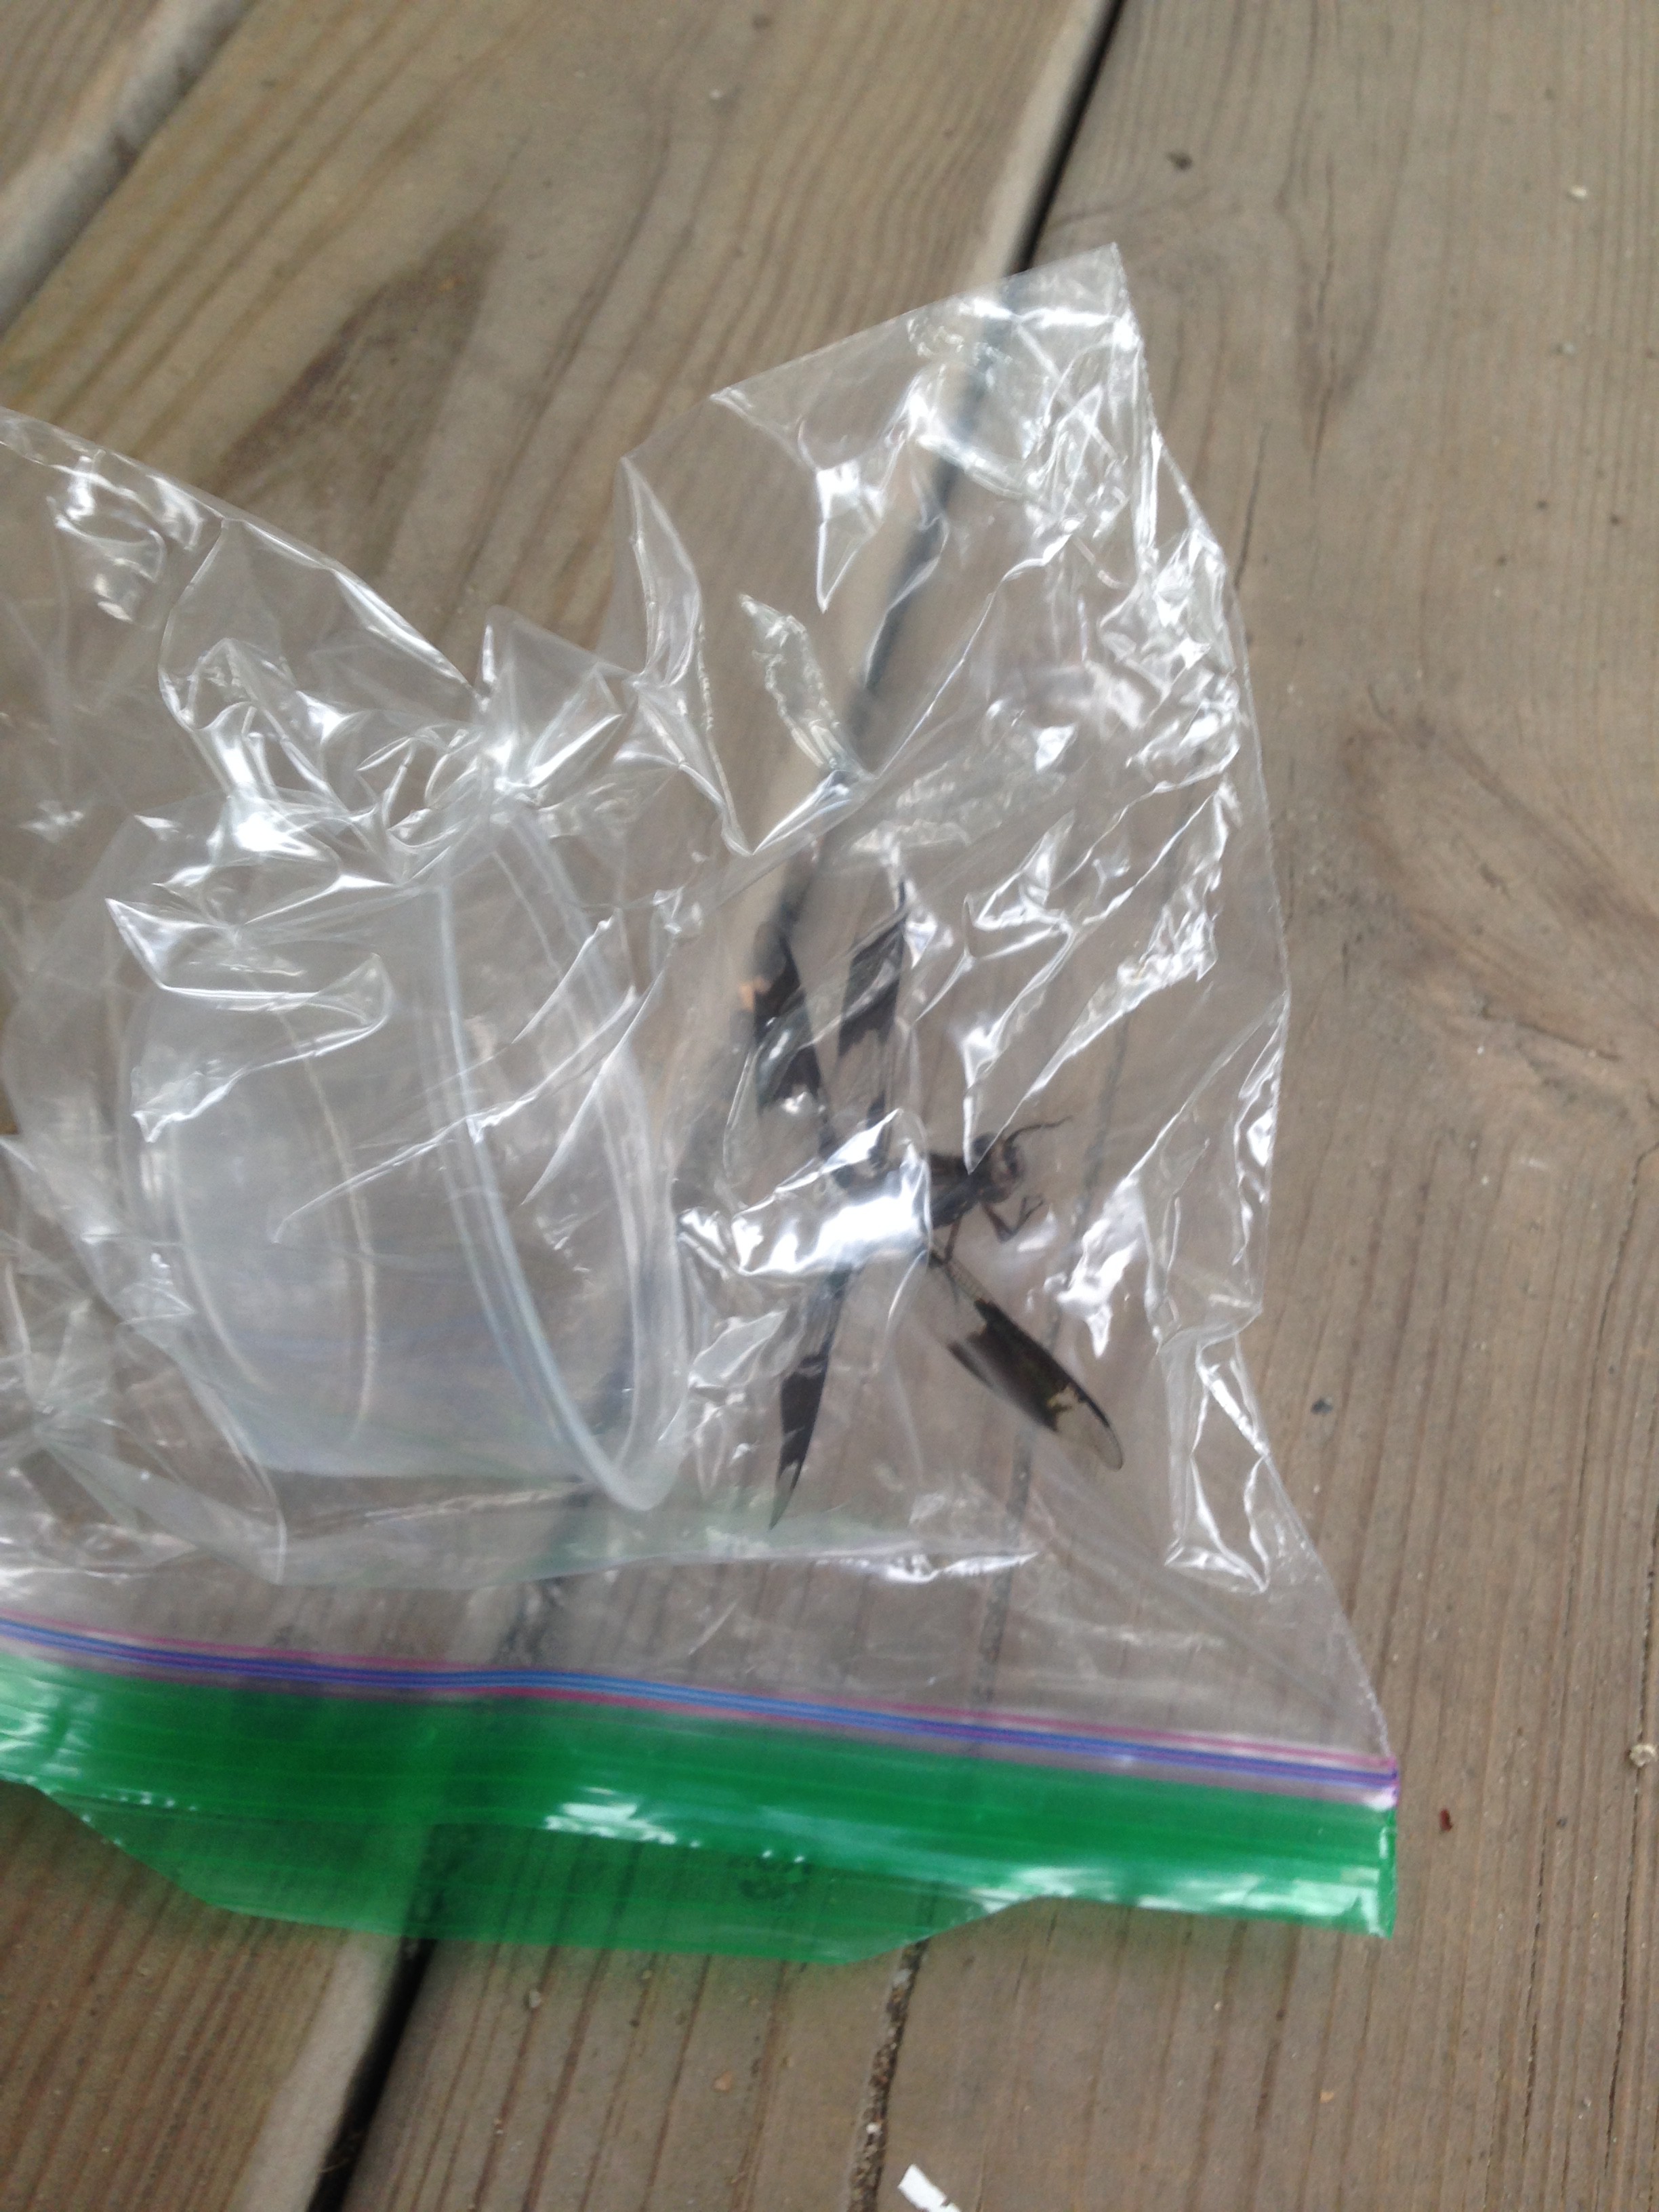
Note: It is important not to catch a damselfly! They look a lot like dragonflies but they are thinner, and when they perch their wings touch (as opposed to dragonflies, whose wings remain spread).
Above is a dragonfly in a bag (not closed to let in air) ready to go in the refrigerator.
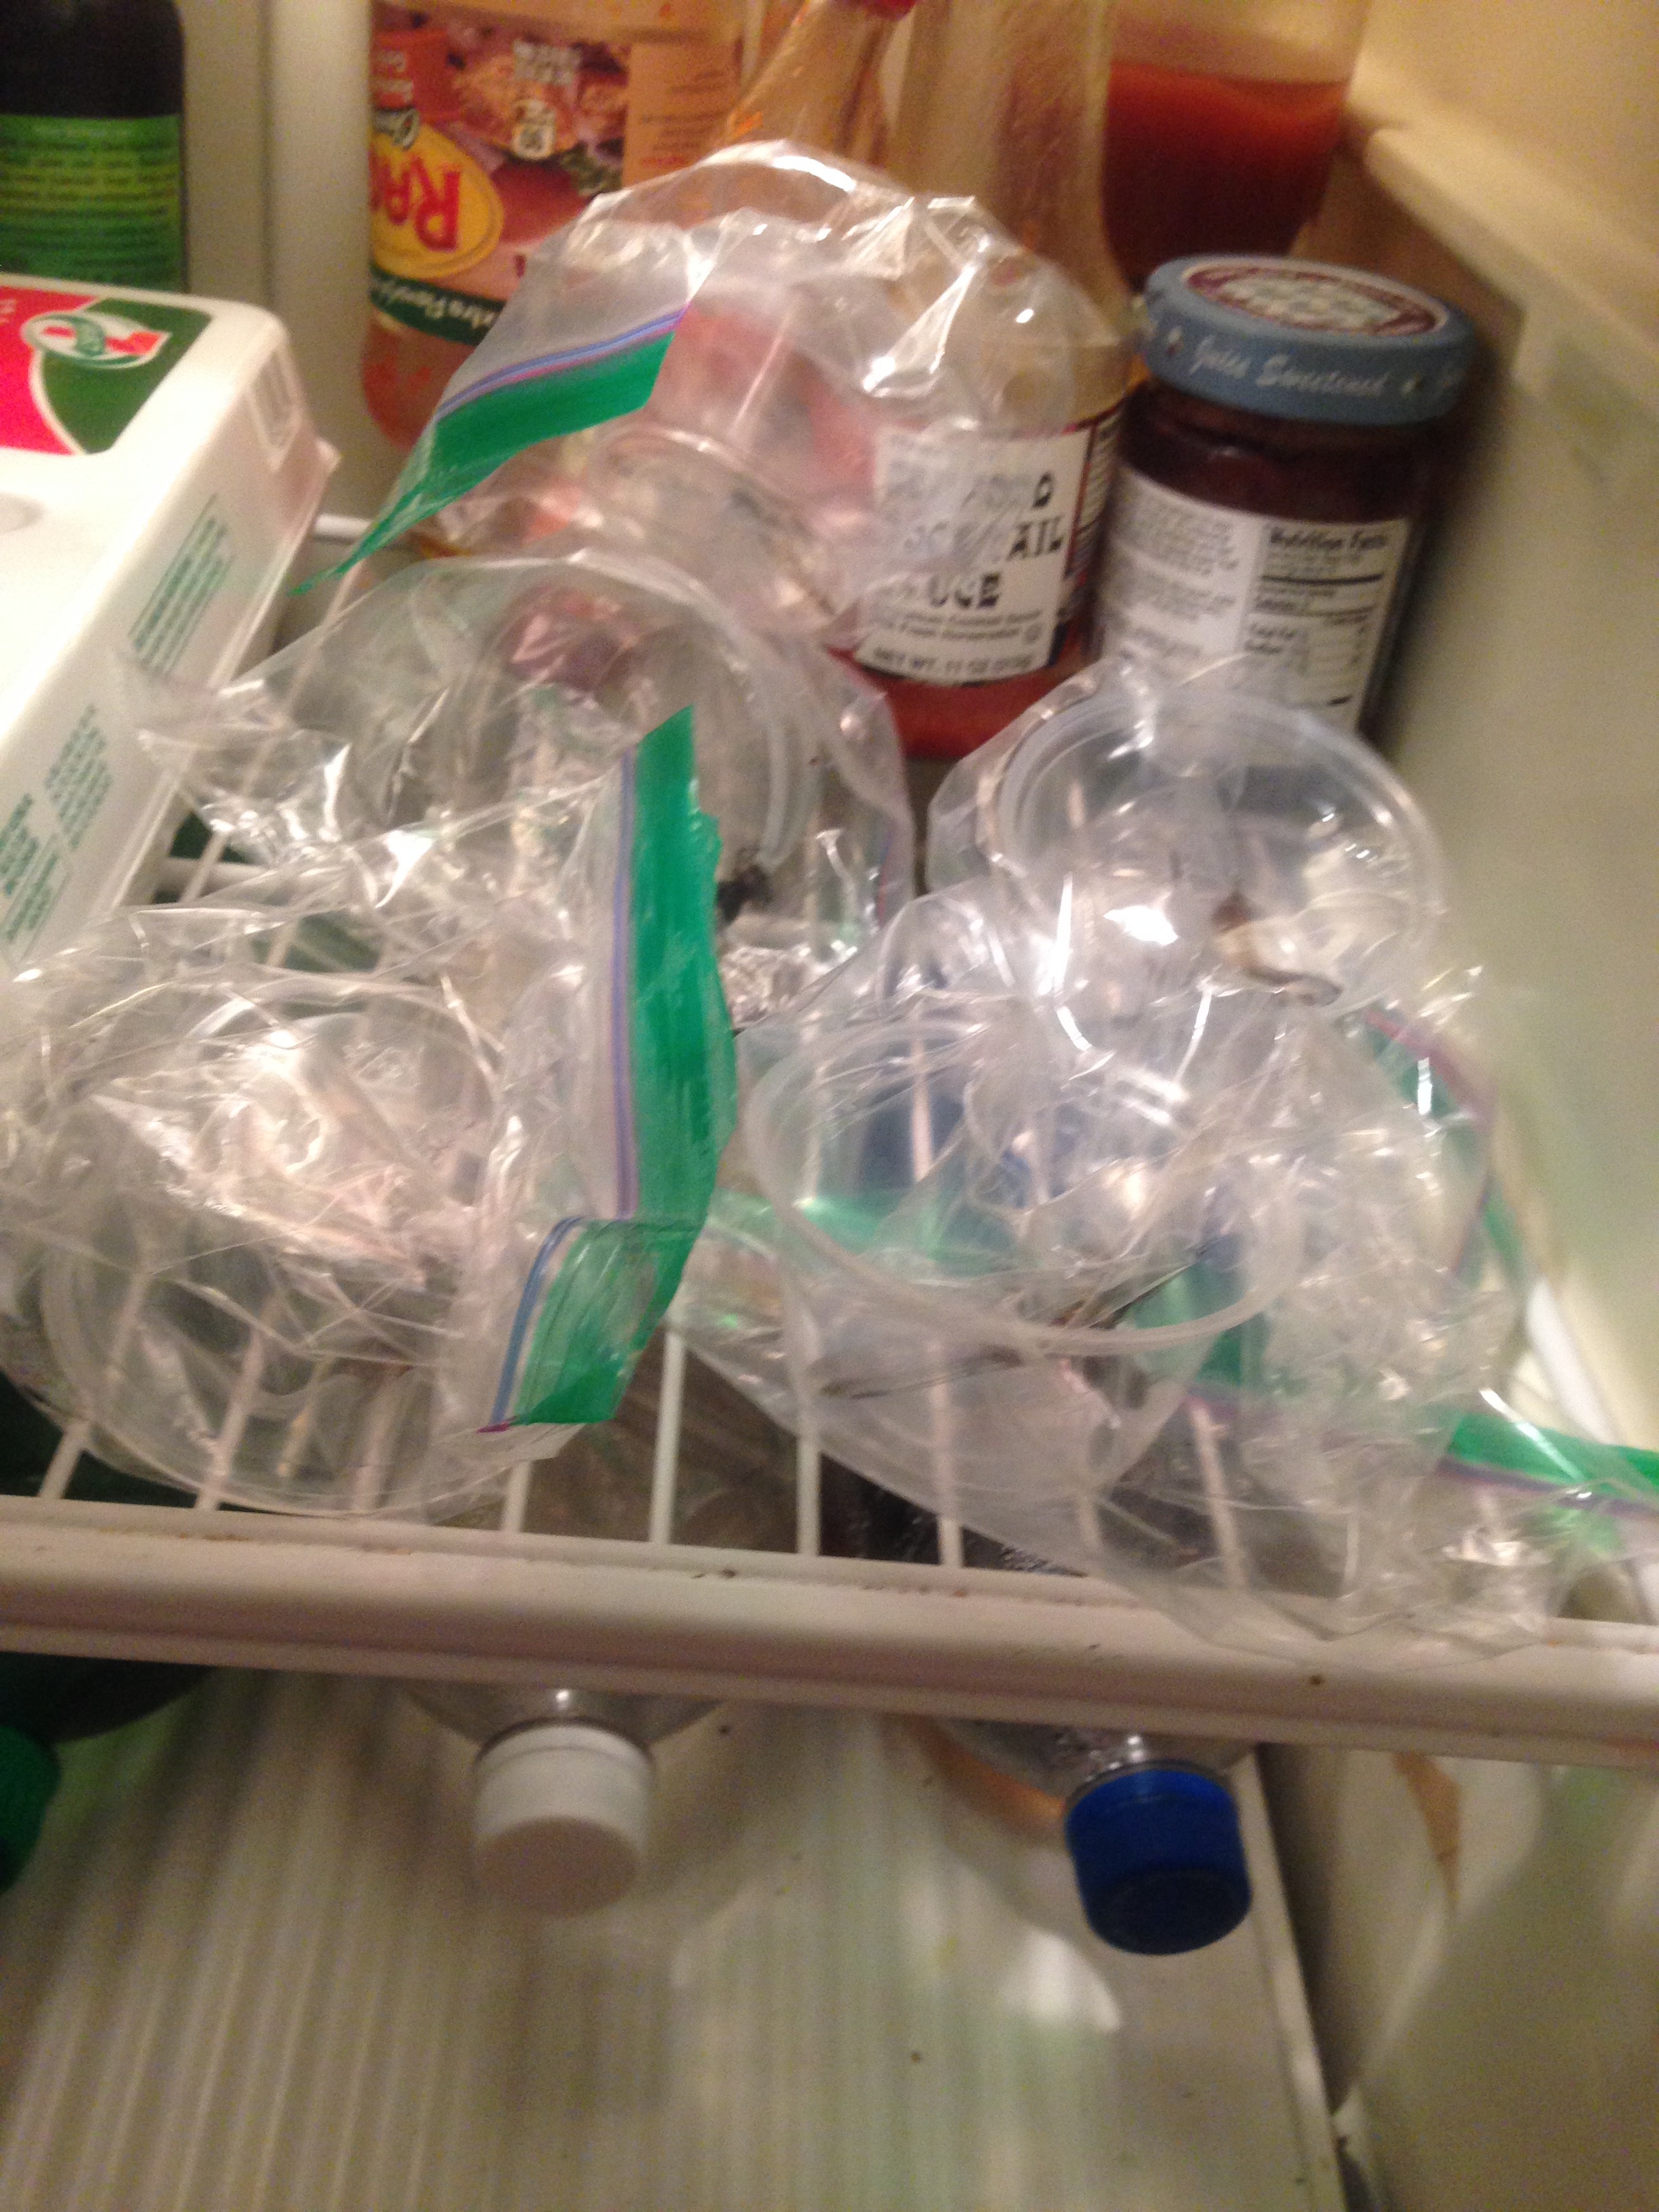
Dragonflies in the refrigerator (5 dragonflies). The dragonflies are in the petri dishes and the plastic bags are lightly placed on top to ensure that the dragonflies do not get out. The bag is open enough to let in plenty of air and big enough not to squish the dragonfly.
The Dragonfly: Nature's Guided Missile
Examining the neural activity of dragonfly predatory behavior to discover the mechanics of its highly accurate prey capture
 Patricia Aguiar