-
Measurement Preamplifier
10/10/2016 at 10:35 • 0 commentsThe noise floor on my Quant Asylum QA400 audio analyzer is too high to measure the Muffsy MC Head Amp. Fortunately, Quant Asylum themselves have the solution, use a high quality preamp to lower the noise floor: http://www.quantasylum.com/content/Home/tabid/40/Post/205/Extending-the-QA400-Noise-Floor-with-a-Pre-amp
So... Looking at the Muffsy MC Head Amp, I realized that I do indeed have a high quality preamp sitting right in front of me. :)
![]()
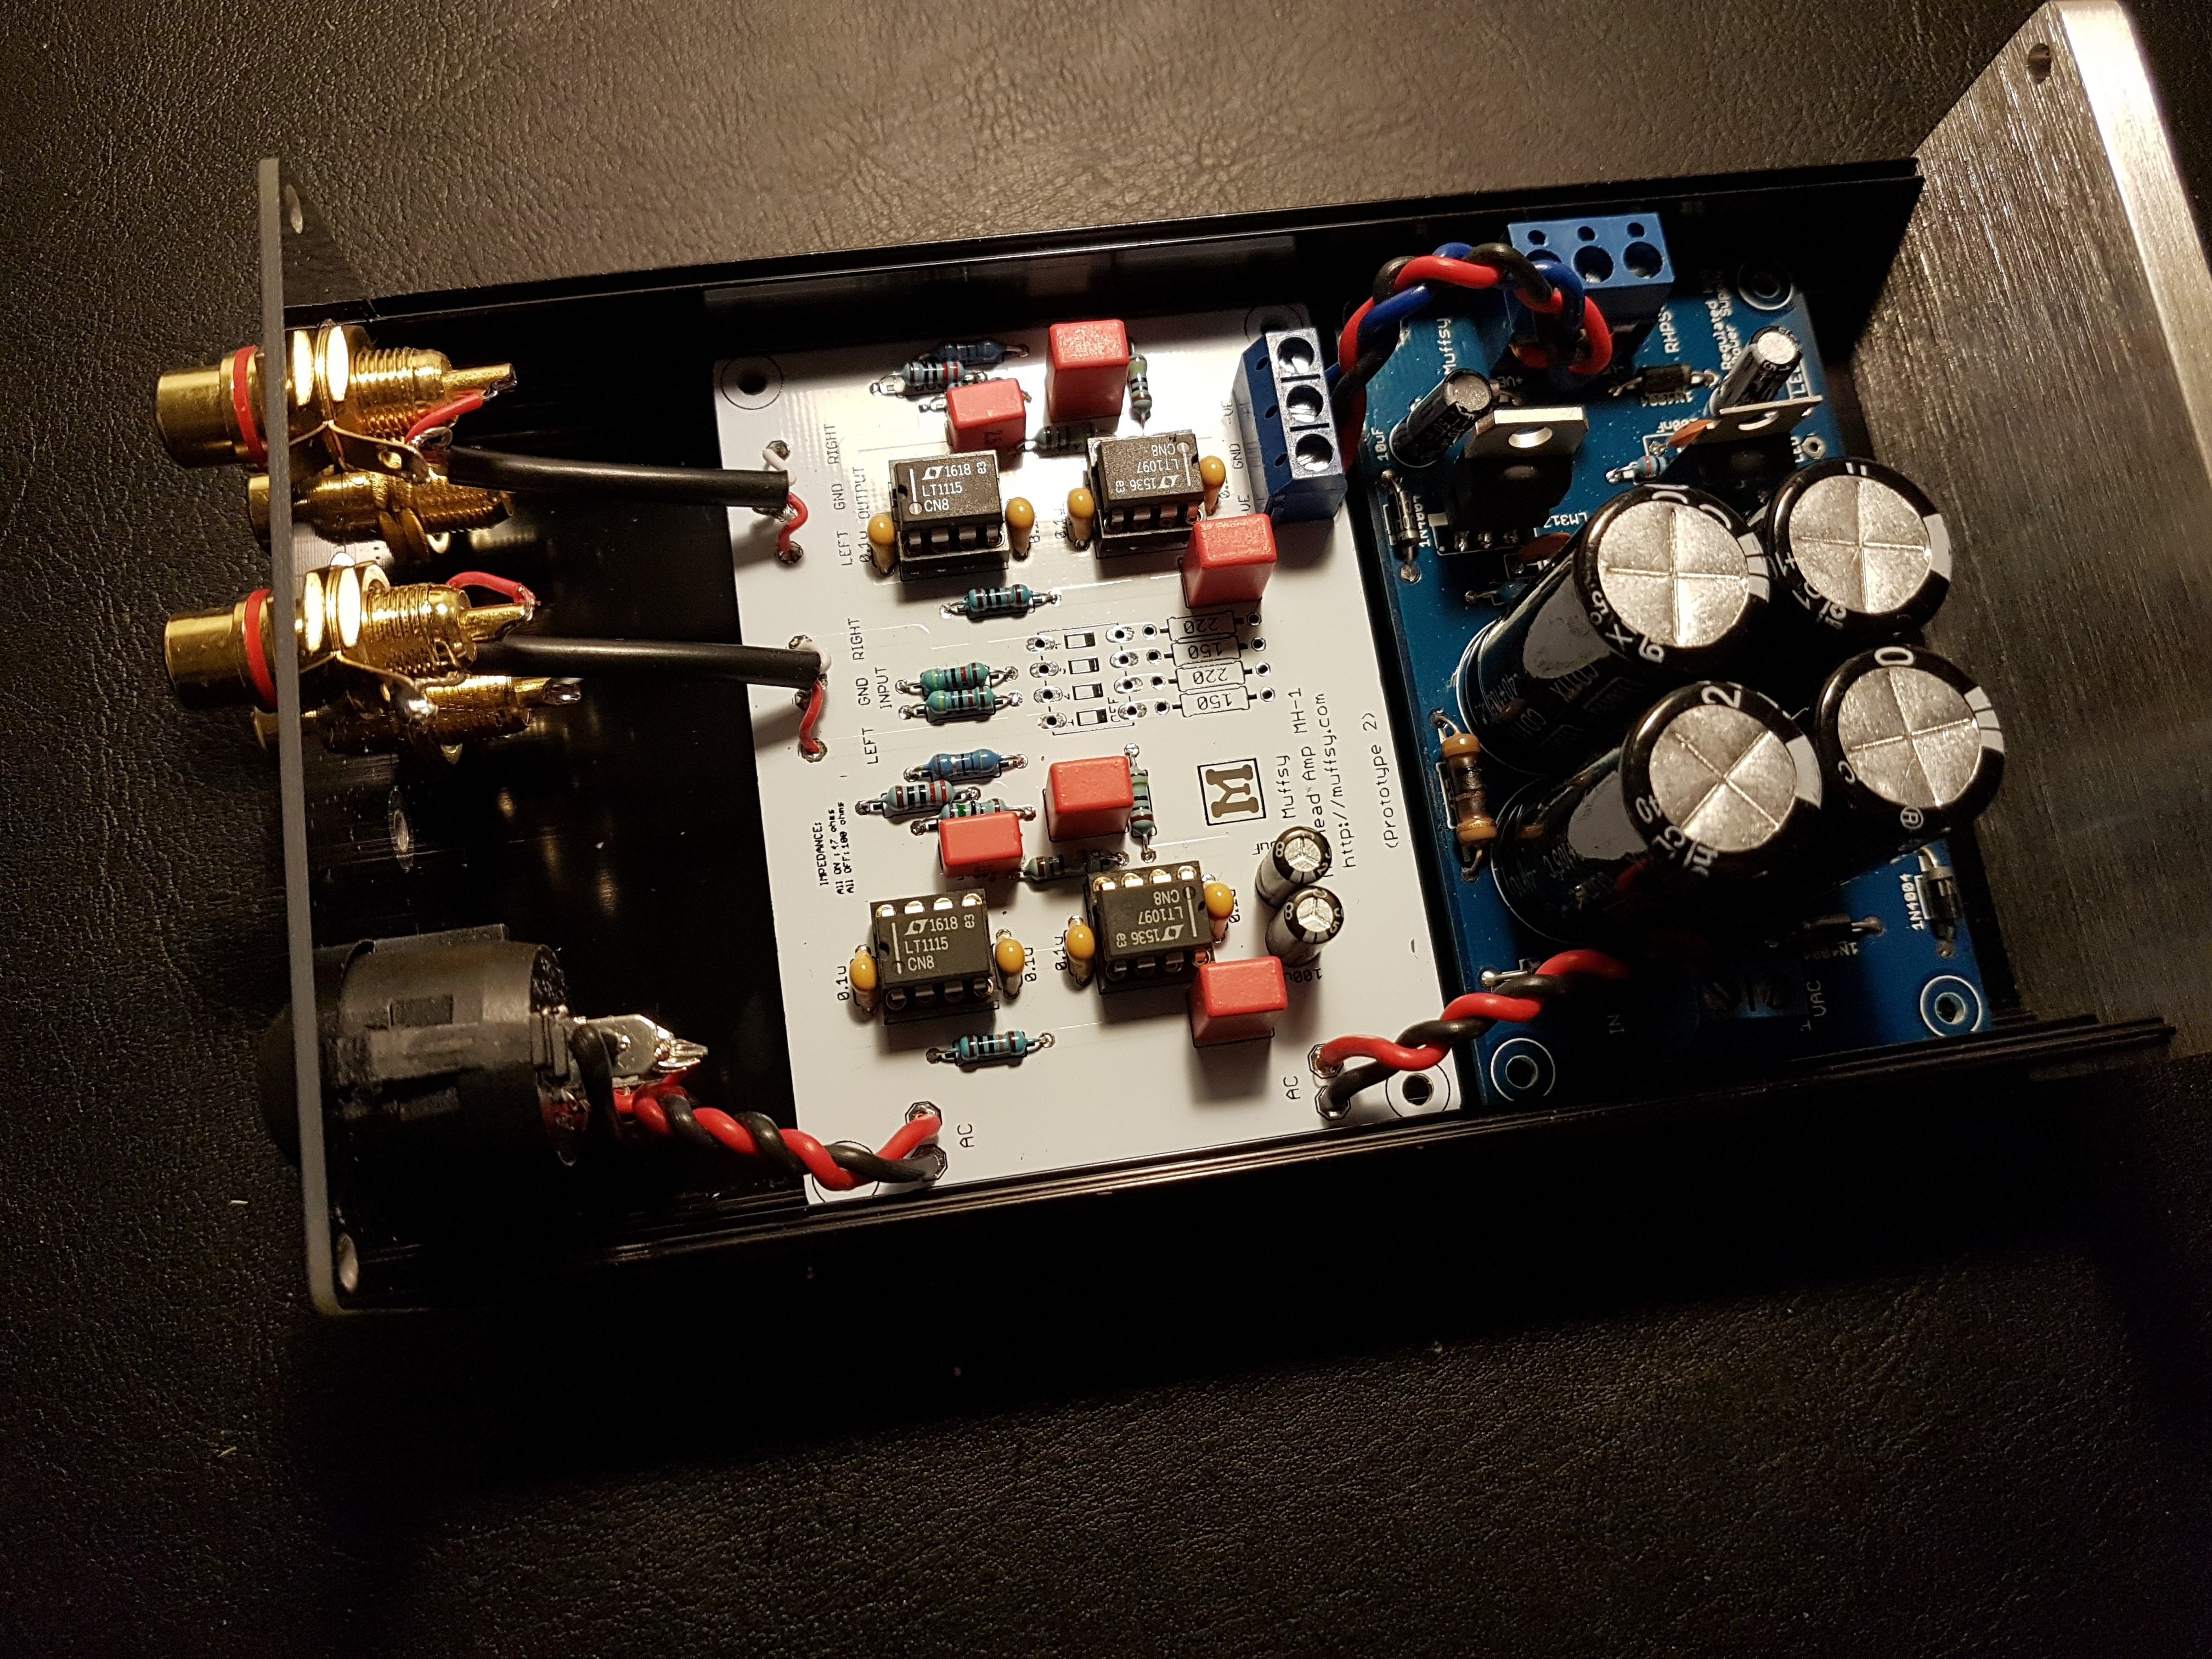
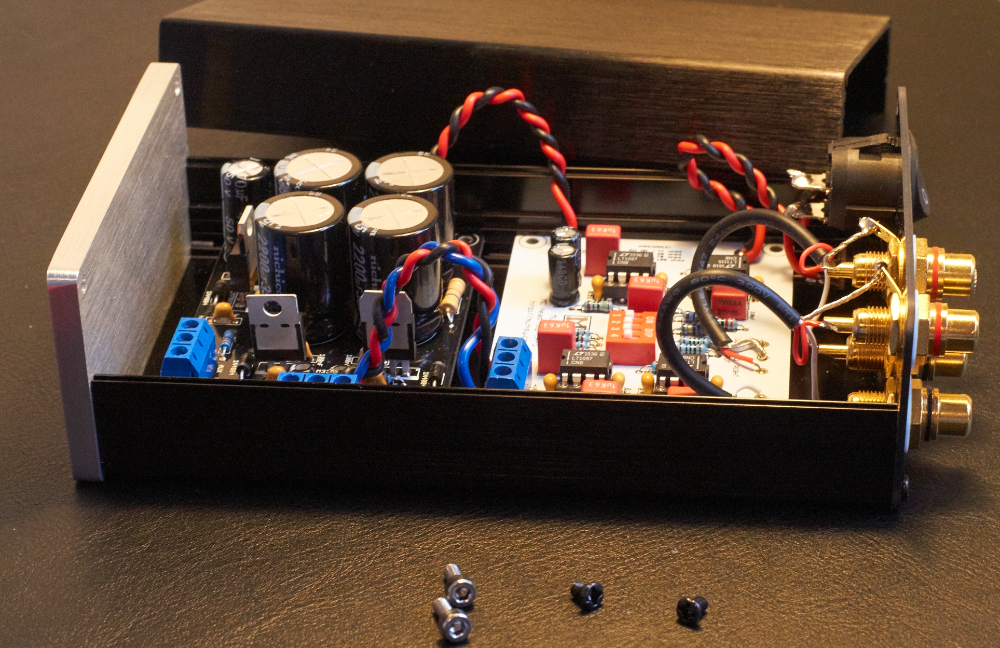
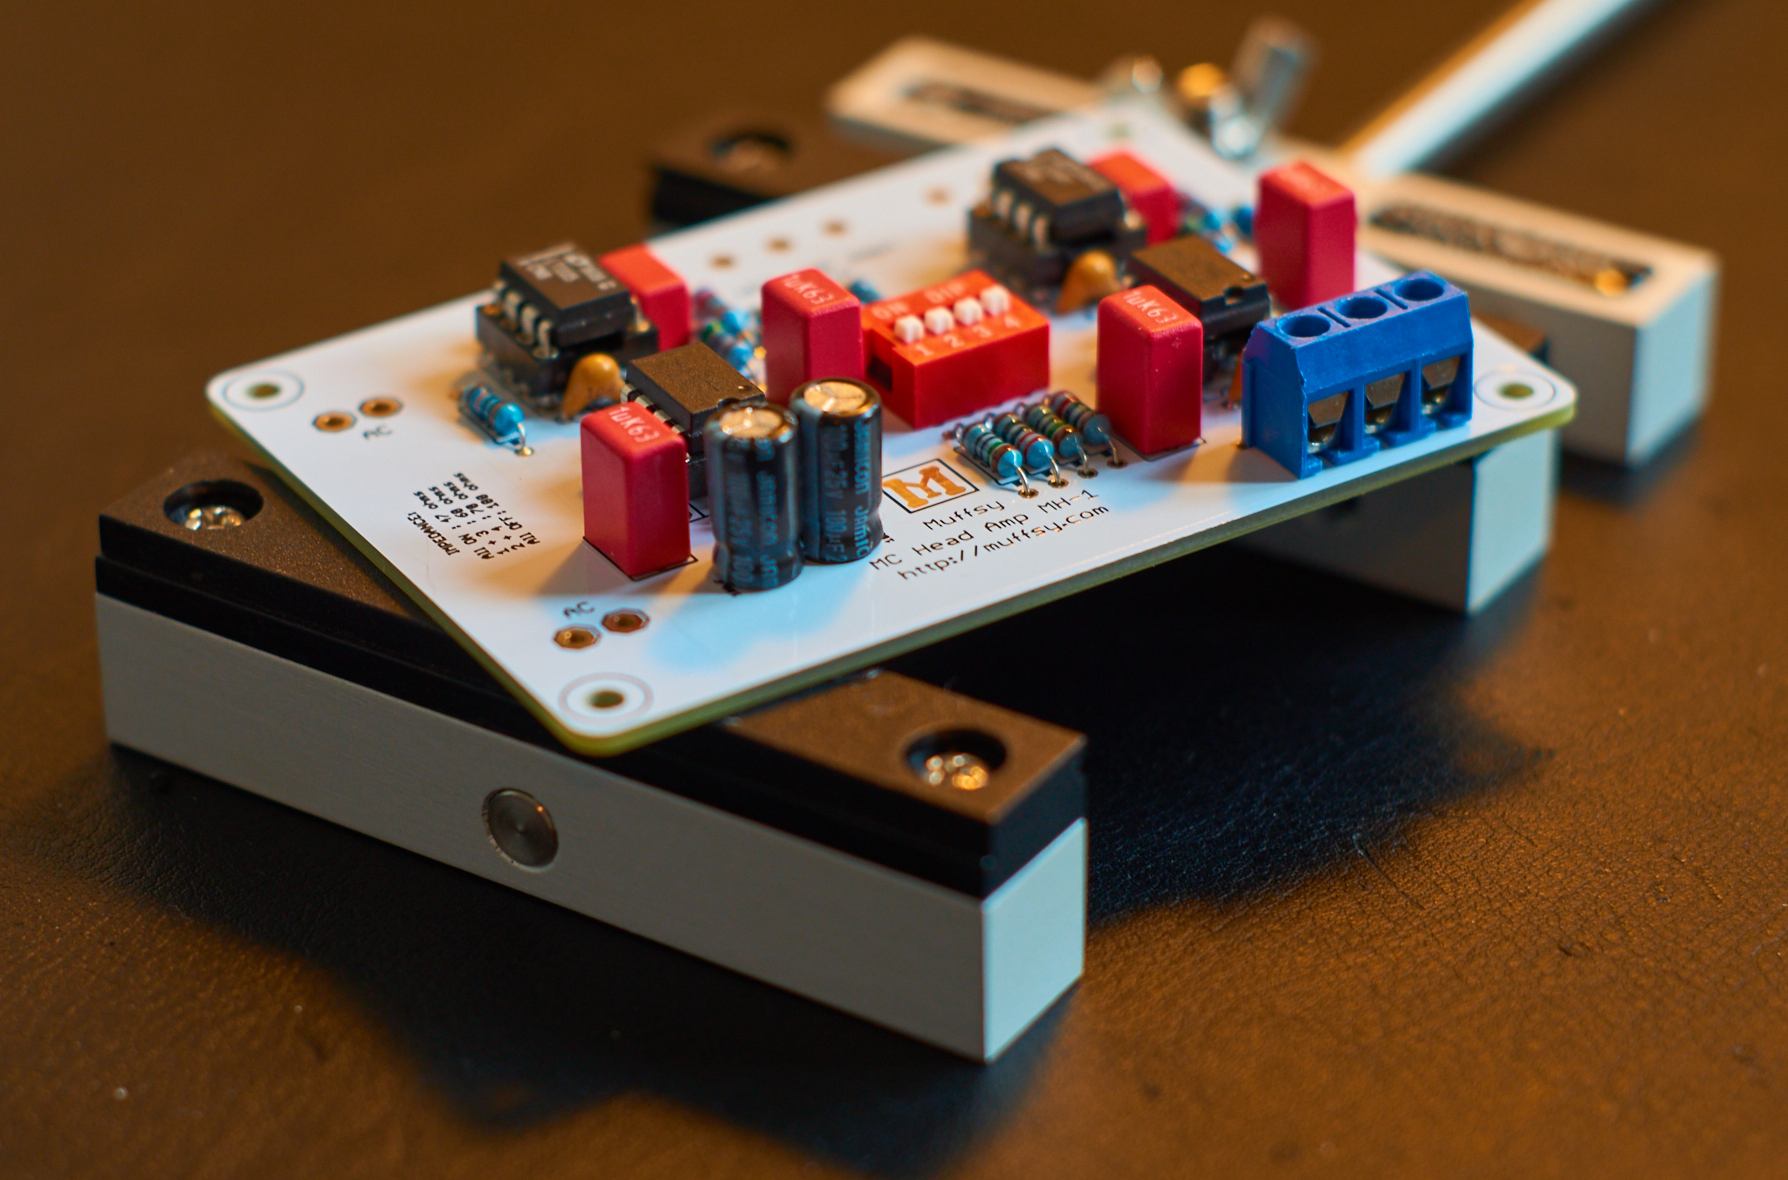
I grabbed one of the prototype boards, one of my old PSUs, a back panel and an enclosure and started soldering, and there's the measurement preamplifier. It will be modified by using multiturn trimpots for variable gain, but there it is. I am now able to use the Muffsy MC Head Amp to measure the Muffsy MC Head Amp!
-
MC Head Amp - What, Why and How
09/29/2016 at 12:53 • 0 commentsWhat is an MC Head Amp?
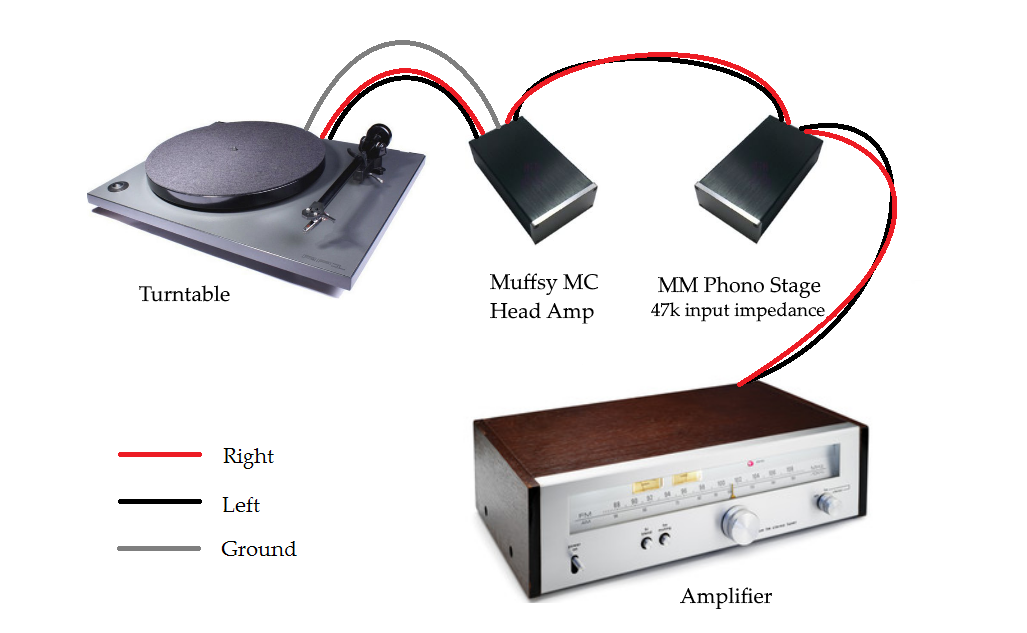
Why would you want one, and how do you connect it to your stereo?This blog post describes it all: http://www.muffsy.com/blogs/post/Why-Would-You-Want-an-MC-Head-Amp/
![]()
-
Modify the Input Impedances
09/19/2016 at 13:27 • 0 commentsUPDATE:
Since only one extra resistor value is needed to get the higher impedances, it's been added to the kit. Now you can choose between the two.The input impedances on the Muffsy MC Head Amp can be changed to your liking. To help you find the right values, here's a nifty input impedance calculator.
![]()
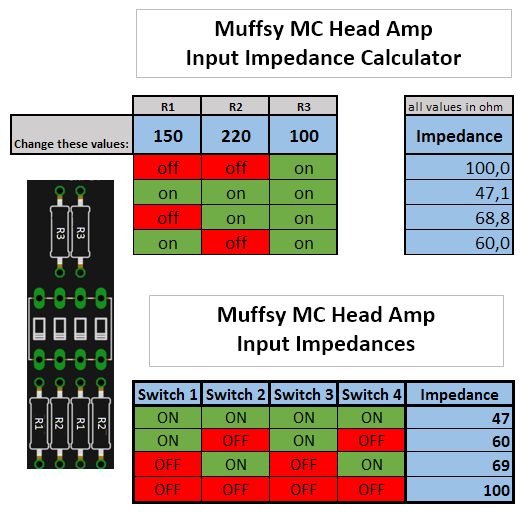
You can play around with the values for R1, R2 and R3, and the calculator will show you what the input impedance choices will be. With all the switches set to OFF, the input impedance will be equal to R3.
The picture shows the values that are included in the kit.
PLEASE NOTE:
The resistors R3 MUST be installed, or you risk that the Muffsy MC Head Amp won't function.
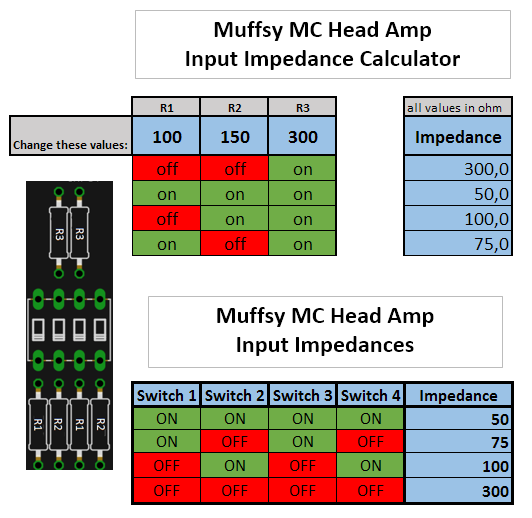
Here's a suggestion for other component values, if you need a bit higher impedance:
![]()
If you decide to use the alternative input impedance scheme, the required components are included in the kit. It also includes a sticker that you can apply to the PCB with the new values.
![]()
-
The Final Version of the MC Head Amp Sings :)
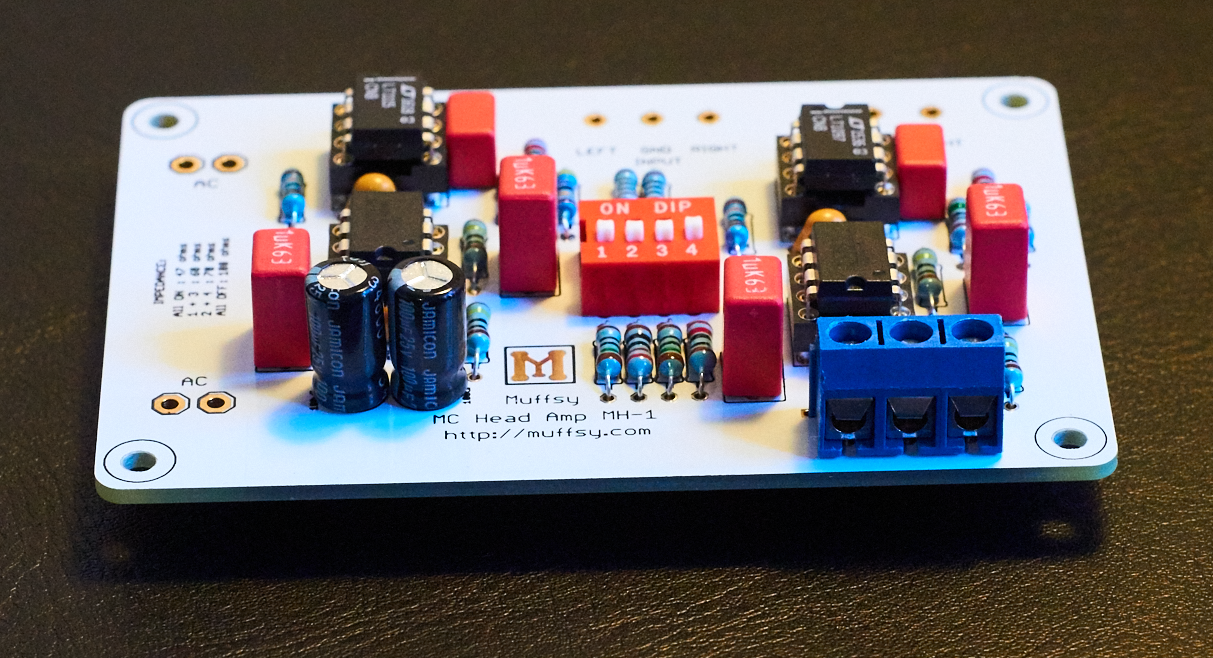
09/18/2016 at 20:42 • 0 commentsIt's done, it's built, it's the first of its kind, it's plugged in, it sings!
UPDATE: The kit is here and available on Tindie.
![]()
No hiccups, no artifacts, it just works playing the 40th anniversary "Crime of the Century" by Supertramp.
Sweet :)
This does mean that, with some effort, the kit will be ready in about two weeks.
Also, the build instructions are very close to finished, I'm still writing the part about testing to make sure your head amp works before plugging it in.
http://www.muffsy.com/build-the-muffsy-mc-head-amp-mh-1.html
-
I Made it to the Hackaday Front Page!
09/18/2016 at 11:13 • 0 commentsThe Muffsy MC Head Amp made it to the Hackaday front page, that's really cool!
http://hackaday.com/2016/09/16/hackaday-prize-entry-high-end-preamps/
There's been a bit of a mix-up between this project and the Muffsy Phono Preamp though, so I wrote about it on the Muffsy Blog to clear up some of the misunderstandings:![]()
http://www.muffsy.com/blogs/post/The-Muffsy-MC-Head-Amp-on-HACKADAY/
-
Assembling the Muffsy MC Head Amp Kit
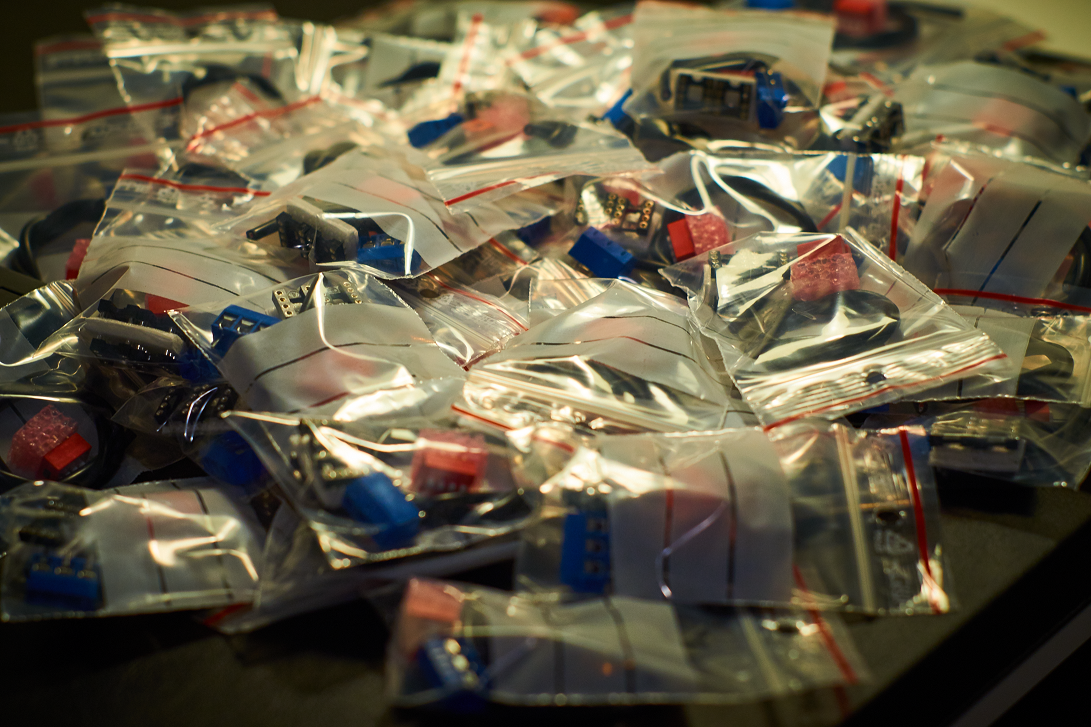
09/13/2016 at 21:30 • 0 commentsThe assembly of the kit has started, first out are the cables, connectors, sockets and switches:
![]()
-
Muffsy MC Head Amp - Build Instructions
09/11/2016 at 20:26 • 0 commentsThe build instructions for the Muffsy MC Head Amp is now available on the Muffsy home page, still hidden from the site's menus as it's not yet available.
The instructions can be found here:
http://www.muffsy.com/build-the-muffsy-mc-head-amp-mh-1.html
![]()
![]()
-
The Final Version of Muffsy MC Head Amp Soldered
09/11/2016 at 16:02 • 0 commentsHere it is. There are still a lot of components coming in, documentation and packaging needs to be completed as well.
![]()
![]()
-
Back Panel for the Muffsy MC Head Amp
09/06/2016 at 14:33 • 0 commentsFor those of you familiar with the Muffsy Phono Preamp, the connectors on the back panel have to be grounded (using cables) like so:
![]()
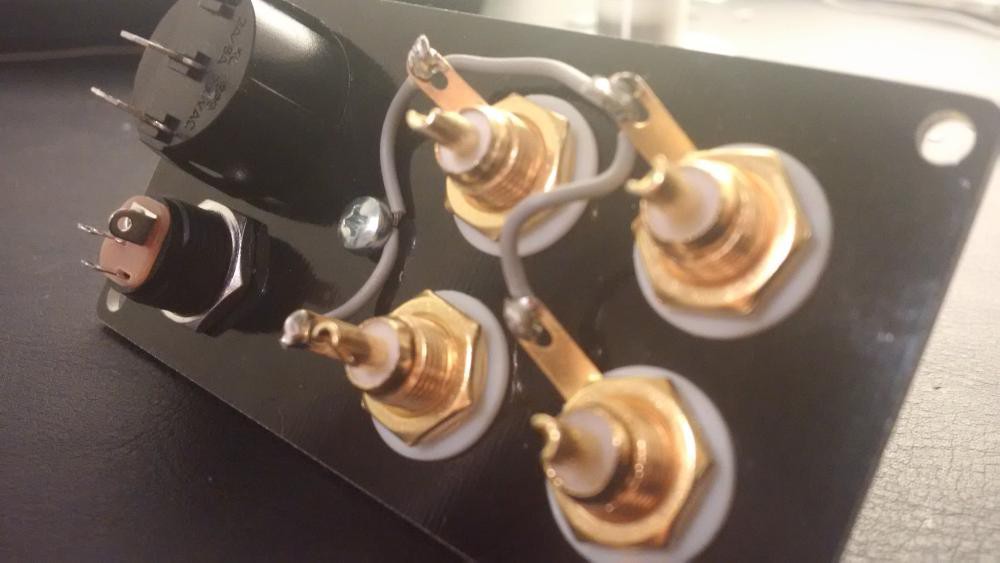
This is perfectly fine for the high output that an MM cartridge delivers, but it can be a source of noise for the lower MC signals. Here's a solution to that problem:
![]()
The RCA connectors and the ground screw will have direct contact with the copper rings around the mounting holes. These copper rings are connected with copper traces beneath the black coating, eliminating the need for separate ground cables.
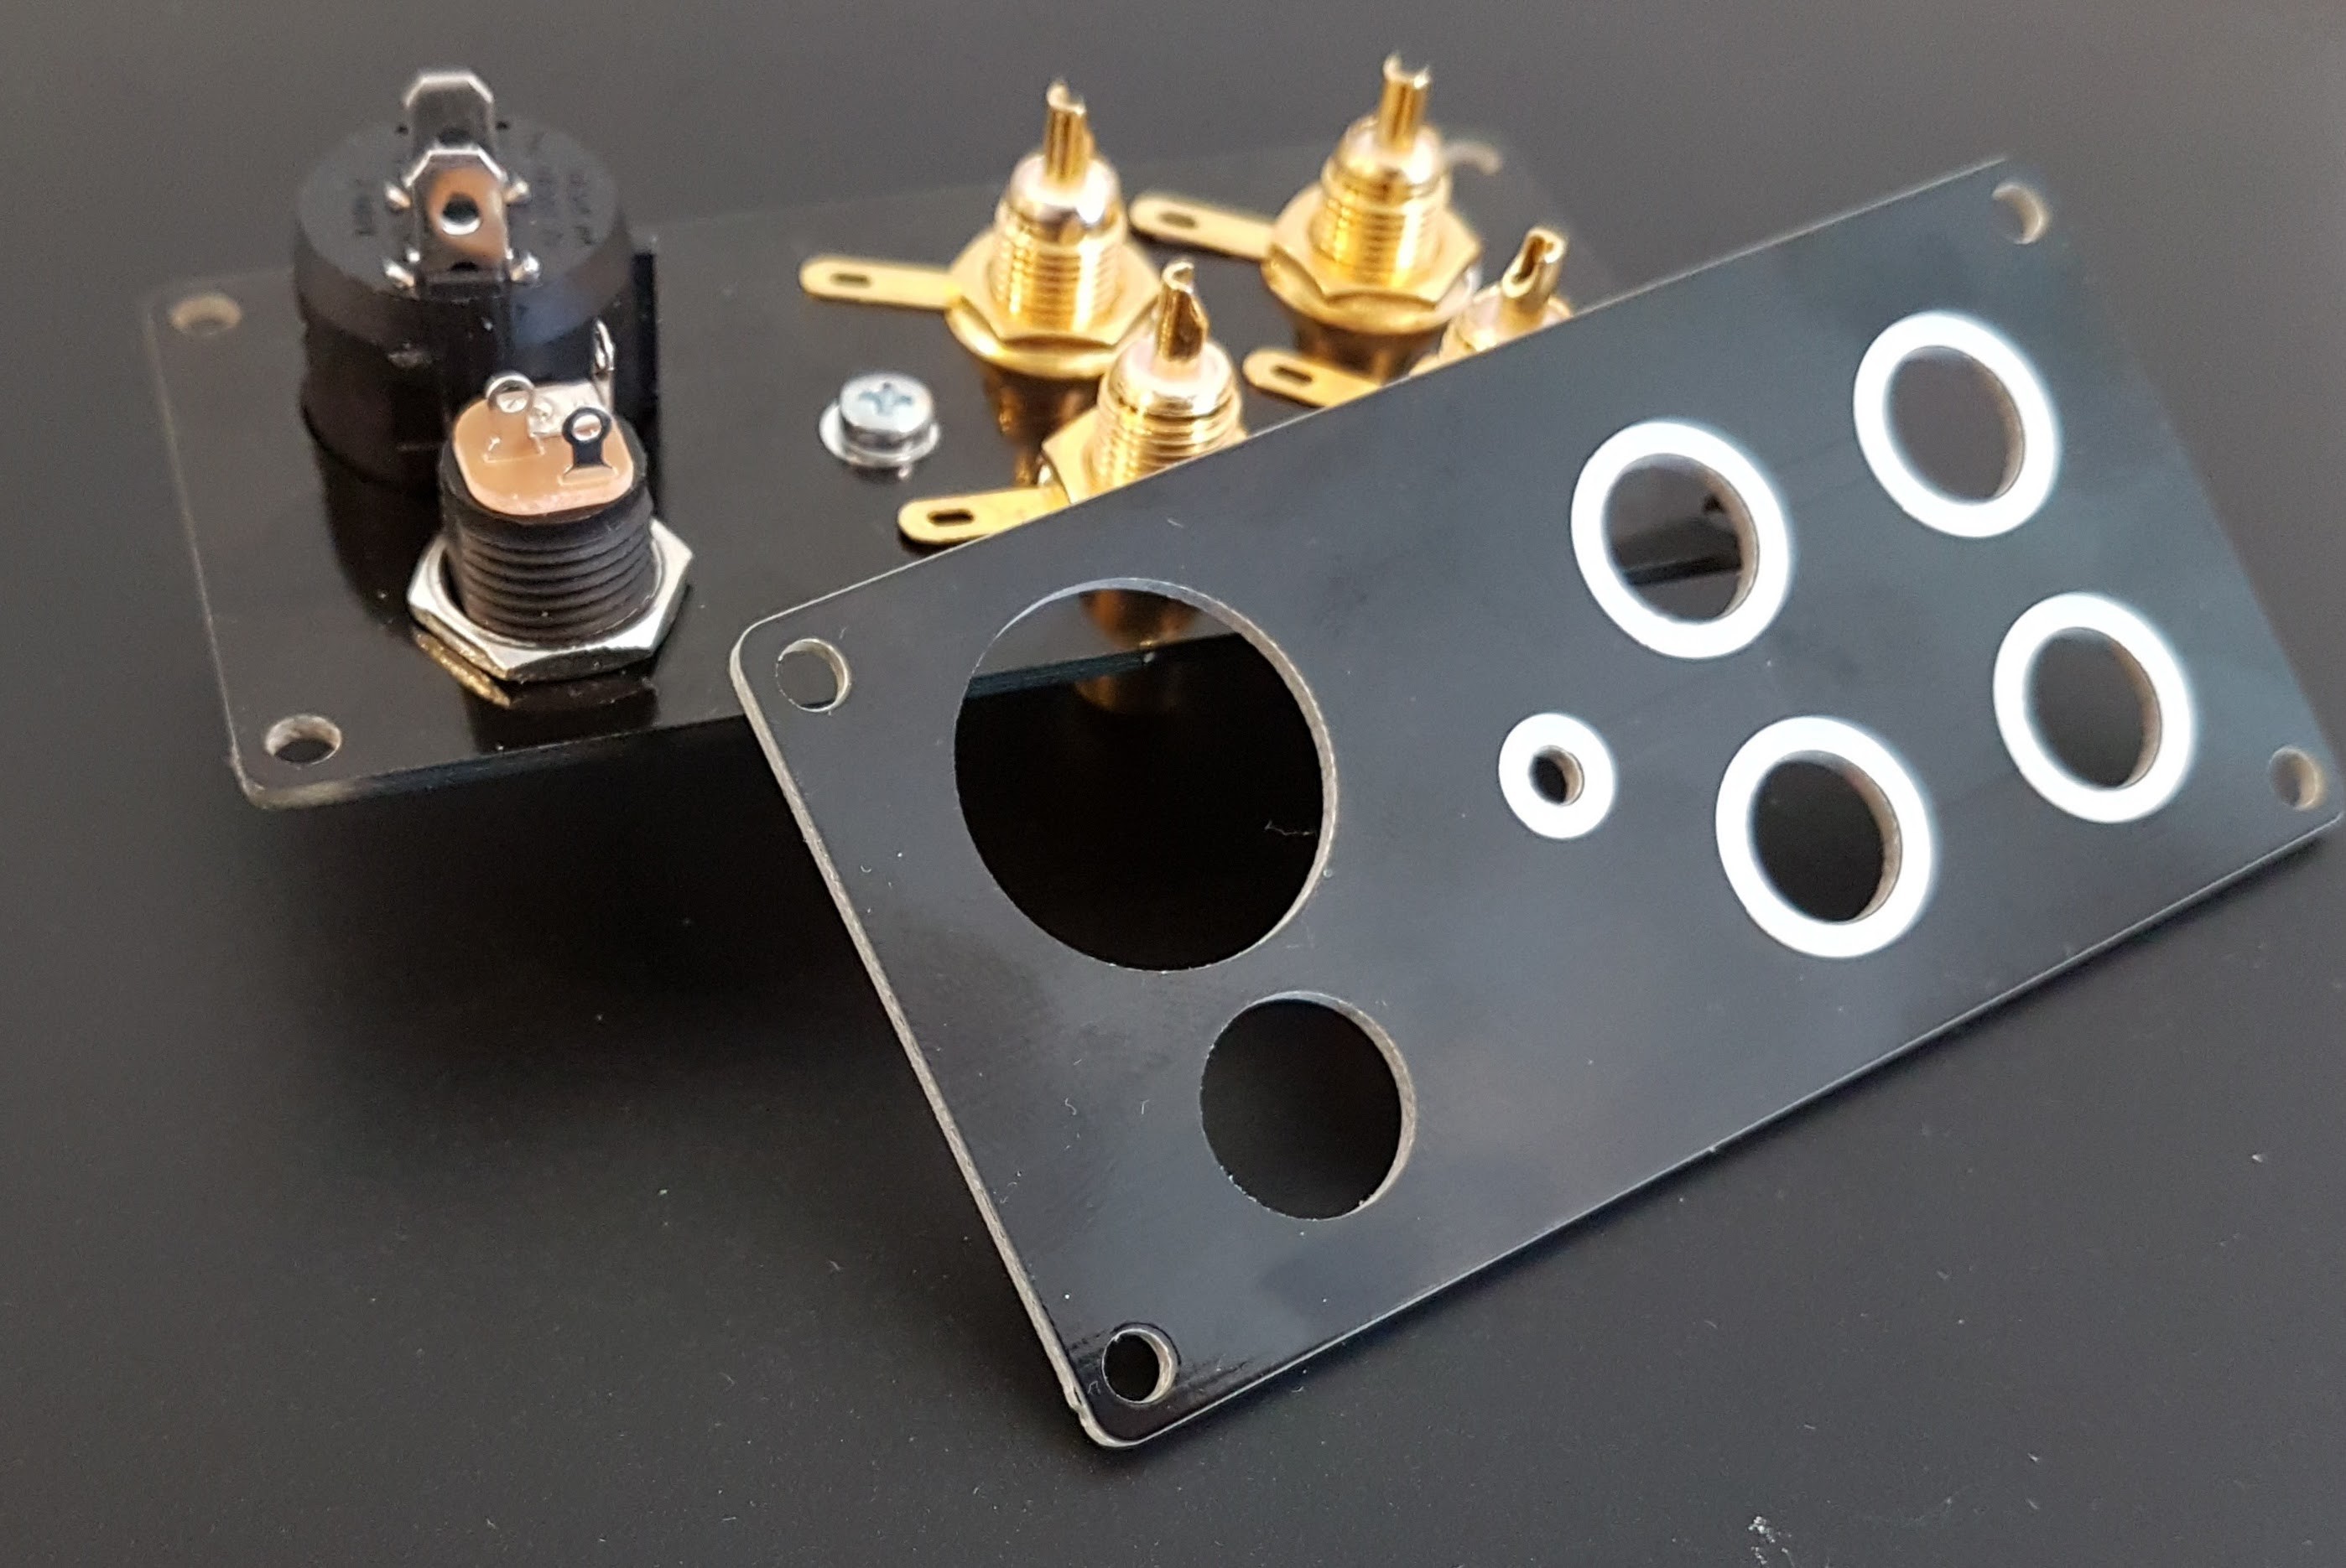
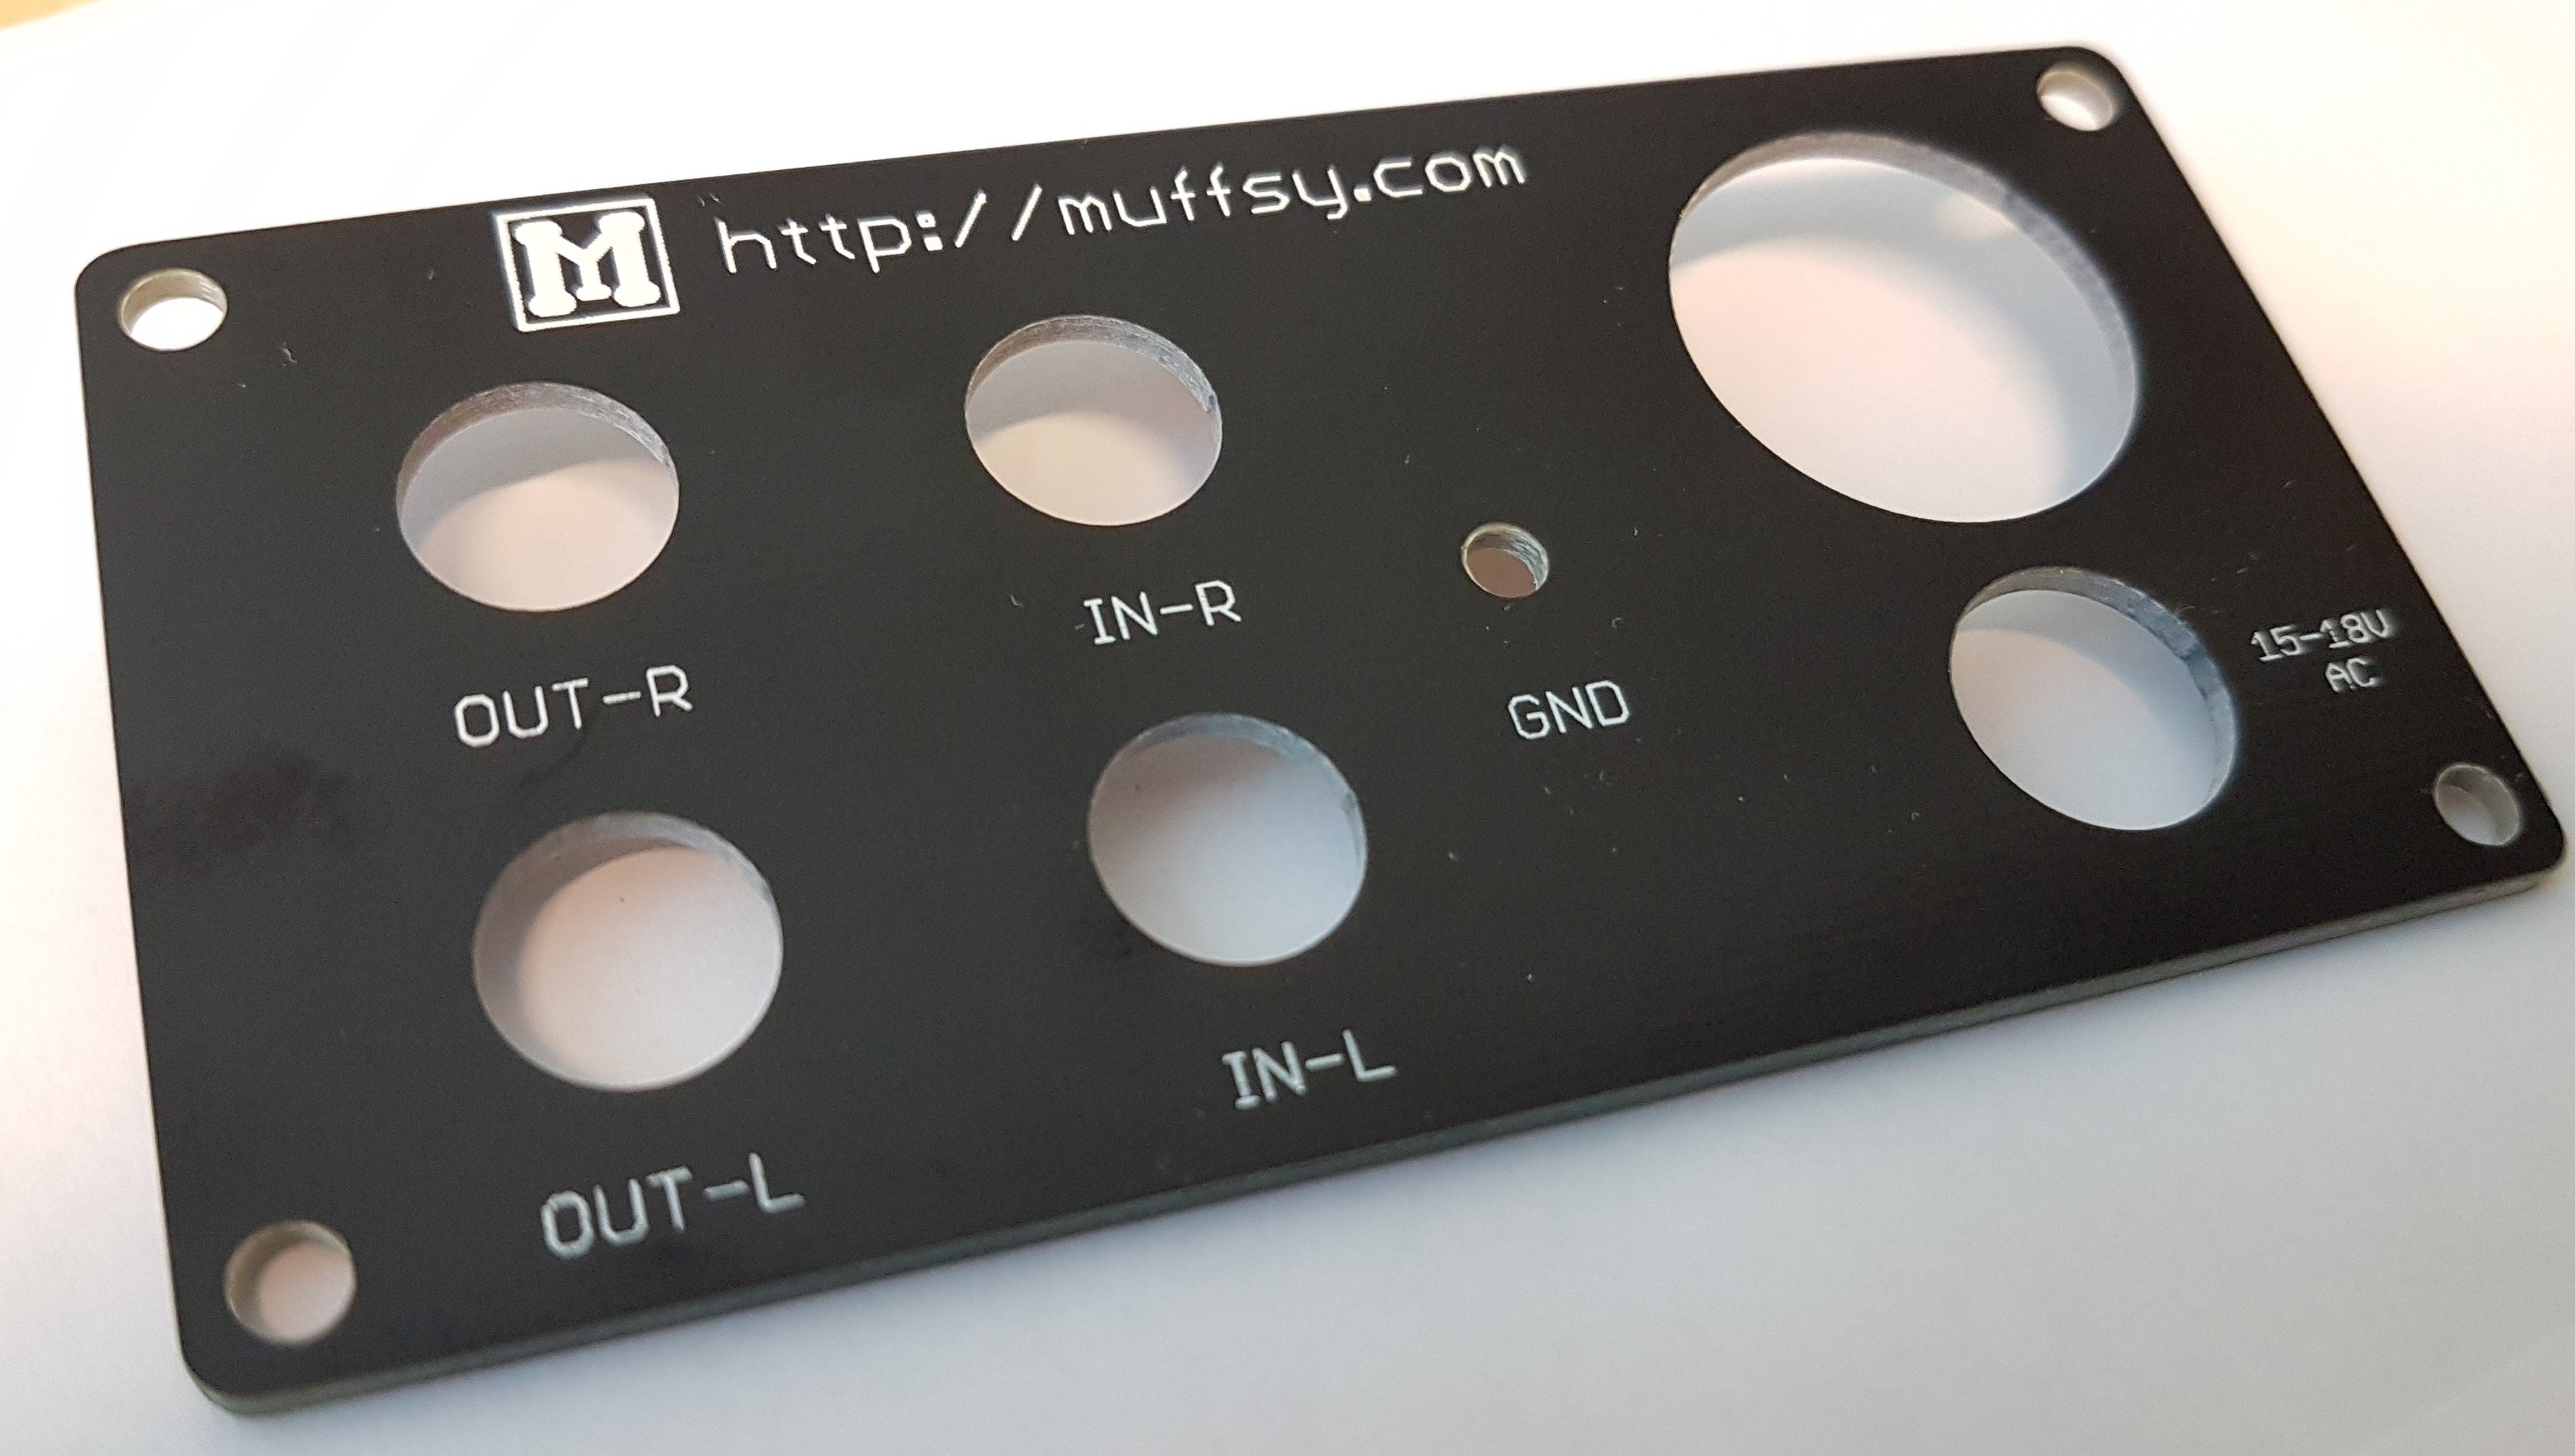
Here's a look at the other side of the panel, which fits the B0905 cabinet perfectly:
![]()
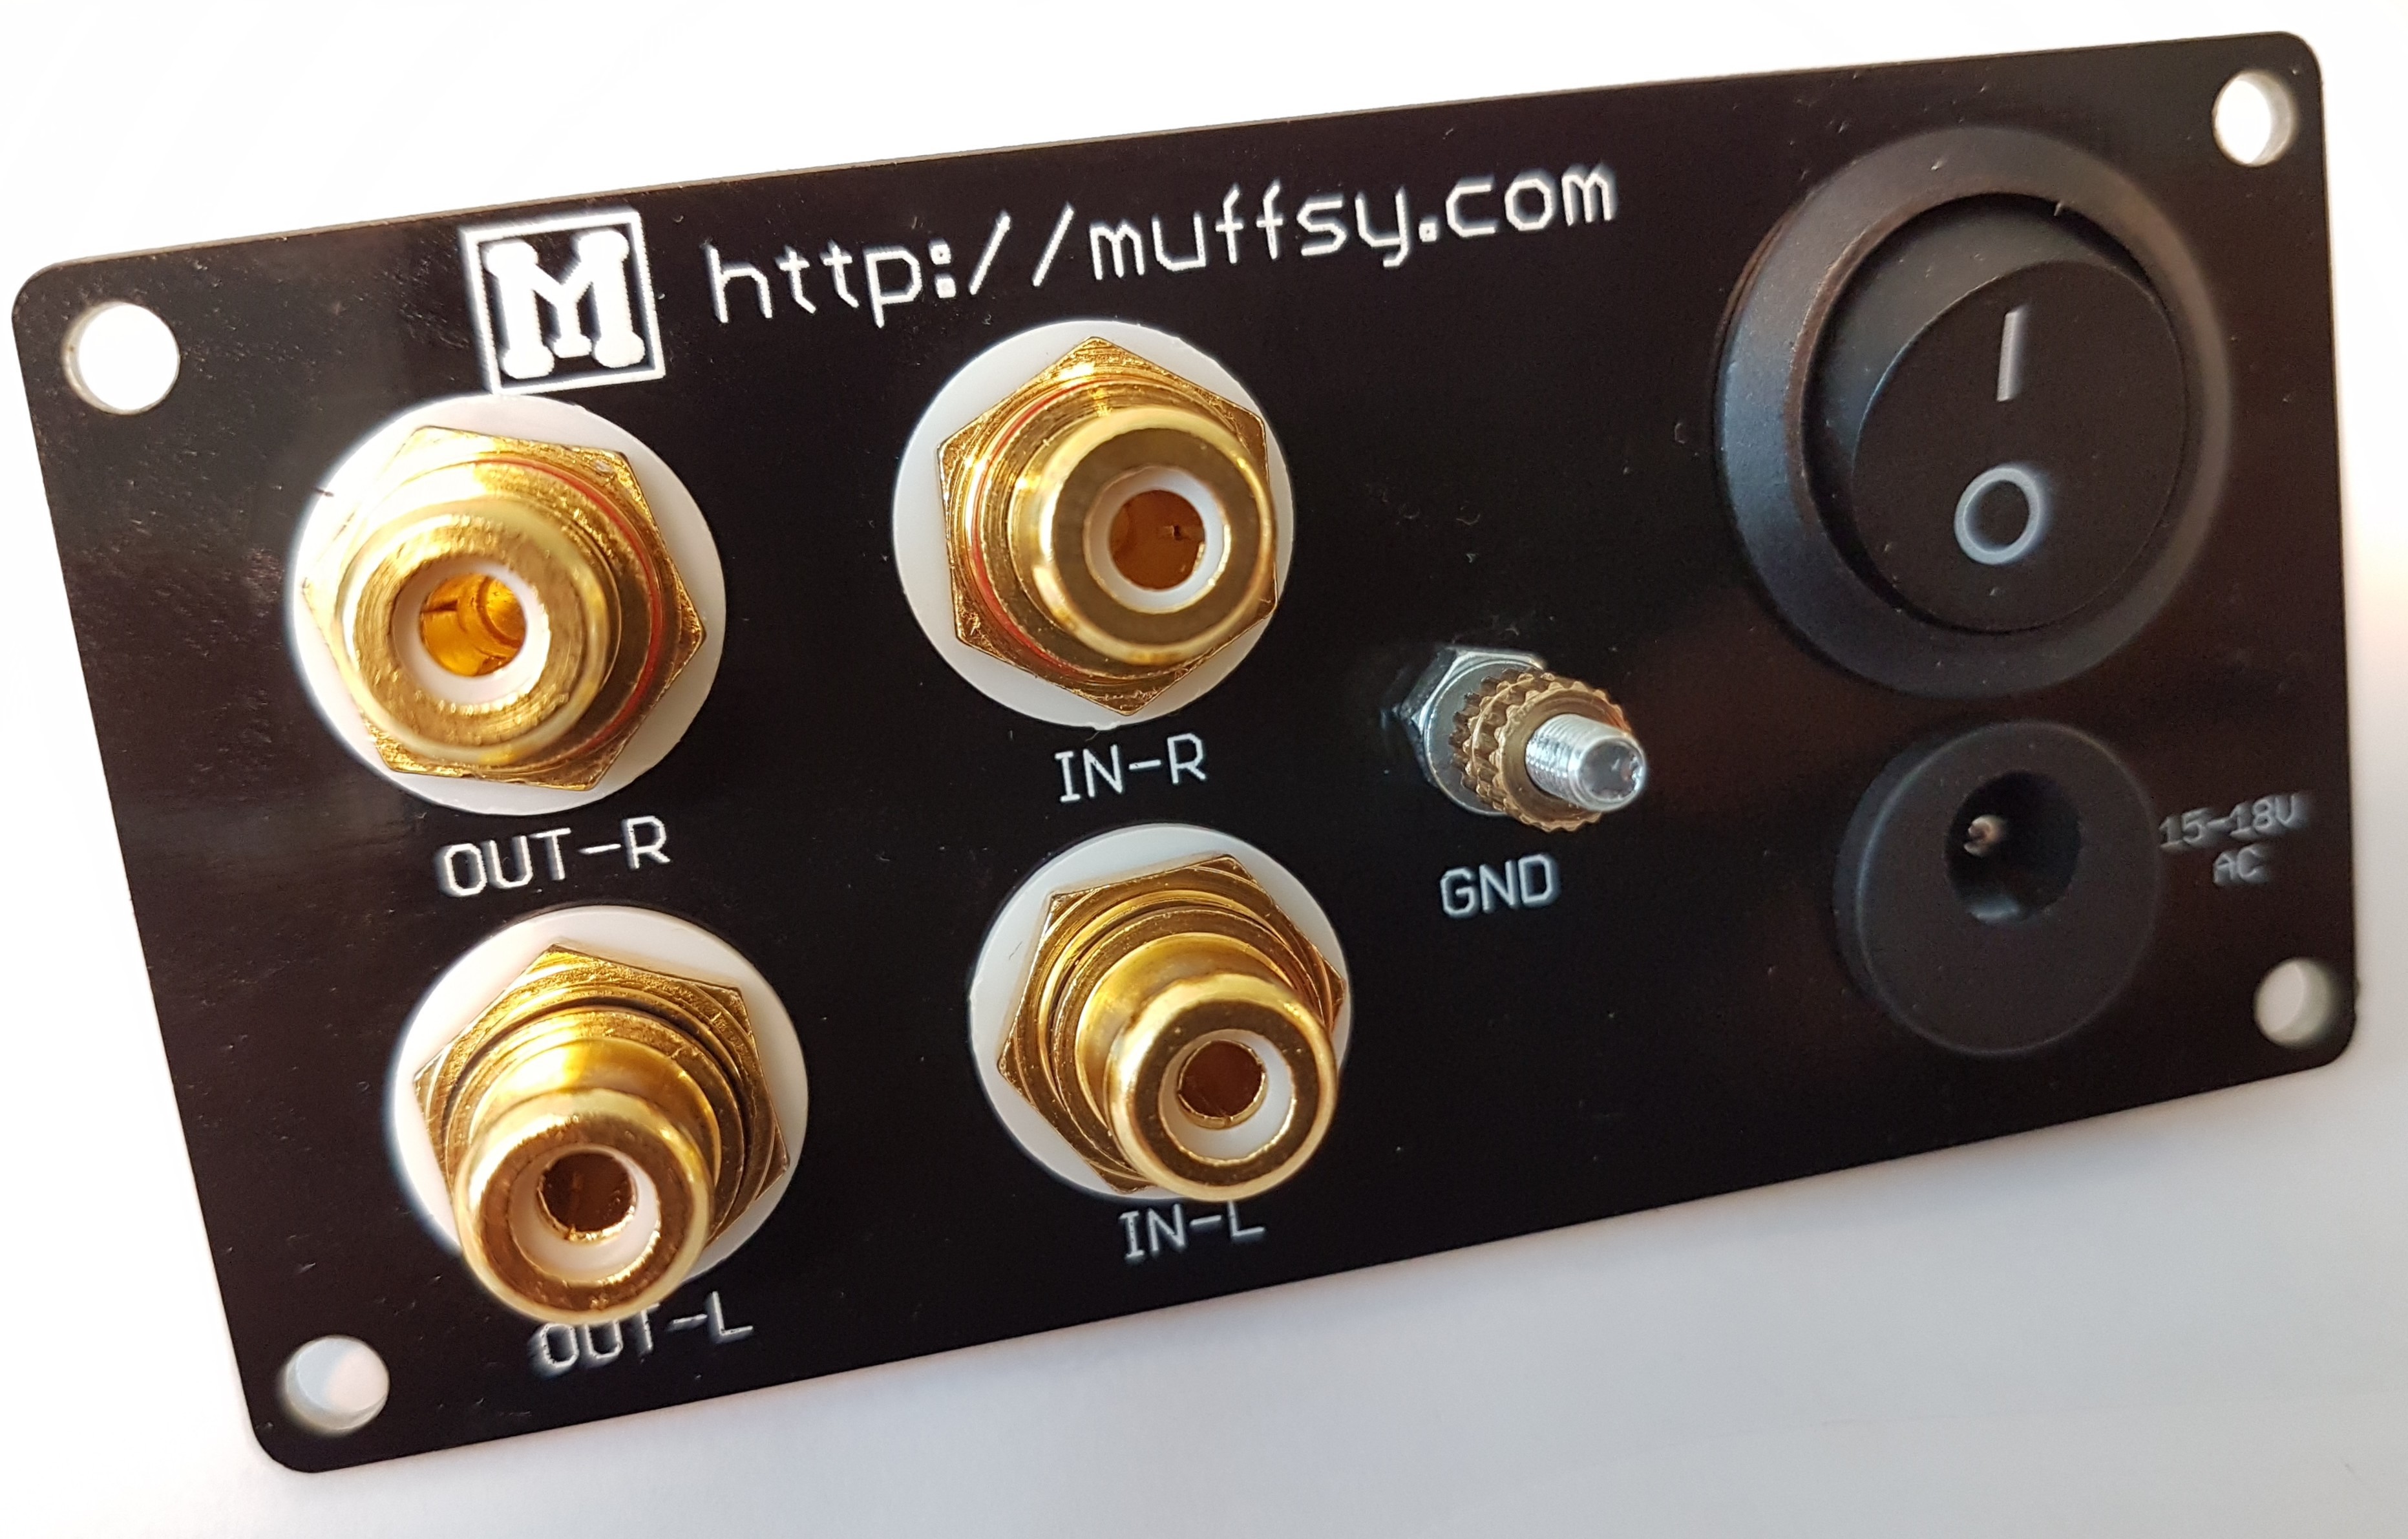
Here it is with connectors, ground screw and power switch:
![]()
-
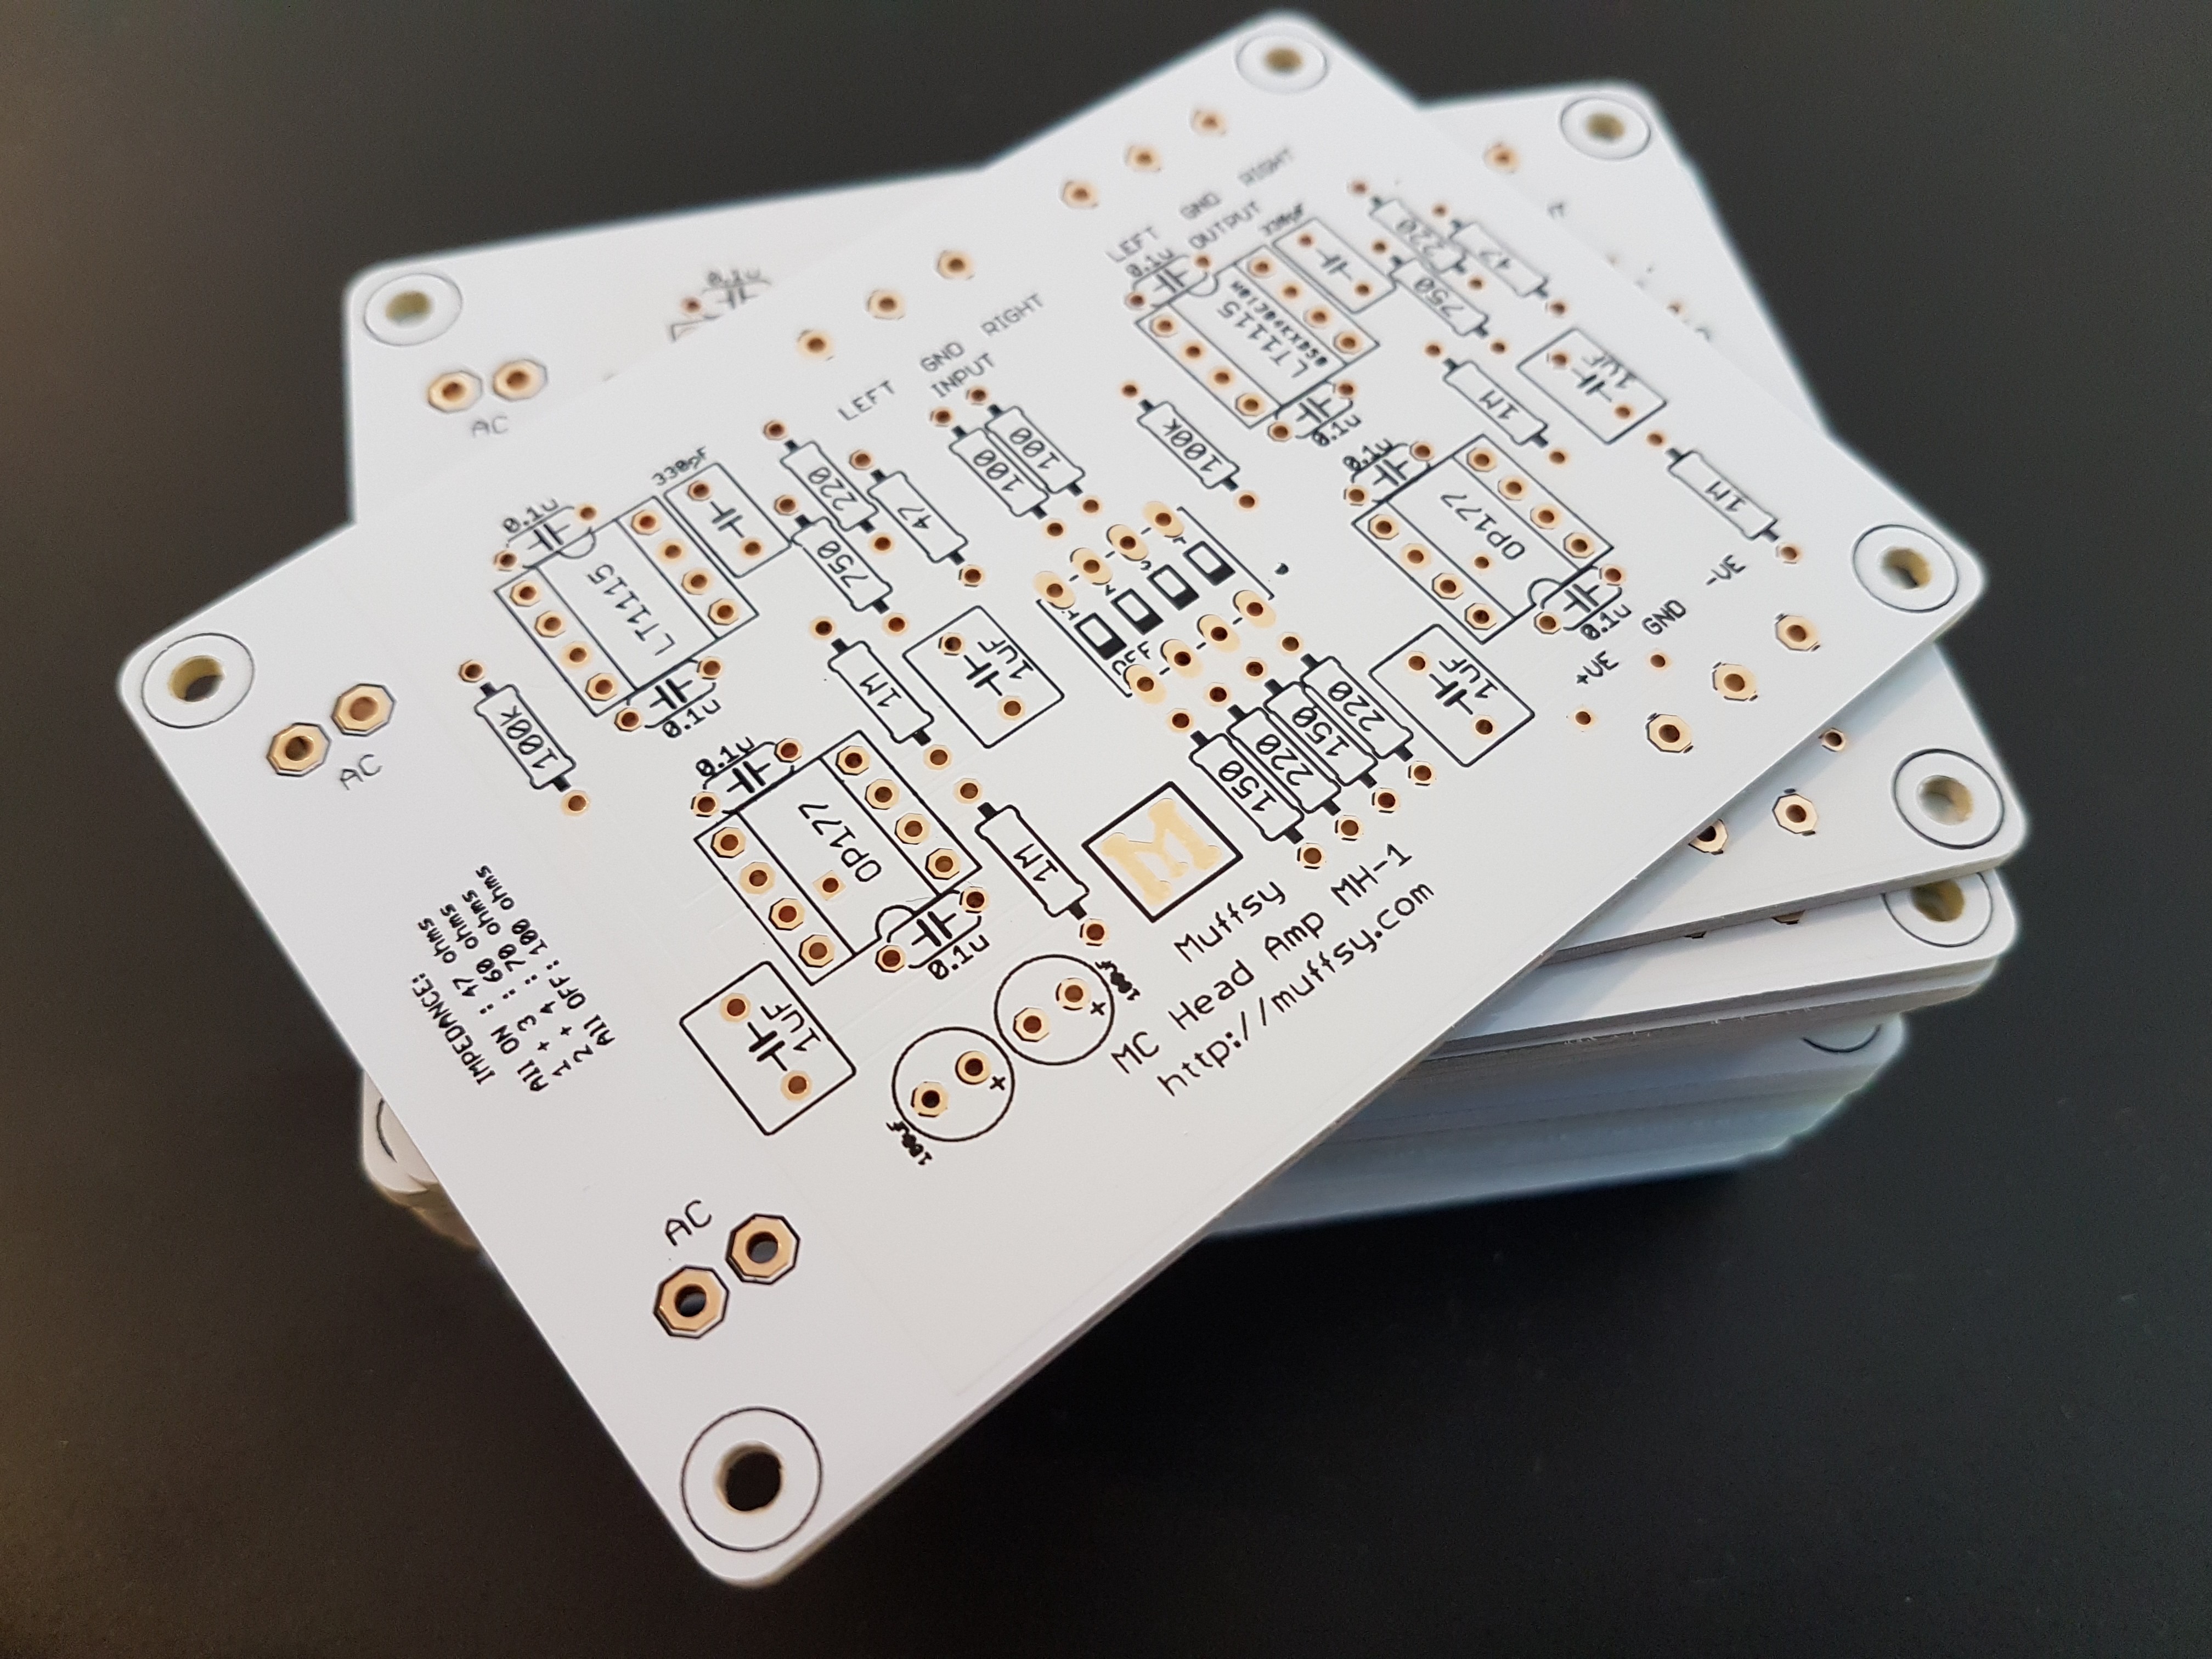
Final Version of the PCB - Received
09/05/2016 at 11:35 • 0 commentsDHL came to visit, we're getting closer and closer to the final kit:
![]()
Muffsy MC Head Amp
A DIY Dual Mono MC cartridge preamplifier for your record player