-
1Step 1
Before starting, you can have a look at this repository. This is a set of ansible recipes for two vagrant VMs (weather and vmc) that contains all softwares described below.
-
2Step 2
![Indoor weather station Indoor weather station]() I had put the weather station on my electric meter because it also retreives consumption informations [fr].
I had put the weather station on my electric meter because it also retreives consumption informations [fr].
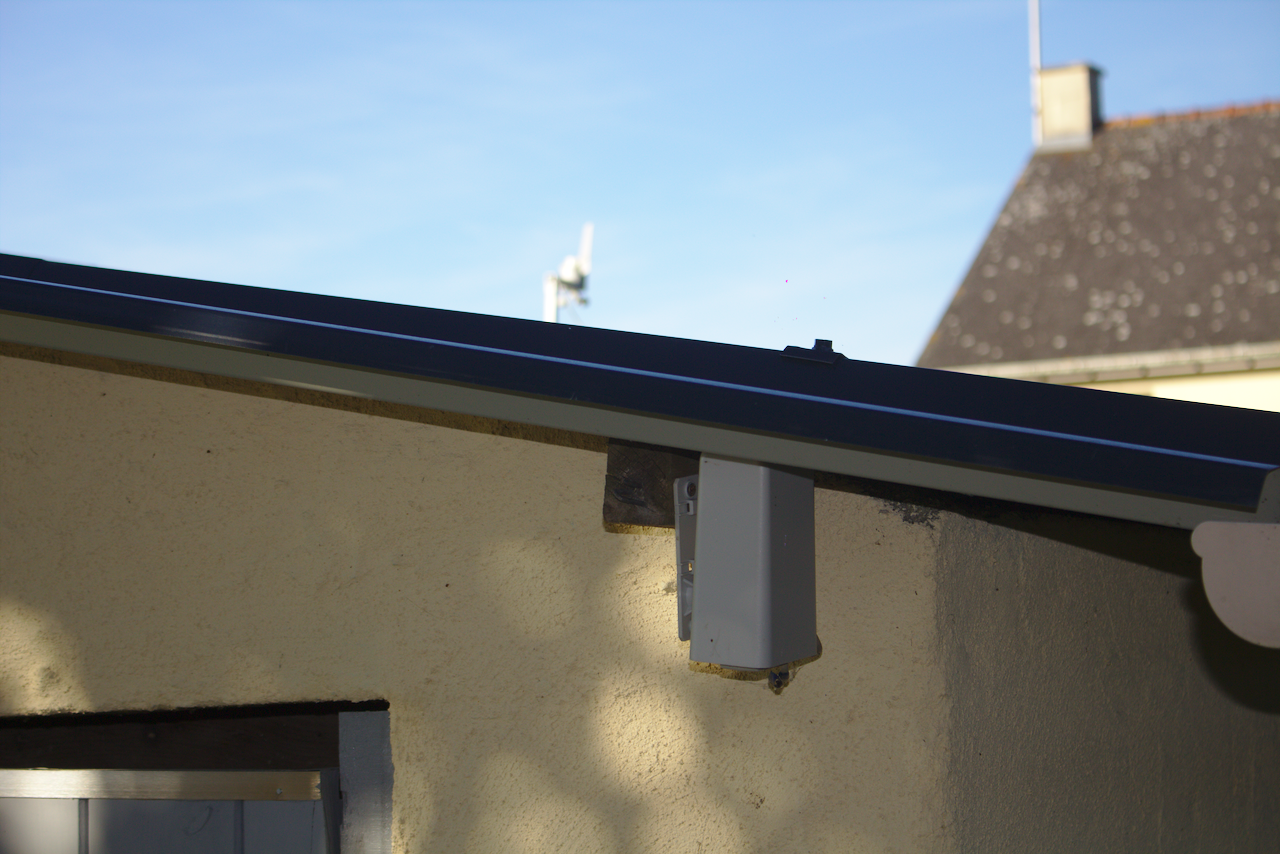
![Outdoor weather sensors Outdoor weather sensors]()
Tips: put the termometer under metal sheets is probably not a good idea…
- First, we collect data from weather station and publish via the mqtt protocol;
- Install raspbian on your raspberry pi and plug the weather station;
- Install mosquitto, mqtt utils:
apt install mosquitto-clients
- To collect data, I use ws2300 (a rewrite in rust of Open2300);
- Finally, periodically publish data on the domotic/weather topic via cron:
* * * * * /usr/bin/mosquitto_pub -t domotic/weather -m "$(/home/pi/ws2300 /dev/ttyUSB0)"
-
3Step 3
- Now, we can store data in a database, for futur reuse. Simply create a new domotic database with a weather table according to weather.sql script;
- With this script, we store all messages published to mqtt server in the database.
-
4Step 4
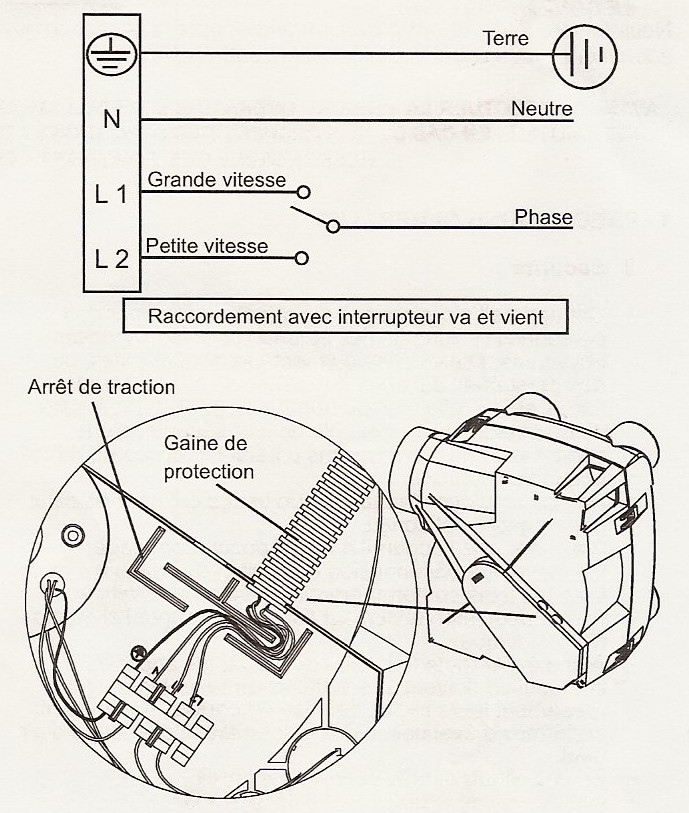
/!\ Becarefull before starting with step, we’ll play with high voltage! Switch off the power supply and read twice all datasheets to undestand what you’ll do.
![CMV datasheet CMV datasheet]()
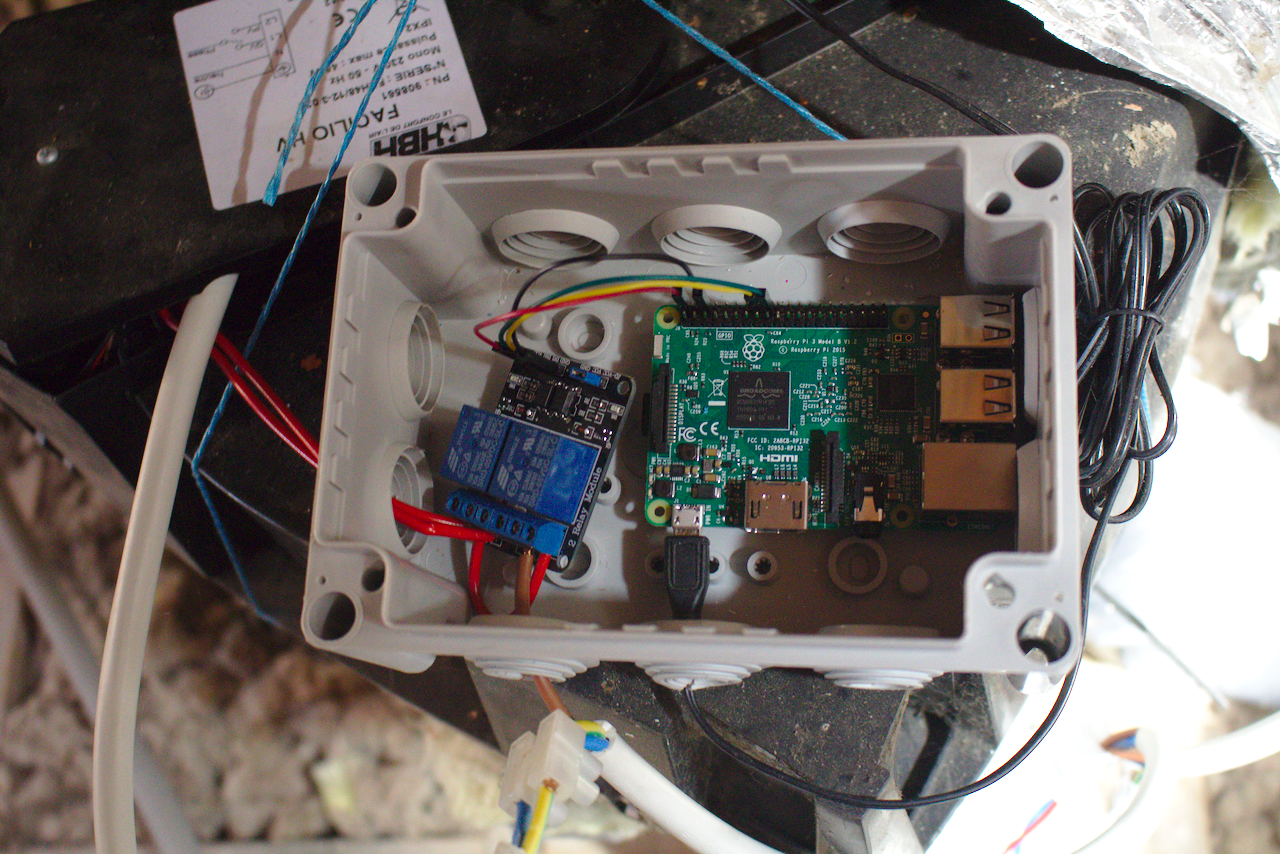
![CMV installation CMV installation]()
- Ok now we have data to control our ventillation. We simply plug another raspberry pi on the CMV power cable (see the picture above) and write a program to control the relay;
- Install raspbian and mosquitto on it;
- Put the vmc program and create the configuration file in ~/.config/vmc:
readonly MAX_HUMIDITY=80
readonly MIN_TEMPERATURE=3
readonly MAX_TEMPERATURE=30
readonly SEASON='summer'
readonly MQTT_HOST='192.0.2.42'
readonly MQTT_USER=''
readonly MQTT_PASSWORD=''
readonly GPIO_INT1=23
readonly GPIO_INT2=24
- The previous script send the new CMV over mqtt, we can log this in a new table. Use the cmv.sql script to create it and modify mqtt2database script to add the new schema:
'domotic/vmc') schema='speed integer, forced boolean' ;; - That works like a charm. I have just one problem: after a shower, I have nothing to force CMV speed to evacuate extra humidity. If you take shower, approximately, each day at the same time, simply add a cron task:
0 23 * * * /usr/bin/mosquitto_pub -t 'domotic/vmc/state' -m pulse2
-
5Step 5
Well, our CMV works fine. Really? We store many data in your database, it’s now easy to graph them and see if that works really fine. For this task, I used grafana. For debian, the installation is easy like an apt install.
But we have a little problem: grafana doesn’t support a postgresql database directly. I write a like peace of code that emulate the influxdb API: pg4grafana. Becarefull, this exposes your database over http. Use a readonly postgresql user and add an http authentification.
Now we can write SQL query to draw graph:
SELECT extract(epoch from created) * 1000, speed FROM vmc WHERE $timeFilter ORDER BY 1And we can see your CMV works fine:
![CMV state graph CMV state graph]()
-
6Step 6
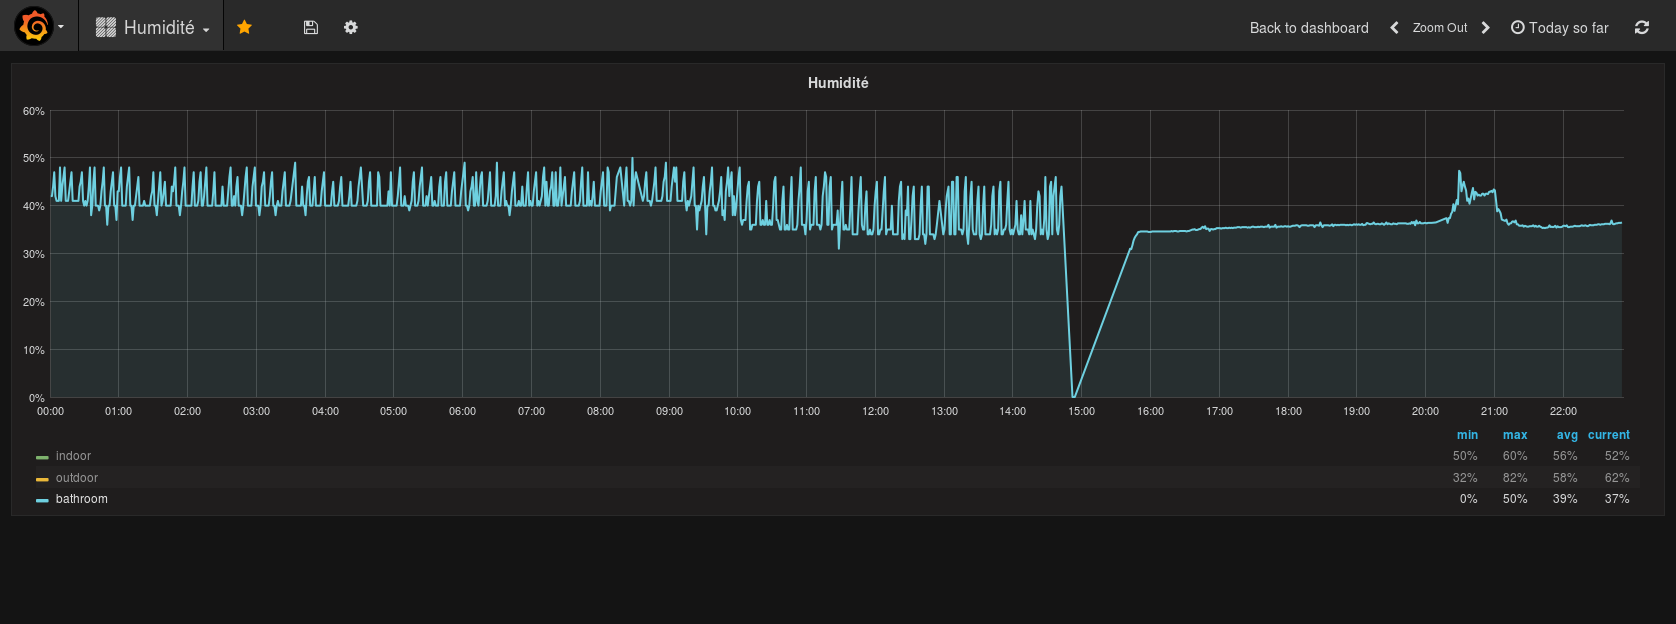
In step 3, I finished on a little ploblem when the interior humidity grows rapidly. I added a cronjob as patch but we can make a better solution by adding an humidity sensor in the room.
To do that, I created a circuit based on a esp8266 and a DHT22 captor.
![Sensor sketch Sensor sketch]()
The associated program simply publish the temperature and humidity on the domotic topic with the room id.
Currently, the circuit is on a prototype board, directly plug in a usb charger:
![]()
As you can see on this picture, I started with a DHT11 sensor, but is not a good idea:
![DHT11 vs DHT22 DHT11 vs DHT22]()
-
7Step 7
Now we have many sensors, many data graphed day after day but we don’t have current data overview and no way to easily interact with your CMV (if you looked source code carefuly, you probably seen pulsed states that force CMV speed during half hour).
I wrote a dashboard web application (mosquitto with websockets protocol is very usefull). You probably would modify the source code to adjust the dashboard to your installation but I prefere this approach over complex application for multi purpose.
First, enable the websockets protocol for mosquitto:
listener 9001
protocol websockets
Second, install the sources code on your web server, and configure the application by modifying the web/js/config.js file.
![]() That’s all!
That’s all!
 Sanpi
Sanpi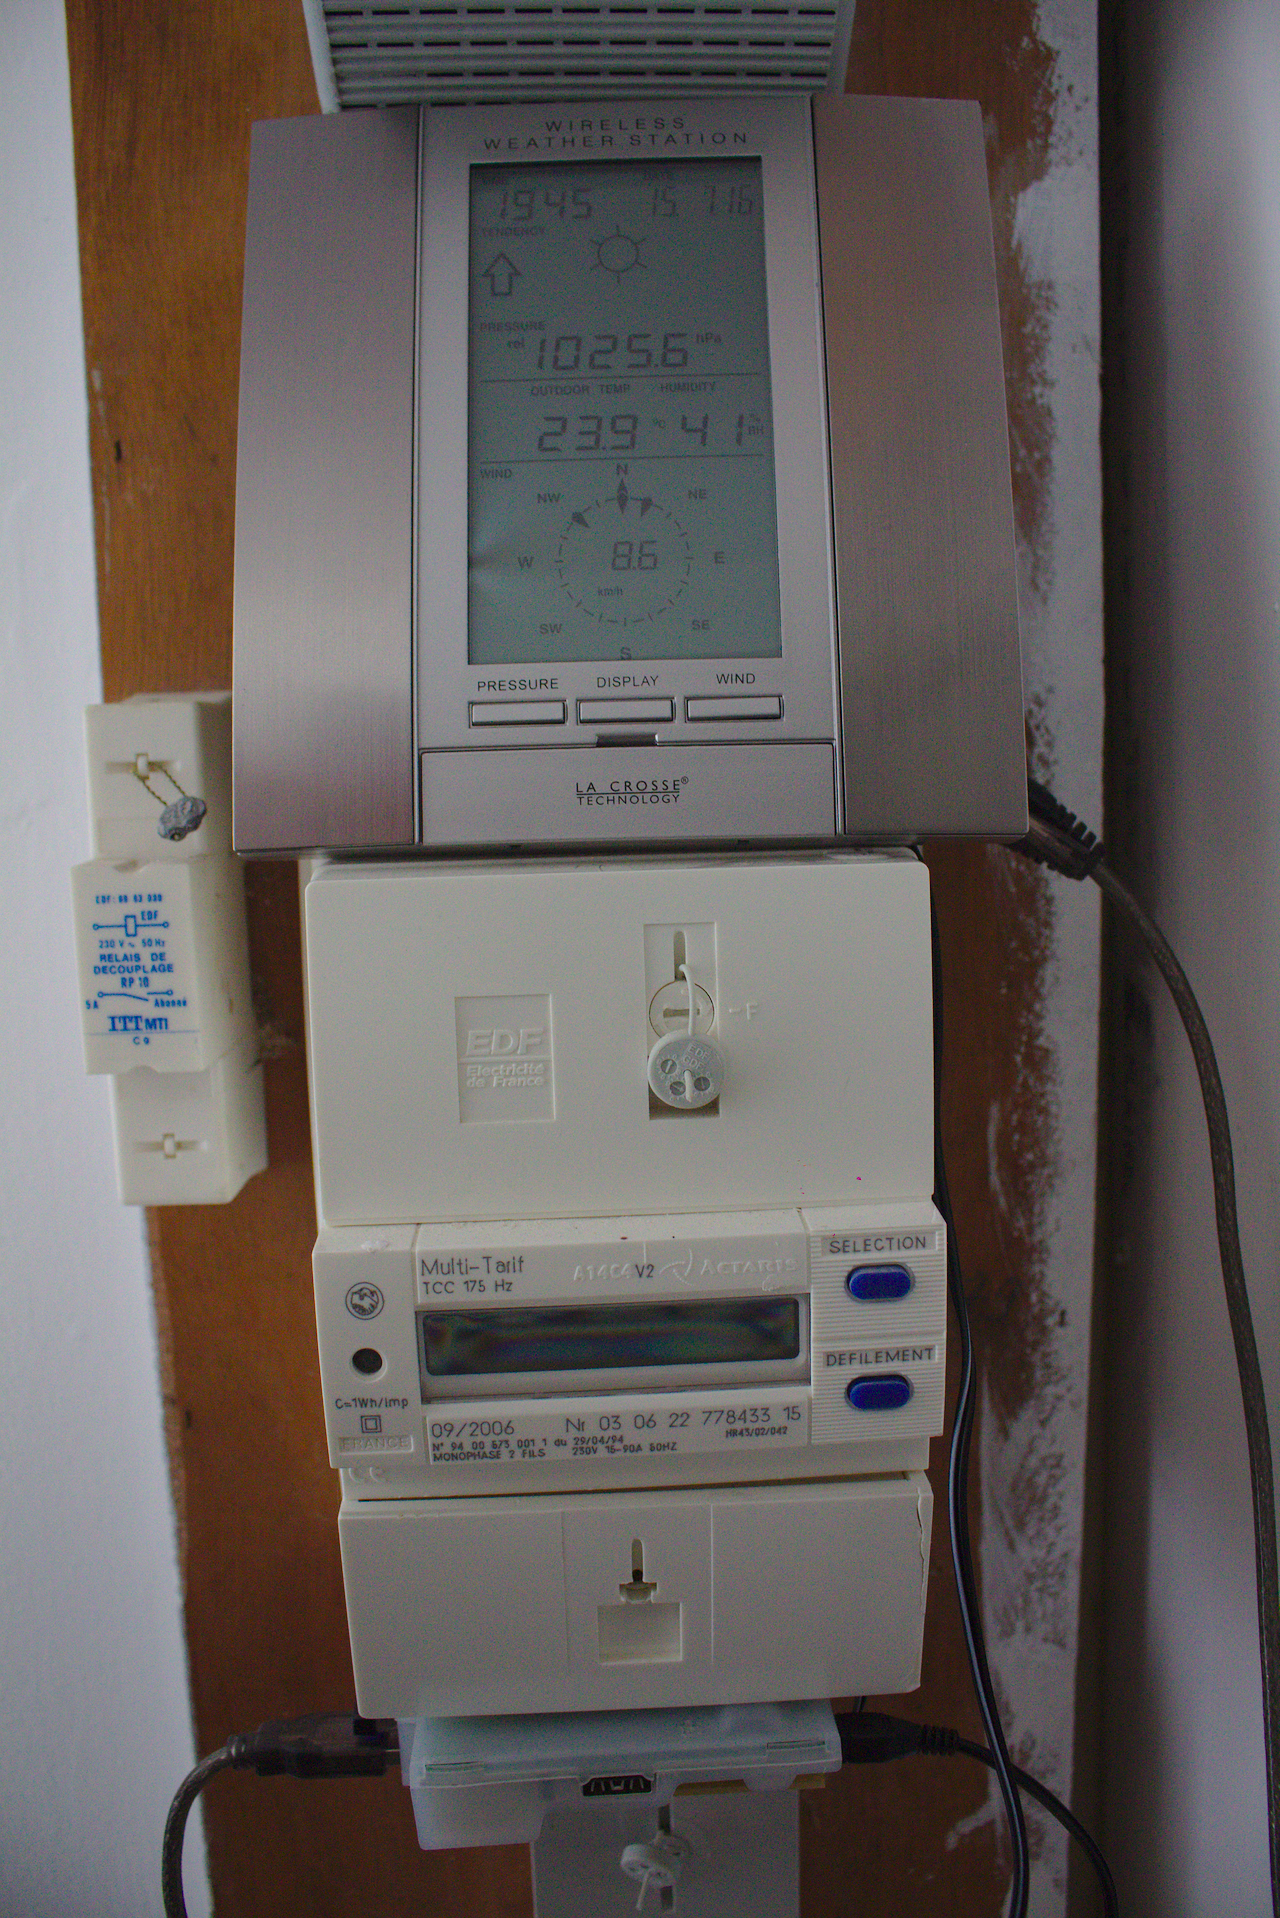 I had put the weather station on my electric meter because it also



 That’s all!
Discussions
Become a Hackaday.io Member
Create an account to leave a comment. Already have an account? Log In.