igorfonseca83
-
Facial expressions
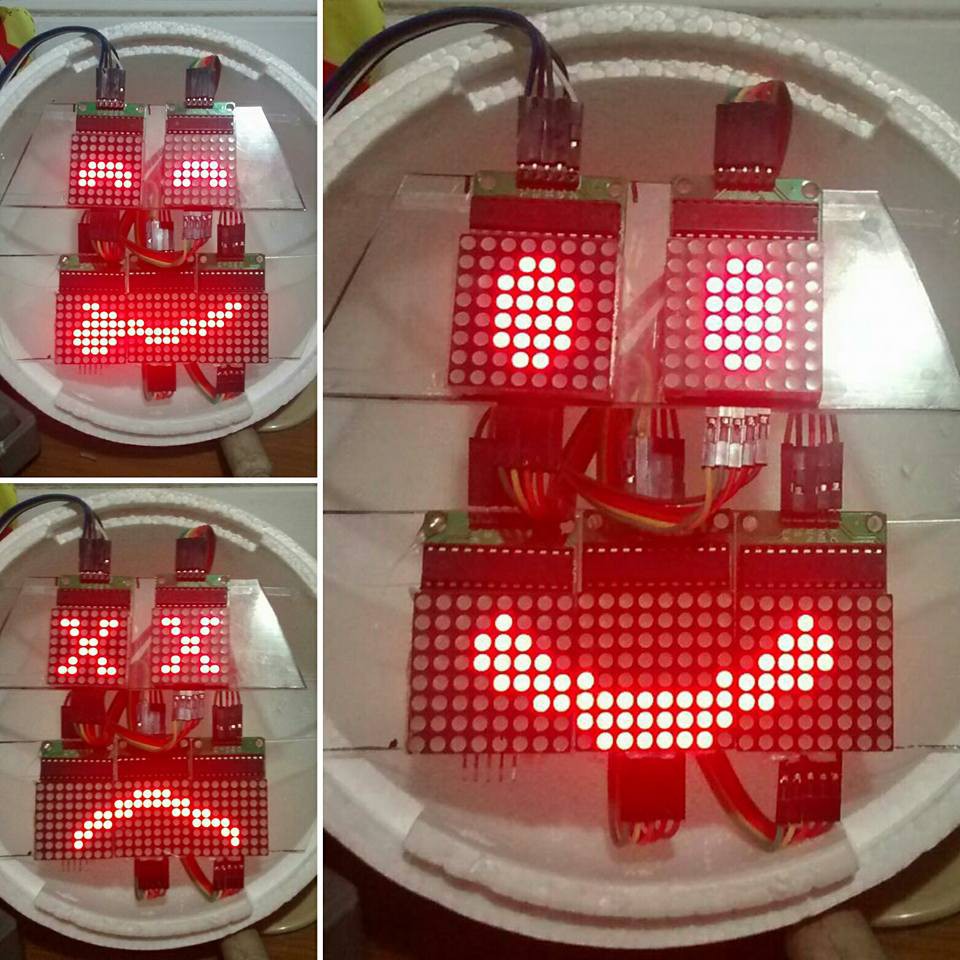
08/01/2016 at 16:19 • 0 commentsFacial expressions are programmed into the Arduino and displayed using 5 8x8 LED matrices. The operator is able to choose the desired expression. Eyes blink automatically and mouth moves when a sound is perceived in the microphone of the operator's interface.
![]()
A expressões faciais são programada no Arduino e apresentadas usando 5 matrizes de LED 8x8. O operador é capaz de escolher a expressão desejada. Os olhos piscam automaticamente e a boca se move de acordo com os sons do microfone na interface do operador.
-
Left arm first movements
07/30/2016 at 14:56 • 0 commentsA simple html interface was designed to control the servos. The ESP8266 module receives messages from the browser and the Arduino Uno sets angles for each servomotor.
Full instructions at: http://www.instructables.com/id/Wi-Servo-Wi-fi-Browser-Controlled-Servomotors-with/
Uma interface em html foi desenvolvida para controlar os servos. O módulo ESP8266 recebe mensagens do navegador e o Arduino Uno define os ângulos para cada servomotor.Instruções detalhadas em: http://www.instructables.com/id/Wi-Servo-Wi-fi-Browser-Controlled-Servomotors-with/
-
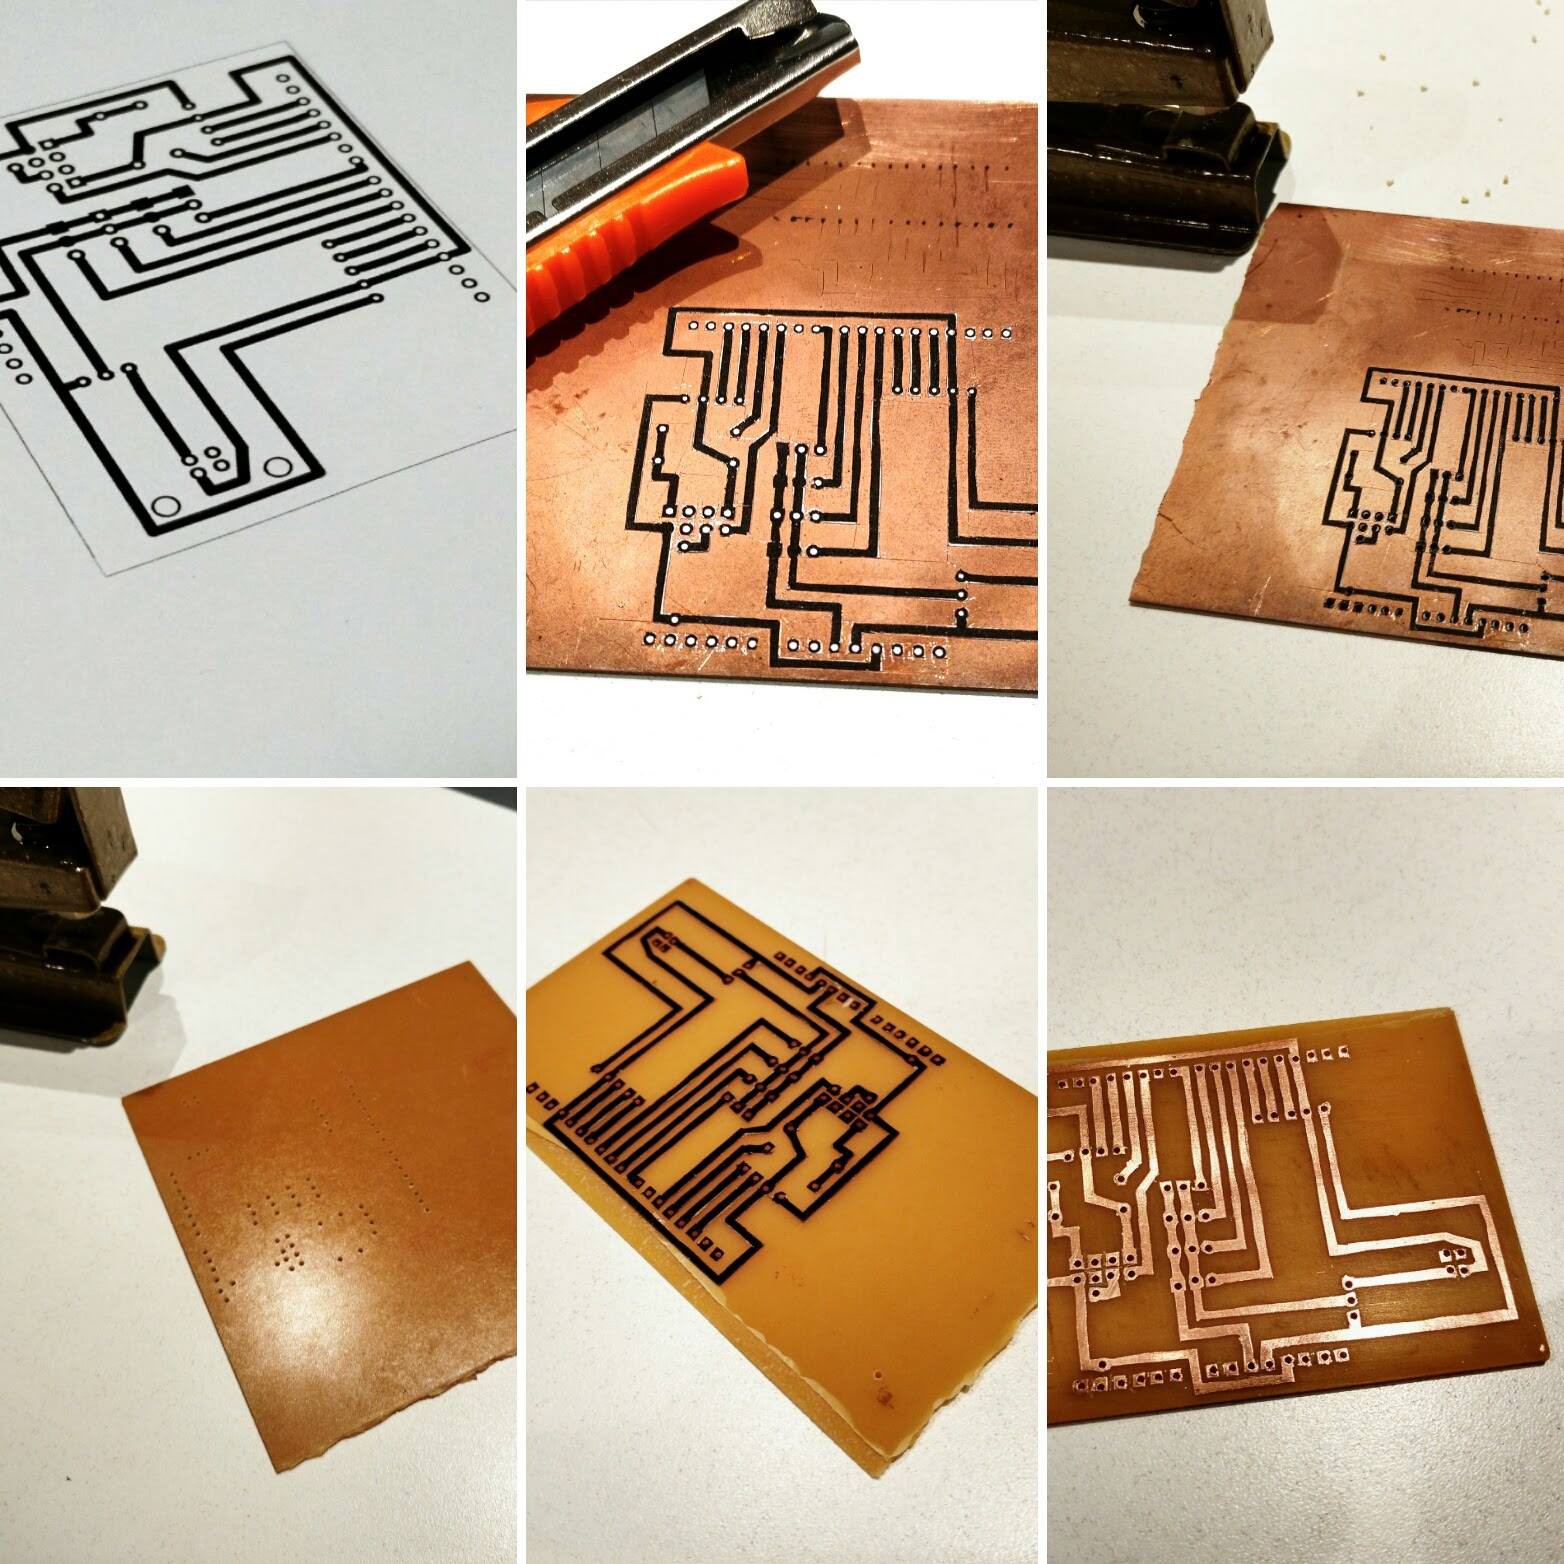
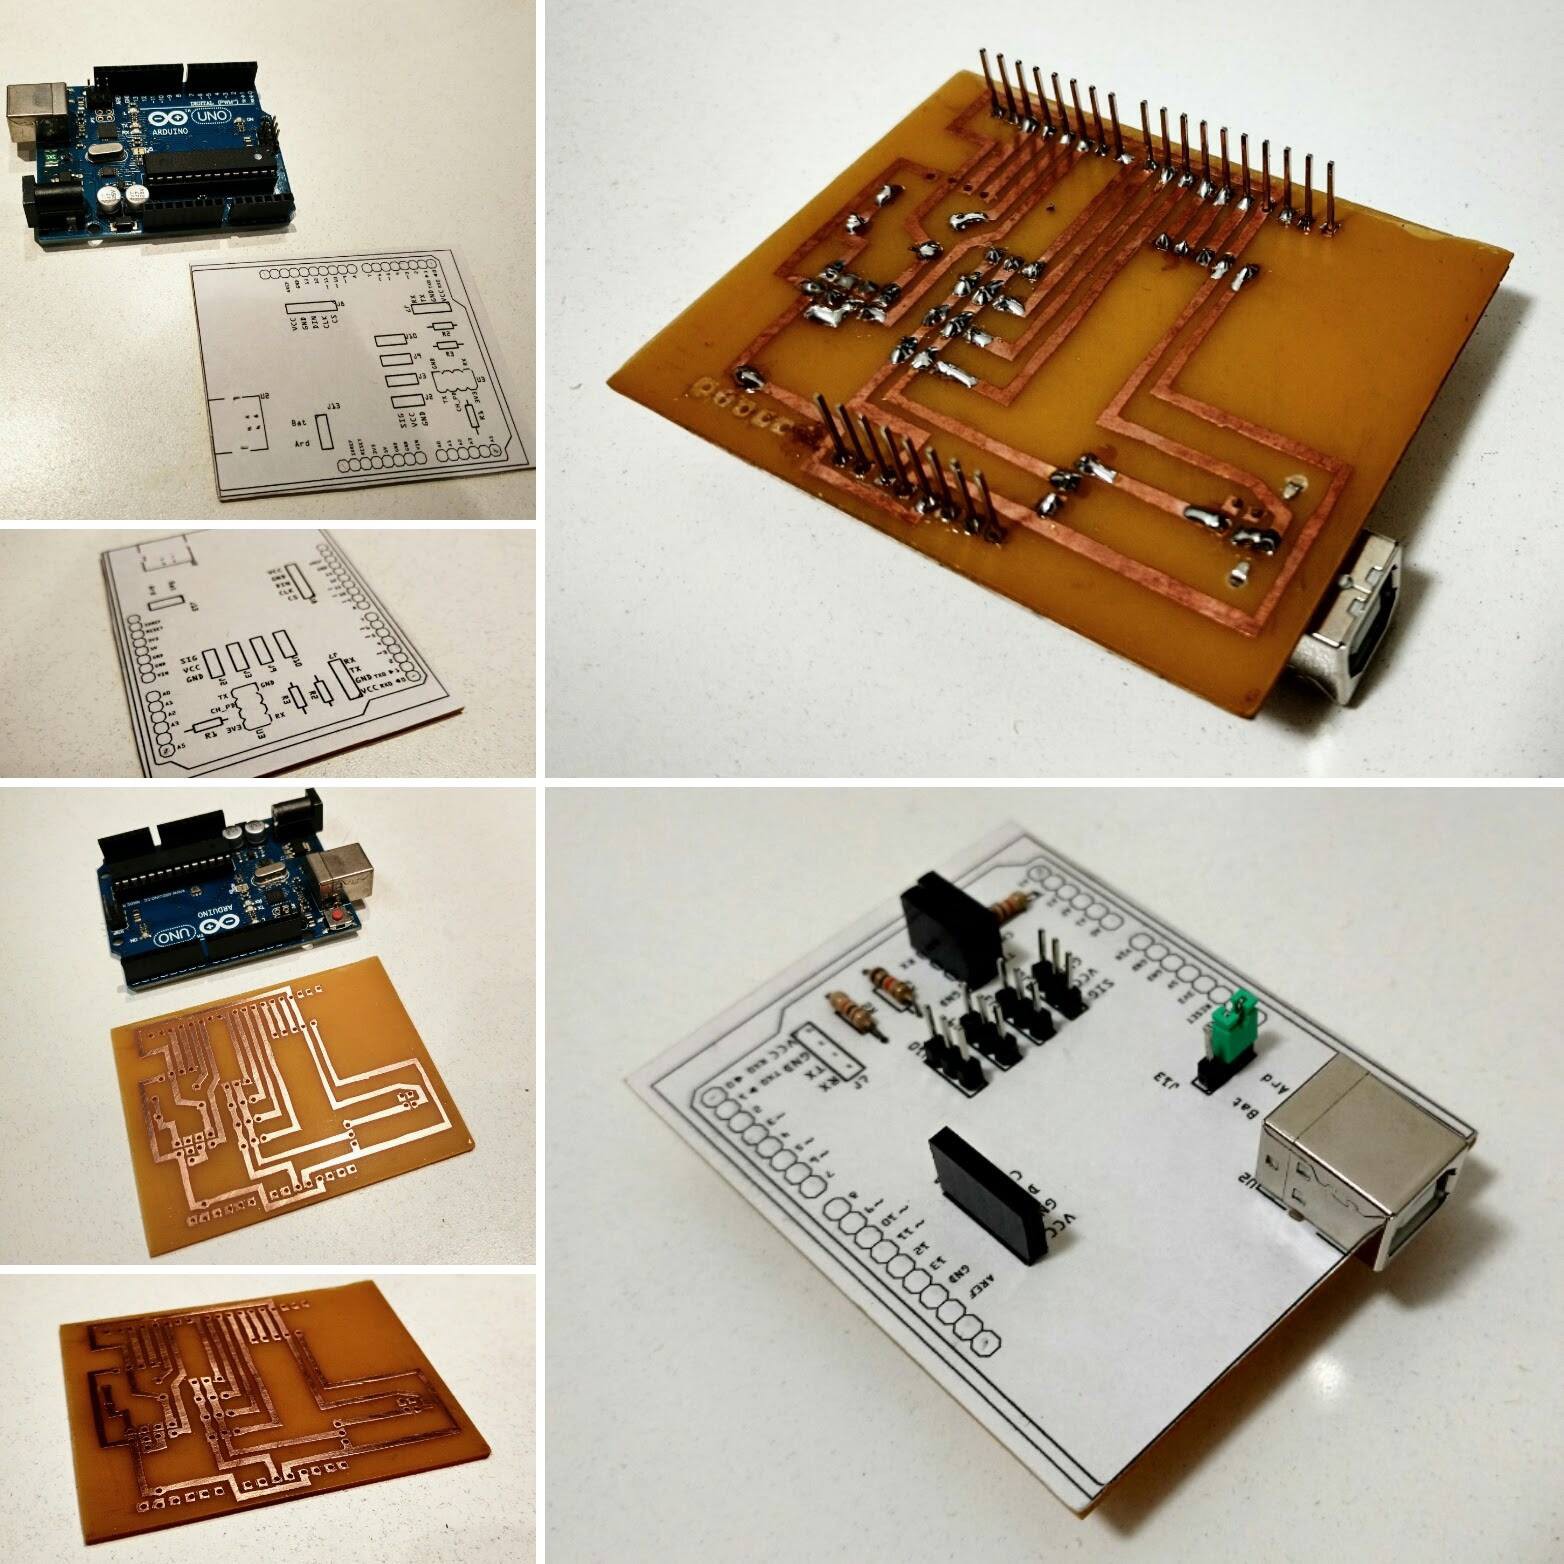
Electronics
07/28/2016 at 14:21 • 0 commentsMaking of a homemade Arduino shield to connect four servomotors (for the arms), an array of LED matrices (for the face) and some communication modules (bluetooth HC-06 or wi-fi ESP8266) to an Arduino Uno.
- The printed circuit board (PCB) was designed using Fritzing software. It was printed in an adhesive paper and applied on the bottom of the copper plate;
- White parts were cropped, leaving only the routes (in black ink);
- The copper plate was perforated for later placement of the components;
- It was etched, leaving only the desired copper routes;
- The PCB was cut in the right dimensions and the ink removed;
- A mask was printed in adhesive paper and applied to the upper layer of the PCB;
- Finally, components were placed and soldered to the PCB.
- A placa de circuito impresso (PCB) foi projetada usando o software Fritzing. O circuito foi impresso em papel adesivo e aplicado na face inferior de uma placa cobreada;
- As partes em branco foram removidas, deixando apenas as trilhas (em tinta preta);
- A placa de cobre foi perfurada para o posicionamento dos componentes;
- Após a corrosão, apenas as trilhas são mantidas em cobre;
- A PCB foi cortada nas dimensões corretas e a tinta removida;
- Uma máscara foi impressa em papel adesivo e aplicada à face superior da PCB;
- Finalmente, os componentes foram posicionados e soldados na placa.
Fabricação de um shield caseiro de Arduino para conectar até quatro servomotores (para os braços), um conjunto de matrizes de LED (para a face) e alguns módulos de comunicação (bluetooth HC-06 ou wi-fi ESP8266) em um Arduino Uno.
![]()
![]()
-
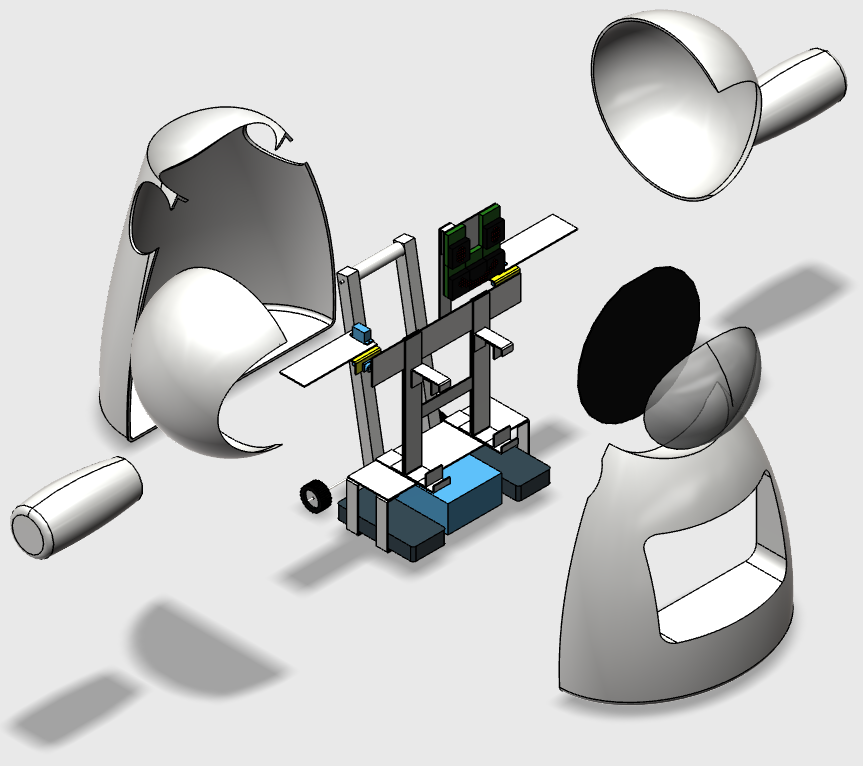
3D Model
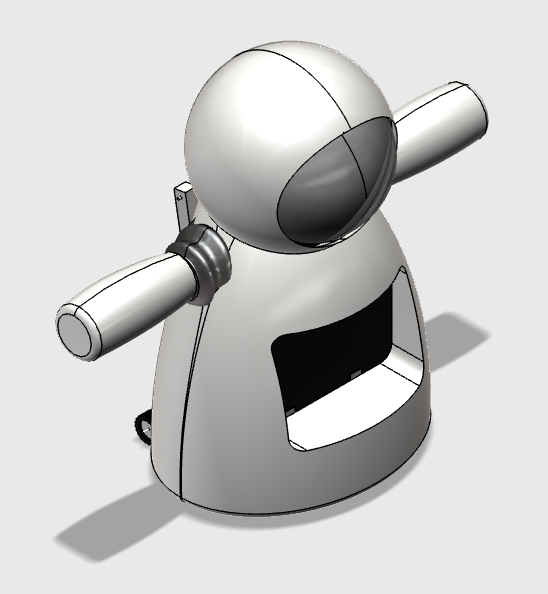
07/27/2016 at 17:34 • 0 commentsFirst 3D model of the robot, designed with 123D Design by Igor Fonseca (https://www.facebook.com/igorfonseca83).
3D printed body with a acrilic exqueleton inside to hold the main components (LED matrix face, four servomotors, two battery pack, control circuits, 10" tablet, and sound speakers).
![]()
Fig.1 - Isometric view of the robot.
![]()
Fig.2 - Exploded view of the robot.
Primeiro modelo 3D do robô, projetado no 123D Design by Igor Fonseca (https://www.facebook.com/igorfonseca83).
Corpo impresso em 3D com um esqueleto em acrílico por dentro para segurar os principais componentes (matrizes de LED, quatro servomotores, duas baterias, circuitos de controle, tablet de 10", e caixas de som).
Fig.1 - Vista isométrica do robô
Fig.2 - Visão explodida do robô
-
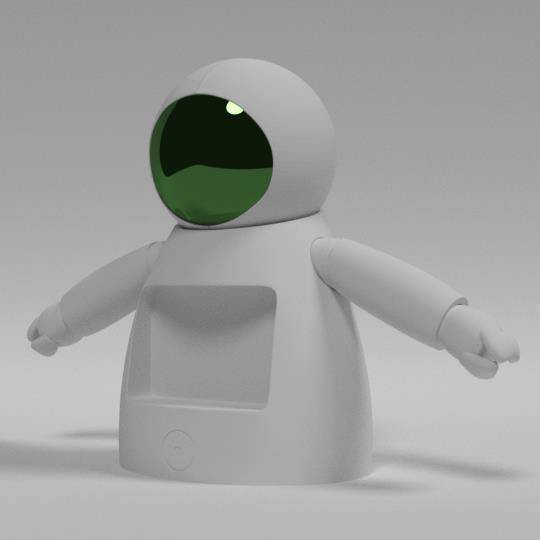
Conceptual 3D model
07/27/2016 at 17:05 • 0 commentsConceptual art by Guilherme Pupo (https://www.facebook.com/guilherme.pupo.9):
![]()
Arte conceitual por Guilherme Pupo (https://www.facebook.com/guilherme.pupo.9). -
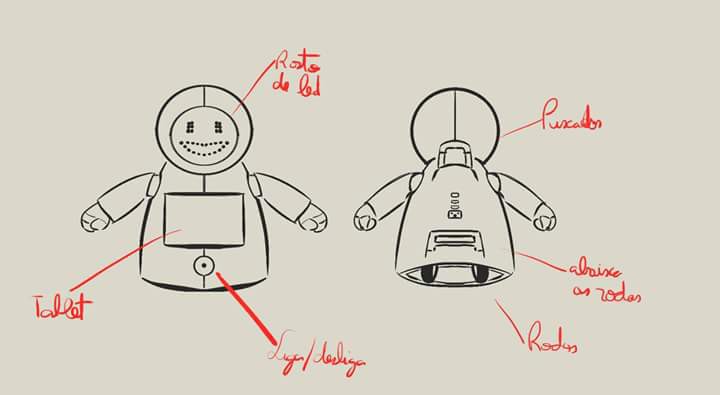
Conceptual design of the robot
07/27/2016 at 16:56 • 0 commentsConceptual art by Guilherme Pupo (https://www.facebook.com/guilherme.pupo.9):
![]()
- Face (eyes and mouth) made of LEDs, able to change and expresses robot's feelings;
- Arms powered by servomotors (initially one degree of freedom each);
- A tablet on the front of the body to display images and games, record and transmit audio and video to a remote operator;
- Wheels under the robot for simple movements.
Arte conceitual por Guilherme Pupo (https://www.facebook.com/guilherme.pupo.9).
- Face (olhos e boca) faita de LEDs, capaz de mudar e expressar os sentimentos do robô;
- Braços acionados por servomotores (inicialmente um grau de liberdade cada);
- Um tablet na frente do corpo para apresentar imagens e jogos, gravar e transmitir áudio e vídeo para um operador remoto;
- Todas sob o robô para movimentos simples.
Robô da Alegria ("Joy Robot")
"Robô da Alegria" is a project to help the interaction with kids in children's hospitals