-
Log 7 - First run, it works
11/19/2016 at 12:21 • 4 commentsI finally got the bugs worked out of the machine and software and felt confident to do a full threaded run. I was half expecting something to go wrong during the 3.5 hour process, but it just worked.
I was thinking of making a time lapse video of it, but since the thing is rotating swiftly the picture would just be a grey blur. Anyway, here is the video.
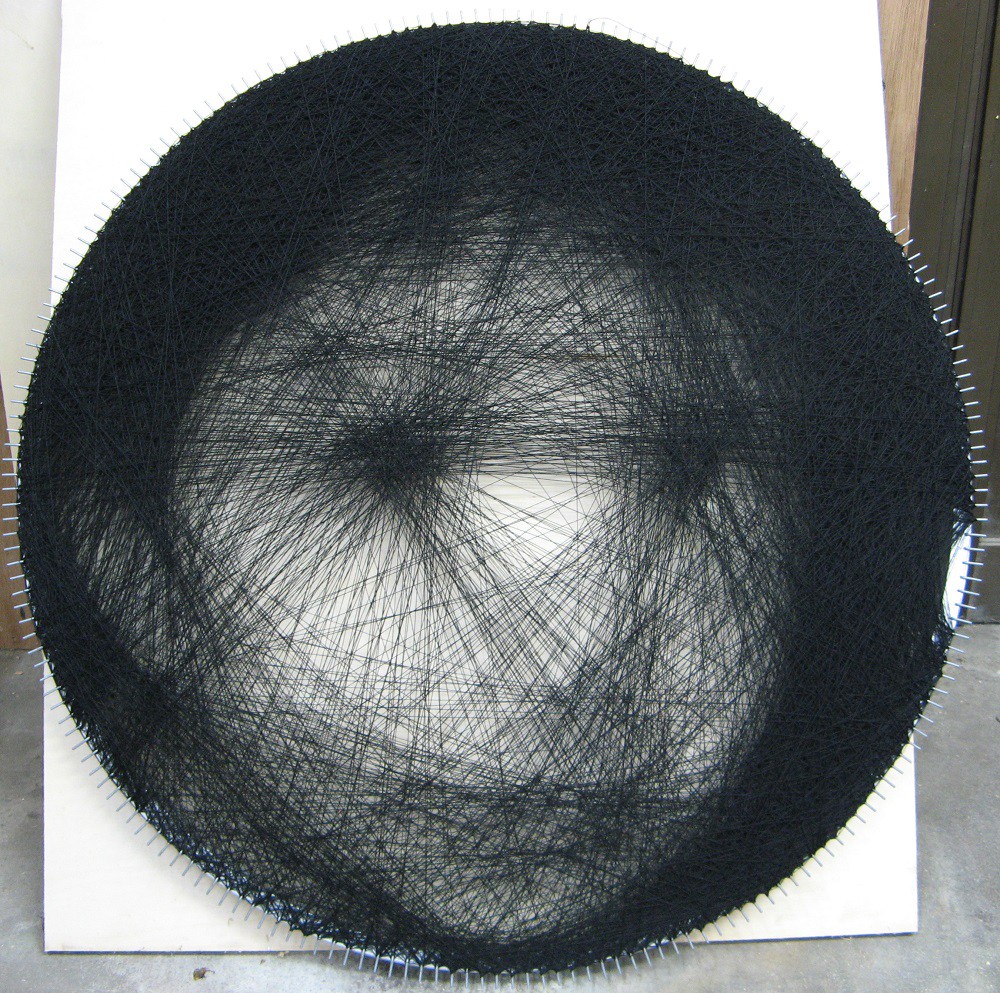
And the result is
![]()
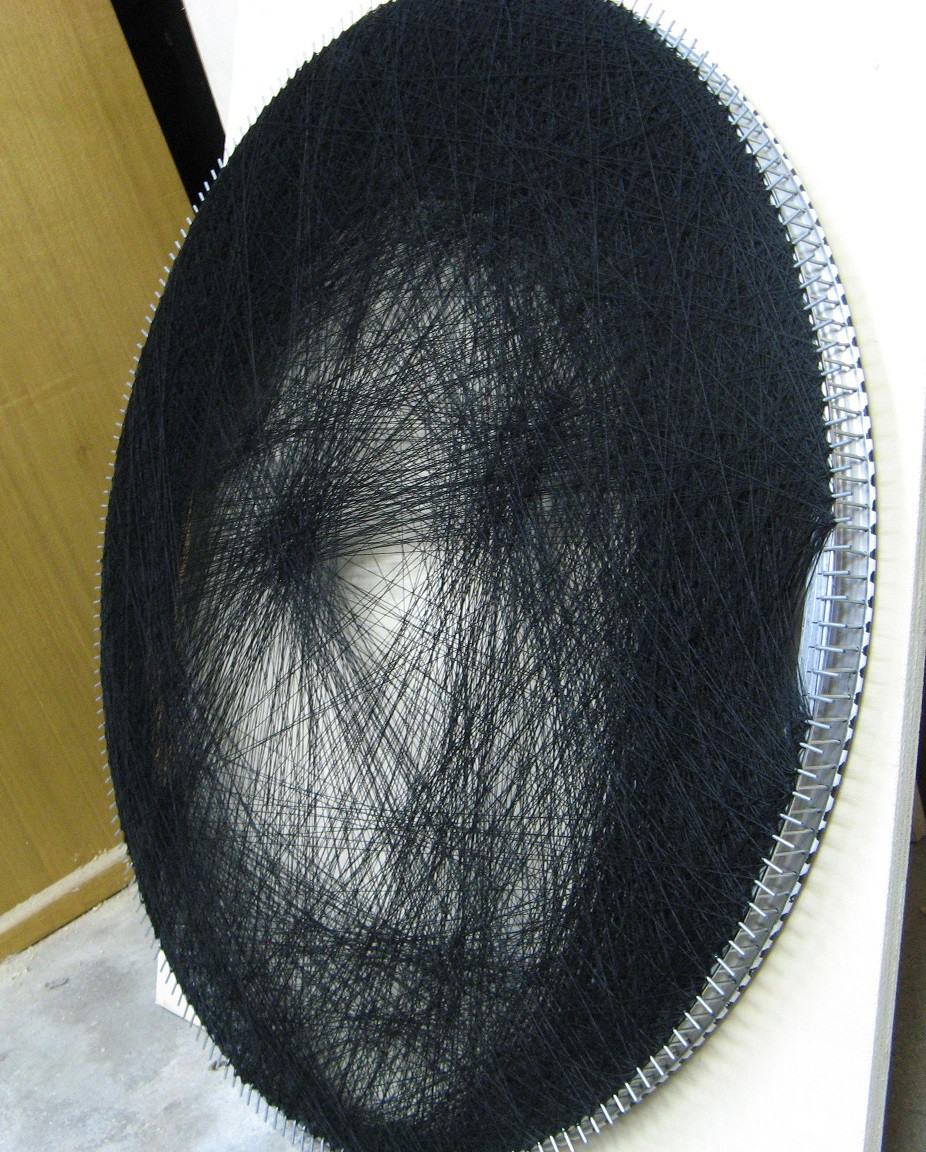
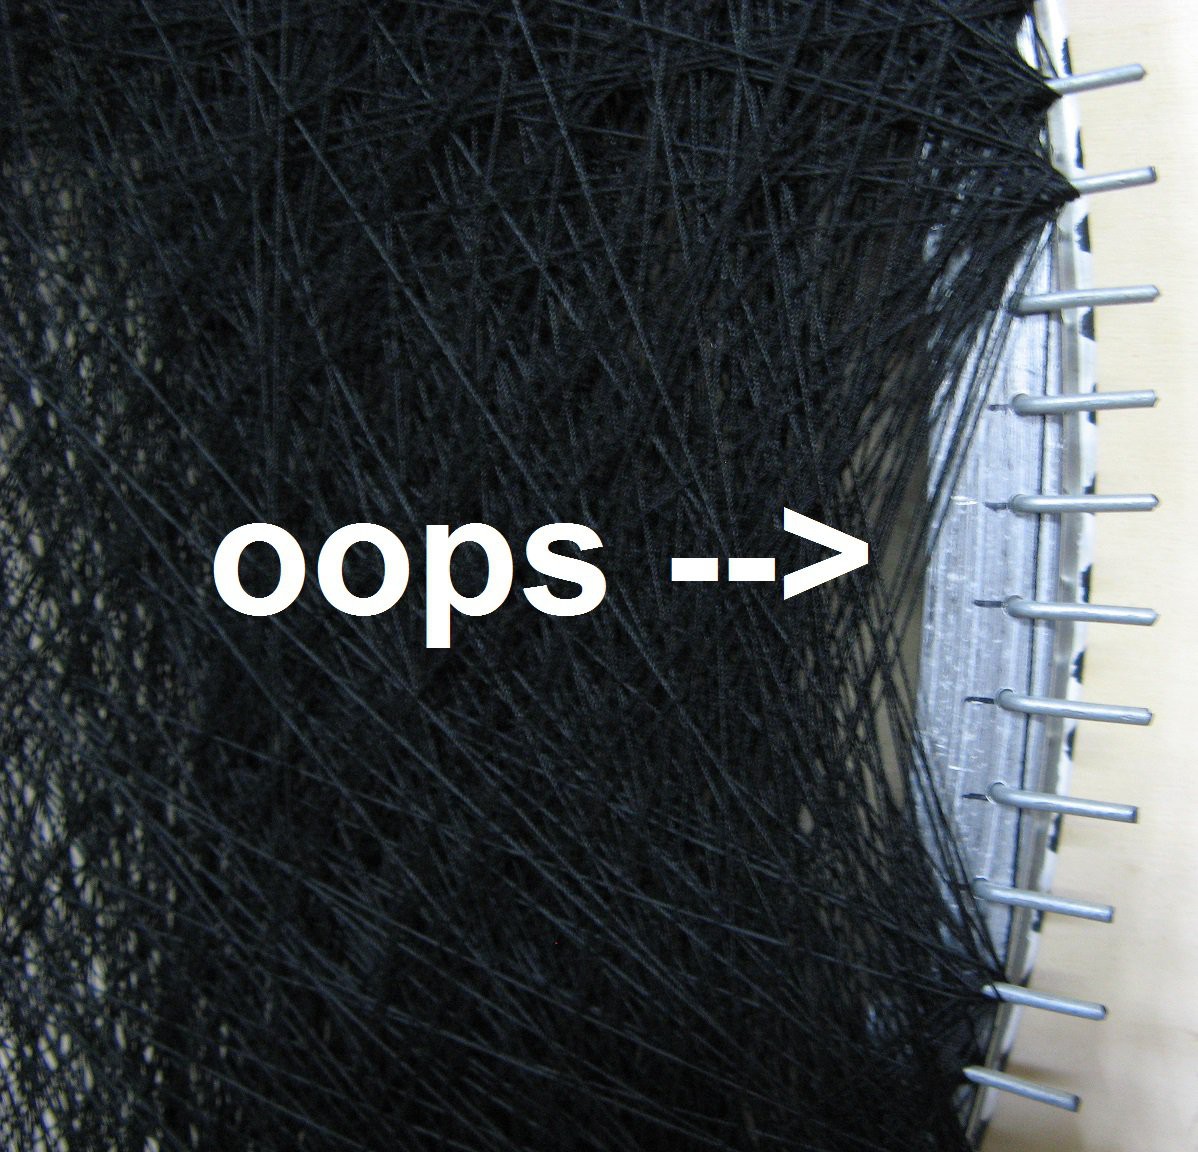
This does not look as good as it should. The parameters for line calculation need to be changed quite a bit and I accidentally ran the calculation for 200 radial pins instead of the 207 on the actual loom. That's why there are seven pins on the right side that are empty and the face is stretched out noticeably.
But I learned so much from this run that the next one will certainly look better. Here are some things I learned:
- The thread is a lot thicker than I imagined. It shows up dark and the black parts of the picture actually come out opaque and thick. I should adjust the simulation to show darker lines. I could also use thinner thread, like a 50 or 60 instead of this 30.
- I can make the minimum line length longer. 25-30 pins rather than 20 would work.
- Faces that have a thinner dark area around them rather than an all black background would look better and require a lot fewer lines.
- Eyes really need careful attention because if there is no clear white part of the eye it just looks like a dark blob.
- This is indeed a functional and very cool idea.
I'll let you know once I get the next one done. Here are some more pictures.
![]()
![]()
-
Log 6 - Thread route
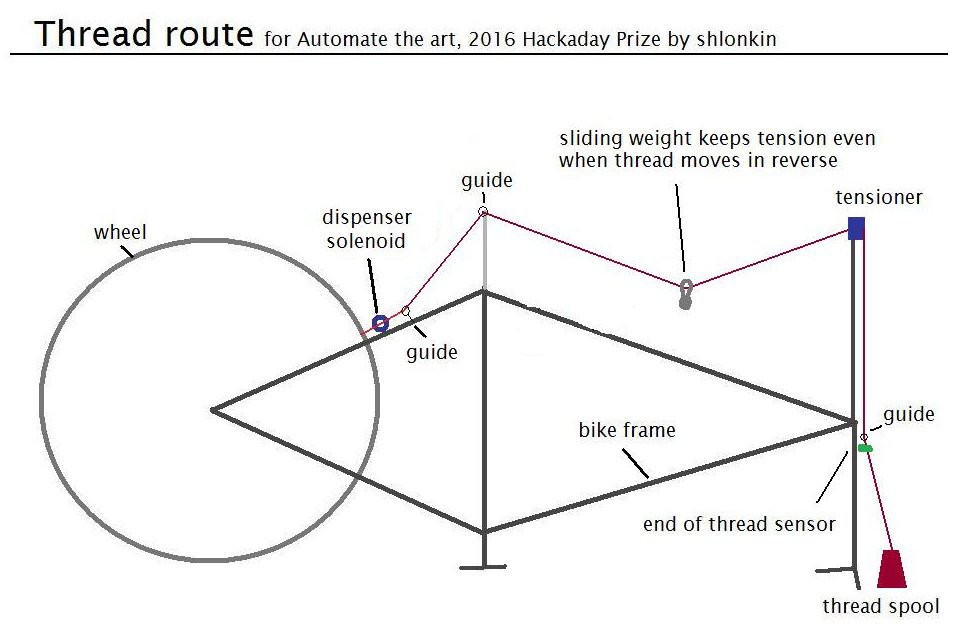
09/25/2016 at 08:35 • 0 commentsSorry about the long delay. Here are some details on the path the thread takes from spool to loom. This is trickier task than it seems and I went through several versions before I found something that should work. So far it has passed a short threaded test run, but I'm not yet confident about it's performance in a full seven hour job. We'll see. Anyway, here's a rough schematic of it.
![]()
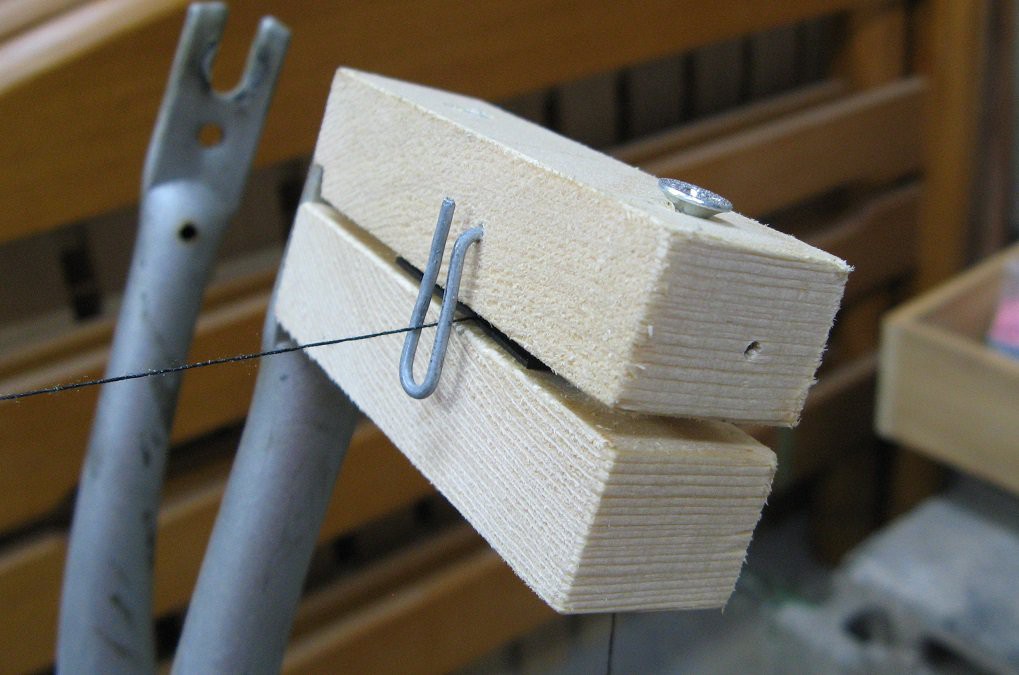
The tensioner is two wood blocks with strips of bike tube hot glued to make friction surfaces. They are screwed together with adjustable tightness and the thread runs between the rubber strips. Here's a pic.
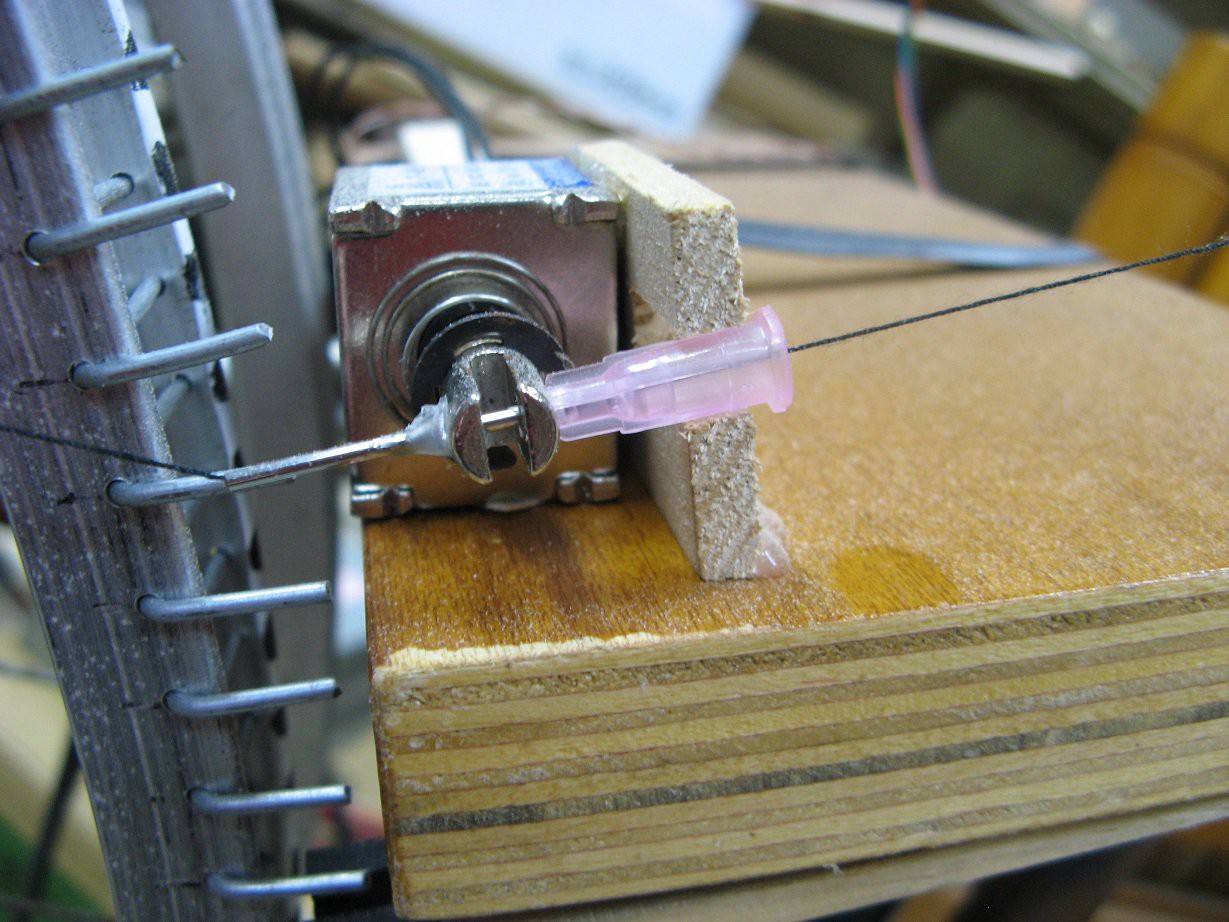
The other major part is the thread dispensing solenoid. I glued a piece of a dollar store cosmetics syringe on the solenoid. The thread passes through the very small steel tube. It is kept from rotating by a wood guide.
I'm sorry I don't have a video of the things running yet. I'm just a little short on time these days. I'll post one as soon as I can, though.
Oh, and I decided my motor setup was just not good enough to trust with a full run, so I ordered a nicer geared motor from ebay and am waiting for it to arrive.
-
Log 5 - Electronics
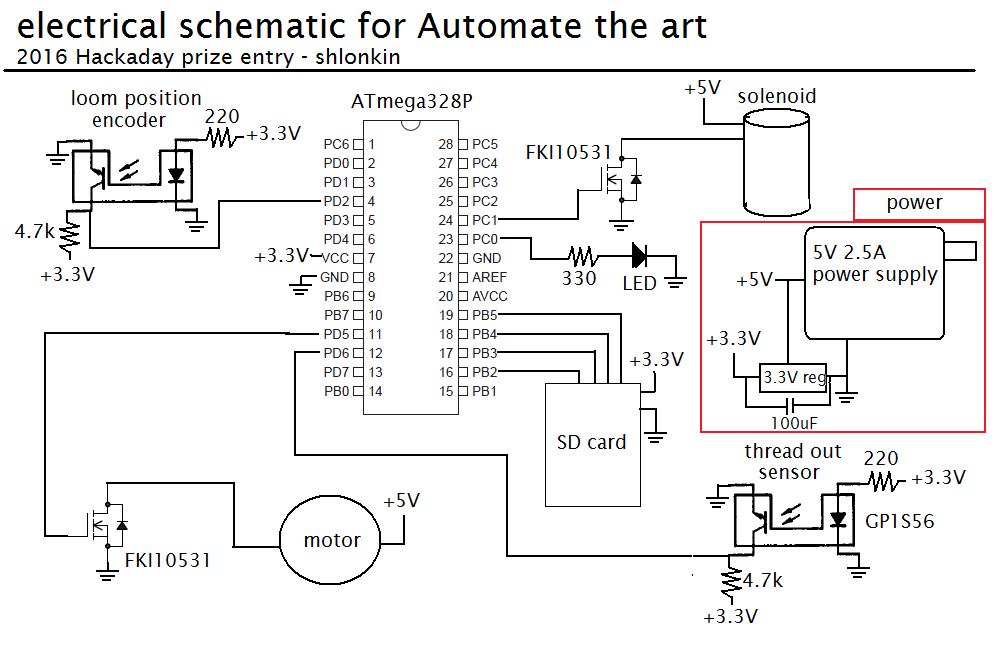
08/21/2016 at 14:11 • 0 commentsThe electronics are not so complicated. I'll let you look over the schematic before I try to explain.
![]()
Notes:
- I would prefer everything to use the 5V rail for simplicity, but that pesky SD card won't let me.
- The encoder and end of thread sensor are photointerruptors I pulled out of my parts bin.
- The motor is a high torque/low speed one salvaged from a printer.
- I haven't received the solenoid yet, but it's rated 12V, 2A, 10mm travel, 20N pull force. I don't need much force so I'm hoping 5V will be enough.
- The LED is for status signals such as errors, finished, I'm hungry.
Oh-crap-the-thread-ran-out sensor -
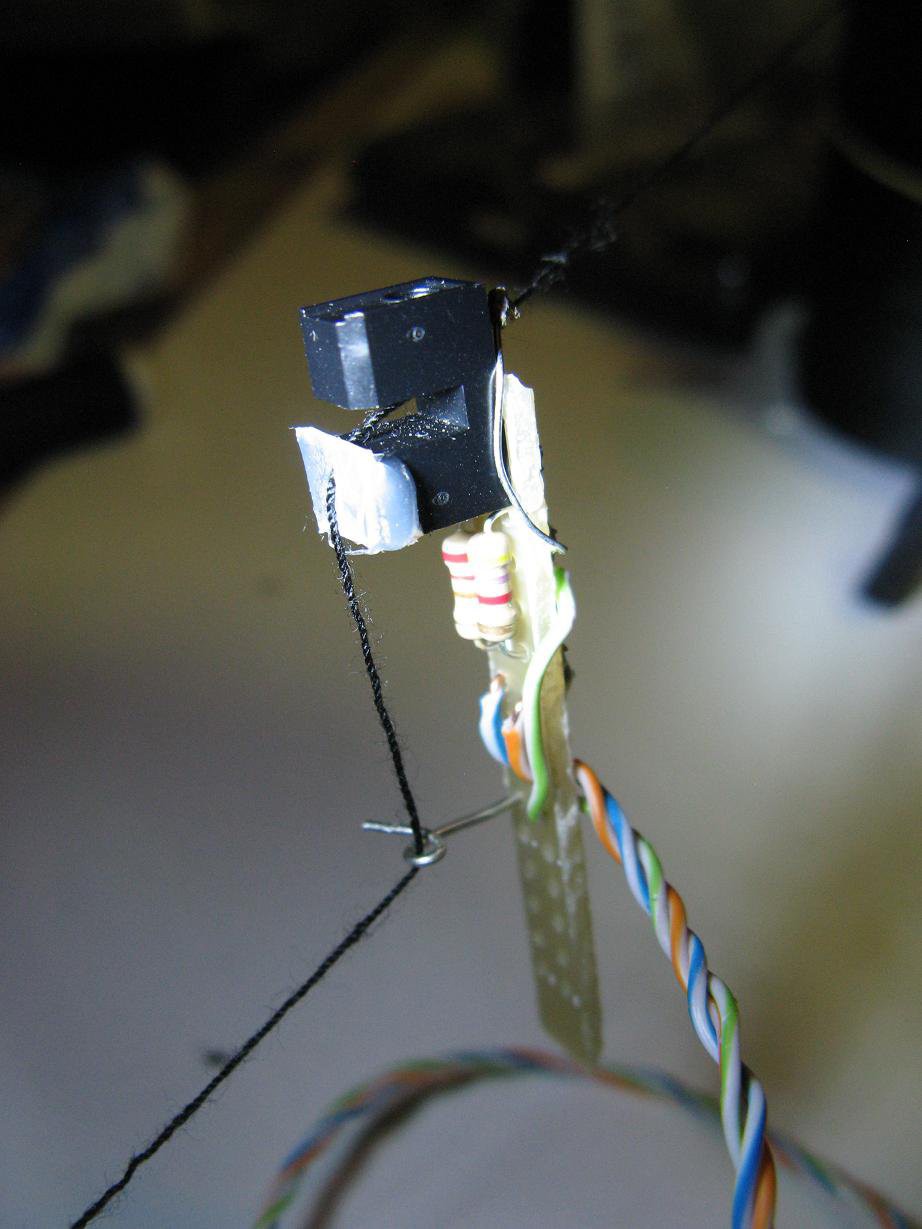
This was a considerable challenge that seemed so easy in my mind, but was not so. I toyed with mechanical devices such as light springs held by the thread, or contacts held apart by thread. But thread is so thin and flexible that I swiftly abandoned that idea and looked for something optical. Digging through my parts bin I found a photointerruptor that just happened to have a little groove the size of my thread right in front of the LED and a hole in the center of the base. It was perfect. The thread runs through the hole in the base, directly between the LED and detector, guided by the groove, and over to a wire loop guide. Here's a picture, but it's hard to see exactly what's going on. The white piece of plastic glued on the device is just to ensure the thread stays in line.
It works great. With thread in place I read a full 5V (on a 5V supply), but when the thread is pulled out it drops to 1.6V which is good enough. When the voltage drops the controller will pause everything and flash a signal on the LED. I'm thinking of adding a button that will let the program resume, but it's not quite as simple as that.
If you want to see where that thread goes from here, wait for the upcoming log that will cover the thread route and tensioner.
-
Log 4 - Software
08/16/2016 at 14:58 • 0 commentsThere are two distinct pieces of software, the image processing part that produces the line sequence, and the microcontroller part that turns the sequence into physical lines of thread. They can be found in the files section of this project, or in the git. They are both functional and awaiting the first threaded test run.
Image processing part -
The algorithm has been reproduced by many people ever since HaD featured the original art. Just look in the comments on that article. I also have to mention Christian Siegel who put his link in the comments here.
Here's an outline of what my version, written in Processing, does:
- An image is chosen and converted to grayscale.
- A circular region is chosen and a number of equally spaced pin locations are set around the circle.
- The sets of pixels along the paths between each pair of pins are found.
- Starting at one pin, the average darkness along each path* from that pin is computed.
- The path with maximal darkness is chosen and the pixels in its set are lightened by some amount. The pin at the other end of the path is the next starting point.
- Steps 4 and 5 are repeated a few thousand times.
*Note: The pins within some range of the starting pin, 20 or so, are not counted. This eliminates short lines around the border that do not contribute to the bulk of the image. An effect of this is a slightly darker ring some distance from the edge.
The user can adjust several parameters to get the image they want. Then the sequence can be saved in a simple file consisting of a two byte step count followed by one byte(the pin number) for each step. The file is put on an SD card to be handed to the next piece of software.
Microcontroller part -
I still haven't decided precisely what piece of hardware I'll be using for the controller, but for testing I'm using an Arduino with SD support provided by an ethernet shield. The final product may use a HaD trinket because I have one in front of me right now.
Anyway, the software does this:
- A sequence of pins is read from the SD card.
- The loom rotating motor is turned on.
- Loom position is measured by a photointerruptor that triggers an interrupt as each pin goes by.
- When a pin in the sequence is reached, a solenoid that moves the thread dispenser is turned on until the next pin arrives. This wraps the thread around that one pin.
- If the thread runs out, a simple sensor signals for everything to stop.
- When the end of the sequence is reached, everything stops.
Just today I tested both pieces of software from the image to the end of the sequence and everything worked fine. The only missing parts were the solenoid(I used an LED for testing) and the whole thread setup. I'm still waiting for the solenoid to arrive in the mail.
-
Log 3 - Loom position encoder
08/14/2016 at 11:52 • 0 commentsIt is rare for my initial ideas to work out just right. Often plan B doesn't work any better. This is such a story. Fear not, my friends, it has a happy ending.
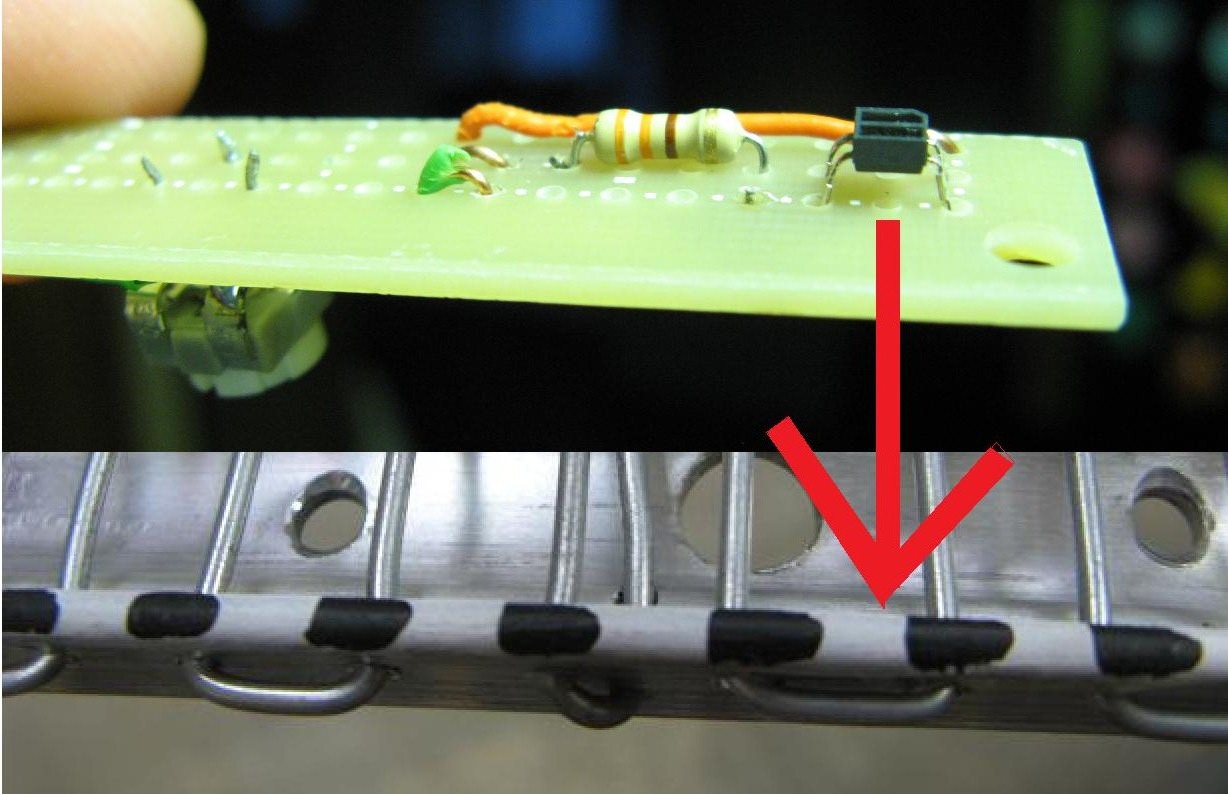
Idea one - surface reflectance sensor and black stripes (fail)
In theory it should work. It seems perfectly reasonable that a surface reflectance sensor that is designed to detect the difference between dark and light surfaces should be able to look at a passing series of dark stripes and generate the desired signal. It probably does work in a professionally built machine with tight tolerances.
I found that it was extremely sensitive to distance from the surface, didn't give a very substantial current swing, and didn't have great resolution. Here's disappointment number one.
Idea two - Mechanical switches (fail)
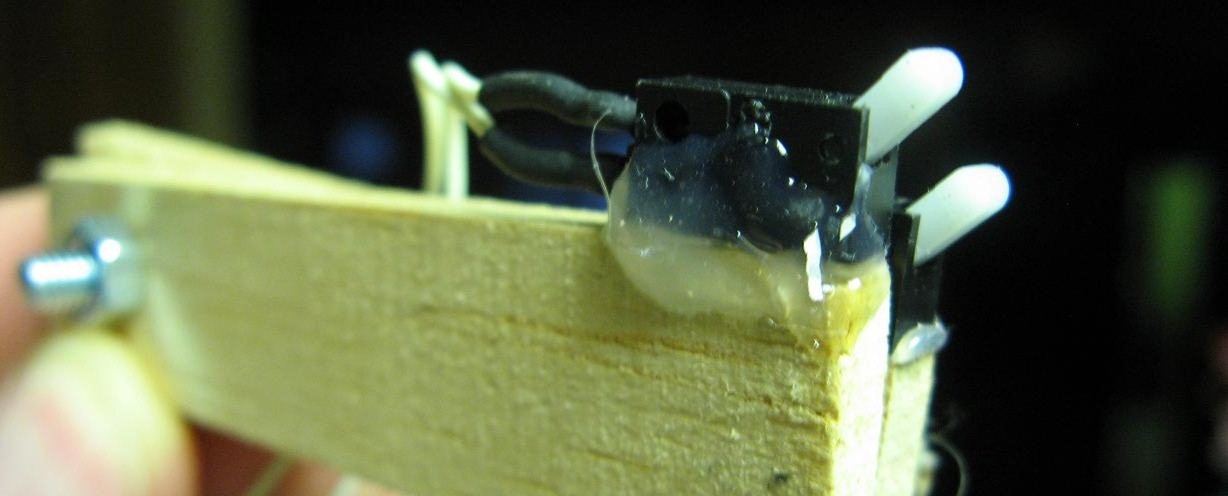
This one actually worked a little, kind of, but between debouncing and the really tight tolerances required, it just wasn't a reliable way to do it. The idea was that the wires that cross between the sides of the rim push a sensitive microswitch as they pass by. To increase resolution I made a pair of switches that can be set for the desired interval. Although I was getting some almost acceptable results, I thought there has to be a better way. Here's disappointment number two.
Idea three - Photo interruptor (success)
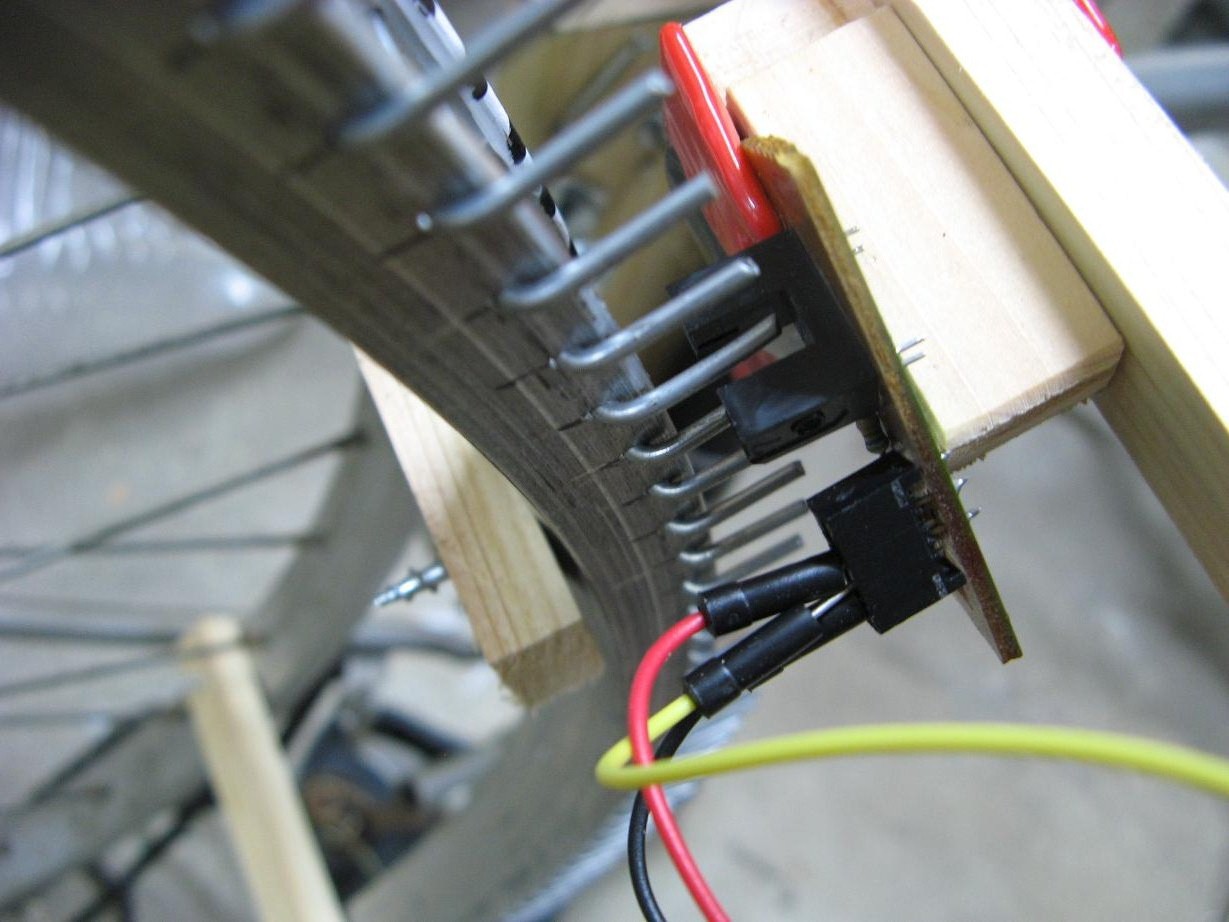
Actually one of my first ideas, but I desired more resolution, so looked elsewhere. My good old friend the photo interruptor. I finally came to my senses and gave it a try. I have these convenient pokey out bits evenly spaced just where I need them, so I just needed to position the device right and bam! clean, reliable, fast signal. Actually it took a little more than that. The pins were not all exactly the same length, so I had to go around and snip all the long ones down a millimeter or two. Here it is just temporarily clamped for testing.
At this point I have a reliably rotating loom with working encoder. The next hardware step is the thread dispenser attached to a fast solenoid. I am waiting for a solenoid from China, but I'm not too confident that it will be the one. It has to move a very light piece of tube between pins flying by about every 30ms. That means it has to reliably move one way, wait a moment, and move back the other way all in 30ms. It's not impossible, but It's a challenge.
-
Log 2 - Rotation
08/12/2016 at 12:22 • 0 commentsThe large circular loom needs to rotate with very little wobble so that the pins are moving in a predictable plane. The speed needs to be slow enough for the thread dispenser to move between pins without collision, but fast enough that it doesn't take forever to get a result. It should look something like this. NOTE: It does not make that noise anymore. It is pretty quiet.
Now I'll tell you how I got there.
The structure -
As you can see, there is a bicycle with half of the back fork triangle thing removed. The wheel still rotates rigidly enough for my purposes while only supported on one side. But I can't use the spoked wheel for the loom because the hub protrudes beyond the rim. Rather, I attached the spokeless loom at a distance of about 6cm. It is attached by eight identical pieces of wood. These are screwed onto the loom through the spoke holes. Matching holes were drilled into the spoked wheel. I spun it by hand and all the pins stayed very nicely in a plane, so I consider myself lucky.
Driving it -
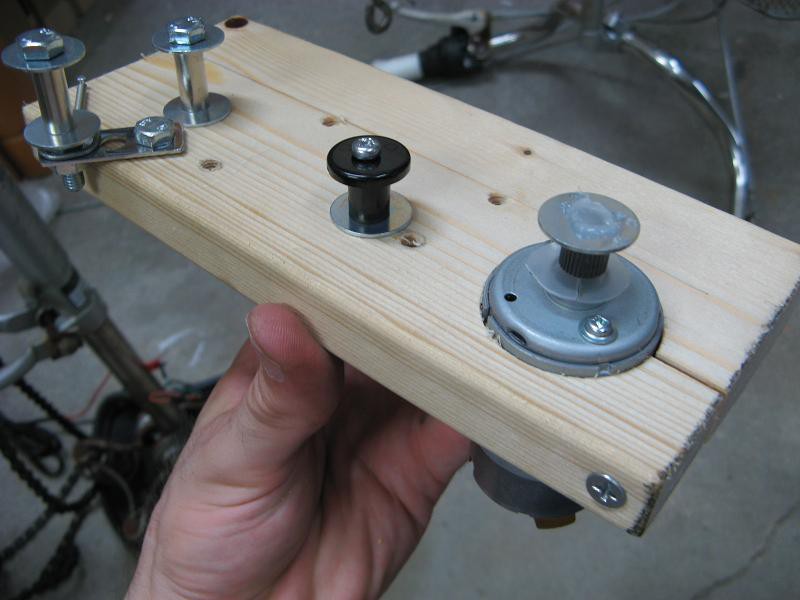
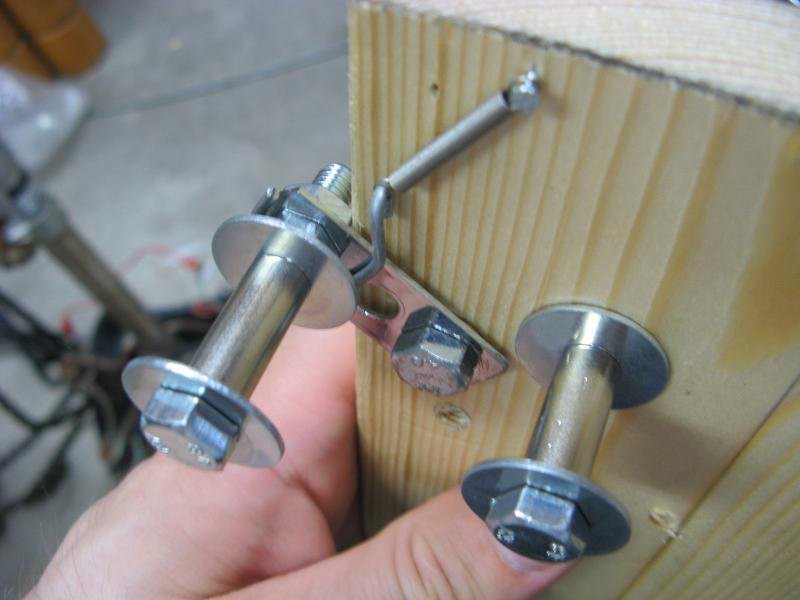
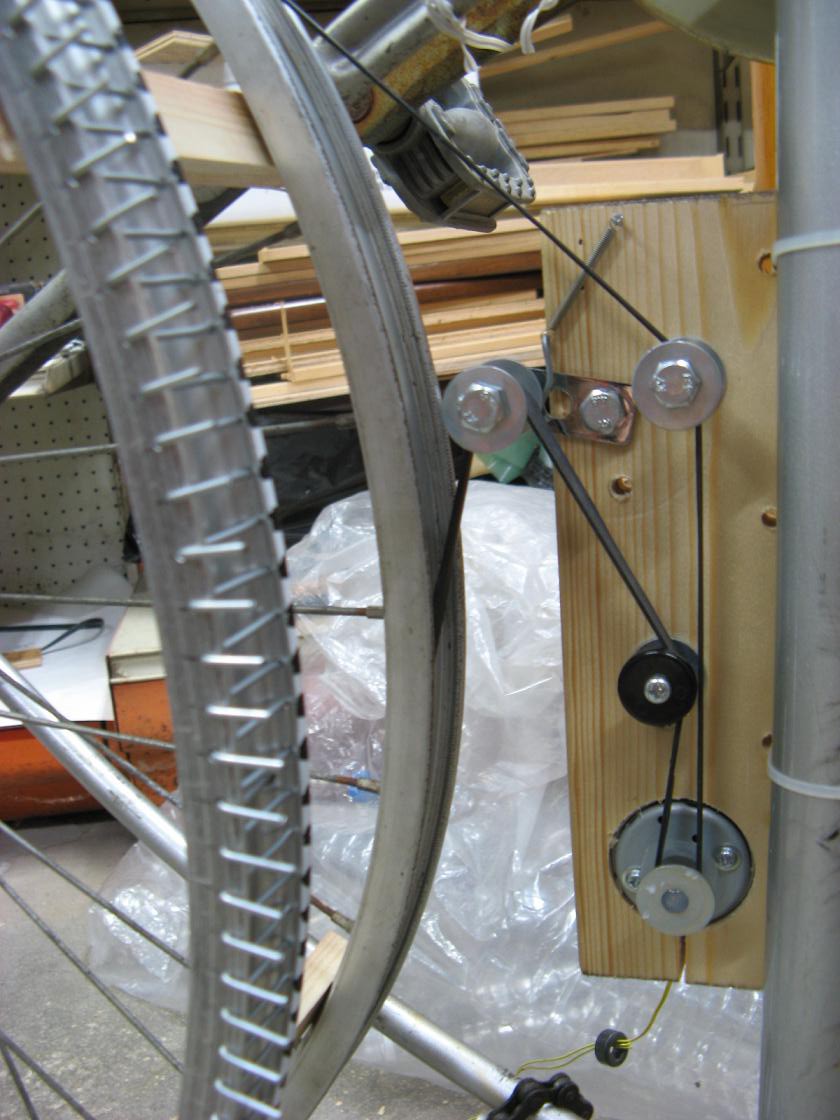
I pulled a really nice DC motor from a printer that has good torque and moderate speed. To get power from the motor to the wheel I cut a thin strip of rubber from the tube(I'm getting a lot from this bicycle). For some reason the strip has a much larger diameter than the wheel?? I then assembled this block of wood with motor, guide rollers and tensioner. This was just a handful of bolts, nuts, spacers, washers and a spring that were laying around the shop. Note the screw and gap that are used to lightly clamp the motor.
When everything is assembled, it looks like this. The block is just held on by cable ties at this point, but I'll need to affix it a bit more securely in the future.
-
Log 1 - building the loom
08/11/2016 at 05:49 • 0 commentsThe basic idea of this art is that thread is run in straight lines across an area, anchored by a set of pins around the perimeter. I'll call this structure with pins a loom for lack of a better word. The easiest shape to make would be a square, but a circle has a lot of nice properties that make it ideal for this project.
Rim -
A 26 inch(or any other size) aluminum bicycle wheel provides a very accurate, rigid structure. They are plentiful and free when found in garbage piles. I grabbed a whole bike for use in this project. Just remove the tire and all the spokes then clean it up and it's ready.
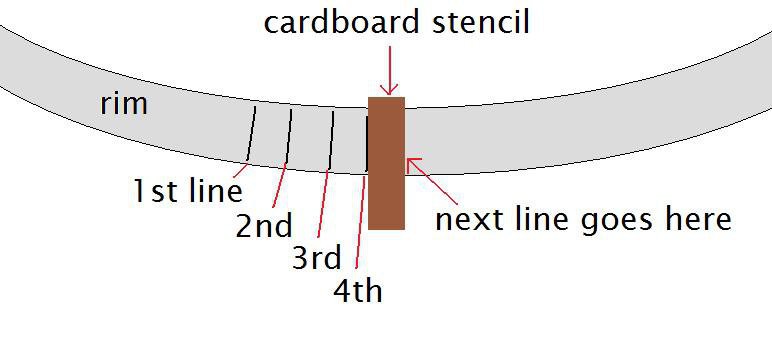
The next step, making the holes, requires a bit more work. Here is one key point that will make it so much easier for you: The number of holes is not important. Consistent spacing is. I set out with the goal of 200 holes, which required about a 9.36mm spacing. I took a piece of cardboard from a tissue box and cut a strip just slightly thinner than that to account for marker width. Then I took the finest point marker I had and began at an arbitrary point.
I was off by an average of about 0.35mm because I ended up with exactly 207 marks. That's OK. The 207th mark just happened to fit in exactly right, but that's not the case in general, so here's a trick that will save you some frustration.![]()
In case your last mark does not land in just the right place, do the last 10 or so lines in pencil. Then if you are off by 3mm in the last interval, adjust those 10 intervals slightly to spread out the error. It will result in about 0.3mm difference per hole which won't be visible in the final product.
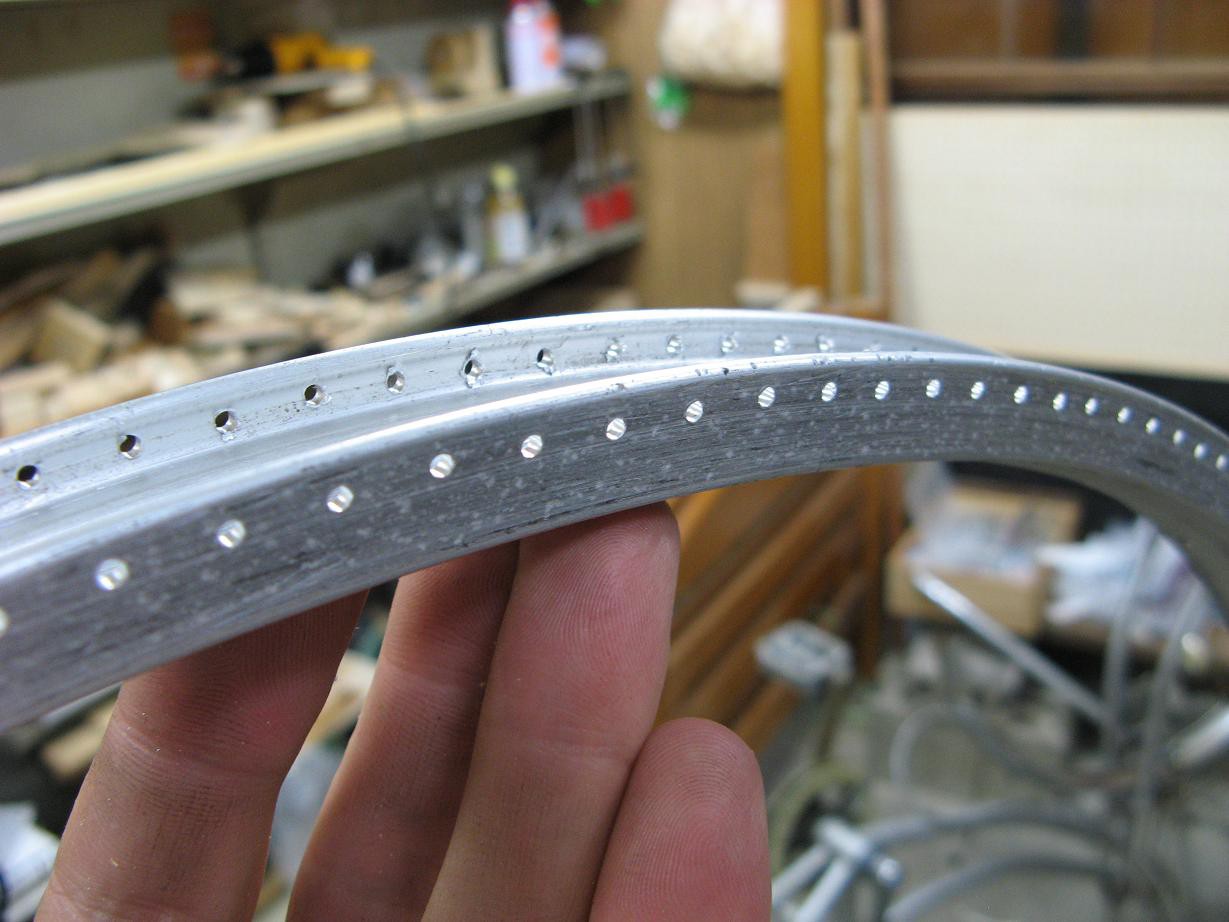
Finally, drill the holes on a drill press with something to hold the rim flat because you want everything straight. I used a 2mm bit to work with my pins.
Pins -
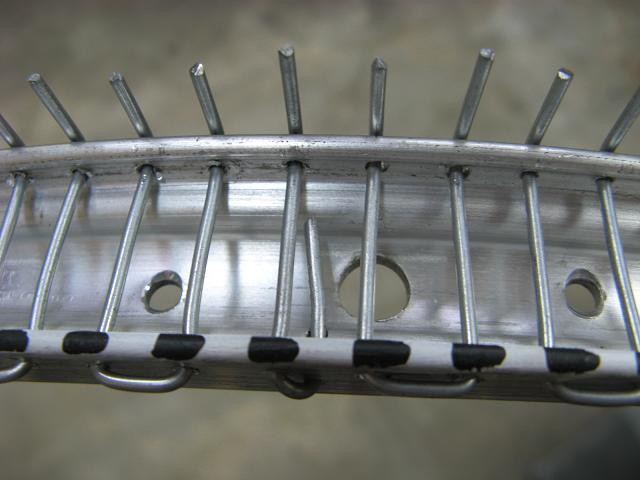
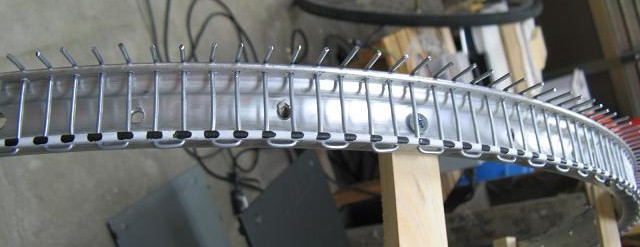
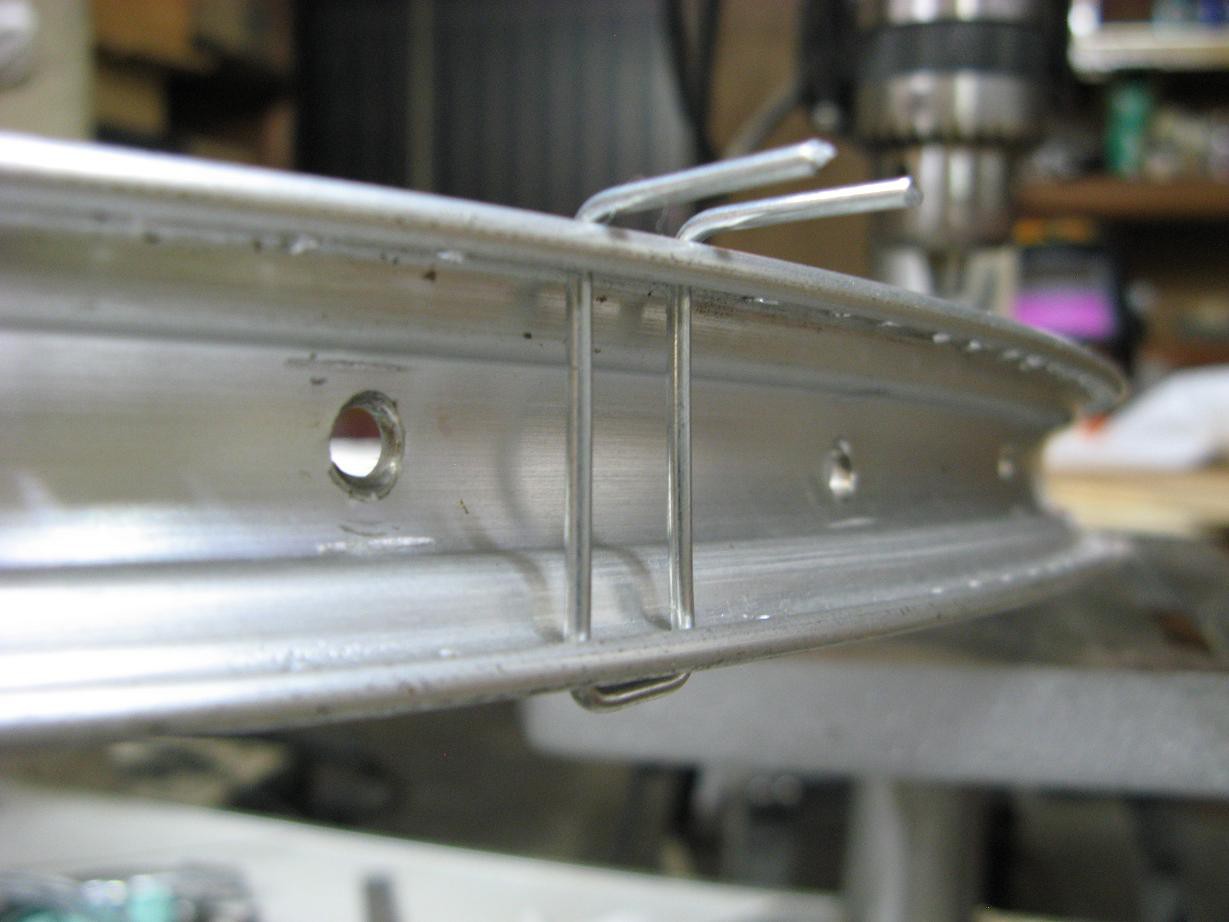
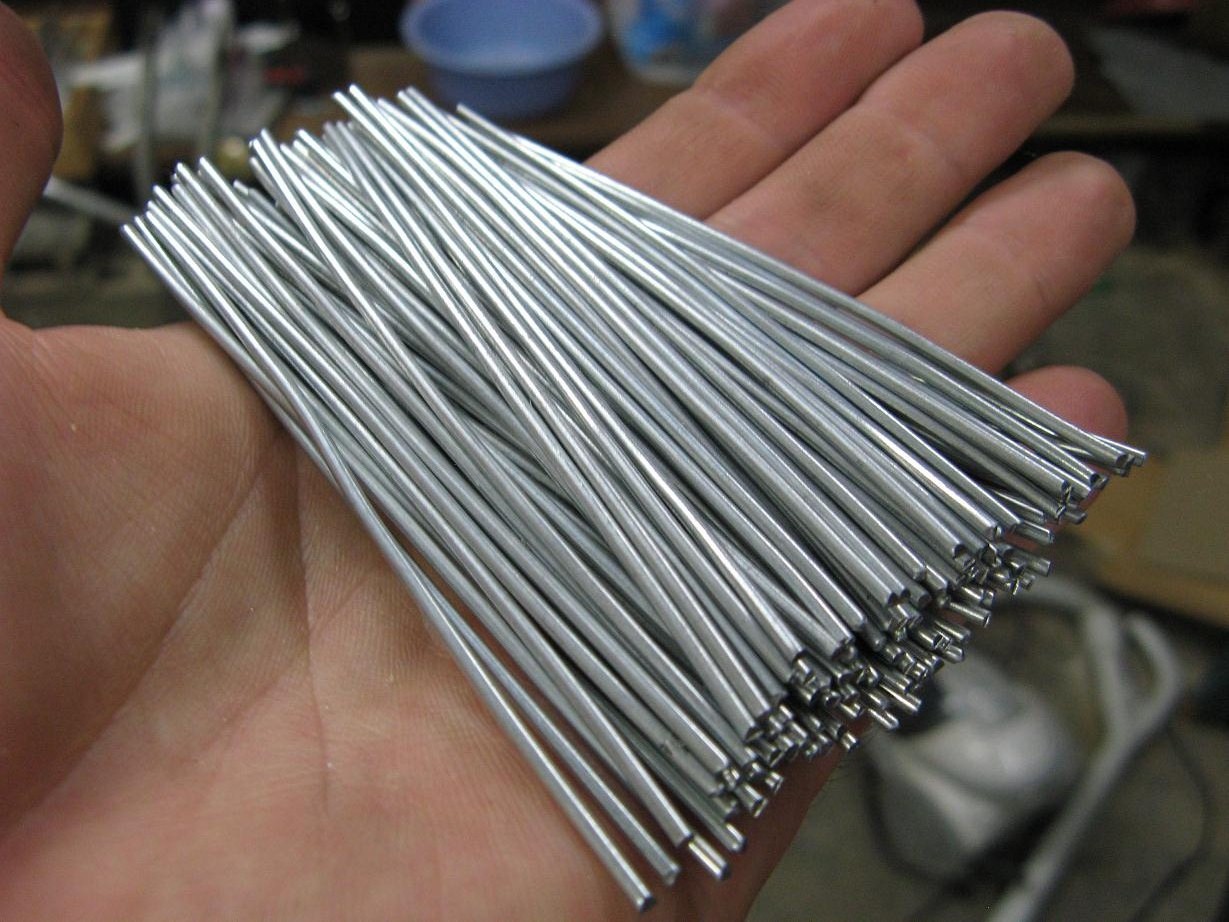
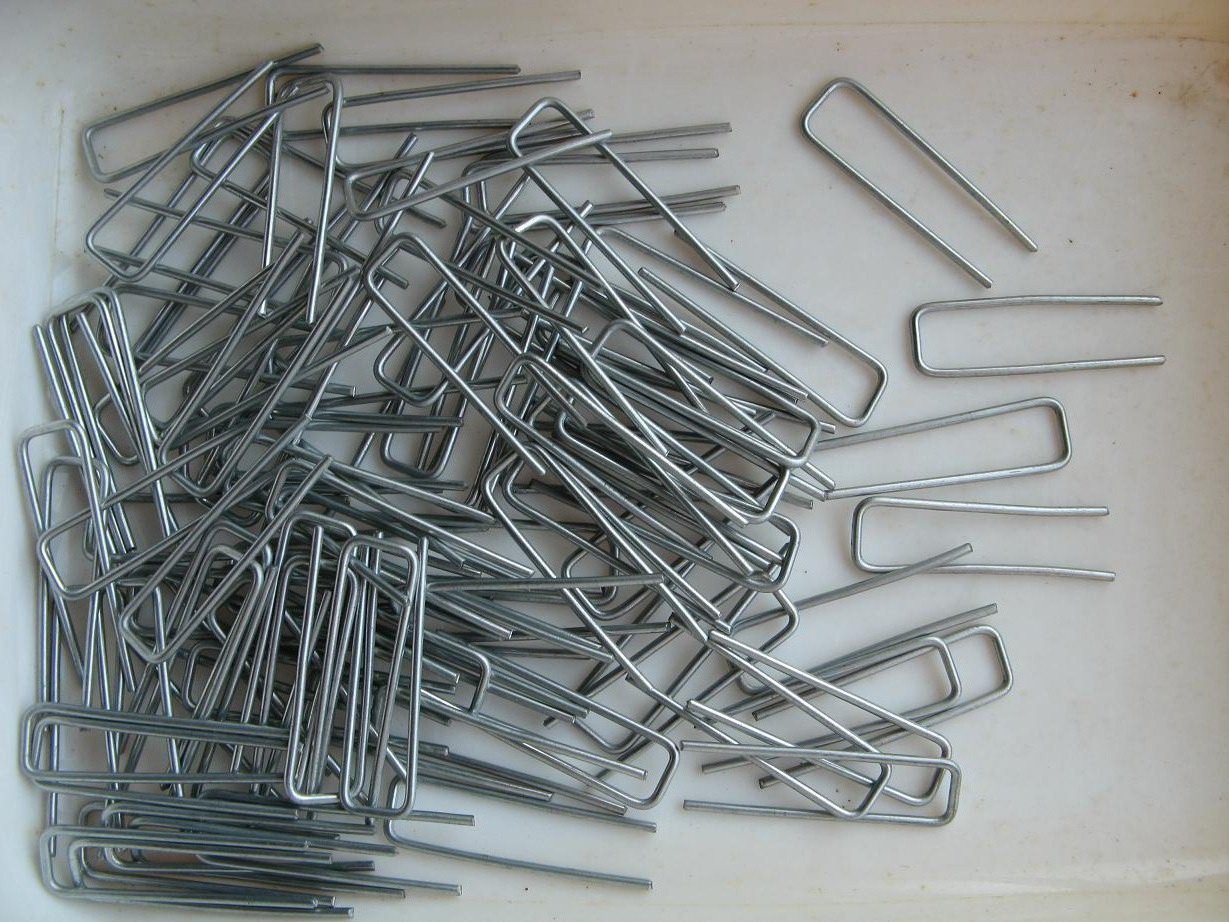
There are many ways to do this. You might find one that works better for you. I decided to use 1.6mm steel wire bent like... well, just look at the picture. This setup gives me nice, rigid pins that I can adjust with pliers.
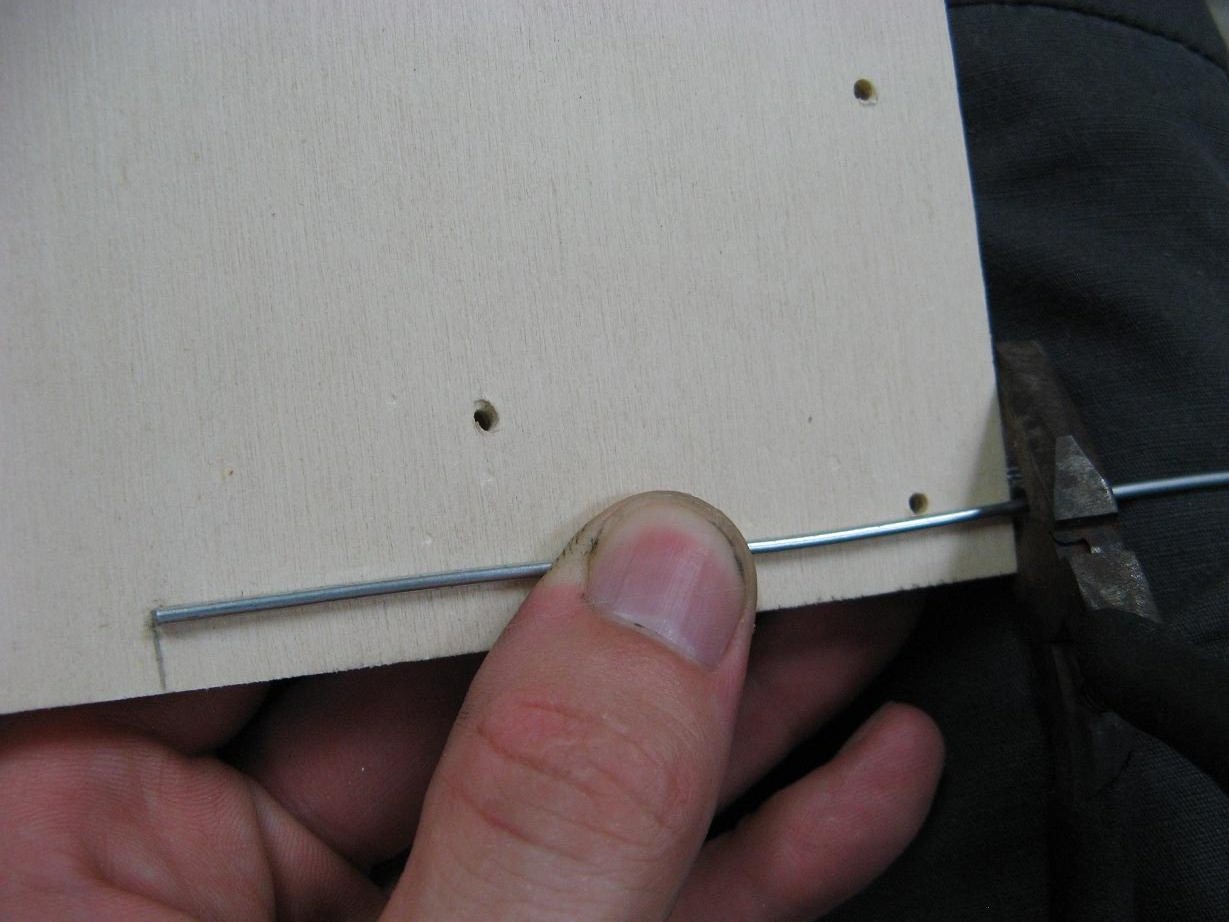
There are going to be a lot of these, so prepare your mind for a little tedious work. Here's the jig to make them the same length. Yes, it's just a pencil line on a piece of wood.
I used a similar jig to bend them right in the middle like this.
Wait a minute, didn't I say 207? What about the last odd pin? I made a dummy hole for it and cut the wire short on one side.
Finally, the loom is complete. I'll tell you about those black spots and bits of wood next time.
 shlonkin
 Wait a minute, didn't I say 207? What about the last odd pin? I made a dummy hole for it and cut the wire short on one side.