-
The Resurrection
06/21/2018 at 14:20 • 0 commentsA couple of weeks ago, I saw that some developers forked the project on GitHub. It made me feel slightly guilty that I left the code so buggy, so I started working on that again. The latest code has big improvements over the version from two years ago. The underlying algorithm is the same, but that's about it. The most important changes are the following:
- The image generation and display now happen at the same time thanks to SDL.
- For compatibility with SDL, the code is now in C++. Although to be honest, it's mostly still C with the C++ features that I needed.
- Generating images of aspect ratio ≠ 1 is now supported.
- More colormaps are available (not only monochrome).
- The image generation itself is better encapsulated in order to make it independent from the display.
- Some image generation steps are combined together instead of spread out over several functions. This probably makes the algorithm a bit more difficult to follow but removes the need for intermediate arrays, which reduces the memory usage and increases the generation speed.
- The image width, height and colormap can be set by command line arguments.
- When running, preset patterns can be added or removed with the +/- keys on the keypad, and the image can be reset by clicking in the window.
- Symmetry functions are simpler, although for the moment only symmetry orders 2 and 4 are implemented.
Here's a 640x480 image with 5 patterns and the "dawn" colormap. Sweet!
![]() The improvements that I'm most interested in are the following:
The improvements that I'm most interested in are the following:- Make a GUI to be able to change the pattern parameters and the colors during generation. That would be süper cool.
- Depending on how the live-controlled generation goes, it would probably be useful to accelerate the code. Most of the time is spent at the lowest level of the algorithm, i.e. the blurring functions. If there's any time to win, it's there. I'm also thinking about multithreading. The activator/inhibitor array generation for the different patterns are independent, it's only when computing the variation array that they all have to be ready. So they may be parallelized.
- Implement better symmetry. A clean rotational symmetry algorithm for symmetry orders different than 2 or 4 is still something I haven't been able to develop.
-
Done, more or less
12/06/2016 at 07:50 • 0 commentsI decided to put this project on hold, even if it's a bit buggy and not as good as I want. It works decently, I already learned a lot along the way, and I want to move on to something else, so this is a good time to consider it somewhat done. And I'm not selling it or anything so you don't have a right to complain :p
Remaining issues
So far all the image parameters (e.g. its size or the number of patterns) are defined as constants. So all the arrays (e.g. the 2D array that stores the image) are statically allocated. But I wanted to be able to call the program from a script and pass the parameters via the command line or via a configuration file. In this case, the parameters wouldn't be know at compilation time, and all the arrays that depend on them would have to be allocated dynamically.
I tried to implement this and there are two problems:- It makes the program less clear and a lot less safe, what with the malloc's and free's everywhere. It's totally doable but I want to focus on getting the principles of multiscale Turing patterns right, not spend more time dealing with pointers to pointers to pointers.
- For some of the arrays, it's easy to switch to dynamic allocation. But for the image, it's more complicated. The image goes through several functions (blurring, applying the symmetries, normalizing...) that all have to be refactored to take pointers instead of 2D arrays. Again, it's no big deal in itself but my design makes it hard to change one function at a time and test it. I have to refactor the whole chain in one go. I tried to do that and I tried a couple of more subtle approaches, but it didn't work. I think my software design is to blame on that one.
Concretely, the problems that remain are the following:
- Only square images can be generated (see last log). I know that the problem comes from the blurring function but I wasn't able to correct it. The symmetry functions are also written for square images because I was lazy.
- The symmetry orders different than 2 or 4 (i.e. all the complicated ones) kind of work but with artifacts. I have no clue where that comes from.
- On some computers, with some parameters (picture too large?), the program crashes with a segfault.
What I learned
I made quite a lot of design mistakes at the beginning, and I realized the consequences when it was too late. I see that as a success because next time, I'll be more careful in the design phase. Incidentally, I just started reading "Code Complete" by Steve McConnell and he describes software design as a wicked problem, i.e. a problem that you have to solve once, mess up, and learn from your errors to solve it right the second time. That resonates with my experience here. Specifically, the mistakes I made:
- The functions that make the actual pattern generation are too dependent on one another. It's hard to modify one without having to change the others as well.
- I should have written unit tests for the important modules from the beginning.
- Related to the last point, from the beginning I tested all my functions with square images of sizes between 100x100 and 800x800 pixels. If I hadn't restricted myself to square images, I would have quickly seen that the blurring wasn't correct, when it was easier to debug. And if I had tried to generate larger images, I would have realized that it caused segfaults. So, I should have tested more liberally and not only special cases.
I also learned about Turing patterns, obviously, as well as doxygen and makefile. And I had to think a lot about pointers, which is always good.
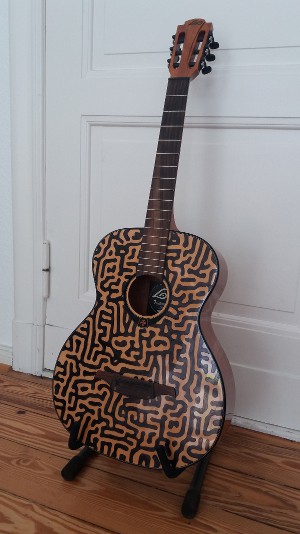
Like I said earlier, I want to move on even if the source is still buggy. On the other hand, I'm not going to let something half-baked run around on the interwebz without ever correcting it -- I have a reputation to maintain. (No? I don't? Damn.) I'm definitely going to use what I learned here in another project featuring Turing patterns. Something über-fancy. In the meantime, I generated a cool single-scale pattern to decorate my guitar, so I'll leave you with that.
![]()
-
Improving and debugging
09/15/2016 at 10:18 • 0 commentsThere are three things I want to improve or correct:
- All the parameters (number of patterns, picture dimensions, etc.) should be passed by command line arguments. If no arguments are provided, then assume some default values. My plan is to make a script that is going to repeatedly call the pattern generator, automatically changing the arguments, and store the results (animations and/or pictures). This way, I could generate tons of results and see the influence of the parameters. This feature won't be hard to implement.
- Correct the symmetry, which works ok but the results are only perfect with symmetry orders 2 and 4. These are special cases because they split the image in square zones. For other symmetry orders, some artifact-ish patterns emerge here and there, and that's not good. So far I haven't been able to narrow the problem down.
- Generate rectangular images. Let's develop that.
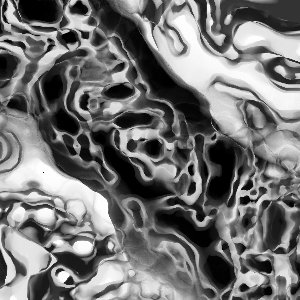
I've been aware for a while that the generator doesn't work if the width and height of the picture aren't equal, so I've limited the tests to square images. But now I want to know what really happens. So I'm running some tests. Here's a 300x300 picture with 3 patterns and no symmetry:
![]() Everything's fine. Now let's try with 400x300:
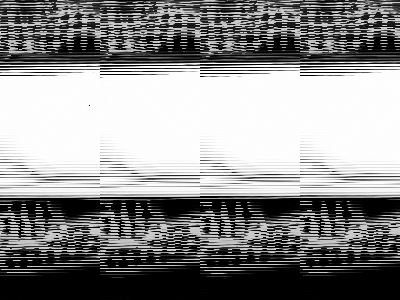
Everything's fine. Now let's try with 400x300:![]() Wooow that's a mess. There seems to be stuff repeating and overlapping... Hard to understand what's happening. But with a small difference between the width and height, we can see a bit clearer. The picture below on the left is 301x300, the right one 302x300.
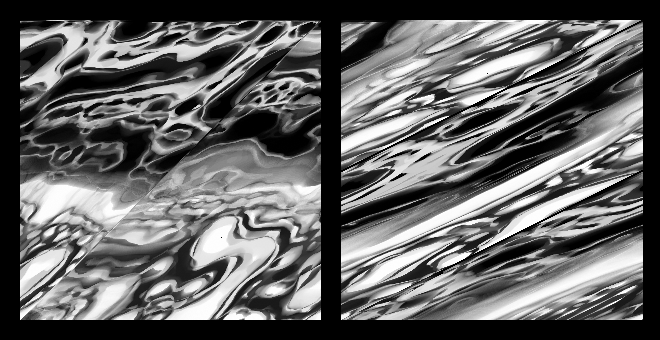
Wooow that's a mess. There seems to be stuff repeating and overlapping... Hard to understand what's happening. But with a small difference between the width and height, we can see a bit clearer. The picture below on the left is 301x300, the right one 302x300.![]()
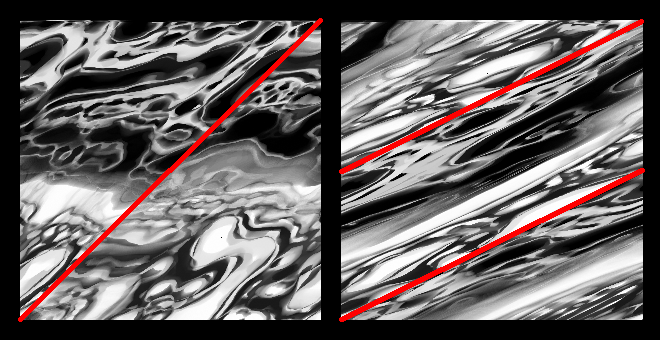
It's like the left picture is split in two zones, and the right one in three. I highlighted the splits in red to show them better:
![]() Turns out an image 301x300 gets split in two zones, 302x300 in three zones, 303x300 in four zones... For 400x300, there are so many zones that it's hard to recognize anything.
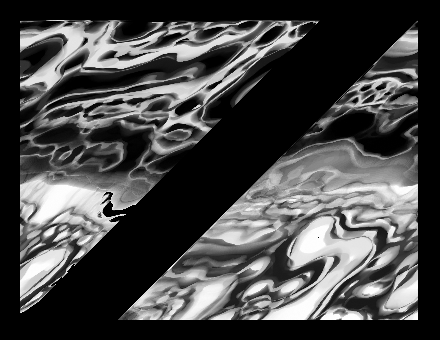
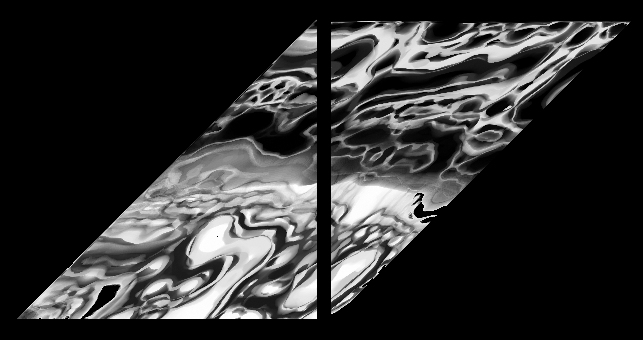
Turns out an image 301x300 gets split in two zones, 302x300 in three zones, 303x300 in four zones... For 400x300, there are so many zones that it's hard to recognize anything.At first I thought that the zones were completely separate, the patterns evolving independently within each one. I also noticed that each zone looked like a good picture but distorted. And I kept looking at those pictures, and oh-em-gee something clicked! Take the 301x300 picture and separate the two zones:
![]() Put the right zone to the left and vice-versa:
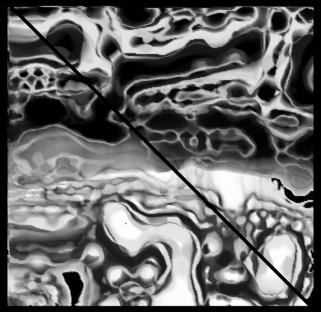
Put the right zone to the left and vice-versa:![]() See where this is going? Now apply some shear to de-distort the picture:
See where this is going? Now apply some shear to de-distort the picture:![]() The zones are not independent, it's only one picture but distorted and somehow split and wrapped around. Or is it some kind of aliasing? I still don't know what's happening there, but hopefully I'm getting closer.
The zones are not independent, it's only one picture but distorted and somehow split and wrapped around. Or is it some kind of aliasing? I still don't know what's happening there, but hopefully I'm getting closer. -
Rotational symmetry
09/10/2016 at 11:35 • 0 commentsOne feature of the algorithm that's been missing so far is a proper rotational symmetry. I've already implemented a point symmetry to get the same result as a 2-fold rotation; it's fast and the code is simple but not generalizable to n-fold rotations. What I find especially cool is 3-fold symmetry. Here I'll explain how I coded the general symmetry and present some results.
According to the original algorithm, the rotational symmetry is applied to the activator and inhibitor arrays of each scale, before looking for the best variations. Each pixel/array element is averaged with its symmetrical points around the origin of the image. The number of averaged pixels depends on the symmetry order. First we'll see how the symmetry works in practice, then to which part of the image it should be applied, and finally an idea to organize all this data.Rotational symmetry
For the moment, let's forget the Turing patterns, forget that we will work with data arrays and just focus on the point symmetry in a 2D coordinate system. We have a picture, assumed square, with a width 2r, and the origin at coordinates (0, 0).
Let's also assume that we want the picture to be point-symmetrical around the origin, with an order of 4. That means that the image will be four times the same sub-image, rotated around the origin.
![]()
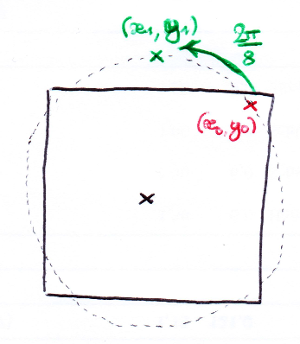
There's a point at coordinates (x0, y0) which symmetrical points we want to find. If we draw a circle centered on the origin and passing by (x0, y0), the first symmetrical point is also on this circle but rotated by one fourth of a full circle, that is 2π/4. This gives the coordinates (x1, y1). The second symmetrical point (x2, y2) is found by the same method and a rotation of 2*2π/4. And the last point (x3, y3), same thing with a rotation of 3*2π/4. In the end, we have four points that are symmetrical around the origin.
![]() In general, for a symmetry order s, the rotations of the (x0, y0) point around the origin will be the angles
In general, for a symmetry order s, the rotations of the (x0, y0) point around the origin will be the angles
where
Obviously, s = 1 is a special case with no symmetry at all.
Concretely, how to compute the coordinates of the points symmetrical to (x0, y0)? Knowing the angles θ, the rotation is done with
Looping through the values of i, it's easy to make a list of all symmetrical points to (x0, y0). And if these two formulas are applied to all points in the appropriate portion of the image (for a symmetry order s = 4, that's the top-right quarter), we can list all the symmetries in the image.
Application
For the project, we have to apply these rotations to a 2D array (activator or inhibitor) and average the values of the symmetrical points. For example, let's work on the activator array act[x][y], again with s = 4:
- Find the coordinates (x0, y0), (x1, y1), (x2, y2), (x3, y3) thanks to the formulas above.
- Compute the average avg = (act[x0][y0] + act[x1][y1] + act[x2][y2] + act[x3][y3]) / 4.
- Replace the values in the array, i.e. act[x0][y0] = avg, act[x1][y1] = avg, act[x2][y2] = avg and act[x3][y3] = avg.
- Loop steps 1 to 3 over all act[x][y] with (x, y) belonging to the top-right quarter.
Here, step 1 is done on-the-fly. This requires computing rotations each time we want to symmetrize an array. But if the symmetry order is fixed, it's more elegant to make a list of symmetrical coordinates at the beginning and just go through the list when repeating steps 2 and 3. Besides, it avoids computing cos and sin all the time, which could be computationally expensive (thanks to Jason Rampe for the idea).
First caveats about the rotation applied to a data array: the (x, y) values are integers, but we compute them with cos and sin functions which give floating-point values. So there are lossy conversions happening, and the rotation/symmetries are flawed. This isn't too worrisome if the resolution is large enough, because the couple of pixels badly symmetrized will be lost in the sea of correct ones. But it's still important to remember that the integer operations are not perfect. In addition, we're applying a rotation to pixels of a square image, so some of the rotated coordinates will be out of the image. For instance, a pixel in the top-right corner rotated by 2π/8 might end up out of bounds (see below).
![]()
Second remark: since the image is represented by a data array, the origin isn't at coordinates (0, 0) but (r, r). The coordinates have to be translated for the computations to be correct, but it's very simple so I won't explain it in detail.
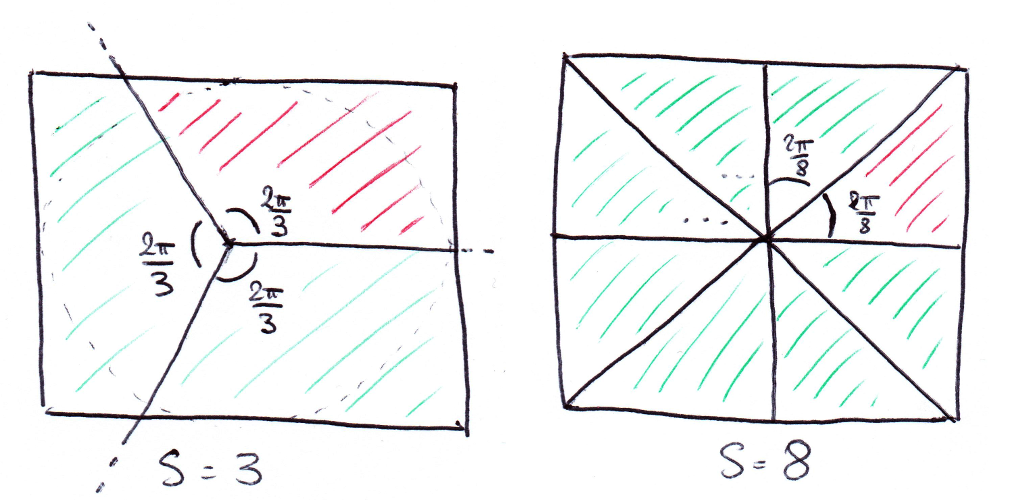
Third remark: like I said before, we only need to compute the symmetrical points of one part of the image, let's call it the "main zone". For s = 4, it's enough to make lists of four points: the first one being in the top-right quarter, and the three other ones being symmetrical to the first. For s = 2, just make lists of two points: one in the top half, the other in the bottom half. In the picture below, the main zone is red and the symmetrical zones are green.
The question is: How do we find which coordinates need to be part of the calculations? For s = 2 and s = 4, it's pretty simple because the main zone of the picture is square. But what about s = 3, s = 8? It's not so straightforward. Let's talk about that.![]()
Defining the main zone
The main zone is one s'th of the total image area, and it is always part of the top half of the image (arbitrarily). For example, with s = 3 and s = 8:
![]() Let's get back to a square image of width 2r and origin (0, 0). We have to find a general description of the coordinates included in the main zone. The first two conditions are simple: a point at coordinates (x, y) is in the main zone if x ∈ [-r, r] and y ∈ [0, r]. That just describes the top half of the image.
Let's get back to a square image of width 2r and origin (0, 0). We have to find a general description of the coordinates included in the main zone. The first two conditions are simple: a point at coordinates (x, y) is in the main zone if x ∈ [-r, r] and y ∈ [0, r]. That just describes the top half of the image.
The third condition is on the relation between x and y. Depending on the symmetry order s (you can think about s as "in how many parts the image must be divided"), the main zone is limited by a straight line. We should distinguish three cases, as shown below:
- If s < 4, a point is in the main zone if its y coordinate is above the limit line.
- If s > 4, y must be under the limit line.
- If s = 4, it's a special case where the limit line is the y axis.![]()
Since the limit line is straight, its equation is simple to find. It's
So the third condition on (x, y) for the point to be in the main zone is:
In practice, the case s = 4 doesn't have to be coded as a special case, it can be integrated in one of the two others.
Data organization
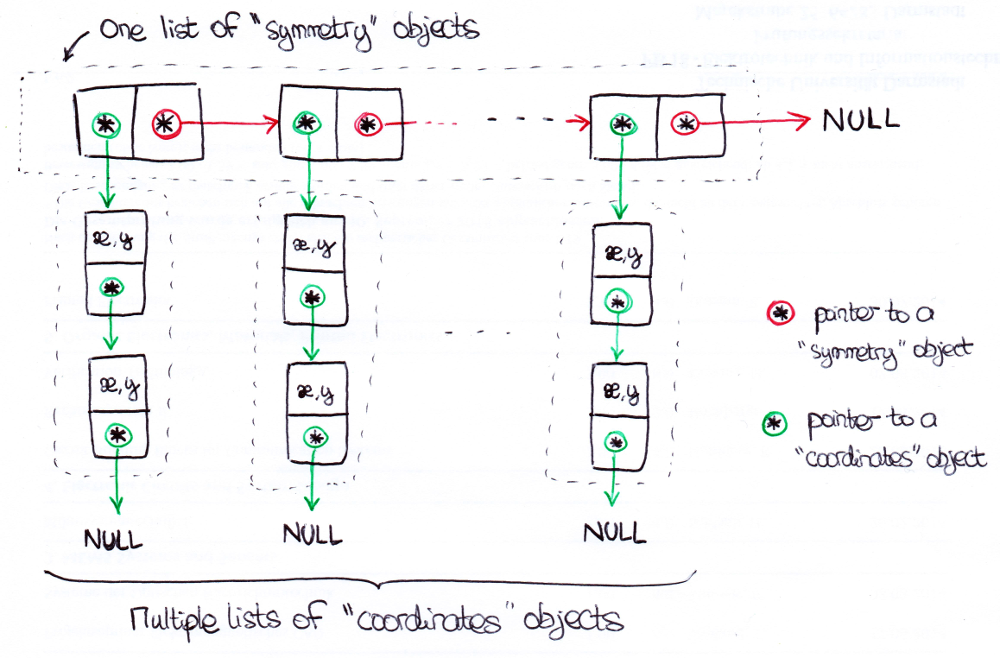
So far we know how to check if a point's coordinates are in the main zone, and how to find the coordinates of its symmetrical points in the rest of the image. The number of points in the main zone and the number of symmetries for each point both depend on the symmetry order s and the picture size. In addition, because the image is square, not all rotated coordinates are within the picture. (For the moment I decided to not include them in the symmetry calculations at all, but another possibility is to wrap them around.) This means that in general, the program doesn't know the amount of data to store before runtime. So the data must be stored dynamically, and since we're dealing with lists, I chose linked lists as a data structure.
The general structure is a linked list of linked lists. For each point in the main zone, there is one "symmetry" object (actually structure, because it's C, but let's call it an object). This object contains two items of data: a pointer to the next "symmetry" object in the list, and a pointer to a "coordinates" object. A "coordinates" object contains three items of data: a pointer to the next "coordinates" object in the list, an x coordinate and an y coordinate. The list of "coordinates" objects represents all points that are symmetrical to each other and within the image's bounds.
![]()
Summary
At the beginning of the program, before generating anything:
- Create an empty "symmetry" list.
- Pick a couple of coordinates in the image. If it's within the main zone (as defined by the three conditions in "Defining the main zone"), add a "symmetry" object to the list.
- Create an empty "coordinates" list and make the lastly created "symmetry" object point to it.
- Compute all the symmetries to the couple of coordinates by the rotation method. For each symmetry that is within the image, add a corresponding "coordinates" object to the list.
- Loop steps 2 to 4 through all coordinates of the image.
And during the image generation, when applying the symmetry to the activator or inhibitor arrays:
- Take the first "symmetry" object of the list.
- Traverse the list of coordinates to which it points.
- Average the values of all symmetrical points and replace these values by the average.
- Go to the next "symmetry" object.
- Loop steps 2 to 4 until the end of the "symmetry" list.
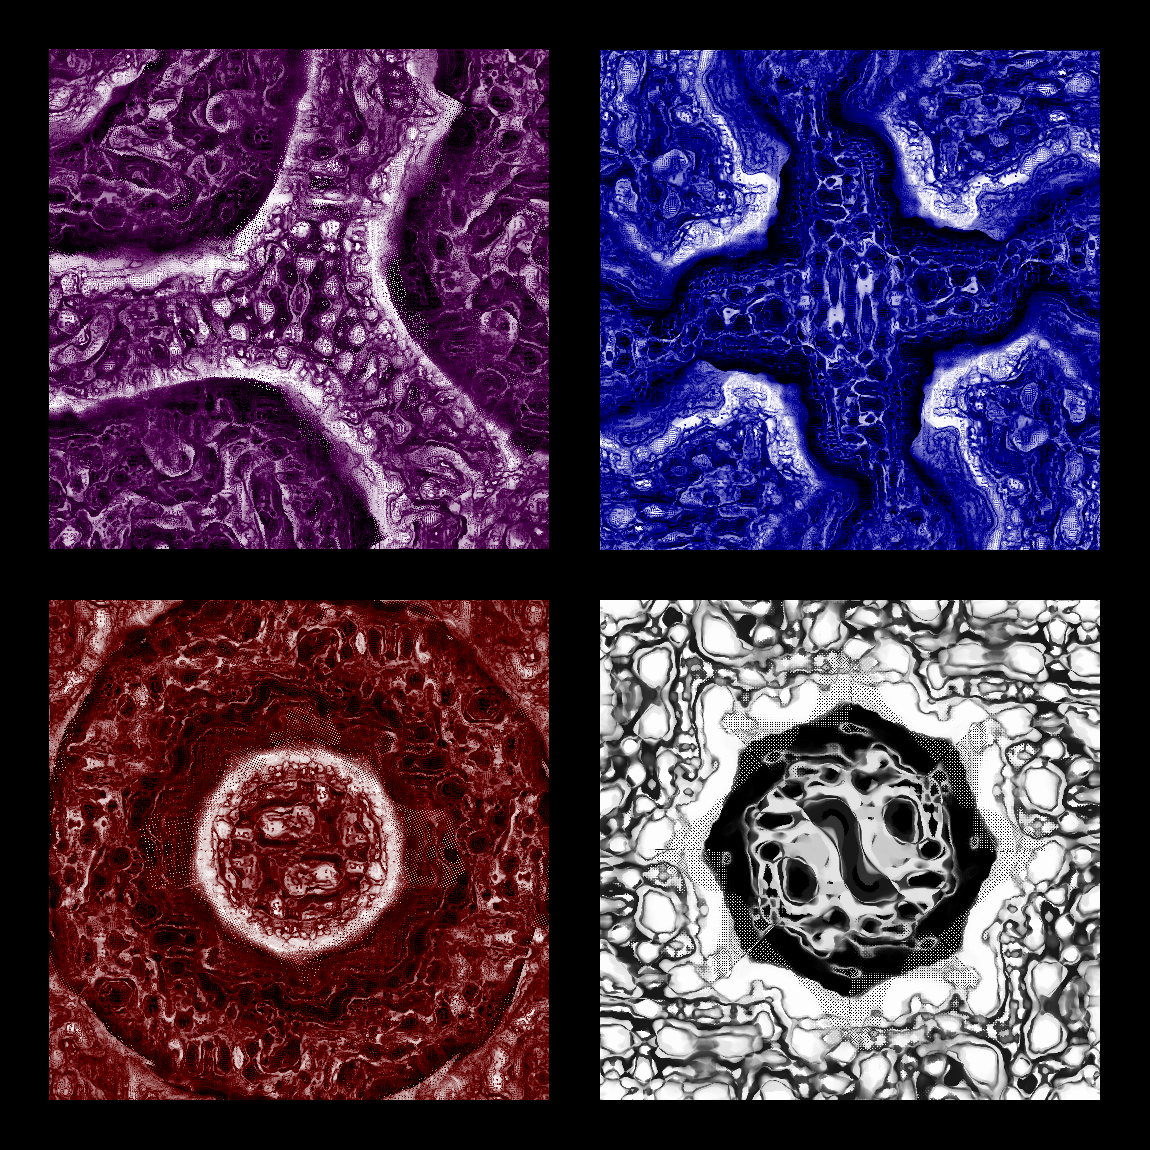
The results are PRETTY AWESOME if you ask me:
![]() There are some artifacts here and there, though. You can see that especially well on the bottom-right picture. I'll have to find out where that comes from.
There are some artifacts here and there, though. You can see that especially well on the bottom-right picture. I'll have to find out where that comes from. -
It's alive! It's alive!
08/31/2016 at 05:14 • 0 commentsI finally understood why the patterns stabilized quickly and why the generated pictures didn't look like J. McCabe's... Turns out that I made a mistake in writing the algorithm. The program used to to this:
- Generate activator and inhibitor arrays.
- Compute variation arrays for each scale.
- Find the smallest variation over all scales and store the corresponding scale.
- Update all pixels based on this one scale.
At one given time step, all pixels of the image were updated on one scale only. And that's not the intended behavior. Instead, the algorithm should work like that:
- Generate activator and inhibitor arrays.
- Compute variation arrays for each scale.
- For each pixel individually, find which scale has the smallest variation.
- Update each pixel based on the local best scale.
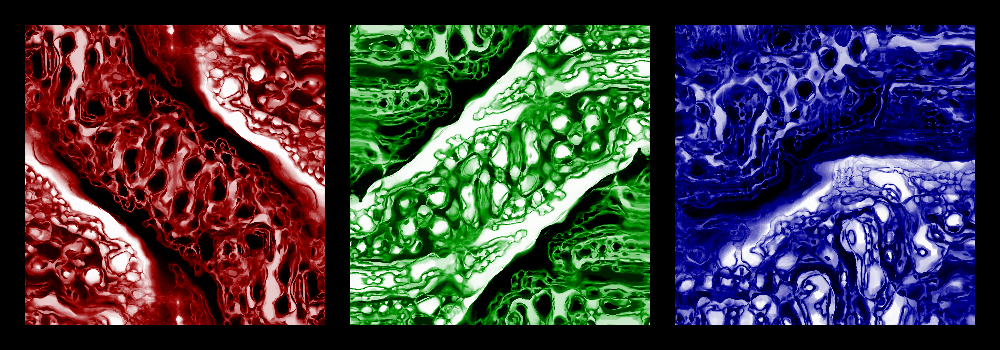
This way, we really get multi-scale patterns. The pictures are awesome now, and keep evolving all the time. I also implemented a simple point symmetry around the origin. I'll improve that later. And finally, I started playing around with color maps to get something more fun than the black and white pictures. A three-color gradient looks pretty nice (black to dark red to white, for example).
![]()
Multi-scale Turing pattern generator
A multi-scale Turing pattern generator in C++, based on Jonathan McCabe's algorithm.
 xD
xD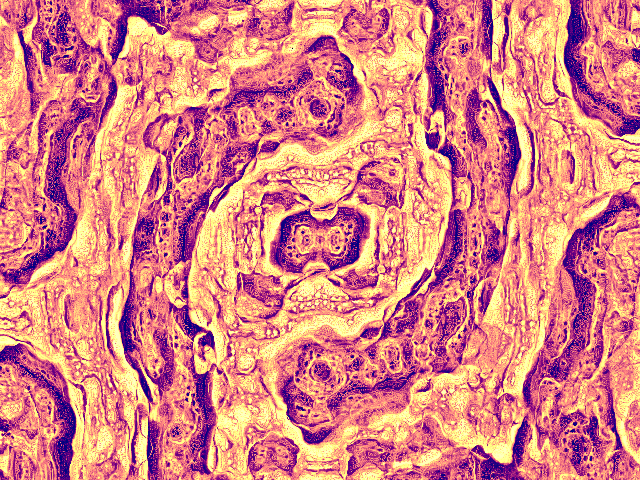 The improvements that I'm most interested in are the following:
 Everything's fine. Now let's try with 400x300:
 Wooow that's a mess. There seems to be stuff repeating and overlapping... Hard to understand what's happening. But with a small difference between the width and height, we can see a bit clearer. The picture below on the left is 301x300, the right one 302x300.
 Turns out an image 301x300 gets split in two zones, 302x300 in three zones, 303x300 in four zones... For 400x300, there are so many zones that it's hard to recognize anything.
 Put the right zone to the left and vice-versa:
 See where this is going? Now apply some shear to de-distort the picture:
 The zones are not independent, it's only one picture but distorted and somehow split and wrapped around. Or is it some kind of aliasing? I still don't know what's happening there, but hopefully I'm getting closer.



 There are some artifacts here and there, though. You can see that especially well on the bottom-right picture. I'll have to find out where that comes from.