Close
0%
0%

Mechanized Prosthetic Foot

The purpose of this project is to design and build a fully mechanized prosthetic foot that is more accessible than current solutions.

Similar projects worth following
Modern day solutions to lower limb replacement come at large costs while providing little-replaced functionality. Our project is to develop a new approach to the conventional prosthetic foot.

The goal of this project is to design and build a prosthetic foot that advances current technology by providing dexterous, graceful, and semi-automatic movement that helps propel the wearer in a natural way. Modern day solutions to lower limb replacement come at large costs while providing little replaced functionality. Our project is a new approach to the conventional prosthetic foot. This design includes electronic control, user input, a micro-hydraulic power plant, energy dissipation system, gait analysis data acquisition and communications between integrated systems. Design criteria are based off improving current practices of prosthetic feet. This includes low weight (less than 2.7% of body weight), minimal cost of goods while maintaining robust structural integrity, strength (being able to absorb shock from person three times as massive) and dimensions (conform to a size 10 women’s shoe). The end project goal will be easier to produce than current high-end dynamic prosthetic and be able to power everyday augmented life.

We are working hard to make this as much of an Open-Source project as possible, if you have any questions or need any files for anything shown please let us know. Presently our design uses 100% opensource components and will continue to going forward.

BalanceTestRig.STEP

Model used to test balance algorithym

step - 1.50 MB - 10/02/2016 at 01:22

Download

AssemblyWithHydraulics.STEP

Advanced model with hydraulics

step - 1.32 MB - 10/02/2016 at 01:22

Download

AssemblyWithDamperMount.STEP

Model with mount for spring and damper

step - 438.59 kB - 10/02/2016 at 01:22

Download

foot_logger.ino

Foot Logging Sketch for Data Acquisition Module

ino - 2.71 kB - 09/29/2016 at 02:14

Download

Motion Tracking Sensor Assembly.STEP

Motion Tracker ASM

step - 2.39 MB - 09/29/2016 at 01:56

Download

View all 9 files

  • 1 × Adafruit Feather 32u4 Adalogger For Balance Sensor
  • 1 × Adafruit 9-DOF Absolute Orientation IMU Fusion Breakout - BNO055 For Balance Sensor
  • 1 × Adafruit Micro Lipo - USB LiIon/LiPoly charger For Balance Sensor
  • 1 × Blank MicroSD Memory Card For Balance Sensor
  • 1 × Breadboard-friendly SPDT Slide Switch For Balance Sensor (sourced from adafruit)

View all 7 components

  • The Next Steps

    Aractapod10/01/2016 at 00:16 0 comments

    Thank you for following us this far through our journey to revolutionize prosthetic s. Let’s recap what we have accomplished these past few weeks and then discuss what we will be accomplishing in the future. The team started off with just an idea, an idea to redefine mobility. We then conducted an intense material research study which resulted in material testing a variety of 3D printed materials. We then went directly into working out the mechanics of the prosthetic foot. This included many different iterations using 3D printing as the prototyping method. While we were designing the basic structure of the foot the group was also working on methods of energy suppression, the damper. The group next worked on figuring out a way to actuate and control the prosthesis.This was done using sensors that feed into the Arduino microcontroller thus driving servos within the hydraulic valve block. This ultimately drives the hydraulic cylinders allowing the prosthetic to move.

    The following are future goals the group has to improve the design and further develop this prosthetic foot. When we add a more advanced control system it will allow for increased safety and functionality. This will involve a more advanced algorithm as well as a multitude of additional sensors to allow for reliability of the system. We plan to add a more compact hydraulic and dampening system as it is crucial in reducing weight. Additionally, a hydraulic system that is more refined and is designed in such a way that insures a completely sealed system with zero leaks is extremely important in insuring reliability. Finally, the electronics and power management system will be condensed and moved onto the prosthesis. Our goal is to have a battery that is similar in size to the size of a couple of cellphone batteries stacked together.

    Aractapod looks forward to continuing work on this project with the Hackaday community trying to reduce cost and increase the functionality and accessibility of powered prosthetic's on the market today!

  • Now We’re Moving

    Aractapod09/29/2016 at 14:39 0 comments

    This is a video of our completed model with hydraulic actuation. The hydraulic system includes a brushless motor with a pump mounted to it, a reservoir, hydraulic oil, an electronic speed controller, hydraulic hosing, 3 double-acting hydraulic cylinders, 3 servos, a valve block (controlled by the three servos), and a battery. Below is an image that shows the basis of hydraulic circuit. The fluid is pumped from the reservoir to the first valve then to the second valve and finally the third valve. After exiting the third valve, the fluid is pumped back into the reservoir. These valves have three positions: left, right, and neutral. Depending on the orientation of the valve block, the left position makes the cylinder either extend or retract. The right position makes the cylinder move in the direction opposite that of the left position. The neutral position is considered bypass mode resulting in the cylinder not moving and the fluid going straight back to the reservoir.

    We chose to go with a hydraulic system because it allows for a delivery of a lot of power in a fairly small package. The foot was moved in a variety of configurations so that it is easily understandable what the ambulation and range of motion of our device is.

    IMG_20160506_102010.jpg

    IMG_20160506_101956.jpg

  • Gravity Test…1…2...

    Aractapod09/29/2016 at 01:44 0 comments

    Structure Changes:

    The structure has gone through a few changes with the addition of a new damper and hydraulics. The bottom of the foot was modified first to accommodate the new damper. The damper’s diameter was within the width of the bottom of the foot, so only six holes were needed to secure the damper to the bottom of the foot.

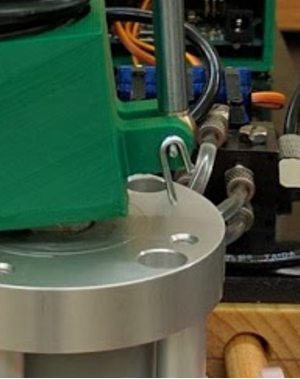
    The top of the foot was sculpted to get rid of some unnecessary excess plastic and a mounting hole for the damper was added right underneath the bottom of the ball joint. Three mounting locations were added to the top of the foot for the hydraulics. Two mounts were added right above the hinge at the front of the foot while a third mount was added to the back of the ball joint block. The mounts had to be adjusted a few times to allow for proper clearance of the hydraulics through their entire range of motion.


    The biggest change was to the ‘shin’ or area above the ball joint of the foot. With the new damper fitting entirely below the ball joint, there was no need to have a hollow tube to encase the damper. The group made this solid with three mounting locations for the hydraulics. Printed into the bottom was a thread to allow the ball joint to be screwed into it. The idea behind the shape of the ‘shin’ was to allow for future components to be added (or mounted) onto it. These could include the hydraulic power plant (once it is scaled down to size), hydraulic reservoir, electronic components, battery, gait analysis microcontroller and more. The only future modification that would be necessary is the addition of an approved prosthetic joint at the top to allow the foot to connect to a prosthetic cup.


    Damper Selection:

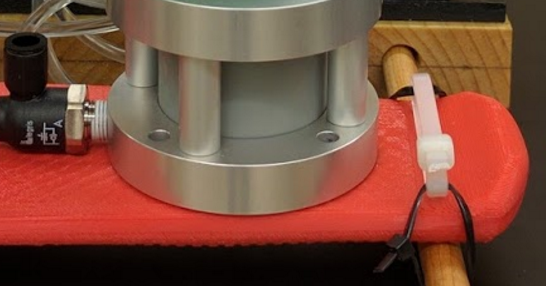
    The damper was chosen exclusively for the following characteristics: dimensions, stroke, and damping coefficient. Because of the size and stroke constraints (the damper should have a damping coefficient in the range calculated, with adjustability as a bonus feature, an outer diameter smaller than the width of the foot below the ankle, should offer at least one inch of stroke, and should be less than three inches in overall length), we wound up purchasing a pneumatic piston.

    To make the piston into a damper, a flow control fitting was added to the lower port (the exhaust port when in compression). Changing the damping coefficient is as easy as turning a valve now! This will allow the user to change the “squishiness” of the foot at will.

    The upper port (the intake port when in compression) has been plugged to prevent unwanted mechanical fouling (dust, debris, liquids, etc.), and will add to the “springiness” of the damper.

    Note: A filter should be added to the flow control fitting to prevent/reduce mechanical fouling!

    The damper was tested by dropping weights on it. We chose a cluster of weights equal to the project specs (~178 lbs), and dropped it on the damper from a height of six inches to simulate a completely stiff person landing on a single leg after a short jump. The rig we used was designed to drop the weight as vertically as possible on the damper.

    IMG_20160506_184131.jpg

    Test data indicates that at small loads (>100 lbs), the damper acts more like a spring. This may be overcome with further experimentation. Perhaps a different flow control device would be helpful. Another outcome was the implication that increasing the effective diameter of the damper (the piston diameter) improves controllability of the damping coefficient. Testing was done with and without a spring.

  • Finally Under Control

    Aractapod09/27/2016 at 19:57 0 comments

    Upon completion of the data sensor we needed to find a way to combine the PID control with the data sensor. This was achieved by taking the output of the data sensor and inputting it into the control loop. This type of control allows for the prosthetic foot to change position based on the previous position of the prosthetic foot using the data sensor.

    After we fine tuned and modified our software we then decided to make a few minor changes to the model so that the movements were smoother. This also reduced strain on the micro servo motors that we were using in our model.


  • You want to measure WHAT?

    Aractapod09/27/2016 at 02:12 0 comments

    As a natural step of progression, the group found it natural to create a data logging device in order to be able to track the movements of a typical human. This information gave us the ability to gain valuable knowledge about gait and stride on regular feet as well for prosthetic feet.

    The basis for our data logger is a Adafruit Feather 32u4 Adalogger connected to a Adafruit 9-DOF Absolute Orientation IMU Fusion Breakout - BNO055. To power the device we used a 3.7V Lipo battery connected through a switch.

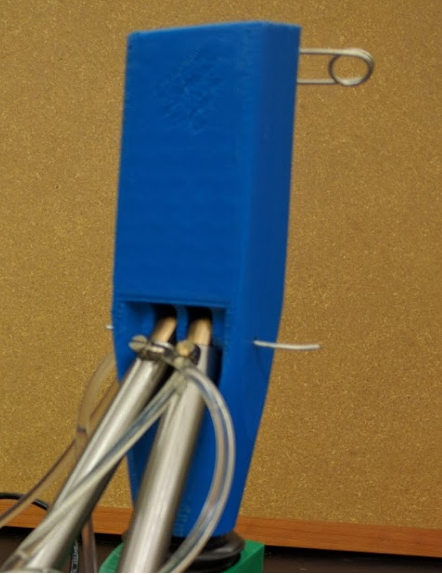
    After 3D printing the enclosure we finished construction on the data module:

    20160423_161959.jpg

    To best mount the sensor system we elected to use a standard format camera mount. Using a standard mount gives us the flexibility for mounting in other orientations or mounts in the future. After completing the mounting setup we then began testing to gather gait and cadence data which we will use later to generalize and control our foot driving algorithm. To confirm our data was correct we ran the same tests on multiple subjects under the same testing conditions. The data gathered after testing is then read and processed into a meaningful curve of the human step which we will use later in our driving function.

    20160506_115832.jpg

    Adv. Sr. Design.jpg

    IMG_20160506_111505-01.jpeg

  • Harmony of the Foot: Balance

    Aractapod09/23/2016 at 15:07 0 comments

    The first step in controlling our prosthetic foot is balance. The question we face is, how can we create a simple control system to govern balance? The group chose to use a fixed adaptive PID control which increments the values on the PID based on the position of the roll and pitch in regard to its variance from the set point value.

    Like any good engineering process the design must be rigorously validated to prove it meets the objectives. Unfortunately, some of the issues with the design included jitteriness and speed. This is most likely due to the fact that the PID needs additional tuning through a mathematical calculation.

    Upon the completion of our prototype code we needed a method to model our programming. This model could be made in one of two ways, either through computer graphical simulation or a mechanical model. We decided to construct a servo based mechanical model to give us the best ability to debug and tune the PID coefficients the easiest. This model was created using FDM like previous material samples. Below is a picture of our testing platform:

    The most important aspect of this design is the ball joints. The ball joint cups were designed in such a way that they could snap onto the balls while still promoting smooth motion. This type of technique is really only applicable when using fairly soft plastics like ABS (which we used) because it allows the plastic to stretch a little bit and then contract back to its original size therefore encasing the ball inside the cup. Any inconsistencies with 3D printing can lead to the part tolerances not being exact, but the group was able to mitigate the inconsistencies.

  • Size {Sometimes} Matters

    Aractapod09/22/2016 at 02:11 0 comments

    With the Python calculations complete a major portion of the last few days were spent researching a spring and damper combination that would fit within the footprint (desired size) of the foot. There were a few different ideas that the group considered to meet the desired 360 lbf/in goal.

    First the group looked to see if there were any standalone dampers that could both fit in the footprint of the heel and meet the desired compression force. Unfortunately, all dampers that were strong enough were either too tall (by several inches when fully extended) or just too wide (again by several inches). The next idea was a spring wrapped around the outside of a damper which would allow them to act at the same time to absorb energy. This meant the damper didn’t have to be as strong because the spring would absorb a portion of the energy. This combination was too big in diameter based on the components found to fit within the footprint of the heal. But the good news was that it led us to another idea.

    IMG_20151211_161915.jpgIMG_20151211_161857.jpg

    If the damper was mounted with the spring on top of it, it should fit the width requirement and may fit the height requirement. Again, the group concluded that no such spring and damper combination existed off the shelf, but found the closest combination that fit within the desired envelope.


    The group is reaching out to several different damper manufacturers to see if there is a more customizable option that could be made to match both the size and strength restraints. The structure may need to be redesigned slightly with a few compromises to accommodate for a larger spring and damper size that would meet the strength requirement. This shouldn’t be too big of a problem considering the group is getting closer to finding a workable combination.

  • Comparing Two Feet

    Aractapod09/21/2016 at 12:14 0 comments

    As with the last design this group did, one of the goals was to ensure that the structure under peak loading should have very uniform stress distributions, and that all parts should be subject to approximately the same stresses. The structure was therefore designed to reduce as much as possible any forces that are not axial to structural members. This resulted in a design with well-understood weak points in the linkage bars near the ends.

    The stresses measured in the simulation model closely matched the figures predicted using python (within 5%). This is an expected result because the figures created using python assume perfectly symmetrical loads, no deformation, and are strictly 2-dimensional in nature.

  • Simulation of a New Step Forward

    Aractapod09/20/2016 at 13:50 0 comments

    After a new structure had been designed, calculations were completed using Python. The Python script determined the spring constant and damper coefficient to ensure that the structure’s material would have the additional energy absorbent characteristics to withstand the peak loading force. The results of the Python predictions was a spring with a constant of 360 lbf/in and a damper with a coefficient of 14.5 lbf*s/in. These characteristics were then added to the simulation model, and a simulation was used to verify the model could withstand the indicated forces. The final force applied to the foot was the Loading Force. All of the user’s weight will be transferred through the ball joint and into the cup of the foot. Because the peak load predicted by the python script under test conditions was approximately 7000 N in the “up” position, we chose this value and position for static testing.

    With all the materials squared away, the group could run the simulation. The simulation that the group is doing is when the foot is at its maximum extended distance (the damper is all the way extended). This is because the maximum values of the forces that are applied to the foot occur at this point. The model is considered static and the simulation is simulated the model at the instance of time when the force is applied. If the model can withstand the maximum amount of forces, then it will be able to withstand the rest of the loading forces as the damper compresses and foot becomes dynamic.Each simulation will produce three simulated model: strain, stress and displacement. Stress and strain measure the amount of stress and strain throughout the entire structure. The goal for these two models it to have as much uniform stress and strain values as possible (the more of the same color there is the better). The displacement model shows how far each part of the structure moved. The goal for these models is to have all little movement as possible (the more red, the higher the displacement).

    The red regions indicate areas of large displacement. For reference, the displacements here are in the millimeter range, and does not represent sufficient deflection to cause permanent deformation. It is also important to note that some of this movement can be attributed to the use of the spring restraint. The group simulated the ABS plastic model. Because the parameters were calculated in python for ABS as the primary material, stresses on the order of the yield strength were anticipated.

    Plastic - Strain Simulation

  • Onwards and Upwards: ABS is King

    Aractapod09/19/2016 at 02:22 0 comments

    The group decided to record a video of our 75% infill compression sample being compressed. This gave the group a more in depth insight into the buckling nature of the part failure. After printing the individual components of the full scale model, the group assembled it using press fits and then prepared the model for testing. To test the full size model under compression loads the group repeated the process it had used for the compression testing. Using a baseline force of 178 pounds with a safety factor of 3 to consider the test a success, a force of 534 foot pound needed to be applied to the sample. The group placed the model in the machine and slowly loaded the machine until the indicator displayed 535 ft pounds of force shown in. Here is a video of the foot being compressed. Having tested the model without failure to the desired load the group proved that ABS plastic is a viable material for the structural design of the prosthetic foot. ABS is a very simple material to print with using FDM due to its melting temperature. ABS is also ductile as can be seen from the stress-strain curves provided in the previous update. Ductility is important because it allows the parts to flex and stretch a little bit reducing the threat of parts breaking unexpectedly.

View all 14 project logs

  • 1
    Step 1

    The following instructions will step through the assembly of our data collection module.

    Step 1: Download the Motion Tracking Sensor Assembly.STEP file and save as STL's parts: Body, Front cover, Top cover, Quick Release, Flatmount and Mount Plate.

  • 2
    Step 2

    3D print the saved files in whatever material you see fit (We used ABS and PLA).

  • 3
    Step 3

    Mount the body of the sensor module to the quick release clamp using: Flat Head Phillips Machine Screws M3 Size, 10mm Length, .5mm Pitch. Some trimming on length may be required. Finish the assembly by adding M3 nuts.

View all 7 instructions

Enjoy this project?

Share

Discussions

Similar Projects

Does this project spark your interest?

Become a member to follow this project and never miss any updates