-
1Step 1
Acquire Components
-
2Step 2
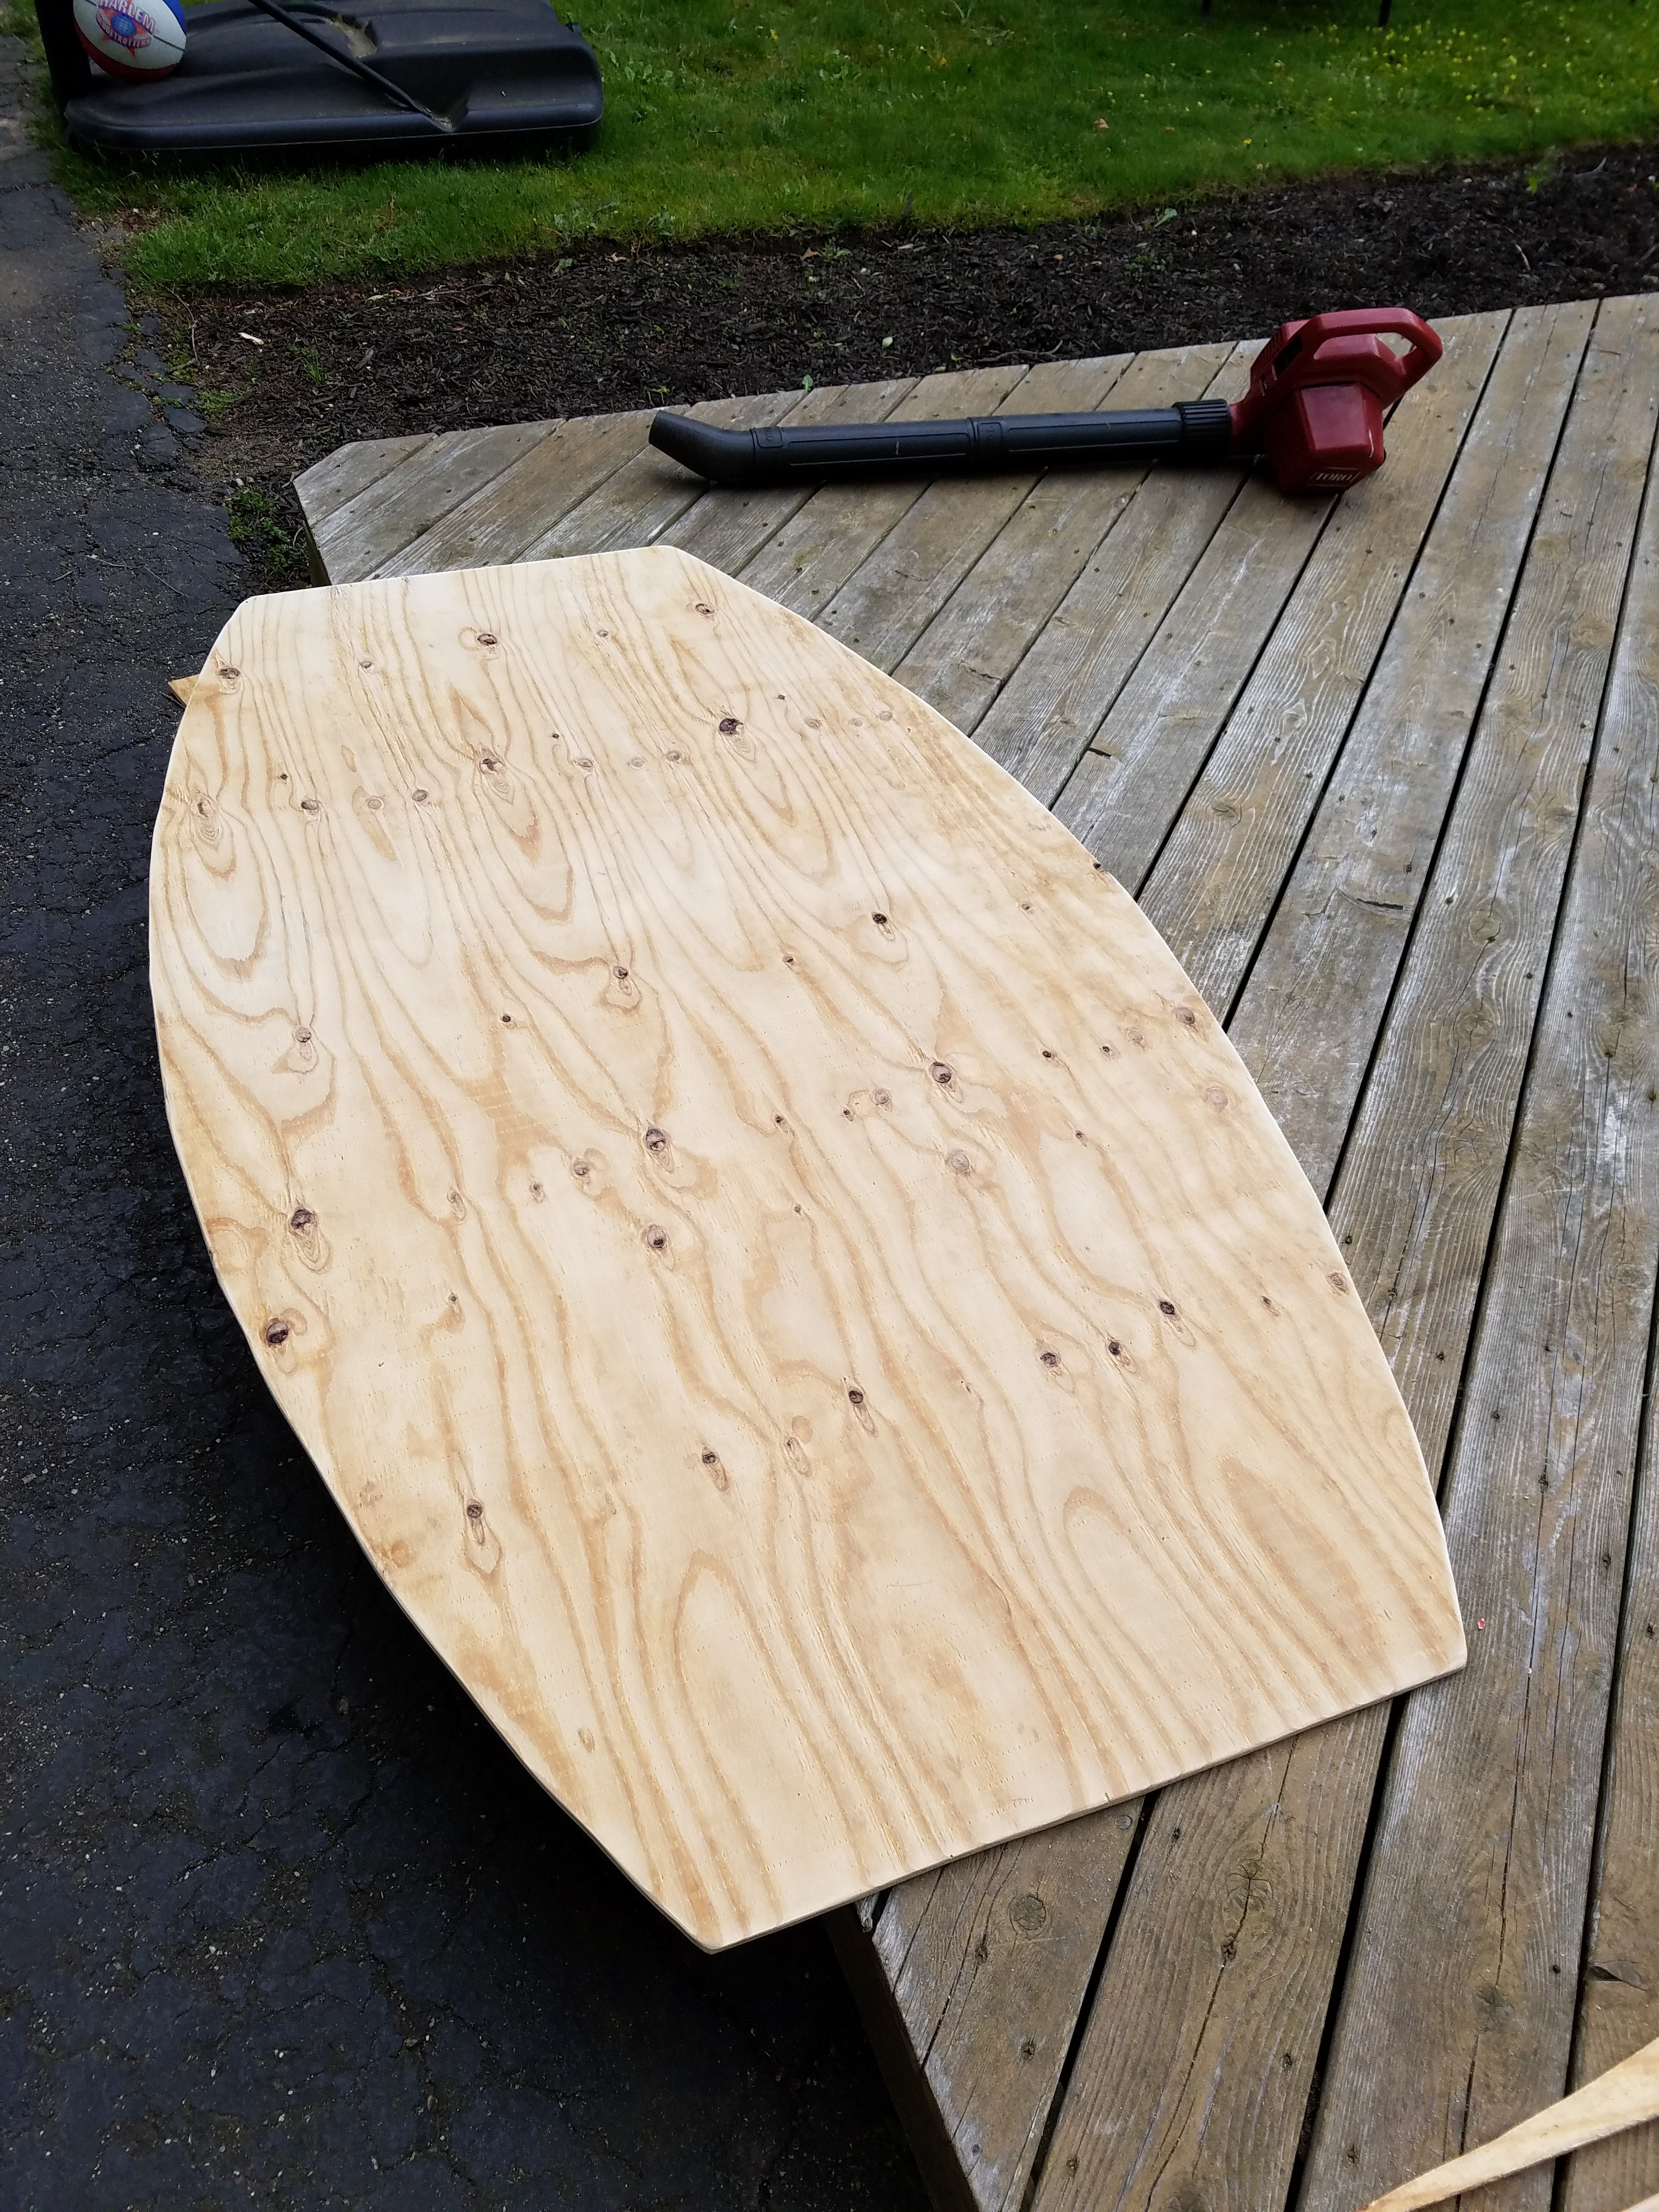
Measure and trace the shape of the table. This table is 6' long by 4' long at its widest. The ends are 2.5' wide, and we used whatever radius makes an arc from a corner of the end through a 4' wide middle point to another corner. To do this use a string and pencil. Any shape can be made
-
3Step 3
Cut the table out using a jigsaw. Sand the edges and top with a palm sander and if you have nicer wood than this build, it may be necessary to hand sand some sections.
![]()
-
4Step 4
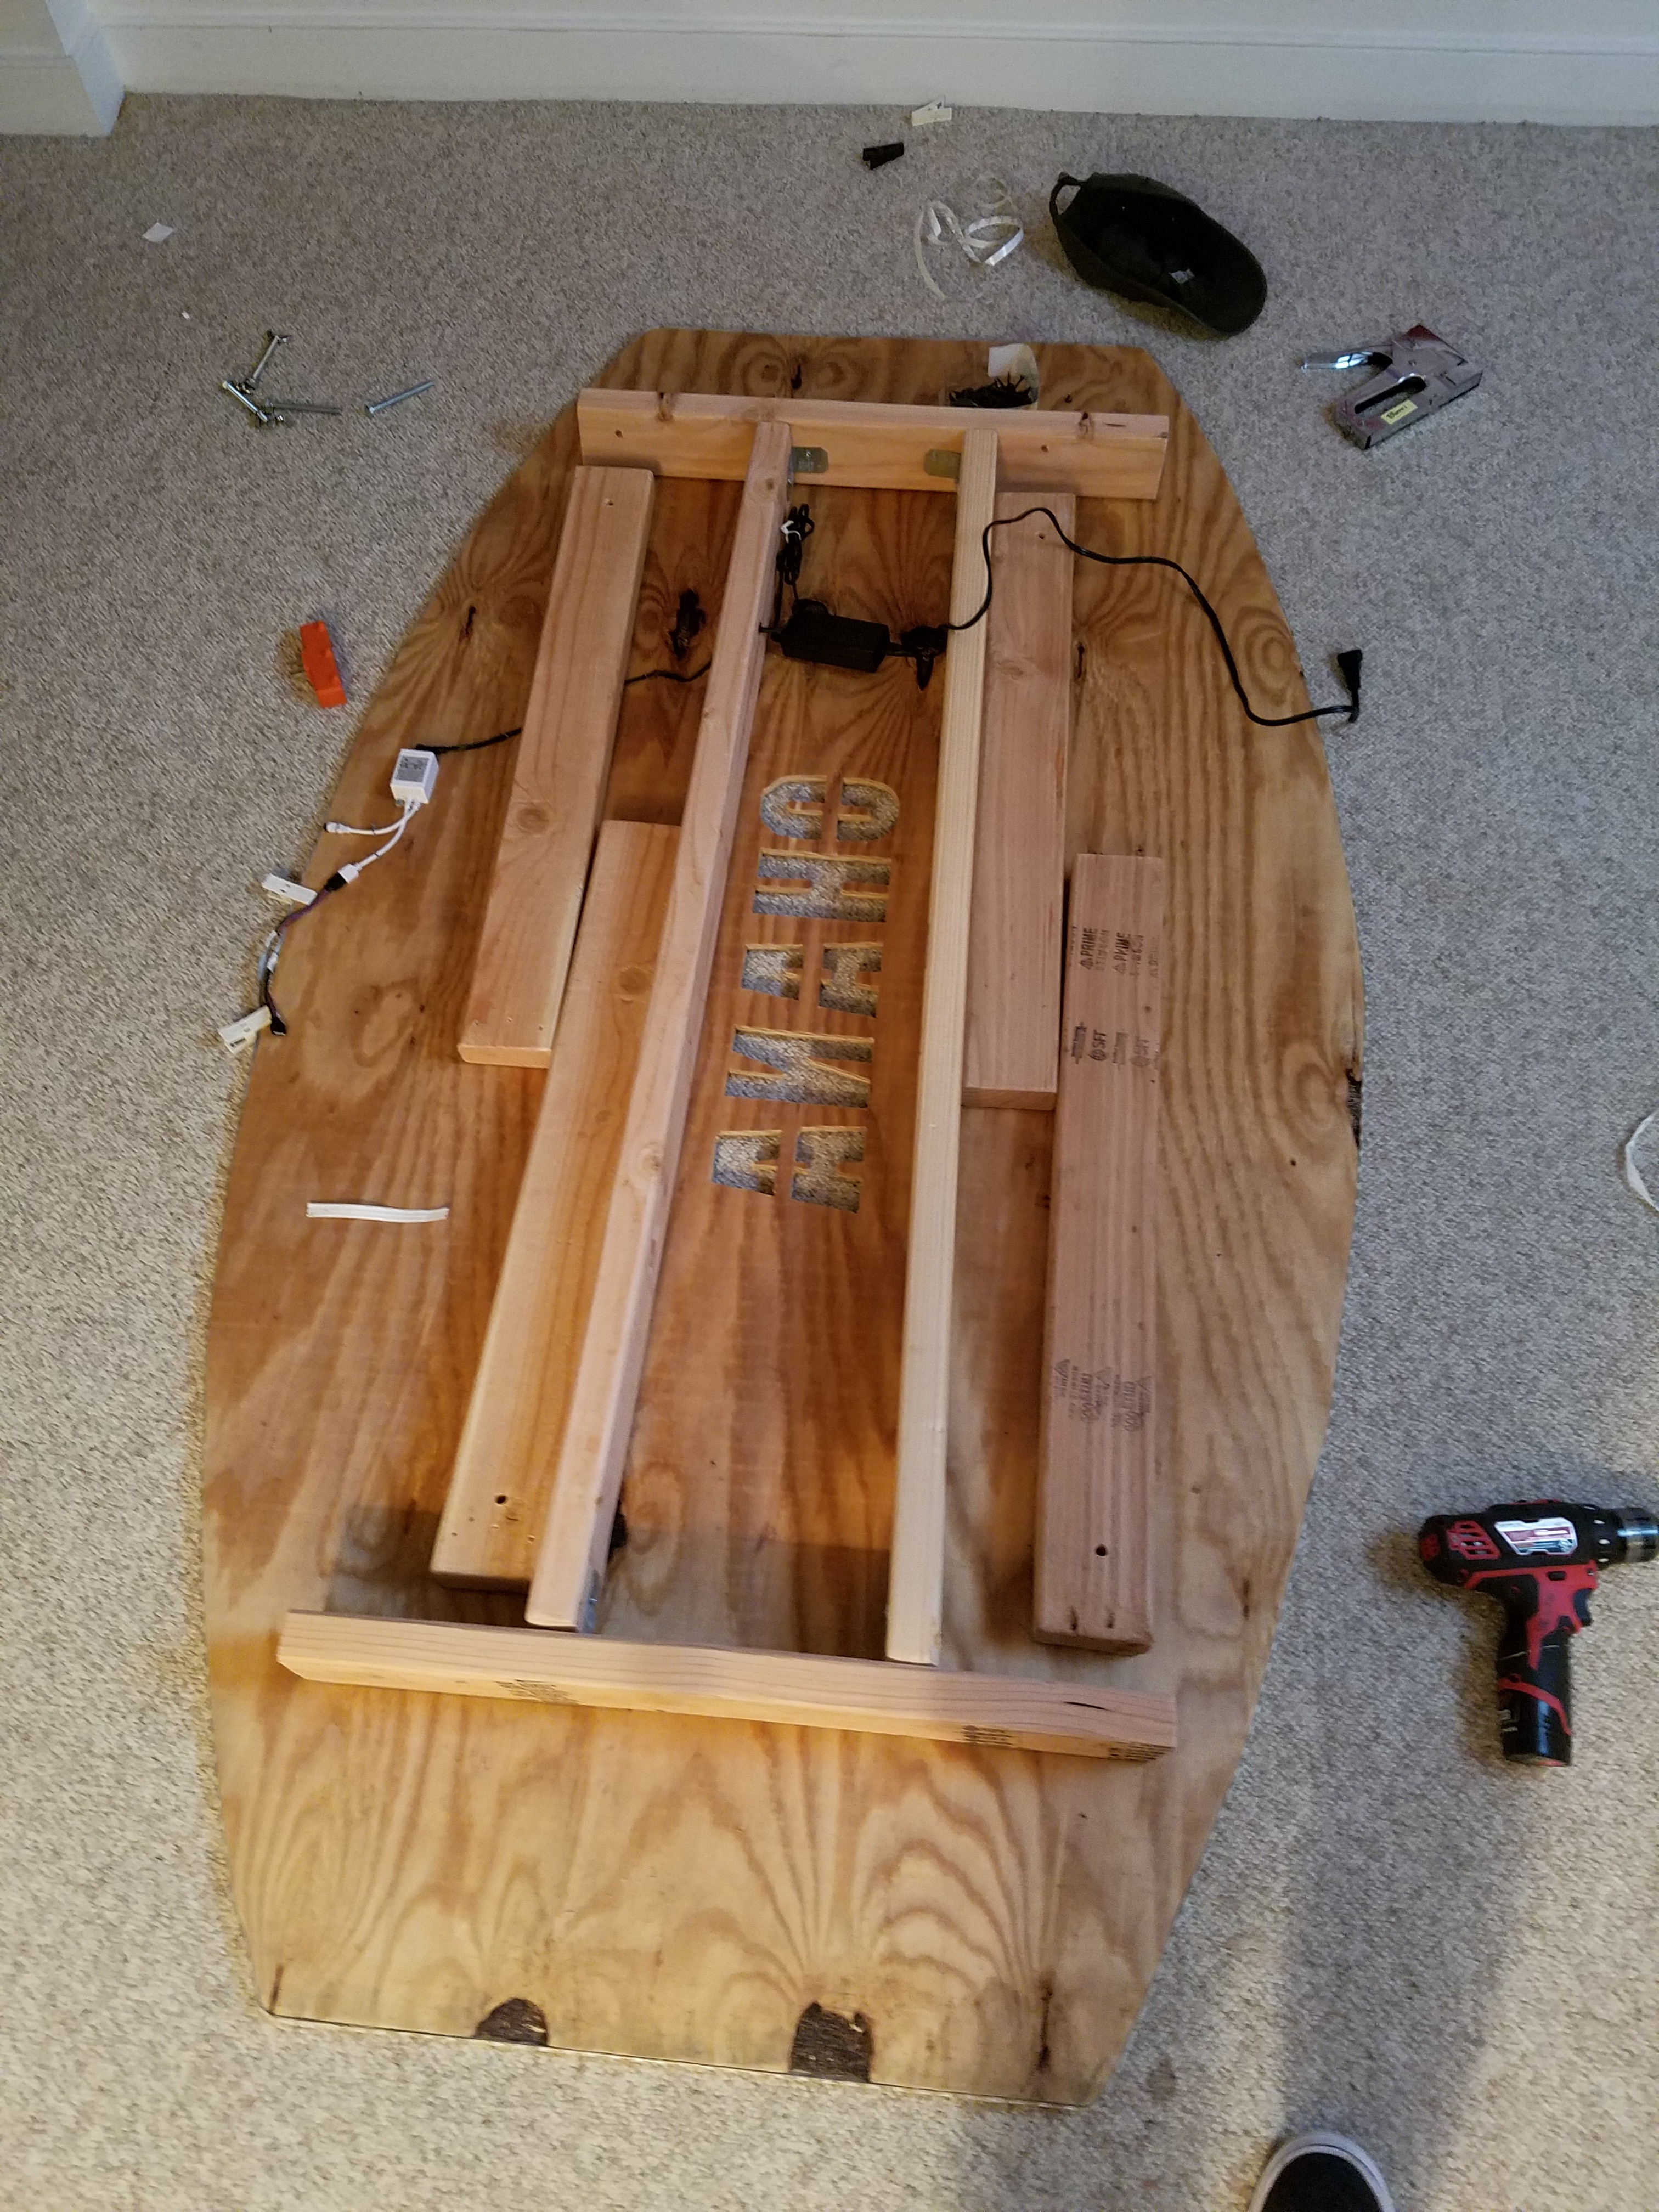
Optional: Trace a cutout of a logo or phrase in the middle of the table. Don't forget to add in supports so the center of letters don't fall out. Drill holes to get starting points for the jigsaw, and cut out the shape(s). Sand the edges.
This design is Impact size 224 "OHANA"
![]()
-
5Step 5
Cut the 2x4's to length. The legs on this table are 29" long. The frame on the underside of the table calls for 2 51" longitudinal supports and 2 23" long supports perpendicular to those.
-
6Step 6
Optional: Varnish the top of the table and the legs. This table has 2 coats of polyurethane on the top and on the legs.
-
7Step 7
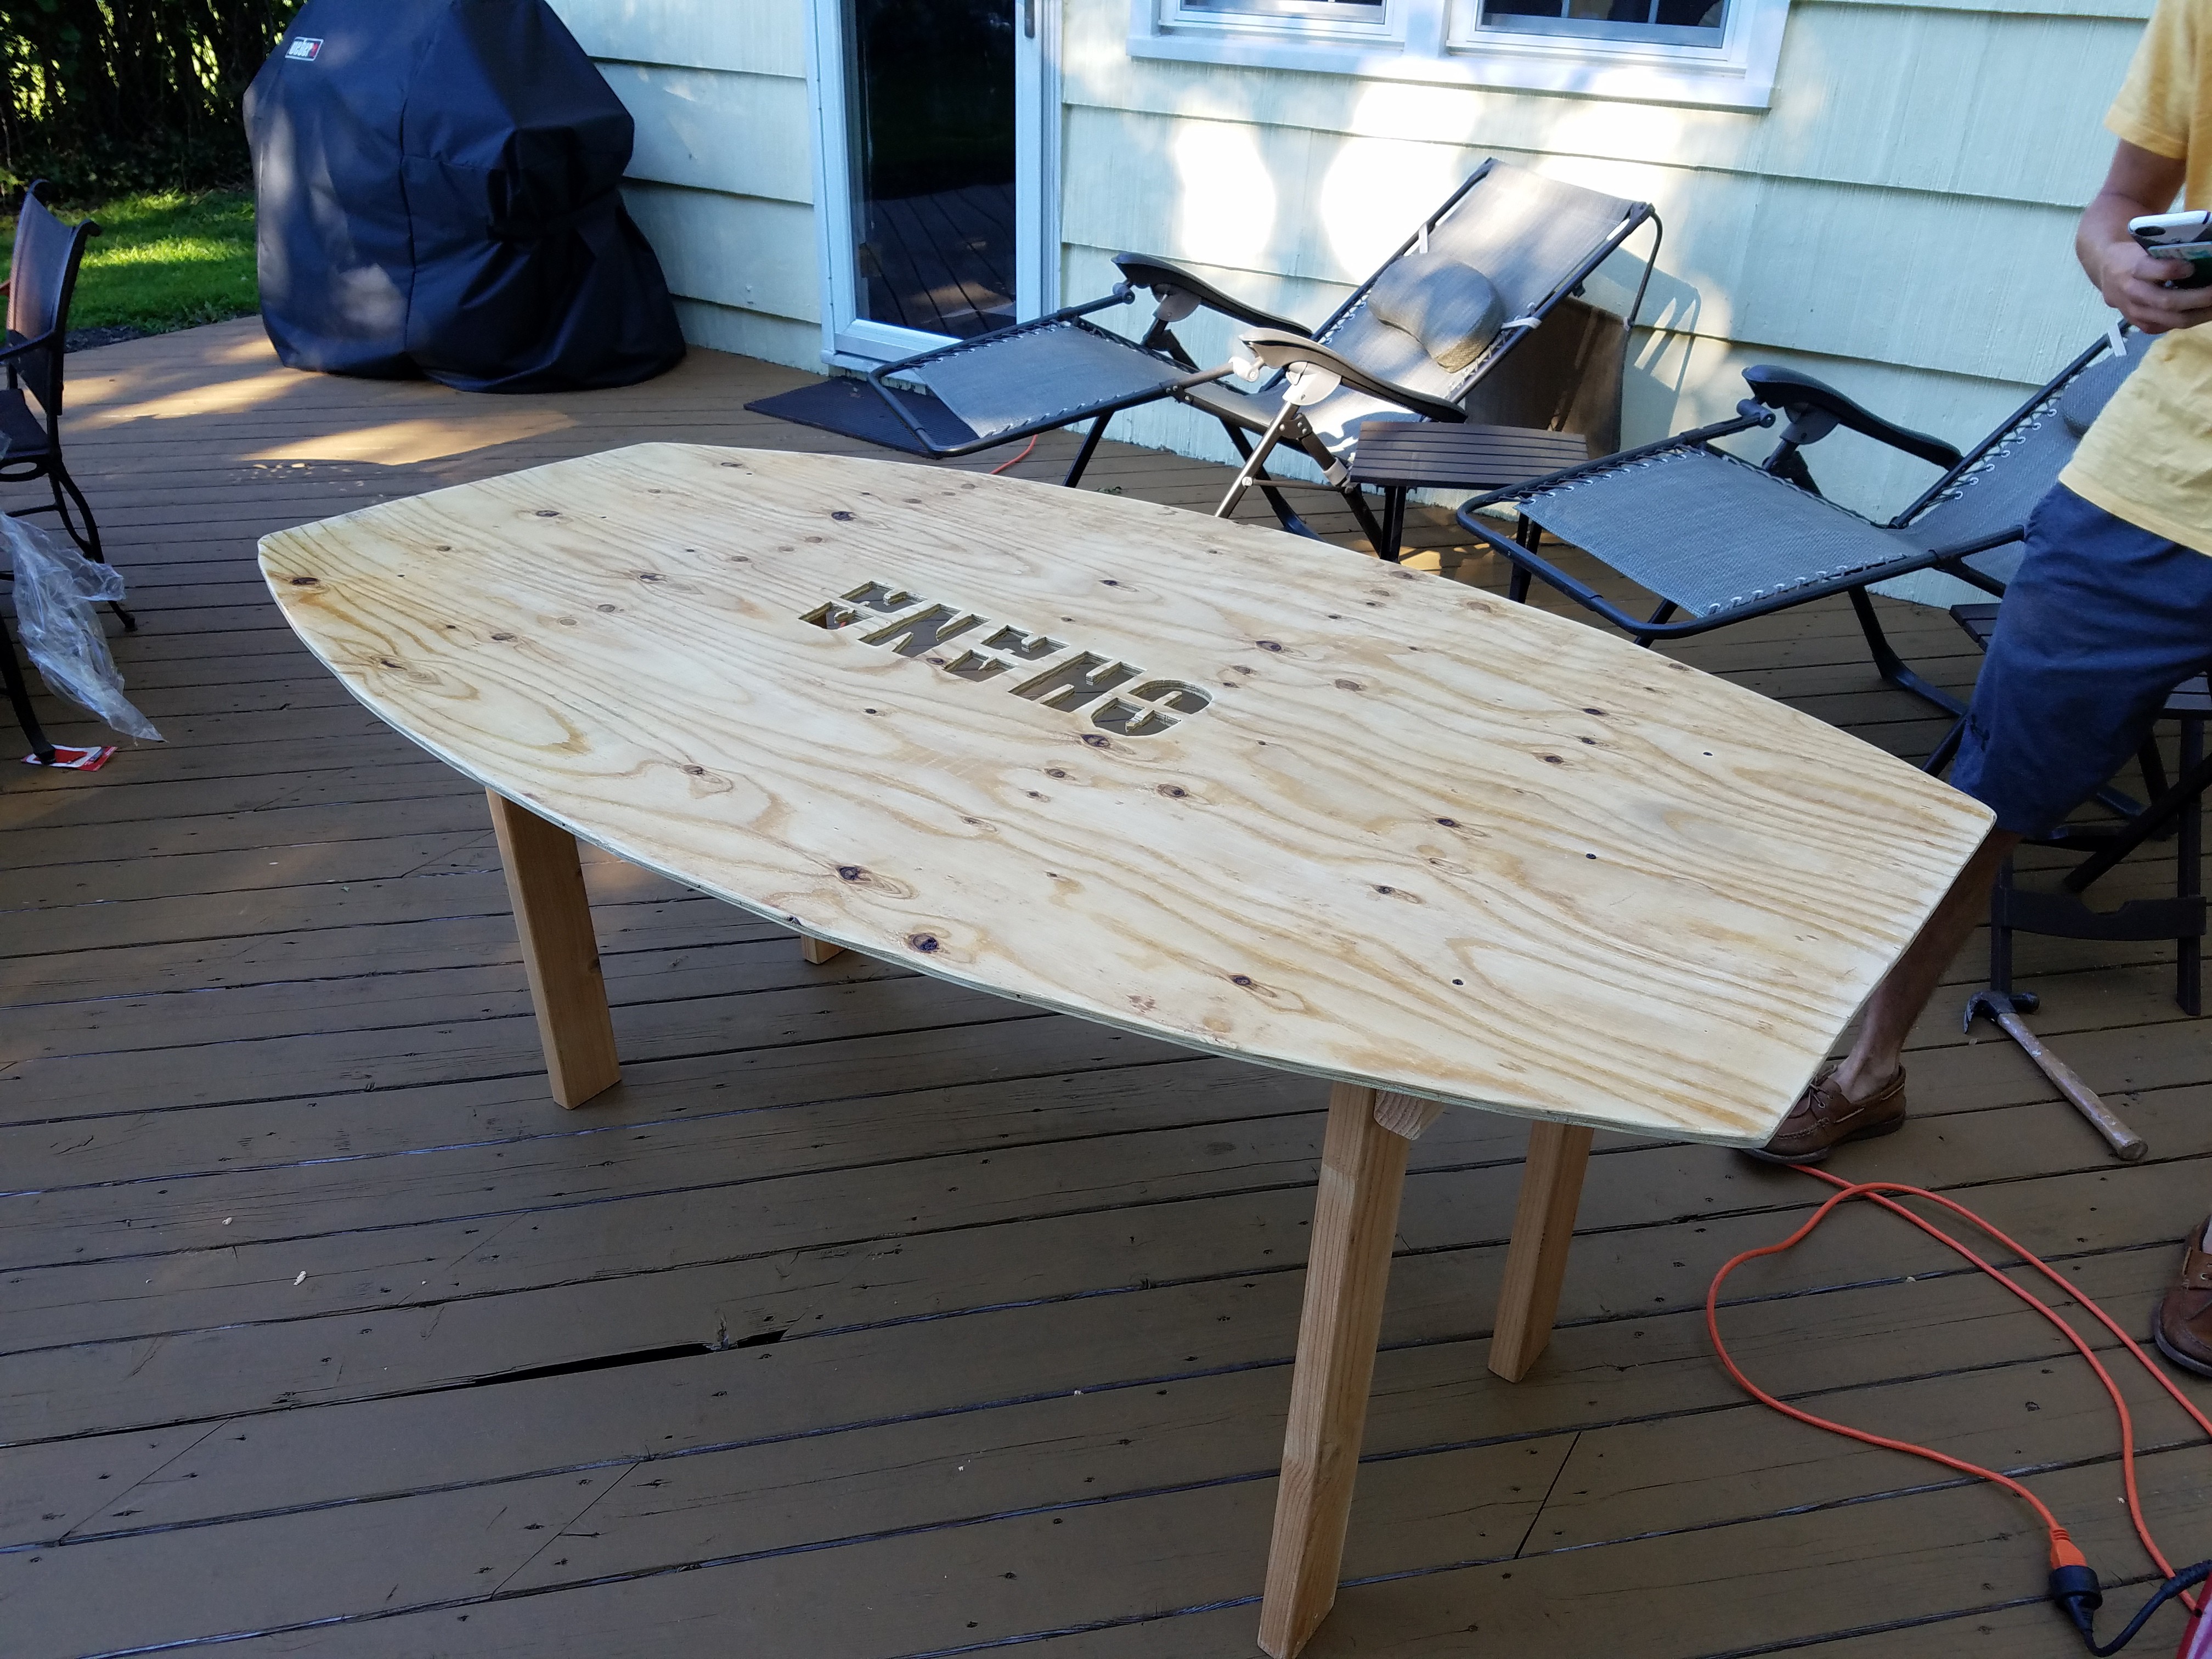
Attach the door hinges to the legs using wood screws. Make sure to attach the hinge the right way so that the leg folds correctly, and so the end of the leg sits as flush as possible to the underside of the table.
-
8Step 8
Construct the frame on the underside of the table. This table had the wood screws drilled through the top
of the table into the 2x4's that make up the frame. The 90 degree right angle joints were added in the inside corners of the frame.
![]()
-
9Step 9
Attach the legs to the underside of the table using short wood screws (so they don't poke through the top). See previous picture. Make sure that the side of the leg sits as flush as possible to the frame when in the upright position. Also ensure that the legs are staggered so that they don't fold into each other.
-
10Step 10
Drill a hole through the brace that is flush against the leg, through the leg. Repeat for all the legs. This is for the through bolt and wing nut to lock the leg in the upright position.
![]()

Discussions
Become a Hackaday.io Member
Create an account to leave a comment. Already have an account? Log In.