 Alvaro Ferrán Cifuentes
-
1Step 1
Disassembly: wheelchair
Remove the manual wheels from the wheelchair. Gripping the nut in the wheel axis, unscrew the axis and take off the wheels.
-
2Step 2
Disassembly: hoverboard
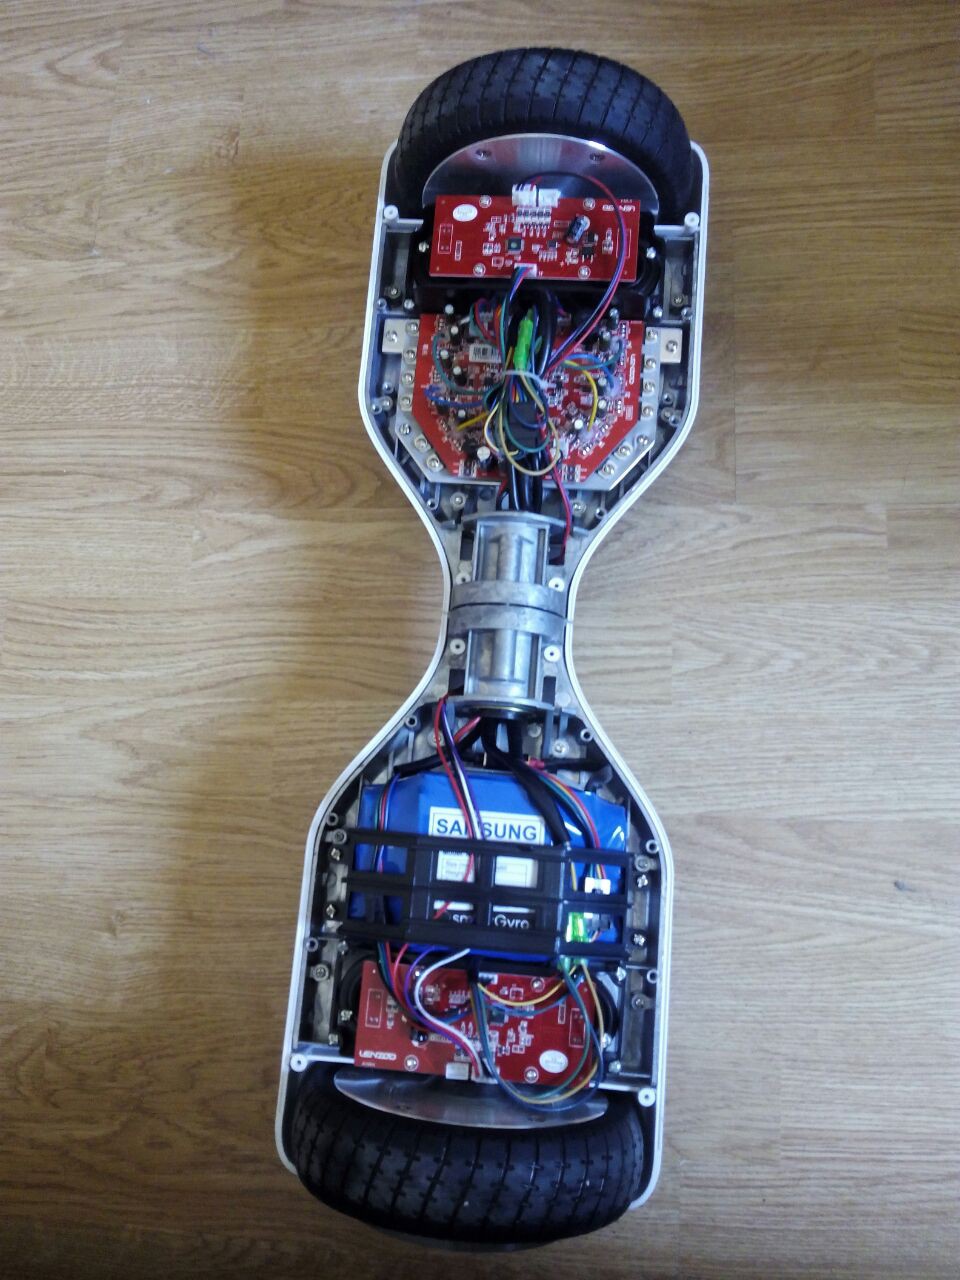
Open the hoverboard unscrewing the bolts. You will have something very similar to this:
![]()
We need the battery (the SAMSUNG labelled blue package in the lower part of the image), its support (the plastic bracket that holds it), the main board (the bigger one in the upper section of the image), the wheels and the aluminum blocks holding them in place. -
3Step 3
Armrests:
Print all the pieces (001, 002, 003) of at least one armrest (the one which will hold the control panel) and assemble them as shown in the gif.
![]()
-
4Step 4
Toolbox:
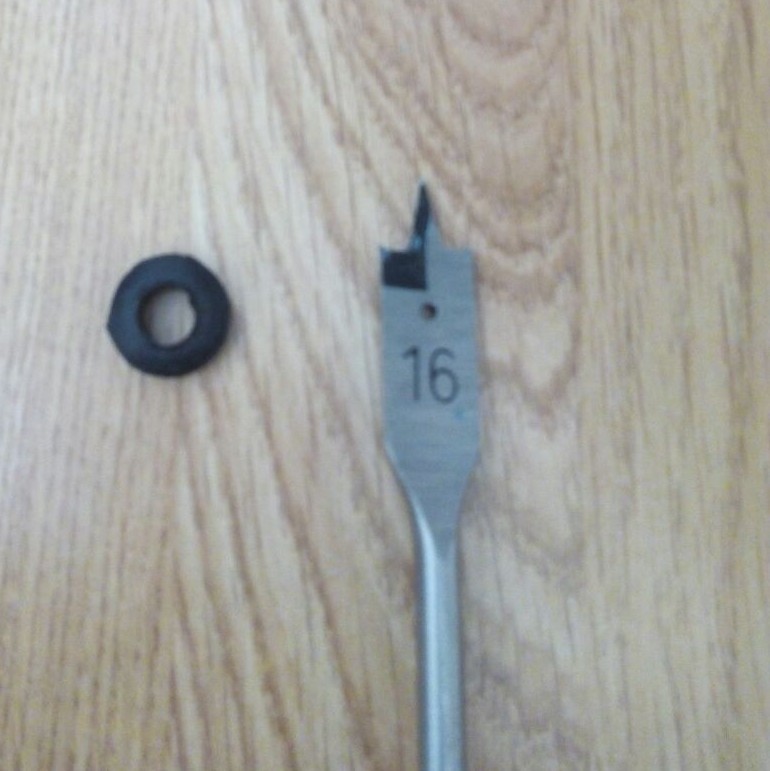
Drill two holes with a 16mm spade drill bit, one on each side of the box, to pass the motor and hall sensor cables.
![]()
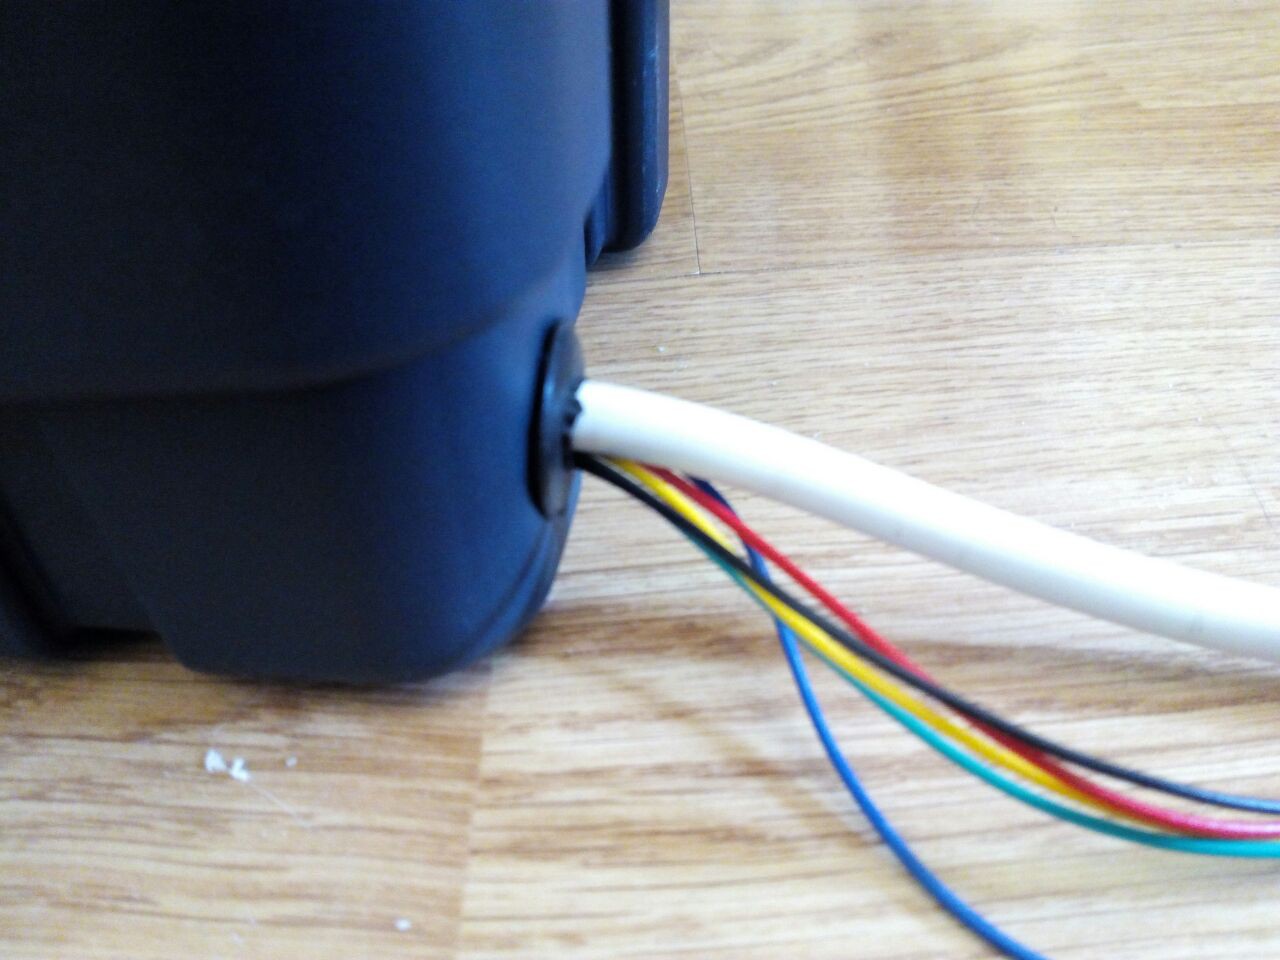
Cover the holes with rubber grommets to protect the cables from the plastic sharp edges.![]()
-
5Step 5
Toolbox:
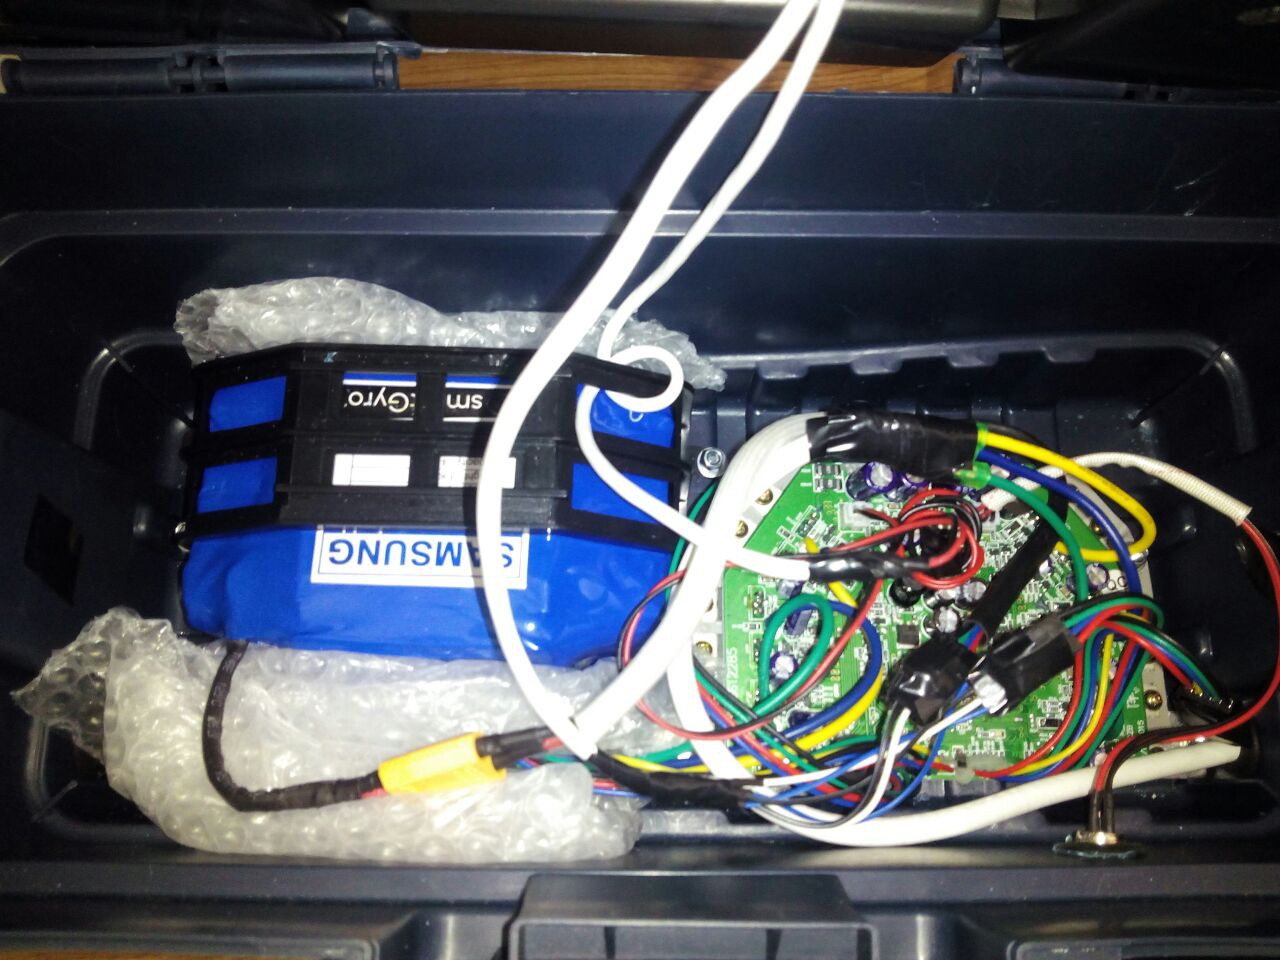
Drill holes to mount the battery (with its original plastic holder) and the board. Screw them using M4x20 bolts and secure them with M4 nuts.
Add some bubble-wrap or other soft and shock-absorbing material to protect and secure the battery more firmly in place.
![]()
-
6Step 6
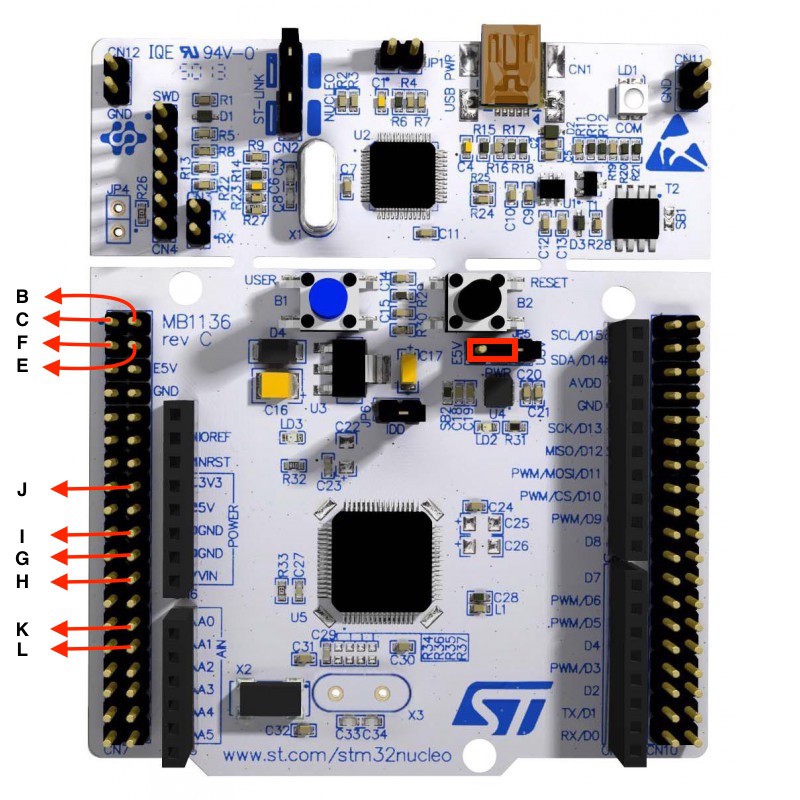
Controller board (Nucleo F446RE):
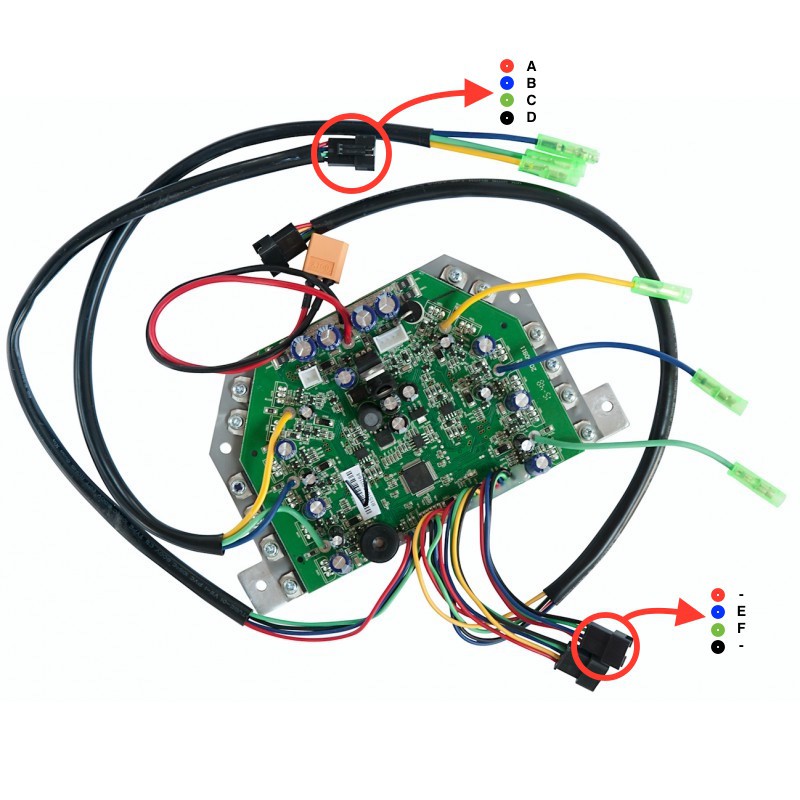
Connect again the motors and hall effect cables to the board.
Take 1m long cables and connect them to the gyroscope connectors on the hoverboard's main board.
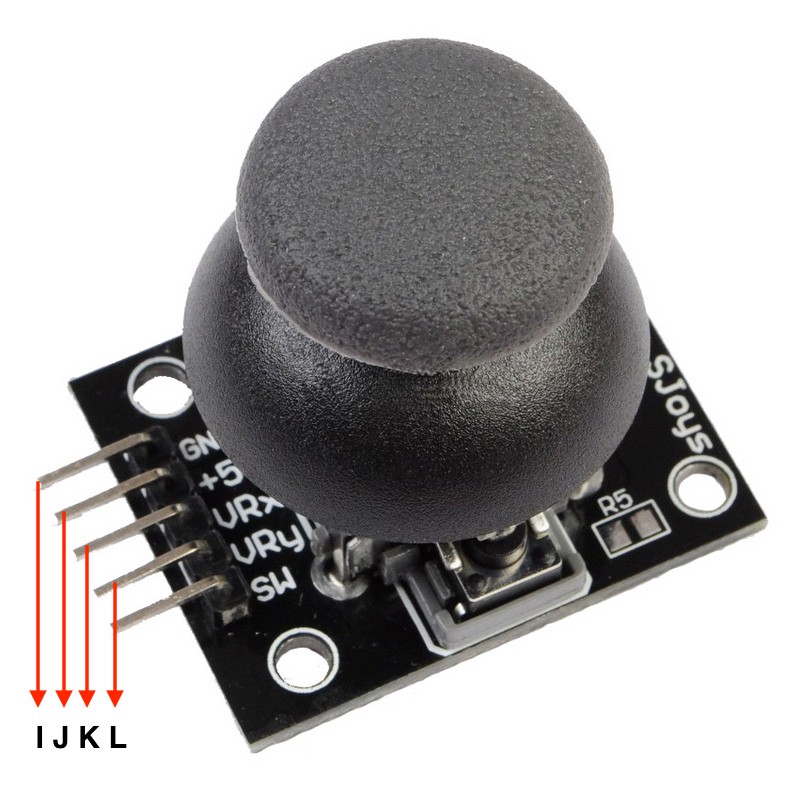
Pass the cable through the armchair where the control panel is located and connect the other end of these cables to your controller board.
The connections are as shown in the pictures below:
![]()
![]()
![]()
![]() NOTE: Regulate the output of the step down to 7-12V prior to connecting it to the Nucleo board.
NOTE: Regulate the output of the step down to 7-12V prior to connecting it to the Nucleo board. -
7Step 7
Motor holder:
Cut a wooden plank with a length equal to the width of your chair and a width of approximately 100mm
-
8Step 8
Motor holder:
Mill a 8mm deep and 16mm wide channel in each of the sides of the plank.
Drill four M8 holes to the sides using the hoverboard's original aluminum block as a pattern.
Drill two more M8 holes on each side of the plank to screw the plank to the chair.
![]()
-
9Step 9
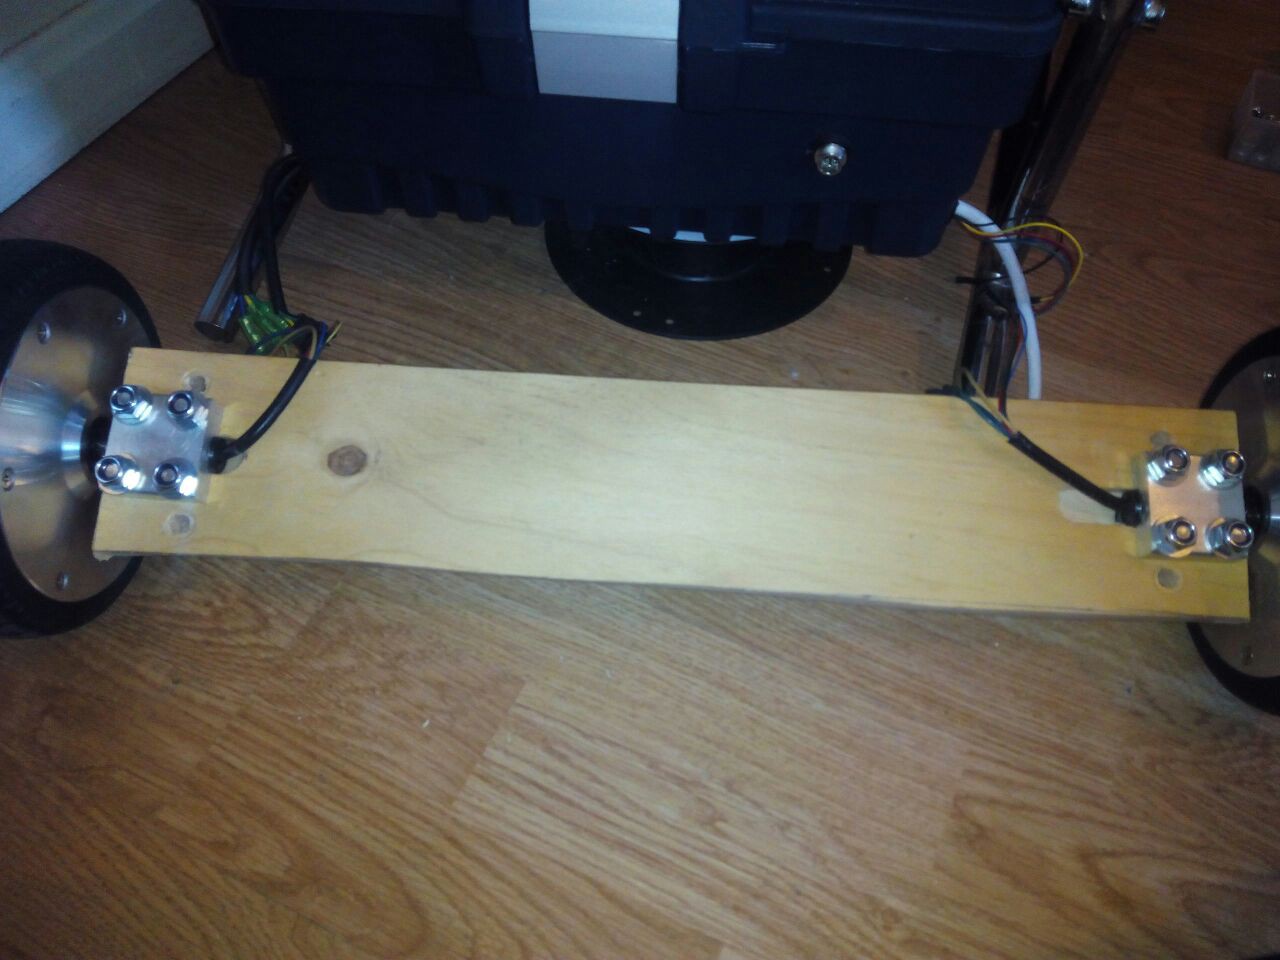
Motor holder:
Clamp both wheel's shaft to the wood plank using its original aluminum block.
![]()
-
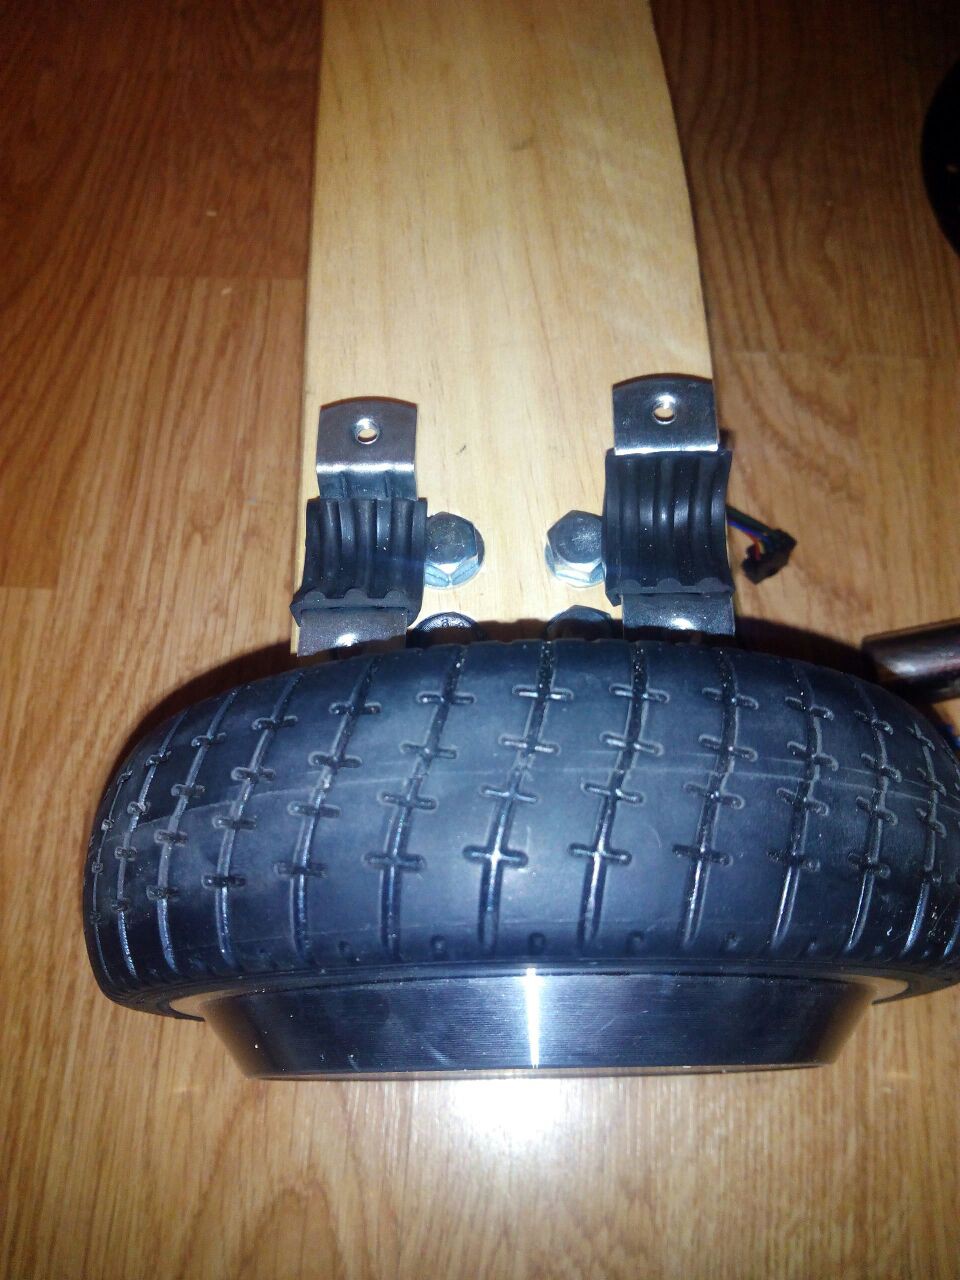
10Step 10
Motor holder:
Screw two rubber-covered pipe brackets to the additional M8 holes at each side of the plank.
![]()

 NOTE: Regulate the output of the step down to 7-12V prior to connecting it to the Nucleo board.
Discussions
Become a Hackaday.io Member
Create an account to leave a comment. Already have an account? Log In.
Are there any specific requirements for the hoverboard? There are many hoverboard brands. Are they all the same for the project?
Are you sure? yes | no