Alvaro Ferrán Cifuentes
-
Alternative control method
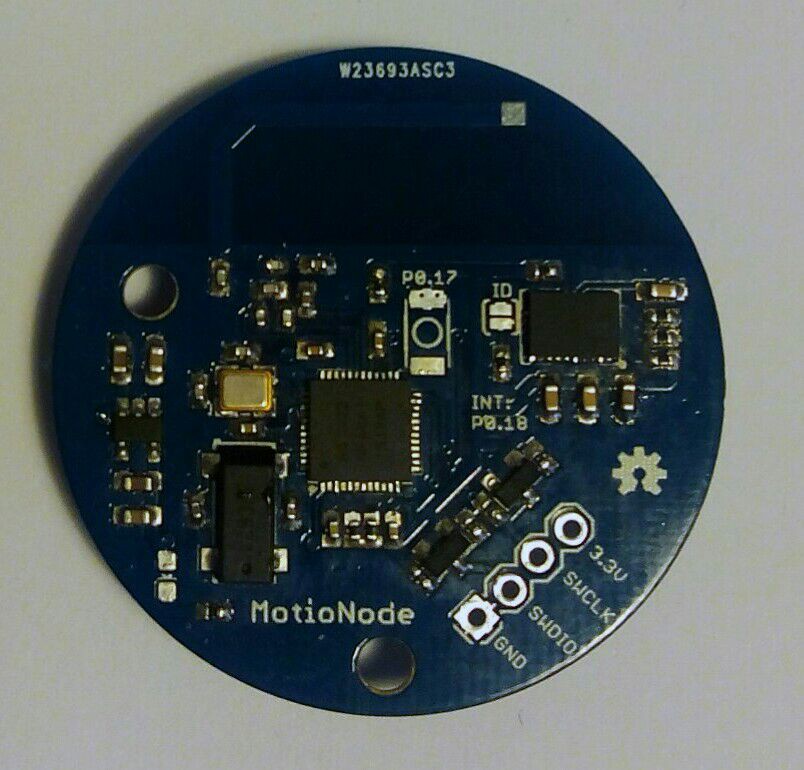
10/06/2016 at 17:54 • 0 commentsIn addition to the previous board, we are also developing an alternative control method.
This self-contained module is based on the nRF51822 Bluetooth Low Energy SoC and a BNO055 IMU with on-board sensor fusion, and is powered by a CR2032 battery cell.
![]()
The idea behind this board is to provide an alternative to people who may be unable to use the joystick, and could control the chair using head gestures along with a dis/enable position to avoid sending commands involuntarily.
-
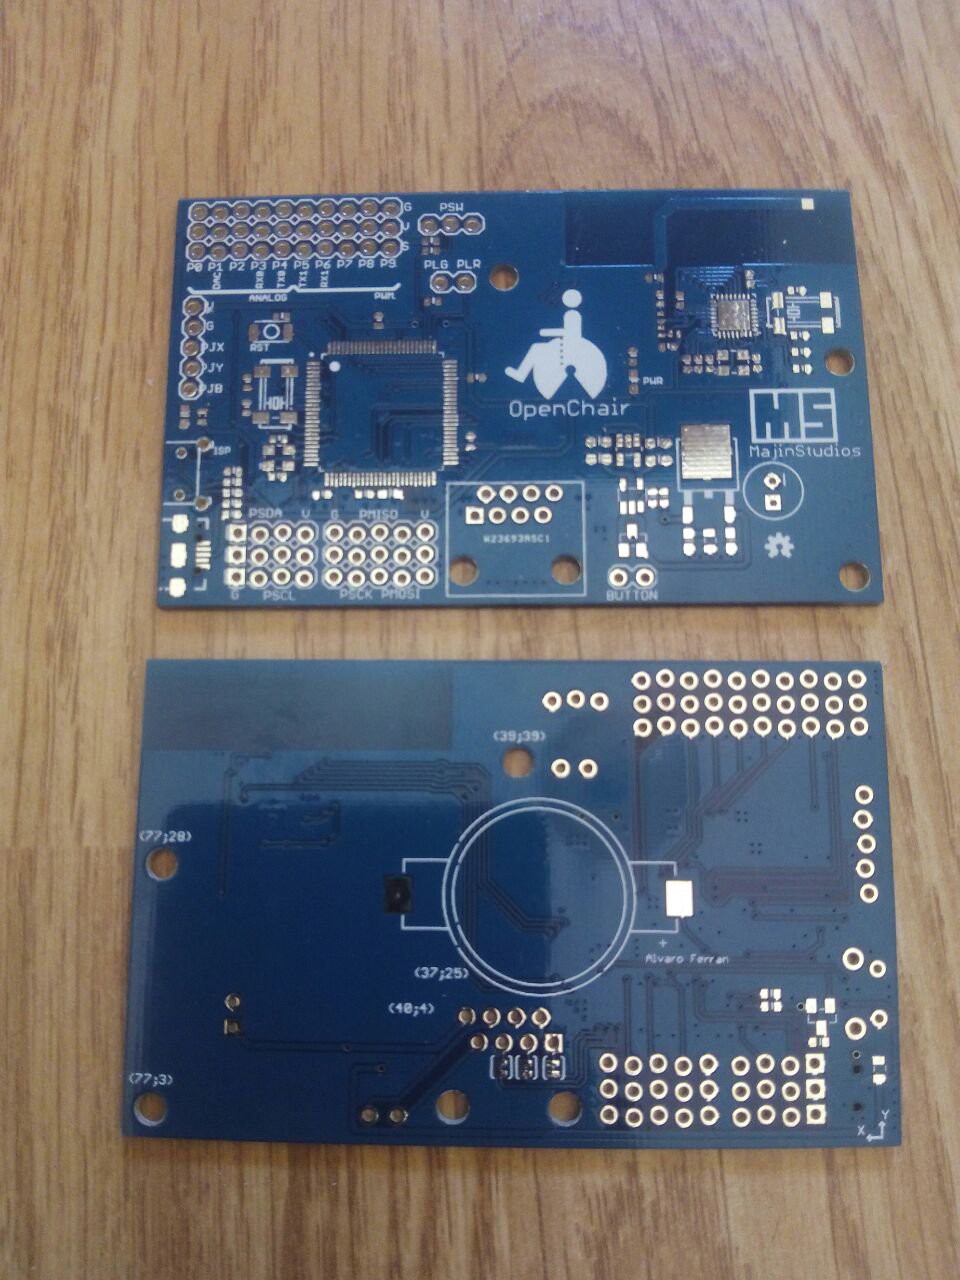
OpenChair board: Hello world
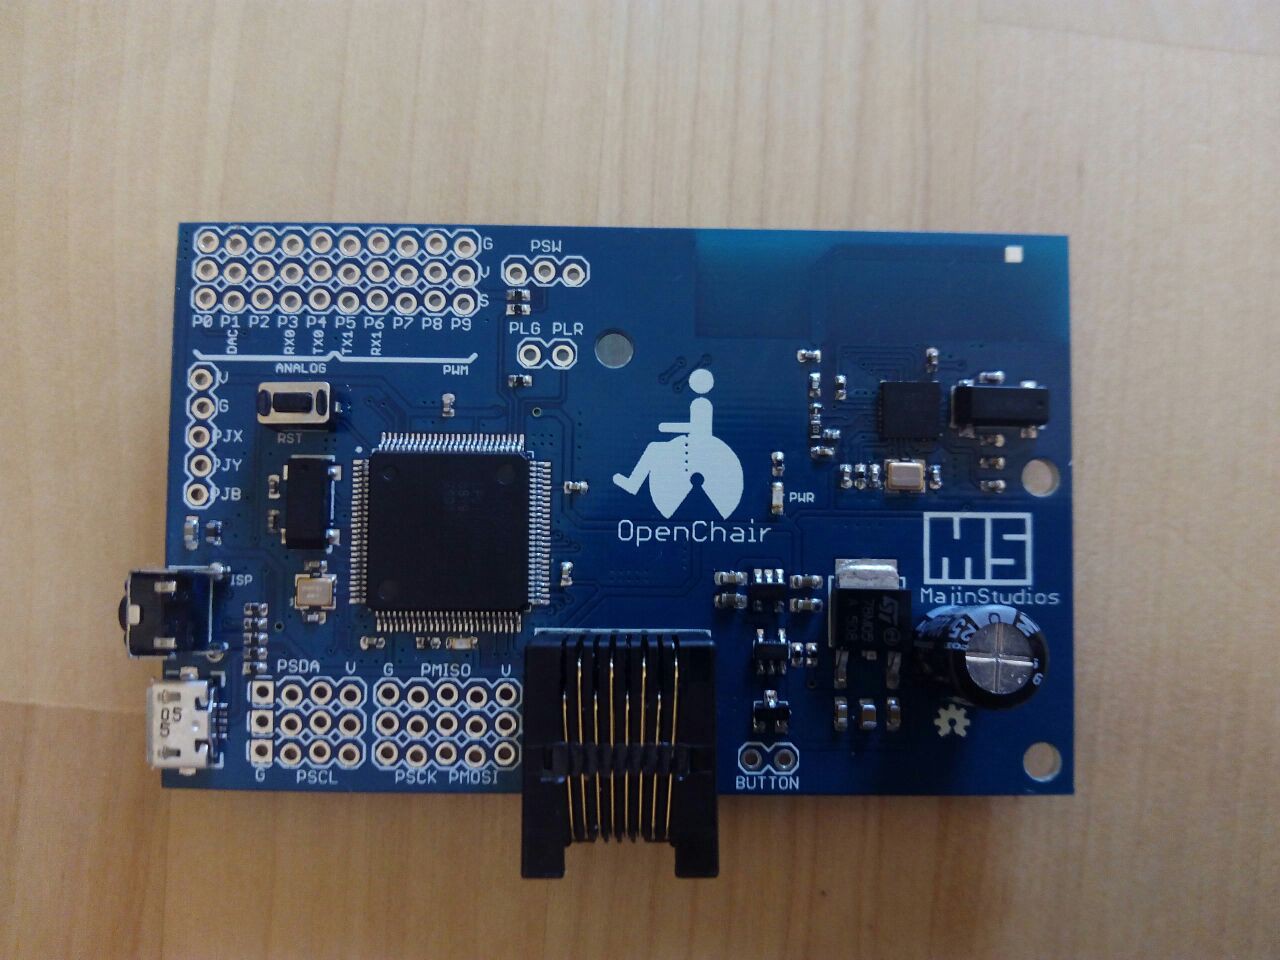
10/01/2016 at 14:07 • 0 commentsWe have finished mounting the board and it's alive!
![]()
The LPC1768 comes with a bootloader to accept being programmed over UART0 via an FTDI converter. We are still seeing if it's possible to load the secondary USB bootloader and/or integrate it with PlatformIO for a one-click compilation and uploading experience, but for now we are programming it using Marc Prager's mxli.
![]()
We have also tested that the power selection works, as it disconnects the USB from the board as soon as the battery is connected and then reconnects when the latter is removed.
-
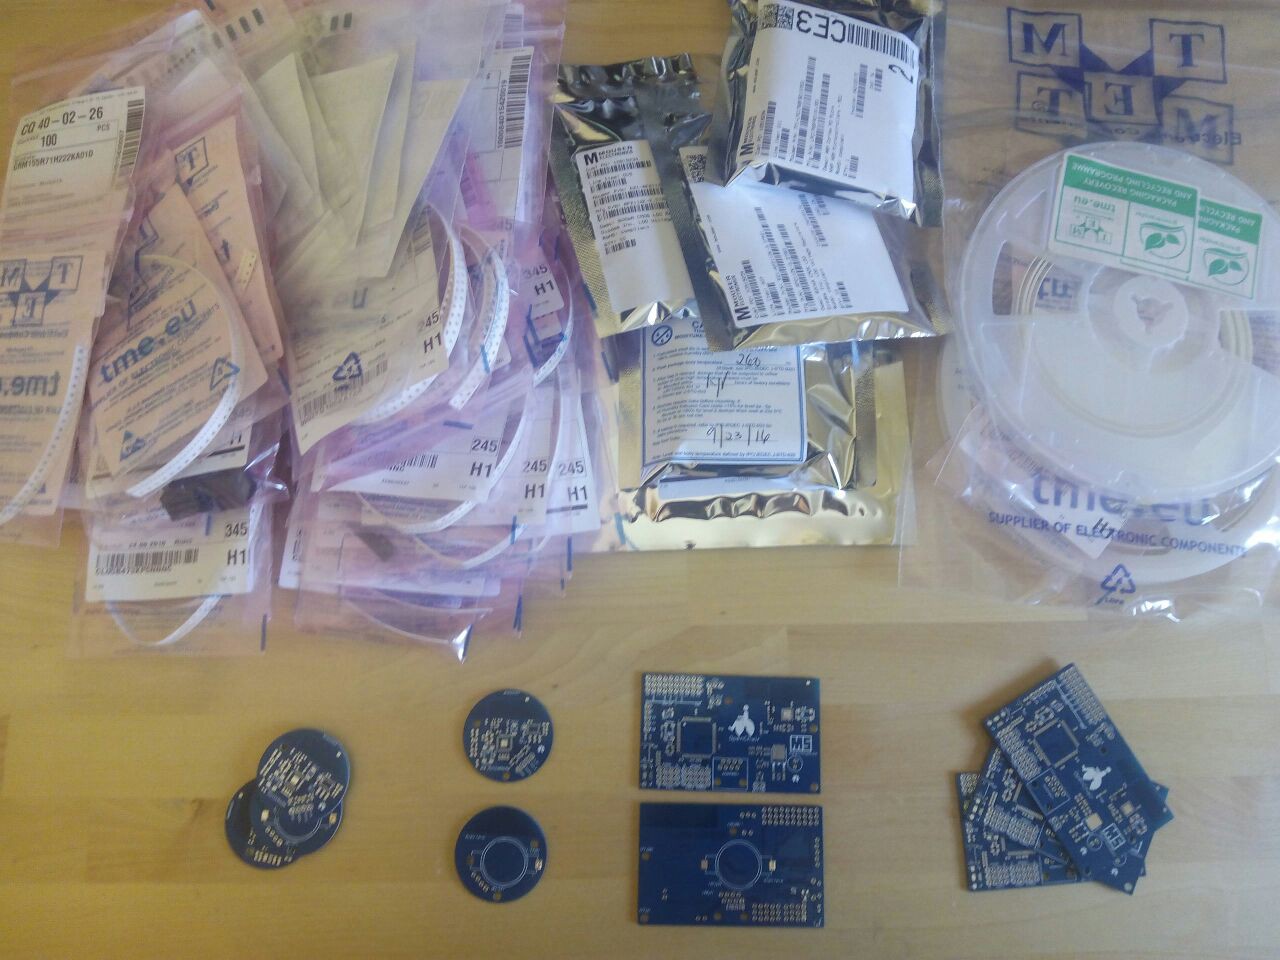
PCBs and components arrived!
09/27/2016 at 12:51 • 0 commentsWe have just received all the components and bare PCBs for the chair.
![]()
Until now we've been using a Nucleo board and a step-down regulator in the control panel. While this works, we wanted to go an extra step to get rid of the mess of cables. The new board handles communications through a CAT5 cable and can take in the 14V provided by the hoverboard. We have also added BLE 4.0 connectivity through an nRF8001 chip to open the chair even more to mobile apps or alternative control methods, such as gesture or eye-gaze based.
![]()
-
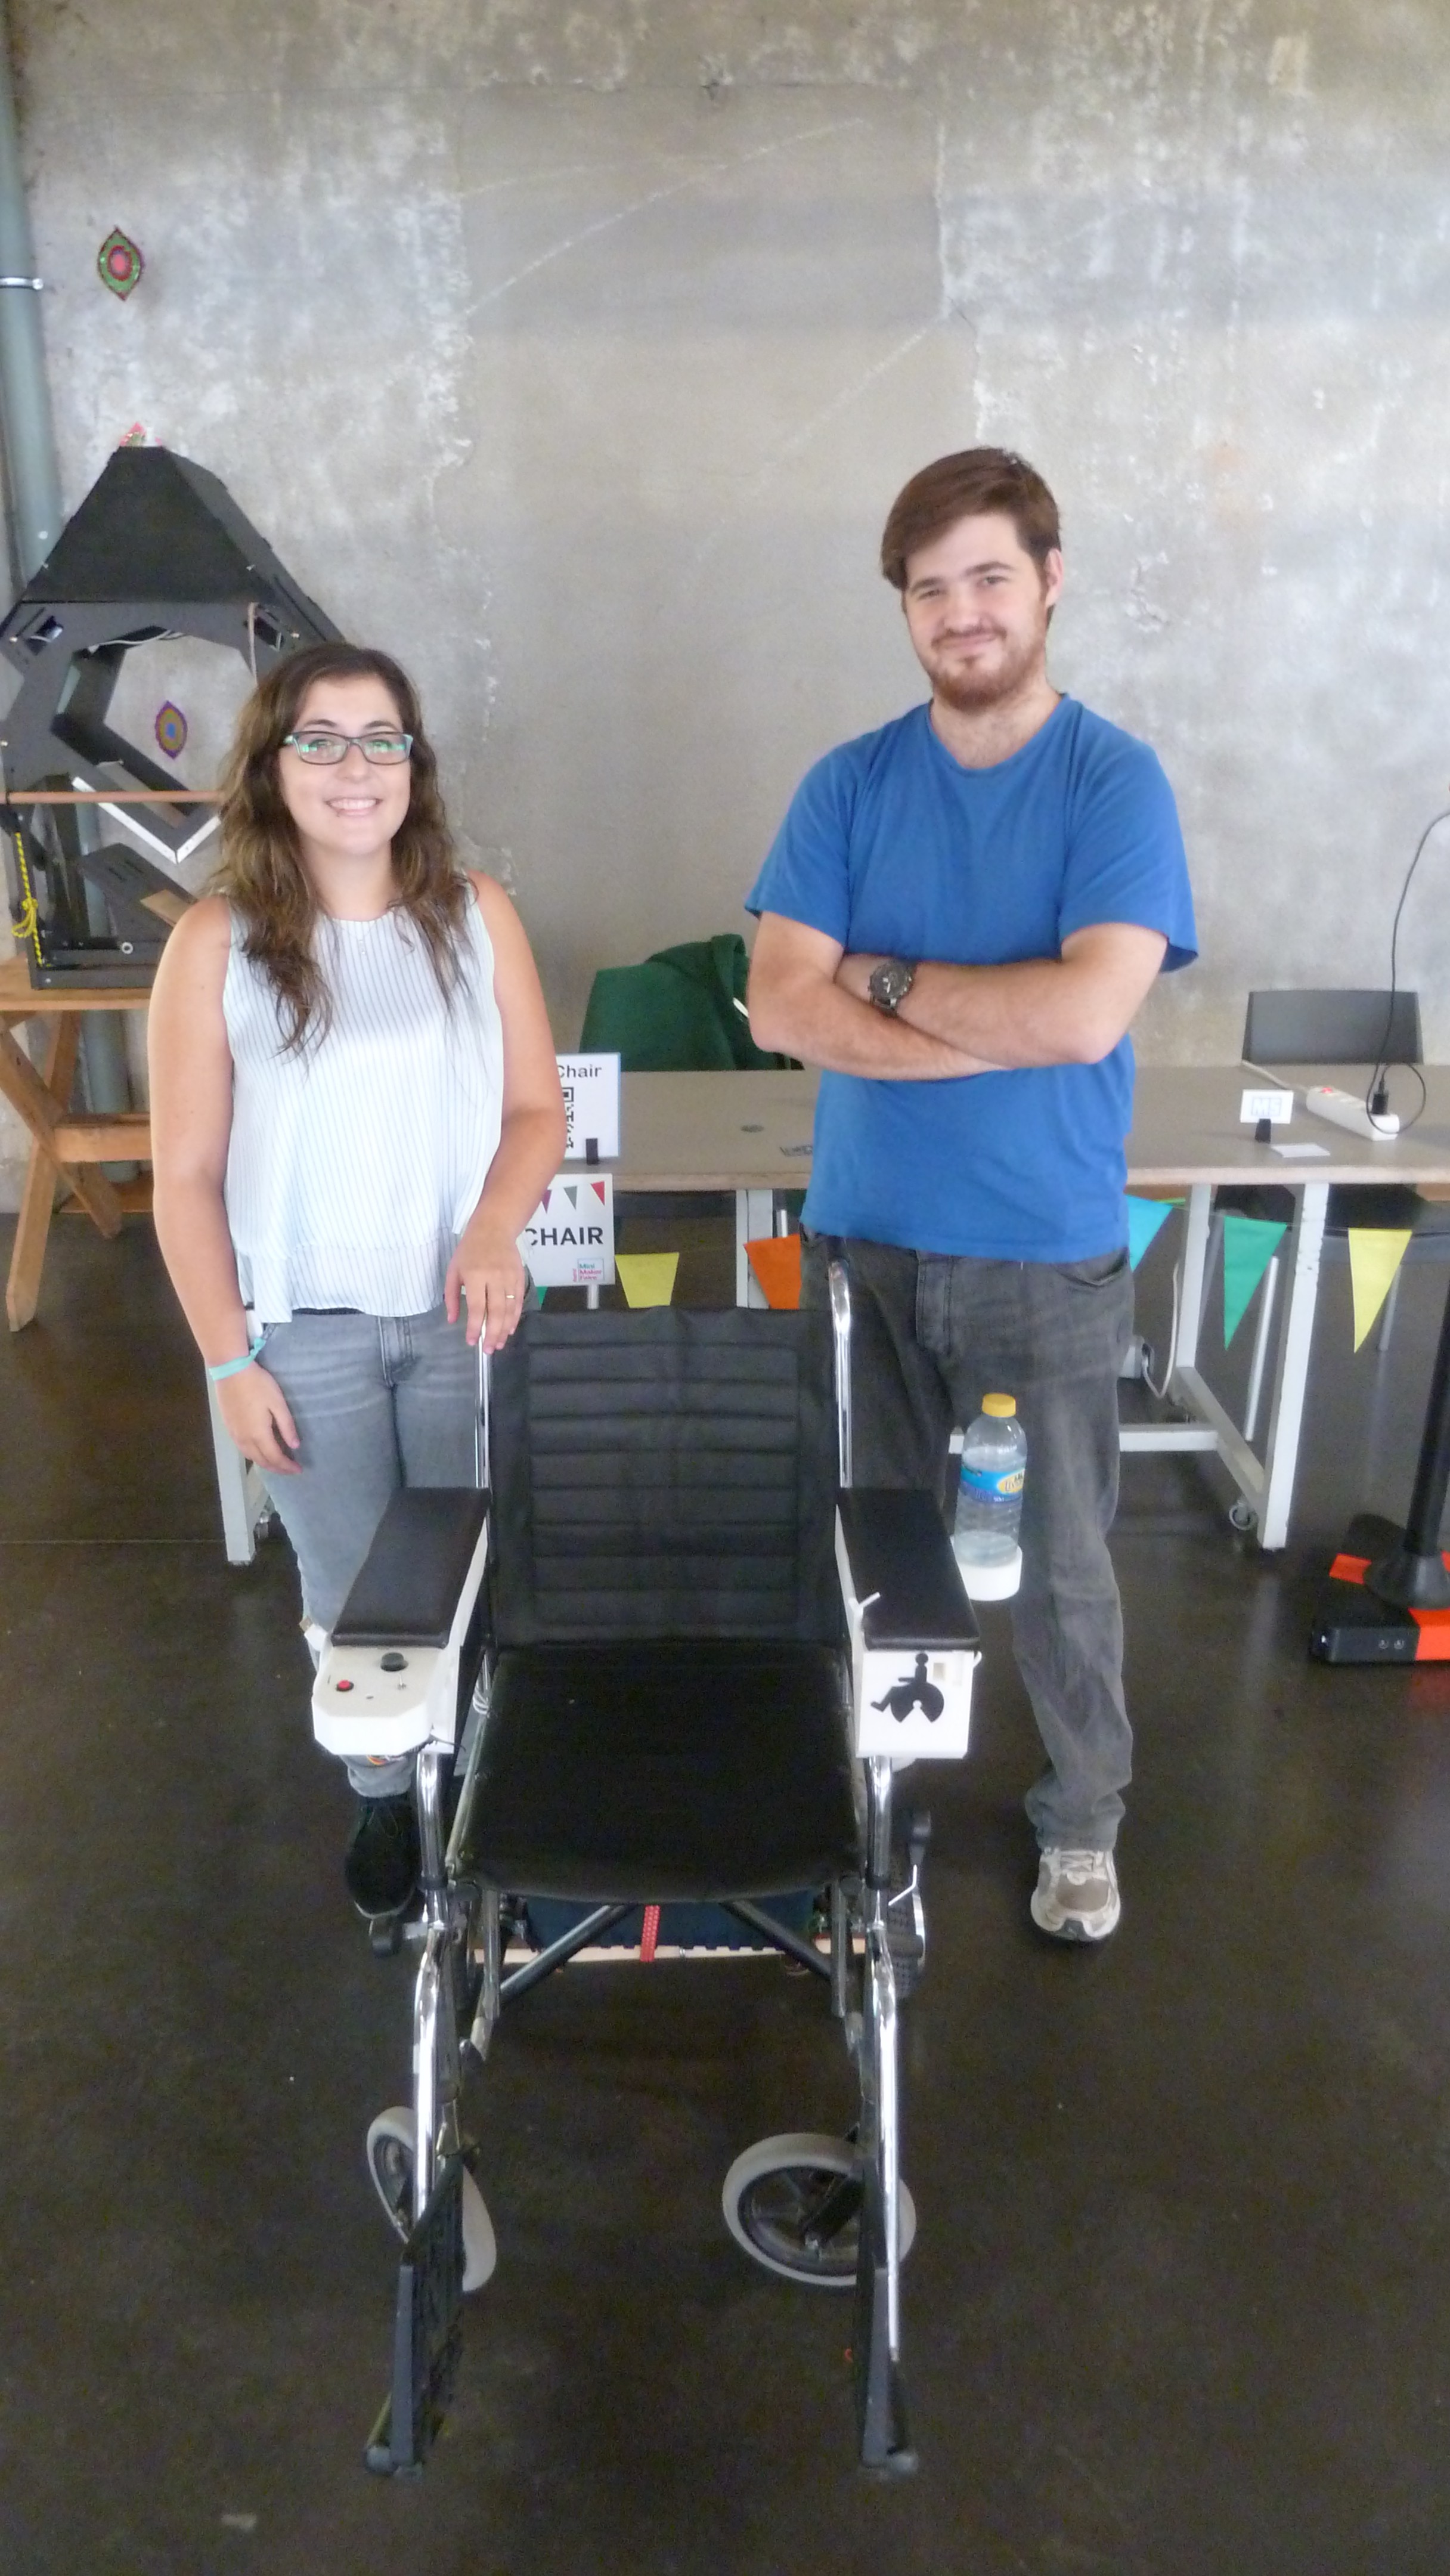
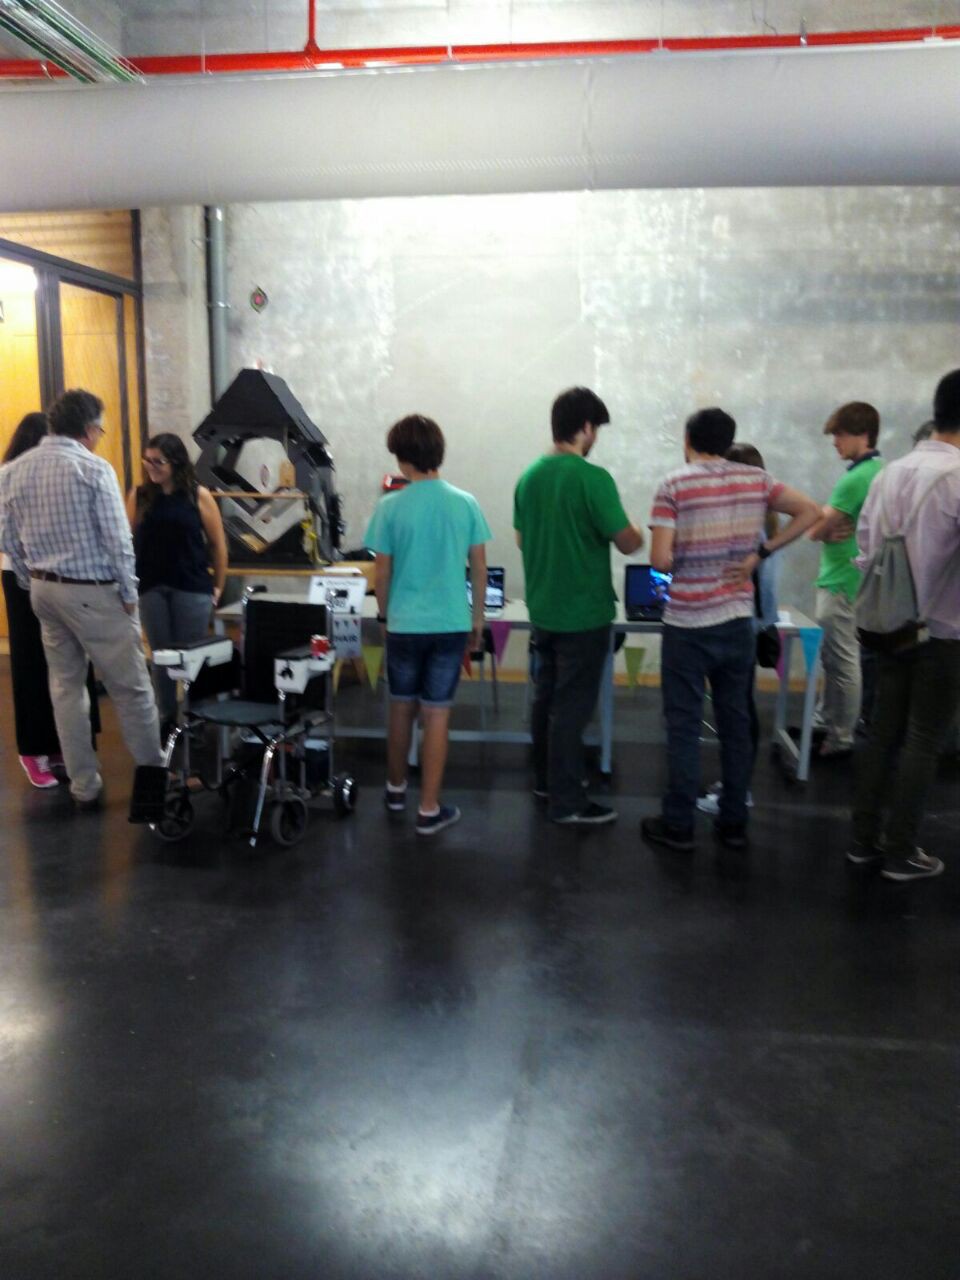
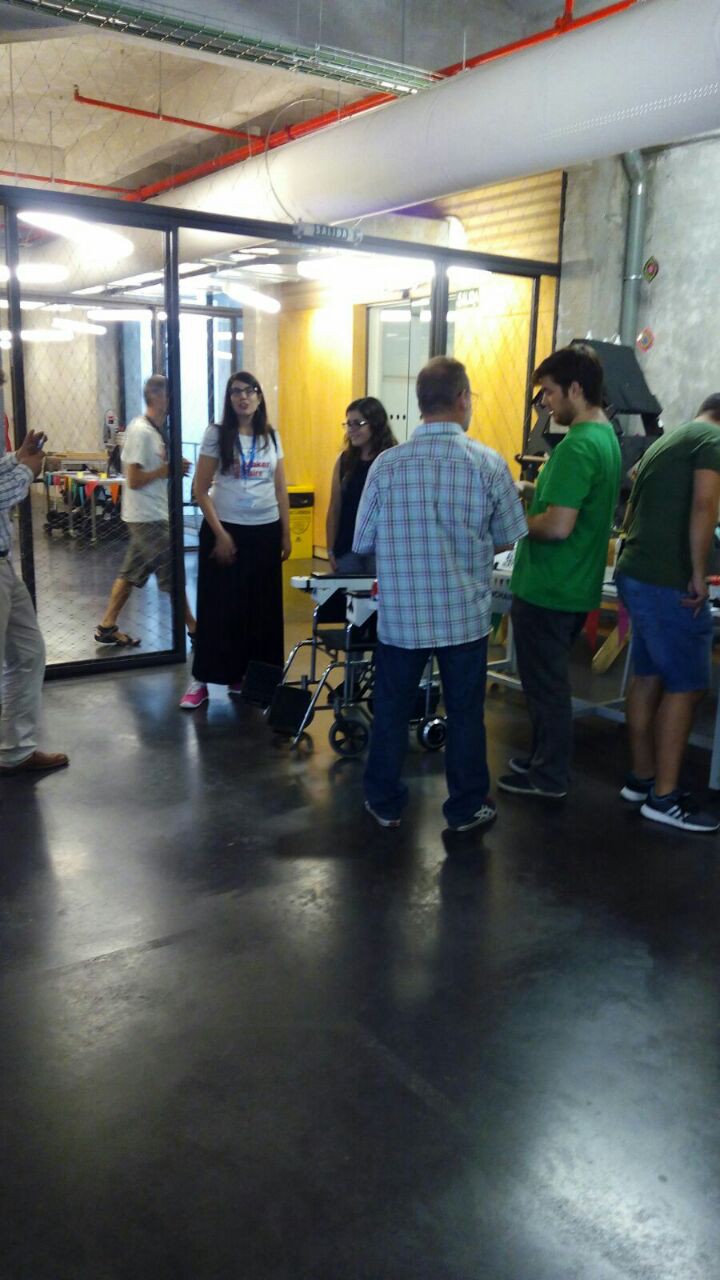
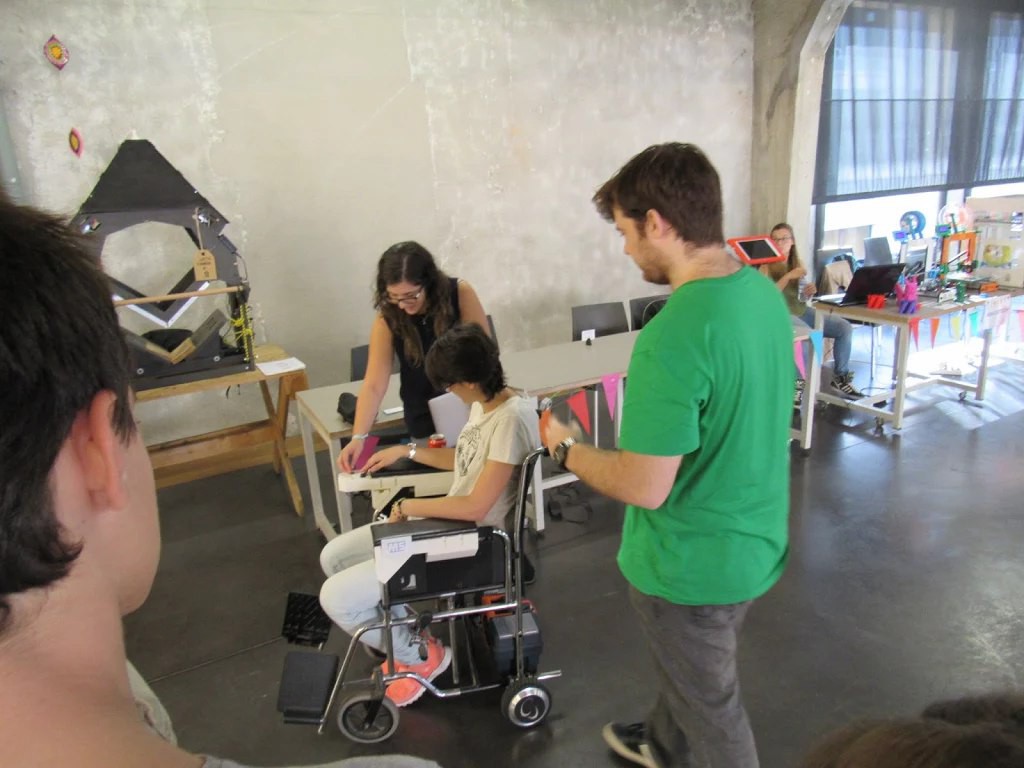
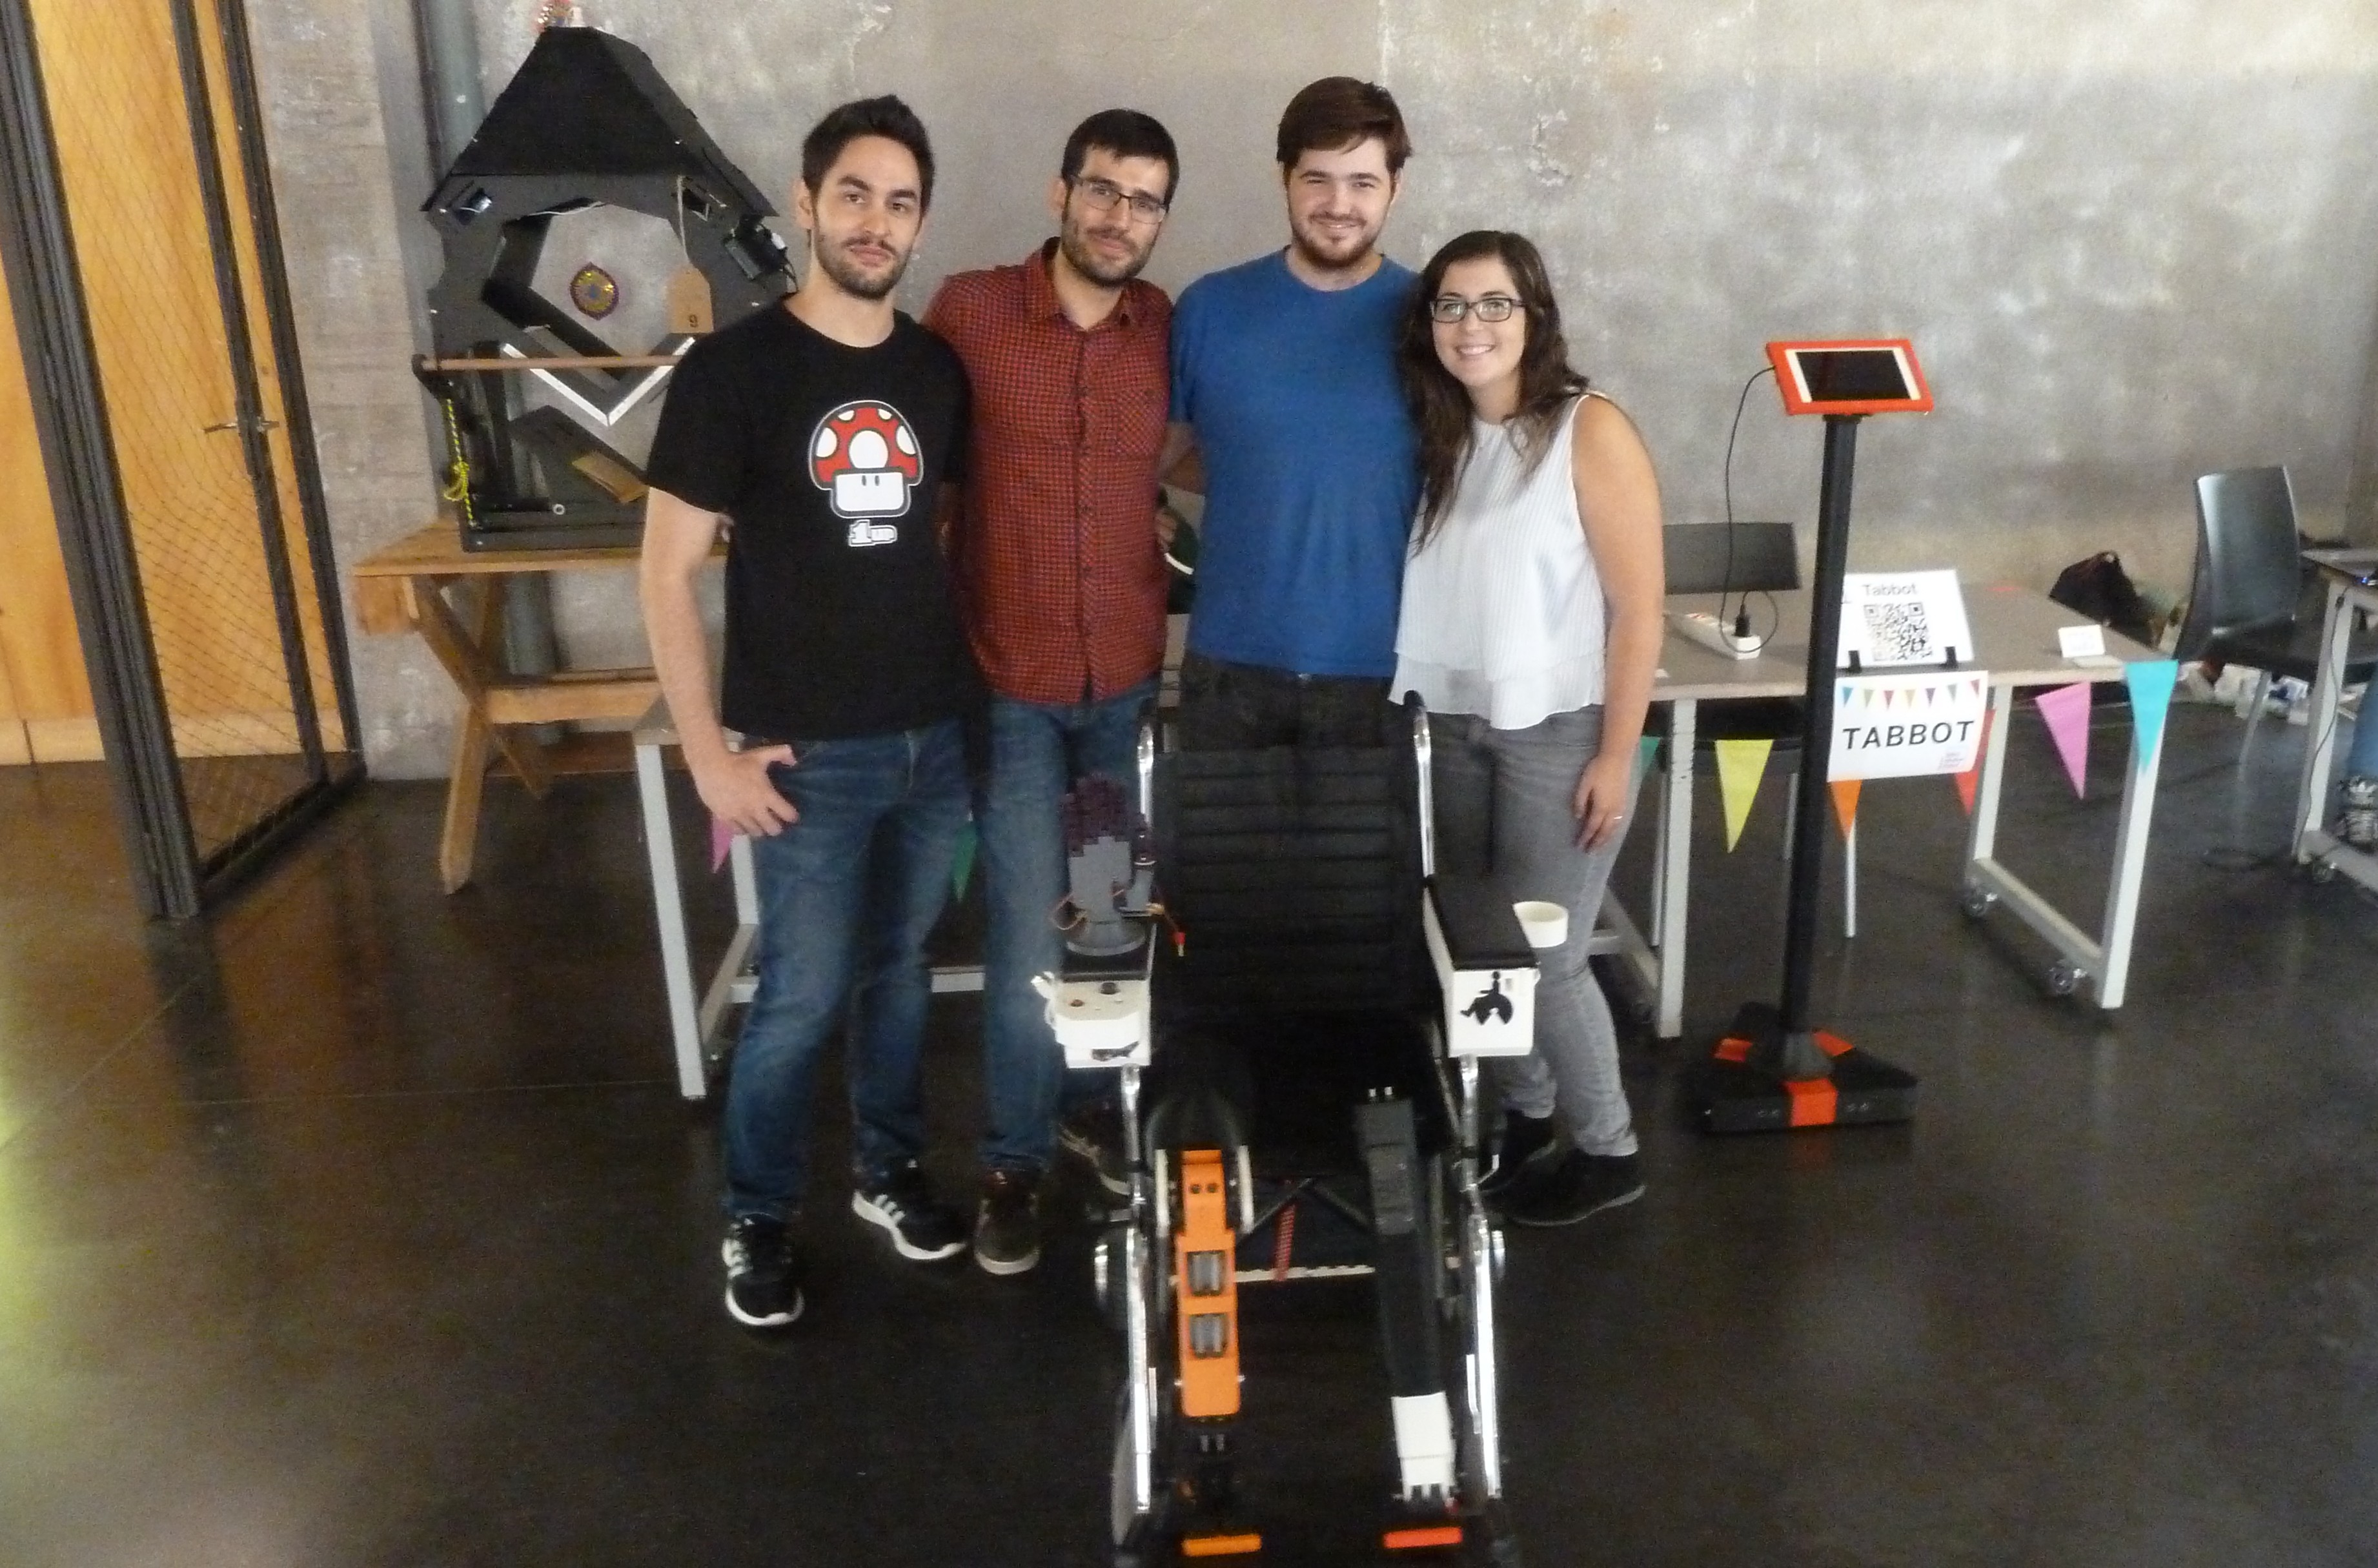
Madrid Maker Faire 2016
09/27/2016 at 11:03 • 0 commentsWe haven't advanced much this weekend technically, but we've gotten a lot of feedback from both wheelchair users and physiotherapists by presenting the chair at the Madrid Maker Faire. Here are some pictures of the event!
![]()
![]()
![]()
![]()
We even took a picture with David Sanchez Falero and Alvaro Villoslada, the creators of Drakkar and Dextra respectively!
![]()
-
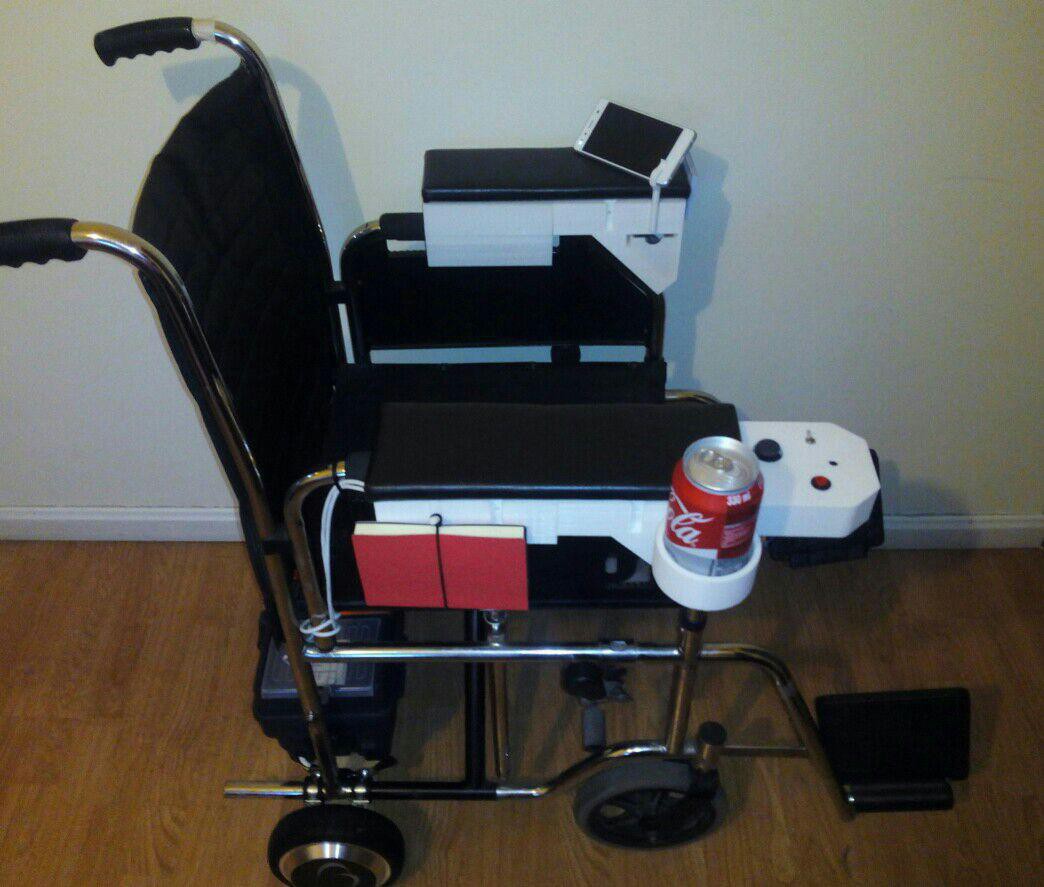
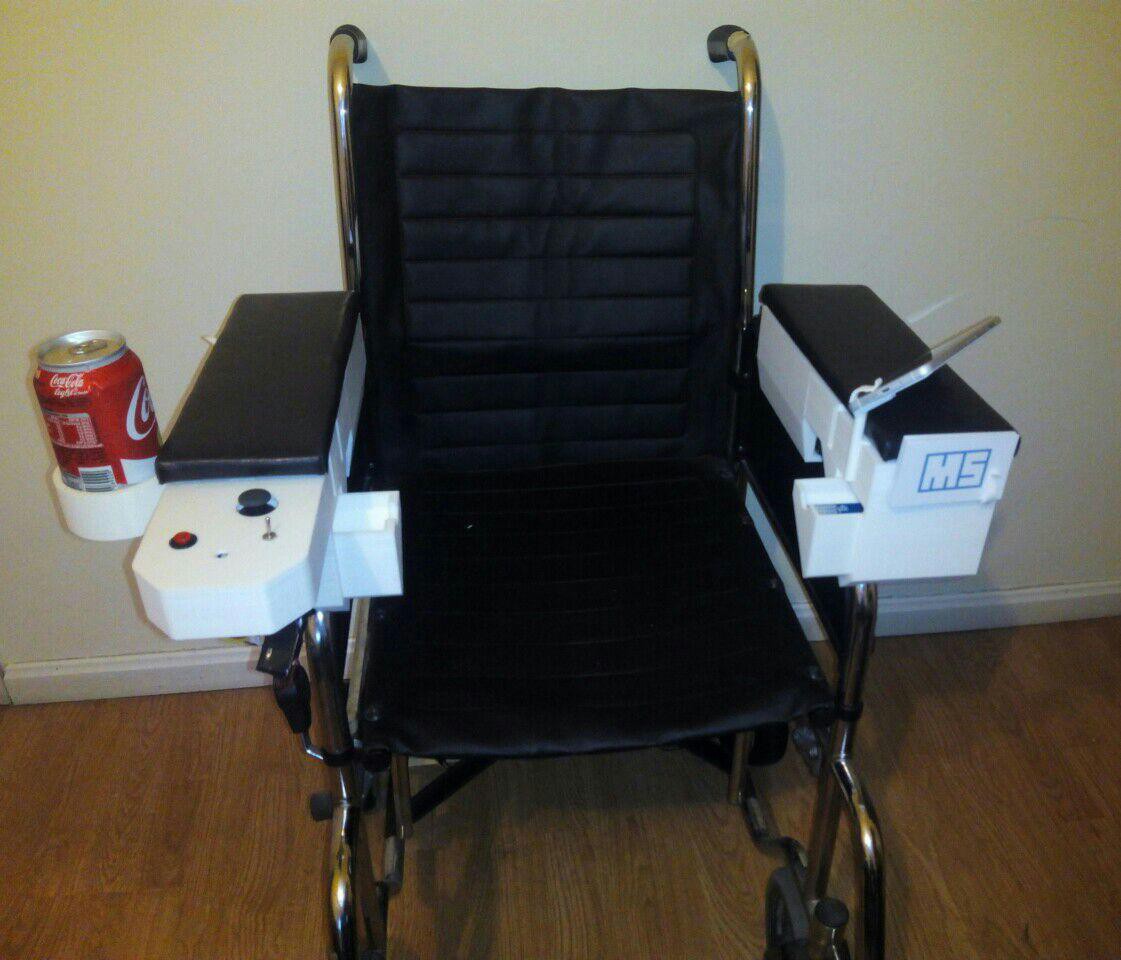
Accessories, accessories everywhere!
09/22/2016 at 20:43 • 0 commentsAs mentioned previously, we decided to design and print the whole armrest, instead of just the control panel.
![]()
Apart from an aesthetics and comfortability point of view, we wanted them to be useful. That's why we designed them with hitches on the sides which allow us to connect different accessories, such as these shown in the picture below.
![]()
They are, from left to right, a business card clip, a hook (to hold bags, notebooks, ..), a phone stand, a drink holder and, below, two cushions for the armrests made by my parents (thank you so much!). You can see here another picture with all these accessories put to use :)
![]()
Apart from the hitches, the armrests have two small drawers to store cash, gums, keys, ... all those things that would be uncomfortable to have on the pockets while sitting on the chair.
These are just some examples but the possibilities are limitless. What would YOUR chair look like?
-
Second ride, it's almost ready!
09/22/2016 at 20:39 • 0 commentsAfter changing (again) the wheelchair design and reverting to the original control method, the chair is now going a lot smoother!
-
OpenChair v0.3
09/22/2016 at 18:29 • 0 commentsThe aim of this project has always been to create an open wheelchair platform, and to do so as simply as possible, which is why we have maintained the large wheels both as a structural support and to reduce the number of steps to perform.
However, when we took the chair for a spin the first time we came upon a problem we hadn't foreseen:
In theory, the larger wheels would support the user's weight and leave the board's wheels to push the chair around, simple and hassle-free. However, this is one of those times where theory and practice don't agree. While all four wheels are level and well aligned, the streets are, unfortunately, not. This causes different wheels to be touching the ground at different times and in an unpredictable manner, which can range from all wheels on ground (ideal case), to one driving wheel and one supporting (undesired turning), no driving wheels (no movement) or worst-case scenario, no supporting wheels (plastic breaks under full weight of user).
After verifying all four cases, and now with one wheel less, we decided that comercial wheelchair manufacturers only used two small driving wheels for a very good reason and that we needed to get back to the drawing board.
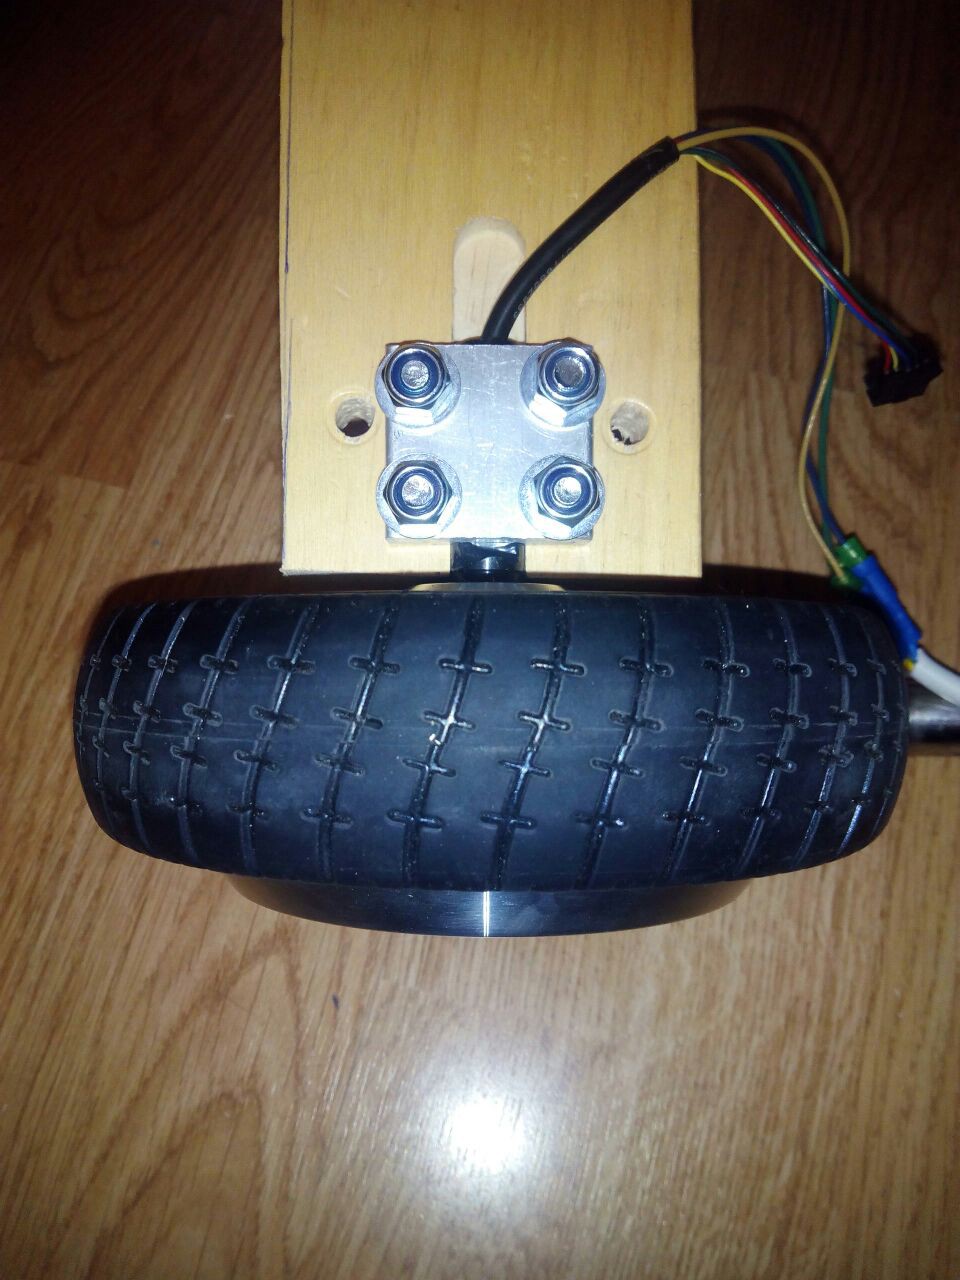
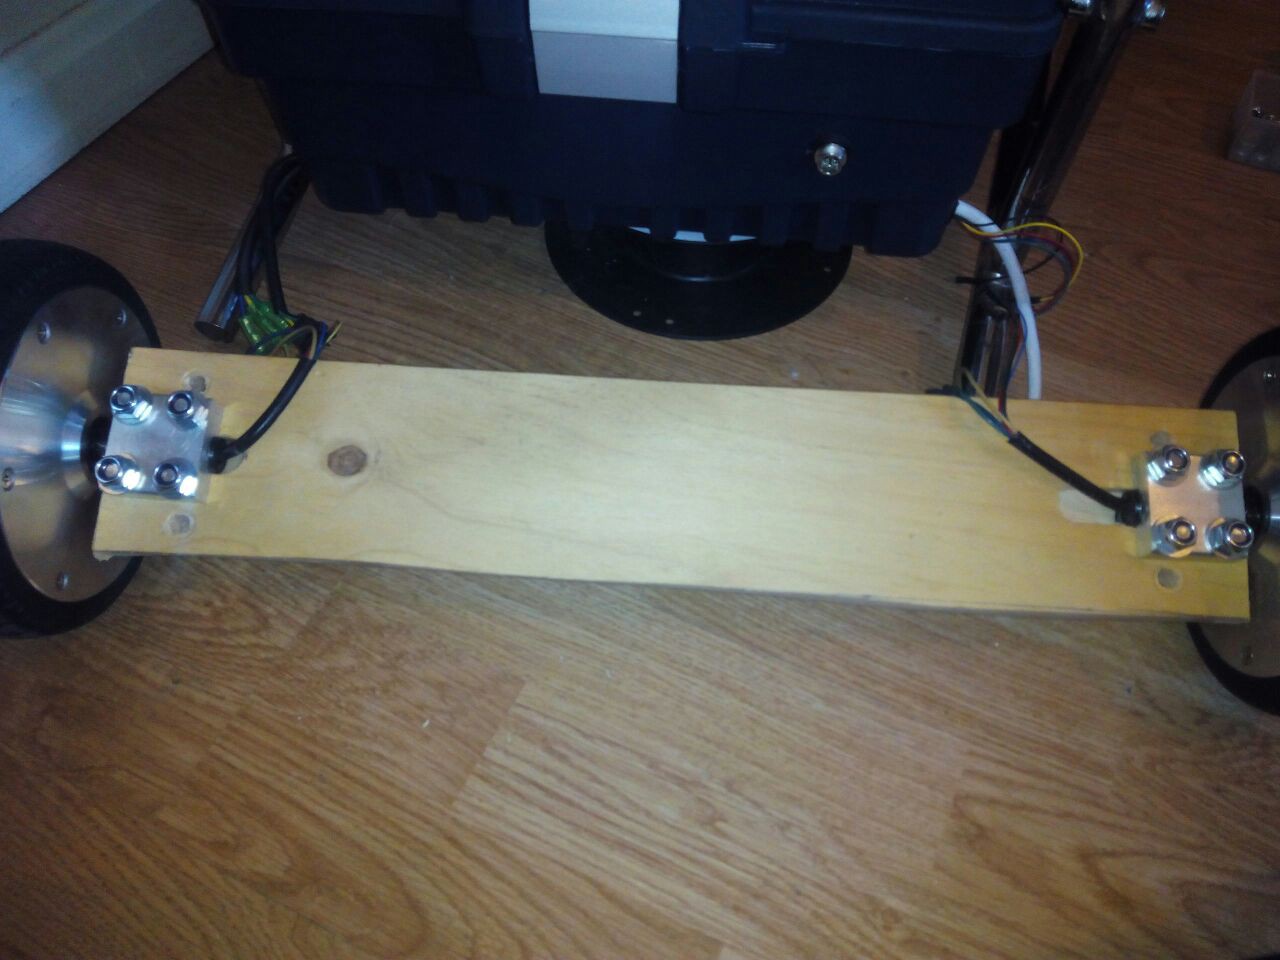
This time we decided to ditch the plastic printed parts and use more resistant materials that could handle the full weight on their own. Instead of having two independent blocks clamping the wheels to the frame, we decided to place a single wooden plank which would prevent them from rotating.
![]()
We milled an 8mm deep and 16mm wide channel with four M8 holes to the sides, which we used to clamp the wheel's shaft using the hoverboard's original aluminum block.
![]()
![]()
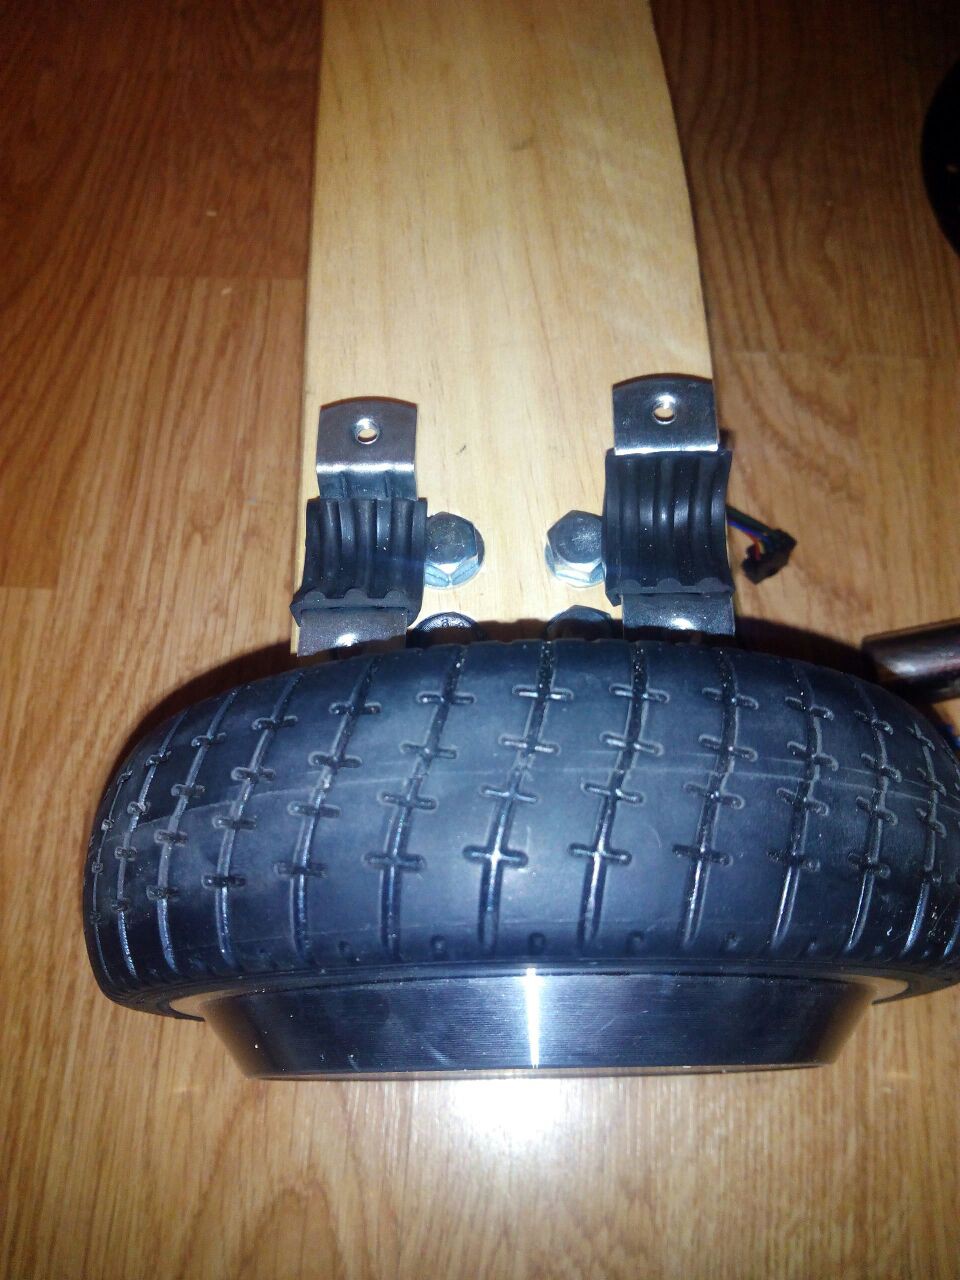
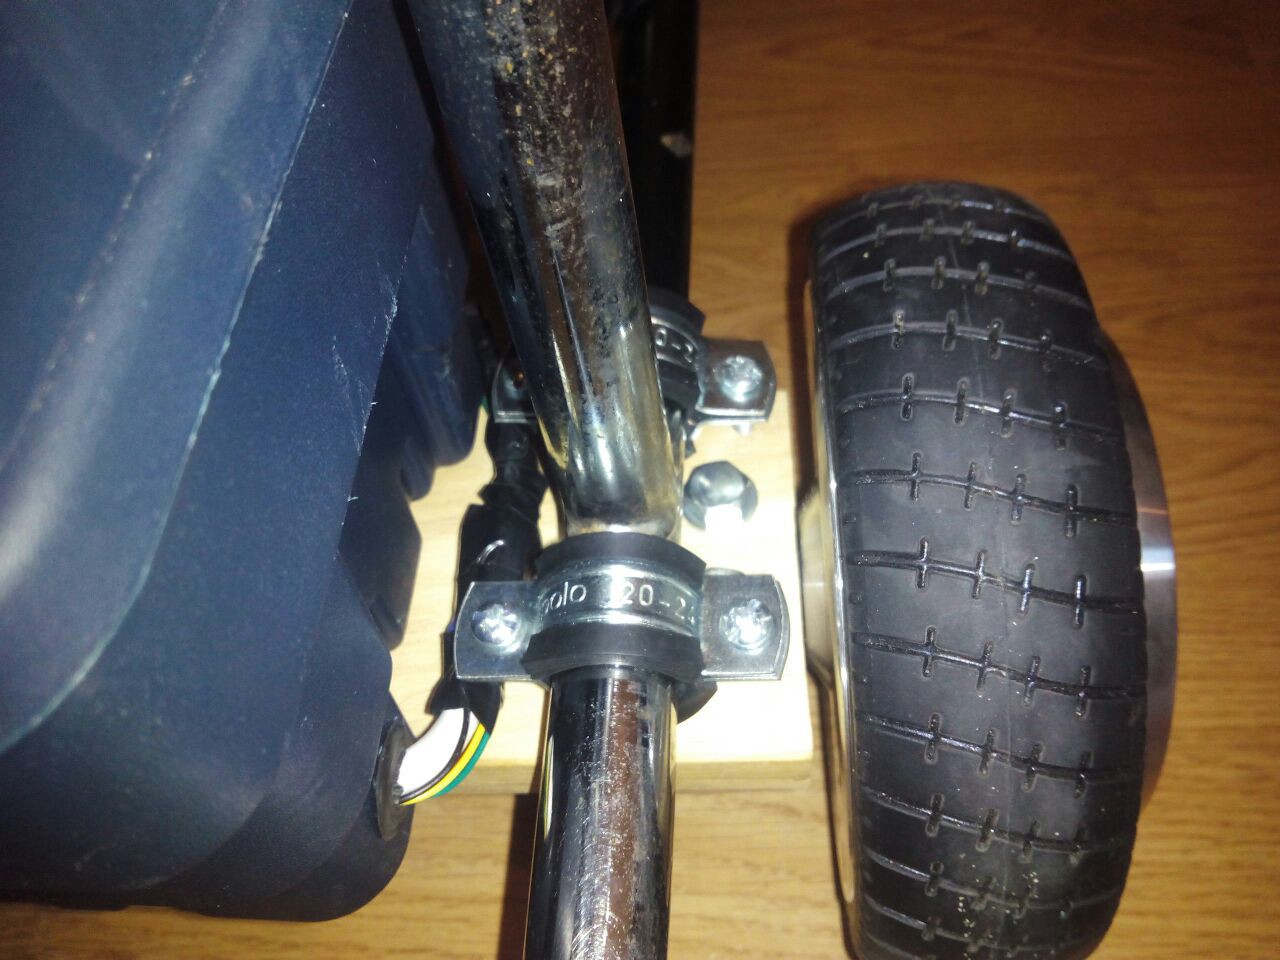
To the sides of the block we screwed two 22mm, rubber-covered, pipe brackets using M8 bolts.
![]()
These brackets were placed to each side of the vertical tube of the frame and fastened to secure the board tightly in place.
![]()
The end result is a monolithic drive system in which the weight is supported directly by the wood and aluminum holding the wheels, these are unable to rotate on the pitch direction because they are connected together, and can't slide off the frame because of the brackets.
![]()
-
First ride, it's alive!
09/19/2016 at 20:52 • 0 commentsToday we went out for the first test drive on the chair. While the design and control are yet to be improved, it actually moved!
-
OpenChair v0.2: Electronics
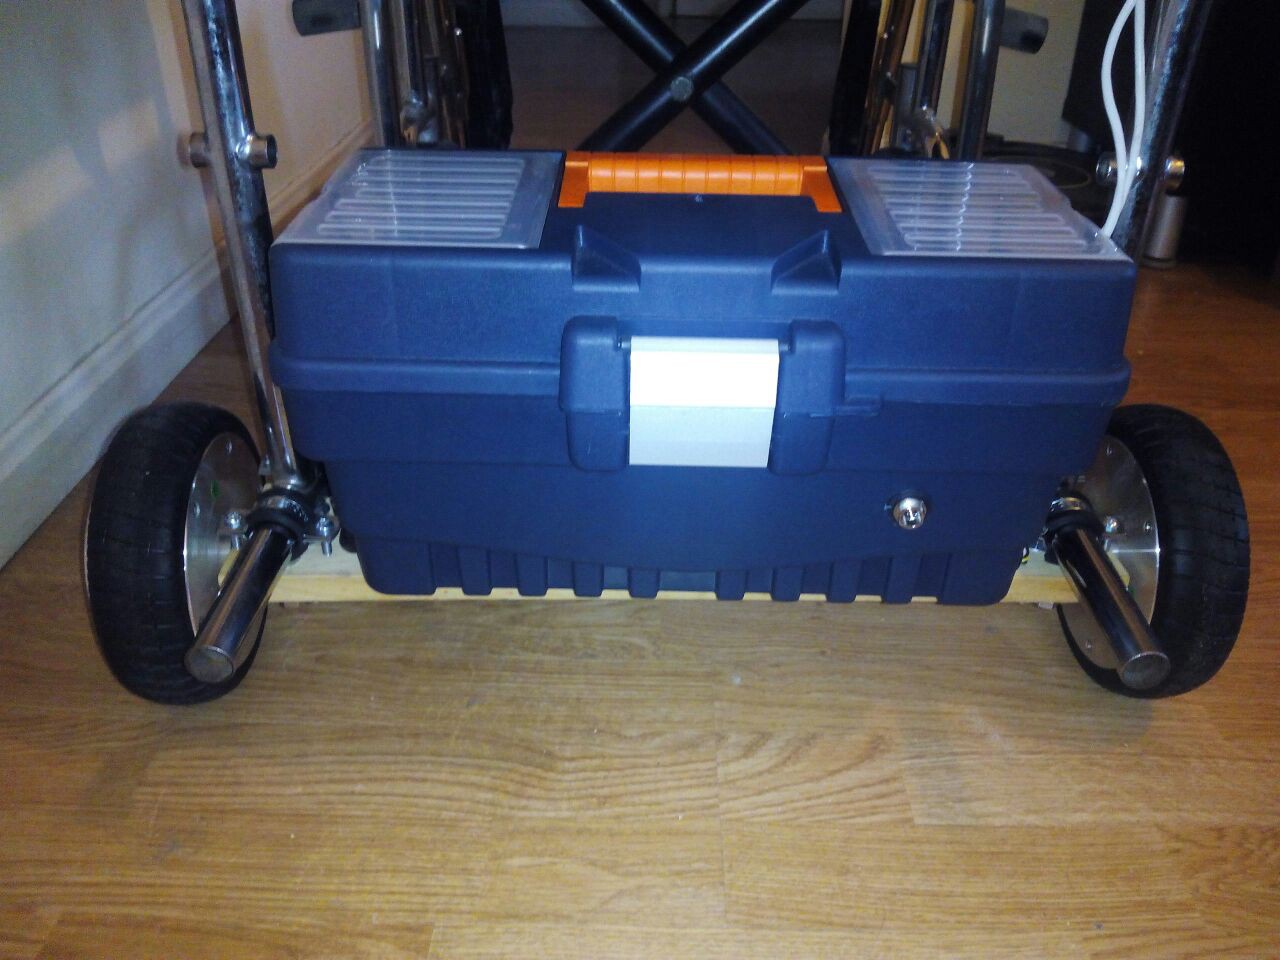
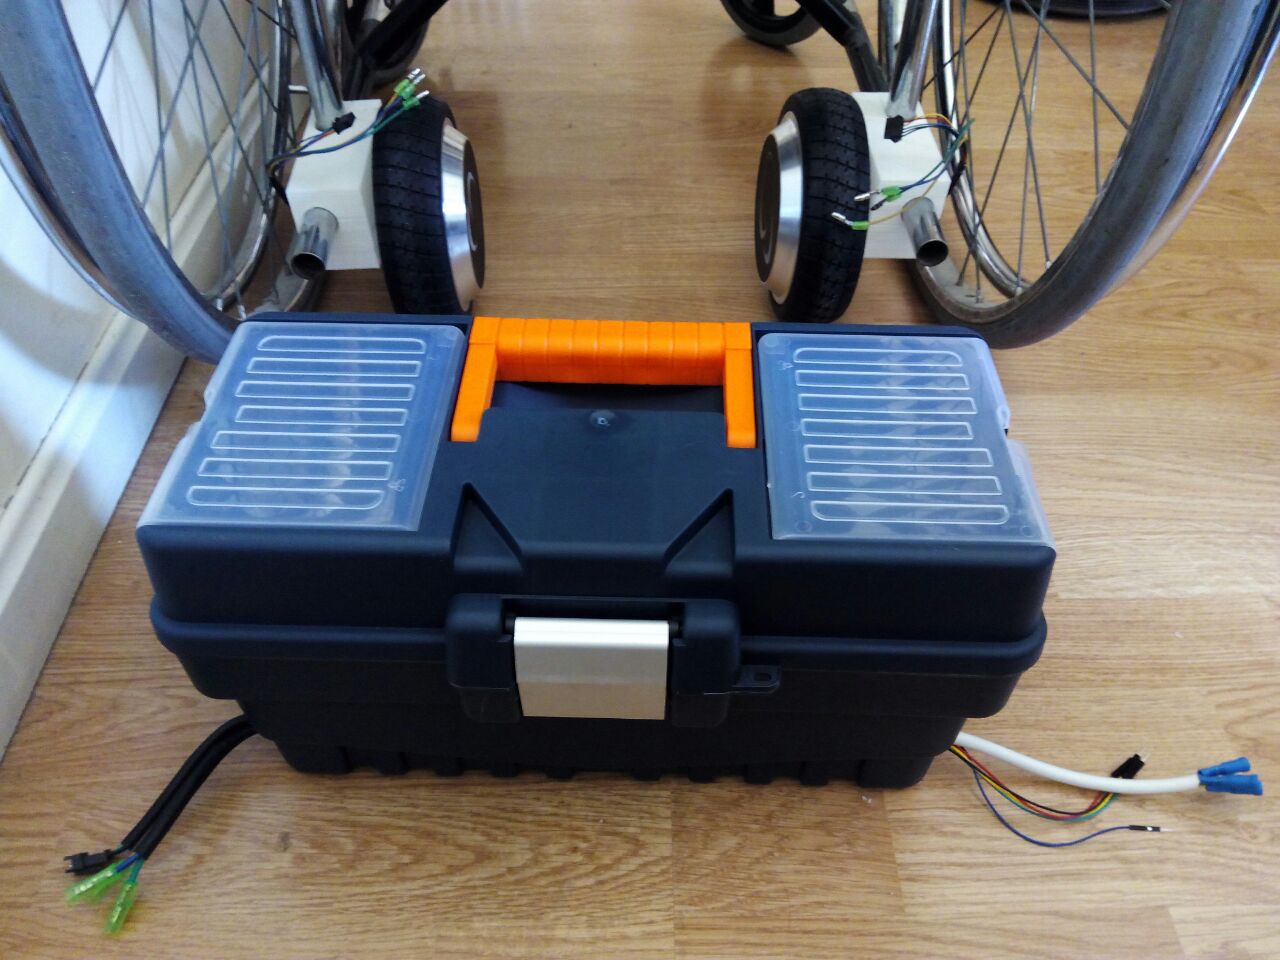
09/19/2016 at 20:10 • 0 commentsSince we moved away from the hoverboard case in this second design, we needed somewhere to place all the electronics, sturdy enough to protect the battery and make sure everything stays in place during use and transportation.
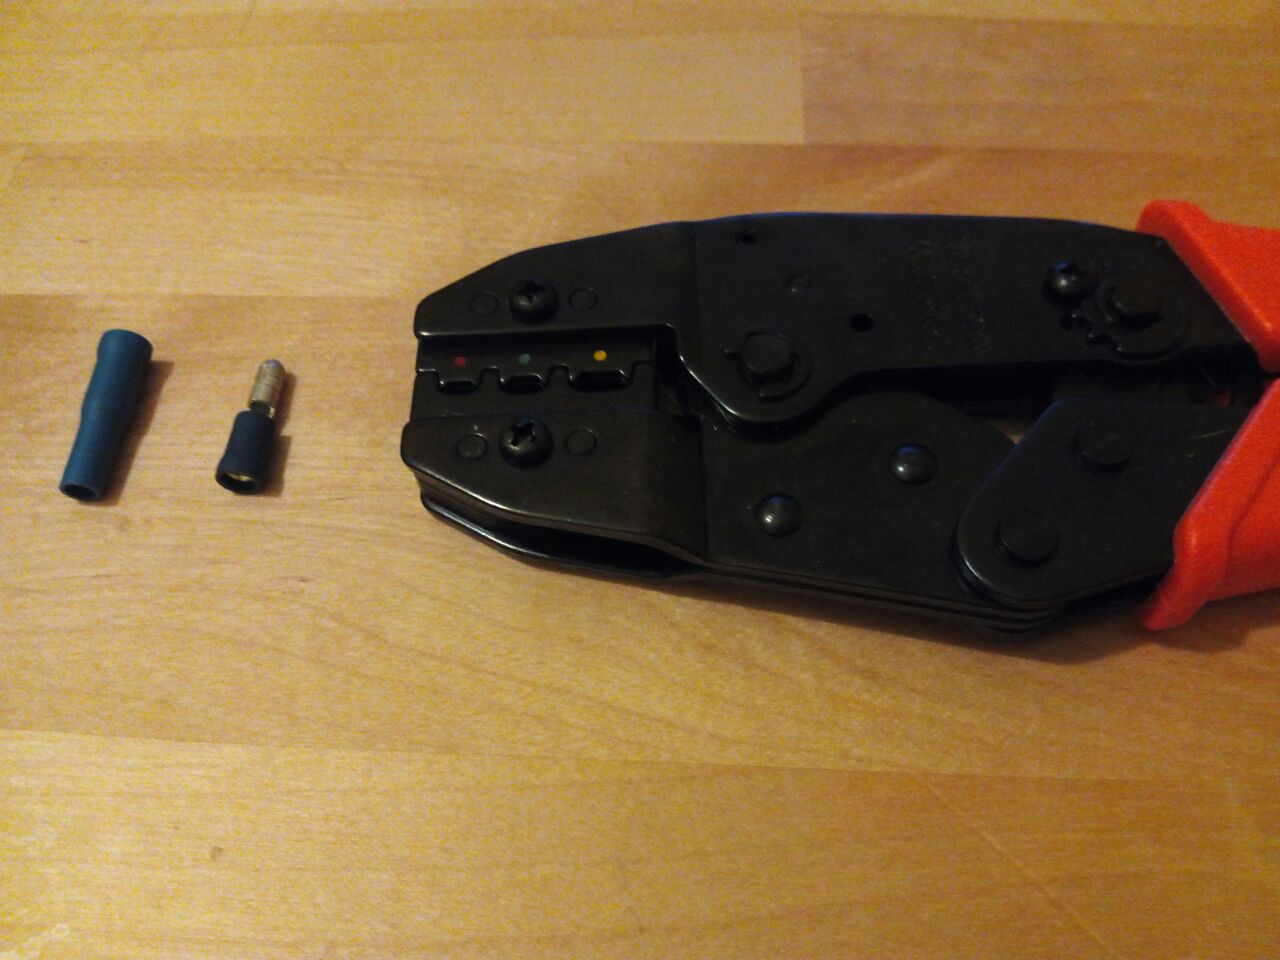
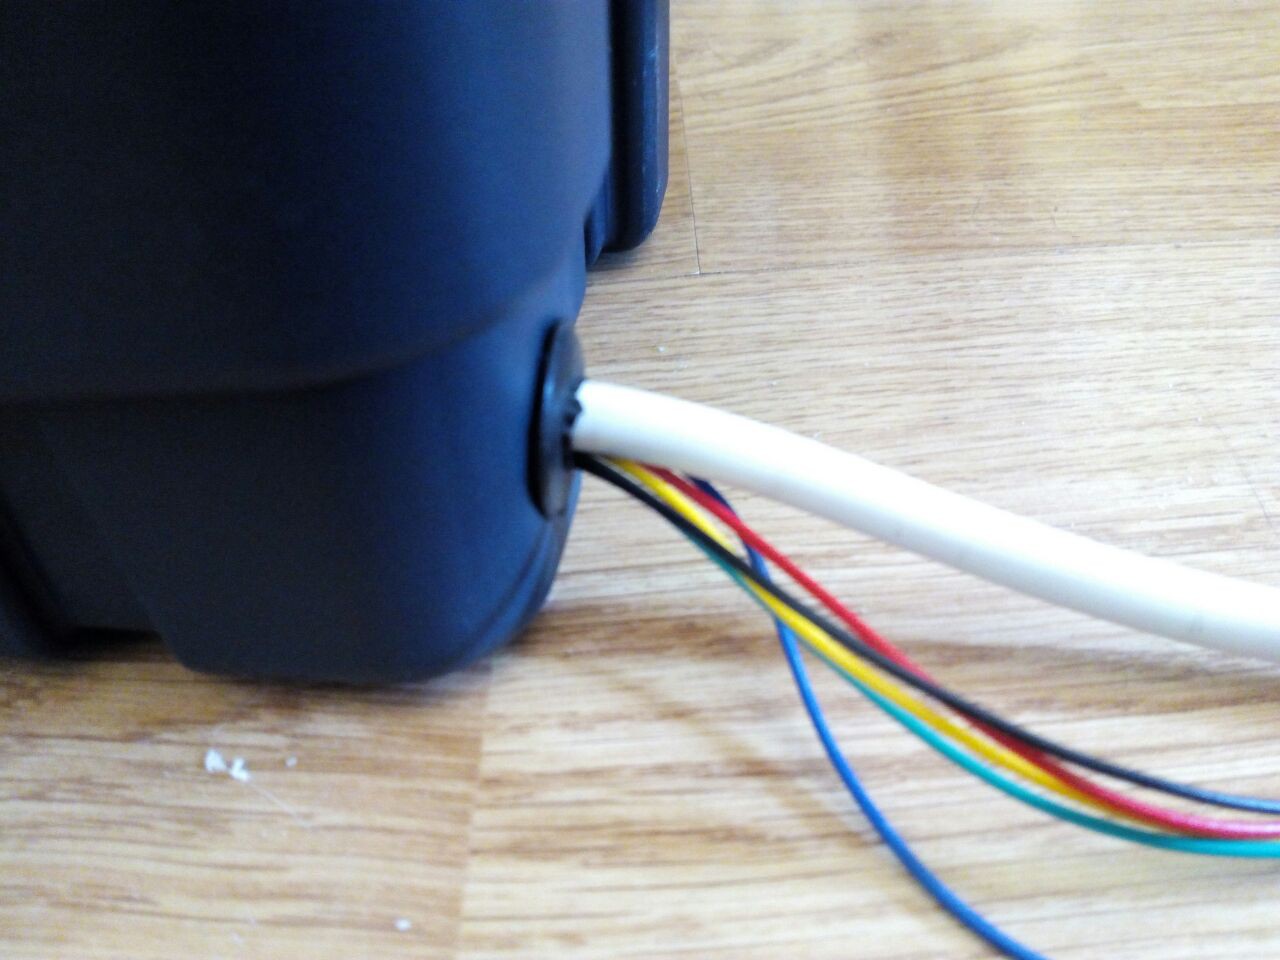
The best option we came with was buying a toolbox, which is both simple to get and cheap. One problem we had to solve was that while the wheels were now closer together, they were facing outwards, and so the distance between the board and the wheels increased. The longer cable covered this new stretch without problems, but we had to build a male to female cable adapter for the shorter side. We did this by crimping three 4mm insulated connectors of 2.5mm^2 section like the ones seen below to each side of three 16AWG cables for the power side of the motor, and simply plugging in five male to female jumper wires into the hall effect cable sockets.
![]() After measuring everything, we cut the side holes for the motor and hall sensor cables with a 16mm spade drill bit and protected the cables from the sharp plastic edges with some rubber grommets of the same size.
After measuring everything, we cut the side holes for the motor and hall sensor cables with a 16mm spade drill bit and protected the cables from the sharp plastic edges with some rubber grommets of the same size.![]()
Here we can see a closeup of one of the sides,
![]()
and the final result on both.
![]()
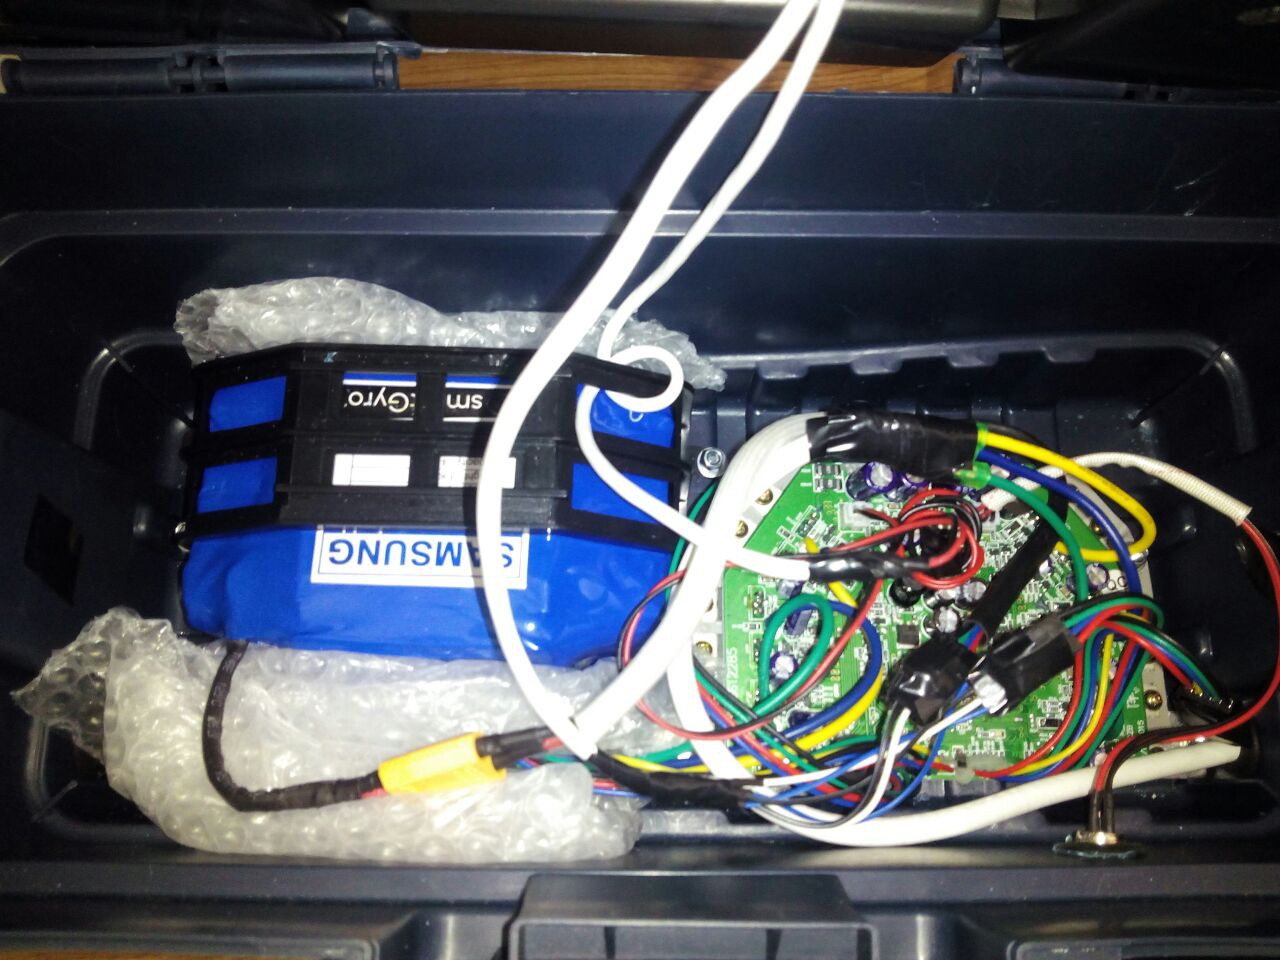
On the inside, we mounted the battery pack and controller using M4x20 bolts and their respective nuts, after drilling the appropriate holes. The battery also uses the original plastic case used to fix it in place in the board, and we added some bubble-wrap to the sides to make sure it doesn't slide or get scratched by any sharp edges in the box.
![]()
The upper tray is used to carry the battery charger so it is always available for some on-the-road charging. We have also tied the cables from the control pad around the handle to create a stress-relief so the fragile connectors don't break or the jumpers get disconnected if the cables are accidentally tugged.
![]()
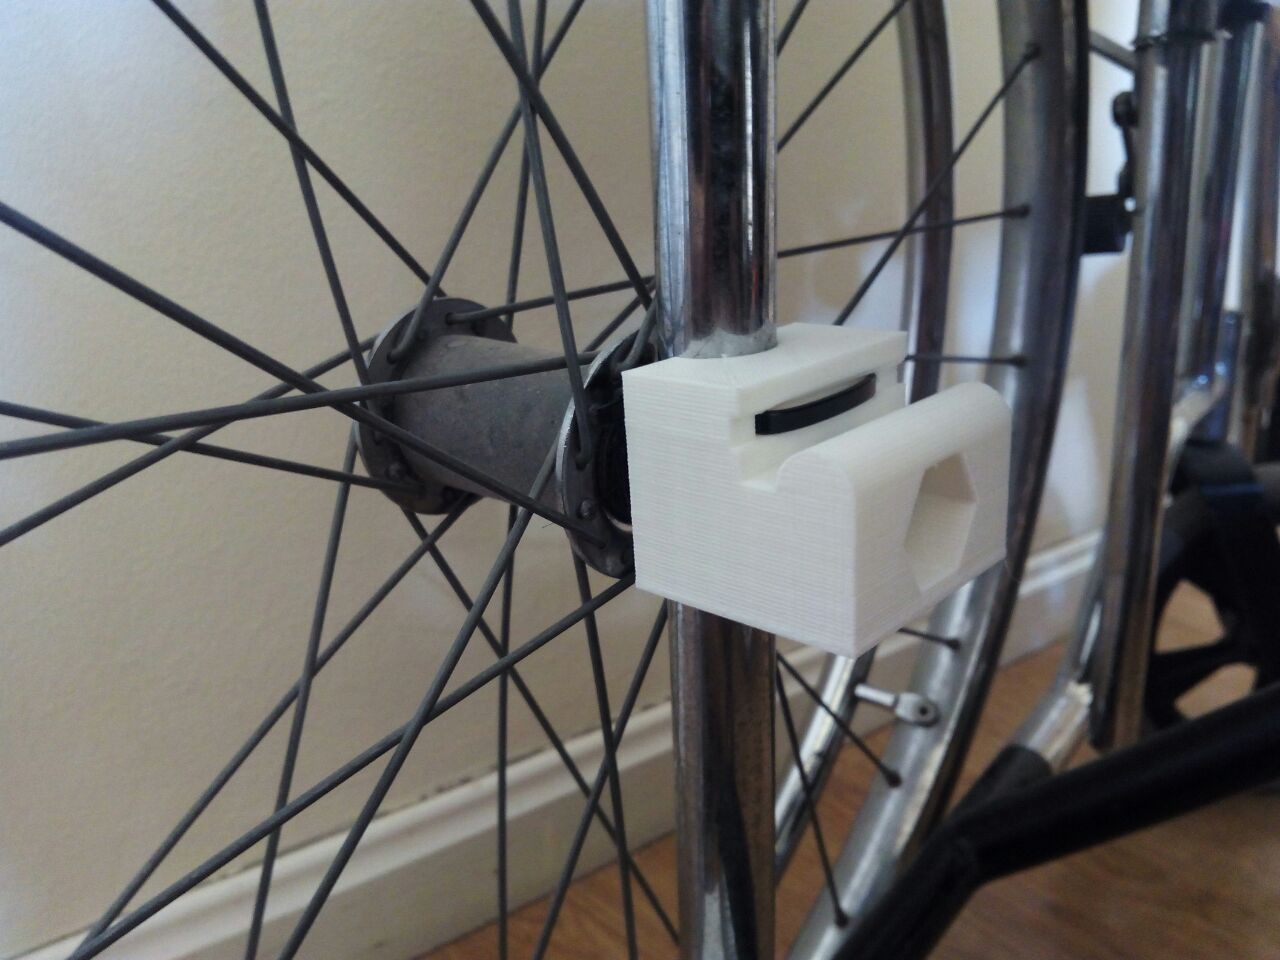
Our box had some handy brackets on the sides, which we used to fix it in place. This is the holding piece, which slides on the nut in the wheel's axis and is secured with a zip tie to prevent it from slipping off again.
![]()
All of this gives us a single unit containing the electronics with a place to carry our charger with us at all times.
![]()
-
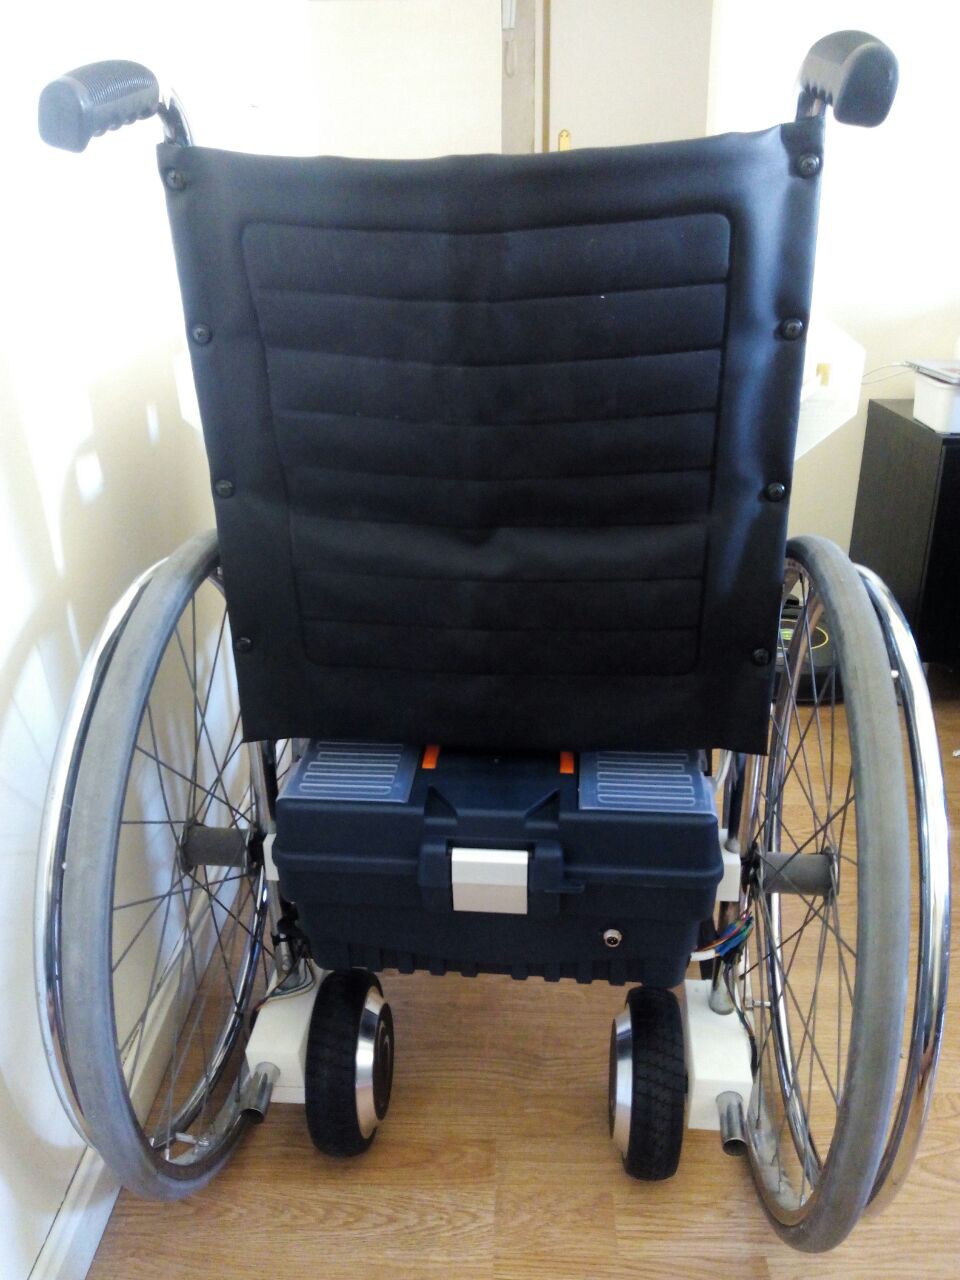
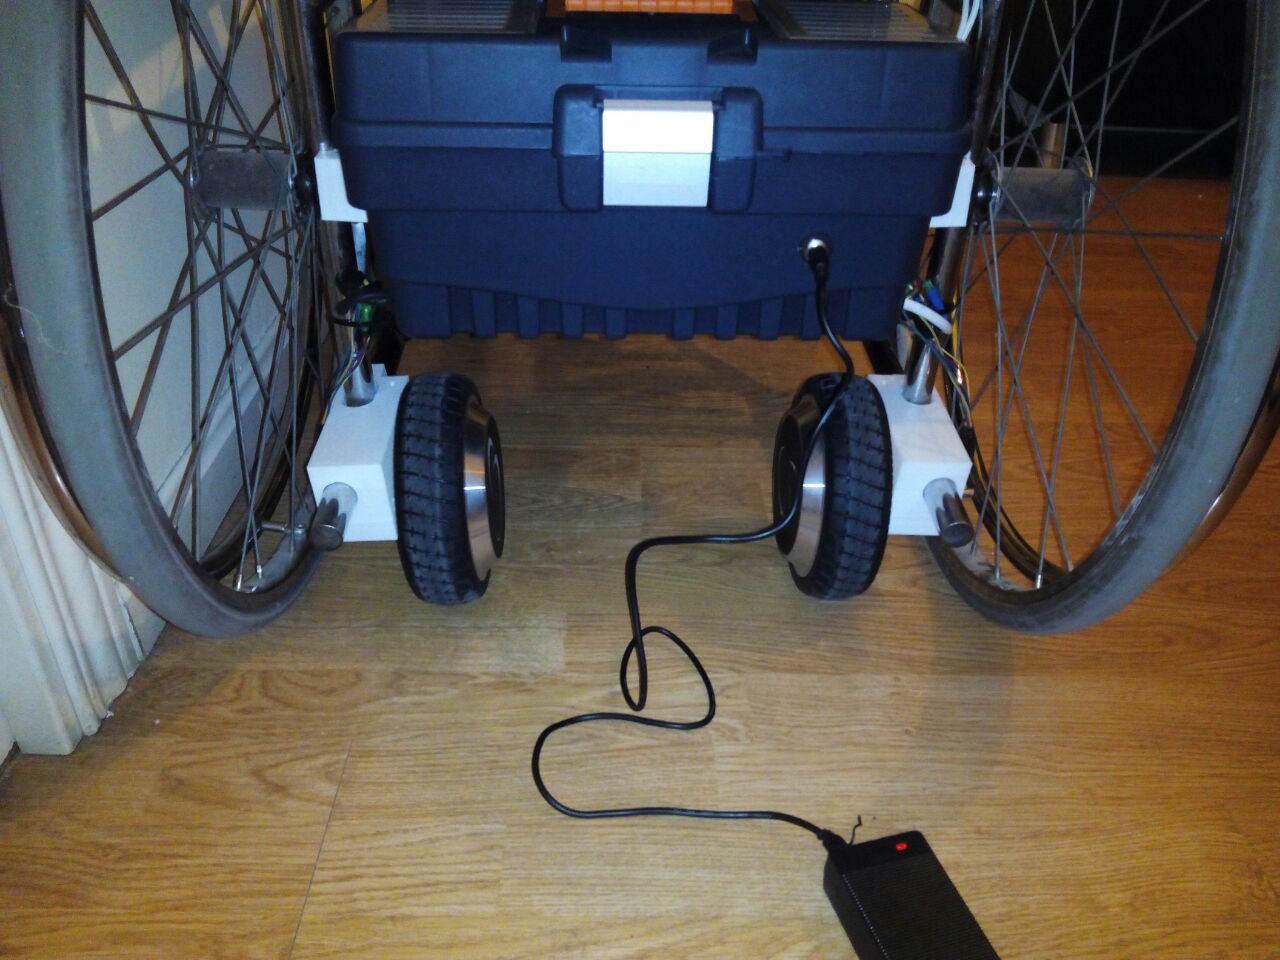
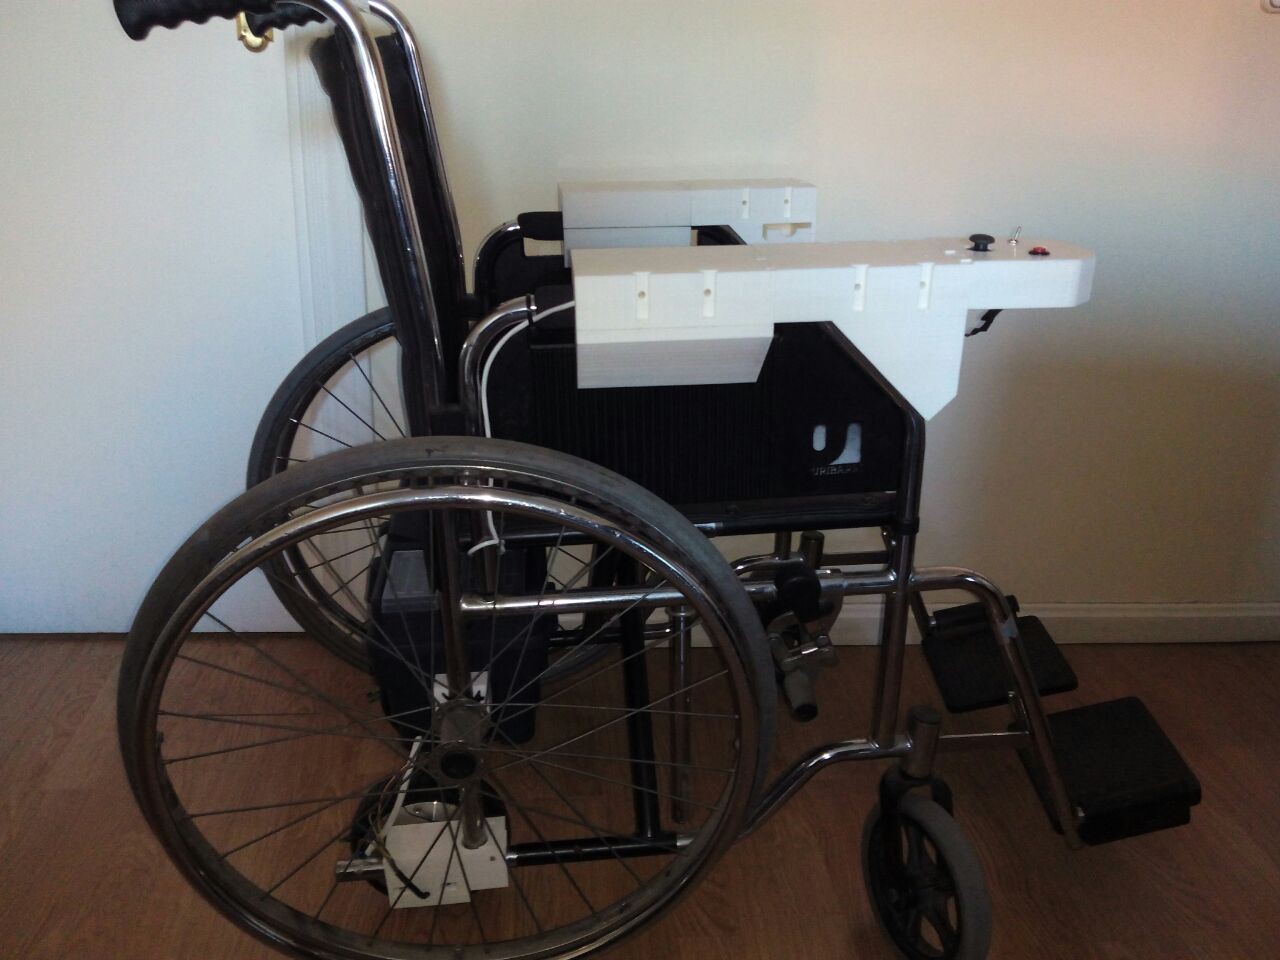
OpenChair v0.2
09/18/2016 at 10:11 • 0 commentsThe following design is the one we have settled on in the second iteration of the chair.
![]() We decided that the driving wheels needed to be attached under the original ones, so all four rollers would be aligned and the chair would be able to pivot effortlessly. In the end however, we compromised and placed them a little behind the axis in exchange for a fastener with a simpler design, and thus stronger due to reduced stress points. The resulting piece is both simple to assemble and strong enough to support the wheel in the air.
We decided that the driving wheels needed to be attached under the original ones, so all four rollers would be aligned and the chair would be able to pivot effortlessly. In the end however, we compromised and placed them a little behind the axis in exchange for a fastener with a simpler design, and thus stronger due to reduced stress points. The resulting piece is both simple to assemble and strong enough to support the wheel in the air.This implementation however meant we needed to fully disassemble the hoverboard. We decided that the best route to take was to buy a sturdy, off-the-shelf toolbox, secure the battery and motherboard inside and mount the whole setup underneath the seat, thus keeping all the modifications in the inside and maintaining a reduced footprint.
![]()
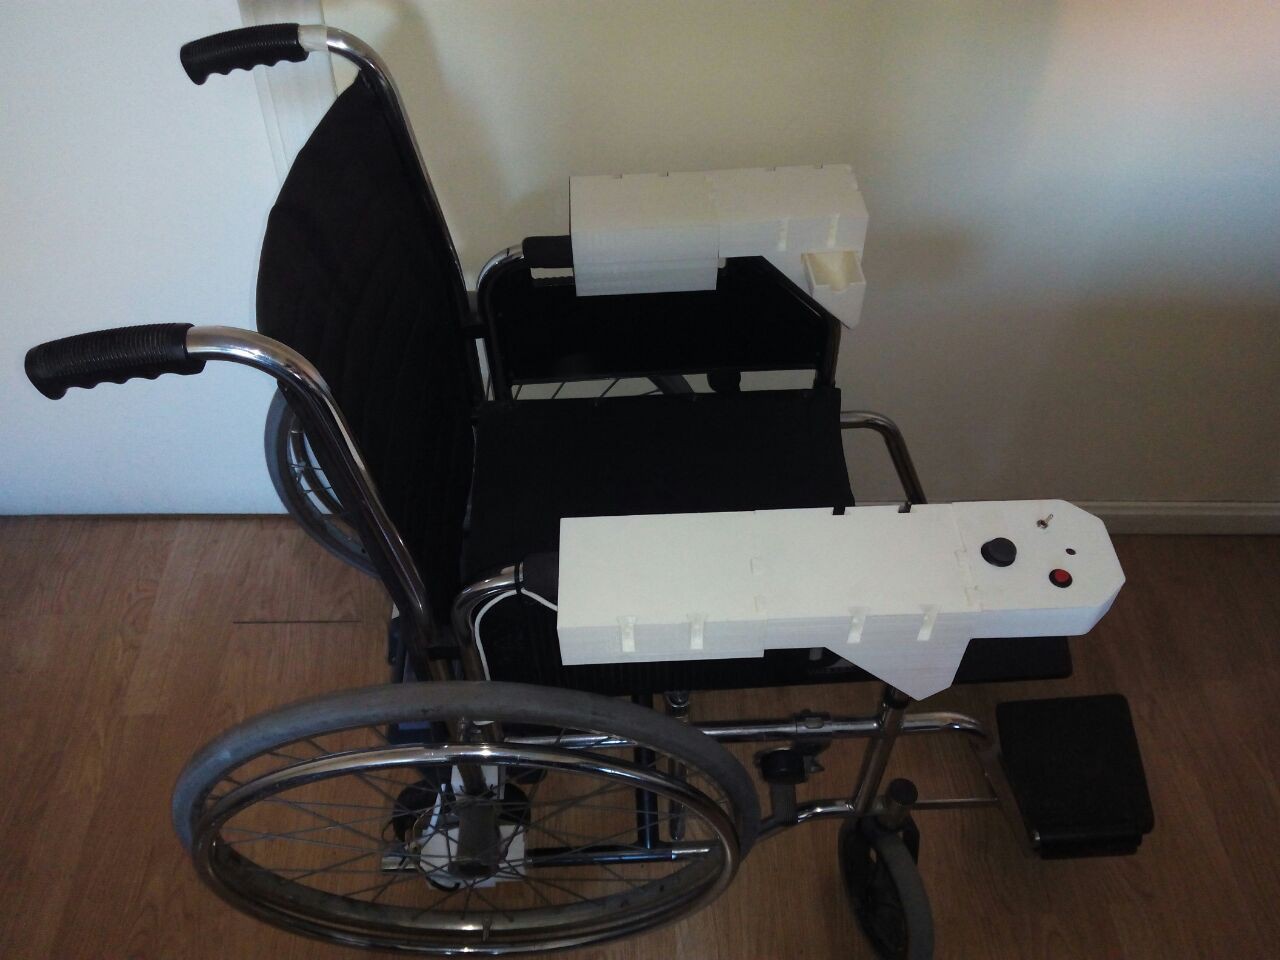
The last big change we implemented was the armrests. Since we needed to add some sort of control pad to the chair, we decided to go for it all the way and designed the complete set to make it wider and more confortable.
![]()
In following logs we will describe in more detail each part, since doing so here would make this post a bit too long!


 After measuring everything, we cut the side holes for the motor and hall sensor cables with a 16mm spade drill bit and protected the cables from the sharp plastic edges with some rubber grommets of the same size.
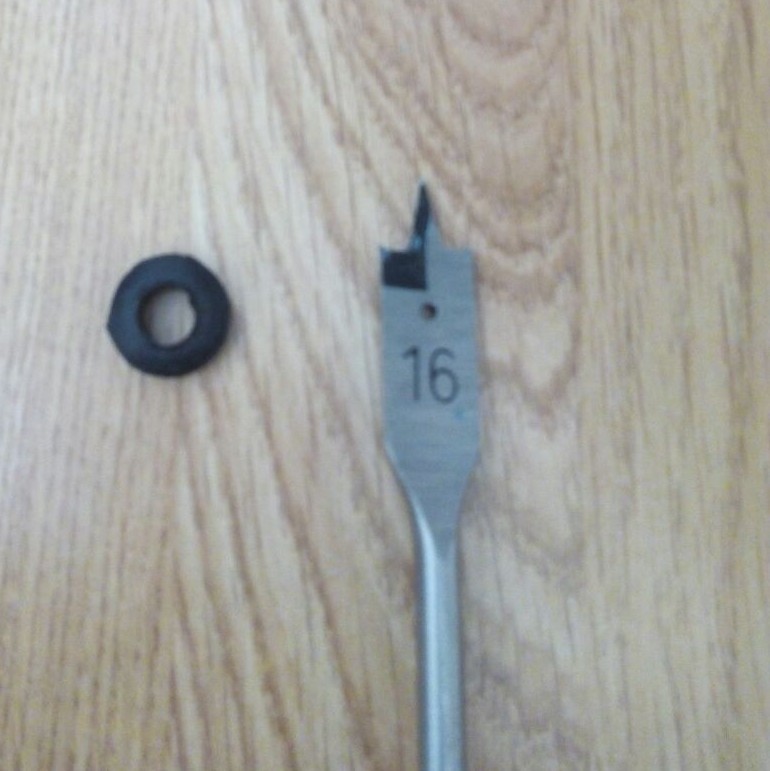

 We decided that the driving wheels needed to be attached under the original ones, so all four rollers would be aligned and the chair would be able to pivot effortlessly. In the end however, we compromised and placed them a little behind the axis in exchange for a fastener with a simpler design, and thus stronger due to reduced stress points. The resulting piece is both simple to assemble and strong enough to support the wheel in the air.